#document formatting software
Explore tagged Tumblr posts
Visit Tumblr Blog
Explore Tumblr blogs with no restrictions, modern design and the best experience.
Last Seen Tumblr Blogs


Fun Fact
Mobile Tumblr US users spend an average of 4.04 minutes per session on the app.
Text
Why PDQ Docs is the Best User-Friendly Document Generation Software for Your Business
In today’s business environment, the ability to generate documents quickly and efficiently is more crucial than ever. Whether it’s contracts, invoices, proposals, or reports, generating documents manually can be time-consuming and error-prone. This is where user-friendly document generation software like PDQ Docs comes in. With its intuitive interface and powerful features, PDQ Docs streamlines the document creation process, allowing businesses to save time, reduce errors, and boost productivity.
Effortless Document Creation
One of the primary benefits of PDQ Docs is its user-friendly design, which makes document creation quick and hassle-free. The User-Friendly Document Generation software allows users to generate a wide range of documents by simply filling out customizable templates. These templates can be tailored to suit the specific needs of your business, whether you’re creating contracts, agreements, invoices, or any other type of document. With PDQ Docs, there is no need for complicated formatting or manual data entry, as the software automates much of the process. This efficiency not only saves time but also ensures that documents are consistent and accurate.

Customization Options to Meet Your Needs
No two businesses are the same, which is why PDQ Docs offers extensive customization options for its templates. The User-Friendly Document Generation software allows users to modify templates to fit their unique branding and operational requirements. Whether you need to add specific fields, logos, or branding elements, PDQ Docs gives you full control over the document generation process. This customization ensures that all documents produced reflect your company's identity, providing a professional and consistent appearance every time. Additionally, templates can be updated as your business needs change, ensuring that your document generation process remains relevant and effective.
Enhanced Efficiency and Reduced Errors
The primary goal of user-friendly document generation software like PDQ Docs is to enhance efficiency while reducing the risk of errors. Manually generating documents often leads to mistakes such as incorrect data entry, formatting issues, or missed information. PDQ Docs eliminates these concerns by automating the process, ensuring that all information is entered accurately and in the right place. The software also integrates with other systems, allowing you to pull in data directly from your CRM or database, further reducing the likelihood of human error. This results in faster document creation and greater consistency across all your documents.
Conclusion
For businesses looking to improve efficiency, reduce errors, and streamline their document creation process, PDQ Docs stands out as the ideal user-friendly document generation software. With its intuitive interface, customizable templates, and powerful automation features, PDQ Docs helps businesses save time and resources while maintaining professionalism and accuracy in every document. Whether you're a small business or a large enterprise, PDQ Docs offers the tools you need to take control of your document generation and ensure that your workflow remains seamless and efficient.
#user friendly document generation software#document creation tools#automated document management#customizable document templates#document generation solutions#intuitive document builder#document formatting software#business document automation#document creation for teams#centralized document editor#automated report generation#digital document tools
0 notes
Text
I handle change so well.
#did i just spend an hour testing various older versions of my preferred writing software until i found one without the ai shit? perhaps~#i tried to use a different one and cried three times. none of the proper shortcuts worked and it kept changing my formatting#i KNOW how to double space a fucking document and it would change my font and the size and just alkfjsadlkfjadslkfjasdl#this works better for me.#AND i get to keep my tabs. thank fuck. i keep like seven wips open constantly
5 notes
·
View notes
Text
⭐ So you want to learn pixel art? ⭐
🔹 Part 1 of ??? - The Basics!
Edit: Now available in Google Doc format if you don't have a Tumblr account 🥰
Hello, my name is Tofu and I'm a professional pixel artist. I have been supporting myself with freelance pixel art since 2020, when I was let go from my job during the pandemic.


My progress, from 2017 to 2024. IMO the only thing that really matters is time and effort, not some kind of natural talent for art.
This guide will not be comprehensive, as nobody should be expected to read allat. Instead I will lean heavily on my own experience, and share what worked for me, so take everything with a grain of salt. This is a guide, not a tutorial. Cheers!
🔹 Do I need money?
NO!!! Pixel art is one of the most accessible mediums out there.
I still use a mouse because I prefer it to a tablet! You won't be at any disadvantage here if you can't afford the best hardware or software.
Because our canvases are typically very small, you don't need a good PC to run a good brush engine or anything like that.
✨Did you know? One of the most skilled and beloved pixel artists uses MS PAINT! Wow!!
🔹 What software should I use?
Here are some of the most popular programs I see my friends and peers using. Stars show how much I recommend the software for beginners! ⭐
💰 Paid options:
⭐⭐⭐ Aseprite (for PC) - $19.99
This is what I and many other pixel artists use. You may find when applying to jobs that they require some knowledge of Aseprite. Since it has become so popular, companies like that you can swap raw files between artists.
Aseprite is amazingly customizable, with custom skins, scripts and extensions on Itch.io, both free and paid.
If you have ever used any art software before, it has most of the same features and should feel fairly familiar to use. It features a robust animation suite and a tilemap feature, which have saved me thousands of hours of labour in my work. The software is also being updated all the time, and the developers listen to the users. I really recommend Aseprite!
⭐ Photoshop (for PC) - Monthly $$
A decent option for those who already are used to the PS interface. Requires some setup to get it ready for pixel-perfect art, but there are plenty of tutorials for doing so.
Animation is also much more tedious on PS which you may want to consider before investing time!
⭐⭐ ProMotion NG (for PC) - $19.00
An advanced and powerful software which has many features Aseprite does not, including Colour Cycling and animated tiles.
⭐⭐⭐ Pixquare (for iOS) - $7.99 - $19.99 (30% off with code 'tofu'!!)
Probably the best app available for iPad users, in active development, with new features added all the time.

Look! My buddy Jon recommends it highly, and uses it often.
One cool thing about Pixquare is that it takes Aseprite raw files! Many of my friends use it to work on the same project, both in their office and on the go.
⭐ Procreate (for iOS) - $12.99
If you have access to Procreate already, it's a decent option to get used to doing pixel art. It does however require some setup. Artist Pixebo is famously using Procreate, and they have tutorials of their own if you want to learn.
⭐⭐ ReSprite iOS and Android. (free trial, but:) $19.99 premium or $$ monthly
ReSprite is VERY similar in terms of UI to Aseprite, so I can recommend it. They just launched their Android release!
🆓 Free options:
⭐⭐⭐ Libresprite (for PC)
Libresprite is an alternative to Aseprite. It is very, very similar, to the point where documentation for Aseprite will be helpful to Libresprite users.
⭐⭐ Pixilart (for PC and mobile)
A free in-browser app, and also a mobile app! It is tied to the website Pixilart, where artists upload and share their work. A good option for those also looking to get involved in a community.
⭐⭐ Dotpict (for mobile)
Dotpict is similar to Pixilart, with a mobile app tied to a website, but it's a Japanese service. Did you know that in Japanese, pixel art is called 'Dot Art'? Dotpict can be a great way to connect with a different community of pixel artists! They also have prompts and challenges often.
🔹 So I got my software, now what?
◽Nice! Now it's time for the basics of pixel art.
❗ WAIT ❗ Before this section, I want to add a little disclaimer. All of these rules/guidelines can be broken at will, and some 'no-nos' can look amazing when done intentionally.
The pixel-art fundamentals can be exceedingly helpful to new artists, who may feel lost or overwhelmed by choice. But if you feel they restrict you too harshly, don't force yourself! At the end of the day it's your art, and you shouldn't try to contort yourself into what people think a pixel artist 'should be'. What matters is your own artistic expression. 💕👍
◽Phew! With that out of the way...
🔸"The Rules"
There are few hard 'rules' of pixel art, mostly about scaling and exporting. Some of these things will frequently trip up newbies if they aren't aware, and are easy to overlook.
🔹Scaling method
There are a couple ways of scaling your art. The default in most art programs, and the entire internet, is Bi-linear scaling, which usually works out fine for most purposes. But as pixel artists, we need a different method.


Both are scaled up x10. See the difference?
On the left is scaled using Bilinear, and on the right is using Nearest-Neighbor. We love seeing those pixels stay crisp and clean, so we use nearest-neighbor.
(Most pixel-art programs have nearest-neighbor enabled by default! So this may not apply to you, but it's important to know.)
🔹Mixels
Mixels are when there are different (mixed) pixel sizes in the same image.

Here I have scaled up my art- the left is 200%, and the right is 150%. Yuck!
As we can see, the "pixel" sizes end up different. We generally try to scale our work by multiples of 100 - 200%, 300% etc. rather than 150%. At larger scales however, the minute differences in pixel sizes are hardly noticeable!
Mixels are also sometimes seen when an artist scales up their work, then continues drawing on it with a 1 pixel brush.

Many would say that this is not great looking! This type of pixels can be indicative of a beginner artist. But there are plenty of creative pixel artists out there who mixels intentionally, making something modern and cool.
🔹Saving Your Files
We usually save our still images as .PNGs as they don’t create any JPEG artifacts or loss of quality. It's a little hard to see here, but there are some artifacts, and it looks a little blurry. It also makes the art very hard to work with if we are importing a JPEG.

For animations .GIF is good, but be careful of the 256 colour limit. Try to avoid using too many blending mode layers or gradients when working with animations. If you aren’t careful, your animation could flash afterwards, as the .GIF tries to reduce colours wherever it can. It doesn’t look great!

Here's an old piece from 2021 where I experienced .GIF lossiness, because I used gradients and transparency, resulting in way too many colours.
🔹Pixel Art Fundamentals - Techniques and Jargon
❗❗Confused about Jaggies? Anti-Aliasing? Banding? Dithering? THIS THREAD is for you❗❗ << it's a link, click it!!
As far as I'm concerned, this is THE tutorial of all time for understanding pixel art. These are techniques created and named by the community of people who actually put the list together, some of the best pixel artists alive currently. Please read it!!
🔸How To Learn
Okay, so you have your software, and you're all ready to start. But maybe you need some more guidance? Try these tutorials and resources! It can be helpful to work along with a tutorial until you build your confidence up.
⭐⭐ Pixel Logic (A Digital Book) - $10 A very comprehensive visual guide book by a very skilled and established artist in the industry. I own a copy myself.
⭐⭐⭐ StudioMiniBoss - free A collection of visual tutorials, by the artist that worked on Celeste! When starting out, if I got stuck, I would go and scour his tutorials and see how he did it.
⭐ Lospec Tutorials - free A very large collection of various tutorials from all over the internet. There is a lot to sift through here if you have the time.
⭐⭐⭐ Cyangmou's Tutorials - free (tipping optional) Cyangmou is one of the most respected and accomplished modern pixel artists, and he has amassed a HUGE collection of free and incredibly well-educated visual tutorials. He also hosts an educational stream every week on Twitch called 'pixelart for beginners'.
⭐⭐⭐ Youtube Tutorials - free There are hundreds, if not thousands of tutorials on YouTube, but it can be tricky to find the good ones. My personal recommendations are MortMort, Brandon, and AdamCYounis- these guys really know what they're talking about!
🔸 How to choose a canvas size
When looking at pixel art turorials, we may see people suggest things like 16x16, 32x32 and 64x64. These are standard sizes for pixel art games with tiles. However, if you're just making a drawing, you don't necessarily need to use a standard canvas size like that.
What I like to think about when choosing a canvas size for my illustrations is 'what features do I think it is important to represent?' And make my canvas as small as possible, while still leaving room for my most important elements.
Imagine I have characters in a scene like this:

I made my canvas as small as possible (232 x 314), but just big enough to represent the features and have them be recognizable (it's Good Omens fanart 😤)!! If I had made it any bigger, I would be working on it for ever, due to how much more foliage I would have to render.
If you want to do an illustration and you're not sure, just start at somewhere around 100x100 - 200x200 and go from there.
It's perfectly okay to crop your canvas, or scale it up, or crunch your art down at any point if you think you need a different size. I do it all the time! It only takes a bit of cleanup to get you back to where you were.
🔸Where To Post
Outside of just regular socials, Twitter, Tumblr, Deviantart, Instagram etc, there are a few places that lean more towards pixel art that you might not have heard of.
⭐ Lospec Lospec is a low-res focused art website. Some pieces get given a 'monthly masterpiece' award. Not incredibly active, but I believe there are more features being added often.
⭐⭐ Pixilart Pixilart is a very popular pixel art community, with an app tied to it. The community tends to lean on the young side, so this is a low-pressure place to post with an relaxed vibe.
⭐⭐ Pixeljoint Pixeljoint is one of the big, old-school pixel art websites. You can only upload your art unscaled (1x) because there is a built-in zoom viewer. It has a bit of a reputation for being elitist (back in the 00s it was), but in my experience it's not like that any more. This is a fine place for a pixel artist to post if they are really interested in learning, and the history. The Hall of Fame has some of the most famous / impressive pixel art pieces that paved the way for the work we are doing today.
⭐⭐⭐ Cafe Dot Cafe Dot is my art server so I'm a little biased here. 🍵 It was created during the recent social media turbulence. We wanted a place to post art with no algorithms, and no NFT or AI chuds. We have a heavy no-self-promotion rule, and are more interested in community than skill or exclusivity. The other thing is that we have some kind of verification system- you must apply to be a Creator before you can post in the Art feed, or use voice. This helps combat the people who just want to self-promo and dip, or cause trouble, as well as weed out AI/NFT people. Until then, you are still welcome to post in any of the threads or channels. There is a lot to do in Cafe Dot. I host events weekly, so check the threads!
⭐⭐/r/pixelart The pixel art subreddit is pretty active! I've also heard some of my friends found work through posting here, so it's worth a try if you're looking. However, it is still Reddit- so if you're sensitive to rude people, or criticism you didn't ask for, you may want to avoid this one. Lol
🔸 Where To Find Work
You need money? I got you! As someone who mostly gets scouted on social media, I can share a few tips with you:
Put your email / portfolio in your bio Recruiters don't have all that much time to find artists, make it as easy as possible for someone to find your important information!
Clean up your profile If your profile feed is all full of memes, most people will just tab out rather than sift through. Doesn't apply as much to Tumblr if you have an art tag people can look at.
Post regularly, and repost Activity beats everything in the social media game. It's like rolling the dice, and the more you post the more chances you have. You have to have no shame, it's all business baby
Outside of just posting regularly and hoping people reach out to you, it can be hard to know where to look. Here are a few places you can sign up to and post around on.
/r/INAT INAT (I Need A Team) is a subreddit for finding a team to work with. You can post your portfolio here, or browse for people who need artists.
/r/GameDevClassifieds Same as above, but specifically for game-related projects.
Remote Game Jobs / Work With Indies Like Indeed but for game jobs. Browse them often, or get email notifications.
VGen VGen is a website specifically for commissions. You need a code from another verified artist before you can upgrade your account and sell, so ask around on social media or ask your friends. Once your account is upgraded, you can make a 'menu' of services people can purchase, and they send you an offer which you are able to accept, decline, or counter.
The evil websites of doom: Fiverr and Upwork I don't recommend them!! They take a big cut of your profit, and the sites are teeming with NFT and AI people hoping to make a quick buck. The site is also extremely oversaturated and competitive, resulting in a race to the bottom (the cheapest, the fastest, doing the most for the least). Imagine the kind of clients who go to these websites, looking for the cheapest option. But if you're really desperate...
🔸 Community
I do really recommend getting involved in a community. Finding like-minded friends can help you stay motivated to keep drawing. One day, those friends you met when you were just starting out may become your peers in the industry. Making friends is a game changer!
Discord servers Nowadays, the forums of old are mostly abandoned, and people split off into many different servers. Cafe Dot, Pixel Art Discord (PAD), and if you can stomach scrolling past all the AI slop, you can browse Discord servers here.
Twitch Streams Twitch has kind of a bad reputation for being home to some of the more edgy gamers online, but the pixel art community is extremely welcoming and inclusive. Some of the people I met on Twitch are my friends to this day, and we've even worked together on different projects! Browse pixel art streams here, or follow some I recommend: NickWoz, JDZombi, CupOhJoe, GrayLure, LumpyTouch, FrankiePixelShow, MortMort, Sodor, NateyCakes, NyuraKim, ShinySeabass, I could go on for ever really... There are a lot of good eggs on Pixel Art Twitch.
🔸 Other Helpful Websites
Palettes Lospec has a huge collection of user-made palettes, for any artist who has trouble choosing their colours, or just wants to try something fun. Rejected Palettes is full of palettes that didn't quite make it onto Lospec, ran by people who believe there are no bad colours.
The Spriters Resource TSR is an incredible website where users can upload spritesheets and tilesets from games. You can browse for your favourite childhood game, and see how they made it! This website has helped me so much in understanding how game assets come together in a scene.
VGMaps Similar to the above, except there are entire maps laid out how they would be played. This is incredible if you have to do level design, or for mocking up a scene for fun.
Game UI Database Not pixel-art specific, but UI is a very challenging part of graphics, so this site can be a game-changer for finding good references!
Retronator A digital newspaper for pixel-art lovers! New game releases, tutorials, and artworks!
Itch.io A website where people can upload, games, assets, tools... An amazing hub for game devs and game fans alike. A few of my favourite tools: Tiled, PICO-8, Pixel Composer, Juice FX, Magic Pencil for Aseprite
🔸 The End?
This is just part 1 for now, so please drop me a follow to see any more guides I release in the future. I plan on doing some writeups on how I choose colours, how to practise, and more!
I'm not an expert by any means, but everything I did to get to where I am is outlined in this guide. Pixel art is my passion, my job and my hobby! I want pixel art to be recognized everywhere as an art-form, a medium of its own outside of game-art or computer graphics!

This guide took me a long time, and took a lot of research and experience. Consider following me or supporting me if you are feeling generous.
And good luck to all the fledgling pixel artists, I hope you'll continue and have fun. I hope my guide helped you, and don't hesitate to send me an ask if you have any questions! 💕
My other tutorials (so far): How to draw Simple Grass for a game Hue Shifting
28K notes
·
View notes
Text
i love manually adding (cont'd) behind every single consecutive character dialogue FOR 91 PAGES. writerduet/solo is a piece of shit software
#elia txts#WHY CANT SCRIVENER JUST HAVE DUAL DIALOGUE. ALSO POS SOFTWARE#like writer solo has an auto add cont'd feature but i think it only applies while writing not across a finished document#format fixes were NOT what i thought was on the menu for tonight ugh#also i have i have to point out I DID THIS ONCE BEFORE. WHEN I SWITCHED OUT OF SCRIVENER. WE ARE HERE FOR THE SECOND TIME
0 notes
Text
Converting JPG to PDF Made Easy: Your Ultimate Guide
#PDF to Word conversion#Document transformation#Online conversion tools#desktop software#PDF editing#Word document editing#Formatting preservation
0 notes
Text
Did you know this one thing can predict your wealth and transform your body?
Anyone who has dreamt of a better life understands the frustration and disappointment when things don’t go according to plan. Some people see this problem as a failure to follow through with the demands of their routine, but that’s not the case. What if the reason that these people seem to fail has nothing to do with how forcefully they push to achieve? What if the actual solution is as simple as a 20-word script?
That’s what The Genie Script is all about. According to their website, the key to getting enough energy, having the right intelligence, and establishing mental clarity is simple and singular. The late Bob Proctor originally described the one thing holding consumers back and it is inside every person. This hidden gem is the key to wealth and can even help consumers establish themselves as overnight millionaire in some cases. read more.. https://geniescript.org/
#genie script software#genie script writing#genie script generator#genie script examples#genie script format#genie script language#genie script tutorial#genie script commands#genie script syntax#genie script documentation#best genie script tool#genie script automation#genie scripting language#writing in genie script#learn genie scripting
1 note
·
View note
Text
Professor Layton spoilers are illegal
Great! Now I have your attention. It wasn't a lie though.
TL;DR: Level-5 legal document says they will take down videos that show just the cutscenes of the games and videos edited with the purpose of listening to the games' music, among other legal measures.
The official Professor Layton twitter account published this tweet: https://x.com/L5_layton/status/1872196972142366916
It links to something called "guideline". I thought "Hey, finally, a rundown of all the games so new people know when to watch ED and..." It wasn't that. At all.
It is a legal document detailing what images and videos of the Layton series can be posted online without risking Level-5 breathing on our necks. Anyone else feeling like L-5 got a lawyer recently?
To be fair, it is extremely unlikely that they will come check Tumblr of all places for copyright infringement content but Im assuming that you all have lives outside of Tumblr, like in YouTube, Twitch, Twitter, Instagram or TikTok, and those places they will check.
So, here is what I understood from the rules:
Rule 0: These all apply to CV, DB/PB, UF/LF, LS/SC, MM, AL, LBMR, LMJ and PLvsPW:AA; all versions, including the trilogy on mobile and LMJ for switch and MM+. It does not apply to NWOS, which will have different rules explained later.
Rule 1: You can totally upload gameplay and still images from gameplay to social media, but if it's not directly captured from the console using console software they ask* that it has running commentary over, or opinions (basically something that makes it clear you're a fan and it's not an official video).
*This "ask" sounds like "we're not going to legally persecute you but please do us a solid".
Rule 2: Please put spoilers warnings before videos.
Rule 2.5: Don't post videos of the credits songs nor the first voice acting of LMJ. (The anime voice acting is fine).
Rule 3: It is prohibited to post videos that are just the animation scenes or videos and images that are just puzzles and solutions. If it's in gameplay it's fine, but the editing scenes together is not allowed.
Rule 4: Don't post videos or images to pages that you have to pay to enter. However youtube monetizing and similars are allowed.
Rule 5: If you post to a video sharing site you have to include a copyright notice like ©2007 LEVEL-5 Inc. The format depends on the game, look up the chart.
Rule 6: Third party rights are your problem.
Rule 7: Don't post anything that may make people think you are part of Level-5.
Forbidden things:
Anything that is ilegal
Anything that violates third party rights
Anything discriminatory
Anything that harms the image of L-5
Anything with cheats/glitches
Using the videos or still images to sell stuff (commercial purposes)
Editing movie scenes, audio, puzzles, or music from this series for the primary purpose of listening to them!!!
Using the images/videos for religious/political stuff.
And the kicker:
We may take measures such as deleting or suspending the distribution of videos, still images, etc. from this series that we determine to be in violation of these guidelines.
So yeah. Take care my friends! Enjoy the cutscenes and music compilations while they last and maybe don't look into Youtube downloaders.
463 notes
·
View notes
Text


❛ 004 , CRACKED POMEGRANATE . . . moody masterdoc template: 8 pages, single muse, used for keeping all of a character's information in one document. includes a title page with a list of contents, a "basics" page for the character's main information and their major character beats that have to exist in every AU they're in, a 2 page personality section (for paragraphs and lists alike), a 2 page appearance section (for paragraphs and lists as well), a connections page to showcase characters they know in every AU they're in, and a links section for related documents or links. this document is not mobile friendly due to the drawings it uses for the titles. if you intend on editing most of the images, you will need a PC and an editing software of some sort to get the gradient affect - apps with a "gradient map" effect will also work. the page is letter size (8.5'' x 11'') in landscape format. if you're using, please keep the credit in the "Links" section and consider a like and reblog. goes a long way to help creators out. model used: tanya ravichandran hexcodes for the images, darkest to lightest: 1b0000 - redblack 150000 - redblack 081f02 - green 3b241b - brown 651b29 - deep red b61936 - pinkred c4496c - pink bb9c50 - yellow fff5ce - yellowwhite HOW TO USE select the 'file' button. from there, you'll find the 'make a copy' button. click it, and then you can name your doc and go from there! do not request access. this doc uses a few tables so i suggest having some knowledge on how they work if you plan on editing anything about the appearance of them. i also recommend keeping your text around the same number of lines as shown in the template. it prevents the doc from going all wonky! to edit the images, select your own image and edit it within a separate software. be sure to maximize the gradient effect with the listed hexcodes above. click the original image and select the "replace image" button. i suggest making sure the images you want to add are a similar style to the original - make the cut-outs from the original into your own cutouts, make the full images from the original your own full images. the titles/hollowed text for each section are done using google drawings. if you'd like to edit them, double click the text, and you'll be in drawings. double click the first letter and change it to the one you'd like, and do the same with the other part of the word. photos in the 'connections' section are also created in drawings. they can be replaced by double clicking the picture, then once you're in drawings you can select the photo, select 'replace image,' and set it to the one you'd like instead. the pink star symbols/emojis are for inserting links. copy your link, highlight the star, click the little 'insert link' button beside the highlighter button, and insert your link. after that you should be good to go! if you have any questions or issues that arise, please let me know. have fun!
#google docs#google docs template#roleplay#rp resources#rp template#oc template#oc sheet#character template#roleplay resources#rp doc template#rp docs template#gdocs#gdocs template#templates#roleplay template#roleplay blog#writing template
222 notes
·
View notes
Text
User Friendly Document Generation Software to simplify workflows and enhance productivity!
Are you overwhelmed by the sheer volume of paperwork in your office or law firm? Efficiency and productivity are extremely important in today's fast-paced business environment. For small businesses and professionals, managing documents can be a daunting task. Repetitive tasks can drain resources and stifle growth.
PDQDocs, an advanced user friendly document generation software for anyone looking to revolutionize their document management practices. It is a powerful document generation software designed to simplify workflows and enhance productivity. With its user-friendly interface, robust automation features, and centralized document management capabilities, it transforms the way you handle documents.

Key Features of PDQDocs
Unlimited Document Templates - Create as many templates as you need to accommodate various clients and projects.
Multi-Client Support- Effortlessly manage and support multiple clients without hassle.
Ease of Document Generation - Generate unlimited documents quickly and efficiently.
Simplified Document Creation Process - Make the entire document creation process straightforward and intuitive.
Automation of Repetitive Tasks - Save valuable time by automating mundane tasks.
Comprehensive Template Management - Manage templates, drafts, and final documents all in one platform.
Why Choose PDQDocs?
Simplify Your Document Management
PDQDocs Software v1.0 is engineered to tackle these challenges head-on. Its intuitive user interface is easy-to-navigate regardless of his technical expertise. You can quickly find, create, edit, and organize files, making document management a straightforward process.
Streamline Workflow and Document Creation
It serves as a centralized document management solution, enabling users to create unlimited templates that cater to an endless number of clients. This flexibility is essential for small businesses, allowing for seamless customization to meet unique documentation requirements.
Powerful Automation Features
One of the standout capabilities of it is its powerful automation features. Legal documents and essential paperwork can be generated in a matter of minutes, drastically reducing the time and effort spent on manual tasks. By automating workflows, professionals can focus on strategic initiatives that drive business growth rather than getting bogged down by repetitive duties.
Innovative and Versatile Solution
It is not just limited to legal services. It is a versatile solution suitable for multiple industries. This user friendly document generation software is perfect for small businesses and solo professionals. It simplifies repetitive document generation tasks, allowing users to devote their energies to more impactful activities. The intuitive platform ensures that users can learn to create and manage documents with minimal training.
Easy-to-use Document Generation Software for Law Firms
It is particularly specialized for law firm document generation. It is tailored for solo practitioners and small law firms, boosting productivity while minimizing repetitive tasks. The innovative automation features enhance accuracy and significantly reduce manual document errors, making it perfect for estate planning and other legal documents.
Easy-to-Navigate Interface
Designed for accessibility, even those with minimal technical skills can quickly adapt to the platform. Users can effortlessly manage their documents, which supports various output formats to meet different needs. Real-time document generation allows for immediate review and refinement, streamlining the entire creation process.
#user friendly document generation software#document automation#template creation#easy to use software#document generation tools#customizable templates#document management#workflow automation#document personalization#business document solutions#document formatting#document collaboration#legal document automation
0 notes
Note
As you've asked for asks!:
Do you have any quick-and-dirty book/fic binding methods a terrified-of-failure novice could use to bang something out to get over the first collywobbling step of Actually Doing The Thing? (this may be something I've been meaning to ask for ages)
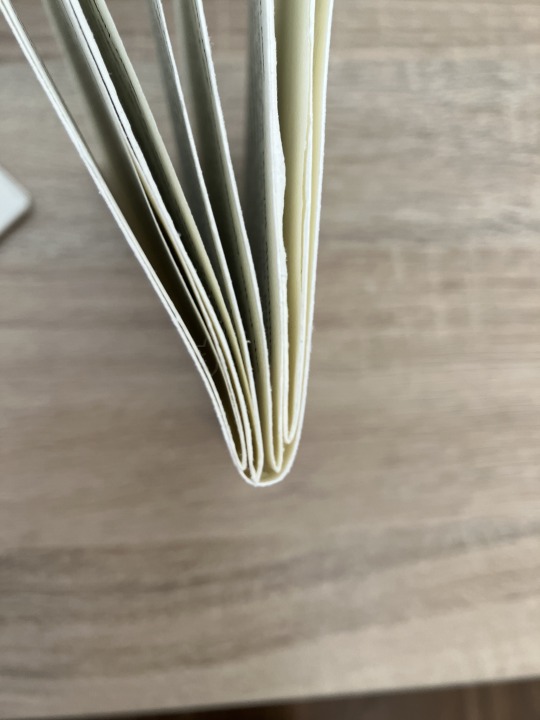
yes! I absolutely do! in my opinion the best quick-and-dirty bookbinding method is a no-glue pamphlet: you don't have to mess with glue or measuring or cutting anything, all you need is your text, some paper, a needle and thread. you can use the same needle to punch holes if you don't have an awl.
this is going to be a little long but that's because I'm going to write out some fairly detailed instructions for an A5 sized pamphlet. If you don't want detailed instructions and think you can glean the necessary info from photos, just skip to the photos! I've also linked tutorials.
for preparing the text to printing, in whatever software you use (word, libreoffice, gdocs, whatever) make sure your document is set to page size A5. make it look readable. then save as/export that document as a straight-paged PDF. now go to the bookbinder JS tool (https://momijizukamori.github.io/bookbinder-js/), and upload the PDF. source manipulation: none printer paper size: A4 display unit (you can ignore, or choose cm if it gives you anxiety that it automatically displays points) printer type: select single-sided or duplex accordingly* rotate paper: ignore flip on long side: check if you are printing duplex and if your duplex printer flips the paper on the long side page layout: tick folio page scaling: original page positioning: centered ignore the rest flyfleaf: ignore signature format tick: standard signatures. in the length drop down, this depends on the type of pamphlet you are doing. for folio i generally find 4-5 pages per signature a comfortable thickness. if you have 6 whole A4 pages you can still do that as a single signature or you can split it into two signatures 3 pages each. wacky small layouts: ignore this signature info click the generate preview button to see what your PDF looks like imposed! I love this step especially when I'm doing quarto (A6) or octavo (A7) sized books generate output - click this to generate an imposed PDF
for A6 and A7 sized books the instructions are much the same, except for these you make sure the page size is A6 or A7 in your software, and then you choose quarto or octavo instead of folio. for signature length drop down I keep signature length to 1 for octavos typically and 2 for quartos, as this still refers to sheets of paper, and for octavo 1 sheet of A4 paper will turn into 4 smaller sheets in one signature once folded and cut.
*if you don't have a duplex printer you will have to manually turn the paper to print on the other side. I cannot be arsed with this so I bought a printer capable of duplex printing (I didn't have a printer anyway). if you already have a printer check what it can do as you might be surprised and go from there.
now to the pamphlets! you don't need a cover - I have one for the long stitch pamphlet but for the saddle stitch one I didn't bother and just made sure the first page had a title on it. you can always take a different piece of paper and print a cover on or or just use coloured cardstock and create a simple cover, but a cover is not necessary unless you're doing a long stitch pamphlet. all you need to do is to punch holes and start sewing. there are a few different stitch types below, I wouldn't say any of them are more difficult or easier than others, but they do look different so...pick one you like the look of and go from there?
pamphlet stitch (uneven number of holes) I haven't ever done a pamphlet stitch but here's a tutorial for how to do it: https://www.starpointestudio.com/simple-pamphlet-stitch-book-step-by-step/
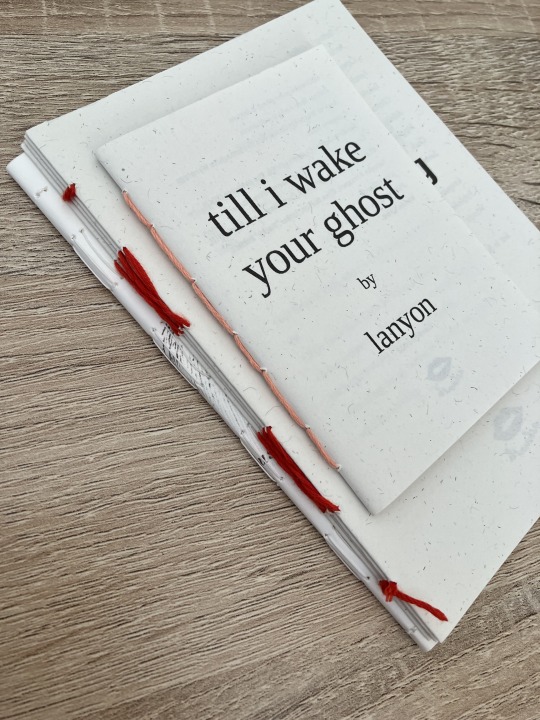
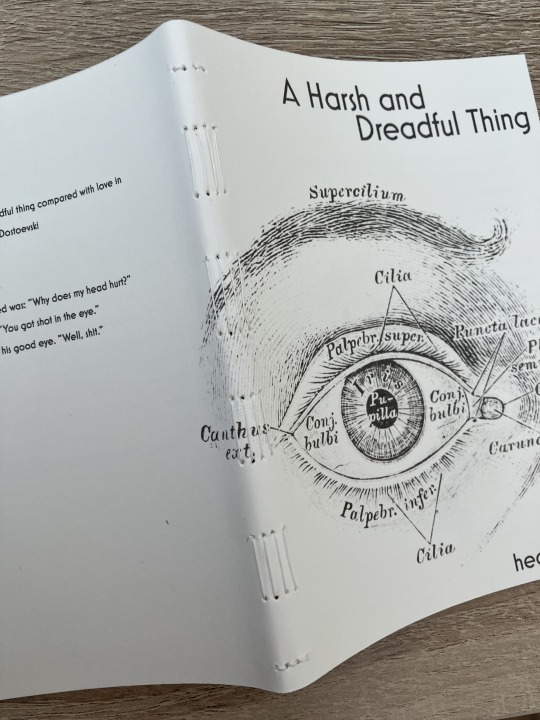
saddle stitch (uneven number of holes) I realised that what I was thinking of as a pamphlet stitch is actually saddle stitch, as in this A7 pamphlet:
here's a tutorial for how to sew saddle stitch: https://www.bookbindingworkshopsg.com/saddle-stitch-bookbinding-tutorial/ here's a video tutorial: https://www.youtube.com/watch?v=aWHkY5jOoqM (sealemon has a lot of bookbinding tutorials and I know many people who like her videos, I used her tutorial for coptic binding way back when I first made a book but I can't otherwise vouch for the quality as I haven't used her videos)
french link stitch (even number of holes) in this one I used french link stitch which I typically use for thicker textblocks that i'm not planning to use tapes with as the french link gives it some robustness, I used it here because I had never done it before and wanted to try it out. I am planning to take these stitches out and re-sew this pamphlet with a cover now that I've found a suitable piece of transformer fanart to use as a cover:
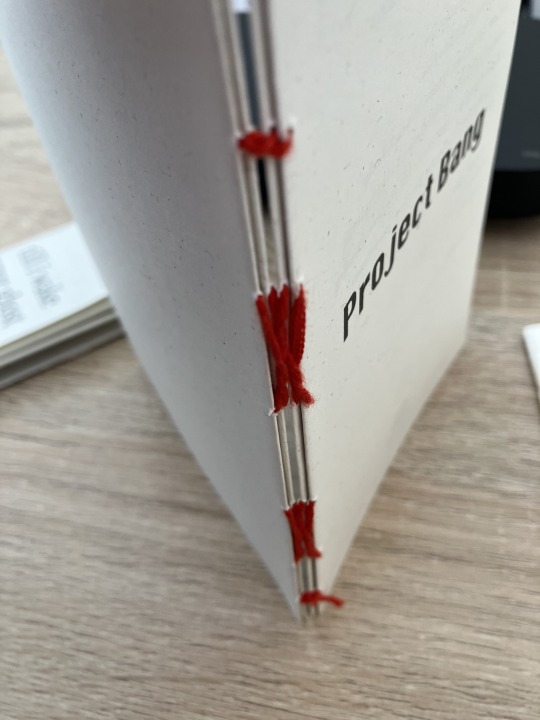
french link tutorial. it's quite long but it has a colour coded bit towards the end that shows how the thread is supposed to link which i find very helpful to visualise: https://www.handmadebooksandjournals.com/bindings/french-link-stitch-binding/
here's a video tutoral from DAS bookbinding (he is my go to for techniques and he has the most soothing Australian accent as well, though fair warning not all of his videos are for beginners): https://www.youtube.com/watch?v=O4ZPdbaM-Ws
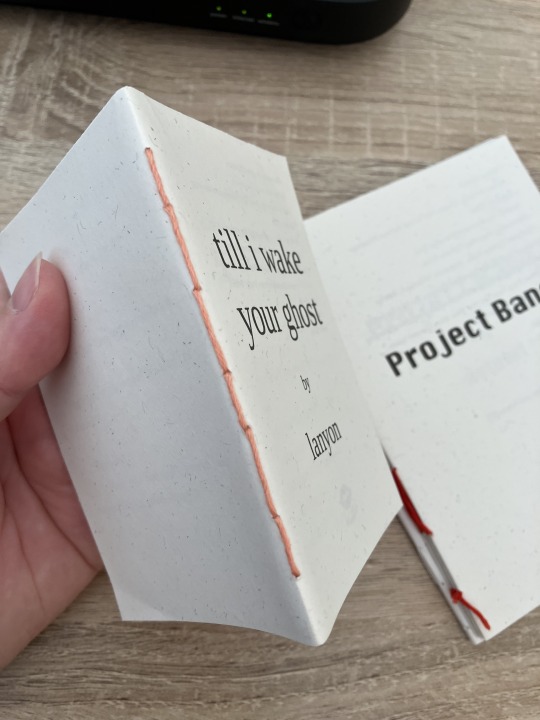
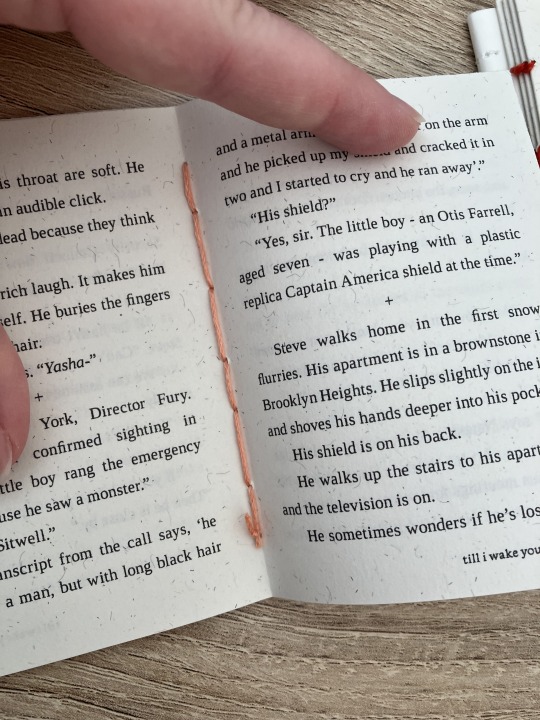
long stitch (even number of holes) for this one I used long stitch and I had a cover. this one is my favourite variation because I can make these pretty and simple covers and the stitch looks nice on the outside as well, so this one scratches the 'i want to make a book' itch for me.

here's a tutorial that also includes a how to on a cover that is different from my cover: https://lccprintmaking.myblog.arts.ac.uk/files/2020/06/Long-Stitch-Tutorial-A4.pdf DAS also has a video tutorial for long stitch but it's like three videos long, maybe watch it later :'D here's one I haven't watched but seems decent: https://www.youtube.com/watch?v=XnignTL_wDQ
you can use saddle stitch for this kind of pamphlet as well, that's what I did for dozens of ships and hundreds of souls (https://ashmouthbooks.tumblr.com/post/681587080267202560).
I hope this helped!!
2K notes
·
View notes
Text
as per a request in my local renegade server: here is my process (such as it is) for the stenciled covers i've done for my binds. obviously, huge thanks to everyone in the renegade discord for teaching me most of what i know about bookbinding. this tutorial only exists thanks to the resources they've made available and the conversations i've had there.
material list
vinyl cutter (i have a silhouette portrait 3) + mat + blade
stencil vinyl (i have this one, but have had some adherence troubles with it. unclear whether this is just The Nature Of Stencil Vinyl or whether there's a better brand out there. adhesive vinyl can also be a viable option, although i haven't personally experimented with it yet.)
transfer tape (i have this stuff. it's fine.)
weeding tools (i have this hook and a very fine tip pair of tweezers. i highly recommend getting a hook, especially if you—like me—are haunted by the specter of carpal tunnel. get an off-brand one or get one on sale, though. i only have the silhouette brand one because it was on clearance.)
acrylic medium (i have this one because it was on sale at the time i was buying acrylic medium. when i replace it, i will be replacing it with a matte one. the gloss definitely has a noticeable sheen that i don't love.)
acrylic paint (literally any paint will do. i've been mostly using the decoart extreme sheen because it's $4 at michaels. you may be noticing a theme here.)
stiff stenciling brushes (the ones i have are similar to these but cost even less. again, there's a theme here.)
an iron and some parchment paper (jury is still out on whether using heat to "set" the pattern is necessary, but i do feel like it melts the paint a bit into the bookcloth and lessens the extent to which the pattern sits above the bookcloth.)
your trusty bone folder
instructions and a truly hideous number of words under the cut.
step 0.5: discern what will make a good stencil and what will make you hate yourself, your life, and the art of bookbinding
there are a LOT of different ways to put titling on a book. you could do a paper cover with a printed design or paste paper labels onto bookcloth or foil your title onto your cover with heat activated foil. the best method depends on what kind of design you have in mind, what tools you have available to you, and what materials you're working with (for example, i've had very bad luck getting acrylic paint to adhere to Allure bookcloth, but Allure does foil like a dream).
as far as stencils are concerned, you can kind of sort cover designs into three categories:
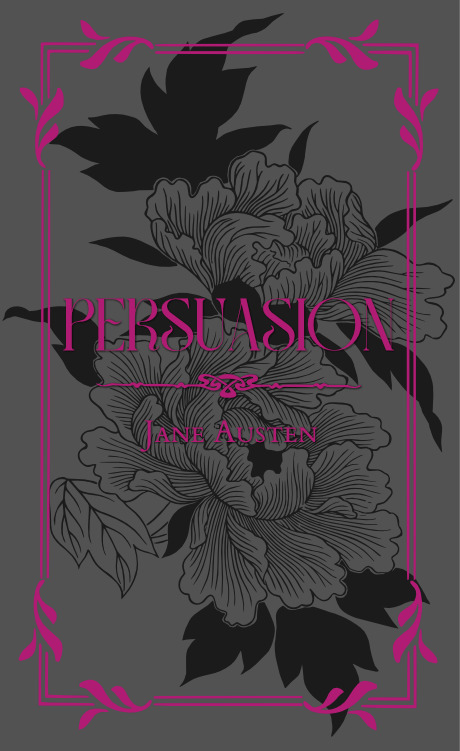
BEST for stencils: big, bold shapes on larger format books (think letter folio or letter/legal quarto)
OKAY for stencils, but you might hate yourself: intricate detail at a large enough form factor for it to be cut well by your vinyl cutter
BAD for stencils, you will die and it will hurt the entire time you are dying: lots of intricate detail and lots of fine lines
below are examples of category 1, 2, and 3 (all designed for letter folio). to be clear, category 3 can technically be possible, depending on the design. but only undertake it with the awareness that you will die, and it will hurt the entire time you are dying.

step 1: design a thing to put on your cover
i'm not going to go too in depth on this because cover design is a HUGE can of worms. a few pointers, though:
i never start designing my cover until my text block is done. this allows me to design my cover at "full size" based on the measured size of my text block and cover boards.
i fully lay out my cover in a separate program before exporting a transparent PNG to silhouette studio (or whichever proprietary software you have to use to communicate with your particular vinyl cutter). i use affinity designer. some free options would be inkscape (if you want to work with vectors) or gimp.
i design my cover on a document with dimensions of (HEIGHT of boards + 20 mm) x (WIDTH of boards or spine + 20 mm) and 10 mm margins. the area within the margins represents the actual dimensions of the thing i'm designing, while the area outside of the margins creates a mask that prevents me from getting paint on things i don't want paint on (like the covers, if i'm creating a spine stencil).
i always outline my document with a 3 or 4pt black line. this creates the outer edge of my stencil and provides my vinyl cutter with a cut line. if you're working with a smaller vinyl cutter (like the cricut joy) there are ways to jigsaw designs together from smaller pieces of vinyl, but i'm not the person to ask about that. i specifically bought a portrait so that i didn't have to worry about that.
here's an example of one of my affinity files from a recent cover. i've exaggerated my outline to make it clearer. you can also see that i use affinity to experiment with color combinations. before i export, i turn all my elements black and make any backgrounds transparent, meaning that the PNG i import into silhouette studio looks like the one on the right.

step 2: cut and weed your stencil
again, not going to go terribly in depth here. there is a veritable army of youtubers out there with tutorials about how to use [insert propriety vinyl cutter software here]. but, again, a few pointers:
with my particular vinyl cutter and stencil vinyl, i usually cut my stencils with the material set to "washi," depth at 1, force at 13, and speed at 4. google, experiment, see what works. also, you want to put your stencil vinyl on the mat with the blue vinyl facing UP, and you don't want to mirror your design. with stencils, what you see is what you get.
i cut my vinyl a bit bigger than necessary because i'd rather waste a bit of vinyl than have to worry about a stencil falling off the edge of my vinyl because i misaligned it on the mat.
unlike HTV, you will be weeding out all the black parts of your original image. be prepared to hate the letters "e" and "a" forever, because you will have to somehow keep the little eye of them in place while you pry out the rest of it.
step 3: apply your stencil to your case
alright, now let's get into the meat of it. i always stencil after my case is finished but before i case in my book. this means that if i totally fuck it up, i can trash the case instead of the entire book.
additionally, i completely stencil my spine first (as in lay down stencil, paint, remove stencil) and then stencil my covers. i've found that it's easier when you don't have stencils overlapping and sticking to each other.
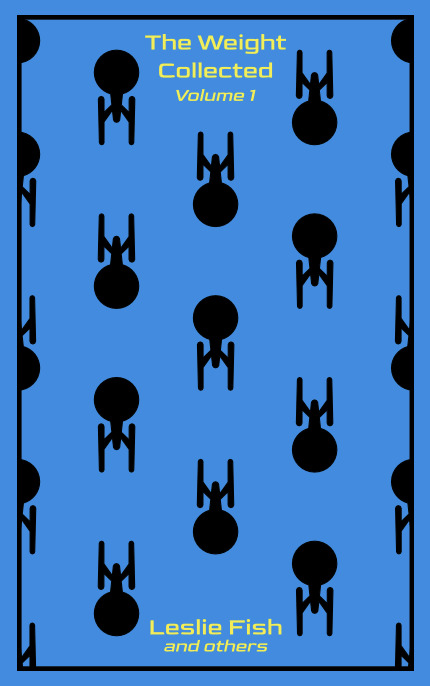
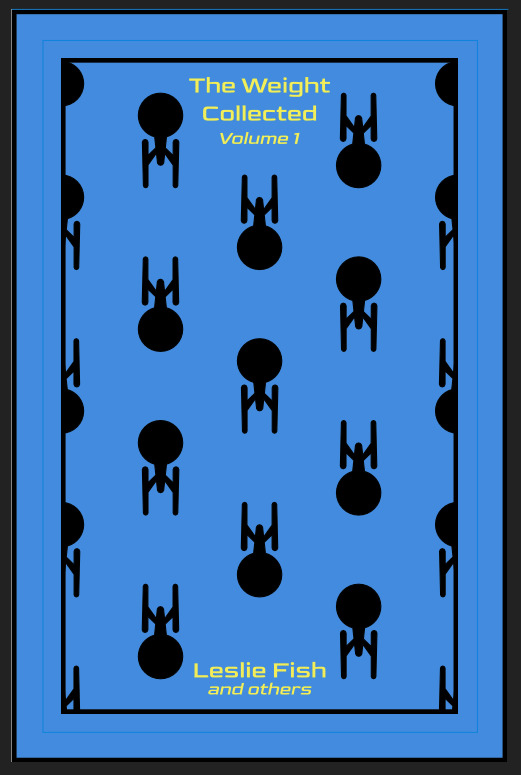
OPTIONAL STEP: mark guides onto your cover to help you position your stencil. whether or not i do this step depends on the design. a lot of the time, i just eyeball it. but for some designs, precision is key. for those projects, i use my ruler to mark out guides in white chalk for where i need certain elements of the stencil to fall. (i used guide marks for the "penguin clothbound" copies of the The Weight Collected that i've been using as an example in this post—the black rectangular boarder would've made uneven placement REALLY obvious.)
use transfer tape to remove your vinyl from its slick backing. what i've found is that you really, really don't want your transfer tape to be too sticky. you want it just barely sticky enough to pick up the stencil if you rub it down with a bone folder or your fingernail. i have a piece of transfer tape that i stuck to my jeans a bunch of times and then proceeded to use for 8 books in a row. it is, frankly, still a little bit too sticky. i have rolled it up so that i can use it for the next 8 books, at which point it will presumably be the right level of stickiness.
position your stencil. when you're happy with it, rub it firmly down with your bone folder. then do it again. then use your fingernail to score down over the titling text. then pray. in my experience, stencils prefer to stick to transfer tape rather than bookcloth. ymmv.
start at one corner of your stencil. carefully begin peeling back the transfer tape. i've found that essentially folding back the transfer tape (like, the corner that's been freed from the stencil being folded back away from the stencil) helps the tape to release. go slowly, rubbing down with the bone fold as necessary.
after you've finally manage to pry the tape off, go back and smooth down the stencil and firmly rub it down to get it to adhere to the bookcloth as thoroughly as possible with as few ripples or air bubbles as possible.
step 4: paint time!
here is a secret that the renegade discord taught me that i am now passing on to all of you: before you put any paint on your stencil, put down a layer of clear acrylic medium. the medium will finish the job of pasting down the stencil to your cover, and any leaks that happen in the process will be clear medium instead of colored paint (and will therefore be basically unnoticeable). ergo:
stipple a thin coat of acrylic medium over your stencil. you want to use an up-and-down daubing motion, not a brushing motion. brushing will get paint under your stencil. let dry.
after your medium is dry, stipple a few thin coats of your colored acrylic paint onto your stencil. let dry between coats. (i usually find that two coats is enough.) again, try to keep your coats thin. you don't want a thick layer of paint because that will create a raised surface above your bookcloth.
let your paint fully dry. i usually leave it overnight, but if i'm feeling especially impatient, i still make sure to at least give it a good three or four hours.
peel up your stencil. your weeding tools will once again come into play here to pry up little bits and pieces of stencil (like the stupid eyes of the "a"s and "e"s that were so annoying during the initial weeding stage).
step 5: optional setting stage
again, jury is still out on whether or not this is necessary, and the effects are pretty subtle. but i do it every time anyway. some tips:
use an iron on very low heat (i keep mine at the low end of the synthetic setting) and with steam turned OFF
keep a piece of parchment paper (NOT waxed paper. you want the slick paper that you put under cookies to keep them from sticking to the pan.) between the iron and your cover.
press the iron down, don't rub it like you're ironing a shirt. it's possible to smear your paint doing that (ask me how i know).
i usually lay the iron down on a section for 10-15 seconds at a time, then lift it and move it to another section.
start with less of everything (less heat, less time) and build up. always better to be conservative with this.
i usually continue until the paint is warm to the touch, then move onto another section. after it's cooled, i evaluate if i feel like it's melted into the cloth enough. if not, i repeat the process.
step 6: BOOK
congrats, you have put a design on a book cover. the world is your oyster. go forth and make books. become ungovernable.


113 notes
·
View notes
Text
explaining to a discord full of vtubers as if i am explaining to a kindergarten class why having 100% of their software documentation in the format of "jiggly furry vtuber with flashing textures doing a baby voice while narrating a Unity pipeline on YouTube" is not best practices
842 notes
·
View notes
Note
Do you think it's a good idea to try and get away from Google Docs when it comes to writing? I really can't afford any other fancy program to write my drafts in, and it honestly seems like the easiest - not to mention, most convenient - program to use to share my manuscript with beta readers. I could use advice on this matter because I keep seeing things across the net about it being a bad place to work on writing, but I have no idea what to turn to to make things easy for me and my future beta readers.
This is such a good question. Thank you.
So, a little backstory. Ever since Google removed their motto "do no evil" they have gone down the rather predictable path of all big players of the rot economy: putting profits over user experience.
A little while back, there was rumor that Google trains AI with the content of google docs, then they said they don't really, they only scan the content and do nothing with it, and then they started blocking access to documents with sexy images. Do we believe that Google has our own best interest at heart? That's something everyone has to decide for themselves.
Back then, I made a post with alternatives for Google Docs, you can find it here, also check the reblogs for more options:
Now, is it a good idea to switch from google docs? I think it is, but I'm also not consistent with it. As you mentioned, it seems to be the easiest to share writing with beta readers, and I also still often use it for fanfiction.
But there are alternatives, and they require very little adjustment in the process. Let me give you two free options.
Ellipsus is webbased, meaning you can write in it in the browser on any device. They have sharing, specifically for beta reading, and an export function for AO3.
Reedsy (marketplace around everything self-publishing) has an editor. It is webbased, and they also have an option for sharing with beta readers. This software is aimed at book type-setting and exporting but it works just fine for copying to web.
Personally, I'm currently switching everything to LibreOffice (also free!) files in some cloud connected folder. I used to do a lot of mobile writing on my phone with a bluetooth keyboard but currently, I'm taking my laptop everywhere so LibreOffice works great for me. If I have to use my phone or tablet for some lightweight mobile writing, on vacation for instance, I can still use something webbased.
So, I hope I gave you some interesting options. Do I think it's a good idea to make us less dependent on Google? Yes, I do. I don't trust them.
We have alternatives, and they cost us nothing more than a little adjustment.
~ barbex
#writing software#writing tools#alternatives to google docs#barbex gives advice#ellipsus#reedsy#google docs#libre office
43 notes
·
View notes
Text

If you're like me, you bounce around a bunch of different platforms and applications in the writing process. My hot take is that this is totally fine. No one ever said the writing process is perfectly streamlined! That being said, I've shared some tools I use for different parts of my process. For the most part, I use them consistently for the purposes mentioned below:
→ Miro
I use Miro for my first pass of plot and character arc outlines. Miro is a free software that acts like a digital board, where you can arrange sticky notes and all sorts of features. I prefer using an online board as opposed to a physical one, because I’m constantly reworking my beats and moving things around, and it’s more efficient to do both digitally (in my opinion). I keep my plot outline separate from my character arc outline at the very early stages, because I’m essentially ideating how the two can be married. At the end of the day, I believe the most compelling stories always fall back on character emotions and motivations propelling the plot. Tools like Miro help me map the journey towards that end goal.
→ Notebook
My notebook contains my brain dump. I dedicate a single notebook to a project, and it basically becomes a collection of unfiltered thoughts. I’ll dump character tidbits, sequences for each chapter, feedback from my writing accountability buddy, and questions I want to address in the next iterations of my WIP. This is helpful for me, because I tend to struggle with rapid thoughts, so the notebook helps me focus on the idea itself. Later, I’ll always have the opportunity to categorize them in another platform as I’m writing.
→ Google Docs
In the past, I was writing chapters on Google Docs. This was helpful at the time, because it’s free, it tracks key metrics I care about (mainly word count), and it’s easy to share your work with anyone. But there are some drawbacks. The biggest one for me is having to format everything for a manuscript. This’ll be more relevant later down the line, but sometimes I get really bogged down by little things like spacing and indentation. It really distracts me from focusing on the sentences themselves. After seeing it pop up on Instagram a couple of times, I decided to purchase Scrivener for desktop. It is super functional, and I probably only use like 2% of its max capability right now. But it’s been super helpful for organizing my chapters and scenes, writing out little summary cards, color-coding progress status and POV, bullet pointing margin notes, and most importantly, pre-formatting my WIP as a manuscript. I definitely think Scrivener is worth the long-term investment if you find yourself writing and publishing multiple projects.
→ Scrivener
Even though I’ve transitioned to Scrivener for the actual manuscript, Google Docs still comes in handy for me. Right now, I mainly use it to 1) track feedback and revisions on a chapter-by-chapter basis, and 2) maintain a treatment of my novel. A treatment is essentially a full-length document that details everything that happens in your story from start to finish. They can be as short as 3 pages or as long as 50 pages. I could keep and maintain these documents in Scrivener, but I already had these written out on Docs, so I’m sticking to them. Later down the line, I’ll likely shift over to Google Sheets to track revisions.
What tools do y'all like using? Please feel free to recommend any! Tips on Scrivener are also welcomed!
#writers#writeblr#writingcommunity#writerscommunity#novel writing#wip#writers life#writers on tumblr#creative writing#fiction writing#writing help#writing resources#sytips
35 notes
·
View notes
Note
I still believe the craziest form of computer program storage format from the 1980s is the cassette tape. Logical I get it but to store entire programs on little tape (that I only remember using to play music) is just crazy to me. Idk
Agreed, cassette tape for data storage was really clever. The concept had its heyday was the 1970s in a wide variety of encoding schemes for different computer platforms. It did persist into the 80s, mostly in Europe, while the US switched to floppy disks as soon as they were available for systems. The majority of my Ohio Scientific software is on cassette.
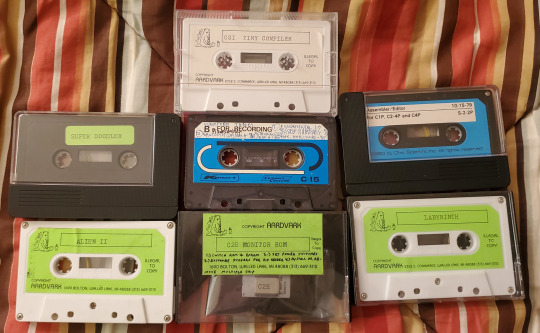
Talking with UK vs. US Commodore 64 users in particular will highlight the disparity in which storage mediums that were commonplace. I've got a few pieces of software on tape for mainly the VIC-20, but I rarely bother to use it, because it's slow and annoying. To be fair, Commodore's implementation of data storage on tape is pretty rock solid relative to the competition. It's considered more reliable than other company's but Chuck Peddle's implementation of the cassette routines are considered quite enigmatic to this day. He didn't document it super well, so CBM kept reusing his old code from the PET all the way through the end of the C128's development 7 years later because they didn't want to break any backward compatibility.

The big thing that really made alot of homebrewers and kit computer owners cozy up to the idea was the introduction of the Kansas City Standard from 1976. The idea of getting away from delicate and slow paper tape, and moving towards an inexpensive, portable, and more durable storage medium was quite enticing. Floppy disk drives and interfaces were expensive at the time, so something more accessible like off the shelf audio tapes made sense.
I've linked two places you can read about it from Byte Magazine's February 1976 issue below (check the attribution links).
You might recognize a familiar name present...
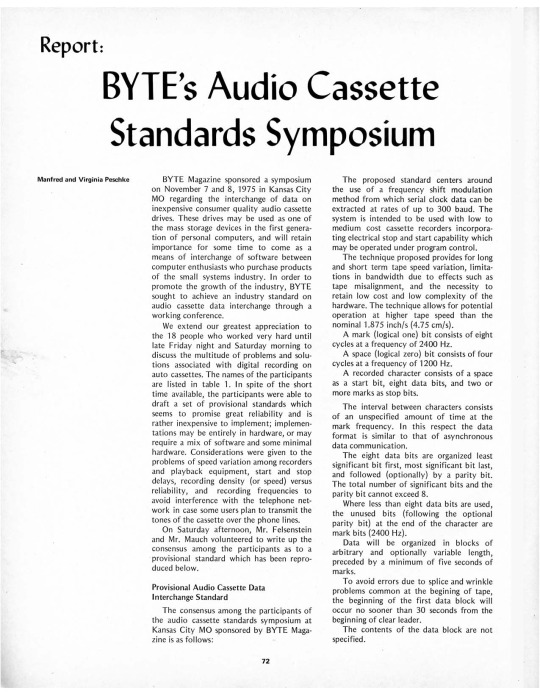
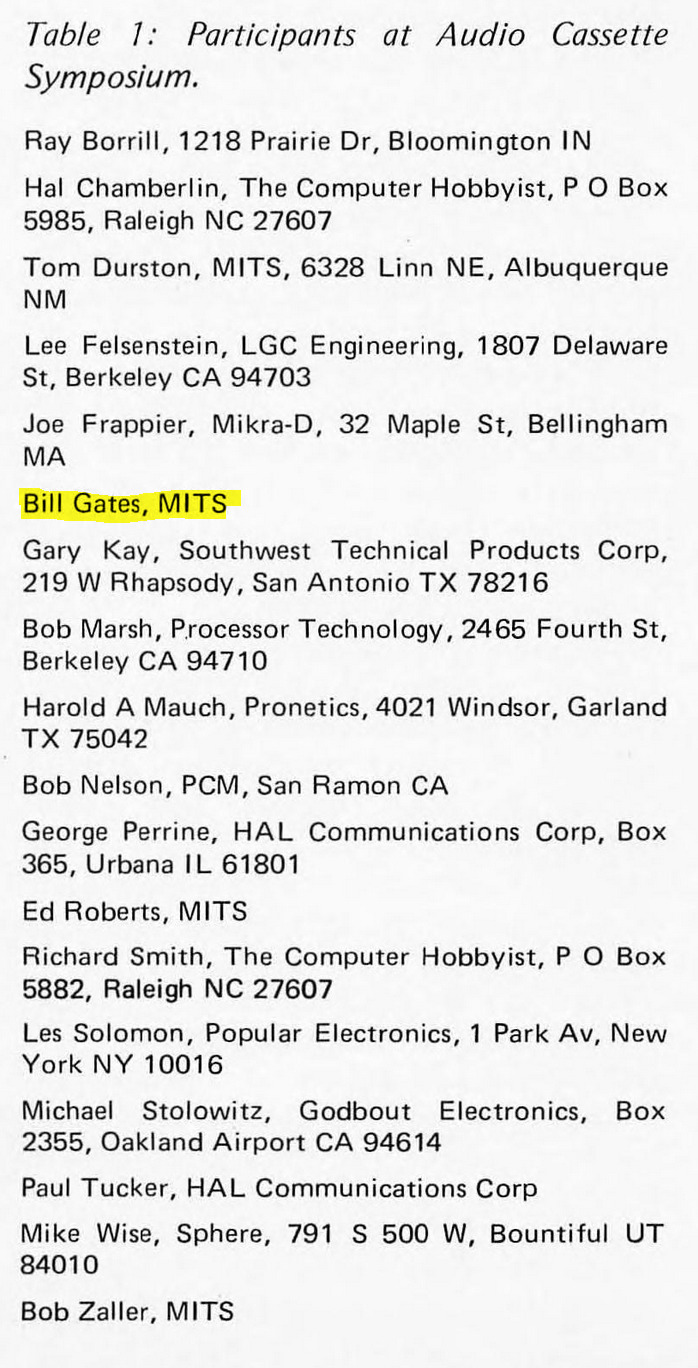
There are a few ways to encode binary data on tape designed to handle analog audio, but the KCS approach is to have 1's be 8 cycles of 2400Hz tone, and 0's be 4 cycles of 1200Hz tone. I say cycles, because while 300 baud is the initial specification, there is also a 1200 baud specification available, so the duration of marks vs spaces (another way of saying 1's and 0's), is variable based on that baud rate. Many S-100 computers implemented it, as do a few contemporary proprietary designs.
The big 3 microcomputers of 1977 that revolutionized the industry (Apple II, Commodore PET 2001, and Tandy TRS-80 Model I) each have their own cassette interface implementation. It kept costs down, and it was easy to implement, all things considered. The Apple II and TRS-80 use off-the-shelf cassette deck connections like many other machines, whereas the original variant of the PET had an integrated cassette. Commodore later used external cassette decks with a proprietary connector, whereas many other companies abandoned tape before too long. Hell, even the original IBM PC has a cassette port, not that anybody bothered to use that. Each one used a different encoding format to store their data, rather than KCS.
Here's a sample of what an OSI-formatted tape sounds like.
And here's a Commodore formatted tape, specifically one with VIC-20 programs on it.
I won't subject you to the whole program, or we'd be here all day. The initial single tone that starts the segment is called the "leader", I've truncated it for the sake of your ears, as well as recorded them kinda quietly. I don't have any other tape formats on hand to demonstrate, but I think you get the idea.
You can do alot better than storing programs on tape, but you can also do alot worse -- it beats having to type in a program every time from scratch.
273 notes
·
View notes
Note
Hi, Mr Prokopetz, I'm a big fan. Apologies if you've answered this before, but I was wondering what software you use to create the pdf and epub layouts of your ttrpgs, and whether you'd recommend it to a hobbyist who wants to try putting together something more professional than a gdoc for their own ttrpg?
My workflow is unfortunately not terribly accessible unless you have a fair amount of technical know-how.
In brief, I write all of my games in Notepad++ as HTML documents, taking care to use only the subset of HTML5 tags which are supported by most popular EPUB readers. I then use Calibre (or, more, precisely, the command-line utility that comes with Calibre, though you can get mostly the same results via the GUI) to bundle the HTML document as an EPUB3 file. I typically distribute both the HTML and EPUB versions (the former in a zipfile with all of the fonts and images and such) because web browsers tend to have much better screen-reader support than EPUB apps do.
The PDF, meanwhile, is generated from the same master HTML document using CSS paged media extensions – the layout is all generated automatically based on rules specified in a big, gnarly CSS file, and is never touched by human hands. There are a number of software packages which can do this sort of CSS-driven HTML-to-PDF conversion, some of them free or open source; I use a commercial product called Prince because, to the best of my knowledge, it's the only such software which has out-of-the-box support for PDF/UA semantic tagging (i.e., the stuff you need to do in order to make your PDFs screen-reader friendly), but you have more options if you're willing to tag your PDFs manually. (I am not.)
As for whether I'd recommend doing it this way? Like I said, unless you're a proper gearhead, not really; it's super efficient once you get it all set up – the only version of the game I actually maintain is the master HTML document, and generating updated versions of all the other formats is a one-click affair – but it's really only feasible for me because I already knew how to all that workflow automation stuff for unrelated reasons. I can't imagine teaching yourself all that from scratch just to write elfgames!
349 notes
·
View notes