#free audio editing and recording tools
Text
Discovering the Power of Reaper: My Go-To DAW for Music Production
In the expansive world of digital audio workstations (DAWs), Reaper stands out not just for its robust features and affordability but as my DAW of choice for all my music production needs. From the intricate beats crafted for the Garlic Farm project to the diverse soundscapes explored in my other works, Reaper has been an indispensable tool in my creative arsenal. Here’s why Reaper has earned its…
View On WordPress
#Advanced Music Production#Audio Editing#Audio Mixing#Audio Production Tips#Audio Routing#Beat Making#Beatstars#Customizable DAW#Digital Audio Workstation#Efficient Music Software#Free Beats Download#Garlic Farm Project#Home Studio Setup#MIDI Sequencing#Multi-Platform DAW#Music Automation#Music Composition#Music Creation Tools#Music Production#Music Production Guide#Music Software Review#Professional Audio#Reaper DAW#Reaper for Beginners#Recording Software#Sound Design#VST Plugins
0 notes
Text
Here's a list of Free tools and resources for your daily work!🎨
2D
• Piskelapp Pixel art + animation
• Krita general digital painting + animation
• Gimp image manipulation + painting
• MapEditor Level builder (orthogonal, isometric, hexagonal)
• Terawell manipulate 3D mannequin as a figure drawing aid (the free version has everything)
• Storyboarder Storyboard
3D
• Blender general 3D software (modeling, sculpting, painting, SFX , animation…).
• BlockBench low-poly 3D + animation.
• Dust3D low-poly 3D (similar to Zbrush Zsphere)
Sound Design
• Audacity Audio editor (recording, editing, mixing)
• LMMS digital audio workstation (music production, composition, beat-making).
• plugins4free audio plugins (work with both audacity and lmms)
• Beepcomp chiptune/8-bit/16-bit music synthesizer
Video
• davinciresolve video editing (the free version has everything)
• OBS Studio video recording + live streaming.
2D Animation
• Synfig Vector and puppet animation, frame by frame. Easy.
• OpenToon Vector and puppet animation, frame by frame. Hard.
↳ You can import your own drawings.
For learning and inspiration
• models-resource 3D models from retro games (mostly)
• spriters-resource 2D sprites (same)
• textures-resource 2D textures (same)
• TheCoverProject video game covers
• Setteidreams archive of animation production materials
• Livlily collection of animated lines
433 notes
·
View notes
Text
Kickstarting the Red Team Blues audiobook, which Amazon won't sell (read by Wil Wheaton!)
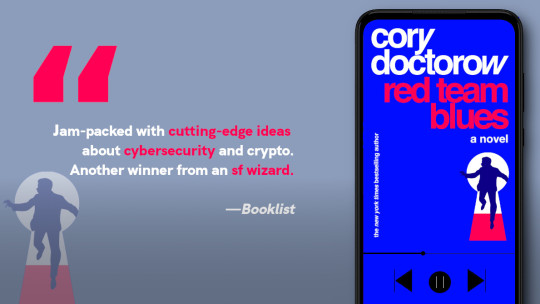
Red Team Blues is my next novel, a post-cyberpunk anti-finance finance thriller; it’s a major title for my publishers Tor Books and Head of Zeus, and it’s swept the trade press with starred reviews all ‘round. Despite all that, Audible will not sell the audiobook. In fact, Audible won’t sell any of my audiobooks. Instead, I have to independently produce them and sell them through Kickstarter:
https://www.kickstarter.com/projects/doctorow/red-team-blues-another-audiobook-that-amazon-wont-sell
If you’d like an essay-formatted version of this post to read or share, here’s a link to it on pluralistic.net, my surveillance-free, ad-free, tracker-free blog:
https://pluralistic.net/2023/03/21/anti-finance-finance-thriller/#marty-hench
Audible is Amazon’s monopoly audiobook platform. It has a death-grip on the audiobook market, commanding more than 90% of genre audiobook sales, and every single one of those audiobooks is sold with Amazon’s DRM on it. That means that you can’t break up with Amazon without throwing away those audiobooks. Under the 1998 Digital Millennium Copyright Act, I can’t give you a tool to convert my own copyrighted audiobooks to a non-Amazon format. Doing so is a felony carrying a five year prison sentence and a $500,000 fine for an act that in no way infringes anyone’s copyright! Indeed, merely infringing copyright is much less illegal than removing Amazon’s mandatory DRM from my own books!
I’ve got amazing publishers who support my crusade against DRM, but they’re not charities. If they can’t sell my audiobooks on the platform that represents 90% of the market, they’re not going to make audio editions at all. Instead, I make my own audiobooks, using brilliant voice actors like Amber Benson and @neil-gaiman, and I sell them everywhere except Audible.
Doing this isn’t cheap: I’m paying for an incredible studio (Skyboat Media), a world-class director (Gabrielle de Cuir), top-notch sound editing and mastering, and, of course, killer narrators. And while indie audiobook platforms like Libro.fm and downpour.com are amazing, the brutal fees extracted by Apple and Google on app sales means that users have to jump through a thousand hoops to shop with indie stores. Most audiobook listeners don’t even know that these stores exist: if a title isn’t available on Audible, they assume no audiobook exists.

That’s where Kickstarter comes in: twice now, I’ve crowdfunded presales of my audiobooks through KS, and these campaigns were astoundingly successful, smashing records and selling thousands of audiobooks. These campaigns didn’t just pay my bills (especially during lockdown, when our household income plunged), but they also showed other authors that it was possible to evade Amazon’s monopoly chokepoint and sell books that aren’t sticky-traps for Audible’s walled garden/prison:
https://www.publishersweekly.com/pw/by-topic/columns-and-blogs/cory-doctorow/article/90282-we-wrote-a-book-about-why-audible-won-t-sell-our-book-and-snuck-it-onto-audible.html
And today, I’m launching the Kickstarter for Red Team Blues, and even by the standards of my previous efforts, I think this one’s gonna be incredible.
https://www.kickstarter.com/projects/doctorow/red-team-blues-another-audiobook-that-amazon-wont-sell
For starters, there’s the narrator: @wilwheaton, whose work on my previous books is outstanding, hands-down my favorite (don’t tell my other narrators! They’re great too!):
https://wilwheaton.net/
Beyond Wil’s narration, there’s the subject matter. The hero of Red Team Blues is a hard-charging forensic accountant who’s untangled every Silicon Valley finance scam since he fell in love with spreadsheets as as a MIT freshman, dropped out, got his CPA ticket, and moved west. Now, at the age of 67, Marty Hench is ready to retire, but a dear old friend — a legendary cryptographer — drags him back for one last job — locating the stolen keys to the backdoor he foolishly hid in a cryptocurrency that’s worth more than a billion dollars.

That’s the starting gun for a “grabby next-Tuesday thriller” that sees Marty in between three-letter agencies and international crime syndicates, all of whom view digital technology as a carrier medium for scams, violence and predation. Marty’s final adventure involves dodgy banks, crooked crypto, and complicit officials in a fallen paradise where computers’ libertory promise has been sucked dry by billionaire vampires.
It’s a pretty contemporary story, in other words.
I wrote this one before SVB, before Sam Bankman0Fried and FTX — just like I wrote Little Brother before Snowden’s revelations. It’s not that I’m prescient — fortune-telling is a fatalist’s delusion — it’s that these phenomena are just the most spectacular, most recent examples in a long string of ghastly and increasingly dire scandals.
Red Team Blues blasted out of my fingertips in six weeks flat, during lockdown, when technology was simultaneously a lifeline, connecting us to one another during our enforced isolation; and a tool of predatory control, as bossware turned our “work from home” into “live at work.”
The last time I wrote a book that quickly, it was Little Brother, and, as with Little Brother, Red Team Blues is a way of working out my own anxieties and hopes for technology on the page, in story.

These books tap into a nerve. I knew I had something special in my hands when, the night after I finished the first draft, I rolled over at 2AM to find my wife sitting up in bed, reading.
“What are you doing?” I asked.
“I had to find out how it ended,” she answered.
The next day, my editor sent me a four-line email:
That.
Was.
A! Fucking! Ride!
Whoa!
Within a week, he’d bought Red Team Blues…and two sequels. I finished writing the second of these on Monday, and all three are coming out in the next 22 months. It’s gonna be a wild ride.

Kickstarter backers can get the usual goodies: DRM-free audiobooks and ebooks, hardcovers (including signed and personalized copies), and three very special, very limited-run goodies.
First, there’s naming rights for characters in the sequels — I’m selling three of these; they’re a form of cheap (or at least, reasonably priced) literary immortality for you or a loved one. The sequels are a lot of fun — they go in reverse chronology, and the next one is The Bezzle, out in Feb 2024, a book about prison-tech scams, crooked LA County Sheriff’s Deputy gangs, and real-estate scumbags turned techbros.
The third book is Picks and Shovels (Jan 2025), and it’s Marty’s first adventure after he comes west to San Francisco and ends up working for the bad guys, an affinity scam PC company called “Three Wise Men” that’s run by a Mormon bishop, a Catholic priest and an orthodox rabbi who fleece their faithful with proprietary, underpowered computers and peripherals, and front for some very bad, very violent money-men.
Next, there’s three Marty Hench short story commissions: the Hench stories are machines for turning opaque finance scams into technothrillers. While finance bros use MEGO (“my eyes glaze over”) as a weapon to bore their marks into submission, I use the same performative complexity as the engines of taut detective stories. Commissioning a Hench story lets you turn your favorite MEGO scam into a science fiction story, which I’ll then shop to fiction websites (every story I’ve written for the past 20 years has sold, though in the event that one of these doesn’t, I’ll put it up under a CC license).
Finally, there’s a super-ultra-limited deluxe hardcover edition — and I do mean limited, just four copies! These leather-bound editions have Will Staehle’s fantastic graphic motif embossed in their covers, and the type design legend John D Berry is laying out the pages so that there’s space for a hidden cavity. Nestled in that cavity is a hand-bound early draft edition of The Bezzle, the sequel to Red Team Blues. The binding is being done by the fantastic book-artist John DeMerritt. Each copy’s endpapers will feature a custom cryptographic puzzle created especially for it by the cryptographer Bruce Schneier.
I often hear from readers who want to thank me for the work I do, from the free podcast I’ve put out since 2006 to the free, CC BY columns I’ve written for Pluralistic for the past three years. There is no better way to thank me than to back this Kickstarter and encourage your friends to do the same:
https://www.kickstarter.com/projects/doctorow/red-team-blues-another-audiobook-that-amazon-wont-sell
Preselling a ton of audiobooks, ebooks, and print books is a huge boost to the book on its launch — incomparable, really. Invaluable.
What’s more, helping me find a viable way to produce popular, widely heard audiobooks without submitting to Amazon’s DRM lock-in sets an example for other creators and publishers: we have a hell of a collective action problem to solve, but if we could coordinate a response to Audible demanding the right to decide whether our work should have their DRM, it would force Audible to treat all of us — creators, publishers and listeners — more fairly.
I’ll be heading out on tour to the US, Canada, the UK and Germany once the book is out. I’m really looking forward to as many backers in person as I can! Thank you for your support over these many long years — and for your support on this Kickstarter.

Today (Mar 22), I’m doing a remote talk for the Institute for the Future’s “Changing the Register” series.
[Image ID: A graphic showing a phone playing the Red Team Blues audiobok, along with a quote from Booklist, 'Jam-packed with cutting-edge ideas about cybersecurity and crypto. Another winner from an sf wizard.']
#pluralistic#wil wheaton#drm#chokepoint capitalism#Monopoly#audible#amazon#audiobooks#sf#science fiction#post cyberpunk#cyberpunk#technothrillers#thrillers#heists#cryptocurrency#red team blues#marty hench#kickstarter
1K notes
·
View notes
Text
Humanizing Your Characters (And Why You Should)
To humanize a character is not to contort an irredeemable villain into the warped funhouse mirror reflection of a hero in the last 30 seconds to gain “narrative subversion” points. To humanize is not to give said villain a tragic backstory that validates every bad choice they make in attempt to provide nuance where it does not deserve to be.
To humanize a character, villain or otherwise, is to make them flawed. Scuff them up, give them narrative birthmarks and scars and imperfections. Whether it’s your hero, their love interest, the comic relief, the mentor, the villain, the rival, these little narrative details serve to make all your literary babies better.
Why should you humanize your characters?
To do this means to write in details beyond those that service the plot, or the themes, or the motifs, morals, foreshadowing, or story. These might be (and usually are) entirely unimportant in the grand scheme of things. So, if I wrote lengthy diatribes on pacing and why every detail must matter, and character descriptions and thematic importance, why am I now suggesting go free-for-all on the fluff?
Just like real people have quirks and tics and beliefs and pet peeves that serve our no greater purpose, so should fictional people. Your average reader doesn’t have the foggiest idea what literary devices are beyond metaphor, simile foreshadowing, and anecdote, but they can tell when the author is using motif and theme and all the syntactical marvels because it reads that much richer, even if they can’t pinpoint why.
And, for shipping fodder, these tiny little details are what help your audience fall in love with the character. It doesn’t even have to be in a book – Taylor Swift (whether you like her or not) never fills her music with sexual innuendo or going clubbing. She tells stories filled with human details like dancing in the refrigerator light. People can simultaneously relate to these very specific and vivid experiences, and say “not that exactly, but man this reminds me of…” and that’s (part of) the reason her music is so popular.
What kinds of narratives need these details?
All of them. Visual media, audio, written, stage play. Now, to what degree and excess you apply these details depends on your tone, intended audience, and writing style. If your style of writing is introspection heavy, noir character drama, you might go pretty heavy on the character design.
But even if you’re writing a kids book with a scant few paragraphs of setting descriptors and internal narration, or you’re drawing a comic book – if you have characters you want people to care about, do this.
Animators, particularly, are very adept at humanizing non-human characters, because, unlike live acting, every single stroke of the pen is there with intent. They use their own reflections for facial references, record their own movements to draw a dance, and insert little bits of themselves into signature character poses so you know that *that* animator did this one.
How to humanize your characters.
I’m going to break this down into a couple sections: Costume/wardrobe, personality, beliefs/behavior/superstitions, haptics/proxemics/kinesics, and voice. They will all overlap and the sheer variety and possibilities are way too broad for me to capture every facet.
Costumes and Wardrobe
In the film Fellowship of the Ring, there’s a blink-and-you’ll-miss-it moment where, after Boromir is slain by the Uruk-Hai, Aragorn takes Boromir’s Gondorian vambraces to wear in his honor, and in honor of their shared country. He wears them the rest of the trilogy. The editing pays no extra attention to them beyond a split second of Aragorn tightening the straps, it never lingers on them, never reminds you that they’re there, but they kept it in nonetheless. His actor also included a hunting bow that didn't exist in the book because he's a roamer, a ranger, and needs to be able to feed himself, along with a couple other survival tools.
Aragorn wears plenty of other symbolic bits of costume – the light of the Evenstar we see constantly from Arwen, the Lothlorien green cloaks shared by the entire Fellowship, his re-forged sword and eventual full Gondorian regalia, but all those are Epic Movie Moments that serve a thematic purpose.
Taking the vambraces is just a small, otherwise insignificant character moment, a choice made for no other reason than that’s what this character would do. That’s what makes him human, not an archetype.
When you’re writing these details and can’t rely on sneaking them into films, you have to work a little harder to remind your audience that they exist, but not too often. A detail shifts from “human” to “plot point” when it starts to serve a purpose to the themes and story.
Inconsequentiality might be how a character ties, or doesn’t tie their shoelaces, because they just can’t be bothered so they remain permanent knots and tripping hazards. It might be a throw-away line about how they refuse to wear shorts and strictly stick to long pants because they don’t like showing off their legs. It might be perpetually greasy hair from constantly running their fingers through it with stress, or self-soothing. A necklace they fidget with, or a ring, a belt they never bother to replace even though they should, a pair of lucky socks.
Resist the urge to make it more meaningful than “this is just how they are”. If I’m using the untied shoelaces example – in Spiderverse, this became a part of the story’s themes, motifs, and foreshadowing, and doesn’t count. Which isn’t bad! It’s just not what I’m talking about.
Personality
In How to Train Your Dragon, Toothless does not speak. All his personality comes from how he moves, the noises he makes, and the expressions on his face. There’s moments, like in the finale, when his prosthetic has burned off and Hiccup tells him to hold on for a little bit longer, and you can clearly see on his face that he’s deeply uncertain about his ability to do so. It’s almost off the screen, another blink-and-you’ll-miss-it moment. Or the beat of hesitation before he lets Hiccup touch him in the Forbidden Friendship scene. Or the irritated noise he makes when he’s impatiently waiting for Hiccup to stop chatting with his dad because they have a giant dragon to murder. Or when he slaps Hiccup with his ear fin for flying them into a rock spire.
None of those details *needed* to exist to endear you to his character or to serve the scenes they’re in. The scenes would carry on just fine without them. He’s a fictional dragon, yes, but these details make him real.
Other personality tics you could include might be a character who gets frustrated with tedious things very quickly and starts making little inteligible curses under their breath. Or how they giggle when they’re excited and start bouncing on their toes. Maybe they have a tic where they snap their fingers when they’re concentrating, trying to will an idea into existence. Or they stick their tongue out while they work and get embarrassed when another character calls them on it. They roll around in their sleep, steal blankets, drool, leave dishes in the sink or are neurotic with how things must be organized. They have one CD in their car, and actually use that CD player instead of the phone jack or Bluetooth. They sing in the shower, while they cook, or while they do homework, no matter how grating their voice.
They like the smell of new shoes or Sharpies. They hate the texture of suede or velvet or sticky residues. They never pick their socks up. They hate the overhead light in their room and use 50 lamps instead. They hate turning into oncoming traffic or don’t trust their backup camera. They collect Funko Pops and insist there’s always room for more.
And about a million others.
Beliefs, Behaviors, and Superstitions
*If you happen to be writing a story where superstitions have merit, maybe skip this one.* Usually, inevitably, these evolve into character centerpieces and I can’t actually think of one off the top of my head that doesn’t become this beyond the ones we all know. A few comedic examples do come to mind:
The Magic Conch in “Club Spongebob” and the sea-bear-proof dirt circle in “The Camping Episode”
Dean Winchester’s fear and panic-driven actions in “Yellow Fever” and “Sam, Interrupted”
The references to the trolls that steal left-foot socks in How to Train Your Dragon
I’m not a fan of wasting time writing a religious character doing their religious thing when Plot Is Happening, but smaller things are what I’m talking about. Like them wearing a cross/rosary and touching it when they’re nervous. Having a specific off-beat prayer, saying, or expression because they don’t believe in cursing.
The classic ones like black cats, ladders, broken mirrors, salt, sidewalk cracks can all be funny. Athletes have plenty, too, and some of them, particularly in baseball culture, are a bit ridiculous. Not washing socks or uniforms, having a team idol they donate Double Bubble to and also rub their toes. A specific workout routine, diet, team morale dance.
Other things, too. A character who’s afraid to go back downstairs once the lights are off, or fear the basement or the backyard shed. Or they’re really put-off by this old family photo for no reason other than how glassy their eyes look and it’s creepy. They like crystals, dreamcatchers, star signs, tarot, or they absolutely do not under any circumstances.
They believe in all the tried and true ways of predicting the weather like a grizzled old sailor. They believe in ghosts, vampires, werewolves, witches, skinwalkers, doppelgangers, fairies. They talk to the cat statue in their kitchen and named it Fudge Pop. They whisper to the spirit that possessed the fridge so it stops making all that racket, and half the time, it works every time. They wear yellow for good luck or carry a rabbit’s foot. They’re not religious at all but still throw prayers out to whoever’s listening because, you know, just in case. They sit by their window sill and talk to the moon and the stars and pretend like they’re in a music video when they’re driving through the city in the rain.
Haptics, Proxemics, and Kinesics
These are, for all you non-communication and psych majors out there, touch and physical contact, how they move, and how they move around other people.
Behold, your shipping fodder.
Two shining examples of proxemics in action are the famous “close talker” episode of Seinfeld (of which every communication major has been subjected to) and Castiel’s not understanding of personal space (and human chronemic habits) in Supernatural.
These are how a character walks, if they’re flat-footed, clumsy, or tip-toers. If they make a racket or constantly spook the other characters. If they fidget or can’t sit still in a seat for five seconds, if they like to sit backwards or upside down. How they touch themselves, if they do a lot of self-soothing maneuvers (hugging themselves, rubbing their arms, touching their face, drawing their knees up, holding their neck, etc) or if they don’t do any self-soothing at all.
This is how they shake hands, if they dance while they cook or work. It’s how much space they let themselves take up, if they man-spread or keep their limbs in closer. How close they stand to others or how far. If they let themselves be touched at all, or if they always have their skin covered. If they always have their back to a wall, or are always making sure they know where the nearest exit is. If they make grand gestures when they talk and give directions. If they flinch from pats on the back or raised hands. If they lean away from loud voices or project their own. If they use their height to their advantage when arguing, puff their chest, square their shoulders, put their hands on their hips, or point fingers in accusation.
If they touch other characters as they pass by. If they’re huggers or victims of falling asleep on or near their comrades. If they must sleep facing the door, or with something solid behind them. If they can sleep in the middle of a party wholly uncaring. If they sleepwalk, sleeptalk, migrate across the bed to cuddle whoever’s nearest with no idea they’re doing it.
If they like to be held or like to hold others. If they hate being picked up and slung around or are touch-starved for it. If they like their space and stick to it or are more than happy to share.
Do they walk with grace, head held high and back straight? Or are they hunched over, head hung, watching their feet? Are they meanderers or speed-walkers? Do they cross their arms in front or lace their hands behind them? Do they bow to authority or meet that gaze head on?
I have heard that Prince Zuko, in Last Airbender, is usually drawn sleeping with his bad ear down when he doesn’t feel safe, like on his warship or anywhere in the Fire Nation, or on the road. He’s drawn on his other side once he joins the Gaang. In Dead Man’s Chest, just before Davy Jones drives the Flying Dutchman under the waves, two tentacles curl up and around the brim of his hat to keep it from blowing off in the water.
When they fight, do they attack first, or defend first? Do they touch other characters’ hair? Share makeup, share clothes? Touch their faces with boops or bonks or nuzzles and eskimo kisses? Do they crack their knuckles and necks and knees?
Do they stare in baffled curiosity at all the other characters wholly comfortable in each other's spaces because they can’t, won’t, or don’t see the point in all this nonsense? Do they say they’re happy on the outside, but are betrayed by their body language?
Voice
Whether or not to write an accent is entirely up to you. Books like Their Eyes Were Watching God writes dialogue in a vernacular specific to its characters. Westerners and southerners tend to be written with the southern drawl or dialect, ripe with stereotypical contractions. Be advised, however, that in attempt to write an accent to give your character depth, you could be instead turning off your audience who doesn’t have energy to decipher what they’re saying, or you went and wrote a racist stereotype.
Voice isn’t just accent and dialect, nor is it how it sounds, which falls more solidly under useful character descriptions. Voice for the sake of humanizing your characters concerns how they talk, how they convey their thoughts, and how they become distinct from other characters in dialogue and narration.
If you’re writing a narrative that hops heads and don’t want to include a big banner to indicate who’s talking at any given time, this is where voice matters. It is, I think, the least appreciated of all the possible traits to pay attention to.
First person narrators have the most flexibility here because the audience is zero degrees removed from their first-hand experiences. Their personality comes through sharply in how they describe things and what they pay attention to.
But it’s also in what similes and metaphors they use. I read a book that had an average (allegedly straight) male narrator going off and describing colors with types of flowers, some I had to look up because I just don’t know those off the top of my head. My immediate thought was either this character is a poorly written gay, or he’s a florist. Neither (allegedly), the writer was just being too specific.
Do they have crutch words they use? like, um, actually, so…, uh
Or repeat exclamations specific to them? yikes, yowzers, jeepers, jinkies, zoinks, balls, beans, d’oh!
Or idioms they’re fond of? Like a bat out of hell. Snowball’s chance.
Do they stutter when they’re nervous? Do they lose their train of thought and bounce around, losing other characters in the process? Do they have a non-Christian god they pray to and say something other than “thank God”? Are they from another country, culture, time period, realm, or planet with their own gods, beliefs, and idioms?
When they describe settings, how flowery is the language? Would this grizzled war hero use flowery language? How would he or she describe the color pink, versus a PTA mom? Do they use only a generic “blue, green, red” or do they really pay attention with “aquamarine, teal, emerald, viridian, vermillion, rose, ruby”?
How do this character’s hobbies affect how well they can describe dance moves, painting styles, car models, music genres?
This mostly matters when you’re head-hopping and the voice of the narrator serves to be more distinct, otherwise, what’s the point of head-hopping? Just use third-person omniscient.
If you really want to go wild, give a specific narrator unique syntax. Maybe one character is the ghost of Oscar Wild with never-ending run-on sentences. Just be sure to not go too overboard and compromise the integrity of your story.
In the book A Lesson Before Dying, a somewhat illiterate, underprivileged and undereducated minor has been given a mentor, a teacher, before they face the death penalty. At the end of the book, you read all of the letters they wrote to their teacher. There’s misspellings everywhere, almost no punctuation, and long, rambling sentences.
It’s heartbreaking. The subject matter is heavy and horrible, yes, but it’s the choice to write with such poor English that has a much bigger impact than perfect MLA format.
How to implement these details
Most of these, in the written medium, need only show up once or twice before your audience notices and wonders why they’re there. Most fall squarely under character design, which falls under exposition, and should follow all the exposition guidelines.
These details exist to be random and fluffy, but they can’t exist randomly within the narrative. If you want to have your character be superstitious, pick a relevant time to include that superstition.
Others, like ongoing speech habits or movements, still don’t overuse, especially if they’re unique. A character might like to sit backwards in a chair, but if you mention that they’re doing it every single time they sit down, your audience will wonder what’s so important and if the character is unwell.
And, of course, you can let these traits become thematically important, like a superstition being central to their personality or backstory or motivation. These all serve the same purpose of making your character feel like a real person instead of just a “character”.
Just think about tossing in a few random details every now and then and see what happens. One tiny sentence can take a background character and make them candidates for the eventual fandom’s fan favorite. Details like these turn your work from “This a story, and these are the characters who tell it” into “these are my characters, and this is their story.”
#writing advice#character design#writing tips#writing resources#exposition#writing tools#writing a book
212 notes
·
View notes
Text
ᕱ⑅ᕱ how to make subliminals ? <3

- Apps that you need
▪︎ Capcut (to edit the videos)
▪︎ T2s (or any Text to Speech app)
▪︎ Pinterest (for your thumbnail, editing materials)
▪︎ Notes app (to write benefits and affirmations)
--------------------------------------------------------------
STEP 1 : write the benefits
☆ okay for this very first it's honestly simple. just go to your notes app in your phone pick out a topic and just write on the benefits first.
for example you pick the topic "Clear Skin"
benefits :
- always clear skin
- glass like clear skin
- skin free from acne , pimples , blemishes etc
and yk wtv you want to add go crazy !!!
--------------------------------------------------------------
STEP 2 : write the affs
☆ you're still gonna use the notes app for this. now go to a new file/new note and start typing out the. affirmations. For example
- I have clear skin
- My skin is naturally clear
- I love how clear my skin is
- I get so many compliments on my clear skin
etc
NOTE : there is no such thing as powerful affirmations and not powerful affirmations. a normal affirmations itself is already a powerful tool to help manifest your desires. don't worry about writing complex , "aesthetically pleasing" affirmations. write what you want and what suits you the best.
--------------------------------------------------------------
STEP 3 : text to speech
☆ there are thousands of apps for this personally I use T2s cause I find it more convenient to use and sometimes if I am feeling extra I will record the affirmations using my own voice in capcut.
🙋♀️ : What's the difference between using a robot voice and your own voice ?
Ah now honestly speaking there isn't much of a difference it's just that using your own voice you can make it sound more human. With all those AI voice generators now you can literally use your favourite celebrities voices.
Another perk of using your own voice is that you are literally conveying your emotions to it so if you are just generally feeling any kind of positive emotion during that it will convey to your listeners and will make the subliminal xtra effective.
Do remember that not many will believe that statement and all subliminals WORK THE SAME. At the end of the day it is YOU who is going manifest YOUR desires.
Anyways continuing....
So basically you go to the app , copy and paste your affirmations. You can go to the settings and set to however you wish and then just download it.
--------------------------------------------------------------
STEP 4 : editing materials
☆ you're probs gonna wanna add some edits or aesthetic pictures in your sub right? and where are we going for that? Yep PINTEREST.
just search up for example "angel aesthetic" and you're gonna get TONS of pictures that you can use for your thumbnails and videos.
Once again you don't need to make your videos aesthetically pleasing for others. If you want to go for it but don't feel the need to do it. All subliminals are the same no matter how it is edited. Don't feel the need to satisfy others hun <3
--------------------------------------------------------------
STEP 5 : all together
☆ this is where our bestie capcut makes an appearance. go to capcut. click new project, add your picture/video you want to use. go to audios and add in your affirmation tape.
i personally usually lower the volume from 2 - 5 because I don't prefer hearing the affirmations while listening to the audio but that is of course up to you however you want to do it. Speeding up also I either keep it at 1.0x or speed it up 1.5x.
For the asmr you can use https://youtu.be/FfXD3RBMW-Y?si=Q0wLF39Mn8Q9YZx4 their asmrs it's the best !!
if you want a rain sound you can just search it up
!
and that's pretty much it.
--------------------------------------------------------------
if you have any questions don't hesitate to dm me !

#manifesting#affirm and persist#how to manifest#neville goddard#subliminals#void state#law of manifestation#loa tumblr#self love#affirm#how to make subliminals#subliminal community#subliminal results
256 notes
·
View notes
Note
Do you have any tips/useful information for people who want to start making audio rps?
(Also love ur content sm!!! Mitch is the most lovable little guy)
Aw thank you so much! Love him too!
This is a great question, had to think about it for a bit;
If you want to dabble with making audios, feel free to start off with public scripts! I think there's subreddits like ASMR script haven (IIRC?) that has public scripts that can be filled by anyone. Just be sure to read the author's conditions carefully i.e. credit, terms of use, what can be changed etc. Right at the start I recorded a public script to try and get started, it's a great way to just jump right into making something to learn the ropes of it without also first having to write an entire script for it too. Filling public scripts is a fantastic way to start off, however I reckon writing your own stories is a major part of the fun!
You don't need an expensive mic, but audio quality is a very important factor. Do some test recordings and listen back to them (with headphones!) and see how it sounds. This is especially important for whispered scenes (DO NOT get too close to the mic or breathe on it!) or loud scenes (DO NOT peak the mic!). If your mic has a gain / input dial, play with that before recording! Just start with mono to begin with, play with stereo if your mic supports it after you become familiar with it. Aim for your recording to be no louder than -6db at the highest, if you can keep your voice roughly between like -20 and -6 that tends to sound reasonably natural.
Do your best to eliminate external sounds! If you have AC or anything like that on, turn it off. I have to shut down my main PC and record with only my editing Mac on because the PC fans are much louder and my mic is very sensitive! There'll pretty much always be background fuzz, some mics will just have some, but try to make your room as quiet as you can. Your software may have some background noise removal tools, I use filters for that (expensive so I can't recommend them), but DO NOT use the noise removal tool in Audacity! It's terrible!
Speaking of, Audacity is decent to get started with. It's good basic recording software, plus multiplatform. For a while I preferred recording on Windows with Audiodope, also very simple, plus I liked that it asks me whether I wanted to record in mono or stereo first in case I forget to switch, I currently record on Mac with ocenaudio which does the same, while Audacity won't ask, you have to go into settings. Anyway Audacity is okay to start with for editing, it's free, but from what I understand it's a "destructive" editing software in that after you make a change like adding a filter, you can't then go back in and change it other than just undoing, which I really don't like, plus changing the timing of things looks fiddly. I don't know what to recommend to move up from, I've heard good stuff about Reaper but it looks very complicated. Avoid Adobe unless you have a free subscription from somewhere else. I edit entirely in Final Cut Pro so I can't recommend that unless you're on Mac, plus it's my old work software and expensive! If you need sound effects, I use freesound.org, there are other great free resources as well, but make sure you check each individual sound effect's license before use.
Once you've edited the audio and want to turn it into a video, I've heard good stuff about Da Vinci Resolve and Kden Live, both are free! Make a video canvas of 1920 x 1080, FPS doesn't especially matter if you only have a still thumbnail, 25 or 30 is fine, and render it out as a h264 mp4 if you're not sure what to select! Good compression for internet video, good for streaming. Try to record and export your audio as wav if you have enough space, wav is uncompressed audio so it maintains full quality but they can get large.
I also make my thumbnails in-edit but you may want to use external software like Gimp to make them. Avoid getting random stuff of google especially anime boys / girls, and definitely don't ever use an artist's stuff without asking for permission + giving proper credit. Using pre-built generators like Picrew is totally fine, just be sure to credit where you got it from, but 100% avoid AI generators, obviously. Be careful with Adobe stock images, apparently there's AI slop in there too. You don't need art for audios though, they're a nice to have bonus, but many of my most viewed videos have no art at all. If you need background images, I like unsplash.com because it has a free license! Read over it yourself but basically you're able to use pretty much any image they have in your videos!
Just jump in and try making something small, never start with your magnum opus! I started with the introverted incubus character because I'm a very shy person myself, it was an easier role to get started with! If you want to start writing your own scripts too there's a lot we could talk about there as well, just try to picture the scene from the perspective of the listener, what they may be thinking or feeling at any given moment, not just the perspective of the character you're going to be playing!
This was a lot and I don't think I covered much, I hope some of it helps though!!
30 notes
·
View notes
Text
so you want to use OBS
hello! i’ve decided to compile information on my OBS setup and some resources that have helped me along the way. this is mostly for personal reference, but maybe others can make use of this information!
some notes before i get into it:
i use OBS for both offline recording and (twitch) streaming. any footage i record is edited using DaVinci Resolve 18, which is free.
most of my OBS captures are of video games (through a USB capture card, specifically elgato), and the occasional screen/application capture (like clip studio paint, and sometimes PC games).
as such, the information here is reflective of these experiences. this post is not comprehensive to all of OBS’s features- this is just an overview of the settings and configurations that are most relevant to me.
with that out of the way, all the information will be under the cut!
Basic Setup
file format:
how to change: settings -> output -> recording -> recording format -> press “apply” once finished!
I save most of my recordings as .mkv files- it supports multi-track audio! i prefer .mkv over .mp4 because if your power goes out, you still have a recording to work with.
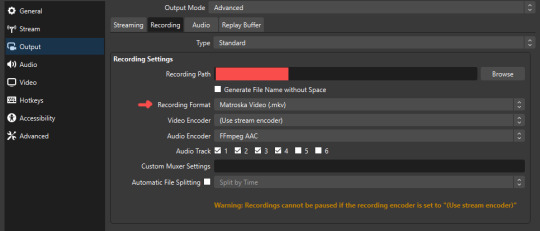
.mkv files can be read by DaVinci Resolve without an issue- but for Adobe software, they'll need to be remuxed to .mp4 within OBS! (file -> remux recordings -> press the … to select a file -> press the “remux” button)
video resolution and framerate:
how to change: settings -> video -> output (scaled) resolution
my obs canvas is @ 1920 x 1080p (16:9)
i switch between 720p and 1080p as needed! if you're concerned about space, you can probably just go for 720p. i also record at 30 fps, simply because that’s what my capture card supports.
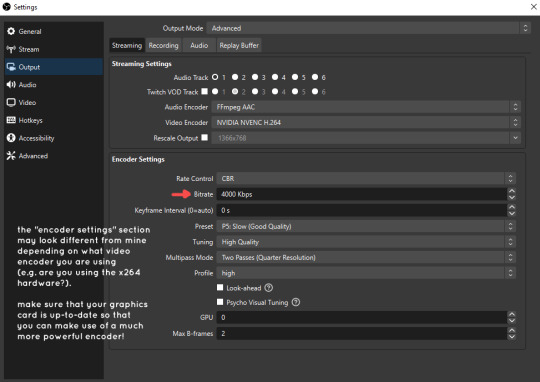
video bitrate:
how to change: settings -> output -> encoder settings (located in both the streaming and recording tab) -> press “apply” once finished!
bitrate is a bit of a doozy to explain, but the most important thing to know is that bitrate affects your video’s quality. lower numbers = lower quality, while higher numbers = higher quality.
generally speaking, you'll want higher bitrate when you're recording things with high depth of information (e.g. you’d want a higher bitrate for something fast-paced like splatoon, compared to a slower-paced game like animal crossing).
my video bitrate is either set to 3000 or 4000 kbps! and here's some of my other (related) settings while i'm at it:
you can put your bitrate at much higher values than me if you're a stickler for quality- but keep in mind that a higher bitrate means:
bigger file size
more information to upload (when streaming)
your computer will need to encode more
i’d recommend reading twitch’s guidelines on encoding, bitrate, resolution, and framerate to get an idea of what values to pick. for people who are doing offline recording or streaming on a different platform, i suggest googling the appropriate resources!
multi-track audio:
this is mostly applicable to anyone looking to do video editing!
multi-track audio basically allows you to separate your audio sources (e.g. discord, game audio, and your own microphone) into different tracks.
this is an immensely helpful tool because it lets you adjust audio levels in post-production (editing). some examples of how this can be used:
increasing someones microphone volume if they speak too softly
increasing/decreasing game audio
muting swear words/sensitive information
completely muting voice call + microphone if you want to upload a no commentary video
and more!
to set this up, take a look at your audio mixer panel, and press the ⚙ icon. this will bring up advanced audio properties.
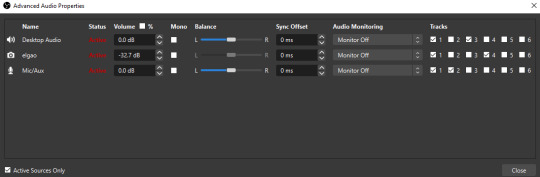
by checkmarking a track box, it puts the audio on that track. to make the above screenshot easier to digest:
track 1 consists of ALL three audio sources- desktop, elgato, and microphone.
track 2 only has the microphone audio.
track 3 only has desktop audio (i use this for voice calls)
track 4 only has the elgato capture card audio (game audio). the volume has also been lowered so that any speaking voices can be heard clearly.
tracks 5 and 6 are unused.
you might be wondering, “why do all three of these have 1 checked off?” this is what i call the universal audio track. i recommend having a universal audio track for a few reasons:
when you stream from OBS onto twitch/youtube- you have to select ONE audio track.
it’s also a nice backup in case you didn’t separate your audio correctly.
if for whatever reason you need to move around your individual audio tracks in editing, the universal track acts as a nice reference point.
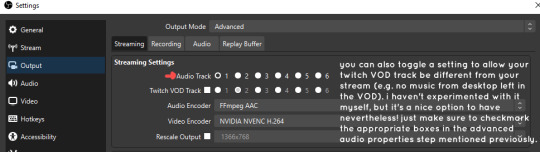
mark off your audio tracks for each audio source as you see fit! once you’re finished with the advanced audio properties, go to settings > output.
for the streaming tab, you’ll want to have the number of your universal audio track selected. in my case, that will be audio track 1.
for the recording tab, checkmark all the audio tracks that are applicable to you (in my case, audio tracks 1, 2, 3, and 4). by default, only audio track 1 is selected.
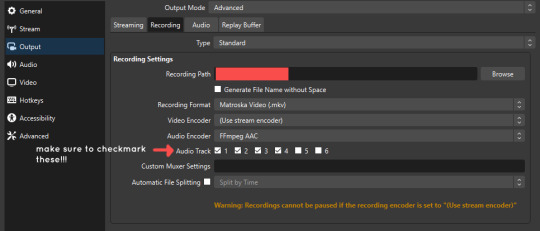
if you don’t check off the additional audio tracks in the output > recordings section, you will not have access to those audio tracks in editing, and you won’t be able to edit your audio tracks independently of each other. so don’t forget to do this! 👍
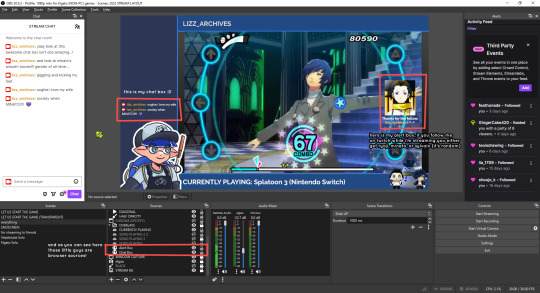
custom browser docks
custom browser docks are a great tool for when you’re streaming and want to have access to your twitch chat and/or activity feed! (or if you wanted to have some other web browser on OBS).
to create one, go to docks -> custom browser docks.
you’ll be given a table interface that asks you to put the dock name and URL. for streamers who want to have chat and alerts available, do the following:
on twitch’s homepage, go to the upper right and click your icon
then, click creator dashboard
once you’re on your dashboard, go to stream manager
click the vertical “...” on my chat OR activity feed.
press “pop-out chat” OR “pop-out activity feed”
copy and paste the link into the table back into OBS
press apply once you’re done
click and drag the docks around at your leisure to put them where you like!
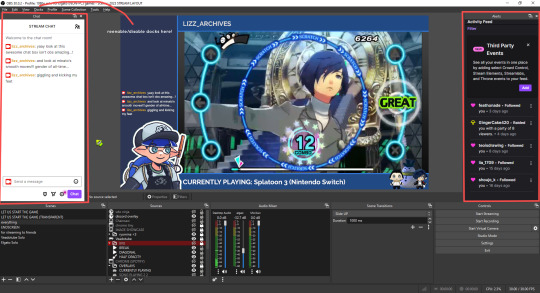
if you ever decide you don’t want to have something on your OBS dock (or want to bring something back), go to the toolbar, click “docks,” and click the appropriate dock!
third party things
a section of optional things that you may enjoy having.
streamlabs alerts
this is basically for anyone who streams and wants to have their chat and/or follower notifications visualized on screen!
streamlab alerts can be added to OBS by adding a browser source into your scene, and the specifics can be customized on streamlabs itself. it’s pretty self-explanatory, so i’ll just leave a link to streamlabs website, where you can log in using the streaming platform of your choice: https://streamlabs.com/
discord overlay
this is a browser source that can be set up to show people who are in a server's voice chat and who speaks. i recommend this to people who make multiplayer content- it can help viewers distinguish who is who but also it can be helpful in editing.
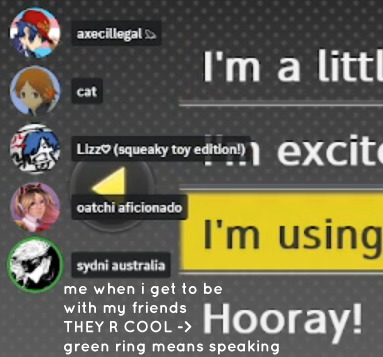
to set this up, go to https://streamkit.discord.com/overlay, click “install for OBS,” and after logging in with discord, go to “voice widget” and click the server and voice channel you want.
you are able to apply CSS if you'd like more control over the visuals, but the standard layout tends to work fine for me! a search of “discord overlay css” on youtube can help you get more information.
veadotube mini
this is a pngtuber software that a friend recommended to me! no webcam is required- mouth opening and closing is based on your microphone input!
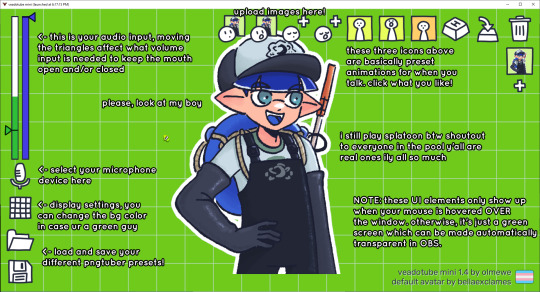
you can download it here (it’s pay what you want!): https://olmewe.itch.io/veadotube-mini
for a proper tutorial on how to use it, i recommend checking out the app's documentation, which you can read here: https://veado.tube/help/
source record
have you ever wanted to stream something with a chat overlay/layout, but wanted your recording to ONLY be the gameplay? or maybe you wanted to record BOTH your gameplay AND your webcam so that you can have a crisp zoom-in on your webcam!
source record is a third party plugin that can help you with that!
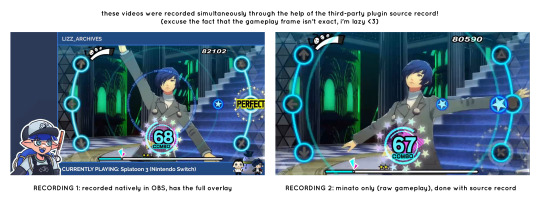
the general gist of source record involves applying the “source record” filter on either a scene or source, and customizing the encoding settings accordingly. the exact details of how to set it up is beyond the scope of this post, so I'll just direct people to this video instead (it was very helpful to me):
youtube
⚠ a quick note about source record: this plugin can be intense for your computer. be sure to do test recordings and the like to see what your computer can handle (and see if the recordings come out the way you like). it took me a few tests before i settled onto something i liked!
you can download and install source record here: https://obsproject.com/forum/resources/source-record.1285/
vdo.ninja
have you ever wanted to do a collaborative video or stream where you feature someone else’s video on your stream? or maybe you’re doing a multi-person streaming event! vdo.ninja is the perfect tool for you!
vdo.ninja turns your OBS virtual camera into a browser source link- which your collaborator can add on their stream! this is a new tool that i’ve added to my arsenal recently- since my friend and i are planning to stream a side order challenge together! i’ve still got to iron it out a bit more, but i like what i’ve used of it so far.
try it out for yourself at their website here (with documentation and demos available on the homepage!): https://vdo.ninja/ (no downloads required!)
ok! i’m set up! what now?
and with that, that’s all of the settings and tools that i thought would be worth mentioning! while most of my setup was written with video games in mind, some of these plugins and setups may be applicable to other types of videos (e.g. tabletop gaming with a physical camera)!
now that i’ve outlined all these settings, i have one more thing i have to say: regardless of what you're using OBS for, do a test recording before doing anything “official” with it. this recording can be as short as 30 seconds. it’s a good habit to develop that can make sure your streams/recordings turn out the way you want them to!
here are the kinds of things i like to check! it’s not an exhaustive list, but this can be a starting point:
video:
does my video look the way i want it to (and can my computer handle that)?
can my computer handle the load of encoding? - OBS will note in the bottom if the encoding is overloaded. if it can’t handle it, turn down your bitrate or adjust other encoding settings (e.g. i had to toggle psycho visual tuning OFF because it was causing lag)
this is especially the case if you're recording PC games- you don’t want to have slowdown on either your game or the recording!
audio:
are my audio sources (e.g. desktop audio and microphone) correct? - if you plug/unplug devices a lot, be sure to check this (settings -> audio).
are any of my audio sources muted? - make sure you don’t have anything on 🔇 if you don’t want it to be muted! otherwise the audio will be lost forever… (i lost my friend’s VC audio once… it was sad)
are my audio tracks separated properly? - requires you to boot up your editing software, but it's worth doing! for the test recording, just have something from all your sources playing at once, and see if your editor has things separated into tracks.
can i hear the voices clearly? or does the music and/or game overpower them?
if for whatever reason your OBS crashes, or you want more information on anything “critical” or “warning” worthy in your set-up, you can go to help > log files > upload current log file > analyze. crash logs currently can’t be analyzed by the log analyzer- but they’re a valuable tool when asking for help on the OBS forums!
and that’s all! for real, this time. i hope that some of these tools and settings can help anyone wanting to get more out of OBS. there’s definitely other things i didn’t touch upon (e.g. audio filters for noise compression, suppression, etc.), so i suggest doing your own research and trying things out!
happy recording/streaming, and thanks for reading! ✨
#lizzy speaks#this was a fun little write up!! i've been slowly getting some of my friends into video making teehee and its SO FUN!!!#(digital) video is like one of my other passions next to art. everyone say thank you splatoon for getting me back into it again <3#i've been using obs since like 2018 so i wanted to share some of the things i learned for funsies... i really love video...#but also i like having reference posts like this in the case people have questions they want to ask me...#because i don't always remember what video tutorials i watched and it's nice to document that somewhere...#warning to anyone who reads it this is like 2.1k words. i do want to stress that this isn't comprehensive but there's still a lot of info#that i wanted to put for this post...! that said topics like designing your own stream layout + assets for it are NOT in the scope of this#post and nor is this a beginner's guide to obs (i wrote this with the assumption that you know how to record and/or stream and that-#people already have an idea of how to use scenes and the different types of sources obs can use).#i hope everyone's had a lovely march 5th! i would love to look at the fanart but im still not done with reload...#but im hoping to finish it by the end of the month!!! yipee!!!#Youtube
47 notes
·
View notes
Text
PSA: Free Software
Reading this may really save your time, privacy, and money!
Reblog or share to spread awareness!
Folks often use software that’s expensive and sometimes even inferior because they don’t know there are alternatives. So to those unfamiliar: basically, free and open-source (FOSS) or "libre" software is free to use and anyone can access the original code to make their own version or work on fixing problems.
That does not mean anyone can randomly add a virus and give it to everyone—any respectable libre project has checks in place to make sure changes to the official version are good! Libre software is typically developed by communities who really care about the quality of the software as a goal in itself.
There are libre alternatives to many well-known programs that do everything an average user needs (find out more under the cut!) for free with no DRM, license keys, or subscriptions.
Using libre software when possible is an easy way to fight against and free yourself from corporate greed while actually being more convenient in many cases! If you need an app to do something, perhaps try searching online for things like:
foss [whatever it is]
libre [whatever it is]
open source [whatever it is]
Feel free to recommend more libre software in the tags, replies, comments, or whatever you freaks like to do!
Some Libre Software I Personally Enjoy…
LibreOffice
LibreOffice is an office suite, much like Microsoft Office. It includes equivalents for apps like Word, Excel, and Powerpoint, which can view and edit files created for those apps.
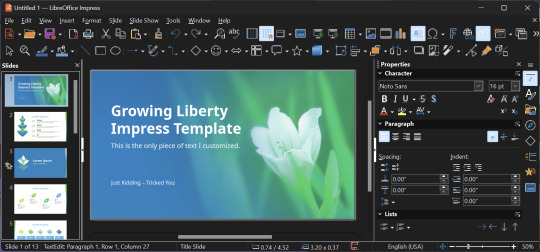
I can't say I've used it much myself yet. I do not personally like using office software except when I have to for school.
OpenShot
OpenShot Video Editor is, as the name suggests, a video editing program. It has industry-standard features like splicing, layering, transitions, and greenscreen.
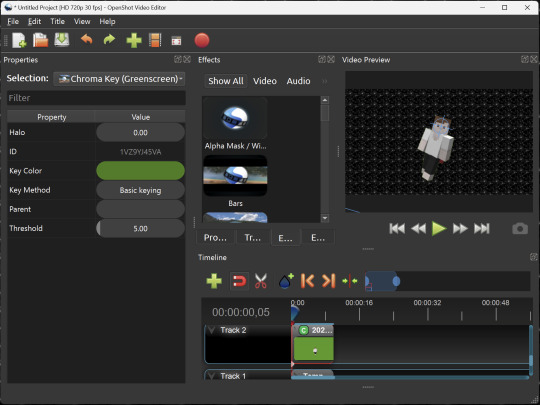
I've only made one video with it so far, but I'm already very happy with it. I had already paid for a video editor (Cyberlink PowerDirector Pro), but I needed to reinstall it and I didn't remember how. Out of desperation, I searched up "FOSS video editor" and I'm so glad I did. There's no launcher, there's no promotion of other apps and asset packs—it's just a video editor with a normal installer.
GIMP
GNU Image Manipulation Program is an image editor, much like Photoshop. Originally created for Linux but also available for Windows and MacOS, it provides plenty of functionality for editing images. It is a bit unintuitive to learn at first, though.
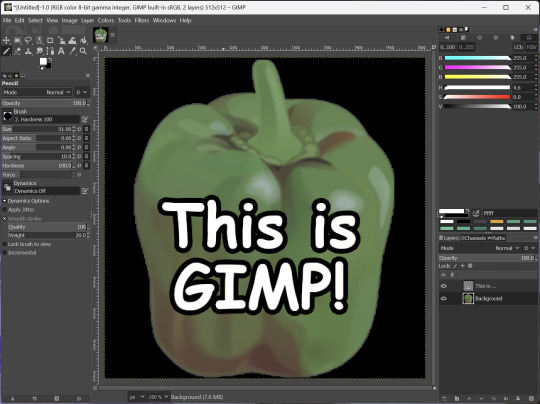
I've used it to create and modify images for years, including logos, really bad traceover art, and Minecraft textures. It doesn't have certain advanced tech like AI paint-in, but it has served my purposes well and it might just work for yours!
(Be sure to go to Windows > Dockable Dialogs > Colors. I have no idea why that's not enabled by default.)
Audacity
Audacity is an audio editing program. It can record, load, splice, and layer audio files and apply effects to them.
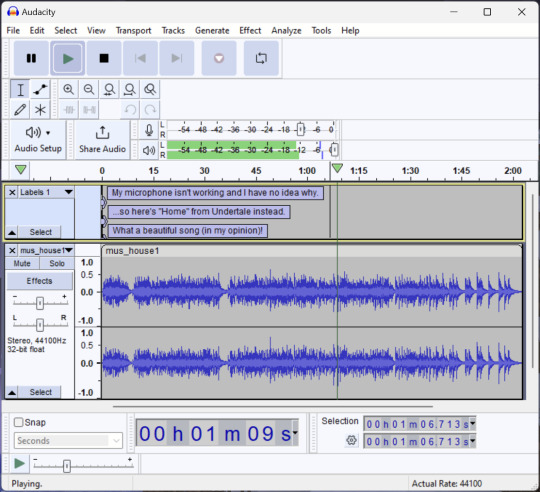
Audacity is another program I've used for a long time. It is not designed to compose music, but it is great for podcasts, simple edits, and loading legacy MS Paint to hear cool noises.
7-Zip
7-Zip is a file manager and archive tool. It supports many archive types including ZIP, RAR, TAR, and its own format, 7Z. It can view and modify the contents of archives, encrypt and decrypt archives, and all that good stuff.
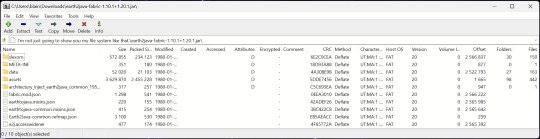
Personally, I use 7-Zip to look inside JAR files for Minecraft reasons. I must admit that its UI is ugly.
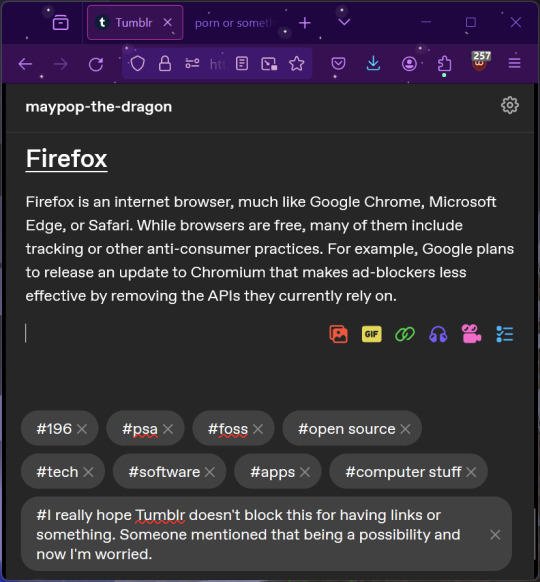
Firefox
Firefox is an internet browser, much like Google Chrome, Microsoft Edge, or Safari. While browsers are free, many of them include tracking or other anti-consumer practices. For example, Google plans to release an update to Chromium (the base that most browsers are built from these days) that makes ad blockers less effective by removing the APIs they currently rely on.
Aside from fighting monopolies, benefits include: support for animated themes (the one in the picture is Purple Night Theme), good ad blockers forever, an (albeit hidden) compact UI option (available on about:config), and a cute fox icon.
uBlock Origin
As far as I know, uBlock Origin is one of the best ad blockers there is.
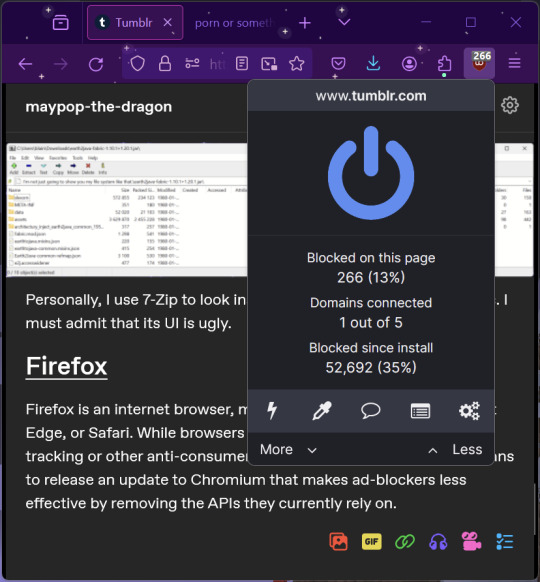
I was on a sketchy website with my brother, and he was using Opera GX's ad blocker. Much of the time when he clicked on anything, it would take us to a random sponsored page. I suggested that he try uBlock Origin, and with uBlock Origin, that didn't happen anymore.
Linux
Linux is a kernel, but the term is often used to refer to operating systems (much like Windows or MacOS) built on it. There are many different Linux-based operating systems (or "distros") to choose from, but apps made for Linux usually work on most popular distros. You can also use many normally Windows-only apps on Linux through compatibility layers like WINE.
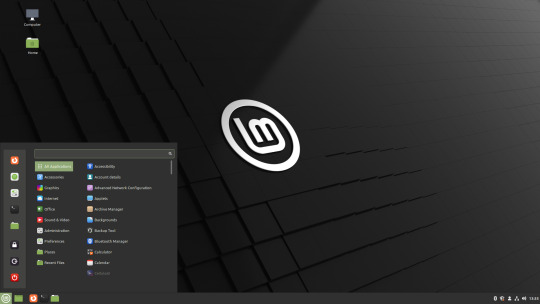

I don't have all four of these, so the images are from Wikipedia. I tried to show a variety of Linux distros made for different kinds of users.
If you want to replace your operating system, I recommend being very careful because you can end up breaking things. Many computer manufacturers don't care about supporting Linux, meaning that things may not work (Nvidia graphic cards notoriously have issues on Linux, for example).
Personally, I tried installing Pop!_OS on a laptop, and the sound output mysteriously doesn't work. I may try switching to Arch Linux, since it is extremely customizable and I might be able to experiment until I find a configuration where the audio works.
Many Linux distros offer "Live USB" functionality, which works as both a demo and an installer. You should thoroughly test your distro on a Live USB session before you actually install it to be absolutely sure that everything works. Even if it seems fine, you should probably look into dual-booting with your existing operating system, just in case you need it for some reason.
Happy computering!
#196#psa#foss#open source#tech#software#apps#computer stuff#I really hope Tumblr doesn't block this for having links or something. Someone mentioned that being a possibility and now I'm worried.#please reblog#2024-01-26
35 notes
·
View notes
Text
Resources
Some resources that have helped me as a writer. It might help you too.
Public domian Artwork
Artvee
National Gallery of art
Free use dividers
Pixabay
Firefly graphics
Royalty free Stockphotos and Icons
Pixabay
Public domian vectors
Baldur's Gate 3 Assets and Icons
Spell icons
Drive folder that definitely does NOT have any dnd guides or books or bg3 artbooks. It does not contain it.
Google drive with bg3 datamined dialogue
Google drive with bg3 dialogue
Fonts from bg3
Class icons from bg3
Ability icons crom bg3
Book templates from bg3
Basically check this tag for all bg3 png resources compiled by the tumblr user Mirza
The bg3 wiki
Writing Tools & pdfs
Thesaurus & descriptive proses
Personal book recommendations
Just consume more media my guy, it will click. If not, who cares, go write the story anyways.
I have no mouth and I must scream - audio book
Metamorphosis
The Oddyssey
Free library for books, containing the classicals.
Music while writing - little to no lyrics
A man buys milk
1h animal crossing music with rain
Mozart - requiem D minor
Claire de Lune - Debussy
On a train background music
Psychology
Art and seeking validation
Fear of failure
Thoughts about writing
Depression and creativity
For a writing app, I use google Docs.
This whole channel about dealing with mental illness struggles.
For an editing and drawing app, I use Ibispaint.
For a pc recording software, I use xbox gaming overlay on Windows.
If you have any resources you'd like to add to the list or share. Feel free to send it. In an ask or send it in a direct message and I'll add it quietly here after looking at it myself.
30 notes
·
View notes
Text
Whether you approach arts and media as a creator, a fan, a professional, or a hobbyist, you are probably very well aware of the rapid growth of AI in many areas of creative life and the conversation surrounding it. Whether we are talking about fiction or text of any kind, visual arts like painting and drawing, music composition and performance, sound design and audio editing - in all of these fields AI is something we now have to deal with, and there are many unanswered questions. How do we protect our livelihoods and practices as artists? What control can we have over our own work and its incorporation into machine learning tools and datasets? How do we as lovers of art and music determine if what we are reading, watching, or listening to is made by humans? Or how do we denote the particular degree of involvement of humans in a work of art?
It’s a complicated issue because it can be hard to say exactly where to draw the line. For example, well before the current conversation about AI, composers like Brian Eno were incorporating generative and algorithmic elements into their work. Does this mean such work is not “essentially human made”? Does it matter if the non-human components of a piece are created by randomness, or by natural elements gathered in e.g. a field recording, vs. being created by a computer program?
Those kinds of questions are more about the philosophical side of the issue. There are more pressing questions to do with how AI affects our ability to actually survive as artists. And, as the technology grows more powerful and the distinction between AI-generated or AI-enhanced material and human made material or basic documentation of reality itself, what methods do we use to signify that a given piece of media is or is not AI made, and what are the exact qualifications of that? Should the label “AI art” apply to work that is entirely generated by a computer, or should that label also be applied to any art that uses AI tools in any context - e.g. the new tools in Photoshop that make it easier to remove a specific object from an image and fill it in with background. What about the world of video games, where AI has been used for decades for things like pathfinding but is new and controversial when it comes to using it for story/dialog elements or certain visual assets?
We are, I think, still very much in the early days of all this, so it’s hard to come up with firm answers as the field changes so rapidly, but this is an essential conversation to be held now. I’ve been talking to a friend who put together a survey for an organization called Verified Human, who are looking specifically into the issue of how do we determine - going forward - whether a piece of art or media is “essentially human made”, and the question of how that should be communicated.
The idea of this survey is to gather as many points of view as possible for this conversation. I know a lot of the people that follow me here are artists and lovers of art, of all different kinds, and to me it is absolutely essential that creators of all kinds be involved in this conversation from early on. Please take a few minutes and fill out the survey via the link below, and if you are interested in helping out, please spread the word. And if you have any questions or would like to discuss, please feel free to contact me directly. Thank you.
https://forms.gle/BrSbGyq9wAyzwTa88
#ai#ai art discourse#ai art discussion#ai art theft#chatgpt#gpt 4 ai technology#verified human#ai art community#artists on tumblr#musicians#writerscommunity#writers and poets#writers on tumblr#fan fic writing#fan fic art#sound design#disparition
67 notes
·
View notes
Text
How to Make High Quality Gifs
A few people have asked me for a gif tutorial, so here we go! As a disclaimer, there are many parts of gif-making that are subjective, and this is just my personal process/preferences. If anyone is confused about a particular step, or wants more in-depth info about something, just message me!
Tools:
✧Laptop/computer
✧Adobe Photoshop 2024
✧External Hard Drive (mine is 250GB)
✧Video Downloader (I use the Video Downloadhelper extension on Firefox)
PHASE ONE: Make Animated Gif
1. Download high quality video
This is very important! You should download the highest quality of the video you can find. I use the free Video DownloadHelper extension on Firefox, but it doesn't download audio sometimes (it could be me not using it properly, or they want you to pay to get audio). No audio is fine for gifs, but if I'm doing a video edit, I either need to record the audio separately with Quicktime or use a free online downloader for youtube, twitter, or instagram videos.
For this gif, I downloaded an HD interview from the F1 website with the Video DownloadHelper extension on Firefox.
Tip: Make sure your video file is an .mp4 -> photoshop can struggle with .mov files bc they're larger
2. Import: Video Frames to Layers...
File -> Import -> Video Frames to Layers... -> Open your video -> Selected Video Range -> Make Frame Animation
If photoshop has to load a while to make the frames, it means you should select a smaller portion of the video to animate.
Tip: If you discover that there are duplicates of every frame or that there are way too many frames for the portion of video you want to gif, you may need to re-import and check the "Limit to Every _ Frames" box, and write in "2". This will import every other frame of the video and get rid of duplicates or too many frames.
Once your frames are imported, make sure you're working in the "Motion" workspace by going to the top to Window -> Workspace -> Motion.
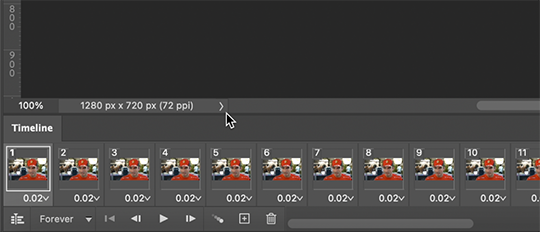
Now, all your frames should appear at the bottom in the Timeline. Make sure that the box in the left corner is set to "Forever", and now it should play the frames and loop back to the beginning each time.
3. Choosing your frames
I usually aim for around 60 frames total for a gif, but sometimes I'll go under or over that number. This particular gif is 55 frames in total. In general, I want my gif to be around 3 seconds in length bc under that feels too short and over that starts to be a large file size. Totally subjective, though! (edit: I have started to experiment with up to 80 frames for some gifs, which comes out to about 4 sec.)
Play through your frames and if you want to delete some, select them and click on the trashcan icon, which you can see in the screenshot above. (If you don't delete them this way, you'll have issues later.)
4. Set Frame Delay

Once you're happy with your frames, select all of them and click on the part that says "0.02", then go to "Other..." I usually choose 0.05 or 0.06, to land my gif around 3 seconds, but it depends on the video and how many frames you have. This particular gif is set to 0.06 because it looked good and brought me to around 3 seconds.
You can always choose a delay and if you don't like it, go back and change it! Just do what looks good to you.
5. Convert to Video Timeline
Click on the symbol that looks like 4 lines stacked, and choose "Convert to Video Timeline". Now is usually when I play through the gif to see what the speed is looking like/if I like the frame delay and it's landing somewhere around 3 seconds. If not, you can just Undo and adjust anything when it's still in the frame animation stage.
Next, scroll through the Layers on the right side and delete any layers that don't have the "eye" symbol next to them -> these are frames you deleted in the frame animation stage, but they need to be deleted in the timeline stage as well. Lastly, select all your remaining layers (which should all have the "eye" symbol) so they're all highlighted.
6. Convert to Smart Object
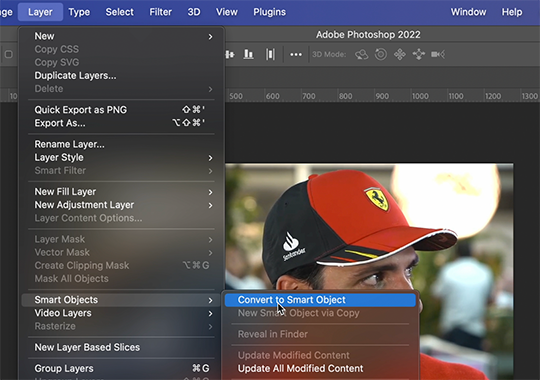
With all layers selected, go to the top to Layer -> Smart Object -> Convert to Smart Object. Ta da! You have a gif.
I always make sure to save my file at this point (you can do it before, but it just depends on how fast you work). Remember to frequently save your progress while gif-making: sometimes, photoshop gets overwhelmed and quits while you're mid-color correction 🥲. You never want to start over from scratch...
Now, some people like to crop & resize their gifs first. Or do sharpening before color. Or color, resize, then sharpen. It's really up to you. The order I like to do is Color, Sharpen, Crop, Resize, Export.
PHASE TWO: Color & Sharpening
(the fun part!)
1. Brightness/Contrast
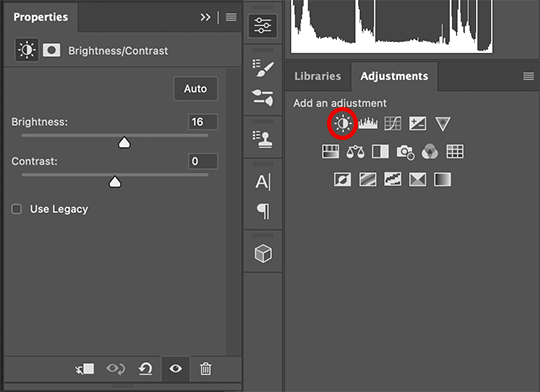
So here's where we start getting into the really subjective stuff. I always use the Brightness/Contrast and the Selective Color adjustment layers to do my coloring. I rarely touch the contrast bc that can be adjusted in selective color, but almost always, the gif needs overall brightening.
Tip: Even when I think a video looks bright to my eyes, sometimes I post the gif and they look dark once they're in the app. My advice is to always brighten a little bit, even when you don't think it's needed...
Here shows the very subtle shift in brightness I did for this gif. It can be a lot more intense depending on the video quality/lighting. The difference will also look a lot more stark after the color layer is applied.
2. Selective ColorNext is color. This is totally up to you and what looks good to your eyes. Make sure you have any software turned off that might change the color of your screen (like a nighttime filter or something that removes blue light).
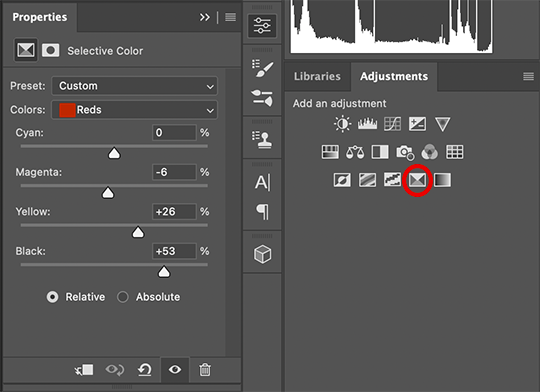
I use selective color bc you can adjust the levels of cyan, magenta, yellow, and black in each color channel independently. This is how I adjust the specific color of red that Charles and Carlos wear, or the amount of cyan in the blacks, etc. The "Neutral" layer effects the whole image, so I'll sometimes add some yellow there if I'm wanting a warmer image, or I'll add or remove black to brighten or darken the mid-tones.
Just play around! Sometimes, I'll take the slider from +100 to -100 back and forth just to see what it's doing to the gif. And I frequently turn on and off the color layer to see what the gif looked like before and after color. (I've found that most F1 content is really magenta-skewed, which you may not even notice until you've corrected it out).
Above is Color vs. No Color.
It might look extreme to you presented this way, but when the whole gif is colored, no one questions it! As long as there's consistency across gifs, that's all that matters. I frequently copy and paste my adjustment layers onto another gif from the same interview/video so the look stays consistent.
Above is Color w/ Brightening vs. Without.
This gives you a better idea of how much of a difference that Brightness/Contrast layer makes.
3. Sharpening
I got my Sharpening routine of choice from this tutorial on gif-making. To be honest, I don't know if it's the best sharpening procedure bc I haven't taken the time to in-depth compare to other ways of doing it, but it looks good to me! So I've stuck with it. (edit: I've also added a Reduce Noise filter to my sharpening routine. But as always, just do what looks nice to you!)
I copy and past the sharpening from my other gifs onto new ones so I don't have to do all the steps again. There are quicker ways of doing this, like using quick actions and stuff, but how I do it is fast enough for me.
If you want to figure out your own Sharpening routine:
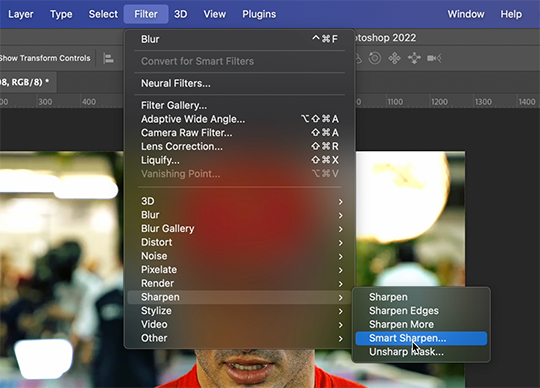
With the gif layer selected, go to the top to Filter -> Sharpen -> Smart Sharpen. It will bring up this window:
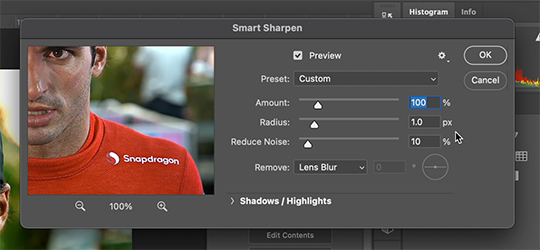
Here you can play around with the amount, radius, noise reduction, etc. and see what you like.
I also add a Gaussian Blur effect, which you'll find under Filter -> Blur -> Gaussian Blur.
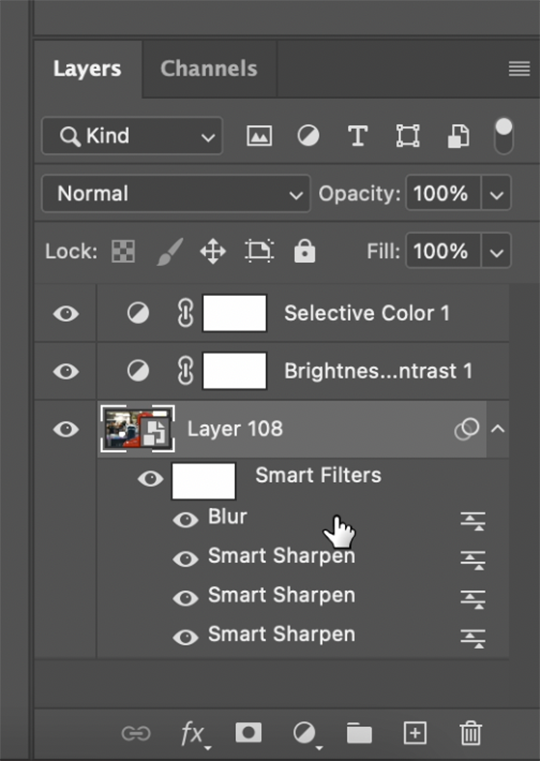
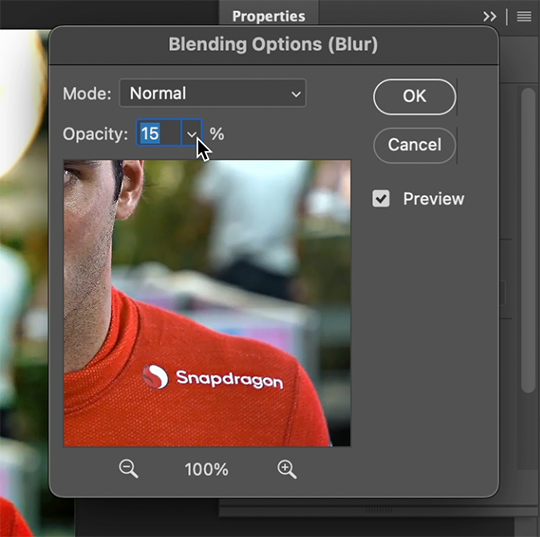
^All of your Sharpen and Blur effects will stack up underneath your gif layer like this. To adjust the opacity of one of these effects, double click on its adjustment/slider symbol to the right, and it'll bring up the Blending Options window.
If there's any sharpening or blurring layer you don't like, you can easily drag it into the trashcan symbol to get rid of it.
Above is a visual of Sharpened vs. None.
You can really tell with the difference in the Snapdragon logo on either shoulder. But I also personally love how much more Carlos' eyes pop to me on the Sharpened side.
As you can see, it's up to your preference. Sometimes, I really love gifs I see that aren't sharp, but rather really smooth and almost painterly. It's up to the gif-maker!
PHASE THREE: Crop & Resize
1. Cropping
Go to the toolbar on the left and choose the Crop Tool. Above where it says "Ratio", you can choose from preset ratios that photoshop has, or you can make your own. I like to use the presets, or at the very least, clear numbers that you can apply to a whole gifset. Free transforming without a ratio makes it nearly impossible to maintain consistency across a gifset.

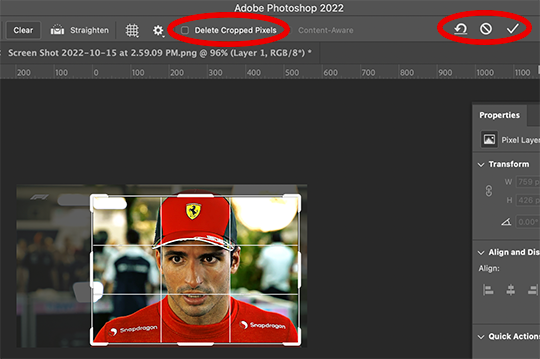
If it isn't already, uncheck "Delete Cropped Pixels". This will allow you to move the gif around inside the cropped area later if you want to adjust what's in frame. It also gives you the option to increase the frame later, if you want. You can also click the gear icon next to "Delete Cropped Pixels" and change how you view the gif during cropping.
When you're done, click the check mark or hit Enter. Now, you've got a cropped gif!
2. Resizing
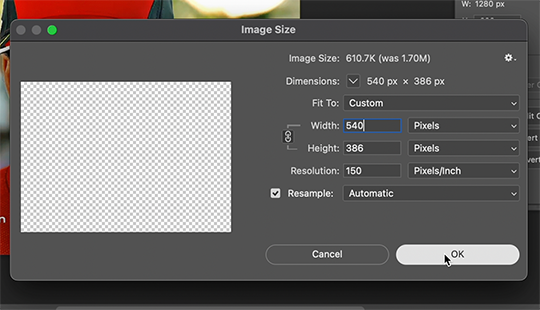
Go to the top to Image -> Image Size...
Make sure you have Pixels selected. For the Resample tab, I have it set to Automatic here, but sometimes I'll use Bicubic smooth or sharpen, depending on what I'm doing. Here's a cool post that compares the different settings. Just experiment with it.
(edit: I no longer change the resolution to 150. I've found that increasing the resolution, and therefore the size, before ultimately resizing down to 540 px means you are compressing even more (the larger something is, the more it has to be compressed within 540 px). I now leave the resolution at 72, which is what it's set at originally, and if the image composition allows it, try to crop in as close to 540 px as I can get so that when I resize, there's the least amount of compression happening.)
If I know a gif is going to be the full width of a tumblr post, I'll resize the width to 540 pixels (the height doesn't matter). But if I make a portrait-style gif which will be sharing a row with another gif, I'll resize anywhere from 270 px -> 350 px. If it's smaller than 270 px, tumblr will enlarge the gif and it'll look bad. If it's wider than 270 px, tumblr might reduce its quality a bit and it won't look as good. But personally, I prefer that if someone clicks on the gif to enlarge it, it looks better enlarged, so I usually will leave it around 345 px as long as the file isn't too big.
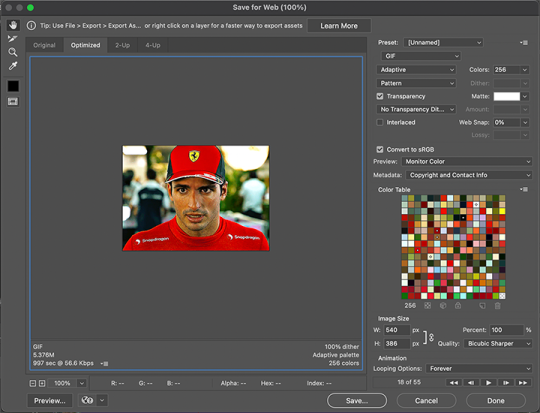
PHASE FOUR: Export (last one!)
Once you're happy with everything about your gif, it's time to export. (Remember to save your progress frequently!)
Go to the top to File -> Export -> Save for Web (Legacy)...
^It'll bring up this Save window.
These are the settings I like to use for gifs. You'll find a lot of differing opinions out there about Adaptive vs. Perceptual/Pattern vs. Diffusion, but you should always have "GIF" selected, "Transparency" checked with "No Transparency Dither" selected, Looping set to "Forever", and Colors set to "256". I like "Bicubic Sharper" for my Quality tab, but there are whole tutorials just about comparing those settings. The best thing to do though is to try them out and compare for yourself.
(edit: I've discovered that if a gif is slightly too large and I don't want to shorten it or resize it down, I can try to reduce the colors from 256 to 128 to get it under the limit. I'll never go below 128, and sometimes I will go to 200 or 170 to try to eliminate as little color variety as possible, but often there is not a noticeable difference in your finished gif. But always compare, of course, to make sure.)
On the bottom left is where the size of the gif is shown -> tumblr requires gifs 10MB and under, but in my experience, gifs load/play best on tumblr when they're around 6MB. I always leave a little growing room as well, bc it might say 5.8MB in this window, but after it saves, the file will have grown a little bit and will likely be over 6MB at that point. (edit: I now regularly post gifs that are around 9.5MB and tumblr seems to be able to handle it better.)
AND THAT'S ALL!
If you've made it this far...congratulations! haha
I know this is a whole lot of information and you might be feeling overwhelmed! But I hope, if anything, this shows you just how complex gif-making can be, and how it is absolutely an art! No one should be stealing anyone's gifs, as a lot of hard work and love goes into the process.
This doesn't include things like adding text to a gif, or more complex adjustments and corrections like masking or key frames. But I'm happy to do more of these if there are specific questions people have.

Let me know what you're curious about or if something is unclear! And happy gif-making! ❤️
#wooow this was a process to make lol#people can let me know if they're curious about adding text or more complex adjustments - i am at your service!#gif tutorial#ask
246 notes
·
View notes
Text
About Podfic

As promised in the Podfic Highlight Week post here are some infos and resources about podfic:
In case you don't know what podfic is, it's basically like an audio book or audio play but for fanfiction. Fans record audio versions of fanfiction, either of previously written fics or fics written specifically to record them. If you would like a more in-depth definition as well as history of podfics, check out the fanlore article.
Other audio based fan works are for example filk (fan songs) and oral not!fic (unscripted podfics). But for this highlight week all fanworks with an audio component qualify.
You can find podfic by searching/filtering for the podfic or podfic & podficced works on AO3. Just go into your favorite fandom or ship tag and see what amazing podfics have been made for it.
If you are interested in joining the podficcing community, I recommend the Discord server podfichat which is very welcoming to new members and has many amazing resources and lots of people willing to help and explain things.
You don't need a lot to start podficcing. A pair of headphones, your phone or another mic and a free audio edditing software like Audacity or garage band are more than enough.
If you like the idea of people making podfics of your works, I recommend making a fandom permission statement for example with this handy tool. You can find more information @fanworkspermissionstatement.
If you're a podficcer looking for fics by authors who have blanket permission for podfics, check out the FPS data base. It's a data base that collects AO3 authors with permission statements. There is even a handy browser extension by @trollslimes that highlights these authors while you're looking through AO3.
I'm still very new to the podficcing community myself and definitely forgot very important resources. For example guides and tutorials that explain how to record, edit, host and post podfics. If you have resources you want to recommend please add them in a reblog.
If I got anything wrong please let me know. If you have any questions, I will do my best to answer them.
I will collect more links and add them under the read more.
AO3 podfic posting guide
#podfic#podficcing#podfic highlight week#comment exchange#filk#audio fic#transformative works#information post#long post
9 notes
·
View notes
Text
Digital Tools
(For the Witch)
•☽────✧˖°˖⛤˖°˖✧────☾•
You may be thinking, "Locke, you're devoted to the Old Way. Why are you blogging about technology?"
Well, the truth is: I love technology. It makes my life easier, and when it comes to witchcraft, I have found so many different tools to both boost my academic productivity and help keep my focus.
So, without further ado, here are five free programs that I use to study witchcraft with:
Canva Whiteboard
Planable
Google Keep
Finch
Live Transcribe
Now, I know that new software can be a bit hard to digest, especially if a witch is inexperienced with technology to begin with. So, let me break down everything for you. I've kept all my information short, snappy, and easy to grasp right away.
Canva Whiteboard
Pros
Visual organization
Customizable templates
Infinite space
Cloud storage
Cons
Learning curve
Text limitations
A lot of people use Canva for making lovely little infographics, icons, and wallpapers. What they don't know is that Canva has a whiteboard function that allows their users to play with sticky notes, shapes, stickers, multimedia, graphics, and more. I find this absolutely perfect for making mind maps, keeping sigils, and keeping a visual record of herbs and crystals.
This is great for visual-style learners who like to study with minimal writing.

Planable
Pros
Aesthetic layout
Customizable font
Group editing
Tagging system
Cloud storage
Cons
Limit of 50 articles for free
You must sign up as a "company" (I say coven!)
Mobile app does not allow note editing
Planable was originally designed for planning professional social media posts. However, it's also fantastic for keeping long-form notes. It has all the writing tools you could possibly need for making in-depth articles, plotting out the content of your grimoire, and hosting live study groups. It can handle any multimedia you throw at it. It also has an app in beta for viewing your notes on the fly.
Great for witches who love hoarding all their knowledge in one cozy spot.

Google Keep
Pros
Customizable note backgrounds
Voice memos
Drawings
Tagging system
Cloud storage
Cons
Only has basic font customization
Images only (no video compatibility)
It's short; it's sweet. Google Keep (or simply Keep) is an ad-free notes app that gets down to the nitty-gritty. It's best for lists, checkboxes, short-form notes, and posting pretty pictures all in between.
Finch
Pros
Cute and easy app design
Turns goals into a game
Guided meditiation
Daily affirmations
Recieve uplifting messages from friends
Cons
Requires a healthy/newer phone to run
Only available on Google Play Store
Finch is charming, useful, and an anchor all bundled into one. Aimed for self-care, this app is no standard pet simulator. Your finch brings genuine companionship from a place of love, sending you affirmations, inspiring quotes, and offering compassion in hard times. You raise your finch by setting and completing goals for yourself, whether it be for self-care, everyday tasks, magick, or all three. The app also offers guided meditation, emergency panic/anxiety attack regulation, journaling, motivation check-ins, and other various emotional wellbeing activities.
The best way to do magick is with a clear and calm mind. Finch is perfect for facilitating this!

Live Transcribe
Pros
Minimalistic
Instant loading time
Transcribes in multiple languages at once
Offline usage
Cons
May occasionally mishear you
Doesn't shy away from transcribing vulgar language
If the app is closed, you will lose your previous transcription unless history is turned on
Turn it on and let it work! Live Transcribe takes verbage and turns it into a live and fairly accurate transcript for you to format into notes. I personally love finding short video documentaries on history and witchy how-tos to transcribe.
Great for learning and retaining verbal information for witches who may have an audio processing disorder. It's also good for the humble act of hoarding knowledge.
I hope that you find good use out of these digital tools! Have a lovely rest of your week, and enjoy a breath of fresh organization. 🌿✨️
•☽────✧˖°˖⛤˖°˖✧────☾•
11 notes
·
View notes
Photo

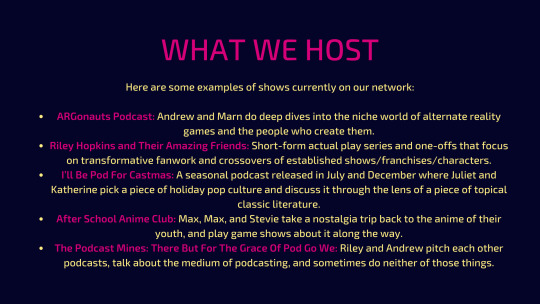


Moonshot Network is opening for YOUR podcast pitches this Friday! But who even ARE we? What does that mean? How do you even send a pitch????
Good news: we’ve made this handy slideshow in order to answer all those questions, and also questions you didn’t even know you had! It’s a condensed version of our official pitch guide, to save you the trouble of clicking through to the GDoc link! You can also find the full plain text below the cut here.
What is Moonshot and why should I pitch you my podcast, anyway?
WHO WE ARE
Moonshot is a podcast network built on creative collaborations and far-out ideas. Some of our work includes: podcast seasons recorded in 24 hours, a dunk tank fundraiser stream, amateur Pokemon competitions, fanfiction actual plays, and deep media analysis of things like Saw, Christmas music, Harlequin romance novels, and the Halo 3 alternate reality game.
Our primary goal is to be a home for out-there ideas, shorter and seasonal projects, and experiments in the podcast medium that might not fit in anywhere else. We aim to provide the enthusiasm, the structure, and support for our members to work on their dream projects.
Our second goal is giving first-time and early-career creators the tools they need for a successful start. We feel strongly that podcasting should not be a gatekept medium, and aim to support new creators with the funding and guidance to make their show a success.
WHAT WE HOST
Here are some examples of shows currently on our network:
ARGonauts Podcast: Andrew and Marn do deep dives into the niche world of alternate reality games and the people who create them.
Riley Hopkins and Their Amazing Friends: Short-form actual play series and one-offs that focus on transformative fanwork and crossovers of established shows/franchises/characters.
I’ll Be Pod For Castmas: A seasonal podcast released in July and December where Juliet and Katherine pick a piece of holiday pop culture and discuss it through the lens of a piece of topical classic literature.
After School Anime Club: Max, Max, and Stevie take a nostalgia trip back to the anime of their youth, and play game shows about it along the way.
The Podcast Mines: There But For The Grace Of Pod Go We: Riley and Andrew pitch each other podcasts, talk about the medium of podcasting, and sometimes do neither of those things.
WHAT WE OFFER
We offer network members a lot of perks, including:
Coverage of hosting costs, plus access to Pinecast's advanced analytics
A pre-existing community of fans and listeners to introduce your show to
Collaborative network shows with monthly spots for guest hosts
Other podcasters to talk shop and collaborate with in our creators-only Discord
Assets for streaming, a Twitch channel, and (time permitting) a stream producer
Subscriptions to Soundstripe (royalty-free music ) and Otter.ai (transcription services)
Optional participation in large group charity livestreams
OKAY...HOW DO I PITCH?
If you’re a creator looking to pitch us on a not-yet-published show, send us:
A strong pitch of your idea - what the base premise of the show is, an introduction to the regular hosts, what topics you hope to cover, and anything else that feels relevant. For audio dramas, feel free to send us an outline of the plot alongside the basic pitch!
A recorded and edited pilot episode.
OPTIONAL: More sample episodes, if you’ve already recorded them.
OPTIONAL: More scripted episodes, if you’re making an audio drama.
Examples of your past audio work. If you don’t have any, don’t worry! As long as your pitch is solid, you don’t need to have prior experience.
If you’re a creator looking to pitch an ongoing/established show, you’ll need:
A link to your feed.
Links to 3-5 episodes that exemplify what your show is about, and what it sounds like at its best.
If you’re a creator that has a pitch that is outside of these two options:
3-5 episodes in some format.
A solid pitch for why we should take on your show!
Please send these things to [email protected] with the subject line PITCH: [Your Podcast Name Here]. The body of your email should include a brief introduction of yourself, your podcast, and any cohosts; followed by links to the above requested content.
If you’re a new creator and have any sort of roadmap for your show, including an outline (for fiction shows) or a list of content you’re going to cover in future episodes (for nonfiction), we’d love to see those too! Please also include links to your and your cohosts’ social media.
Our inbox opens for pitches on November 25th! We hope to see you there!
84 notes
·
View notes
Text
Great, free/inexpensive programs I have and love
Audio:
Audacity, VCL player
Video editing:
Vegas pro 18.0, got my copy from an Ebay seller for 5 dollars. The key was from a scrap part computer. Works like a dream
Art:
Paint Tool Sai 2, it's easier to get for free than actually buy. (I have tried but I haven't found an actual site to pay for the license) THIS VERSION HAS THE TEXT AND perspective rulers!!)
Animation/3d art:
Mikumiku dance, Blender
Video Recording:
OBS, Bandicam (unlicensed will have a watermark and you can only record 10mins max per clip. If you are fluent enough in video editing you can just cut these out)
Please be careful and keep common sense in mind when you are downloading anything from the internet.
17 notes
·
View notes
Text
Capturing the Moment: Six Free Screen Recorders That Leave No Watermark
Screen recording software is an invaluable tool for anyone who frequently presents or shares digital content, from educators and gamers to software developers and marketers. Yet, finding a tool that can capture high-quality videos without slapping a distracting watermark on the final output can be a daunting task. Let's dive into a collection of six free screen recorders, including ScreenRec and others, that promise crisp, watermark-free recordings.
1. ScreenRec
First on our list, ScreenRec sets itself apart with its simple, user-friendly interface and robust capabilities. It offers not just video, but also audio and voice recording. What truly sets ScreenRec apart, however, is its instant private sharing link feature. Once a recording is made, the software automatically generates a link for immediate sharing—a boon for speedy communication.
2. OBS Studio
Open Broadcaster Software (OBS) Studio is another free and open-source screen recording tool. Loved by gamers, OBS Studio provides high performance, real-time video/audio capturing, and mixing. Its comprehensive features allow users to switch seamlessly between unlimited scenes, collected from multiple sources, and arrange them to create a professional-grade broadcast.
3. Free Cam
Free Cam is a Windows-friendly tool well-known for its easy-to-navigate interface. It provides users with a range of capabilities, including voice-over recording, system sounds, and the option to highlight the mouse cursor for instructional content. Free Cam also comes with a built-in audio and video editor, granting users the convenience of basic editing before saving or sharing the final recording.
4. ShareX
ShareX is a robust tool offering not only screen recording but also screen capture capabilities. In addition to creating watermark-free videos, ShareX also allows users to record with a webcam or other capture devices. Its comprehensive suite of post-capture editing tools like annotations, image effects, and watermarking adds to its appeal.
5. Apowersoft Free Online Screen Recorder
The Apowersoft Free Online Screen Recorder is a web-based tool, which means there's no need to download any software. It allows users to record from their screen or webcam with audio. Its flexible settings enable users to either capture an entire screen, a selected area, or a single browser tab.
6. ScreenApp.IO
ScreenApp.IO is another handy online tool that requires no downloads or extensions. With just a few clicks, it allows users to record their whole screen, an application window, or a browser tab. ScreenApp.IO shines with its simplicity and ease of use, making it perfect for quick, uncomplicated recordings.
In summary, each of these free screen recording tools—ScreenRec, OBS Studio, Free Cam, ShareX, Apowersoft Free Online Screen Recorder, and ScreenApp.IO—offer their unique strengths. Whether you need a simple solution for swift communications, a feature-rich tool for professional broadcasts, or a convenient online option, there's a screen recorder in this list that's sure to meet your needs. And the best part? Each one delivers clean, watermark-free videos, ensuring your content is clear, crisp, and free from distracting branding. Happy recording!
29 notes
·
View notes
Last Seen Blogs

felixschadler
Flix

peterspjptthviri
Untitled

brittanymlemay
smm panel

reading-is-fundie-mental
Reading is Fundie-mental

nyxia-moonkis
Nyxia