#git project vs repository
Text
What is GitHub? Github tutorial and project setup, Reference guide to GitHub Commands
Hi, a new #video on #GitHub #tutorial and #Project #Setup is published on @codeonedigest #youtube channel. Learn, what is GitHub in 1 minute.
#Gitprojecttutorial #gitproject #gitprojectupload #gitprojectsetup #gitprojectmanagement #gitprojectexample #git
GitHub is a code hosting platform for version control and collaboration. It lets people work together on projects from anywhere. GitHub is easy to use, it supports both public and private repositories, it is free of cost.
In this video we will learn, how to start working with GITHUB repository? How to create GITHUB project? How to initialize GITHUB repository? How to add files in GITHUB? How to…

View On WordPress
#Git and github#git and github gull tutorial#git bash#git commands#git commands with examples#git project#git project example#git project management#git project setup#Git project tutorial#git project upload#git project vs repository#git repository#git repository clone#git repository creation#git repository delete#git repository for beginners#git repository not found error#git repository setup#Git repsository tutorial#git stash#github#github account creation#github actions#github actions tutorial#github basics#github course#github desktop#github developer pack#github kya hai
0 notes
Text
Using Git for Twine Games
A while back, I somehow managed to copy the contents of one file and overwrite a different file, meaning the entire section of the map was lost for good. I had to reconstruct it from snippets of prose written in separate documents. It sucked. And that motivated me to try something that would stop that problem from ever happening- hosting my project on GitHub!
Git sounds really fancy and hard to understand, but it's really not! So I'm going to walk you through how to use it to back up your files and do much, much more.
This tutorial expects you to have an already set up Tweego folder and VSCode. If you don't know how to get that started, @manonamora-if has an excellent ready-to-use folder with an explanation of how to use it.
What is Git?
In short, git is a kind of version control. Say you're working on a coding project with somebody else, and you need to work on the same file they were working on. But how do you know you're working on the right version of that file? Maybe they forgot to send you the newest version. Or maybe you both have to make changes at the same time. It would take a lot of effort to manually splice together everybody's changes, let alone identify what each of you had changed. That's what git's job is. Git identifies what has changed about a file, notes those changes, and updates the "main" files to match. That way, everything stays consistent, and big files can be updated easily.
Okay, but what benefit does git provide to you, somebody who's just working on a solo project with very little code? Well for one, it would have completely fixed my problem. Instead of overwriting all of my work, git would have shown me that the file had been changed. Then, I could simply click a button to revert the change. Neat! It also means you can keep working on the same project from multiple locations without losing progress. Say you're working on your game on your home computer, but then you want to keep working on your school laptop. All you'd have to do is "push" your changes to save them to your master file, and then "pull" the changes when you get to school. Neat
The Basics of Git
Okay, but what does "push" and "pull" mean? Git's confusing, but the basic terms you'll be encountering don't have to be! Here's some terminology:
Git - This is the program that goes on your computer to manage your files. It does all of the version control.
GitHub/GitLab/BitBucket - These provide servers you can host your git repositories on.
Repositories - This is a fancy word for a folder that's being maintained by git. Every file in a repository is getting analyzed by git for changes.
Local vs Remote - Your local repository is the one hosted on your computer, and it's the one you're editing. The remote one is the one hosted on a site like GitHub.
Stage - When you stage a file, you're getting it ready to commit it.
Commit - A commit is like saving your progress as a new update. You can go back to a commit later if you messed something up.
Push - When you "push" your commits, git will look at your changes, go into the remote repository, and individually change all of those things in the "main" branch.
Pull - Just like pushing, when you pull, you're taking changes from the remote repository and updating your local one to match it.
Under the cut, I'll show you full step-by-step (with photos!) of how to set up your game with GitHub using VSCode!
Setting Up Git With VSCode
Lucky for you, VSCode has built in integration with GitHub, which means you don't have to download any new programs other than git itself. You'll just have to set it up. A note- I'm not sure at what point exactly in this process VSCode prompts you to install git, because I'm not going to install it on another computer just for this tutorial haha. VSCode will provide the installation, just go along with the default settings and you'll be fine.
So first, make a Github account. It's free!
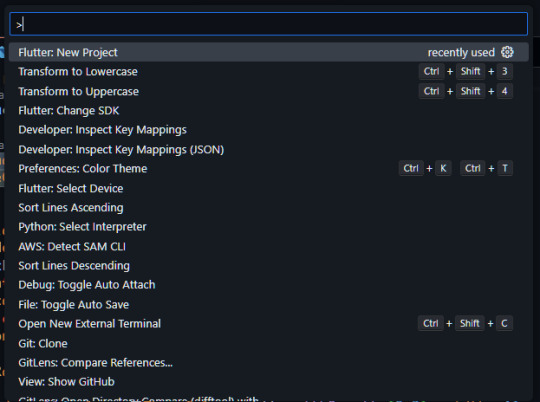
Now, open VSCode. Here's our project! You're going to want to click on that third button down in the side menu, the Source Control tab.

Under source control, you'll see this option. Click it.


Aaaaand it's done! That was easy, right? Now your folder is a git repository. Crazy!
Before you can put all of this up in GitHub, you'll need to push all of your files. Type a brief message (try "Initializing" to feel like a real cool coder), press commit, and VSCode will ask if you want to skip staging and just commit everything. Yes! Yes you do!
Now that all of your "changes" have been committed, let's publish your new repository to GitHub. Click on the new button that says "publish branch." When the popup appears, click "Allow" to give VSCode access to your GitHub account and sign in. Back in VSCode, you'll see this:

You're probably going to want it to be private, otherwise anyone on the internet could see all of your writing! Which is cool if it's a public coding project that people might want to download and use for their own projects, but if you're not a fan of code diving, leave it private.
Using Git To Help You Write
Now that you've got your folder set up as a git repository, it'll change the way VSCode looks. VSCode is using git's info to know where you've made changes, and it'll represent those changes in the UI. Here's what those look like:

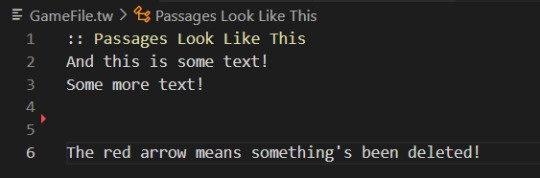
If you click on those lines, you'll get to see this fancy new panel that highlights all of your changes:

So let's say we have a scene, and we aren't happy with how it's looking, but we aren't sure if we want to make one change or a different change. Instead of backing up all of your stuff or copy and pasting it to test it, you can just make whatever change you want and click that backwards facing arrow to revert it back if you aren't happy with it. You can do the same for things like CSS- when you've made some good progress and want to save your changes, commit them. Then any more changes you make will be easy to revert back if they don't look right. Groovy!
Now that everything's set up, it's as easy as committing your changes when you're satisfied with them and pushing those commits to back up your work.
Pat yourself on the back! You just learned (the very basics of) how to use git! You absolute genius!
If you have any questions while following this tutorial, feel free to ask! My askbox is always open!
#code help#twine tutorial#please don't ask me actual serious questions about git... i'm still a beginner lol#seriously though. use git!!!!! it's so useful
128 notes
·
View notes
Text
The Developer's Toolkit: Essential Tools for Web and Mobile App Development

In today's fast-paced digital landscape, web and mobile app development is at the heart of innovation and entrepreneurship. Whether you’re an experienced coder or just starting your journey in development, having the right tools in your arsenal can make all the difference. With the correct set of development tools, you can increase productivity, ensure smoother project management, and even make the coding process more enjoyable.
The Developer's Toolkit: Essential Tools for Web and Mobile App Development is designed to help developers stay ahead of the curve by leveraging the latest and most efficient tools. As the development ecosystem evolves rapidly, selecting the right tools can seem overwhelming, but this guide simplifies the process by highlighting some of the essential software, platforms, and frameworks that make the job easier.
Why Every Developer Needs a Comprehensive Toolkit
The world of app development is complex. Developers must manage everything from front-end design to back-end functionality while ensuring that their applications perform well across different platforms. This demands tools that can not only streamline coding but also provide insights into performance, user experience, and debugging.
In this article, we will explore various tools that cater to different aspects of web and mobile app development, including text editors, version control systems, testing frameworks, collaboration platforms, and more.
Essential Tools for Web and Mobile App Development
The right development tools ensure that every phase, from ideation to deployment, runs smoothly. With that in mind, let’s dive into some of the most critical tools that every web and mobile app developer should have in their toolkit.
Text Editors and Integrated Development Environments (IDEs)
Code efficiency begins with a high-quality text editor or IDE. These platforms are the backbone of the coding process, providing developers with the environment needed to write, debug, and run their code.
Visual Studio Code: Loved by web and mobile developers alike, VS Code is lightweight yet powerful. With an extensive range of extensions, it supports virtually every programming language and integrates with multiple development tools.
Sublime Text: Another popular choice, Sublime Text is known for its speed and simplicity. Its clean interface allows for quick edits and is ideal for handling large codebases.
Android Studio: A robust IDE specifically designed for Android app development. It comes with a range of features like a code editor, an emulator, and integrated testing tools.
Xcode: Apple's dedicated IDE for iOS and macOS app development. Xcode is essential for creating native apps for the Apple ecosystem, offering integrated support for Swift and Objective-C languages.
Version Control Systems
Keeping track of changes made to your code and collaborating with other developers is essential in app development, which is why version control systems are crucial tools.
Git: The de facto standard for version control, Git is a must-have for any developer. It allows teams to collaborate on projects while maintaining a complete history of changes made to the code.
GitHub: As the most popular platform for hosting Git repositories, GitHub provides a collaborative space where developers can share, review, and merge code changes with ease.
GitLab: Another robust platform for hosting Git repositories, GitLab offers features like continuous integration and deployment pipelines, making it a favorite among enterprise developers.
Frameworks and Libraries for Web Development
When it comes to web development, frameworks and libraries simplify the process, allowing developers to avoid reinventing the wheel for common tasks like UI elements, routing, and data handling.
React: Created by Facebook, React is one of the most popular libraries for building user interfaces. Its component-based architecture makes it easy to build scalable and dynamic web applications.
Vue.js: A lightweight alternative to React, Vue.js is perfect for developers who want flexibility without the overhead of more complex frameworks.
Angular: Developed by Google, Angular is a full-fledged web development framework that offers two-way data binding, dependency injection, and modular components for building single-page applications.
Bootstrap: For responsive design and quick prototyping, Bootstrap provides pre-built components like forms, buttons, and navigation bars, ensuring your web apps look good across devices.
Frameworks and SDKs for Mobile App Development
Mobile app development requires specialized frameworks and software development kits (SDKs) to ensure optimal performance across different devices and operating systems.
Flutter: Google's open-source SDK for building natively compiled apps for mobile, web, and desktop from a single codebase. Flutter uses Dart as its programming language and offers a rich set of pre-designed widgets.
React Native: If you’re familiar with React for web development, React Native is an excellent choice for building mobile apps using JavaScript. It allows developers to use a single codebase for both iOS and Android apps.
Swift: Apple's native programming language for iOS development, Swift provides powerful performance and security while maintaining a user-friendly syntax.
Kotlin: As Google's preferred language for Android development, Kotlin offers a modern alternative to Java, with improved safety features and seamless integration into Android Studio.
APIs and Backend Tools
No web or mobile app is complete without a strong backend to handle data management, authentication, and server-side logic. These tools provide robust solutions for backend development.
Node.js: A server-side platform built on Chrome's V8 JavaScript engine, Node.js allows developers to create fast and scalable network applications.
Firebase: A Google-backed platform that offers cloud storage, real-time databases, authentication, and hosting, all in one. Firebase is an excellent choice for both web and mobile app developers.
Django: A Python-based framework that simplifies backend development by offering pre-built modules for handling user authentication, content management, and more.
Design and Prototyping Tools
The user interface is the first thing people notice about your app. That’s why design tools are just as important as development tools.
Figma: A cloud-based design tool, Figma allows teams to collaborate in real-time on UI/UX design. Its ease of use and flexibility make it a top choice for both web and mobile app designers.
Sketch: A vector-based design tool primarily used for UI design. Sketch is great for creating pixel-perfect layouts and offers a wide array of plugins to enhance the design process.
Adobe XD: Part of the Adobe Creative Cloud suite, Adobe XD is a versatile tool for designing and prototyping user interfaces. It integrates seamlessly with other Adobe products like Photoshop and Illustrator.
Testing and Debugging Tools
Every developer knows that no app is perfect without thorough testing and debugging. These tools ensure that your code performs as expected across all platforms.
Selenium: An open-source testing tool for automating web applications. Selenium supports multiple browsers and programming languages, making it a versatile choice for testing.
Appium: A popular tool for automating mobile app testing. It supports both Android and iOS apps, allowing developers to run tests on a variety of devices.
Postman: A platform used to test APIs. Postman simplifies the process of sending API requests and verifying the results, ensuring your backend functions correctly.
Jira: More than just a bug-tracking tool, Jira offers comprehensive project management features that help teams collaborate, track issues, and plan sprints in agile development environments.
FAQs
What is the most important tool for web and mobile app development?
There isn't a single "most important" tool as it depends on the project’s specific requirements. However, a combination of a good text editor or IDE, version control system, and testing tools is essential for any developer.
Is it necessary to learn multiple programming languages for web and mobile development?
Yes, learning multiple languages such as JavaScript, Swift, and Kotlin can provide flexibility, as different platforms may require specific languages. However, frameworks like Flutter or React Native allow developers to use a single language for both iOS and Android apps.
How do APIs help in mobile app development?
APIs (Application Programming Interfaces) allow apps to communicate with other services and retrieve data. For instance, Firebase API can handle authentication, databases, and cloud storage, making backend development easier.
Which IDE is best for Android app development?
Android Studio is the preferred IDE for Android app development due to its comprehensive tools for coding, testing, and debugging.
What is the advantage of using Git for version control?
Git allows multiple developers to work on the same project without overwriting each other’s work. It also maintains a full history of changes, enabling rollbacks to previous versions if needed.
Is React Native better than Flutter for mobile app development?
Both have their advantages. React Native allows for faster iteration if you’re familiar with JavaScript, while Flutter offers smoother performance and a single codebase for mobile, web, and desktop apps.
Final Words
Building web and mobile apps requires more than just coding skills. With the right set of tools, developers can streamline the entire development process, from writing efficient code to testing and debugging, to collaborating with other team members. Choosing the right tools depends on your project’s specific needs, but having a well-rounded developer’s toolkit is key to delivering high-quality apps efficiently.
Looking to build cutting-edge web and mobile applications? Kanhasoft can help turn your vision into reality with custom development solutions.
Contact us today to discuss your project and see how we can elevate your business with innovative tech solutions.
#WebDevelopmentTools#MobileAppDevelopment#DevelopersToolkit#SoftwareDevelopment#ProgrammingTools#IDEsForDevelopers#VersionControl#MobileAppFrameworks#WebDevelopmentFrameworks#APIDevelopment#FrontendDevelopment#BackendDevelopment#AppTestingTools#AppDesignTools#DevTools
0 notes
Text
Introduction
Git and GitHub are at the heart of modern software development, enabling developers to track changes, collaborate on projects, and manage code versions with ease. Whether you're new to version control or looking to refine your skills, this masterclass will guide you through the essentials of Git and GitHub, from basic commands to advanced workflows. By the end, you'll have the knowledge and confidence to use these powerful tools in your projects.
What is Git?
Definition and Core Functions
Git is a distributed version control system designed to handle everything from small to very large projects with speed and efficiency. It allows developers to track changes to files, collaborate with others, and revert back to previous versions of the code if necessary. Unlike other version control systems, Git stores snapshots of the entire project at each commit, rather than tracking changes line by line.
How Git Works: Snapshots vs. Deltas
Git’s unique approach to version control is based on snapshots. Every time you commit changes in Git, it takes a snapshot of the current state of your project and stores a reference to that snapshot. If files haven’t changed, Git doesn’t store the file again—just a link to the previous identical file. This makes Git extremely efficient in terms of storage and speed.
Benefits of Using Git
Using Git offers several benefits, including:
Version Control: Track every change made to the codebase and revert to earlier versions if needed.
Collaboration: Multiple developers can work on the same project simultaneously without overwriting each other’s work.
Branching: Easily create branches for new features, fixes, or experiments without affecting the main codebase.
Understanding GitHub
What is GitHub?
GitHub is a cloud-based hosting service that lets you manage Git repositories. It provides a web-based interface that makes it easy to share your repositories with others, collaborate on projects, and manage issues and pull requests. GitHub is widely used for open-source projects, but it’s also popular in enterprise environments.
GitHub vs. Git: Key Differences
While Git is a version control system, GitHub is a platform for hosting and collaborating on Git repositories. GitHub provides additional features like issue tracking, project management tools, and integrations with other services, making it an essential tool for modern development.
Why GitHub is Essential for Collaboration
GitHub’s collaborative features, such as pull requests, code reviews, and team management, make it an indispensable tool for any team working on software projects. It also fosters a strong community around open-source software, allowing developers to contribute to projects they’re passionate about.
Setting Up Git
Installing Git on Different Operating Systems
Installing Git is straightforward and can be done on various operating systems:
Windows: Download the Git installer from the official Git website and follow the installation prompts.
macOS: Install Git using Homebrew with the command brew install git.
Linux: Use your distribution’s package manager, such as apt-get for Debian-based systems or yum for Red Hat-based systems, to install Git.
Git Workflow Explained
The Basic Git Workflow
The basic Git workflow consists of three main stages:
Working Directory: Where you modify files.
Staging Area: Where you prepare changes to be committed.
Repository: Where committed changes are stored.
A typical workflow involves modifying files, staging the changes with git add, and then committing them to the repository with git commit.
Advanced Git Commands and Techniques
Stashing Changes with git stash
Sometimes you need to switch branches but have uncommitted changes. git stash temporarily saves those changes so you can return to them later.
Undoing Changes with git reset and git revert
git reset: Reverts changes in your working directory and staging area to a previous commit.
git revert: Creates a new commit that undoes the changes introduced by a previous commit.
Cherry-picking Commits with git cherry-pick
git cherry-pick allows you to apply specific commits from one branch onto another. This is useful for applying bug fixes or features without merging entire branches.
Tagging Releases with git tag
Tags are used to mark specific points in your project’s history, such as releases. Use git tag <tag-name> to create a new tag.
Working with GitHub
Creating and Managing GitHub Repositories
To create a new repository on GitHub, click the "New" button on your GitHub dashboard and follow the prompts. You can then push your local repository to GitHub using:
bash
Copy code
git remote add origin <repository-url> git push -u origin main
Forking and Pull Requests Explained
Forking: Creating your own copy of someone else’s repository on GitHub. This is often the first step in contributing to open-source projects.
Pull Requests: Allow you to propose changes to a repository. After reviewing your changes, the repository owner can merge them into the main codebase.
Collaborating with Teams on GitHub
GitHub’s collaborative features, such as issues, projects, and pull requests, make it easy for teams to manage tasks, track progress, and review code.
Git Branching Strategies
The Feature Branch Workflow
In the feature branch workflow, each new feature or fix is developed in its own branch. This keeps the main branch stable and free from incomplete code.
Git Flow vs. GitHub Flow
Git Flow: A robust branching model that uses long-lived branches for development, release, and hotfixes.
GitHub Flow: A simpler model that uses short-lived feature branches and continuous integration.
Best Practices for Managing Branches
Keep branch names descriptive and consistent.
Regularly merge or rebase feature branches with the main branch to avoid conflicts.
Delete branches after they have been merged to keep the repository clean.
Handling Merge Conflicts
What Causes Merge Conflicts?
Merge conflicts occur when two branches have changes in the same part of a file. Git can’t automatically determine which changes to keep, so it flags the conflict for you to resolve manually.
Steps to Resolve Merge Conflicts
Open the conflicted file in your text editor.
Look for conflict markers (e.g., <<<<<<< HEAD).
Decide which changes to keep and remove the conflict markers.
Stage and commit the resolved file.
Tips to Avoid Merge Conflicts
Regularly merge changes from the main branch into your feature branch.
Communicate with your team to avoid working on the same files simultaneously.
Collaborating with Git and GitHub
Forking Repositories and Contributing to Open Source
Fork a repository to create your own copy, make your changes, and submit a pull request to contribute to the original project. This is how most open-source contributions are made.
Reviewing and Merging Pull Requests
Pull requests should be reviewed carefully to ensure code quality and consistency. Use GitHub’s built-in review tools to discuss changes, request modifications, and approve the final version.
Best Practices for Team Collaboration
Use meaningful commit messages to communicate changes.
Review code in pull requests before merging.
Maintain a clear and organized branching strategy.
GitHub Actions and Automation
Introduction to GitHub Actions
GitHub Actions allow you to automate tasks within your GitHub repository, such as running tests, deploying code, or sending notifications. Actions are defined in YAML files stored in your repository.
Setting Up CI/CD Pipelines
Continuous Integration/Continuous Deployment (CI/CD) pipelines can be set up using GitHub Actions to automatically build, test, and deploy your code whenever changes are pushed to the repository.
Automating Workflows with GitHub Actions
GitHub Actions can be used to automate repetitive tasks, such as merging dependabot updates, generating release notes, or tagging versions.
Git Security Best Practices
Managing SSH Keys and Credentials
Use SSH keys for secure access to your GitHub repositories. Never share your keys or credentials publicly, and consider using a credential manager to store them securely.
Keeping Your Repositories Secure
Use .gitignore to prevent sensitive files from being tracked by Git.
Regularly audit your repository for sensitive information.
Enable two-factor authentication on your GitHub account.
Using GitHub's Security Features
GitHub provides several security features, including Dependabot for automatic dependency updates and security alerts for vulnerable dependencies.
Common Git and GitHub Mistakes
Forgetting to Pull Before Pushing
Always pull the latest changes from the remote repository before pushing your own changes. This helps avoid merge conflicts and ensures you’re working with the most up-to-date code.
Overcomplicating the Branch Structure
Keep your branch structure simple and avoid creating unnecessary branches. This makes it easier to manage and reduces the risk of merge conflicts.
Ignoring Documentation and Commit Messages
Clear documentation and meaningful commit messages are crucial for maintaining a project’s history and making it easier for others to understand your changes.
0 notes
Text
5 Essential Tools for Streamlining ReactJS Development

ReactJs stands out as a powerful framework in the dynamic world of web development. To leverage the optimal capacity of ReactJs you need to hire React developers who are thorough with its essential tools. Whether you are looking for a new hire or already have a ReactJs team in place, these tools can have a significant impact in enhancing business productivity and streamlining the development process.
Without further ado, let’s look at what are these essential tools that your ReactJs developers must be proficient in.
Enhancing Efficiency with These 5 ReactJs Development Tools
Webpack
The reliable module bundler Webpack makes managing assets and dependencies easier. Better performance is achieved through code optimization, which is crucial for ReactJS apps. When considering Reactjs developers for hire examine their competence in this tool. Webpack is an essential tool since it helps streamline the development process and saves time and effort.
Visual studio code
Developers frequently choose Visual Studio Code (VS Code) because of its many plugins and adaptability. Coding is made easier and more productive by its features, which include IntelliSense, debugging support, and Git integration. Making sure React engineers are conversant with VS Code might be a huge advantage for teams seeking to hire them.
ESLint
Ensuring the quality of code is crucial for every development effort. JavaScript code problems can be found and fixed with the aid of ESLint. It guarantees that your ReactJS projects stay tidy and manageable by enforcing coding standards. This is especially crucial if you hire React developers because it guarantees team uniformity.
React Developer Tools
Developers can easily analyze and debug React applications with the help of the React Developer Tools extension for popular browsers like Chrome and Firefox. Debugging becomes easier when component hierarchies, props, and states are understood. Debugging can be made easier by hiring ReactJS experts who are skilled with this tool.
Jest
An essential component of the development lifecycle is testing. A thorough testing framework called Jest integrates well with ReactJS. It makes developing unit tests easier and guarantees that your components function as intended. Investing in developers proficient in Jest can result in programs that are more dependable and devoid of errors.
If you are wondering how to hire Reactjs developers who are proficient in these tools, the answer is your one-stop hiring platform Uplers.
Uplers is a reputed talent network that has gained prominence for over a decade among 7,000+ global clients. With a 1M+ talent network spread across 5+ time zones, Uplers can connect you with the top 3.5% of AI-vetted Indian remote talent. You get the best match for the job at up to 40% cost-savings with zero hassle.
Not only that, Uplers can assist you in comparative salary analysis by comparing the salary of your local hire to that of an Indian remote talent. This will help you align your Reactjs salary with the existing salary trends in the market to attract and retain top talent.
Concluding Thoughts
To conclude, leveraging these React tools can significantly streamline the development process. When you hire React developers look for their competence in these tools repositories. Top talent solutions like Uplers can help you invest in the right talent and steer competition in the fast-paced web development landscape.
#hire react developer#react js developers for hire#react js salary#How to hire Reactjs developer#top talent solutions
0 notes
Text
Top 5 Web Development Tools

Visual Studio Code (VS Code): A powerful and versatile code editor with features like IntelliSense, debugging, and a wide range of extensions. It supports multiple programming languages and integrates well with version control systems.
Chrome DevTools: A set of web development tools built directly into Google Chrome. It helps developers inspect HTML, CSS, and JavaScript, debug code, analyze performance, and test responsive designs.
GitHub: A platform for version control and collaboration using Git. It allows developers to manage code repositories, track changes, and work on projects with other developers.
Bootstrap: A popular CSS framework for designing responsive and mobile-first websites. It provides pre-designed components and grid systems to streamline the web design process.
Sass: A CSS preprocessor that adds features like variables, nesting, and mixins to CSS. It makes writing and maintaining complex stylesheets more efficient and organized.
For effective web development, consider these top tools: Visual Studio Code for coding, Chrome DevTools for debugging, GitHub for version control, Bootstrap for design, and Sass for CSS. At Intileo Technologies, the best website development company in India, we use these tools to build top-quality websites. Trust us for expert web development solutions!
#web development company#website development services#web development agency#Best Web Development Company in India#Best Website Development Company in India#Web Development Company in India#website development company in india#website development agency in india
0 notes
Text
Website Development Tools Every Developer Should Use in 2024
In the rapidly evolving landscape of web development, staying ahead requires leveraging the right tools. Here’s a roundup of essential tools that developers should consider integrating into their workflow in 2024 for optimal efficiency and superior results.
1. Visual Studio Code (VS Code)
Visual Studio Code remains a cornerstone for developers due to its versatility and extensive plugin ecosystem. It supports a wide range of languages, offers debugging capabilities, and integrates seamlessly with version control systems like Git.
2. Git and GitHub
For effective version control and collaboration, Git continues to be indispensable. GitHub enhances this by providing a platform for hosting repositories, managing projects, and facilitating team collaboration through features like pull requests and issue tracking.

3. Frontend Frameworks: React.js and Vue.js
React.js and Vue.js dominate frontend development with their component-based architecture, virtual DOM rendering, and strong community support. They streamline UI development, enhance performance, and facilitate building interactive user interfaces.
4. Backend Frameworks: Node.js and Django
Node.js remains popular for its event-driven architecture and ability to build scalable backend services using JavaScript. Django, known for its high-level Python framework, simplifies complex web application development with built-in features like ORM and authentication.
5. Build Automation: Webpack and Gulp
Webpack and Gulp automate repetitive tasks like bundling, minification, and optimization of assets (CSS, JavaScript). They enhance workflow efficiency by reducing manual intervention and improving build performance.
6. CSS Preprocessors: Sass and Less
Sass and Less extend CSS with features like variables, mixins, and nested rules, enhancing maintainability and scalability of stylesheets. They empower developers to write cleaner, more organized CSS code and streamline styling across projects.
7. Content Management Systems (CMS): WordPress and Drupal
WordPress and Drupal simplify content management and website administration with intuitive interfaces, robust plugins/themes, and extensive customization options. They are ideal for building blogs, e-commerce sites, and enterprise-level web applications.
8. Testing and Debugging Tools: Jest and Chrome DevTools
Jest offers a comprehensive testing framework for JavaScript, ensuring code reliability through unit and integration tests. Chrome DevTools provides a suite of debugging and profiling tools, enabling developers to diagnose performance issues and optimize web applications.
9. Deployment and Hosting: Docker and AWS
Docker facilitates containerization of applications, ensuring consistency across development, testing, and production environments. AWS (Amazon Web Services) offers scalable cloud hosting solutions, providing reliability, security, and global reach for deploying web applications.
10. Collaboration Tools: Slack and Jira
Slack fosters real-time communication and collaboration among team members, streamlining project discussions and updates. Jira facilitates project management with features for task tracking, agile methodologies, and workflow automation.
Embracing these website development tools empowers developers to build robust, scalable, and user-friendly web applications in 2024. By leveraging these technologies effectively, developers can enhance productivity, streamline workflows, and deliver superior digital experiences. For more insights on optimizing your development toolkit, visit Ajiva Infotech’s guide.
0 notes
Text
Essential Tools for High-Quality Web Development Services

For web development services, having the right set of tools is crucial to streamline the development process, enhance productivity, and ensure top-quality outputs. Here are some recommended tools across different aspects of website development services:
1. Code Editors and IDEs
Visual Studio Code (VS Code): A lightweight yet powerful code editor with built-in Git support and a wide range of extensions.
Sublime Text: A fast, feature-rich code editor with extensive customization options.
JetBrains WebStorm: A robust IDE specifically designed for JavaScript development, offering powerful features for modern frameworks.
2. Version Control
Git: A distributed version control system essential for tracking changes and collaborating on code.
GitHub: A platform for hosting Git repositories, code collaboration, and project management.
GitLab: A comprehensive DevOps platform offering Git repository management, CI/CD, and more.
3. Front-end Development
React: A popular JavaScript library for building user interfaces.
Angular: A powerful framework for building dynamic web applications.
Vue.js: A progressive JavaScript framework for building user interfaces.
Bootstrap: A front-end framework for developing responsive and mobile-first websites, crucial for any website development service.
4. Back-end Development
Node.js: A JavaScript runtime for building scalable server-side applications.
Django: A high-level Python web framework that encourages rapid development and clean, pragmatic design.
Laravel: A PHP framework known for its elegant syntax and extensive feature set.
5. Database Management
MySQL: A widely-used relational database management system.
PostgreSQL: An advanced open-source relational database system with a strong reputation for reliability and feature robustness.
MongoDB: A popular NoSQL database for storing and retrieving large volumes of data, often used in web development services.
6. API Development
Postman: A collaboration platform for API development, testing, and documentation.
Swagger: Tools for designing, building, documenting, and consuming RESTful web services.
7. Containerization and Orchestration
Docker: A platform for developing, shipping, and running applications in containers.
Kubernetes: An open-source system for automating deployment, scaling, and management of containerized applications.
8. CI/CD Tools
Jenkins: An open-source automation server for continuous integration and delivery.
CircleCI: A CI/CD service that supports rapid software development and publishing.
Travis CI: A CI/CD service used to build and test software projects hosted on GitHub.
9. Project Management and Collaboration
Jira: A project management tool for planning, tracking, and managing agile software development projects.
Trello: A visual collaboration tool that creates a shared perspective on any project.
Slack: A messaging app for teams that supports collaboration through channels, direct messages, and integrations with other tools.
10. Design and Prototyping
Adobe XD: A vector-based tool for designing and prototyping user experiences for web and mobile apps.
Figma: A collaborative interface design tool that allows multiple designers to work simultaneously.
Sketch: A digital design toolkit for macOS focused on UI/UX design.
11. Performance and Testing
Selenium: A suite of tools for automating web browsers for testing purposes.
Lighthouse: An open-source tool for auditing web performance, accessibility, SEO, and more.
Jest: A JavaScript testing framework designed to ensure the correctness of any JavaScript codebase, important for website development services.
12. Security
OWASP ZAP: An open-source web application security scanner to find security vulnerabilities in web applications.
Burp Suite: A suite of tools for testing web security, including a proxy, scanner, and intruder.
13. Monitoring and Analytics
Google Analytics: A powerful tool for tracking and analyzing website traffic and user behavior.
New Relic: A suite of performance monitoring tools to observe application performance, infrastructure, and user experience.
Datadog: A monitoring and security platform for cloud applications, essential for maintaining professional web development services.
These tools can help streamline your web development services, improve productivity, ensure high-quality outputs, and maintain secure and efficient applications. Depending on your specific project requirements and team preferences, you can choose the tools that best fit your web development service workflow. For those looking to enhance their website development services, these tools are indispensable in creating robust, high-performing websites that meet client needs and industry standards.
0 notes
Text
How to Successfully Master the PHP Development Tools?
PHP (Hypertext Preprocessor) remains one of the most popular server-side scripting languages for web development, powering millions of websites and applications worldwide. To streamline the development process and enhance productivity, developers rely on a plethora of tools and resources tailored specifically for PHP development. In this comprehensive guide, we’ll explore essential PHP development tools that can elevate your coding workflow and help you build robust, scalable, and efficient PHP applications.
Integrated Development Environments (IDEs):
PHPStorm: Developed by JetBrains, PHPStorm is a powerful IDE designed specifically for PHP development. It offers a rich set of features including syntax highlighting, code completion, debugging tools, version control integration, and seamless support for frameworks like Laravel and Symfony.
Visual Studio Code (VS Code): While not PHP-specific, VS Code is a highly customizable and lightweight code editor with extensive support for PHP through extensions. With features such as IntelliSense, debugging, and Git integration, VS Code is a popular choice among PHP developers seeking flexibility and performance.
Debugging Tools:
Xdebug: Xdebug is a robust debugging and profiling tool for PHP that integrates seamlessly with IDEs like PHPStorm and VS Code. It allows developers to step through code, inspect variables, and trace execution paths, facilitating efficient debugging and troubleshooting.

PHP Debug Bar: PHP Debug Bar is a handy debugging toolbar that provides real-time insights into the performance of PHP applications. It displays profiling data, SQL queries, request information, and more, helping developers identify bottlenecks and optimize code performance.
Package Managers:
Composer: Composer is a dependency manager for PHP that simplifies the process of integrating third-party libraries and frameworks into your projects. With Composer, you can easily manage dependencies, install packages from Packagist, and autoload classes, enhancing code modularity and maintainability.
Version Control Systems:
Git: Git is a distributed version control system widely used in PHP development for managing source code repositories. By leveraging Git, developers can collaborate seamlessly, track changes, and roll back to previous versions with ease, ensuring code integrity and project continuity.
GitHub / GitLab / Bitbucket: Platforms like GitHub, GitLab, and Bitbucket provide hosting services for Git repositories, enabling collaborative development, code reviews, and issue tracking. These platforms offer robust features for project management, team collaboration, and continuous integration (CI) / continuous deployment (CD).
Testing Frameworks:
PHPUnit: PHPUnit is a popular testing framework for PHP that facilitates unit testing, integration testing, and functional testing of PHP codebases. With PHPUnit, developers can write automated tests, execute test suites, and assert expected outcomes, ensuring code reliability and quality.
Performance Optimization Tools:
OPcache: OPcache is one of the built-in PHP development tools that improves performance by caching compiled bytecode in memory, reducing the overhead of script compilation on subsequent requests. By enabling OPcache, developers can significantly enhance the execution speed of PHP applications.
Blackfire.io: Blackfire.io is a performance profiling tool for PHP applications that provides deep insights into code performance and resource utilization. It offers profiling, metrics, and recommendations for optimizing PHP code, database queries, and server configurations, enabling developers to identify and address performance bottlenecks efficiently.
Documentation Generators:
phpDocumentor: phpDocumentor is a documentation generator for PHP projects that automatically generates API documentation from PHP source code. By documenting code structure, classes, methods, and parameters, phpDocumentor helps developers create comprehensive and well-documented APIs for their projects.
Continuous Integration and Deployment (CI/CD) Tools:
Jenkins: Jenkins is a popular open-source automation server that facilitates continuous integration and continuous deployment (CI/CD) workflows for PHP projects. With Jenkins, developers can automate build processes, run tests, and deploy applications to production environments seamlessly, ensuring code quality and deployment reliability.
Travis CI: Travis CI is a cloud-based CI/CD platform that integrates with GitHub repositories to automate the testing and deployment of PHP applications. By configuring build pipelines and defining custom workflows, developers can automate the entire software development lifecycle, from code commits to production deployments.

Code Quality Analysis Tools:
PHP CodeSniffer: PHP CodeSniffer is a static analysis tool that detects violations of coding standards and best practices in PHP codebases. By enforcing coding standards such as PSR-12 or custom rules, PHP CodeSniffer helps maintain consistency, readability, and maintainability across projects.
PHPStan: PHPStan is a static analysis tool that performs comprehensive type checking and static code analysis on PHP code. It identifies potential bugs, type errors, and performance issues, enabling developers to write safer and more robust code.
Dependency Injection Containers:
Symfony Dependency Injection Component: Symfony’s Dependency Injection Component provides a powerful mechanism for managing dependencies and configuring services in PHP applications. By decoupling components and promoting inversion of control (IoC), Symfony DI Container enhances code modularity, testability, and maintainability.
Content Management Systems (CMS) and Frameworks:
WordPress: WordPress is a popular open-source CMS written in PHP, powering millions of websites and blogs worldwide. With its extensive ecosystem of themes and plugins, WordPress offers flexibility, scalability, and ease of use for building dynamic and content-rich websites.
Laravel: Laravel is a modern PHP framework known for its elegant syntax, expressive API, and robust features for web application development. With features such as routing, ORM (Eloquent), templating (Blade), and authentication, Laravel simplifies common tasks and accelerates development without sacrificing flexibility or performance.
Community and Documentation Resources:
PHP.net: The official PHP website (PHP.net) serves as a comprehensive resource for PHP documentation, language reference, and tutorials. It provides in-depth documentation for PHP functions, language features, and extensions, serving as a valuable reference for PHP developers of all levels.

Stack Overflow: Stack Overflow is a popular online community for programmers to ask questions, share knowledge, and collaborate on technical issues. With a vast repository of Q&A threads related to PHP development tools, Stack Overflow serves as a valuable resource for troubleshooting, learning, and staying updated on best practices.
Conclusion:
By incorporating a diverse array of PHP development tools and resources—from IDEs and debugging tools to CI/CD platforms and documentation generators—PHP developers can streamline development workflows, enhance code quality, and deliver exceptional user experiences. Whether you’re building web applications, APIs, or content management systems, embracing these PHP development tools and fostering a culture of continuous learning and improvement can empower you to excel in the ever-evolving realm of PHP development.
Also Read: How to Expose Your Business Website to More Prospects and Attract More Sales?
0 notes
Text
Python Universe: Understanding the Dynamics of Language and Development Environments
Introduction: Embarking on a journey through the vast expanse of Python, we uncover the intricate relationship between Python as a programming language and the array of Integrated Development Environments (IDEs) crafted to enhance the development experience.

In this exploration, we delve into the distinct realms Python Course in Hyderabad capabilities and the indispensable role of IDEs in shaping the landscape of software development.
Python: A Foundation of Versatility
Versatility in Syntax and Structure: Python emerges as a cornerstone of versatility, renowned for its intuitive syntax and adaptable structure. Its support for multiple programming paradigms, including procedural, object-oriented, and functional programming, renders it a flexible tool for addressing diverse development challenges with finesse and efficiency.
An Ecosystem of Abundance: At the heart of Python lies an expansive ecosystem teeming with libraries, frameworks, and modules. From Django and Flask for web development to NumPy and Pandas for data manipulation, Python's rich repository empowers developers to harness the full spectrum of functionalities required to realize their vision and drive innovation.
IDEs: Pioneering Productivity in Development
Elevating the Development Paradigm: Integrated Development Environments (IDEs) serve as the nerve center of productivity in Python development, offering a suite of tools and features to streamline the coding process. From syntax highlighting and code completion to version control integration and debugging utilities, IDEs amplify developer efficiency and facilitate collaboration across projects.

Exploring Diverse IDE Landscapes: In the diverse landscape of Best Python Certification Online, a multitude of options cater to the unique preferences and requirements of developers. Whether navigating the feature-rich environment of PyCharm, the lightweight versatility of Visual Studio Code, or the minimalist elegance of Sublime Text, developers have a plethora of choices to tailor their development environment to suit their workflow.
PyCharm: Empowering Precision and Performance PyCharm emerges as a beacon of precision and performance in the realm of Python IDEs. With its robust code analysis capabilities, seamless integration with popular frameworks, and advanced debugging tools, PyCharm empowers developers to craft code with unparalleled accuracy and efficiency, driving innovation and excellence in development.
Visual Studio Code: A Canvas for Creativity Visual Studio Code (VS Code) stands as a testament to creativity and customization, offering developers a canvas to express their ingenuity. With its vast array of extensions and plugins, coupled with seamless integration with Git and debugging support, VS Code provides developers with a versatile platform to unleash their creativity and optimize their workflow.
Sublime Text: Where Simplicity Meets Speed Sublime Text embodies the ethos of simplicity and speed, providing developers with a minimalist yet powerful environment for coding. With its lightning-fast performance, intuitive interface, and plethora of customization options, Sublime Text offers a streamlined experience for writing code with unparalleled efficiency and elegance.
Conclusion: Navigating the Python Galaxy with Confidence
In conclusion, the Python ecosystem offers a dynamic playground for developers to explore and innovate, with Python as the bedrock of versatility and IDEs as the catalysts of productivity. Whether harnessing the precision of PyCharm, the creativity of Visual Studio Code, or the simplicity of Sublime Text, developers have the tools at their disposal to navigate the Python galaxy with confidence, driving innovation and excellence in software development.
0 notes
Text
How to Prepare for Full Stack Development Training

Introduction:
In the ever-evolving landscape of technology, the demand for skilled professionals is surging, and one role that stands out prominently is that of a Full Stack Developer. With the increasing complexity of web applications, companies are seeking individuals who can navigate both the front-end and back-end development seamlessly. In this blog post, we will delve into the realm of Full Stack Development training, exploring its significance, key components, and the avenues available, including options like Full Stack Developer Training in Noida and Full Stack Developer Course Online.
Understanding Full Stack Development:
Defining Full Stack Development:
Full Stack Development refers to the comprehensive skill set required to work on both the client-side (front-end) and server-side (back-end) of a web application. A Full Stack Developer is proficient in various programming languages, databases, server management, and client-side technologies, making them versatile contributors to the development process.
Key Components of Full Stack Development:
Front-end Technologies:
A Full Stack Developer should be adept in front-end technologies such as HTML, CSS, and JavaScript. These are essential for creating an intuitive and user-friendly interface.
Back-end Technologies:
Proficiency in back-end technologies like Node.js, Python, Ruby, or PHP is crucial for handling server-side logic and database management.
Database Management:
Full Stack Developers need to be well-versed in database management systems (DBMS) like MySQL, MongoDB, or PostgreSQL to store and retrieve data efficiently.
Version Control/Git:
Knowledge of version control systems, especially Git, is essential for collaborative coding, tracking changes, and managing code repositories.
Web Servers and Deployment:
Understanding web servers (e.g., Apache, Nginx) and deployment strategies ensures that applications run smoothly in a production environment.
APIs (Application Programming Interfaces):
Full Stack Developers should know how to create and consume APIs, enabling seamless communication between different components of a web application.
Significance of Full Stack Development:
Versatility and Efficiency:
Full Stack Developers can seamlessly switch between front-end and back-end tasks, contributing to faster development cycles and efficient problem-solving.
Cost-Effectiveness for Small Teams:
In smaller development teams, having a Full Stack Developer can be cost-effective as it reduces the need for hiring separate front-end and back-end specialists.
Enhanced Problem-Solving Abilities:
Full Stack Developers have a holistic understanding of the entire development process, allowing them to identify and solve issues at various stages.
Full Stack Developer Training: Options and Benefits:
Traditional Classroom Training vs. Online Courses:
Traditional Classroom Training:
Institutions providing Full Stack Developer Training in Noida offer a traditional classroom setting where students can engage in face-to-face interactions with instructors. This format is beneficial for those who thrive in a structured learning environment.
Online Courses:
For individuals seeking flexibility, Full Stack Developer Course Online options provide the convenience of learning at their own pace, making it suitable for working professionals or those with busy schedules.
Curriculum and Skill Development:
Comprehensive Curriculum:
A good Full Stack Development course covers a wide range of technologies, frameworks, and tools, ensuring that students gain a well-rounded skill set.
Real-World Projects:
Practical, hands-on experience with real-world projects is crucial for applying theoretical knowledge and building a strong portfolio.
Industry-Relevant Skills:
Full Stack Developer training programs focus on imparting skills that are in high demand in the industry, aligning with current trends and technologies.
Certification and Career Opportunities:
Industry-Recognized Certification:
Completing a Full Stack Developer training program often comes with a certification that is recognized by industry leaders, enhancing your credibility as a developer.
Diverse Career Opportunities:
Armed with Full Stack Development skills, individuals can pursue diverse career paths, including Full Stack Developer, Web Developer, or even take on entrepreneurial roles by developing their own web applications.
Choosing the Right Training Program:
Research and Reviews:
Before enrolling in a Full Stack Developer training program, it's essential to research the curriculum, read reviews, and possibly reach out to alumni for feedback.
Flexibility and Support:
Look for programs that offer flexibility in terms of schedules and provide adequate support through mentorship or forums for student collaboration.
Conclusion:
Full Stack Development is a dynamic and rewarding field that opens doors to a multitude of opportunities in the tech industry. Whether you opt for traditional classroom training in Noida or choose an online course, investing in Full Stack Developer Training is a step towards becoming a versatile and sought-after professional. The skills acquired during the training will not only make you adept at creating seamless web applications but also position you as a valuable asset in the competitive world of technology.
0 notes
Text
Fluttering into Action: A Step-By-Step Guide to Installing and Configuring Flutter SDK on macOS

Flutter has attained immense popularity in the software industry. Big tech corporations are investing large sums of money to hire a Flutter developers team. As a result, the developer community has become obsessed with mastering the skills necessary to harness the full potential of the platform. However, software developers face a steep learning curve when they select Flutter app development. This comprehensive guide will teach you how to install and configure Flutter on macOS and efficiently migrate your project onto the platform. Let’s go ahead and understand the installation process of Flutter on macOS.
Step-By-Step Guide For Flutter Installation On MacOS
Before you initiate the installation process, you must make sure that your current hardware and system fulfill the minimum requirement of Flutter.
SYSTEM REQUIREMENTS
Operating Systems: macOS (64-bit), version 10.14 (Mojave) or higher.
Disk Space: 2.8 GB (excluding space for IDE/tools).
Tools: Git for macOS or Xcode.
DOWNLOAD FLUTTER SDK
Now that you have verified that your hardware and system meet the basic requirements for the installation, you can proceed to the first step of the process.
Start by downloading the installation bundle from here — Flutter SDK for macOS.
The newest version of Flutter 3.16.3 for macOS was released on the stable channel on 12/06/2023.
If you are using the Apple Silicon processor, download the latest version from here — flutter_macos_arm64_3.13.7-stable.zip
Extract The Zip File
Extract the downloaded Zip file to a folder of your choice.
cd ~/development
$ unzip ~/Downloads/flutter_macos_3.13.7-stable.zip
Append Flutter Tool to your assigned path
export PATH="$PATH:`pwd`/flutter/bin"
To verify if the PATH is already set correctly, you must run the program once.

Using this command is vital because the installer appends the Flutter repository as the default PATH. This prevents Flutter from working in another terminal directory. Once you are done with this step, you can deploy Flutter commands successfully.
Run Flutter Doctor
If any dependencies are missing, Flutter won’t work. Most firms hire Flutter developers team after getting stuck on this step. However, you can use the following command to check for the missing dependencies-

This useful command runs a full diagnostic on the system environment and generates a full report on its findings. The report is supplied at the terminal window, and it tells the developer if he needs to download or update an existing dependency. You cannot skip over this step even if you downloaded Flutter through the Dart SDK. There might be some other software missing or additional tasks you need to perform to get the platform up and running.
For example, you may face the “Android license status unknown” message in case the sdkmanager shell script crashes in the $android_sdk/tools/bin directory.
Review PATH Environment Variable
A skilled Flutter developer from Flutter Agency will always validate that your system’s PATH environment variable incorporates the path to Android SDK’s bin directory. Look for this output –
export PATH=$PATH:/path/to/android-sdk/tools/bin
Install Flutter Plugin
IntelliJ, Android Studio, and VS Code each have their unique editor plugin. For our guide, we shall use the VS Code or Visual Studio Code.
Run VS Code.
Press Command+Shift+B buttons to activate View>Command Palette.
Type ‘install’ on the command palette, and when the ‘Extensions: Install Extension’ comes up on the screen, click on it.
Type ‘flutter’ on the search field and then click on the ‘Flutter’ option in the list.
Click on the Install button.
Reload VS Studio by clicking on the ‘Reload’ button.
Android Studio
Flutter Doctor often reports on two common issues associated with Android Studio. If you see ‘Flutter plugin not installed’ or ‘Dart plugin not installed’ flashing on the Flutter Doctor console, follow these steps to rectify the error –
Launch Android Studio
Click on ‘Preferences’, and from the drop-down, select ‘Plugins’.
Click on ‘Browse Repositories’, and then select the Flutter plugin and click ‘Install’.
Click on the ‘Yes’ button when prompted to start the Dart plugin installation process.
After the installation, a dialogue box will appear with the restart option. Click on the “Restart’ option.
Verify Your Setup
You must run Flutter Doctor again to validate your setup thus far. Most software development companies need to hire flutter developers team because they skip over this step and face issues in the later stages of the app development.
iOS Setup
To start this process, you must first download and configure Xcode. These are the steps involved –
Install Xcode
Download Xcode from the 9.0 version onwards from the Mac App Store to create Flutter applications for iOS.
Configure Xcode using sudo xcode-select –switch /Applications/Xcode.app/Contents/Developer command.
Use the command line to sign the Xcode license agreement by clicking on the ‘Agree’ button.
Configure The iOS Simulator
You need to test out your Flutter app on your iOS simulator first. Follow these steps — Use the open -a Simulator command to launch the simulator on your Mac.
Click on the Hardware option and then Device to check if your simulator is using a 64-bit device.
Select the Scale Menu on the Window option to set the app’s dimensions.
Launch A New Project In VS Code
Utilize the Flutter starter app template to initiate a new project.
Press Cmd+Shift+P.
Click on Flutter: New Project and then select ‘Enter’.
Set a Project name and location.
Execution and Debugging
When you run a Flutter project on VS Code for the first time, the status bar will show Flutter-specific entries. You might also see the ‘No Devices’ error message. We will share a secret tip to overcome this error that only a skilled Flutter developer from the Flutter agency knows.
Click on ‘No Devices’.
On the command palette, click on iOS Simulator.
Press F5 or click on the Debug menu on the IDE window to start debugging.
CONCLUSION
Now, you are ready to take advantage of Flutter, which has been instrumental in the success of other companies. Alternatively, you can also hire a Flutter developers team to take care of this massive undertaking.
Content Source: Complete Tutorial For Flutter Installation Guide on macOS
#hire a Flutter developers team#Flutter SDK for macOS#Android license status unknown#Flutter Doctor#Best Flutter App Development Company#Flutter App Development Company#Flutter Company#Flutter Development Company#Hire Flutter Agency#Top Flutter App Development Companies#Dedicated Flutter App Developers#Flutter App Developer#Flutter Mobile App Developer#Hire Flutter App Developers#Hire Flutter Application Developers#Hire Flutter Developer
0 notes
Text
Connecting Power BI to Git: Streamlining Collaboration and Data Insights
Introduction
In the rapidly evolving field of data analytics and business intelligence, Microsoft has made significant strides with the integration of Power BI and Git, facilitated by Microsoft Fabric. This integration enhances collaboration within development teams and streamlines the entire development process of Power BI content. The ability to connect Power BI workspaces to Azure DevOps repositories has unlocked a plethora of benefits, ranging from improved version control to streamlined development and deployment processes.
The Basics of Power BI and Git Integration
Power BI’s integration with Git revolves around the use of Power BI Desktop projects, allowing developers to save their work in a structured folder format compatible with Git. This is a departure from the traditional .PBIX file format, providing a more source-control-friendly approach to managing Power BI content.
Getting Started


Leveraging Microsoft Fabric for Enhanced Collaboration
Microsoft Fabric plays a crucial role in this integration, providing a robust framework for managing the full application lifecycle across development, testing, and production workspaces. Developers can utilize the intuitive UI or automate processes using tools like Azure Pipelines, ensuring a seamless and efficient workflow.
Prerequisites and Best Practices
Before diving into the integration, ensure you are familiar with Git, have Git and VS Code installed, and are comfortable using Git source control in VS Code. This foundational knowledge will enable you to leverage the full capabilities of the integration, ensuring a smooth and productive development experience.
Conclusion
The integration of Power BI with Git, facilitated by Microsoft Fabric, represents a significant advancement in the field of data analytics and business intelligence. It empowers developers with enhanced collaboration tools, streamlined development processes, and robust application lifecycle management capabilities.
Article Source: https://inference.in/integrating-power-bi-with-git-a-comprehensive-guide/
#artificial intelligence#ecommerce#economy#sales#success#branding#DataAnalytics#InferenceLabs#analytics
0 notes
Text
Highlight Essential Tools, Libraries, And Resources For Web Development Process

Web Development Tools: Highlight essential tools, libraries, and resources that can streamline the web development process and boost productivity.
Web development is an ever-evolving field, and staying ahead requires not just coding skills but also familiarity with a plethora of web development tools, libraries, and resources. These tools are designed to streamline the development process and boost productivity, allowing developers to create websites and web applications more efficiently. In this article, we’ll highlight essential tools that are indispensable for modern web development.
Integrated Development Environments (IDEs)
1. Visual Studio Code (VS Code): This open-source code editor from Microsoft is incredibly popular for web development. With a vast collection of extensions, it supports multiple languages and offers features like auto-completion, debugging, and Git integration.
2. Sublime Text: Known for its speed and efficiency, Sublime Text is a lightweight text editor that is highly customizable and supports various programming languages. It’s favored by developers for its simplicity and performance.
3. WebStorm: WebStorm by JetBrains is a robust IDE designed specifically for web development. It provides advanced coding assistance, intelligent coding insight, and powerful debugging capabilities.
Version Control
4. Git: Git is the standard for version control in web development. GitHub and GitLab are popular platforms for hosting Git repositories, facilitating collaboration and code management.
Package Managers
5. npm (Node Package Manager): npm is the default package manager for JavaScript and is used for installing and managing libraries and dependencies for Node.js and frontend projects.
6. Yarn: Yarn is an alternative to npm, designed for performance and reliability. It offers faster package installation and deterministic builds.
Task Runners and Build Tools
7. Gulp: Gulp is a task runner that automates repetitive tasks like minification, compilation, and testing. It’s particularly useful for frontend development.
8. Webpack: Webpack is a powerful module bundler that optimizes and bundles JavaScript, CSS, and other assets, improving website performance.
9. Grunt: Grunt is another popular JavaScript task runner, known for its configurability and ability to automate various development tasks.
Content Management Systems (CMS)
10. WordPress: For content-driven websites and blogs, WordPress is a versatile and user-friendly CMS with a vast ecosystem of themes and plugins.
11. Drupal: Drupal is a robust and highly customizable CMS ideal for complex websites and applications. It provides advanced content management and user access control.
12. Joomla: Joomla is a middle-ground between WordPress and Drupal, offering a balance of user-friendliness and flexibility for various web projects.
Web Frameworks
13. React: A JavaScript library for building user interfaces, React is widely used for creating dynamic and interactive frontend components.
14. Angular: A full-featured frontend framework by Google, Angular is suitable for building complex web applications.
15. Vue.js: A progressive JavaScript framework, Vue.js is known for its simplicity and ease of integration into existing projects.
16. Django: A high-level Python web framework, Django is ideal for rapidly building secure, maintainable websites and applications.
17. Ruby on Rails: A Ruby-based framework, Ruby on Rails follows the convention over configuration (CoC) and don’t repeat yourself (DRY) principles, making it efficient for web application development.
Testing and Debugging Tools
18. Selenium: Selenium is an open-source tool for automating browser actions and performing functional testing on web applications.
19. Chrome DevTools: A set of web developer tools built into the Chrome browser, DevTools includes inspection, debugging, and performance profiling features.
20. Postman: Postman simplifies the process of developing APIs and services, allowing developers to test requests and responses.
Libraries and Frameworks for Styling
21. Bootstrap: Bootstrap is a popular CSS framework for creating responsive and visually appealing web designs.
22. SASS/SCSS: SASS (Syntactically Awesome Style Sheets) and SCSS (Sassy CSS) are CSS preprocessors that simplify and enhance the CSS development process.
Collaboration and Communication
23. Slack: Slack is a messaging platform that facilitates real-time communication and collaboration among development teams.
24. JIRA: JIRA by Atlassian is a project management and issue tracking tool, which is often used for agile software development.
Learning Resources
25. MDN Web Docs: Mozilla Developer Network’s Web Docs is a valuable resource for web development documentation and tutorials.
26. Stack Overflow: Stack Overflow is a community-driven platform where developers can ask and answer technical questions.
In conclusion, these essential web development tools, libraries, and resources are the backbone of efficient and productive web development projects. Whether you’re a beginner or a seasoned developer, leveraging these tools will streamline your development workflow and empower you to create cutting-edge websites and web applications. Keep in mind that the web development landscape is dynamic, and staying updated with the latest tools and trends is crucial for success in this field.
Source:
#kushitworld#saharanpur#india#itcompany#digitalmarketing#seo#seo services#webdevelopment#websitedesigning#webdesign
0 notes
Text
git-commit
The contributors to these repositories know that a well-crafted Git commit message is the best way to communicate context about a change to fellow developers (and indeed to their future selves). A diff will tell you what changed, but only the commit message can properly tell you why. Peter Hutterer makes this point well:
Re-establishing the context of a piece of code is wasteful. We can’t avoid it completely, so our efforts should go to reducing it [as much] as possible. Commit messages can do exactly that and as a result, a commit message shows whether a developer is a good collaborator.
A well-cared for log is a beautiful and useful thing. A project’s long-term success rests (among other things) on its maintainability, and a maintainer has few tools more powerful than his project’s log. It’s worth taking the time to learn how to care for one properly. What may be a hassle at first soon becomes habit, and eventually a source of pride and productivity for all involved.
In this post, I am addressing just the most basic element of keeping a healthy commit history: how to write an individual commit message. There are other important practices like commit squashing that I am not addressing here.
In order to create a useful revision history, teams should first agree on a commit message convention that defines at least the following three things:
Style. Markup syntax, wrap margins, grammar, capitalization, punctuation. Spell these things out, remove the guesswork, and make it all as simple as possible. The end result will be a remarkably consistent log that’s not only a pleasure to read but that actually does get read on a regular basis.
Content. What kind of information should the body of the commit message (if any) contain? What should it not contain?
Metadata. How should issue tracking IDs, pull request numbers, etc. be referenced?
The seven rules of a great Git commit message
Separate subject from body with a blank line
Limit the subject line to 50 characters
Capitalize the subject line
Do not end the subject line with a period
Use the imperative mood in the subject line
Wrap the body at 72 characters
Use the body to explain what and why vs. how
Firstly, not every commit requires both a subject and a body. Sometimes a single line is fine, especially when the change is so simple that no further context is necessary. For example:
Fix typo in introduction to user guide
Nothing more need be said; if the reader wonders what the typo was, she can simply take a look at the change itself, i.e. use git show or git diff or git log -p.
However, when a commit merits a bit of explanation and context, you need to write a body. For example:
Derezz the master control program
MCP turned out to be evil and had become intent on world domination. This commit throws Tron's disc into MCP (causing its deresolution) and turns it back into a chess game.
Commit messages with bodies are not so easy to write with the -m option. You’re better off writing the message in a proper text editor.
—
Example:
Summarize changes in around 50 characters or less
More detailed explanatory text, if necessary. Wrap it to about 72 characters or so. In some contexts, the first line is treated as the subject of the commit and the rest of the text as the body. The blank line separating the summary from the body is critical (unless you omit the body entirely); various tools like `log`, `shortlog` and `rebase` can get confused if you run the two together.
Explain the problem that this commit is solving. Focus on why you are making this change as opposed to how (the code explains that). Are there side effects or other unintuitive consequences of this change? Here's the place to explain them.
Further paragraphs come after blank lines.
- Bullet points are okay, too
- Typically a hyphen or asterisk is used for the bullet, preceded by a single space, with blank lines in between, but conventions vary here
If you use an issue tracker, put references to them at the bottom, like this:
Resolves: #123
See also: #456, #789
5. Use the Imperative Mood
The imperative can sound a little rude; that’s why we don’t often use it. But it’s perfect for Git commit subject lines. One reason for this is that Git itself uses the imperative whenever it creates a commit on your behalf.
Writing this way can be a little awkward at first. We’re more used to speaking in the indicative mood, which is all about reporting facts. That’s why commit messages often end up reading like this:
Fixed bug with Y
Changing behavior of X
And sometimes commit messages get written as a description of their contents:
More fixes for broken stuff
Sweet new API methods
To remove any confusion, here’s a simple rule to get it right every time.
A properly formed Git commit subject line should always be able to complete the following sentence:
If applied, this commit will your subject line here
6. Wrap the body at 72 characters
Git never wraps text automatically. When you write the body of a commit message, you must mind its right margin, and wrap text manually.
The recommendation is to do this at 72 characters, so that Git has plenty of room to indent text while still keeping everything under 80 characters overall.
A good text editor can help here. It’s easy to configure Vim, for example, to wrap text at 72 characters when you’re writing a Git commit. Traditionally, however, IDEs have been terrible at providing smart support for text wrapping in commit messages (although in recent versions, IntelliJ IDEA has finally gotten better about this).
Take a look at the full diff and just think how much time the author is saving fellow and future committers by taking the time to provide this context here and now. If he didn’t, it would probably be lost forever.
0 notes
Text
GitHub vs GitLab: Difference Between GitHub and GitLab

GitHub and GitLab are two popular web-based platforms that provide hosting services for Git repositories, enabling developers to effectively manage and collaborate on software development projects. While they share some similarities, they also have notable differences in terms of features, deployment options, and target user base. Let's delve into the details of GitHub and GitLab to understand their dissimilarities.
1. Ownership and Licensing:
GitHub is owned by Microsoft, which acquired it in 2018. It operates under a freemium model, offering both free and paid plans, with additional features and benefits available to paid users. GitLab, on the other hand, is an open-source project and is managed by GitLab Inc. The core GitLab software is available under an open-source license (MIT), allowing users to download and host it on their own infrastructure for free. GitLab also offers a Software as a Service (SaaS) solution where they host and manage the GitLab instances for users who prefer not to self-host.
2. Deployment Options:
One of the key differences between GitHub and GitLab lies in their deployment options. GitHub is primarily a cloud-based service, meaning that it hosts and manages the repositories on their servers. Users can access and collaborate on projects using the GitHub website or desktop applications. GitLab, on the other hand, provides both a cloud-hosted SaaS solution (similar to GitHub) and a self-hosted option. This flexibility allows users to install GitLab on their own servers, giving them more control over their repositories and infrastructure.
3. Features and Functionality:
Both GitHub and GitLab offer a wide range of features to support software development projects. However, there are some differences in the features they provide:
Issue Tracking: Both platforms have robust issue tracking systems. GitHub's issue tracker is considered more streamlined and user-friendly, making it suitable for smaller projects. GitLab, on the other hand, provides a more comprehensive issue tracking system, including features like multiple issue boards, time tracking, and more advanced workflows.
Continuous Integration and Deployment (CI/CD): GitLab has built-in CI/CD capabilities, allowing developers to automate the testing, building, and deployment processes. GitHub provides similar functionality through GitHub Actions, which enables developers to create custom workflows for their projects.
Container Registry: GitLab includes a container registry that allows users to store and manage Docker images. GitHub offers container registry functionality as well but at the time of writing, it is still in the process of being rolled out to all users.
Permissions and Access Control: GitLab has more granular permissions and access control settings, making it suitable for larger organizations with complex team structures. GitHub provides more basic access control features, which are generally sufficient for smaller teams or open-source projects.
4. Pricing and Plans:
GitHub offers a freemium model with different plans, including a free plan for public repositories and limited private repositories. Additional features and advanced functionality are available with paid plans. GitLab, in contrast, offers a "Core" version that is free and open source, which includes many features. They also provide a variety of paid plans, offering additional features, support, and enterprise-level capabilities.
5. Community and Ecosystem:
GitHub has a large and vibrant community of developers and open-source projects. It has been the go-to platform for many popular open-source projects, making it a hub for collaboration and contribution. GitLab, while growing rapidly, has a smaller community in comparison. However, GitLab's open-source nature and self-hosted options have attracted a community that values privacy, control, and customization.
6. Built-in DevOps Tools:
GitLab takes a comprehensive approach to DevOps by integrating various stages of the development lifecycle into a single platform. In addition to source code management, it includes features like project management, code review, continuous integration/continuous deployment (CI/CD), and container registry. This all-in-one approach can be advantageous for teams looking for a unified solution. GitHub, on the other hand, focuses more on its core strength as a code hosting platform and offers additional features through integrations with third-party tools.
7. Community and Collaboration:
GitHub has a well-established and thriving community, making it the platform of choice for many open-source projects. It provides a social coding experience with features like pull requests, code reviews, and discussions, which facilitate collaboration and contributions from developers worldwide. While GitLab has a growing community, it is often favored by organizations and enterprises that prioritize privacy, security, and control over their development processes.
8. User Interface and User Experience:
Both GitHub and GitLab have intuitive user interfaces, but they differ in certain aspects. GitHub's interface is generally considered more polished and user-friendly. It has a clean design and focuses on simplicity, making it accessible to developers of all experience levels. GitLab's interface is feature-rich and provides extensive customization options. While this gives users more control, it may also lead to a steeper learning curve for new users.
9. Public vs. Private Repositories:
GitHub gained popularity as a platform for hosting public repositories, making it a central hub for open-source projects. Its free plan allows for unlimited public repositories, while private repositories are limited in the number of collaborators. GitLab, on the other hand, offers more flexibility with its free plan, allowing users to have unlimited private repositories with a limited number of collaborators. This makes GitLab an attractive choice for teams working on closed-source projects or organizations with stricter privacy requirements.
10. Extensibility and Integrations:
Both GitHub and GitLab provide integrations with a wide range of third-party tools and services to enhance the development workflow. GitHub has a vast marketplace of integrations and extensions, offering seamless integration with popular project management, testing, and deployment tools. GitLab also supports integrations but has a more limited selection compared to GitHub. However, GitLab's open-source nature allows users to customize and extend its functionality to suit their specific needs.
In summary, GitHub and GitLab are both powerful platforms for hosting and managing Git repositories, but they differ in ownership, licensing, deployment options, features, pricing, and target user base. Deciding between GitHub and GitLab depends on factors such as the project's size, requirements, team structure, need for self-hosting, and preference for specific features.
Read the full article
0 notes
Last Seen Blogs

jualkacamatablueray
JUAL KACAMATA BLUERAY

happyhourtimes
Untitled

marusu-lovey-blog
INACTIVE

little-miss-catto
leeisaf

fgjh45688
흥신소