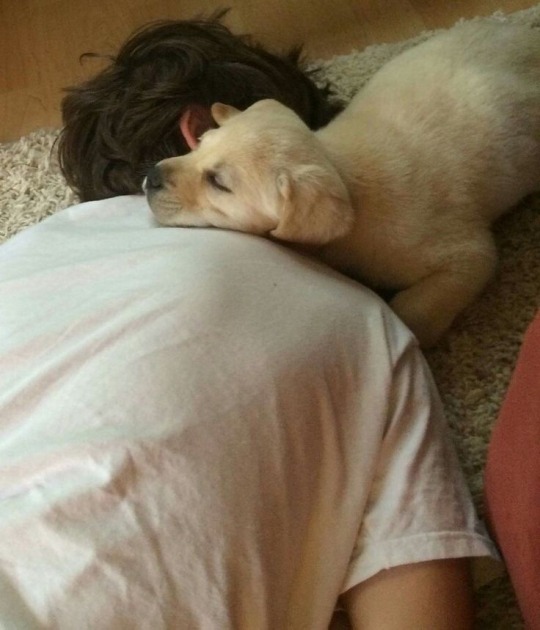
#going to make these pics my entire personality
Note
How do you think of your wonderful beasts?
Usually I start with really vague ideas for shapes or colour schemes and just make the creatures up as I go along. Most of the time I'm aiming to make something that has personality but isn't too easy to compare to any existing animal. If it's too boring then I'll weird it up a bit by rearranging parts or throwing on extra shapes. If it's too abstract then I'll swap in some more realistic animal features.
I saved some in-progress pics of yesterday's creature to step through the process:
I started by giving myself the very open-ended task of drawing a creature with a mouth in an unusual place. When sketching digitally I often like to forgo lineart and just play with blocks of colour.
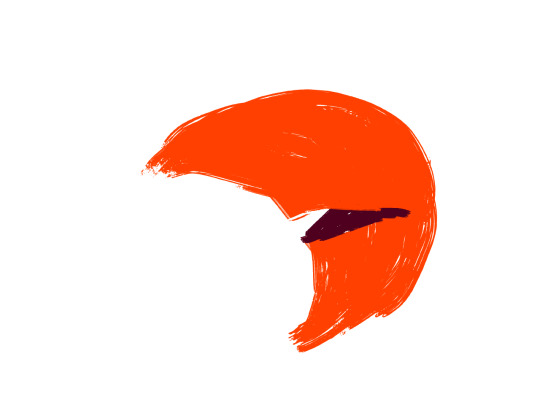
Why is it crescent shaped? Why is it orange? I dunno. But I think that I can turn this into a body with the mouth at the centre of the mass. There are certainly weirder and more interesting places to put a mouth then in the belly, but I don't really know how this sketch is going to go from here. Maybe I'll put more mouths on the feet or something. Finding out is part of the fun.
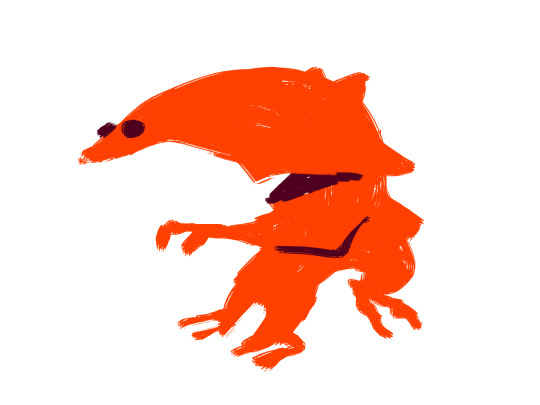
Let's start simple. I figure that it should have arms to pick up food, as well as eyes and a nose to clearly define a 'head' somewhere away from the mouth. Okay now it looks like a creature, but not one that I particularly like. Also there's nothing between the nose and the mouth so it looks less like it has a mouth in its stomach and more like it just has a really big, weirdly-shaped head. I can fix that if I move the arms above the mouth. And I'll give it a tail and another bend in the torso to balance it out and make it less front-heavy.
Now we're getting somewhere. I'm starting to like this for reasons entirely unrelated to the mouth, so I'll just remove it completely. It's getting in the way of the rest of the anatomy. There's no client or art director dictating what I need to make here. The initial premise is just a jumping-off point and I can ditch it entirely if the design works better without it. I like this bug-eyed, cobra-hooded aardvark-centaur-dragon-thing. That seems like enough of a creature without throwing on extra features.
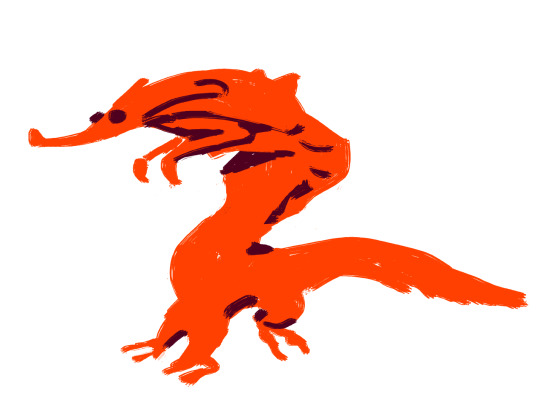
I try to keep my palette organized and only add more colours when they feel necessary. The countershading here helps to define the creature's shape a bit better and break up all of that orange, as well as just making it a little more realistic. I made the tail bigger just because I like what that does for the 2d composition of the picture.
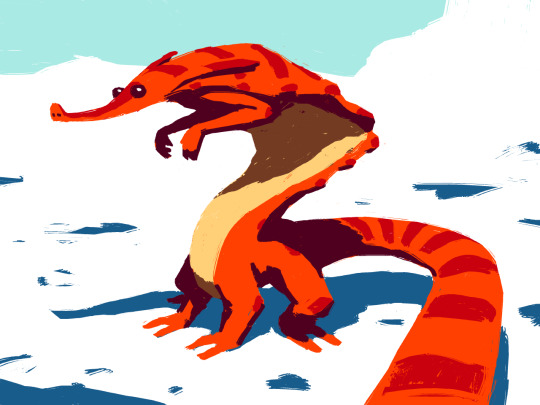
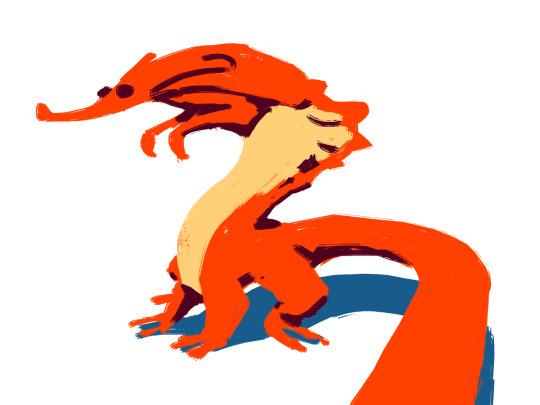
Cleaning up the shadows also helps to make the volume read a bit better. The stripes help too, but I mostly added them to break up the orange some more and make the creature more interesting. I also started laying in some blobs of colour for a background. Now that all of the basics are in place it's just a matter of adjusting colours and polishing out details until I'm either happy with it or just sick of looking at it!

Done!
80 notes
·
View notes
Text

!?@#;!;~`[273#;?*
#i feel faint#i think i’m going to throw up#i’ll need approximately 2638261839 business days or perhaps even more to recover#ON A RANDOM SUNDAY#this was so uncalled for !?@]%[]!“#going to make these pics my entire personality#cous cous
35 notes
·
View notes
Text


HYUNJIN x DISPATCH
#hwang hyunjin#hyunjin#stray kids#bystay#createskz#staysource#malegroupsnet#a9gifs#*edit#*ccarly#*hyunjin#*carly:hyunjin#long post#i am so obsessed w these. i've only seen hyunin's pics from this so far but#i love the dispatch shoots i need to see them all SDFSDGSDGGSD#i am going to make these my entire personality i think
288 notes
·
View notes
Text

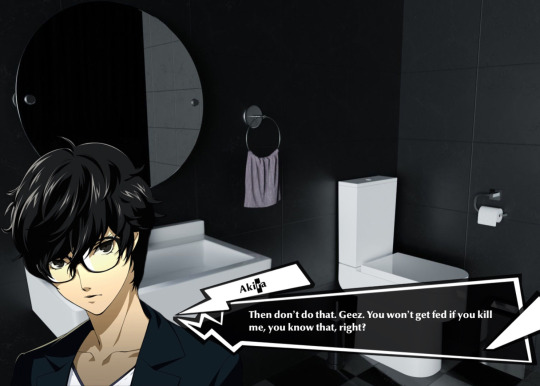

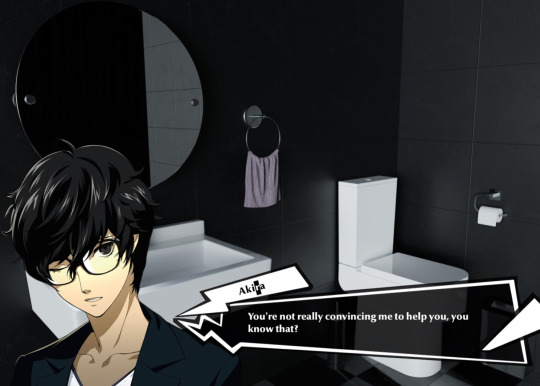
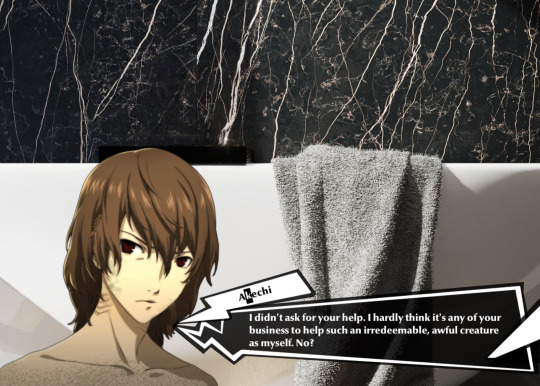


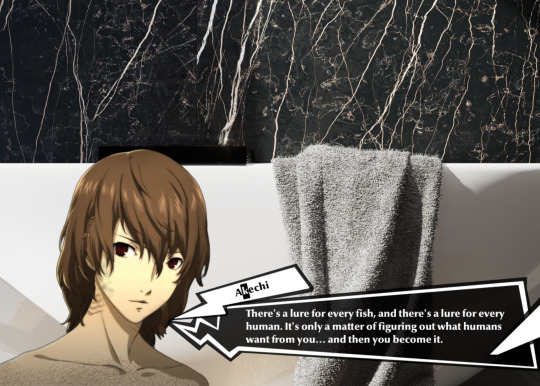
Imitates human behaviors to an uncanny degree, Akira remembers from the lab notes. Mimic skill on par with any natural predator that imitates another animal to lure in prey.
Scene from the amazing mermaid fic, I like to think I’m a good person by @relationshipcrimes (READ THE TAGS BEFORE BEGINNING)
#this fic has been driving me insane - every time I’ve seen my cat go near my bathtub for the last few days I’ve had a panic response LMAO#<- if u want to know why I did then read the fic but also check the tags bcuz it’s… FUCKED up#this little scene is near the start so it looks very cute and wholesome but um. it’s. not.#ANYWAY so sorry about the inaccurate backgrounds 😔 Akechi is in the containment tank at this point of the fic NOT the bathtub…#but unfortunately I can’t craft an entire military-grade fish tank from scratch bcuz I hv to study lol#which is a shame cuz I hv a really clear vision of it in my head lmao#anyway peep Akechi’s little braids and freckles heheheh. so sweet. so human…. (:#also tumblr butchered the quality so u can’t see his teeth very well in the first pic but they are. a little spiky. :)))#also I may or may not be making another sprite edit of Akechi & Akira at the END of the fic but those r gonna take a while bcuz [SPOILERS]#I like to think I’m a good person#persona#persona 5#p5#persona 5 royal#p5r#persona 5 fanfiction#goro akechi#akira kurusu#ren amamiya#shuake#akeshu#mine#anyway this fic slaps in a very haunting type of way so read it asap (if ur ok w the content warnings)#oh for the record the dots on his chest & shoulders aren’t freckles they’re scale texturing lol#I also messed w the portrait dimensions so u could see mermaid Akechi better… so I couldn’t standardise the sizing like usual 😭#so if it looks a little wonky that’s why 🙇♀️😭 apologies
70 notes
·
View notes
Text
.
#I'm probably nomad goro's number one fan and I wanna take so many pics of him in the badlands and with the 'caldos#but I also wanna make what feels right to me and what feels good and that's also just the domestic life/soft lighting/more home life shots#nomad goro owns my whole entire heart but I've decided to accept and embrace the fact I'm branching out#and wanting to do different things isn't a bad thing at all : )#and I know my new years resolution was to take more nomad goro VP but... now I think it's gonna be the opposite#I have to feel it#they spend so much time in the city nowadays so I'm gonna roll with it#-#sunshot shots however aren't going anywhere!!!!!#personal#goro takemura#breezy rambles
11 notes
·
View notes
Text


hsmtmts + texts posts (pt 4)
#this entire thing (pt 3 and pt 4) was because i made the first one while making my lab rats ones and decided to make more again#it was so hard to find gallery pictures where redky were on the correct sides#and because emmy has so little gallery pics i had to go and find a an episode where she was unhinged#personally took pics 3 4 5 7 8 myself#heheh#ricky bowen#nini salazar roberts#ej caswell#gina porter#kourtney greene#big red#carlos rodriguez#emmy hsmtmts#big red hsmtmts#hsmtmts#high school musical the musical the series
4 notes
·
View notes
Text
vanishing without explanation for six days
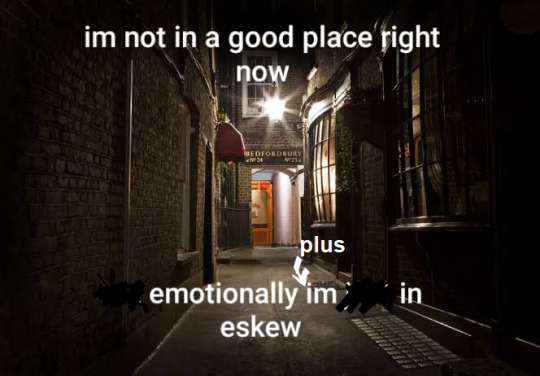
#river dipping#me editing my i am in eskew pic to say actually yea i was being mentally ill <3#i have an avoidant personality disorder likeeeeee jndgkfjh expect me to disappear semi-regularly honestly#but!!! :))) i've finally finished editing all of the photos from that smoking pose set i made for mattodore back in.....#[checks calendar] ..........march lmao#i'm actually getting the post together for it rn... there are eight photos in total here so...........#i have to stare at them for a really long time to check for mistakes#there's dialogue that goes along w/ the images too but i'm not sure if i want to include it#i probably won't..................... we'll see#but anyway hi hello... i've also avoided simblr entirely while i was gone so 🧍 i'm really behind... hope you're all well <3#i might be busy today so i probably won't be able to play catch up for a while but we'll see...#........aszdKSDJFNGKJD ALSO... i just realized looking at my last posts that i was like okay <3 vampire theo time <3 and then logged out#SAWRRY... i could just post the vampire photos raw but maybe i'll edit them like the smoking photos...#there are six photos from it... it's a sequence of events yk...#some blood drinking takes place <3#...want you all to know that when i make posts i type and then i open another tab then i come back then i open ps then i come back etc etc#so while i'm only just now posting this i actually just finished captioning and tagging the mattodore smoking post jdgkfnh#i just flit back and forth from one thing to another my brain is always going so fast like i HAVE to be doing multiple things Or Else#like those earlier tags are obsolete now but i'll keep them anyway
18 notes
·
View notes
Text
.
#this is not a hot take anymore but i Will be a hater about this#if you're at a concert and you're literally on your phone the entire fucking time#like you can safely say more than half of the gig you were staring at a tiny screen in your hand#the brightness of it burning your brain cells and ruining the enjoyment of ppl behind you#you are not living right#take a few videos!! take a few pics!! but you don't need all of them!! you don't!!#someone else will have it and otherwise you'll have your own fucking memories man!!#maybe perhaps your memories will be more vibrant if you're not focusing on that fucking phone!!#holy shit i'm mad and i know i should let it go bc they can live their lives the way they want#but they're actively making concerts and my enjoyment of them worse#also this is not me hating on younger ppl bc i witness all ages do this#this rant is based off my experience last night standing behind an insane person constantly on that damn phone#rant over
7 notes
·
View notes
Text
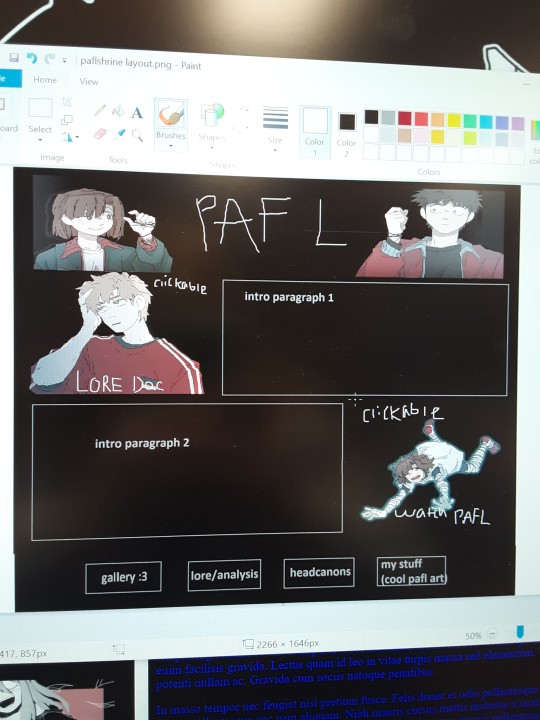
gonna work on reformatting my pafl webshrine when i get homeee
#sorry for taking a pic of my computer screen#i <3 using mspaing to sketch up concepts for site layouts#theyre always so iconic#mspaint* aaaagh#the "my stuff' button is gonna go to a page w/ all of my own pafl art/edits/etc#ive wanted to implement that page since i wrote the first line of code for the shrine but i only had one pafl piece back then#since i finally have a decent amount i had to figure out where to put the page link on the site itself#and the solution was reformatting the entire thing#wooo#i needed to fix the gallerys loading times and move it off of the main page too#and just generally unclutter it and make it more navigable#even if i WAS really proud of the javascript that switches the intro box with the lore box#hm. i should probably actually dedicate this site to paflshrine instead of having it as an extension of my personal site#bc i rllyyy havent done anything w the personal pages in like a year#so..#schizobabble#also the nature of the lore and hcs scrollboxes is that they would get REALLY long and horrible#so moving them onto their own pages is a much better idea#paflshrine#its a tag now ! cause i post abt it way too much!
9 notes
·
View notes
Note
hope this isn't a weird question, but would you have any advice for people going to Portugal? things to watch out for, places to go (or not go), things tourists often don't know but should? muito obrigada :)
Not at all! It does depend on where you're thinking of going/staying and what your personal tastes are (i.e. if you prefer nature or cities and those things)
The only thing i'd really say is Lisbon (and Porto) are beautiful, yes, worth visiting ofc but they're too crowded with tourism and I'd highly advise you to go other places for longer stays that are even more beautiful and actually would benefit a lot from having tourists there (on contrary of the big cities where locals are being thrown out to build more hotels and airbnbs :( i think that's what i'd like most for tourists to know tbh)
But if you'd like i'll make you an entire list of things to see and places to visit catered to your preferences because i love to do that 💖
#honestly am thinking of starting an instagram page or something just sharing random places i go to#and aesthetic pics#and i make being portuguese my entire personality so i bahave like a tourist guide lmao#answers#anon
3 notes
·
View notes
Text
this has been a really good year like despite my insanity its just been incredible and amazing and im literally so lucky<3
#one of my best friends made some collages w some pictures of all of us from this year and im tearing upppppppppp#pics at school parties clubs someones house another towns coffee shops 12 of barely fitting in a car etc and its so <3#and like those arent even half of the times we were together and even if they were they would b enough#but theyre not like im going 2 scream its been a great year <3333#and i mean those r moments w him . im not even talking about seeing the love of my life (damon) w my two best friends in the entire world#and the strokes w my dad! and that trip 2 the beach w my mom and grandma!#living by myself in the city again and i think ive grown as a person a lot this year#that and getting to know me even more and im my most authentic self so far <3333333#like ive never been more true to myself than rn#and i love that im unapologetically myself and the entire world knows im obsessed w damon albarn and i dont care#and also being like . completely out makes m feel so good <3#idk its been real nice#despite me needing a lobotomy every few weeks its overall been an awesome year#++++ finally realizing what it is i wld like 2 do........... life changing
8 notes
·
View notes
Video
youtube
i went through this account’s handful of videos from this show, and i’m pretty confident that’s will roland, next to harrison chad as quince, despite the view being mostly obstructed from the angle this whole time. he’s Most Visible for a moment at the very end lol. since the costuming is just a buttonup and tie w/no especial “it’s This character, or Any character” cues, i’ll guess he’s “will roland” at this point, though that doesn’t mean he wasn’t appearing in some other capacity earlier. every pre-2018 xmas wrole cited in that tweet has been accounted for, but that doesn’t mean he hasn’t been some of those characters more than once, as is definitely true for uncle peenie appearances
#the sixth annual show....twenty thirteen....don't know of any more specific info abt this one. like ''oh xyz pic is from then''#i think the third annual show in twenty ten was Probably his first one / the year of peter the coffee kid but that's still technically#an informed guess as it were lol....and evidently he was in the next yr's show as the christmas burgler / also just [ensemble]#but atm so far as i know regarding definite Dates / the Year; there's only this b/w that & the twenty fifteen 8th annual show there#wherein he was uncle peenie / virgin mary dancer / belly button puppet show puppeteer / will roland At Least#was like hmm twenty twelve/thirteen was The Black Suits times; would he have been able to make it...#but the fact that harrison chad does appear to be there suggests it was entirely plausible for anyone else in the cast to be#what with him playing brandon....and lo & behold does seem to be william next to him there#but yeah can't even speculate ''is This the show in which he played [role listed as having been played but hasn't been seen elsewhere]??''#b/c they've all been seen elsewhere at least the once#the other videos are mostly like twenty or thirty or six second increments of mostly the mister chestnut number & like one other full song#but there was like a forty second recording of Virgin Mary Ft. Her Dancers & i was like god can you imagine. i'll lose it.#by which one means be Head In Hands like keeling over a bit. but none of them was him lmao so [oh lord. imagine] averted beyond that#joe iconis christmas extravaganza#will roland#glad there's a more visible glimpse right at the end but my watching it all prior like Okay Come On Now lmfao#i mean at least it was evident most of the way that there was even a person there to go ''oh huh that could be him'' about#just still thinking about the ''mike wazowski'd but for the viewer / listener looking / listening for him'' experience from the other day#npr affiliate station ep abt gtm:pota that at least cited every oscr cast member by name w/the sole exception of will lmao. cmon#billions wide group shot showing everyone's face except whoops winston in the corner blocked by the group of extras. pointing#but w/these glimpses it's like; hey; it's Anything which is impressive; it's identifiable Enough; also hardly guaranteed. i'll take it
3 notes
·
View notes
Photo
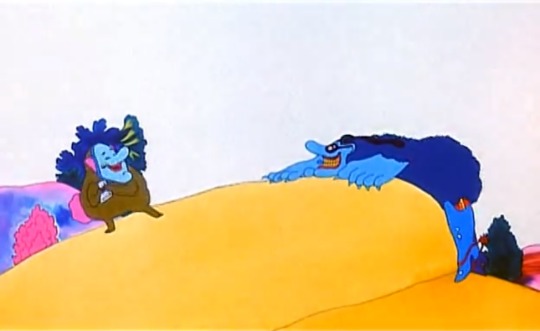

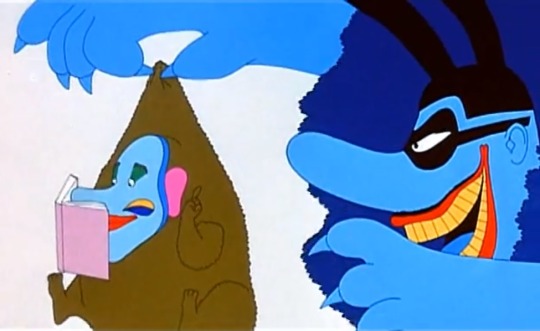

i like them ::-)
#original nonsense#personal#love how expressive the blue meanie is with his entire body. whoag#i remember before i knew abt this movie i saw a pic of the blue meanie leader and he creeped me out.#[gears in my head turning trying to formulate a thought into words]#okay so the meanies r like trying to take over pepperland cuz they think their way of living is the best and also i think they hate music?#obviously overhtrowing a town isnt the way to go but i think they still deserve a space of their own rather than#conforming to the rest of the society ..............#does that make sense!!!!!!!!!#idek what happens to the meanie population at the end. i assume the leader meanie stays in pepperland tho#cuz he was hanging with jeremy in the last song.#anyways that was my yello submarine thought.
5 notes
·
View notes
Text
camera roll with bf!matt
backstory of each pic at the end <3

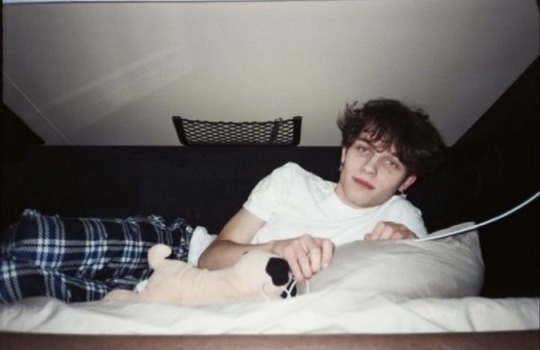


backstory of each pic:
༻ʚ 1. “i loveee this outfit on you, you look so cute,” you smirked knowing your boyfriend doesn’t take compliments well.
“this outfit? you have weird taste.” he rolled his eyes but you can see the corner of his lips fighting back a smile.
you ignore his comment and move away from him as he gives you a questioning look. his confusion is gone when you pull out your film camera from your drawer. “is this really worth film?”
“yes, the fit, your hair, and mr wrinkleton- this is important!! smile please.” he then finally posed, barely smiling but that’s as much as you’re gonna get out of him.
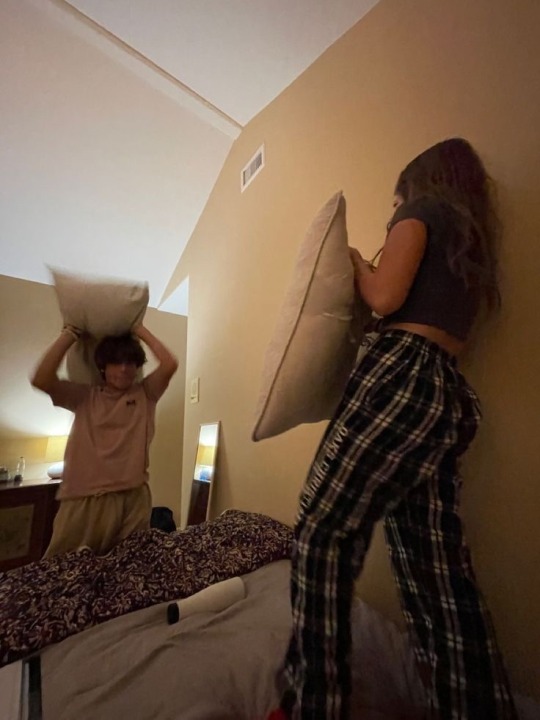
༻ʚ 2. “matt, stop!” you giggle running away from matt who had started a pillow fight earlier. you walked into his room wearing his pj bottoms (from pic 1) and told him they’re yours now. he claimed it’s his favorite but it was yours too :( you unintentionally declared a war when you said if he wants them back he’ll have to take it himself.
that’s when he stood up and started chasing you and it turned into a pillow fight. see, he doesn’t actually care about the pants- you can have his entire closet if you asked. but he loved teasing you just as much as you loved annoying him.
you run into nick’s room yelling, “ nick, help! your brother is trying to kill me!”
“she stole my pants, i want them back!” he laughed, out of breath.
“aren’t boyfriends supposed to like giving their clothes to their girlfriends? stop being a loser matt.” nick said, pulling out his phone to record this. “EXACTLY, tell him nick!!”
matt finally got a hold of you as he tackled you into nick’s bed, both of you giggling and play flighting while nick eventually gets tired and kicks you both out.
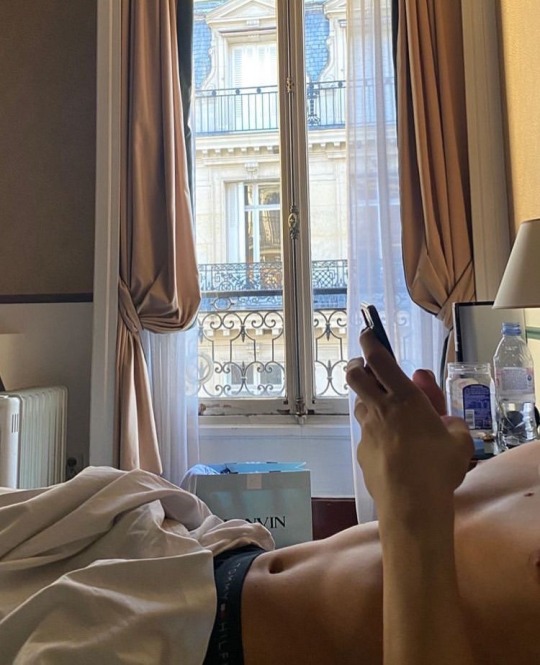
༻ʚ 3. you and matt agreed to keep your relationship offline for at least a year. well it was finally your one year anniversary and matt surprised you with a trip just the two of you.
you woke up cuddled in matt’s arms, he gave you a soft kiss as he struggled to fully wake up. you’re more of a morning person than he is so you sat up taking in the view from the hotel and that paired with how fine your boyfriend is you decided to take a “soft launch” picture asking matt if you can post it to which he nods. the pic became a fan favorite amongst his fans for obvious reasons :)
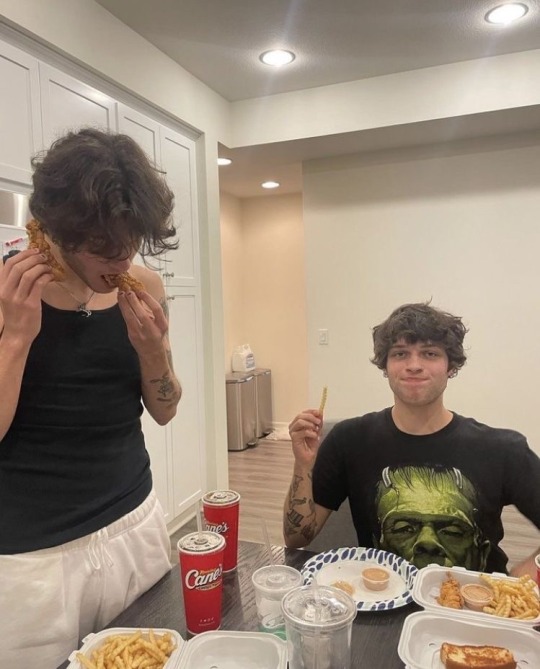
༻ʚ 4. before this picture was taken, you and matt were in his room…making out…a lot. it was getting intense with his grip on your waist guiding your hips back and forth on his lap while your hands pull and tug on his hair and his tongue down your throat.
before this went any further you hear a loud yell from chris saying ‘food’s here.’ groaning you get up off him admiring how fucked he looks. “wait a few minutes, i can’t go out with a hard on.” you laughed and said you’ll meet him outside.
when he comes out of his room his hair is still a mess and he looked as fine as ever. you told him and nick to pose for a friday dump but really, you just wanted to this look on your boyfriend. you’ll definitely pick up where you left off tonight.
༻ʚ 5. beach date with matt <3
༻ʚ 6. matt was playing with your puppy and you left them to go make some food, when you came back you found them napping together on the ground making your heart melt. you love them both so much.

tag list🤍 ~ @mattscoquette @et6rnalsun @norr1ssturni0lo @sturnsxplr-25
if you wanna be added please lmkk <3
#matt sturniolo#matt sturniolo x reader#matthew sturniolo x reader#sturniolo triplets#chris sturniolo#christopher sturniolo#nick sturniolo#chris sturniolo x reader#sturniolo x reader#nick sturniolo x reader#matt sturniolo headcanons#matt sturniolo fanfic#matt sturniolo fic#matt sturniolo x you#matt sturniolo fluff#matthew sturniolo#n6ptunova
1K notes
·
View notes
Note
Any tips on learning to make buttonholes? I've been putting it off for.... *checks notes* like three years.... but better late than never and all that. I don't have any fancy machines so I gotta do it by hand but that seems right up your alley.
Thanks!
It IS up my alley, yes, I do most of my buttonholes by hand!
I'm actually part way through filming an 18th century buttonhole tutorial, but I expect it'll be a few more weeks before I finish that and put it on the youtubes, so in the meantime here's the very very short version. (The long version is looking like it'll probably be about 40 minutes maybe, judging by how much script I've written compared to my last video?)
Mark your line, a bit longer than your button is wide. I usually use a graphite mechanical pencil on light fabrics, and a light coloured pencil crayon on dark ones. (I have fabric pencils too, but they're much softer and leave a thicker line.)
You may want to baste the layers together around all the marked buttonholes if you're working on something big and the layers are shifty and slippery. I'm not basting here because this is just a pants placket.

Do a little running stitch (or perhaps a running backstitch) in fine thread around the line at the width you want the finished buttonhole to be. This holds the layers of fabric together and acts as a nice little guide for when you do the buttonhole stitches.

Cut along the marked line using a buttonhole cutter, or a woodworking chisel. Glossy magazines are the best surface to put underneath your work as you push down, and you can give it a little tap with a rubber mallet if it's not going through all the way.

I'm aware that there are some people who cut their buttonholes open using seam rippers, and if any of them are reading this please know that that is abhorrent behaviour and I need you to stop it immediately. Stop it.
Go get a buttonhole cutter for 10 bucks and your life will be better for it. Or go to the nearest hardware store and get a little woodworking chisel. This includes machine buttonholes, use the buttonhole cutter on them too. If you continue to cut open buttonholes with a seam ripper after reading this you are personally responsible for at least 3 of the grey hairs on my head.
Do a whipstitch around the cut edges, to help prevent fraying while you work and to keep all those threads out of the way. (For my everyday shirts I usually do a machine buttonhole instead of this step, and then just hand stitch over it, because it's a bit faster and a lot sturdier on the thin fabrics.)

I like to mark out my button locations at this point, because I can mark them through the holes without the buttonhole stitches getting in the way.
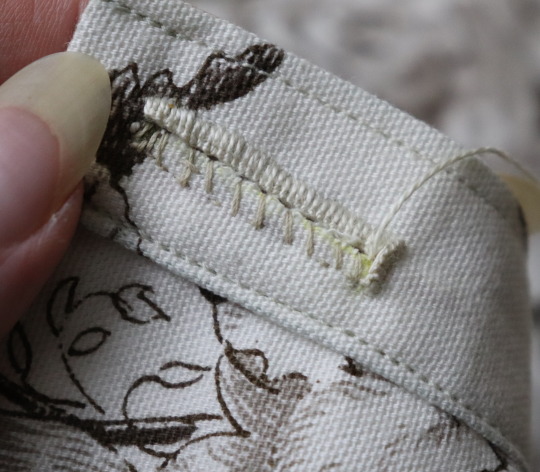
For the actual buttonhole stitches it's really nice if you have silk buttonhole twist, but I usually use those little balls of DMC cotton pearl/perle because it's cheap and a good weight. NOT stranded embroidery floss, no separate strands! It's got to be one smooth twisted thing!
Here's a comparison pic between silk buttonhole twist (left) and cotton pearl (right). Both can make nice looking buttonholes, but the silk is a bit nicer to work with and the knots line up more smoothly.

I've actually only used the silk for one garment ever, but am going to try to do it more often on my nicer things. I find the cotton holds up well enough to daily wear though, despite being not ideal. The buttonholes are never the first part of my garments to wear out.
I cut a piece of about one arm's length more or less, depending on the size of buttonhole. For any hole longer than about 4cm I use 2 threads, one to do each side, because the end gets very frayed and scruffy by the time you've put it through the fabric that many times.
I wax about 2cm of the tip (Not the entire thread. I wax the outlining/overcasting thread but not the buttonhole thread itself.) to make it stick in the fabric better when I start off the thread.
I don't tend to tie it, I just do a couple of stabstitches or backstitches and it holds well. (I'm generally very thorough with tying off my threads when it comes to hand sewing, but a buttonhole is basically a long row of knots, so it's pretty sturdy.)

Put the needle through underneath, with the tip coming up right along that little outline you sewed earlier. And I personally like to take the ends that are already in my hand and wrap them around the tip of the needle like so, but a lot of people loop the other end up around the other way, so here's a link to a buttonhole video with that method. Try both and see which one you prefer, the resulting knot is the same either way.


Sometimes I can pull the thread from the end near the needle and have the stitch look nice, but often I grab it closer to the base and give it a little wiggle to nestle it into place. This is more necessary with the cotton than it is with the silk.
The knot should be on top of the cut edge of the fabric, not in front of it.

You can put your stitches further apart than I do if you want, they'll still work if they've got little gaps in between them.
Keep going up that edge and when you get to the end you can either flip immediately to the other side and start back down again, or you can do a bar tack. (You can also fan out the stitches around the end if you want, but I don't like to anymore because I think the rectangular ends look nicer.)
Here's a bar tack vs. no bar tack sample. They just make it look more sharp, and they reinforce the ends.

For a bar tack do a few long stitches across the entire end.

And then do buttonhole stitches on top of those long stitches. I also like to snag a tiny bit of the fabric underneath.

Then stick the needle down into the fabric right where you ended that last stitch on the corner of the bar tack, so you don't pull that corner out of shape, and then just go back to making buttonhole stitches down the other side.
Then do the second bar tack once you get back to the end.

To finish off my thread I make it sticky with a bit more beeswax, waxing it as close to the fabric as I can get, and then bring it through to the back and pull it underneath the stitches down one side and trim it off.


In my experience it stays put perfectly well this way without tying it off.
Voila! An beautiful buttonholes!


If you want keyhole ones you can clip or punch a little rounded bit at one end of the cut and fan your stitches out around that and only do the bar tack at one end, like I did on my 1830's dressing gown.

(I won't do that style in my video though, because they're not 18th century.)
Do samples before doing them on a garment! Do as many practice ones as you need to, it takes a while for them to get good! Mine did not look this nice 10 years ago.
Your first one will probably look pretty bad, but your hundredth will be much better!
Edit: Video finished!
youtube
And here's the blog post, which is mostly a slightly longer version of this post.
#ask#buttonholes#sewing#hand sewing#sewing tutorial#I've been procrastinating on the video this week#I want it done! I don't want to work on it I want new projects! I want to cut out more gloves!#currently forcing myself to do the last few buttonholes on these pants and then maybe I can cut out new gloves? as a treat?#but I hope I get some filming done tomorrow too
4K notes
·
View notes
Text
so i opened twitter again after so long today. aaand the last time i logged in was 24 dec but even before then, i rarely spend more than 2 minutes on the platform.
i think what's really interesting was just how quick a sense of doom settled in me, and my feed wasn't even particularly negative. it's heavily, strictly curated to only show people i personally know or in a community with, but either way the only people i kept following from both of those groups are not the kind of people that consistently bring ~drama~ and controversial tweets to my feed. and yet.
even before i finished catching up to all the tweets i missed (which wasn't a lot -- i followed like 50 people? and half of those are barely active like me) i started getting ... tired. but it's in the middle of the night and i can't sleep and i haven't been on the bird app for a while, so what the hell let's just keep going. then the tiredness slowly got worse even though by this point, the closest thing to a "negative" bullshit i saw on my feed was just a friend of mine clowning on an andrew tate tweet that wasn't even all that bad. (tate was quoting al-baqarah, lol.)
ok, ok, so maybe it's the timeline, the homepage. it's the stuff from other people that, while am almost certain they won't bring too much negativity to my eyes, i still can't be 100 per cent sure. maybe that uncertainty made me feel kinda uneasy. so i switched to my own profile, completely filled with stuff i retweeted because they brought me joy, but still, i started feeling something close to a fatigue. then pretty quick i seriously started thinking, "holy shit i want to die."
which is fucking wild, by the way. i haven't had anything close to suicidal thoughts in probably months -- not unironic like this, anyway. and it's all just because i was scrolling through twitter. but it was pretty fucking addictive, not gonna lie. if i hadn't thought about killing myself or whatever, i might've continued scrolling until who knows when and what state of mind i'll arrive in.
i genuinely don't know what it is about twitter. i always thought the whole thing about twitter and other similar social media apps weighing people down and affecting their mental state negatively was just about the stuff that actually appears on their feed but as i said: almost the entirety of my feed was fine. there was nothing really outrageous or maddening or frustrating like it was fine. but still within seconds i started doom scrolling and the only reason i snapped out of it was because i caught sight of a super massive red flag.
i don't know if it was because the app UX specifically overwhelmed me, or i simply already had too much negative experiences on twitter that that affected the way i saw and interacted with the app, or if it was something else entirely. i just know that the fucking bird app is pure evil. it made me want to kill myself simply by being in it and -- no fucking thanks.
#suicide mention#personal#it's legitimately a fucking wild experience by the way#it was a lot like when you stop eating mcd's and then when you eat it again it makes you sick#except it's on entirely different level of sinister#anyway yeah am deleting the app i think#i kept it around just to save yixing pics from all the other accounts (lol) but considering i haven't even done that in a long while#am just going to delete the whole thing#auuuuggghhh i'll have to readjust with my app drawer though. hnnnnnnggghhhhh i hate when the orders shuffle
0 notes
Last Seen Blogs

nypdfinn
new york's finest
sticksspace
Fillian
there-are-many-ways-to-smile
My Heart To Hold


niltad-machine23
Sans titre