#how to publish html website on free hosting
Explore tagged Tumblr posts
Visit Tumblr Blog
Explore Tumblr blogs with no restrictions, modern design and the best experience.
Last Seen Tumblr Blogs


Fun Fact
The KCSC sent more than 20K requests to delete posts related to prostitution and porn to Tumblr from January to June 2017.
Text

the tl;dr
IRON CROWN as a free comic is now off of wordpress and can be viewed by a neat, robust HTML/CSS/JS comic template called rarebit! effectively nothing has changed for the reader, beyond expecting a little more reliability of uptime over the years.
all comic pages and previously paywalled patreon posts can also be downloaded in this art dump for free, as mentioned in the new author's notes.
the long story:
When talking shop about site/platform moves under this handle, I think it's useful to realize that us (taboo) kink artists live in an actively adversarial internet now, compared to five years ago.
meaning that we have to live with an expectation that 99% of platforms (including registrars and hosting, let alone sns sites) will ban/kick us without warning. this might explain the overly cautious/defensive way we discuss technologies - weighing how likely (and easily) the tool can be used against us vs the perks.
for example: has a harassment mob bullied the platform owners into quietly dropping lolisho artists? trans artists? does the platform/technology have a clear, no-bullshit policy on drawn kink art (specifically third rail kinks like noncon)? does the platform have a long history of hosting r18 doujin artists/hentai publishers with no issue? does the company operate in a nation unfriendly to specific kinks (eg fashkink artists fundamentally incompatible with companies based in germany, when other kinks might be OK?). i talk with a few different groups of artists daily about the above.
but that gets tiring after a while! frankly, the only path that's becoming optimal long-term is (a) putting kink art on your personal site, and if possible, (b) self hosting the whole thing entirely, while (c) complementing your site with physical merch since it's much harder to destroy in one go.
with that said - I've been slowly re-designing all of my pages/sub-domains as compact 'bug out bags'. lean, efficiently packed with the essentials, and very easy to save and re-upload to a new host/registrar near instantly (and eventually, be friendly to self-hosting bandwidth costs since that's now a distant goal).
how does this look in theory, you ask?
zero dependencies. the whole IRON CROWN comic subdomain is three JS files, a few HTML files, one CSS file, and images. that's it.
no updates that can be trojan horse'd. I'm not even talking about malware though that's included; I'm talking about wordpress (owned by the same owners as tumblr cough) slipping in AI opt-outs in a plug-in that's turned on by default. I used to think wordpress was safe from these shenanigans because wordpress-as-a-CMS could be separate from wordpress-as-a-domain; I was wrong. they'll get you through updates.
robust reliability through the KISS principle. keep it simple stupid. malware/DDOS'ing has an infinitively harder time affecting something that doesn't have a login page/interactive forms. You can't be affected by an open source platform suddenly folding, because your "starter" template is contained files saved on your desktop (and hopefully multiple backups...). etc.
so how does this look in practice?
To be fair, you're often trading convenient new shiny UI/tools for a clunkier back-end experience. but i think it's a mistake to think your art site has to look like a MIT professor's page from 1999.
with IRON CROWN, I've effectively replicated it from a (quite good) comic template in wordpress to 98% of the same layout in pure HTML/CSS/JS via rarebit. Should rarebit's website go "poof", I've got the initial zip download of the template to re-use for other sites.
I frankly have a hard time recommending rarebit for an actively updating webcomic since you personally might be trading too many advantages like SEO tools, RSS feeds, etc away - but for a finished webcomic that you want to put in "cold storage" - it's amazing. and exactly what I needed here.
45 notes
·
View notes
Text
Entry 8: Snowball Instigator
1/15/25
The past few days have consisted of two things: one, settling on a website host/builder and a domain – and thus also my penname! – and experimenting with that; and two, in general leaning into that momentum and making several other important choices.
While there’s still a lot to be done and decided, I feel good about the progress made. As of right now and barring any surprises, these are the things I’ve decided:
Initial publishing platforms and formats
Book dimensions
Map artist
Crowdfunding platform and tip-gathering platform
Penname and thus website domain name
Newsletter / mailing list service
(Though not quite a ‘decision’ per se) Initial social media platforms
Next on the docket while I wait for a friend’s graphic design portfolio are determining what ARC service I’d like to use, narrowing down what rewards/perks/merch I want to offer and in what circumstances and thus what fulfillment service(s) I want to use, and most of all – my cover illustrator/designer.
The ‘next up’ items notwithstanding, I’d been hemming and hawing over a lot of these decisions. Their interconnectedness made it difficult and to an extent, still does. However, the good news is that once you just go ahead and make a decision on one of them, it’s freeing, and makes it a bit easier to go ahead and make others. The good news is that a lot of services/platforms nowadays make it relatively easy to change your mind and migrate elsewhere if you really fuck up.
In general I’ve been reflecting that we have so many more tools at our disposal than we did ten, twenty years ago. I remember being rather young and wanting a website of my own (back when the internet was starting to become something bigger), and my dad teaching me the basics of HTML. Nowadays there’s things like drag-and-drop! How novel! Much wow. So truly, as daunted as I’ve felt with all the things I have to decide and try out and set up, it’s not so bad. If you have even a mouse’s share of common sense you can generally find your way, and like I said, if you change your mind or something goes awry, there’s rarely a situation where it’s devastating and irreparable.
Anyway, several of the things I mentioned I’m not quite ready to share yet, but there are at least two things for now: come find me on Bluesky*, and as you may have guessed, I’ve landed on Tamara S. Harker for my penname for my fantasy books! Thank you to everyone who’s voted in the poll I sent. <3 * Bluesky won't be my only social media platform, so only find me there if you'd like to!
+++++ Baroness' Self-Publication Journal Masterpost I'm journaling what I uncover as I do more research for self-publication of my novel! I'll be using the tag "#sp journal". All of this will eventually wind up as part of a larger, more detailed guide for which I'm making notes.
2 notes
·
View notes
Note
how did you find the move from choicescript to twine?? I've been working on a project in choicescript but not really sure I want to host it there anymore
hello! thank you for the ask,
preface, i think both tools are great for what they were built for. i had a good time with choicescript and it was a good introduction to what variables can be used for and structuring an if game. if you don't care about UI/ appearance, then choicescript makes sense.
i will be real and say, the move to twine was difficult personally lmao because i had no experience with html, css, or javascript prior to the move -- but that shouldn't put you off. my personal approach to it was that it's a learning opportunity.
be prepared to be 'not good'. learning something new can be a really frustrating and discouraging process. things won't work the first time round, they never do, but keep reminding yourself that this is a process and the progress, and your understanding, will come with time! the best quality a dev can have is patience, especially in the if circle.
if you go into twine thinking about your long form game/project and try to port things immediately into a template, i think it will really mess with you. make something tiny first, like a tutorial game, and when you're ready move up to the long form stuff.
you don't have to do it my way, but the best way for me to learn was to just get hands on with twine templates other developers have made. get a feel for the twine programme, language, layout, interface etc etc. i will tell you right now the second day i started learning twine/ sugarcube i got stuck on how to //open// an imported file haha. learning is hard and it sucks but now i've built my own interface for my own game!
all this being said, you don't even HAVE to build an interface for your game -- it comes with a default UI that you can start using straight away. so, if you don't care about the ui/ aesthetics, twine can still be an option.
i do want to touch on publishing, because that is a huge aspect of if. twine is a free open source tool and choicescript is not. if you get to the point where you finish a game and can publish with cog/ hosted games, then just be aware that you do not //own// your own writing because it is in the choicescript language. you will only own the IP.
i was stubborn about choicescript for a very long time, i still think it has better accessibility //because// the interface is basic and the appeal of going through a publishing house is very understandable. they have a huge reach and an established audience so there's no doubt of your game having eyes on it.
twine has an advantage being open source because no one owns it. plus, it encourages self-publishing and i think that's a great thing to aspire to as a writer! i love chop shop even more now because i built and own the whole thing. technically, twine games don't even need to be on itch.io because they're just html files, so they can be hosted anywhere that supports html. if i had a website for example i could just embed it into a page.
obviously, i am going to have a lot of bias towards twine since i made the move myself haha. i'm not trying to put my own feelings into this because COG as a company was a whole other reason why i moved and that won't be discussed on this blog.
you don't have to move to twine if you don't want to publish through COG, i'm pretty sure choicescript games can be hosted on itch.io.
edit: from @/hpowellsmith in the replies: you can have a contract with Hosted Games to monetise a ChoiceScript game on itch or elsewhere online where you pay them a smaller percentage of revenue than if you're published through Hosted Games
i think if you're happy with choicescript and COG/ hosted games then go for it and, if not, there are other options out there!! it doesn't have to be twine but it's probably one of the better tools for interactive games and has a wealth of help guides/ tutorials.
sorry this was so LONG, but thanks for reading if you got this far anyways :^)
#general ask#sorry this got long! lmao#again i'm not trying to like lakeith stanfield you and scream GET OUT but just consider your options#choicescript just ended up not being the tool for me and that's okay#and good luck with your project! plus i can always help with twine problems if needed :-)#edited: read the replies too! good good advice and insight
40 notes
·
View notes
Text
Blogging and digital learning
Blogging refers to writing, photography, and other media that's self-published online. Blogging started as an opportunity for individuals to write diary-style entries, but it has since been incorporated into websites for many businesses. The hallmarks of blogging include frequent updates, informal language, and opportunities for readers to engage and start a conversation.
What Is Blogging?
The word blog is actually a shortened form of its original name, "weblog." These weblogs allowed early internet users to "log" the details of their day in diary-style entries. Blogs often allow readers to comment, so as they became more common, communities sprung up around popular blogs.
If you want to create your online presence and share content you are passionate about, blogging can be a lucrative career choice. In this article, we answer, “What is blogging?”, explore its advantages, understand how you can start blogging and make money from it and share some tips for running a successful blog.
How Blogging Works
Blogging is as simple as obtaining a website and publishing original content on it. Tech-savvy bloggers can buy a domain name and build the website themselves. Those with less HTML knowledge can create an account with sites like WordPress that simplify the web design and publishing process.
Blogs are usually simple websites. Older pieces may be archived in separate sections of the site, and there may be a separate page with contact info or a bio, but the blog itself is usually just a single page that can be scrolled through—similar to the news feed on social media sites like Facebook. As with a Facebook news feed, a blog displays the newest content at the top of the page.
Pros and Cons of Blogging
Pros
Good for SEO
Maintains communication with customers
Builds rapport with customers
Generate alternate income
Cons
Time-consuming
Constantly requires fresh ideas
Payoff is delayed
Blogging in and of itself won't generate income
Requirements for a Blog
The good news is that starting a blog or adding a blog to your existing site is relativity easy and affordable. All you have to do is follow these four steps.
Set Up the Blog
There are free blog options such as WordPress and Blogger, but to retain control and a professional image, consider investing in a domain name and a hosting service. You can install WordPress or another content management system on your host if you don't want to create the whole site from scratch.
Add Content
Once your blog is up and running, you need to keep it active with new content to grow your business. Develop a set schedule for writing and posting blog articles. Create a content calendar so you always know what you're going to post.
Market
Like all other business ideas, your success comes from marketing and getting your message in front of your target market. Great ways to reach your market are through social media apps, email lists, and by reaching out to other bloggers, podcasters, and media outlets for publicity. Repurpose your blog content to promote your business across platforms, such as by using quotes on your Twitter or Instagram profiles, or by creating a video of your article to share on YouTube.
Add Income Streams
While your blog can complement an existing business, it's also a great way to add additional income streams to your home business. You can promote other companies' products and services in affiliate marketing. You can advertise or feed ad networks, such as AdSense, on to your blog. If you have a service business you're promoting with your blog, you can create your own information products to complement it. Or, if you have your own product, you can offer a service.
2 notes
·
View notes
Text
How to Use ContactFormToAPI to Connect Your Static HTML Forms to Zapier
In the modern web development landscape, building fast, secure, and serverless websites is more popular than ever. Static sites are blazing fast, cost-effective, and often hosted on platforms like GitHub Pages, Netlify, or Vercel. But one lingering challenge remains: how do you handle form submissions without a traditional backend?

Enter ContactFormToAPI, a powerful no-code solution that connects static HTML forms directly to any API endpoint, including Zapier. By bridging this gap, you can easily automate workflows, capture leads, and integrate with countless apps—without spinning up a backend or writing server-side logic.
In this guide, we’ll walk through how to use ContactFormToAPI to connect your static HTML forms to Zapier, so you can trigger zaps every time someone submits a form on your website.
What You'll Need
A simple HTML website or static site (can be hosted anywhere)
A Zapier account (free or paid)
A ContactFormToAPI account (free tier available)
Step 1: Create Your HTML Form
Here’s a basic contact form you might include in your HTML site:
<form id="contactForm" method="POST" action="https://contactformtoapi.com/api/YOUR_UNIQUE_ENDPOINT">
<input type="text" name="name" placeholder="Your Name" required>
<input type="email" name="email" placeholder="Your Email" required>
<textarea name="message" placeholder="Your Message" required></textarea>
<button type="submit">Send</button>
</form>
Note: You’ll replace YOUR_UNIQUE_ENDPOINT with the actual endpoint provided by ContactFormToAPI. We'll set that up next.
Step 2: Create a Zap in Zapier
Zapier is an automation platform that connects your apps and services. Our goal here is to make a Zap that triggers when a form is submitted via ContactFormToAPI.
1. Log in to Zapier
Visit zapier.com and sign in.
2. Create a New Zap
Click the “+ Create Zap” button.
3. Set the Trigger App to "Webhooks by Zapier"
Select Webhooks by Zapier as your trigger app.
Choose Catch Hook as the trigger event.
Zapier will now generate a unique webhook URL. Copy this URL—we'll use it in the next step.
Step 3: Set Up ContactFormToAPI
Go to the Contact Form to Any API and sign in or create a free account.
1. Create a New Form Endpoint
Click “New Form” or “Create Endpoint.”
Name your form (e.g., "Zapier Contact Form").
In the Webhook URL, paste the Zapier webhook URL you copied earlier.
(Optional) Enable reCAPTCHA or set a redirect URL after submission.
Click Save to generate your unique endpoint URL.
2. Update Your HTML Form
Replace YOUR_UNIQUE_ENDPOINT in your form’s action attribute with the new endpoint URL provided by ContactFormToAPI.
Example:
<form action="https://contactformtoapi.com/api/abcd1234">
3. Test the Form Submission
Fill out and submit the form on your website.
Zapier should detect the test data, and you’ll be prompted to move to the next step in building your Zap.
Step 4: Configure the Zap Action
After Zapier catches the hook, you'll configure what happens next:
1. Choose an Action App
Select any app where you'd like the form data to go:
Gmail (send email notification)
Google Sheets (log new entries)
Slack (send a message to a channel)
Notion, Trello, Airtable, Mailchimp, etc.
2. Map the Form Fields
Zapier will show the form fields (name, email, message). Match these fields with the action app's fields.
3. Turn On Your Zap
Click Publish Zap to activate it. Your static form is now fully connected!
Real-World Use Cases
Here are some creative ways you can use ContactFormToAPI + Zapier:
Newsletter Signup: Collect emails and add them to Mailchimp.
Support Form: Create a ticket in Trello or Zendesk.
Lead Generation: Send qualified leads directly to your CRM.
Job Application Form: Upload applicant details to Google Drive and notify HR in Slack.
Survey Feedback: Append responses to a Google Sheet for analysis.
Benefits of Using ContactFormToAPI with Zapier
No backend needed: Eliminate server setup and maintenance.
No-code friendly: Ideal for marketers and designers.
Fast setup: Get working forms live in minutes.
Highly flexible: Connect with over 5,000 apps via Zapier.
Security ready: Includes spam protection and HTTPS by default.
Tips for Success
Use reCAPTCHA v2 to protect your forms from bots.
Set up redirect URLs for a smoother user experience.
Add error handling by showing fallback messages if the form fails.
Log form data to a Google Sheet as a backup.
Conclusion
Thanks to ContactFormToAPI and Zapier, static websites can now have fully functional, automated forms without a backend. Whether you're building a landing page, portfolio, or marketing site, this powerful combo enables you to collect and route form data with ease.
0 notes
Text
The Best Free Blogging Platforms to Start Your Blog:
Blogging has been an affordable and simple means of communicating your ideas, experiences, or knowledge to the world. Whether you are interested in recording your personal life, building a brand, or making money, blogging is a multipurpose tool for expression and communication. The most daunting entry point for blogging is the upfront cost. Luckily, there are a number of free blogging sites that you can use to get started without spending money on hosting or web design.
Here, we will review the top free blogging sites of 2025, giving you an overview of features, advantages, disadvantages, and how they can assist you in putting your blog online fast.
1. WordPress.com
Overview: WordPress.com is a free blogging platform that is widely used, and many people get it mixed up with WordPress.org. WordPress.com is hosted, so you don’t have to deal with the technical side of your site. It’s great for newbies who want to concentrate on writing and publishing content.
Features:
Ease of Use: WordPress.com has a simple editor and easy setup. It is a great solution for newbies without any technical knowledge. Customization: You have lots of themes and templates to select from, though you can do little customization if you’re going with the free version. Free Domain: You’ll receive a subdomain (e.g., yoursite.wordpress.com), though you can use a custom domain as you become larger. Basic Analytics: WordPress.com offers you limited analytics with which to analyze your blog performance.
Pros: Easy-to-use interface Solid hosting that doesn’t involve any technical admin Good lineup of free themes Great support and community
Cons: Weak customization without paid upgrades Advertisements shown on your blog Few monetization choices (no ads or affiliate links in the free version)
Best For: New bloggers who would like to blog with minimal configuration and are happy to evolve into a paid version later.
2. Blogger:
Overview: Blogger, which is owned by Google, has been in existence for several years and is still one of the simplest and most uncomplicated blogging platforms for a beginner to learn. Blogger’s connection with Google’s ecosystem makes it an excellent option for users who already make use of Google tools.
WordPress.com is a free blogging platform that is widely used, and many people get it mixed up with WordPress.org. WordPress.com is hosted, so you don’t have to deal with the technical side of your site. It’s great for newbies who want to concentrate on writing and publishing content.
Features:
Ease of Use: Blogger is easy to install and operate, with an intuitive dashboard. Customization: Blogger has some degree of flexibility in terms of its templates and themes. It is, however, possible to take some basic knowledge of HTML/CSS to be able to customize it completely. Free Domain: You are provided with a free subdomain (yoursite.blogspot.com), and you can redirect to a custom domain if desired.
Pros:
Free to use with no surprises Simple setup Integrates well with Google services like Analytics and AdSense Cons:
Outdated and limited design options compared to newer platforms Customization is possible but requires some technical knowledge No official support from Google for Blogger
Best For: Beginners looking for simplicity and integration with Google tools, or those who want an easy-to-manage blog without many bells and whistles.
3. Medium
Overview: Medium is a content-first and writing-focused platform as opposed to website customization.
Features:
Clean and Minimalist Design: Medium is all about the content, so it provides a stunning, distraction-free writing environment. Built-In Audience: Medium has a built-in audience of a great many readers who can see your blog sooner. It also provides the opportunity to become part of the Medium Partner Program and earn income from your posts. Claps and Followers: Readers are able to “clap” (like) your posts and follow you for more updates, building momentum for your content. Editorial Tools: Medium features a minimalist but robust editor with straightforward formatting and media embed functionality such as pictures, video, and hyperlinks.
Strengths:
Sleek and uncluttered design oriented to content Pre-existing reader for visibility Medium Partner Program with opportunities for profit Nothing to be concerned with regard to hosting, safety, or maintenance
Weaknesses:
Too limited customization options (you can’t modify your blog’s appearance or layout) You don’t completely own your audience (Medium owns the platform and can modify rules at any time) Fewer monetization options beyond the Medium Partner Program
4. Wix:
Overview: Wix is one of the best website builders with free blogging. Wix is famous for its drag-and-drop editor, making it simple to build beautiful websites and blogs without writing any code.
Features:
Drag-and-Drop Editor: With Wix, it’s simple to design a personalized layout for your blog, even if you have no technical knowledge. Design Flexibility: You have access to a big library of customizable templates to fit your blog’s niche or look. Free Plan: Wix offers a free plan with hosting and a subdomain (e.g., yoursite.wixsite.com). You can then upgrade to eliminate ads and get a custom domain. Mobile-Optimized: Wix takes care of making your blog mobile-friendly without additional effort.
Advantages:
Very user-friendly with drag-and-drop features Wide variety of design choices Great for visually-oriented blogs (photography, design, etc.) Good customer service and resources
Cons:
Ads and Wix-branded domain come with free plan Less functionality than paid plans Can get costly if you need advanced features
Best For: Creative people or those who have visually-oriented blogs and prefer a basic, customizable platform.
5.Weebly:
Description: Weebly is a simple-to-use website creation platform that has free blogging tools. It’s built for those who wish to quickly make websites without struggling with difficult technical aspects.
Features :Drag-and-Drop Editor: Weebly has a drag-and-drop editor, which makes designing your blog simpler without coding expertise. Mobile Compatibility: Weebly has responsive themes that resize properly to fit on mobiles. Built-In eCommerce Features: Even on the free plan, Weebly has basic eCommerce features, which might be useful if you’re looking to sell products via your blog. Free Subdomain: Similar to other platforms, Weebly also includes a free subdomain (e.g., yoursite.weebly.com).
Pros :Easy-to-use and intuitive interface Flexible themes and design Good inbuilt features for bloggers who want to venture into eCommerce Mobile-friendly templates
Cons: Free plan comes with Weebly branding and a subdomain Free plan has limited storage More advanced features call for a paid plan upgrade
Best For: Bloggers seeking a simple-to-use, integrated platform with eCommerce and blogging functionalities at no cost.
0 notes
Text
How to Build Your First Page in Elementor Plugin
What Is Elementor
Elementor is a popular WordPress page builder plugin. With which you can easily create a website by dragging and dropping in a short time. Nowadays WordPress's page builder plugin has brought a revolutionary change in the work of website design and has made it very easy and a matter of minutes. Elementor Plugin works on drag and drop and does not require any coding, HTML, PHP knowledge.
How To Download Elementor Page Builder
Elementor page builder is the most popular page builder in the world. This is the most popular page builder in the WordPress community. This page builder has left all other page builders behind and has made its place at the top. Now most of the WordPress websites are being built in Elementor page builder. Its specialty is that you can import a ready demo website and its customization is very easy. To use it, you only need basic computer knowledge and creativity.
To download it, you can go to its official website https://elementor.com/ or you can download it by clicking on the link given below.
Key Features of Elementor
Elementor has a library of over 300 premade templates
Has multilingual capabilities in both left-to-right and right-to-left languages
Provides mobile view for editing across devices
No coding HTML PHP knowledge required
Elementor is a drag-and-drop page builder Plugin है
Custom breakpoints based on device size
Complete method of Elementor installation – Elementor Installation Process
If you are wondering how to install Elementor, never fear. Doing so is as easy as using the interface. Just follow the steps we have mentioned below-
Login to your WordPress admin account.
You can go to your WordPress Dashboard and click Plugins>Add New.
Discover Elementor.
Install and activate the Elementor Plugin.
How to start website development with Elementor?
The Elementor interface has several key elements:-
Main canvas: This is where you can place and manage content blocks.
Available content elements
Access to settings for element colors, fonts, etc.
Global settings for the page you're working on.
The revision history of the page you are working on.
Ability to switch device view (desktop, mobile, tablet).
Preview your changes.
Finally, publish your page.
To build a page with Elementor, you need to understand the page structure that Elementor uses:-
A page can have many types of sections.
Each section can have one or more columns.
Each column is capable of holding one or more content elements.
You can style each content element individually.
To start, you can either add a ready-made template or include a blank section. Inside the new section, you can add new columns and then add content to these columns by dragging and dropping special blocks from the sidebar.
Once you have a content block, you can click on it to manage what's inside it and the finer details of its presentation. There are three primary tabs for doing this: content, style, and advanced.
Is Elementor Good for SEO?
Elementor itself is neutral regarding SEO. It allows you to create attractive, functional websites, but SEO success also depends on content quality, site speed, and other SEO practices. Elementor does allow for easy editing of important SEO aspects like meta titles and descriptions.
Can Elementor Edit Any Theme?
Elementor is designed to work with most WordPress themes. However, for optimal performance and compatibility, it’s best to choose themes that are specifically designed to be compatible with Elementor.
Does Elementor Slow Down My Site?
Elementor can add extra code to your site, which may impact loading times. However, this effect is usually minimal. Keeping your site optimized, choosing a good hosting provider, and using caching can mitigate any potential slowdowns.
Elementor FREE widgets
Unlock the potential of Elementor with our comprehensive suite of free widgets and tools, designed to empower your website creation process and elevate your design capabilities:
Heading. Add eye-catching headlines.
Image. Control the size, opacity and more.
Text Editor. Just like the WordPress editor.
Video. Add YouTube, Vimeo, Dailymotion or self-hosted videos.
Button. Create interactive buttons.
Link in Bio. Build link in bio components to promote your business / services.
Image Box. A box with image, headline and text.
Testimonials. Customer testimonials.
Icon. Place one or more of 600+ icons available.
Icon Box. An icon, headline, and text with one widget.
Social Icons. Link to your social pages with the Facebook/X (formerly Twitter) icons.
Image Gallery. Display your images in a grid.
Image Carousel. Create rotating carousels or sliders for chosen images.
Icon List. Use any icon to create a bullet list.
Counter. Show numbers in an escalating manner.
Progress Bar. Include an escalating progress bar.
Nested Tabs. Display content in vertical or horizontal tabs.
Nested Accordion. Display any type of content in collapsible sections.
Toggle. Use the Toggle to hide or display content, like FAQ.
Rating. Display how many stars (or another icon) other visitors gave.
Alert. Include a colored alert box to draw visitor’s attention.
HTML. Insert code into the page.
Shortcode. Insert shortcodes from any plugin into the page.
Menu Anchor. Link any menu to this anchor.
Read More. Set the Read More cut-off for the excerpt in archive pages.
Sidebar. Add sidebars onto the page.
Google Maps. Embed maps into the page.
SoundCloud. Add SoundCloud audio bits.
Divider. Separate content with a designed divider.
Spacer. Add space between elements.
Text Path. Attach your text to a path.
And counting…
Are WordPress and Elementor Different?
Yes, WordPress and Elementor are different platforms, each with its own unique features and capabilities.
WordPress is a content management system (CMS) that allows users to create and manage websites, while Elementor is a drag-and-drop page builder plugin that can be used with WordPress to design and customize web pages.
Elementor, on the other hand, is a plugin that can be used with WordPress to create custom web pages.
It is a drag-and-drop page builder that allows users to easily design and customize web pages without needing to know how to code.

Screenshot of the Elementor editor
While WordPress and Elementor are different platforms, they can be used together to create a powerful website.
By using WordPress as the CMS and Elementor as the page builder, users can create a custom website that meets their specific needs and requirements.
#Latest WordPress Plugins#Elementor WordPress Plugin Tutorial#Free Elementor Plugin For WordPress#Is My Site Secure With Elementor
1 note
·
View note
Text
Vidhive Review – Next-Gen Video Hosting & Marketing Platform
Welcome to my Vidhive Review Post, Where I will discuss the features, upgrades, demo, price, and bonuses, how Vidhive can benefit you, and my opinion. The world’s first and most powerful technology Let us upload, customize, and publish unlimited videos at lightning speed for an unbeatable low one-time price, skyrocketing your sales and leads.
Every time we wish to learn something, we use the main search engines to look up online training programs. Because of this, the e-learning industry is now the one expanding at the highest rate and is expected to reach a market size of $398 billion by 2026. The primary cause of this is the global rise in internet users, which also presents you with an AMAZING opportunity to access this enormous industry and raise your income. And you can do so with ease thanks to Vidhive, which gives you the ability to make your own playlists and video channels and sell online courses in order to profit greatly from one of the marketplaces with the quickest growth. Also, you may enjoy fast uploading without buffering or delays in providing consumers with high-quality video content while saving thousands of dollars on video hosting platforms. “Vidhive” is a Powerful & Proven Solution for Effectively Marketing Items and Services through Video Hosting.
Vidhive Review: What Is Vidhive?
Vidhive is a cutting-edge Video Hosting tool that dazzles your audience with lightning-fast, seamless video playback on any website, page, or device. With the power to create custom channels and playlists, you’ll captivate your viewers, drive more product sales, and elevate customer satisfaction to new heights.
Imagine being able to host, Manage and publish thousands of 8K videos without any uploading issues or buffering issues without worrying about reaching any uploading or viewing limits or being forced to pay every month for your business.

Vidhive Review: Overview

Creator: Laxman Singh
Product: Vidhive
Date Of Launch: 2024-May-02
Time Of Launch: 11:00 EDT
Front-End Price: $17 (One-time payment)
Official Website: Click Here To Access
Product Type: Software (Online)
Support: Effective Response
Discount: Get The Best Discount Right Now!
Recommended: Highly Recommended
Bonuses: Huge Bonuses
Skill Level Required: All Levels
Discount Code: “VISTA3” Get $3 OFF Instantly!
Refund: YES, 30 Days Money-Back Guarantee
<<>> Click Here & Get Access Now Vidhive Discount Price Here <<>>
Vidhive Review: About Authors

Vidhive was created by Lalit Chhipa and Laxman Singh. They have changed the world of video hosting and marketing with their joint knowledge and love of technology. Lalit & Laxman here a 6 fig Internet Marketer with my partners Laxman & Lalit. Two veteran marketers who have been running a 6-figure online business for the last 5 years. We’re blessed to be living a Laptop Lifestyle. Together we have spent 15+ years in the Online Marketing Space and generated millions of dollars in sales. And we are always looking for that golden niche that we could Tap into for making more profits.
His portfolio includes a number of significant products, including ODIO, Fab AI, Vidvista, 360HUB AI, InboxSumo AI, Audio Journal AI, MindPal AI, MusikPay, Fiverrpayz, and many others
Vidhive Review: Features
Upload, Store & Publish all your videos in just 1-click!
VidHive comes with HTML 5, supporting all kind of videos.
VidHive supports FFMPEG video conversation, you can upload all kind of videos with resolution upto 8k.
Create channels & playlists to keep your audience engaged with videos.
Play videos on any website, landing page, online shop or membership site in simple steps.
In-Built Thumbnail and Image Designing Feature.
FREE COMMERCIAL LICENCE
100% Newbie Friendly.
99.99% Up Time Guaranteed.
Nothing to download and install. Get Started in 2 minutes.
30 Days Money-Back Guarantee.
ZERO Upfront Cost.
Vidhive Review: How Does It Work?
All It Takes Is Just 3 Steps To Start Your Own Video Hosting & Marketing Agency
STEP #1 — Login & Upload
Login and upload one or more videos at a time and let VidHive optimize them for faster delivery on any browser, page & device.
STEP #2 — Choose the player
VidHive comes with HTML5 Players, supporting all kind of videos & advertisment. It supports FFMPEG video conversation, you can upload all kind of videos with resolution upto 8k.
STEP #3 — Publish & Profits
Publish your video and share on any landing page, website or device and watch your customer engagement, sales and Profits rolling in fast.
<<>> Click Here & Get Access Now Vidhive Discount Price Here <<>>
Vidhive Review: Can Do For You
Host Unlimited Videos: There is No Limit to What You Can Do and Make money with VidHive. You can upload UNLIMITED videos, capture unlimited leads from unlimited visitors.
Ad-Free Videos to Skyrocket Engagement: Being Ad Free Means You Don’t Annoy Your Viewers… It goes without saying that annoyed visitors don’t buy. Plus, you’re never going to lose your hard-earned traffic to other people with their sneaky ads…
SEO Friendly: Give your video a meta title, description, kws & thumbnail image for better ranking. You also can disallow search engines with no follow or no index settings in few clicks.
Create Playlist/ Channels: Organize all your videos seamlessly into easy-to-manage playlists to bump up engagement levels. Keep your audience closely connected by giving them their preferences & don’t let them get distracted.
Unlimited Audience: No limit on visitors. Get as many as visitors we will not charge a single penny for it.
Unlimited Views: There is No Limit on views like other third-party platforms. Capture unlimited views from unlimited visitors.
Unlimited Lead Finds with Lead Finder Tool: Get unlimited leads with our exclusive lead finder tool.
100GB Storage: Host upto 100GB of videos without any restrictions, to get you started with creating your channel & playlist.
250GB Free Web Hosting: Best part is, you’re getting hosting for up to 250 GB bandwidth/month for a one-time price during this launch.
Ultra-fast Bandwidth: Every single second delay in your videos and content loading — can decrease your sales, visitor engagement & customer satisfaction by 20% We make sure that the videos play without buffer/delay on any mobile or desktop device — with minimum internet bandwidth every time.
Ultra-Light & Attractive Player that works on any Device: It’s also completely customizable to your exact specifications. The HTML Player is Perfectly Optimized to play videos on ALL devices & it’s 100% Mobile Responsive.
Embed anywhere with embed code Feature: Publish Your Videos Anywhere You Like by just copy & pasting 1 Line of Embed Code on ANY Website, Landing Page, Online Shop or Membership Site!
Support all types of videos format: Add Videos in MP4 or FFMPEG format to optimize them to deliver at lightning-fast speed on any device with full 8K support.
Go Viral with Social Sharing Feature: Get numbers of visitors interested in what you have to say on video page & allow visitors to share your videos on top social media sites for viral traffic & lead.
Commercial License: For a limited time only. VidHive comes with a commercial license… Which allows you to sell this as a service to anyone if you want.
30 Days Money Back Guarantee: Your purchase of VidHive is backed with Iron Clad 30 days money back guarantee, if you think it is not worth.
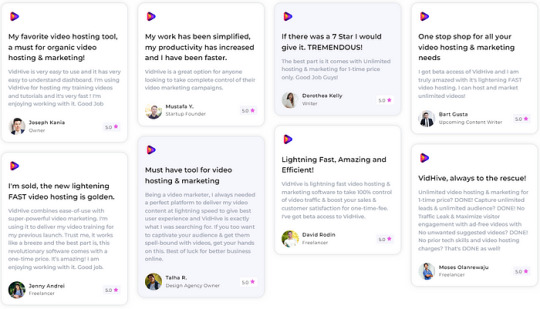
Vidhive Review: Verify User Feedback
Vidhive Review: Who Should Use It?
Business Coaches
Affiliate Marketers
Ecom Sellers
Digital Marketers
Software Seller
Online Gamer
Video Editors
Freelancers
Gym
Music Classes
Bars
Schools
Doctors
Car Dealer
Real Estate
Vidhive Review: OTO’s And Pricing
Front End Price: Vidhive ($17)
OTO 1: Unlimited ($37)
OTO 2: DFY ($97)
OTO 3: 10K Traffic ($67)
OTO 4: Profit Campaigns ($47)
OTO 5: Agency ($47)
OTO 6: Reseller ($67)
OTO 7: Whitelabel ($97)
<<>> Click Here & Get Access Now Vidhive Discount Price Here <<>>
Vidhive Review: Why You Must Grab It
Next Generation Video Hosting Technology
Play videos on any website, landing page, online shop or membership site in just 3 easy steps.
Create channels & playlists to keep your audience engaged with videos.
Image editor to edit images to create captivating thumbnails for your videos.
Free hosting included — up to 250 Gb bandwidth/month.
Get 5 attractive video player with complete customization & optimized to work on all devices.
Have 100% control on your traffic — no traffic leakage with unwanted related videos.
Seamless integration with top autoresponders.
Zero technical skills required. A-Z complete video training included.
Upload unlimited sales, e-learning, training, client prospecting or demo videos.
Sell more products or services and get more customer satisfaction.
Super-fast delivery (after all, time is money!) No buffering. No delay. Get up to 20% more conversions.
100% mobile responsive video pages and player
Vidhive Review: My Unique Bonus Bundle
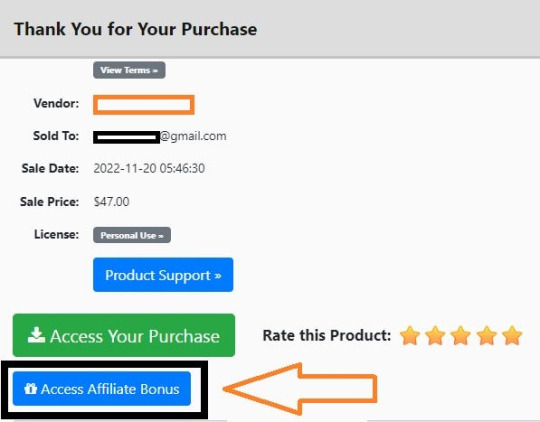
My Unique Bonus Bundle will be visible on your access page as an Affiliate Bonus Button on WarriorPlus immediately after purchase.
And before ending my honest Vidhive Review, I told you that I would give you my very own unique PFTSES formula for Free.
Vidhive Review: Free Bonuses
Bonus #1: Training For Start Email Marketing (Value $397)
By taking action NOW, you can speed-up you’re learning and get best results using Email Marketing with our easy and pin-point accurate video training.
Bonus #2: Email Marketing Cheat Sheet (Value $667)
Here’s How You Can Turn a ‘Dead List’ Into a Rabid Buyers List and Increase Sales by A Huge Leap. Why You Should Build Your Own Email List Now Strengthen Connections.
Bonus #3: 100+ Marketing Emails (Value $567)
Your complete “fill in the blank” autoresponder series you can use for ALL your internet marketing lists and is geared toward TEN main areas of your business!
Bonus #4: 80% Discount on ALL Upgrades (Value $997)
Get 80% instant discount on purchase of All Upgrades. This is very exclusive bonus which will be taken down soon.
Bonus #5: 30 Agency License (Value $997)
You have full rights to use this software. You can use it for anyone whether for individuals or for companies. Generate massive free traffic to yourself and for others as well.
<<>> Click Here & Get Access Now Vidhive Discount Price Here <<>>
Vidhive Review: Money Back Guarantee
You’re Backed By Our Iron-Clad,30 Day Money Back Guarantee.
Only a few competent software companies can offer you such a strong promise and the longest duration of return. We are one of the finest in customer assistance and are well-known for our Quality software series in a variety of sectors. Our customers recommend us, and you will as well if you do business with us. We win when you succeed in business. If you have a technical problem that we cannot fix, we will refund your whole purchase price, even if it is on the 30th day. Our money-back guarantee only applies to technical concerns; otherwise, all purchases are final.
Vidhive Review: Pros and Cons
Pros:
High-performance hosting: Ensures fast video delivery worldwide.
Marketing & engagement tools: Add CTAs, capture leads, and encourage social sharing within videos.
Monetization features: Sell videos through pay-per-view, subscriptions, or built-in advertising.
Analytics & tracking: Gain insights into video performance and audience demographics.
Cons:
You cannot use this product without an active internet connection.
In fact, I haven’t found any additional Vidhive issues.
Frequently Asked Questions (FAQ’s)
Q. Is this a desktop software? Does it work on a PC?
This is a Cloud-Based App that doesn’t require any Installation. Simply access it from anywhere, anytime in the world just as long as you have an internet connection!
Q. I already have such a tool. What do I do?
You don’t have such a tool. What VidHive does there’s no other tool out there that does that. We checked before we got started. Sure, you may have a tool for creating videos — but what you’re getting today is just extraordinary. My sincere advice to you would be to cancel your existing subscription and get grandfathered access to VidHive at a low one-time price right now.
Q. Do I need video creation or editing experience?
None at all! The dashboard & canvas make creating custom videos literally point & click simple. We’ve tested this interface with brand new beginners to ensure it’s 1–2–3 simple!
Q. Can I create & sell videos to clients?
Yes! You can create an unlimited amount of videos and sell them to businesses when you purchase our Commercial License package during the launch period. There are no limits. Set the price you want to charge and keep 100% of the profits. You will never have to pay us any royalties or additional fees on the money you make.
Q. Are there any training videos included?
Yes! Even though VidHive is simple and easy to use, we make it even easier for you with step-by-step training tutorials to get up and running even faster.
Q. How much do updates cost?
Yes! We are constantly working on updating the software and providing you with the latest patches. When you purchase VidHive updates are automatic and provided free of charge.
Q. How do I get support?
Easy! Just email us and we will gladly answer any questions you may have.
Vidhive Review: My Recommendation
Vidhive emerges as a powerful video hosting platform ideal for creators and businesses seeking to unlock the full potential of their video content. Its robust hosting infrastructure, coupled with marketing, engagement, and monetization features, makes it a compelling choice. However, pricing might not suit everyone, and some advanced features require higher tiers. Ultimately, evaluating your needs, budget, and desired functionalities will determine if Vidhive is the right platform to elevate your video content strategy.
<<>> Click Here & Get Access Now Vidhive Discount Price Here <<>>
Check Out My Previous Reviews: Coursiify Review, Azon AutoSites Review Konnect App Review, Healthifier AI Review, TelleBotAi Review, AI Beast Review, Share Ai Earn Review.
Thank for reading my Vidhive Review till the end. Hope it will help you to make purchase decision perfectly.
Disclaimer: This Vidhive review is for informational purposes only and does not constitute professional advice. Before making a purchase decision, we recommend conducting your own research and exploring the software.
Note: Yes, this is a paid tool, however the one-time fee is $17 for lifetime
#Vidhive Works#What Is Vidhive#Buy Vidhive#Vidhive Price#Vidhive Demo#Vidhive Discount#Vidhive Honest Review#Vidhive Pricing#Vidhive FE#Vidhive Pros#Vidhive OTO#Vidhive Preview#Vidhive Scam#Get Vidhive#Vidhive Reviews#Purchase Vidhive#Vidhive Legal#Artificial Intelligence#AI#Vidhive Benefits#Vidhive Bonus#Vidhive Bonuses#Vidhive Software#Vidhive Software Review#Vidhive App Review#Vidhive Upsell#Vidhive Downsell#Vidhive OTOS#Vidhive Funnels#Vidhive Worth
0 notes
Text
Ultimate Guide for Twilio Migration: Web SDK
Twilio has unexpectedly revealed that their Programmable Video API product will be rolled out by the end of 2024, surprising both customers and the industry everywhere.
If you're discovering the uncertainty of what's ahead, let EnableX help you navigate this migration from Twilio. While Twilio's method may require a more sophisticated setup, EnableX emerges as a top choice, providing a versatile, dependable, and cost-effective solution for your video communication needs. EnableX enables enterprises to reinvent video communication through powerful functionality, developer-friendly integration, and a diverse range of use cases.
This detailed tutorial will help you switch from your current Twilio Video configuration to the EnableX Video SDK. We recommend that anyone starting a new project refer to the EnableX Video SDK manual for advice. We guarantee a smooth transition for all Twilio users wishing to transfer to a dependable alternative with no fuss. Begin with a free trial to see for yourself how easy integration is.

Step 1: Begin with EnableX (Start Your Free Trial)
Want to start your free trial? Great! We've made it very simple. Simply navigate to the EnableX site and select "Try for Free." Then, provide your name, phone number, company, and email address, and accept our Terms of Service. After that, check your email, click the verification link, and you're ready to go! It's a simple process, no hassle at all.
Step 2: Set Up Your Video Calling Project
Are you ready to create your first video production with Enablex? Simply follow these steps. First, launch your project using our simple dashboard and enable the video options. Before you go into the technical details, ensure that your project is secure. We'll email you special codes called App ID and App Key; keep them secure! You'll need them later to establish secure connections. To increase security, ensure that your website uses HTTPS. It's like locking your website's door! You can obtain a security certificate to ensure that everything is safe and sound.
Step 3: Integrate EnableX on the Client Side
With EnableX's comprehensive SDKs, you can easily integrate video calling into your app. To guarantee that you have access to the most recent functionality, begin by updating your existing SDK references with the most recent EnableX SDK release. Then, use the thorough documentation supplied by EnableX Web SDKs to create your bespoke user interface. This allows you to customize the video calling experience to meet your app's design and user experience. Set up server-side API interactions to make processes like room creation and token generation easier, which will improve functionality.
Step 4: Install EnableX Video SDK
To obtain the EnableX Web SDK, download and extract the contents of the zip file. The extracted files should then be stored either on your hosting srver or in the chosen directory within your project structure.
Install SDK Using Package Managers
with npm
npm i enableX-rtc-sdk-ng
or with pnpm
pnpm add enableX -rtc-sdk-ng
or with yarn
yarn add enableX -rtc-sdk-ng Add the SDK to your HTML file
Step 5: Start and Join Sessions
Twilio
// Replace Twilio Video import import * as TwilioVideo from 'twilio-video'
var twilioVideo = TwilioVideo var twilioRoom
twilioRoom = await twilioVideo.connect(TOKEN, { name: 'yourName', audio: false, video: false, dominantSpeaker: true })
EnableX
To facilitate client endpoint access, begin by obtaining a token. This token authenticates the client's connection to the targeted room. Once retrieved, use the SDK's joinRoom() method to bridge the connection. Upon successful connection, start audio/video streaming to the specified area, allowing for smooth collaboration. However, error handling procedures must be implemented in order to efficiently resolve any potential connection issues and ensure a smooth user experience throughout the video conversation.
/* Configure your Media Stream to publish */ var PublishStreamInfo = { audio: true, video: true, videoSize: [640, 480, 640, 480], attributes: { name: "John", age: 21, emp_id: "EMP039" } };
/* Create Empty Object, if not to publish Media Stream */ var PublishStreamInfo = {} ;
/* Connect to Video Room / localStream = EnxRtc.joinRoom(TOKEN, PublishStreamInfo, function(success, error) { if (error && error != null) { / Handle Connection Error / } if (success && success != null) { / Connected Room Information */ room = success.room; } });
Step 6: Publish Remote Stream
Twilio
// video let localVideoTrack = await twilioVideo.createLocalVideoTrack({ height: { ideal: 720, min: 480, max: 1080 }, width: { ideal: 1280, min: 640, max: 1920 }, aspectRatio: 16/9, })
twilioRoom.localParticipant.publishTrack(localVideoTrack) const localMediaContainer = document.getElementById('video-container-div') localMediaContainer!.appendChild(localVideoTrack.attach())
// audio let localAudioTrack = await twilioVideo.createLocalAudioTrack()
twilioRoom.localParticipant.publishTrack(localAudioTrack); const audioElement = localAudioTrack.attach(); document.body.appendChild(audioElement);
EnableX
// Configure Optional Publishing Options var PublishOpt = { "minVideoBW":"Number", "maxVideoBW": "Number" };
room.publish(localStream, PublishOpt, function(StreamId) { });
Step 7: Unpublish Remote Stream
Twilio
twilioRoom.localParticipant.videoTracks.forEach((publication) => { publication.unpublish(); publication.track.stop(); var selfTwilioVideo = document.getElementById('video-container-div') selfTwilioVideo?.querySelector('video')?.remove() })
twilioRoom.localParticipant.audioTracks.forEach((publication) => { publication.track.disable() })
EnableX
room.unpublish(localStream, function(result, error) { if (result === undefined) { // Failed } else { // Unpublished } });
Step 8: End Session
Exiting a Session in Twilio
You may have used Twilio's disconnect function to exit a session.
twilioVideo.disconnect()
Ending a Session in EnableX
To terminate the session, call the SDK's disconnect() method. Ensure that all sockets and connections are properly closed.
room.disconnect();
room.addEventListener("room-disconnected", function(event) { // You are disconnected });
room.addEventListener("user-disconnected", function(event) { // One user is disconnected // event - User Information of disconnected user });
To acquire a complete understanding of the EnableX Web Video SDK's features and implementation, we recommend reading the EnableX Video SDK documentation. This resource contains thorough information on the features, allowing for the creation of advanced and feature-rich video conferencing solutions. Whether you have specific feature requests or need help, the documentation provides useful information and support.
#Twilio migration#Twilio alternative#Twilio video alternative#Twilio video connect#Twilio video#Alternatives to twilio
0 notes
Text
it course in chennai
What are the best sites to learn how to code for free?
There are numerous websites that offer free resources to learn how to code. Here are some of the best ones:
Codecademy (https://www.codecademy.com/): Codecademy provides interactive coding lessons in various programming languages, including Python, JavaScript, HTML, CSS, and more.
Khan Academy (https://www.khanacademy.org/): Khan Academy offers introductory programming courses and challenges in JavaScript and SQL. It's a great platform for beginners.
freeCodeCamp (https://www.freecodecamp.org/): This is a nonprofit organization that provides a free, self-paced coding curriculum. It covers HTML, CSS, JavaScript, Databases, Git & GitHub, Node.js, React.js, and D3.js.
Coursera (https://www.coursera.org/): Coursera offers a wide range of programming courses from universities and organizations around the world. While some courses are free, you may need to pay for a certificate.
edX (https://www.edx.org/): Similar to Coursera, edX offers free online courses from universities and institutions. It covers a variety of programming languages and computer science topics.
MIT OpenCourseWare (https://ocw.mit.edu/index.htm): MIT publishes virtually all its course content online for free. You can find computer science courses and lectures on their OpenCourseWare platform.
Mozilla Developer Network (MDN) Web Docs (https://developer.mozilla.org/en-US/): MDN provides comprehensive documentation on web development technologies like HTML, CSS, and JavaScript. It's an excellent resource for web developers.
W3Schools (https://www.w3schools.com/): W3Schools offers tutorials and references for web development languages such as HTML, CSS, JavaScript, and more. It's a handy resource for quick learning.
GitHub (https://github.com/): While GitHub itself is a platform for version control and collaboration, it also hosts a variety of open-source projects that you can explore and contribute to. It's a great way to learn by doing.
Hackerrank (https://www.hackerrank.com/domains/tutorials/10-days-of-javascript): Hackerrank provides coding challenges and competitions in various domains. It's a good platform to practice coding skills.
Remember that the best learning approach may vary from person to person, so try a few of these platforms and see which one suits your learning style the best.
It course in chennai
It institute in chennai
It training institute in chennai

0 notes
Text
CMS development services
CMS Development Services
CMS development services can help you create a website that is easy to use. The process involves identifying your content management needs, user roles, and workflow processes. Then, developing a custom CMS architecture and user interface based on these requirements.
A CMS is a web application that allows users to post content without having to learn HTML or CSS. It also allows you to optimize your site for search engines.
Easy to use
CMS development services allow businesses to create and edit their content without the need for a developer. They also help them update their websites quickly and easily. This saves time and money, as they don’t have to pay developers to do the work. These systems are relatively easy to use, and can be used by people with no technical knowledge.
Most CMS platforms are mobile-friendly, and have standard bundled features that allow business owners to get their sites up quickly. They are also optimized for search engine optimization (SEO), making them a great choice for businesses that want to boost their visibility and drive traffic.
CMS solutions are highly customizable and offer a variety of plugins and tools that make them ideal for companies in various industries. For example, they can be integrated with virtual reality and augmented reality to deliver immersive content experiences. In addition, they can collect data from a range of digital touchpoints and provide personalized recommendations.
Easy to maintain
CMS development services make it easy for companies to keep their websites updated. They can post new content and make changes without the need to hire a developer. They can also update security updates and patches easily, which can help protect against attacks.
When choosing a CMS, think about how you plan to use it. For example, will you be using it to create blogs or host product images? How many changes will you be making each day? A CMS that can accommodate your business needs is crucial.
Choosing the right CMS platform can be challenging, especially for novices. Some platforms require a certain level of coding knowledge, while others offer an intuitive interface for those who don’t know any programming languages. Wix, for example, is a simple CMS that offers a drag-and-drop feature and pre-made templates. It also boasts a 24/7 security team and provides users with a secure experience across all devices. These features make it an excellent choice for beginners.
Easy to scale
A CMS is software that enables users to create, edit, and publish web pages. It also allows companies to add and update content quickly without hiring a developer. It also helps businesses collect and analyze customer data from a variety of digital touchpoints.
Choosing the right CMS development company is crucial for your project. You should make sure to choose a partner with a proven track record and the ability to meet your specific needs. You should also ask the company about its post-development support and maintenance services, as well as its security measures.
A top CMS development company should be able to provide flexible solutions that can grow with your business. It should also be able to handle large amounts of data and offer SEO features for improved search engine rankings. It should also be able to accommodate different platforms and devices. This will ensure that your website stays current and relevant to your customers.
Easy to integrate
CMS development services make it easy to create, edit, and publish content. They also allow you to distribute and archive data, documents, and other information quickly and efficiently. These tools can also collect and analyze customer data across digital touchpoints, making them a valuable tool for your business. They can also clear data automatically when it has reached its retention period, freeing up storage space.
Custom CMS solutions are designed to meet the specific needs of your organization. They are scalable and flexible, and they can be easily integrated with other systems, such as CRMs and e-commerce platforms. These solutions will help you get more out of your content and boost your revenue.
It’s important to take the time to assess your CMS requirements and choose a solution that meets your needs. A good starting point is to talk to the marketing team, chief content officer, and IT staff to learn what they need from a CMS.
#ecommerce web development#ecommerce web design#ecommerce web design london#ecommerce web design company#ecommerce web design agency
0 notes
Text
Unmetered Dedicated Server Germany
Advice on How to Optimize the Site to Achieve Better Performance
When a site loads slowly, visitors leave, employees are less productive, and the site's popularity drops overall. Better user experience, greater search engine rankings, more conversions, more engagement, fewer bounces, and fewer missed opportunities all stem from a site's high level of performance. You will lose money and credibility if your website loads slowly. Thus, site optimization is essential for maintaining and improving the quality of any website.
To load a website as quickly as possible, one must employ many techniques and standards to increase loading times. Here are some tried-and-true methods for enhancing the responsiveness and speed of your website, as well as providing a more satisfying experience for your visitors.
Upgrade Your Web Hosting Plan:
Most people who are starting their first website go with a standard package. These hosting packages are great for novices because of their inexpensive prices, ease of use, and support for static websites. However, your site will grow and attract more visitors if you provide progressive content. In that scenario, switching to a more powerful unmetered dedicated server Germany is your best option. Then, not only will your users be pleased, but your Search Engine Optimization (SEO) and website ranking will hold steady, and your site will be adaptable to future changes.

Audit Your Site:
It's essential to do an audit of your site's existing performance before switching to an unmetered server Germany and making any changes that could affect how quickly pages load or how smoothly material is handled. A free auditing tool is an excellent place to start. The quality of your web will be evaluated, and you'll be informed of the results. In addition, it will give you a color-coded score that reflects your site's overall performance and highlight places where you can boost that score.
Perform Technical SEO:
Having a well-structured website is essential for technical SEO. It is impossible to publish a hodgepodge of unrelated articles and blog posts. Google will have an easier time crawling and indexing your pages if they are organized in a way that is favorable to SEO.
Minify and Combine CSS, JavaScript, and HTML Files:
Minification reduces the size of JavaScript and CSS files by eliminating unnecessary symbols and condensing those that remain. The results are identical in functionality but only partially legible by humans. But browsers can read it just fine, and the smaller file sizes mean less time waiting for pages to load.
Use a Content Delivery Network (CDN):
A content delivery network (CDN) is a collection of servers located in different parts of the world that work together to provide users' requests for web content regardless of where they happen to be located. Website requests from all users are sent to the same hardware when hosted on reliable Germany servers. As a result, it takes longer to complete each request. Moreover, users experience longer load times when geographically separated from the server. Utilizing a CDN, requests are sent to the closest server. The result is a faster-loading website and faster delivery of content to users.
0 notes
Video
youtube
Free Web Hosting - How To Upload HTML/PHP Website On Free-Hosting In Hindi 2020
#how to upload html website on free hosting#how to upload php website in free hosting#how to upload website on cpanel#how to upload php website on free hosting#upload html website to free hosting#how to live html website on free hosting#How to upload html website on Cpanel#how to upload your html website to the internet#how to upload html website to server#html website to free hosting#how to publish html website on free hosting#php website to free hosting
0 notes
Text
On creating a wiki for your worldbuilding
Do you have a lot of lore to keep track of? Whether you're an author, a Game Master, or simply someone who really really likes worldbuilding, this post is for you.
Here's a quick overview of what I'll be talking about:
Platforms people use to create personal wikis
Formats and organization systems you may find useful when creating your own wiki
A brief look at the actual content you might put in your wiki (I'm planning a more in-depth post on that later with more images and demos)
And because this is gonna be a long'un, I'm putting a read-more here! I'll also make downloadable epub and PDF versions of this post available for free on my Ko-Fi at some point in the future.
(I'm also planning to reblog with a list of links later on, but I want this initial post shows up in search)
Also now that you're here, I'm going to say this isn't, like, super comprehensive or anything. I'm just talking about stuff I know a little about or have experience with. Please feel free to reblog with additions and/or corrections as needed!
What is a wiki?
According to Wikipedia, "a wiki is a hypertext publication collaboratively edited and managed by its own audience, using a web browser."
In this case, you'll likely be the sole person making updates to your wiki. The web browser part is optional these days as well, as you'll soon see.
Platforms for creating wikis
Websites for creating worldbuilding wikis
WorldAnvil
This one is actually designed for people who want to create big worldbuilding wikis.
Pros: Worldbuilding prompts! Those are great. It's got a pretty comprehensive set of article types too.
Cons: Kind of expensive to upgrade for features like making your wiki private, and it does NOT work well with adblock turned on, so if you don't want to pay for a membership you'll get inundated with ads. I'm not a huge fan of the interface in general and a lot of it isn't intuitive, but I like what they're doing so I support them anyway.
---
Tiddlywiki/Tiddlyhost.com.
In addition to having a cat as its icon and also a silly name, each 'article' you create with this is called a 'tiddler' which makes me think of Chuck Tingle. I haven't used it much myself yet, but I did make an account and it seems pretty neat.
---
Miraheze
A community-hosted wiki platform that runs on MediaWiki (which is what Wikipedia runs off of).
Pros: It's not Fandom.com.
Cons: You have to request a wiki and can't just make it yourself, as far as I can tell. I haven't actually looked into this one as much.
---
Neocities
An option for if you want to go super oldschool and create a website using only basic html and hyperlinks (without the handy shortcuts of bbcode or Markdown). Monthly cost is $5 usd if you want to have more space and your own domain.
Pros: 100% control over your content.
Cons: Doesn't support PHP databases for wiki software, and can be fairly labour-intensive to update if you break a link or something.
---
Fandom.com
Unfortunately, this one is the top result you'll get when you look up how to make your own wiki. I'm only including it here to tell you to stay as far away from it as possible!!
Its staff are known to ban wiki creators from their own wikis and a bunch of other nonsense that I'm not getting into here.
Programs and apps/web apps for creating worldbuilding wikis
Obsidian.md
My personal favourite. I'm planning to make a whole post about how I use it in the near future as part of this article series.
It's a markdown-based application that you can get on just about any platform (Windows, MacOS, Linux, iOS, Android, etc) which is great. Obsidian is really easy to pick up and use and also has great themes and community plugins!
Best thing is, it's FREE and you only have to pay if you use their publishing service, which... I don't, so.
---
Notion
I've heard this one is pretty good too. Idk if it costs anything. It's another "second brain" style app (might be markdown also?) and I think it might do more than Obsidian, but I haven't checked it out much myself.
---
Microsoft Word/Google Docs etc.
...Or just about any word processor that lets you create internal hyperlinks. Word may work best due to the collapsible headings so it doesn't get too unwieldy, but *shrug* whatever floats your boat.
---
Excel/Google Sheets etc.
Or, again, any spreadsheet creator that lets you create internal hyperlinks.
I'd recommend having some basic spreadsheet knowledge before doing this. It could get complicated. Before I started using Obsidian, I was using Sheets to keep track of my glossary, notes about characters, and plot ideas.
Types of formatting & organization systems
There are as many organization systems as there are people who want to organize their stuff. Everybody needs something a little different! I find the ones that work best for me are systems that have a lot of customization options.
Here are a couple I know of.
Johnny Decimal
This system is absurdly simple in its concept and yet so versatile. From their website (it's just johnnydecimal dot com but I'll link it in a reblog later):
Take everything you need to organise and sort it in to, at most, ten large buckets.
Make sure the buckets are unambiguously different.
Put a label on each bucket.
Their website has a better explanation than I can give in this post, but I'll sum up the appeal of this system as quoted from their site: "There's only one place anything can ever be."
Usefully, part of this method is creating a directory for the rest of the system.
So if you're like me and tend to shove things wherever only to lose track of it later, this is a great system—especially when used in conjunction with the Zettelkasten Method (see below).
---
Zettelkasten Method
Originally devised as an extensive paper-based knowledge management system, Zettelkasten is meant to easily add new entries to a knowledge base while giving each one a unique ID for easy 'linking.'
The creator of this method said 'it is not important where you place the note, as long as you can link to it.'
As with the Johnny Decimal system, I can't explain it super succinctly (nor can the website, if I'm being honest), so I'll include a link in a future reblog for a video that gave me an excellent run-down of the basics.
Setting up your own system
An organization system is only useful if you can actually, y'know, use it.
It can be fun to set up a super-detailed organization system with predetermined categories for everything, but is it easy for you to use? How will you navigate it?
Making decisions
There will be a lot of decisions to make as you set up your system. The only set-in-stone rule I follow is... don't set anything in stone. It's okay if you decide something that doesn't work later on.
Figuring out your categories
My advice: go fairly broad. You can always sub-categorize. I'm going to go over my own wikis for Athenaeum and Rocket Boosters in detail in a later post, but here are the starting top-level categories I'd recommend for worldbuilders:
A meta category for notes about your database, templates, and any relevant research you've done.
Characters, including main characters, minor characters, and important figures
Worldbuilding
In the last category, which is the main reason for the existence of my wiki, I might have:
Culture
History
Locations
Organizations
Lore (if relevant)
Technology
Transportation
I'll go over the nuances of these 'main' subcategories in that future post I mentioned. In other words, the stuff that actually goes in those categories!
Determining the importance and relevance of worldbuilding elements
You'll need to figure out whether a topic is complex enough to deserve its own entry, or if it should be a sub-heading under another entry. It's okay if you decide on both! I have short subheadings under some entries that amount to "see [link to main entry on that topic]."
I've also decided to expand subheadings into their own topics, and I've removed topics as their own entry and shoved them under subheadings. I do this a lot, in fact! So it's okay if you don't know.
Templates
Will you be creating several of one type of entry?
Individual character profiles
Towns and cities
Factions
(to name a few)
It might be handy to figure out the basic types of information you'll need about each of those things and create a template for them.
A character template might have spaces for the basics, such as name, role, age, and so on.
Some characters will have a lot more information, and some might have even less than what your template dictates! And that's fine.
A word of warning about using system-creation as procrastination
Creating a wiki can be a daunting task. You might decide it's not for you, and that's okay. But you might also decide to go headlong into the process and work on every minute detail, and that is also okay, but.
But.
Beware of using your wiki as an excuse to procrastinate your actual writing/session preparation. Yes, use it to keep track of all the lore you've injected into your manuscript/campaign/whatever, just make sure it stays in its place as a companion to your main project rather than becoming your main project.
How formal should your entries be?
Honestly this one's entirely up to you. I have a mix. Some entries are written like Wikipedia entries with a thorough explanation of the topic with proper punctuation and formatting, while others are simply bullet-point lists of thoughts and ideas that I can return to at a later date.
What methods do you use to keep track of your lore and worldbuilding? Let me know in a reblog or comment!
And please make sure to check the notes. I'll be reblogging with links, and then reblogging that reblog to make sure they're, y'know, actually visible in the notes.
#wiki#worldbuilding#writing advice#writeblr#writeblr community#resource#worldbuilding wiki#obsidian#zettelkasten#resource by keyboardandquill
722 notes
·
View notes
Note
hi hi! love your blog! I am also working on building sites for my portfolio but am a little stumped on how/where to deploy them. would you mind sharing what you are using for deployment? thanks!
Places to Deploy Your Website

Hiya! I know a few places I've tried in the past and some I am yet to try but I know other developers use them!

GitHub pages
GitHub Pages is a free static site hosting service that allows you to publish your website directly from a GitHub repository. It supports HTML, CSS, and JavaScript, as well as Jekyll, a static site generator. I used GitHub pages a lot since I use GitHub to keep all my repositories.
Replit
Replit is a cloud-based development environment that provides an integrated IDE, code editor, and hosting platform all in one place. With Replit, you can easily create and deploy web apps, games, and other projects in multiple programming languages such as Python, HTML, CSS, and JavaScript. I use Replit a lot too for my other much smaller projects that I can’t upload on GitHub to run the program online!
Netlify
Netlify offers a free plan for static site hosting that includes features such as continuous deployment, custom domains, and SSL encryption. It supports HTML, CSS, and JavaScript, as well as serverless functions and other backend technologies.
Heroku
Heroku offers a free plan for hobbyist developers that allows you to deploy up to 5 applications. It supports many languages and frameworks, including Ruby, Node.js, Python, Java, PHP, and Go. Heroku allows free hosting for small applications.
Firebase Hosting
Firebase Hosting is a free service that allows you to host and deploy your web app or static content to a global content delivery network (CDN) with SSL encryption. It supports HTML, CSS, JavaScript, and other static assets. It allows free hosting for small applications.
Surge
Surge is a free static site hosting service that allows you to publish your website with a custom domain or a Surge subdomain. It supports HTML, CSS, JavaScript, and other static assets. Allows free hosting with unlimited bandwidth.
Each of these free deployment options has its own cons such as:
Its lack of server-side functionality
Limited database support
The cost of advanced features
Limited control over the infrastructure
May not be suitable for more complex websites or applications
However, for small projects, I think you’ll be fine with the free options!
Hoped this helps and good luck with your websites’ deployments! 🥰🙌🏾💗
#my asks#codeblr#coding#progblr#programming#studying#studyblr#developer#developers#comp sci#computer science#cs student#cs studyblr#resources#coding resources#deployment#deploy websites#portfolio#deployment websites#tech#web dev
213 notes
·
View notes
Text
choose between a CMS and a website builder
Online free website builders have been around for a while, and with so numerous to choose from, these days it's easier than ever to make your own website and get it up and running presto.

Whilst in dividua lities are the egregious target request for these" make a website yourself", each- by- one point structure and hosting platforms, they're decreasingly offering redundant services acclimated to making business websites as well, complete with online stores. Their simple setup and content updating( CMS) tools can make them an ideal choice for numerous small businesses,
whose coffers do not inescapably extend to a major- but nevertheless essential- online presence, or who had only ever pictured of developing ane-commerce result for their business ahead.
Still, whether for particular or professional reasons, there are a many details you will need to figure out before choosing one, If you are in the request for a free website builder. Asking yourself some questions beforehand on will help you define your requirements, and to choose the website builder stylish suited to you choose between a CMS and a website builder
How numerous runners will you need? This will be determined by the volume of content, and the way you want to divide that content up.
How important material will you need to add to your website? suppose about effects like images to illustrate your content, lines and documents you will want callers to be suitable to download. You will need to insure your provider gives you enough space to store all the lines you will need, or a way to pierce content stored away.
How compatible will you website be? If your website builder usesnon-standard web technologies, you will be limiting callers' capability to pierce your website- flash content or websites, for illustration, simply will not load on some cybersurfers, like the iPhone.
This is not an total list, of course, but you will need to get details similar as these easily sorted out before you start looking. It'll save you a lot of time in the long run, if you are sure about what you are looking for right from the launch.
Acquire Content Management Software
Once a specific area of products or services has been named and a plan has been created, the coming step is to probe and detect effective content operation software. This software allows website builders to produce, organize, edit, publish and also modify point content fluently and effectively. CMS is designed to work in a stage-alone fashion without taking hard rendering knowledge or experience from webmasters.
CMS for classifieds is the stylish selection since it's designed especially for classified website builders. These types of software are typically relatively stoner-friendly for the webmaster, any staff that might be employed and those who visit and use the services of the website. A good CMS for classifieds will include an multifariousness of features that allow colorful operations, content, vids, prints and other crucial factors to be readily engaged, and they generally have erected- in SEO programming so your point ranks well on hunt machines.
The webmaster of similar software also has control of adding, removing, or modifying web hosting, language, runtime, documents, lines and HTML content.
Determine a Web Host
When the website has been created and effectively modified through the classified website builder software, it must be published on the World Wide Web so that callers can find it and begin using it. The web host that you choose will depend on several factors. First, it'll depend on your CMS for classifieds software specifications. You'll also need to determine how important business you anticipate and how presto you want runner commerce to be.
Numerous people begin with a lower, less precious web host and also progress to a more important and briskly service once their website grows.
With the right classified website builder software, you can have an seductive, stoner-friendly and fluently manageable point up and running a veritably short time. also, with only minimum advertising and operation sweats, you'll have an active and productive classified website choose between a CMS and a website builder.
2 notes
·
View notes