#sonoma installer
Text
#Outdoor Wedding Lighting Napa County#Outdoor Lighting For Weddings Sonoma County#Christmas Lights Installation Sonoma County
0 notes
Text
youtube
#macos 14#mac#macos#macosSonoma#sonoma#macOS Sonoma Beta2#macOS Sonoma Download#macOs Sonoma Install#macos tips#macos update#macapps#macos monterey#macos ventura 13.4#macos 12.4#macinstosh#macOS tips and tricks#macOS Sonoma tips#macOS Sonoma Tricks#macOS Tutorials#mac os 9#beste macos spiele#datahoarders#datahoarding#appledatahoarding#Youtube
0 notes
Text
Have you got an old Mac that is no longer supported by Apple? It's time to give it a new life.
How to install the latest MacOS on Mac hardware that is no longer officially supported using OpenCore Legacy Patcher.
I recently discovered this and it has been a game changer. Recently my partner needed a Mac for her music course, so we bought a 2012 Macbook Pro as it was cheap and on paper still had decent hardware for working with music. We were then disappointed to find out that it is no longer supported by Apple, and therefore can't run the latest version of Logic, which she needed to inter-op with the school comptuers. Just as we thought we had bought a less than useful computer, I found this video about OpenCore Legacy Patcher from Youtuber Action Retro.
It's a community made piece of software that allows you to install the latest version of MacOS on any Intel Mac, from the late 2000s onwards. All you need to do is download the application on a mac, it will then allow you to make a bootable USB drive for any version of MacOS you want, and you just need to choose the specific mac you are targeting from a list, and it "blesses" the bootable drive, allowing you to install it on your unsupported mac using the normal install process.
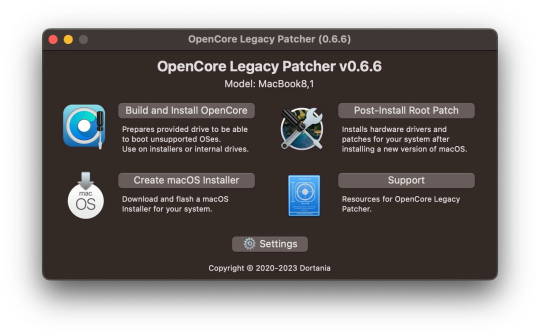
I tried it and it it worked perfectly on the 2012 Macbook Pro, and the latest version of MacOS Sonoma is running perfectly well on the 12 year old hardware. It also allowed us to install the latest version of Logic, so it's working great.
Props to the team for making this and allowing hardware that would otherwise be e-waste to continue to be usable with the modern internet and software. If you end up using it, please consider donating to the team as apparently they had to jump through some serious technical hoops to get this working. Here is the link again if you need it: https://dortania.github.io/OpenCore-Legacy-Patcher/
#mac#MacOS#Computers#OpenCore Legacy#OpenCore Legacy Patcher#Software#hardware#Apple#computer recycling#Action Retro
3K notes
·
View notes
Text
My GIF Making process: Screen capturing using MPV player, Organizing files, 3 Sharpening settings, Basic Coloring PSD + Actions set

This is a very long post so heads up.
I’ll try to be as thorough and true as much as possible to the way I make my gifs (I already use Photoshop Actions which I’ve long since set up but now for this tutorial I’m reviewing them to show you the exact steps I’ve learned to create my gifs 😃) and present them to you in a semi-coherent way. Also, please bear with me since English is my second language.
First things first. Below are the things and tools we need to do this:
Downloaded 4K or 1080p quality videos (let’s all assume we know where to get these—especially for high definition movies and tv series—so this post doesn’t get removed, okay? 😛)
Adobe Photoshop CC or the CS versions can work as well, but full disclosure I haven’t created gifs using the CS versions since 2020. I’m currently using Adobe Photoshop 2024.
mpv player. Use mpv player to get those frames/screenshots or any other video player that has a screen grabber feature. I’ve used adapter for the longest time but I’ve switched to mpv because the press to screenshot feature while the video is playing has been a game changer not to mention ultimate time saver for me. For adapter you need to play it in another video player (like VLC player), to get the start and end timestamps of the scene you want to gif which takes me ages before I can even open Photoshop.
Anyway! Please stop reading this post for a moment and head over to this amazing tutorial by kylos. She perfectly tells you how to install and use mpv player, both for Mac and Windows users.
One thing I have to share though, I had a tough time when I updated my MacOS to Sonoma since MPV is suddenly either duplicating frames or when I delete the duplicates the player seems to be skipping frames :/ I searched and found a solution here, though it didn’t work for me lol. My workaround for this in the meantime is decreasing the speed down to 0.70 then start screenshotting—it’s not the same pre Sonoma update but it works so I’ll have to accept it rather than have jumpy looking gifs.
Now, after this part of kylos’ tutorial:

you can continue reading the following sections of my gif tutorial below.
I want to share this little tip (sorry, this will only cater to Mac users) that I hope will be helpful for organizing the screenshots that MPV saved to the folder you have selected. Because believe me you don’t want to go through 1k+ of screenshots to select just 42-50 frames for your gif.
The Control + Command + N shortcut
This shortcut allows you to create a new folder from files you have pre-selected. As you can see below I have already created a couple of folders, and inside each folder I have selected screenshots that I want to include in one single gif. It's up to you how you want to divide yours, assuming you intend to create and post a Tumblr gifset rather than just one gif.

Another tip is making use of tags. Most of, if not all the time, I make supercorp gifs so I tag blue for Kara and red (or green) for Lena—just being ridiculously on brand and all that.
Before we finally open Photoshop, there's one more thing I want to say—I know, please bear with me for the third? fourth? time 😅
It's helpful to organize everything into their respective folders so you know the total number of items/frames you have. This way, you can add or delete excess or unnecessary shots before uploading them in Photoshop.
For example below there are 80 screenshots of Kara inside this folder and for a 1:1 (540 x 540 px) Tumblr gif, Photoshop can just work around with 42-50 max number of frames with color adjustments applied before it exceeds the 10 MB file size limit of Tumblr.

Sometimes I skip this step because it can be exhausting (haha) and include everything so I can decide visually which frames to keep later on. You'll understand what I mean later on. But it's important to keep the Tumblr 10 MB file size limit in mind. Fewer frames, or just the right amount of frames, is better.
So, with the screenshot organization out of the way, let's finally head over to Photoshop.
Giffing in Photoshop, yay!
Let’s begin by navigating to File > Scripts > Load Files into Stack…

The Load Layers window will appear. Click the Browse button next.
Find your chosen screenshots folder, press Command + A to select all files from that folder then click Open. Then click OK.
After importing and stacking your files, Photoshop should display the following view:

By the way, I'll be providing the clip I've used in this tutorial so if want to use them to follow along be my guest :)
If you haven't already opened your Timeline panel, navigate to Windows > Timeline.
Now, let's focus on the Timeline panel for the next couple of steps.
Click Create Video Timeline, then you’ll have this:

Now click the menu icon on the top right corner then go to Convert Frames > Make Frames from Clips

Still working on the Timeline panel, click the bottom left icon this time—the icon with the three tiny boxes—to Convert to Frame Animation
Select Make Frames From Layers from the top right corner menu button.
So now you have this:

Go and click the top right menu icon again to Select All Frames
Then click the small dropdown icon to set another value for Frame Delay. Select Other…

The best for me and for most is 0.05 but you can always play around and see what you think works for you.
Click the top right menu icon again to Reverse Frames.
I think Photoshop has long since fixed this issue but usually the first animation frame is empty so I just delete it but now going through all these steps there seems to be none of that but anyways, the delete icon is the last one among the line of feature buttons at the bottom part of the Timeline panel.
Yay, now we can have our first proper GIF preview of a thirsty Lena 😜

Press spacebar to watch your gif play for the very first time! After an hour and half of selecting and cutting off screenshots! 😛 Play it some more. No really, I’m serious. I do this so even as early (lol) as this part in the gif making process, I can see which frames I can/should delete to be within the 10 MB file size limit. You can also do it at the end of course 🙂
Now, let’s go to the next important steps of this tutorial post which I’ve numbered below.
Crop and resize to meet Tumblr's required dimensions. The width value should be either 540px, 268px, or 177px.
Convert the gif to a Smart Object for sharpening.
Apply lighting and basic color adjustments before the heavy coloring. I will be sharing the base adjustments layers I use for my gifs 😃.
1. Crop and Resize
Click on the Crop tool (shortcut: the C key)

I like my GIFs big so I always set this to 1:1 ratio if the scene allows it. Press the Enter key after selecting the area of the frame that you want to keep.
Side note: If you find that after cropping, you want to adjust the image to the left or another direction, simply unselect the Delete Cropped Pixels option. This way, you will still have the whole frame area available to crop again as needed and as you prefer.
Now we need to resize our gif and the shortcut for that is Command + Opt + I. Type in 540 as the width measurement, then the height will automatically change to follow the ratio you’ve set while cropping.
540 x 540 px for 1:1
540 x 405 px for 4:3
540 x 304 px for 16:9
For the Resample value I prefer Bilinear—but you can always select the other options to see what you like best.
Click OK. Then Command + 0 and Command + - to properly view the those 540 pixels.

Now we get to the exciting part :) the sharpen settings!
2. Sharpen
First we need to have all these layers “compressed” intro a single smart object from which we can apply filters to.
Select this little button on the the bottom left corner of the Timeline panel.


Select > All Layers
Then go to Filter > Convert for Smart Filters
Just click OK when a pop-up shows up.
Now you should have this view on the Layers panel:

Now I have 3 sharpen settings to share but I’ll have download links to the Action packs at the end of this long ass tutorial so if you want to skip ahead, feel free to do so.
Sharpen v1
Go to Filter > Sharpen > Smart Sharpen…
Below are my settings. I don’t adjust anything under Shadows/Highlights.
Amount: 500
Radius: 0.4
Click OK then do another Smart Sharpen but this time with the below adjustments.
Amount: 12
Radius: 10.0

As you can see Lena’s beautiful eyes are “popping out” now with these filters applied. Click OK.
Now we need to Convert to Frame Animation. Follow the steps below.
Click on the menu icon at the top right corner of the Timeline panel, then click Convert Frames > Flatten Frames into Clips
Then Convert Frames > Convert to Frame Animation
One more click to Make Frames From Layers
Delete the first frame then Select All then Set Frame Delay to 0.05

and there you have it! Play your GIF and make sure it’s just around 42-50 frames. This is the time to select and delete.
To preview and save your GIF go to File > Export > Save for Web (Legacy)…
Below are my Export settings. Make sure to have the file size around 9.2 MB to 9.4 MB max and not exactly 10 MB.

This time I got away with 55 frames but this is because I haven’t applied lighting and color adjustments yet and not to mention the smart sharpen settings aren't to heavy so let’s take that into consideration.
Sharpen v1 preview:

Sharpen v2
Go back to this part of the tutorial and apply the v2 settings.
Smart Sharpen 1:
Amount: 500
Radius: 0.3
Smart Sharpen 2:
Amount: 20
Radius: 0.5
We’re adding a new type of Filter which is Reduce Noise (Filter > Noise > Reduce Noise...) with the below settings.

Then one last Smart Sharpen:
Amount: 500
Radius: 0.3
Your Layers panel should look like this:

Then do the Convert to Frames Animation section again and see below preview.
Sharpen v2 preview:

Sharpen v3:
Smart Sharpen 1:
Amount: 500
Radius: 0.4
Smart Sharpen 2:
Amount: 12
Radius: 10.0
Reduce Noise:
Strength: 5
Preserve Details: 50%
Reduce Color Noise: 0%
Sharpen Details: 50%
Sharpen v3 preview:

And here they are next to each other with coloring applied:
v1

v2

v3

Congratulations, you've made it to the end of the post 😂
As promised, here is the download link to all the files I used in this tutorial which include:
supercorp 2.05 Crossfire clip
3 PSD files with sharpen settings and basic coloring PSD
Actions set
As always, if you're feeling generous here's my Ko-fi link :) Thank you guys and I hope this tutorial will help you and make you love gif making.
P.S. In the next post I'll be sharing more references I found helpful especially with coloring. I just have to search and gather them all.
-Jill
#tutorial#gif tutorial#photoshop tutorial#gif making#sharpening#sharpening tutorial#photoshop#photoshop resources#psd#psd coloring#gif coloring#supercorp#supercorpedit#lena luthor#supergirl#my tutorial#this has been a long time coming#guys. i'm BEGGING you. use the actions set - it was a pain doing all this manually again ngl LMAO#i've been so used to just playing the actions#so this has been a wild refresher course for me too 😆
124 notes
·
View notes
Text

Kalpavriksha 'Wish Fulfilling Tree'
Talon Abraxas
Kalpavriksha - The Wish Fulfilling Tree & the Nature of Our Mind
In the scriptures there is mention of a tree called Kalpavriksha – the Wish Fulfilling Tree. Sitting under this tree, whatever one wishes for will manifest.
As the story goes, a man was walking on a hot, sunny day. He was tired, and when he saw this beautiful tree, he went to sit in its shade. As he sat there, he thought, “It would be so nice if there was a glass of cold water.” A glass of cold water appeared. Not only that, but a glass of cold beer, too! He enjoyed them both.
As he continued to rest, the man thought, “I’m feeling hungry. It would be so nice if there was a little food.” A few of his favorite dishes appeared and he enjoyed a nice meal. Then he thought, “Wow, it would be really nice if there was a comfortable bed.” Even the bed appeared and he rested after his long day.
When he woke up, the man realized there must be a genie somewhere that was responding to all his thoughts. As he set out walking again, he soon came across a small man sitting underneath a tree. The man called to him, “Come, come. I’m a genie! I need a home and I promise I will give you anything you want. Anything you wish for, I will provide. But the day you don’t have anything for me to do, I will devour you. Can I come with you?”
The man thought for a while and said, “Okay, come. I have many projects that you can help with.” The genie accepted the man’s invitation, saying, “I will come with you, but remember, the day you don’t have anything for me to do, I will devour you.”
The man returned to his home with the genie and they got started on all of the small projects around his house. The very moment that he mentioned a project, it would be completed: wells were dug, walls were built, things were moved from here to there. The man started thinking of bigger projects and the genie completed those very quickly as well.
In time, the man began to worry that he would run out of things for the genie to do. He decided to seek the advice of a sage living at the edge of the town. The Babaji listened intently to the man’s predicament and responded, “Okay. Have him install a long pole in the ground. When you have nothing for him to do, ask him to go up and down the pole. And whenever you have a project, call him to do it. When the project is finished, send him back to the pole.”
The man followed the sage’s advice and lived happily ever after!
What is this story really about? The genie of the Wish Fulfilling Tree is our mind.
The mind is a beautiful instrument. Whatever comes into the mind will manifest. It may take some time, but the mind can create whatever we want. But if we don’t cultivate the mind, we get into trouble. With nothing to focus on, the mind’s tendency can veer towards destruction, negativity, and getting caught on small things.
What is the pole that can be used to control the genie, our mind? Our breath. Whenever the mind is free with nothing specific to focus on: straighten your spine, imagine your breath rising up and descending. The mind will follow and you can save yourself from all kinds of negativity.
No matter where you are, with determination and with a little joy, bring the mind back to your breath. Imagine a light sitting at the bottom of your spine. As you inhale and the breath is rising, that light rises up the spine to the space on your forehead between your eyes. As you exhale, the breath and light go back down the spine. Hold that imagery. Breath in and out three times. Then return to engage in the world, renewed.
This mind is capable of providing us with anything we want, if we just learn how to use it, and how to prevent it from running our lives. It’s all about remembrance. Before you start flowing out in a negative direction, remember to take that breath. You’ll see it will change your day. It will change your life.
29 notes
·
View notes
Text
please clap, i undertook the minimum of effort required to install Whisky on my M3 Macbook and get the Hades 2 early access up and running in a bottle, rather than impulsively spending $400 on a Steam Deck
yes it took like 3.5 hours to download Hades 2, and yes I did still start playing at like 11 p.m. only to be killed like four rooms into a run, what of it
anyway, in case anyone is curious, it was really super easy to get Whisky set up on my Mac, no fiddling with settings was required, and from my like 15 mins of playtime so far, it seems to be working perfectly. My controller even works! (Though the game thinks it's a Playstation controller. oh well, I'll take it) I was honestly expecting it to be much more of a headache to get this to work, so I am very pleasantly surprised. The only issue I've run into so far is that I have to close the Windows bottle version of Steam through the little menu widget thing whose name I forget--the thing at the top by the clock--rather than in the dock, otherwise it'll just reopen again for some reason.
So for anyone else using a Silicon Mac running Sonoma: you can probably play Hades 2 early access using Whisky, which is free to download. Download the Windows version of Steam, add it to Whisky, and Whisky will run Windows-only games in a "bottle". Took like 10 mins to download, install, and set up. I used these Youtube tutorials to install Whisky and then add Steam to it. Once you've got Steam running in the bottle, log into your account, purchase/download Hades 2, install it, and you're all set!
11 notes
·
View notes
Text


Flying East (No. 1)
The San Francisco Bay Area, commonly known as the Bay Area, is a region of California surrounding and including the San Francisco Bay. The Association of Bay Area Governments defines the Bay Area as including the nine counties that border the estuaries of San Francisco Bay, San Pablo Bay, and Suisun Bay: Alameda, Contra Costa, Marin, Napa, San Mateo, Santa Clara, Solano, Sonoma, and San Francisco. Other definitions may be either smaller or larger, and may include neighboring counties such as the Central Coast counties of Santa Cruz, San Benito, and Monterey, or the Central Valley counties of San Joaquin, Merced, and Stanislaus.[9] The Bay Area is known for its natural beauty, progressive politics, prominent universities, technology companies, and affluence. The Bay Area contains many cities, towns, airports, and associated regional, state, and national parks, connected by a complex multimodal transportation network.
The earliest archaeological evidence of human settlements in the Bay Area dates back to 8000–10,000 BC. The oral tradition of the Ohlone and Miwok people suggests they have been living in the Bay Area for several hundreds if not thousands of years. The Spanish empire claimed the area beginning in the early period of Spanish colonization of the Americas. The earliest Spanish exploration of the Bay Area took place in 1769. The Mexican government controlled the area from 1821 until the 1848 Treaty of Guadalupe Hidalgo. Also in 1848, James W. Marshall discovered gold in nearby mountains, resulting in explosive immigration to the area and the precipitous decline of the Native population. The California Gold Rush brought rapid growth to San Francisco. California was admitted as the 31st state in 1850. A major earthquake and fire leveled much of San Francisco in 1906. During World War II, the Bay Area played a major role in America's war effort in the Asiatic-Pacific Theater, with the San Francisco Port of Embarkation, of which Fort Mason was one of 14 installations and location of the headquarters, acting as a primary embarkation point for American forces. Since then, the Bay Area has experienced numerous political, cultural, and artistic movements, developing unique local genres in music and art and establishing itself as a hotbed of progressive politics. Economically, the post-war Bay Area saw large growth in the financial and technology industries, creating an economy with a gross domestic product of over $700 billion. In 2018 it was home to the third-highest concentration of Fortune 500 companies in the United States.
Source: Wikipedia
#summer fog#San Mateo County#travel#original photography#vacation#tourist attraction#landmark#cityscape#Bay Area#summer 2022#USA#California#San Francisco International Airport#SFO#evening light#runway#architecture#Pacific Ocean#on board#plane#looking down#flying East
2 notes
·
View notes
Text
Adobe has no fix yet for the issue with gif previews in photoshop with macOS 14 Sonoma and so I’ve spent literally all day trying to downgrade back to Ventura which Apple makes it very difficult to do. I’m finally in the home stretch and hoping that once it’s done the bug is gone. 🤞 At which point I will go back to almost never updating my shit. The one time I decided to update and it broke a bunch of stuff and Adobe is dragging their feet on resolving the issue. 😩
After backing up my computer, creating a bootable installer of Ventura on a USB flash drive (I had to go buy a fucking USB because I haven’t had to use one in like 5 years???), formatting my drive completely, and then installed Ventura from the USB—I’m now restoring my files. There’s so many other hoops and trial/error shit I had to deal with but this is the short version (yeah, THIS is the short version.) and if this doesn’t work I will lose it


EDIT: IT WORKED 😭
4 notes
·
View notes
Text
#Residential Christmas Light Installation Sonoma County#Holiday Lighting For Diwali Near Me#Holiday Lighting In Petaluma
0 notes
Text
It seems that Zorin OS 17 finally fixed compatibility issues with a third-party Cirrus Audio driver that caused certain MacBook models to have no audio, so now my mid-2017 MacBook Pro 13-inch can have a modern, updating, OS that gets new features and active development.
Apple sold this laptop, new, until 2019 (which is when I bought mine, none-the-wiser), and they discontinued support in 2023 with the release of macOS Sonoma 14. I'll be damned if I let a 4-year-old laptop get turned into eWaste, though.
I had previously wiped the SSD and installed Windows 11 because of the aforementioned issues with the audio drivers. Now that I can have audio, though, this computer lives on as Linux machine, as it's 2011 15-inch counterpart does.
#rambles#zorin#zorin os#zorin os 17#macbook#macbook pro#2017 macbook pro#apple#fuck apple#macos#ewaste#software#update#software update#planned obsolescence#linux#tech#technology#computer#computers#laptop#laptops
5 notes
·
View notes
Text
So I just took the LSAT today and to be completely honest… wasn’t as bad as I thought it’d be. Somehow finished every section with time leftover to doublecheck my work! Feeling pretty good about it 🥰 even though I pulled an all-nighter before it and still haven’t slept… 🫠
Not intentionally, mind you—LSAC’s new online LSAT Proctor software isn’t compatible with the new MacOS Sonoma 14.0… so spent all night trying to learn how to downgrade my MacOS version in order to download the testing/proctoring software before my 7am exam.
Turns out, on silicon-chip Macs (M1+), you can’t just simply downgrade or restart/reboot your laptop to the software it originally came in. That’s apparently only an available option on Intel Macs.
Instead, if you have a silicon Mac, you have to go through the complicated process of:
1. Backing up your Mac using Time Machine on some other external hard drive or disk (since downgrading completely wipes your startup disk and erases all data)
2. Setting up a Bootable Installer—also on an external hard drive (separate)
3. Downloading the version software from Apple’s App Store (the easiest part of the entire process! Though, of course, you can’t even run it until you’ve done everything else first)
4. Using the Terminal app and running the specific (in my case, Ventura) command as found on Apple’s website and proceeding with the rest of the commands to get it working.
which… don’t get me started on figuring out how to set up a Bootable Installer. This was all completely foreign to me and honestly I was two “error” messages away from a complete mental breakdown.
At 5am, I gave up and woke up my poor friend to beg her to let me use her laptop for my LSAT.
If anyone can send me a crash course on using the Macbook’s Terminal app, it would be more than welcomed!
At this point, I gotta set up a Bootable Installer just for the spite of it. Never letting myself get blindsided like this again! Will always have a backup version. Learned my lesson lol
#macos sonoma#lsat#technology#programming#coding#macos#macos 14#LSAC#silicon#macbook#personal#lialifelounge
5 notes
·
View notes
Text
3 notes
·
View notes
Text


Another stunning transformation completed! We just finished installing this beautiful Engineered Hardwood from Portercraft, The Sonoma Collection in the warm Verano color. The perfect blend of durability and elegance for any space. Installed by Express Hardwood & Flooring in Lakewood, CO.
0 notes
Text

Dreaming of a kitchen upgrade? Diamond Certified cabinet contractors in Sonoma County offer custom designs and expert installation for cabinets that fit your style and space. 🏡✨ Transform your kitchen with trusted professionals.
#CabinetContractors #KitchenRemodel #SonomaCounty #DiamondCertified #CustomCabinets #HomeImprovement #CabinetDesign #TrustedPros #SonomaHomeProjects #QualityCraftsmanship
0 notes
Text
Our services include: carpet sales and installations, materials only sales for do-it-yourself projects, vinyl, commercial and residential flooring, blinds, shutters, commercial window coverings, remnants and much more! Call today to schedule your free estimate.
0 notes
Last Seen Blogs

gofish83
John Boy

purego
ego

greatszu
Luna in her Rooster Era!

pujiws-blog
普济海外文书代写

pureeoftheday
puree of the day