#visual studio code emmet
Explore tagged Tumblr posts
Visit Tumblr Blog
Explore Tumblr blogs with no restrictions, modern design and the best experience.
Last Seen Tumblr Blogs


Fun Fact
Total funding amounts to $125.3M.
Text
Unova Battle Subway maps
My personal preferred map of the railways (one with blue markers, one with color coded markers)


An alternate map, taking the in-game subway map slightly more literally. (Bonus map with a few non-canon markers I added purely to help myself make sense of the seemingly pointless shapes of some of the routes)


Bonus extra map of the routes taken by Ingo, Emmet, or both of them, for those who want a more specific visual of those routes on their own. (Of course Emmet's line goes through the Pokémon World Tournament lmao)

Misc notes/thoughts under the cut
I'm not a train person, take all these musings with a grain of salt lol

Canon map note: I imagine this map only shows the large, intercity railways. Cities like Nimbasa, Castelia, etc likely have smaller, more complex subway lines all over the city like we tend to see IRL.
Canon map note 2: In an IRL setting, these rail lines are likely far less straight and angular than on these maps and could probably make a lot more sense if drawn with a freer hand and consideration for the landscape, but I tried sticking somewhat close to how it's presented in the game.
International (wi-fi) line: In the game it's the wi-fi line. In a non-game context I imagine this line is one that actually leaves Unova and goes to a neighboring region.
Subwayness: While not all of these lines are 100% underground like they might be in the cities, I like to think quite a few of them are partially or primarily in tunnels. Many lines go across water without a major bridge* on the map, or straight through harsh environments like mountains or deserts, some of which may be more convenient long term to go under rather than through. With the technology of the Pokémon universe, I imagine large stretches of underground train tunnels are entirely possible. (*Maybe there's smaller unshown bridges for the trains, but at least the line that goes right through Castelia's port to an island I'd like to believe could be underground under water)
Battle Subway: The Battle Subway itself likely only runs on these intercity lines.Assuming IRL distances rather than in game walking distances, depending on the length of the line, a lap or two could be a full days work for the bosses. Non-battle trains likely use these same tracks.
Anville Town: The branching path on the Anville line is strange, as it doesn't seem to point toward any known location. It could be pointing toward some unlabelled town or landmark, though I've seen some people posit that it stops at the Celestial or Dragonspiral towers (though they seem too far away for me to agree). My personal headcanon is that rather than the large branch shown on the original map, it's actually two branches going to Anville Town; a large alternate rail to help with rotating/moving trains going in and out of the rail yard there.
Pokémon World Tournament: Located in or very near Driftveil City, it was added in BW2 by Driftveil gym leader Clay. Considering Driftveil is a city, it could have multiple subway stations, one of which just happens to be close to the PWT. Alternatively, it could be a bit of a distance away and thus have it's own station.
PokéStar Studios: Located in or very near Virbank City. As the major intercity lines don't quite hit Virbank itself, I imagine Virbank only has one intercity station near the studio if it's within Virbank itself. That, or it has no intercity stations and one must travel the distance between Virbank and the studio to travel further.
Unity Tower: Literally this train goes through a port and right into the ocean to reach an island. This island is only accessible by boat. I'm convinced this train goes under the seafloor. That or it has a super cool Marine Tube situation where it's a subway tunnel, but the tunnel is transparent and the ocean and water pokémon can be seen out the train windows.
#pokemon#submas#battle subway#unova#pokemon black and white#pokemon bw#if anyone wants a tweaked/variant version of one of these hmu i dont mind making more lmao#for those that dont know the marine tube is a cool unova landmark in bw2. it was a super cool addition to the game at the time. very neat#may tweak the notes section of someone brings up a good point about the maps/notes that i decide i wanna incorporate#icys trashtalk#icys drawings and doodles
429 notes
·
View notes
Text

finally crawling out of my little hidey hole to make an intro post
hello !! you can call me either fuzz or phantas !!
on most platforms you can find me under @phantasmaltrain or shortened versions of it ! ( mainly ao3, tiktok, or discord )
i mainly post about whatever fixations are on my mind, which usually includes pokemon, genshin impact, and other medias that just aren’t coming to mind at this exact moment
i draw and write a lot ! i also dabble into a bit of coding / game making ( i mainly work with visual code studio and ren.py ) ! half the time i get nervous posting !
i am a Very Nervous Person in general so if my stuff randomly disappears or asks don’t go through, chances are i’ve gotten too intimidated by them and i’m just staring at it.
but i do like to talk !! a lot !! please do send me questions and asks about what i write and draw !!
other blogs i have —
@the-paracosm-of-emmet-treyne — ask and comic blog for paracosm au
@burnclan — clangen blog
( common tags on my blog below! )
general tags —
#fuzz moment - just an original post marker!
#reblog - general tag to sort reblogs
#other’s art or #other’s work - reblog tag for other people’s artwork and other things i think are pretty neat!
pokemon au tags —
#split tracks au — volo and emmet prevent ingo falling into hisui, but other problems are created
#paracosm au — ingo does not forget unova, but instead any sign of his existence seems to have disappeared in the present
#fuzzverse alola — personal au retelling of pokemon sunmoon / ultrasunmoon
( other au tags may be added here if i ever post them! )
8 notes
·
View notes
Text
رفع ملفاتك على GitHub باستخدام Visual Studio Code
تريد رفع ملفات مشروعك على GitHub ولكن ليس لديك مهارة الـ Command line, إليك أسهل طريقة للتعامل المباشر بين Visual Studio Code & GitHub. مشكلة عند رفع الملفات على GitHub الكثير من المبرمجين المبتدأين تواجههم صعوبة في رفع ملفات المشروع علي موقع GitHub, وكثيراً ما تحدث أخطاء في الملفات وفي مسارات المجلدات. لا أستطيع استخدام الـ Command line فإذا كنت من مستخدمي Visual Studio Code, فهناك مساحة…
View On WordPress
#git in visual studio code#github#how to install visual studio code#install visual studio code#visual studio#visual studio code#visual studio code 2018#visual studio code emmet#visual studio code extensions#visual studio code guide#visual studio code html#visual studio code json#visual studio code linux#visual studio code python#visual studio code ssh#visual studio code tutorial#visual studio code tutorial for beginners#تعلم github#رفع المشروع#رفع المشروع على github#رفع المشروع علي الجيت هاب#رفع المشروع وربطه بالgithub#رفع الموقع الاول على github وتعلم بعض اوامر ال git#رفع مشروع git#رفع ملفات البوت ع موقع github#رفع ملفات علي جيت هوب#طريقة رفع ملفات css و java على موقع github والحصول على رابط مباشر،#طريقع رفع ملفات على موقع github
0 notes
Text
Speed Up Your Coding with Emmet in VSCode and Mastering HTML Elements
In this blog post, we will explore how to use Emmet in Visual Studio Code (VSCode) to speed up your coding process. We will also dive into various HTML elements, such as tags, inline vs. block elements, lists, and anchor tags. Finally, we will discuss how to style lists without using CSS. Let’s get […] The post Speed Up Your Coding with Emmet in VSCode and Mastering HTML Elements appeared first on TECH - WEB DEVELOPMENT NEWS. https://tech-webdevelopment.news-6.com/speed-up-your-coding-with-emmet-in-vscode-and-mastering-html-elements/
0 notes
Text
【Visual Studio Code】Emmetを使ってコーディングを効率化しよう
Emmetとは? Emmet とは、HTML や CSS を省略記法で入力できるプラグインです。Visual Studio Code や SublimeText、Atom など多くエディタで利用できます。 Emmentを使うことで、キー入力を減らしコーディングの大幅な効率化ができます。 特に Visual Studio CodeはEmmet が標準搭載されているので、拡張機能を入れずに利用できます。 Visual Studio CodeでHTML、CSSを書く人は記法を覚えてまず損はないです。 Visual Studio…

View On WordPress
0 notes
Text
Zen studio

Zen studio how to#
Zen studio code#
Zen studio download#
Zen studio code#
# create a new window code -n # change the language code -locale=es # open diff editor code -diff # open file at specific line and column code -goto package.json:10:5 # see help options code -help # disable all extensions code -disable-extensions. # open the current directory in the most recently used code window code -r. See the platform specific setup topics if VS Code is added to your environment path during installation ( Running VS Code on Linux, macOS, Windows). Make sure the VS Code binary is on your path so you can simply type 'code' to launch VS Code. VS Code has a powerful command line interface (CLI) which allows you to customize how the editor is launched to support various scenarios. Keyboard Shortcut: ⌃R (Windows, Linux Ctrl+R)ĭisplays a Quick Pick dropdown with the list from File > Open Recent with recently opened folders and workspaces followed by files. Navigate between recently opened folders and workspaces This will open the currently selected file in the background and you can continue selecting files from Quick Open. You can open multiple files from Quick Open by pressing the Right arrow key. Repeat the Quick Open keyboard shortcut to cycle quickly between recently opened files. Typing commands such as edt and term followed by a space will bring up dropdown lists. Tip: Type ? to view commands suggestions. Keyboard Shortcut: ⌘P (Windows, Linux Ctrl+P) If you forget a keyboard shortcut, use the Command Palette to help you out.ĭownload the keyboard shortcut reference sheet for your platform ( macOS, Windows, Linux). Keyboard Shortcut: ⇧⌘P (Windows, Linux Ctrl+Shift+P)Īll of the commands are in the Command Palette with the associated key binding (if it exists). Help > Editor Playground.Īccess all available commands based on your current context. Try out VS Code's code editing features, like multi-cursor editing, IntelliSense, Snippets, Emmet, and many more. If you are looking to improve your code editing skills open the Interactive Editor Playground. As you discover and learn, the walkthroughs track your progress. Pick a Walkthrough for a self-guided tour through the setup steps, features, and deeper customizations that VS Code offers. You will get an overview of VS Code's customizations and features. The best way of exploring VS Code hands-on is to open the Get Started page. Prefer a video? You can watch a recent Microsoft Build talk Visual Studio Code tips and tricks, which describes 20 tips and tricks for working productively with VS Code. You can find platform specific setup instructions at Running VS Code on Linux, macOS, and Windows.
Zen studio download#
If you don't have Visual Studio Code installed, go to the Download page. This topic goes pretty fast and provides a broad overview, so be sure to look at the other in-depth topics in Getting Started and the User Guide to learn more. You'll become familiar with its powerful editing, code intelligence, and source code control features and learn useful keyboard shortcuts.
Zen studio how to#
"Tips and Tricks" lets you jump right in and learn how to be productive with Visual Studio Code. Configure IntelliSense for cross-compiling.
0 notes
Text
Windows 7 multimon

#WINDOWS 7 MULTIMON WINDOWS 10#
#WINDOWS 7 MULTIMON CODE#
#WINDOWS 7 MULTIMON PC#
#WINDOWS 7 MULTIMON WINDOWS 7#
But as the old saying goes, “never let the perfect be the enemy of the good. The solution isn’t perfect, by any means. Simply use the Windows key + left or Windows key + right to snap the active window to the monitor you want it on. The final piece of the puzzle is to leverage the Snap feature of Windows to snap each window to the left or right of the spanned monitor pair (note that this workaround is really only practical when using two monitors). RDP files, too!īut that leads to another problem…with spanning enabled, any maximized windows will span both monitors, which is hardly optimal. rdp file, and edit that file, adding the line:
#WINDOWS 7 MULTIMON WINDOWS 7#
Turns out that while Windows 7 Professional doesn’t support multiple monitors as discrete monitors, it does support spanning multiple monitors, which you can enable by saving your remote desktop settings into a. Unfortunately, I discovered this only after having brought my laptop stand (this Furinno Laptop Stand (affiliate link), which I picked up on sale at for around $40…you can get one from Amazon for around $45) in to the office, so I figured before admitting defeat, I should try to find a workaround.
#WINDOWS 7 MULTIMON WINDOWS 10#
This is fine for development, but unfortunately, Windows 7 Professional does not support multiple monitors when hosting an RDP session, even if the client OS (in my case Windows 10 Professional) does.
#WINDOWS 7 MULTIMON PC#
In this case, the problem was that the desktop PC I’m developing on is running Windows 7 Professional. Sadly, sometimes the things you think will be easy turn out not to be, especially when it comes to computers. To remedy this, I planned to bring in my laptop, set it up on a stand, and re-purpose one of the two monitors they provided so I could use Remote Desktop to connect to the desktop PC and still enjoy dual monitors…but there was a small wrinkle in my plan. But one of the things I missed from my home office was my standing desk. The client did a great job of provisioning a nice desktop PC and large dual monitors. I’ve recently transitioned from working at home to working on-site at a client.
Dave Heidstra on Cisco An圜onnect and Hyper-V – Connect to a VPN from Inside a VM Session.
John on Cisco An圜onnect and Hyper-V – Connect to a VPN from Inside a VM Session.
The file system monitor displays activity from the perspective of the file system. The system monitor displays process and thread creation as well as binary image loading. on ASP.NET MVC, Bootstrap, and Internet Explorer Compatibility View MultiMon is an advanced multifunctional system monitoring tool for Windows which displays detailed output of a wide range of activities in real-time.
Łukasz Lech on Cisco An圜onnect and Hyper-V – Connect to a VPN from Inside a VM Session.
matej on Cisco An圜onnect and Hyper-V – Connect to a VPN from Inside a VM Session.
#WINDOWS 7 MULTIMON CODE#
Save Time and Keystrokes with Emmet in Visual Studio Code.
Custom Domains the Easy Way in Azure Web Apps Explore Dual Monitor Wallpapers Windows 7 on WallpaperSafari Find more items about Panoramic Wallpaper Dual Screen, Double Monitor Wallpaper, Free Dual.
Building an Internet-Connected, AI-driven Candy Dispenser with OutSystems.
Took a look at ishadow - Not sure how ishadow will help. We are doing this over a LAN and has also been tested over a WAN, and it is like something is not causing the screen to refresh fast enough when multimon is on, not sure why. I have a case open with Bloomberg as well about this but the issue doesn't happen Via RDP with multimon, the screen does not refresh at a step that blinks a small portion of the screen for an RSA like hardware token/unit to synchronize with the blinking light. The issue is that we have an application (Bloomberg) which when connected Ok, will there ever be desktop composition in real multi mon, is it in the plans? What is stopping MS from implementing it?Īnd sure, there will be 2x or Xx the amount of data to transfer, but /span is transferring the SAME amount of data since the resolution is the same, so why the huge difference in speed there?Īdditionally, we are using it over a LAN as well as a WAN and our internet connections aren't slow, 20Mb down (at home) and 90Mb up (at the office) but that isn't the main issue.
0 notes
Text
Jaksta mac code 無料ダウンロード.Jaksta Streaming Media Recorder
Jaksta mac code 無料ダウンロード.jaksta mac 사용법

macOS への Visual Studio Code のインストール方法.MacOSでVisual Studio Codeをインストールする手順 - Qiita
· 無料 jaksta mac 사용법 のダウンロード ソフトウェア UpdateStar - Download Streaming Video & Audio to your Mac from thousands of web sites. Jaksta downloads any video, music, or radio that is played in your browser. Automatically · 7/10 - Jaksta Streaming Media Recorderを無料ダウンロード Jaksta Streaming Media Recorder ダウンロードし、自動的にインターネットのビデオを変換することができます。Jaksta をダウンロードして快適な YouTube からビデオを得る. Jaksta Streaming Media Recorder YouTube や他のサイトからビデオをダウンロードすることは 3,9/5 Vsiual Studio Code (無料のエディタ)を macOS へインストールする場合は、 以下のようにしてください。 Visual Studio Code をダウンロードする. Visual Studio Code の Download ページ の Mac 用のリンクをクリックしてダウンロードします。
Jaksta mac code 無料ダウンロード.Free jaksta mac インストール Download - jaksta mac インストール for Windows
· 7/10 - Jaksta Streaming Media Recorderを無料ダウンロード Jaksta Streaming Media Recorder ダウンロードし、自動的にインターネットのビデオを変換することができます。Jaksta をダウンロードして快適な YouTube からビデオを得る. Jaksta Streaming Media Recorder YouTube や他のサイトからビデオをダウンロードすることは 3,9/5 purchase Jaksta for Mac buy Jaksta for Mac Now!. Download and convert Video, Radio and Music from, overview of some of the functions of the software. Once monitoring, Jaksta will save video and audio buy Jaksta for Mac code, the ability to record free any video from any site, hassle free and have it automatically convert into the desired format. Mac video capture, others! · Windows・Macで使えるCODE39のフォントセットです。 どなたでも無料でダウンロード可能です。 下に文字がつくタイプとつかないタイプのバーコードのセットです。 CODE39フォント無料ダウンロード
それをMacOS��インストールし、使用できるまでの手順をまとめました。 ちなみにVSCodeはマルチプラットフォームなのでWindows、MacOS、Linuxのいずれの環境にもインストールできます。. ダウンロードフォルダにそれらしいアイコンが表示されたかと思いますが、まだ開かないでください。 そのアイコンをドラッグアンドドロップで、サイドメニューの「アプリケーション」に移動させます。. 赤枠の検索フォームに「Japanese Language Pack」と打ってみてください。 そうすると下に検索結果が表示されるので、同じ名前の拡張機能にある「Install」ボタンをクリックします。. VSCodeを開いた今の状態で、左上の「Code」から「Quit Visual Studio Code」をクリックすると閉じます。 そして再度アプリケーションフォルダからVSCodeを開いたら、インストールと準備は完了です。.
HTMLを作成時にlang属性をenからjaに変更する方法が下記サイトで詳しく書いています。 VSCodeのemmetでhtmlのlangをjaに設定する方法. Qiita Teams that are logged in. NET 6 での開発Tipsを投稿して高性能空気清浄機など豪華プレゼントをもらおう! 詳しくはこちら. Improve article. Report article. Help us understand the problem. What are the problem? It's violation of community guideline. It's illegal. It's socially inappropriate. It's spam. More than 1 year has passed since last update.
posted at updated at MacOSX install VisualStudioCode. Visual Studio Codeとは通称VSCodeと呼ばれ、Microsoft社が開発したテキストエディタです。 他のテキストエディタに比べ、HTMLやCSSなどを書く時の補助的な機能が揃っているため、多くのプログラマやWebデザイナー達の指示を集め最近人気のテキストエディタです。 それをMacOSにインストールし、使用できるまでの手順をまとめました。 ちなみにVSCodeはマルチプラットフォームなのでWindows、MacOS、Linuxのいずれの環境にもインストールできます。 1. ダウンロード 画面が移動したら自動でダウンロードが始まり、ダウンロードフォルダにアプリがダウンロードされます。 3. アプリケーションフォルダに移動 ダウンロードフォルダにそれらしいアイコンが表示されたかと思いますが、まだ開かないでください。 そのアイコンをドラッグアンドドロップで、サイドメニューの「アプリケーション」に移動させます。 5.
認証ボタンを押す(人によっては表示されず、スキップして構いません) この画面が表示されたら「認証」ボタンを押して、管理者のログイン情報を入力し認証してください。 6. VSCodeの初期画面 この様な画面がでるかと思います。 8. 拡張機能の検索からインストールまで 赤枠の検索フォームに「Japanese Language Pack」と打ってみてください。 そうすると下に検索結果が表示されるので、同じ名前の拡張機能にある「Install」ボタンをクリックします。 他の拡張機能もインストールしましょう 他にも下記の拡張機能を同じようにインストールしてみてください。 下記のテキストをコピー・アンド・ペーストで検索したほうが確実です。 Japanese Language Pack Visual Studio IntelliCode Bracket Pair Colorizer Path Intellisense HTMLHint EvilInspector ひととおりインストールしたらVSCodeを再起動しましょう。 VSCodeを開いた今の状態で、左上の「Code」から「Quit Visual Studio Code」をクリックすると閉じます。 そして再度アプリケーションフォルダからVSCodeを開いたら、インストールと準備は完了です。 参考 HTMLを作成時にlang属性をenからjaに変更する方法が下記サイトで詳しく書いています。 VSCodeのemmetでhtmlのlangをjaに設定する方法.
By following users and tags, you can catch up information on technical fields that you are interested in as a whole. What you can do with signing up.
0 notes
Text
100%OFF | HTML & CSS for Beginners

Get Udemy Coupon 100% OFF For HTML & CSS for Beginners Course
Learn everything from scratch.
Debunk the myth that web development is hard!
Create your own sites using HTML & CSS.
After this course you will know how to efficiently use Visual Studio Code to create websites using HTML & CSS.
You will also learn EMMET which speeds up the process of creating websites.
You will learn basic tags & selectors and how to use them efficiently. This course is an entrance for you to become in the future web-developer. After this course you will finally understands basics of creating websites.
I provide as much detail as possible in each lesson so that everyone can understand the web development techniques.
If you have any questions regarding the topics covered in this Python course, please feel free to ask. I’m always happy to help those who want to learn!
Learn fast and hassle-free website development 🙂 Become a web developer today!
ENROLL NOW !!
0 notes
Text
C# For Visual Studio Code

Visual Studio Code C# Project
C In Visual Studio
C# For Visual Studio Code
Visual Studio Code For C# Development
C'est La Vie
How to Setup C# in Visual Studio Code Full SetupDownload the full source code of application here:https://codingshiksha.com/blogs/android/firebase-phone-auth. In this section, you use Visual Studio Code to create a local Azure Functions project in C#. Later in this article, you'll publish your function code to Azure. Choose the Azure icon in the Activity bar, then in the Azure: Functions area, select the Create new project.
C# for Visual Studio Code (powered by OmniSharp)
Welcome to the C# extension for Visual Studio Code! This extension provides the following features inside VS Code:
Lightweight development tools for .NET Core.
Great C# editing support, including Syntax Highlighting, IntelliSense, Go to Definition, Find All References, etc.
Debugging support for .NET Core (CoreCLR). NOTE: Mono debugging is not supported. Desktop CLR debugging has limited support.
Support for project.json and csproj projects on Windows, macOS and Linux.
The C# extension is powered by OmniSharp.

Get Started Writing C# in VS Code
Note about using .NET Core 3.1.40x SDKs

The .NET 3.1.40x SDKs require version 16.7 of MSBuild.
For MacOS and Linux users who have Mono installed, this means you will need to set omnisharp.useGlobalMono to never until a version of Mono ships with MSBuild 16.7.
Note about using .NET 5 SDKs
The .NET 5 SDK requires version 16.8 of MSBuild.
For Windows users who have Visual Studio installed, this means you will need to be on the latest Visual Studio 16.8 Preview.For MacOS and Linux users who have Mono installed, this means you will need to set omnisharp.useGlobalMono to never until a version of Mono ships with MSBuild 16.8.
What's new in 1.23.11
Move the global Mono check to the correct place (#4489, PR: #4492)
Visual Studio Code C# Project
What's new in 1.23.10
Support solution filters (*.slnf) (PR: #4481)
Prompt user to install Blazor WASM companion extension if needed (PR: #4392)
Add path to dotnet so child processes can use the CLI (PR: #4459)
Give more information when Mono is missing or invalid. (#4428, PR: #4431)
Revert incremental change forwarding (PR: #4477)
Fixes to asset generation (PR: #4402)
Add properties to blazorwasm debug configuration. (dotnet/aspnetcore#30977, PR: i#4445)
Avoid white status bar items to ensure contrast (#4384, PR: #4385)
Update OmniSharp to 1.37.8
Update Roslyn version to 3.10.0-1.21125.6 (PR: omnisharp-roslyn#2105)
Update included build tools to closely match NET 6 Preview 1 SDK (PR: omnisharp-roslyn#2103)
Improve custom error messages for MSB3644 (PR: omnisharp-roslyn#2097)
Do not call FindReferencesAsync for null symbol (omnisharp-roslyn#2054, PR: omnisharp-roslyn#2089)
use an OmniSharp specific message for MSB3644 (omnisharp-roslyn#2029, PR: omnisharp-roslyn#2069)
changed the default RunFixAllRequest timeout to 10 seconds (PR: omnisharp-roslyn#2066)
Support Solution filter (.slnf) (PR: omnisharp-roslyn#2121)
updated to IL Spy 7.0.0.6372 (PR: omnisharp-roslyn#2113)
Add sentinel file to MSBuild to enable workload resolver (#4417, PR: omnisharp-roslyn#2111)
fixed CS8605 'Unboxing possibly null value' (PR: omnisharp-roslyn#2108)
Updated Razor support (PR: #4470)
Bug fixes
What's new in 1.23.9
Add option to organize imports during document formatting. (PR: #4302)
Update to use zero based indexes (PR: #4300)
Improve request queues to improve code completion performance (PR: #4310)
Add setting to control whether to show the OmniSharp log on error (#4102, #4330, PR: #4333)
Support building launch assets for NET6-NET9 projects (#4346, PR: #4349)
Add debugger support for Concord extensions. See the ConcordExtensibilitySamples wiki for more information.
Update OmniSharp version to 1.37.6
Handle records in syntax highlighting (#2048, PR: #2049)
Remove formatting on new line (PR: #2053)
Validate highlighting ranges in semantic highlighting requests (PR: #2055)
Delay project system init to avoid solution update race (PR: #2057)
Use 'variable' kind for parameter completion (#2060, PR: #2061)
Log request when response fails (#2064)
What's new in 1.23.8
Updated Debugger support (PR: #4281)
Updated the version of .NET that the debugger uses for running its own C# code to .NET 5
Updated .NET debugging services loader to address problem with debugging after installing XCode12 (dotnet/runtime/#42311)
Fixed integrated terminal on non-Windows (#4203)
Updated Razor support (PR: #4278)
Bug fixes
Update OmniSharp version to 1.37.5 (PR: #4299)
Update Roslyn version to 3.9.0-2.20570.24 (PR: omnisharp-roslyn#2022)
Editorconfig improvements - do not lose state, trigger re-analysis on change (omnisharp-roslyn#1955, #4165, #4184, PR: omnisharp-roslyn#2028)
Add documentation comment creation to the FormatAfterKeystrokeService (PR: omnisharp-roslyn#2023)
Raise default GotoDefinitionRequest timeout from 2s to 10s (#4260, PR: omnisharp-roslyn#2032)
Workspace create file workaround (PR: omnisharp-roslyn#2019)
Added msbuild:UseBundledOnly option to force the usage of bundled MSBuild (PR: omnisharp-roslyn#2038)
Support auto doc comment generation (#8, PR: #4261)
Add schema support for appsettings.json (#4279, PR: #4280)
Add schema support for global.json (PR: #4290)
Update remoteProcessPickerScript windows ssh exit (#3482, PR: #4225)
Do not start OmniSharp server in Live Share scenarios (#3910, PR: #4038)
Suppress codelens for IEnumerable.GetEnumerator (#4245, PR: #4246)
Allow arm64 MacOS to debug dotnet projects (#4277, PR: #4288)
Emmet support in Razor files
To enable emmet support, add the following to your settings.json:


Semantic Highlighting
The C# semantic highlighting support is in preview. To enable, set editor.semanticHighlighting.enabled and csharp.semanticHighlighting.enabled to true in your settings. Semantic highlighting is only provided for code files that are part of the active project.
To really see the difference, try the new Visual Studio 2019 Light and Dark themes with semantic colors that closely match Visual Studio 2019.
Supported Operating Systems for Debugging
Currently, the C# debugger officially supports the following operating systems:
X64 operating systems:
Windows 7 SP1 and newer
macOS 10.12 (Sierra) and newer
Linux: see .NET Core documentation for the list of supported distributions. Note that other Linux distributions will likely work as well as long as they include glibc and OpenSSL.
ARM operating systems:
Linux is supported as a remote debugging target
Found a Bug?
To file a new issue to include all the related config information directly from vscode by entering the command pallette with Ctrl+Shift+P(Cmd+Shift+P on macOS) and running CSharp: Report an issue command. This will open a browser window with all the necessary information related to the installed extensions, dotnet version, mono version, etc. Enter all the remaining information and hit submit. More information can be found on the wiki.
Alternatively you could visit https://github.com/OmniSharp/omnisharp-vscode/issues and file a new one.
Development
First install:
Node.js (8.11.1 or later)
Npm (5.6.0 or later)
To run and develop do the following:
Run npm i
Run npm run compile
Open in Visual Studio Code (code .)
Optional: run npm run watch, make code changes
Press F5 to debug
C In Visual Studio
To test do the following: npm run test or F5 in VS Code with the 'Launch Tests' debug configuration.
License
Copyright © .NET Foundation, and contributors.
The Microsoft C# extension is subject to these license terms.The source code to this extension is available on https://github.com/OmniSharp/omnisharp-vscode and licensed under the MIT license.
Code of Conduct
This project has adopted the code of conduct defined by the Contributor Covenantto clarify expected behavior in our community.For more information see the .NET Foundation Code of Conduct.
Contribution License Agreement
C# For Visual Studio Code
By signing the CLA, the community is free to use your contribution to .NET Foundation projects.
Visual Studio Code For C# Development
.NET Foundation
C'est La Vie
This project is supported by the .NET Foundation.
0 notes
Text
Javascript 1 - Hola mundo!!!
Hola a quien este leyendo este post.
Esta es la primer entrada al curso de javascript, y que es lo que vamos a hacer?, pues como el título lo indica, vamos a hacer el clásico ejemplo de "Hola mundo!!!".
Para quien ha aprendido anteriormente un lenguaje de programación como es mi caso, este ejemplo es bien conocido y querido por muchos.
Si este es tu primer contacto con los lenguajes de programación, bueno este ejemplo es el primero que se ve en cualquier lenguaje, esto se debe a que muestra características básicas del lenguaje, pero aunque son básicas son importantes ya que muestra la interacción del programa con el usuario, aunque solo muestra un mensaje en pantalla realmente le proporciona al usuarios un resultado visual.
Que vamos a necesitar para llevar acabo estas clases?
Lo primero que debemos tener en nuestra computadora es un editor de texto. En este curso estaré usando Visual Studio Code de Microsoft. Aclaro que no es necesario usar este editor, es mi preferencia personal, esto lo hago debido a que este editor cuenta con diversos plugins que nos ayudaran a realizar ciertas tareas.
uno de estos plugins que voy a usar es es live server, por lo cual recomiendo instalar este en VS Code. Este nos permite tener un servidor web local para hacer nuestras pruebas, tiene algunas ventajas este sobre abrir directamente el archivo html solo en el navegador, la ventaja es que cuando modifiquemos algo, en automático se actualizaran los cambios y los podamos ver inmediatamente dentro de este servidor.
adicionalmente este editor cuenta con varios plugins adicionales, pero recomiendo que busquen información sobre que plugins les puedan ser útiles.
Respecto a los otros editores, pueden usar Atom, Sublime, etc., de la misma forma busquen información acerca de plugins son utiles para ustedes.
Bueno, ya tenemos nuestro editor instalado, estamos listos para comenzar y así lo haremos.
Vamos a ver varios temas fáciles en esta primera entrada, ya que esta clase es bastante fácil de realizar.
Hola mundo!!! (html)
Agregando código javascript
Separando html y javascrpt
Comentarios en javascript
El uso de ";" en javascript.
Como podemos ver son temas sencillos que podemos abarcar en usa sola entrada.
Sin más, Comencemos con el ejemplo.
Hola Mundo (html)
Lo primero que vamos a hacer es una carpeta donde vamos a almacenar nuestros archivos, yo he creado en mi escritorio una carpeta llamada Blog Javascript, y dentro de esta otra llamada Hola mundo.

Ahora debemos abrir esta carpeta en VS Code con la opción Open Folder.

Ya con la carpeta abierta en VS Code agregamos nuestro archivo index.html en la carpeta Hola mundo, este archivo se generará completamente vac��o.

Ahora comenzaremos a ingresar el código, este puede ser ingresado completamente manual, pero nosotros vamos a usar "emmet", este es un pluging en la mayoría de editores que nos permite agilizar el ingreso de código, en VS Code ya se encuentra por defecto.
Emmet son un tipo de abreviaciones que al ingresarlas nos va a agregar bloques de código completos.
en nuestro ejemplo de hola mungo necesitamos la estructura de un archivo html. Para esta estructura vamos a ingresar la abreviación "html" y nos mostrará varias opciones, vamos a seleccionar la segunda y veremos que nos proporciona la estructura minima de un archivo html.


Vamos a agregar algo más a nuestro código y para esto solo vamos a ingresar un heading con la leyenda "Hola mundo!!!"
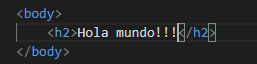
Ahora vamos a ver nuestra web en el navegador, vamos a hacerlo usando live server, en cualquier parte del código damos clic derecho y seleccionamos la opción Open with live server.

se nos abrirá el navegador y podemos ver el contenido de nuestra web.
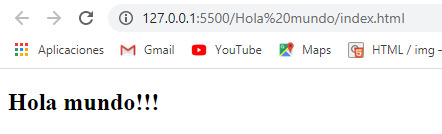
En caso de que hagamos modificaciones, cuando guardemos los cambios la actualización se refleja automáticamente.
Ahora lo veremos cuando ingresemos nuestro código de javascript.
Agregando código javascript
Para hacer esto vamos a usar el tag "script", es una buena practica siempre agregar el código javascript dentro de la sección body siempre antes del tag de cierre de esta sección.
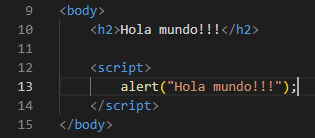
Ahora, guardamos los cambios y vamos a nuestro navegador donde se abrió anteriormente nuestra web para ver que es lo que ha pasado.
Se ve el mensaje que hemos agregado y en nuestro caso no hemos tenido que recargar la página para ver los cambios reflejados.

Este es nuestro primer programa en javascript, muy sencillo, pero para iniciar es muy didáctico.
0 notes
Text
Visual Studio Code Automatic Formatting

Prettier is an opinionated code formatter. It enforces a consistent style by parsing your code and re-printing it with its own rules that take the maximum line length into account, wrapping code when necessary.
Visual Studio Code Formatting Shortcut
Visual Studio Code Auto Format Xml
Visual Studio Code Auto Format React
Visual Studio Format Document
Visual Studio Code Auto Formatting On Save
Visual Studio Code Automatic Formatting
JavaScript · TypeScript · Flow · JSX · JSON CSS · SCSS · Less HTML · Vue · Angular GraphQL · Markdown · YAML Your favorite language?
Install the Flutter extension (see Editor setup) to get automatic formatting of code in VS Code. To automatically format the code in the current source code window, right-click in the code window and select Format Document. You can add a keyboard shortcut to this VS Code Preferences. The code formatting is available in Visual Studio Code through the following shortcuts: On Windows Shift + Alt + F On Mac Shift + Option + F On Linux Ctrl + Shift + I. Visual Studio Code comes with Emmet built-in. (Emmet - the essential toolkit for web-developers) Emmet helps you write HTML (and also CSS) with shortcuts. The shortcuts are triggered by typing the TAB key. About Press Copyright Contact us Creators Advertise Developers Terms Privacy Policy & Safety How YouTube works Test new features Press Copyright Contact us Creators.
Installation
To open your user and workspace settings, use the following VS Code menu command: On Windows/Linux - File Preferences Settings. On macOS - Code Preferences Settings. Add these options to the editable panel of your configuration settings: 'editor.formatOnPaste': true, 'editor.formatOnSave': true.
Install through VS Code extensions. Search for Prettier - Code formatter
Can also be installed in VS Code: Launch VS Code Quick Open (Ctrl+P), paste the following command, and press enter.
Default Formatter
To ensure that this extension is used over other extensions you may have installed, be sure to set it as the default formatter in your VS Code settings. This setting can be set for all languages or by a specific language.
If you want to disable Prettier on a particular language you can either create a .prettierignore file or you can use VS Code's editor.defaultFormatter settings.
The following will use Prettier for all languages except Javascript.
The following will use Prettier for only Javascript.
Additionally, you can disable format on save for specific languages if you don't want them to be automatically formatted.
Prettier Resolution
This extension will use prettier from your project's local dependencies (recommended). When the prettier.resolveGlobalModules is set to true the extension can also attempt to resolve global modules. Should prettier not be installed locally with your project's dependencies or globally on the machine, the version of prettier that is bundled with the extension will be used.
To install prettier in your project and pin its version as recommended, run:
NOTE: You will be prompted to confirm that you want the extension to load a Prettier module. This is done to ensure that you are not loading a module or script that is not trusted.
Plugins
This extension supports Prettier plugins when you are using a locally or globally resolved version of prettier. If you have Prettier and a plugin registered in your package.json, this extension will attempt to register the language and provide automatic code formatting for the built-in and plugin languages.
Configuration
There are multiple options for configuring Prettier with this extension. You can use VS Code settings, prettier configuration files, or an .editorconfig file. The VS Code settings are meant to be used as a fallback and are generally intended only for use on non-project files. It is recommended that you always include a prettier configuration file in your project specifying all settings for your project. This will ensure that no matter how you run prettier - from this extension, from the CLI, or from another IDE with Prettier, the same settings will get applied.
Using Prettier Configuration files to set formatting options is the recommended approach. Options are searched recursively down from the file being formatted so if you want to apply prettier settings to your entire project simply set a configuration in the root. Settings can also be configured through VS Code - however, these settings will only apply while running the extension, not when running prettier through the command line.
Configuring Default Options
Some users may not wish to create a new Prettier config for every project or use the VS Code settings. In order to set a default configuraiton, set prettier.configPath. However, be careful, if this is set this value will always be used and local configuration files will be ignored.
Visual Studio Code Settings
You can use VS Code settings to configure prettier. Settings will be read from (listed by priority):
.editorconfig
Visual Studio Code Settings (Ignored if any other configuration is present)
NOTE: If any local configuration file is present (i.e. .prettierrc) the VS Code settings will NOT be used.
Usage
Using Command Palette (CMD/CTRL + Shift + P)
Keyboard Shortcuts
Visual Studio Code provides default keyboard shortcuts for code formatting. You can learn about these for each platform in the VS Code documentation.
If you don't like the defaults, you can rebind editor.action.formatDocument and editor.action.formatSelection in the keyboard shortcuts menu of vscode.
Format On Save
Respects editor.formatOnSave setting.
You can turn on format-on-save on a per-language basis by scoping the setting:
Format Selection
Format selection works on several languages depending on what Prettier itself supports. The following languages currently are supported:
Format Document (Forced)
If you would like to format a document that is configured to be ignored by Prettier either because it is in a .prettierignore file or part of a normally excluded location like node_modules, you can run the command Format Document (Forced) to force the document to be formatted.
Linter Integration
The recommended way of integrating with linters is to let Prettier do the formatting and configure the linter to not deal with formatting rules. You can find instructions on how to configure each linter on the Prettier docs site. You can then use each of the linting extensions as you normally would. For details refere to the Prettier documentation.
Settings
Prettier Settings
All prettier options can be configured directly in this extension. These settings are used as a fallback when no configuration file is present in your project, see the configuration section of this document for more details. For reference on the options see the prettier documentation.
The default values of these configurations are always to their Prettier 2.0 defaults. In order to use defaults from earlier versions of prettier you must set them manually using your VS Code settings or local project configurations.
Extension Settings
These settings are specific to VS Code and need to be set in the VS Code settings file. See the documentation for how to do that.
prettier.enable (default: true)
Controls whether prettier is enabled or not. You must restart VS Code when you change this setting.
prettier.requireConfig (default: false)
Require a prettier configuration file to format files. Untitled files will still be formatted using the VS Code Prettier configuration even with this option set to true.
prettier.ignorePath (default: .prettierignore)
Supply the path to an ignore file such as .gitignore or .prettierignore.Files which match will not be formatted. Set to null to not read ignore files.
Note, if this is set, this value will always be used and local ignore files will be ignored.
prettier.configPath
Supply a custom path to the prettier configuration file.
Note, if this is set, this value will always be used and local configuration files will be ignored. A better option for global defaults is to put a ~/.prettierrc file in your home directory.
prettier.prettierPath
Supply a custom path to the prettier module. This path should be to the module folder, not the bin/script path. i.e. ./node_modules/prettier, not ./bin/prettier.
prettier.resolveGlobalModules (default: false)
When enabled, this extension will attempt to use global npm or yarn modules if local modules cannot be resolved.
NOTE: This setting can have a negative performance impact, particularly on Windows when you have attached network drives. Only enable this if you must use global modules. It is recommended that you always use local modules when possible.
Note: Disabling a language enabled in a parent folder will prevent formatting instead of letting any other formatter to run
Visual Studio Code Formatting Shortcut
prettier.documentSelectors
A list of glob patterns to register Prettier formatter. Typically these will be in the format of **/*.abc to tell this extension to register itself as the formatter for all files with the abc extension. This feature can be useful when you have overrides set in your config file to map custom extensions to a parser.
It is likely will need to also update your prettier config. For example, if I register the following document selector by itself, Prettier still won't know what to do with that file. I either need a Prettier extension that formats .abc file format or I need to configure Prettier.
To tell Prettier how to format a file of type .abc I can set an override in the prettier config that makes this file type use the babel parser.
prettier.useEditorConfig (default: true)
Visual Studio Code Auto Format Xml
Whether or not to take .editorconfig into account when parsing configuration. See the prettier.resolveConfig docs for details.
prettier.withNodeModules (default: false)
Whether or not to process files in the node_modules folder.
Error Messages
Failed to load module. If you have prettier or plugins referenced in package.json, ensure you have run npm install
When a package.json is present in your project and it contains prettier, plugins, or linter libraries this extension will attempt to load these modules from your node_module folder. If you see this error, it most likely means you need to run npm install or yarn install to install the packages in your package.json.
Your project is configured to use an outdated version of prettier that cannot be used by this extension. Upgrade to the latest version of prettier.
You must upgrade to a newer version of prettier.
Default Formatter
Code formatting is supported using either one of yapf or autopep8. The default code format provider is autopep8.
Auto Formatting
Formatting the source code as and when you save the contents of the file is supported. Enabling this requires configuring the setting 'editor.formatOnSave': true as identified here.
Visual Studio Code Auto Format React
Paths
All samples provided here are for windows. However Mac/Linux paths are also supported.
AutoPep8
You can configure the format provider by changing a setting in the User or Workspace settings file as follows:
Installing autopep8
Custom Path
This is generally unnecessary. As the Extension will resolve the path to the formatter based on Python executable being used or configured in python.pythonPath of settings.json. If this cannot be found, then the formatter will be resolved based on the current environment Path settings.
If this is not the case or you wish to use another version of autopep8, all you need to do is configure the path as follows either in the User or Workspace settings file:
Yapf
Visual Studio Format Document
You can configure the format provider by changing a setting in the User or Workspace settings file as follows:
Visual Studio Code Auto Formatting On Save
Custom Path
This is generally unnecessary. As the Extension will resolve the path to the formatter based on Python executable being used or configured in python.pythonPath of settings.json. If this cannot be found, then the formatter will be resolved based on the current environment Path settings.
If this is not the case or you wish to use another version of yapf, all you need to do is configure the path as follows either in the User or Workspace settings file:
Custom arguments to Yapf
Custom arguments can be passed into yaps by configuring the settings in the User or Workspace settings as follows:
Installing Yapf
Visual Studio Code Automatic Formatting
pip install yapf
0 notes
Text
Sublime Text v3.2.2 – 2021 最新版下載!輕巧、功能強大的「程式編輯」軟體
Sublime Text 是一款跨平台的「文字、程式編輯」軟體,介面設計非常簡潔,並支援眾多程式語言、語法上色,根據網路上的教學,軟體安裝完成之後都會先安裝 Package Control,之後就可以充分利用套件擴充功能,例如安裝「ConvertToUTF8」可解決中文亂碼的問題,或是「jQuery、HTML-CSS-JS Prettify」…等多款實用套件。 筆者本身只會寫簡單的網頁程式,剛好 Sublime Text 這款搭配「Emmet」套件即可快速編輯,筆者爬文、測試過程中也覺得蠻驚豔的。至於其他程式語言的軟體,由於朋友有在業界工作,因此之前也簡單介紹了目前最熱門之一的編輯軟體:Visual Studio Code,有需要可以參考、下載使用看看,推薦給大家! Continue reading
View On WordPress
0 notes
Photo

[FREE] Emmet in Visual Studio Code: Accelerate your HTML workflow What you Will learn ? Be more productive in writing HTML code. Type it fast and efficiently…
0 notes
Text
(Semi)Preparando o ambiente inicial
Antes de pensar em aprender javascript, há algumas coisas que precisam ser configuradas. Começando pelo VISUAL STUDIO CODE. Mas se você preferir utilizar qualquer outro, fique a vontade, tem outros tão bons quanto, como por exemplo o webstorm da JetBrains, mas esse a gente tem que pagar, então eu prefiro o vs code mesmo.
Eu te levo lá, clica aqui
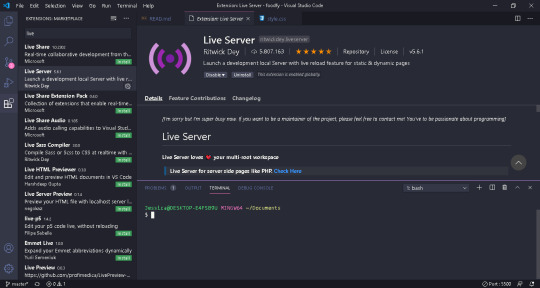
E também ele possui várias extensões boas, hotkeys e o emmet (pra quem não tem muito tempo pra gastar escrevendo certo o HTML). Dentro do Visual studio, temos a opção de deixar o live server ativado, e isso vai fazer sentido pra você nos próximos posts. Faz lá, é rapidinho: Clica em extensões (5 ícone na barra do lado esquerdo) busque por live server, e install. O Meu já está configurado mas é esse cara:
Beleza, tudo lindo e maravilhoso, agora precisamos do Node.js. O que? Não achou que seria tão fácil, não é? Rlx, meu amigo! por enquanto vai ser só.
Isso vai fazer sentido se você me acompanhar.
Ta aqui o node
É só instalar... Tanto o visual studio code (aka será chamado carinhosamente de vscode) quanto o node tem documentação nos sites, caso você queira ler antes de seguir, eu te espero aqui! Acredite, não vou sair do lugar.
Conseguiu?
Maravilha! Seguimos, estou partindo do pressuposto que ninguém aqui manja disso, então pra melhorar pra nós, entre nos seus documentos e crie uma pastinha com um nome qualquer, será nessa pasta que ficarão todos os projetos que trabalharmos, a não ser que você não queira, mas seria ótimo, pois é questão de organização.
Abra o vscode e clique em File -> Open folder
Encontre a pasta e open folder.
Com ela já aberta, crie um arquivo index.js - a extensão é necessário informar quando criamos algum documento no vscode.
Podemos digar a seguinte frase na tela que abriu:
console.log("Hello world");
Salve com ctrl+s ou da maneira mais complicada “File -> Save”
Para ver ele rodando Clique em Terminal e New Terminal, no vscode:
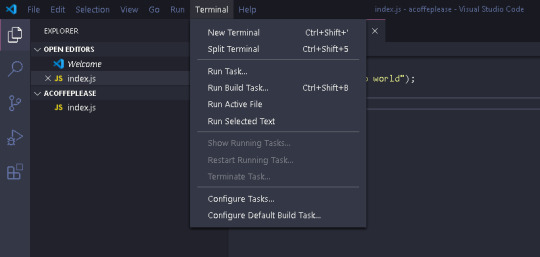
Abrirá uma aba dentro do vsconde com o terminal, nessa tela digite
node index.js
e o Resultado será algo parecido com isso:

Acredito que por hoje já foi o suficiente, na próximo post trataremos sobre strings. Já pegue um café e sinta-se confortavel.
0 notes
Photo

10 Must-have VS Code Extensions for JavaScript Developers
In this article, I’ll focus on a list of must-have VS Code extensions for JavaScript developers.
Visual Studio Code (VS Code) is undoubtedly the most popular, lightweight code editor today. It does borrow heavily from other popular code editors, mostly Sublime Text and Atom. However, its success mainly comes from its ability to provide better performance and stability. In addition, it also provides much-needed features like IntelliSense, which were only available in full-sized IDEs like Eclipse or Visual Studio 2017.
The power of VS Code no doubt comes from the marketplace. Thanks to the wonderful open-source community, the editor is now capable of supporting almost every programming language, framework and development technology. Support for a library or framework comes in various ways, which mainly includes snippets, syntax highlighting, Emmet and IntelliSense features for that specific technology.
VS Code Extensions by Category
For this article, I’ll focus on VS Code extensions specifically targeting JavaScript developers. Currently, there are many VS Code extensions that fit this criterion, which of course means I won’t be able to mention all of them. Instead, I’ll highlight VS Code extensions that have gained popularity and those that are indispensable for JavaScript developers. For simplicity, I’ll group them into ten specific categories.
Snippet Extensions
When you first install VS Code, it comes with a several built-in snippets for JavaScript and Typescript. Snippets help you write repetitive code quickly. However, you may find these may not be enough. You can easily create your own, or you can simply install an extension that includes a bunch of new useful snippets. A quick tip if you want snippets to show on top of suggestions is to use this configuration:
{ "editor.snippetSuggestions": "top" }
Here are some of the most popular snippet extensions for JavaScript developers. However, I would recommend you install just one for simplicity’s sake.
JavaScript (ES6) code snippets, by Charalampos Karypidis. This is currently the most popular javaScript snippet extension with over 3+ million installs to date. This extension provides ES6 syntax for JavaScript, TypeScript, HTML, React and Vue. All snippets include a final semicolon.
JavaScript (ES6) code snippets in StandardJS style, by James Vickery. This is basically a fork of the above extension for those who prefer StandardJS style convention—that is, the snippets don’t have semicolons.
JavaScript standardjs styled snippets, by capaj. Another StandardJS Styled snippets but this one is more popular with over 72k installs. Originally forked from Atom StandardJS snippets. Contains a huge collection of handy snippets and supports JavaScript, TypeScript and React.
JavaScript Snippets, by Nathan Chapman. A collection of JavaScript snippets with about 33k+ installs to date. This snippet extension supports Node.js, BDD Testing frameworks such as Mocha and Jasmine.
Atom JavaScript Snippet, by Saran Tanpituckpong. With about 26k+ installs to date, the snippets in this extension were ported from atom/language-javascript. JavaScript snippets ported from the atom/language-javascript extension.
Syntax Highlighting Extensions
The latest version of VS Code supports better syntax colorization and is now more in line with the standards set in Atom grammar. Hence, extensions such as JavaScript Atom Grammar are no longer needed.
However, we still have a few syntax highlighting extensions that are quite useful when it comes to certain types of projects and file extensions. Here’s a few:
Babel JavaScript, by Michael McDermott. With over 550k+ installs to date, this extension provides syntax highlighting for ES201x JavaScript, React, FlowType and GraphQL code.
DotENV, by 833,737. With over 833k installs to date, this extension supports syntax highlighting for environment settings — that is, .env files.
Bracket Pair Colorizer 2, by CoenraadS. With 730k+ installs, this extension highlights matching brackets with different colors, helping you identify which bracket belongs to which block.
Linter Extensions
Have you have ever gotten into a debate with your teammates over tabs vs spaces or semicolons vs no semicolons? You’ll realize that people have strong opinions about which coding style to use. Nevertheless, everyone on the same team needs to use the same coding style regardless of their opinion.
However, it’s quite common for programmers to forget which coding styling they agreed to work with. To enforce the rules, we need to use linters that compare your code with the rules you’ve established. You define your rules by picking a popular coding style such as Standard, Google, and Airbnb. You can use them as is or use a configuration file to customize the rules. VS Code doesn’t have a built-in JavaScript linter, so you’ll need to install an extension.
Here are the extensions we have available:
ESLint, by Dirk Baeumer. With over 8 million installs, this is the most popular extension providing support for the ESLint library. In order for the extension to work, your project will need ESLint packages and plugins installed. You’ll also need to specify an .eslintrc, which will specify the rules the extension will use to lint your code .
JSHint, by Dirk Baeumer. With 1.2M+ installs, this extension supports linting with the JSHint library. A .jshintrc configuration file is required for the extension to lint your code.
StandardJS – JavaScript Standard Style, by Sam Chen. This extension (259k+ installs) simply integrates JavaScript Standard Style into VS Code. You’ll need to install standard or semiStandard as a dev dependency in your project. No configuration file is required. You’ll need to disable VS Code’s built-in validator for this extension to work.
JSLint, by Andrew Hyndman. This extension provides linting with the JSLint library. You’ll need to install jslint locally or globally for the extension to work. It has 109k+ installs to date.
If you’d like an overview of available linters and their pros and cons, check out our comparison of JavaScript linting tools.
Node Package Management Extensions
Every JavaScript project needs to at least one npm package, unless you’re someone who likes doing things the hard way. Here are a few VS Code extensions that will help you work with managing and working with npm packages more easily.
npm, by egamma. With over 2.3M+ installs, this extension uses package.json to validate installed packages. If anything is missing or versions are mismatched, the extension will provide you with clickable options to fix the issue. In addition, you can also run npm scripts defined in package.json right inside the editor.
–npm IntelliSense, by Christian Kohler. With 1.9M+ installs, this extension provides autocompleting npm modules in import statements.

Path IntelliSense, by Christian Kohler. With 2.7M+ installs, this extension autocompletes filenames. It also works inside HTML and CSS files.
Node exec, by Miramac. With 168k+ installs, this extension allows you to execute the current file or your selected code with Node.js by pressing F8 on your keyboard. You can also cancel a running process by pressing F9.
View Node Package by Dominik Kundel. With 55k+ installs, this extension allows you to quickly view a Node package source and documentation while you’re working with your code.
Node Readme, by bengreenier. With 52k+ installs, this extension allows you to quickly open an npm package documentation right inside the VS Code editor as a separate tab.
Search node_modules, by Jason Nutter. By default, the node_modules folder is excluded from VS Code’s built-in search. With over 470k installs, this extension allows you to quickly navigate and open files in node_modules by traversing the folder tree.

Source: vscode-search-node-modules
Import Cost by Wix. This displays how much disk space a package is using when you import it. The extension has 562K+ installs.

Source: import-cost
Formatting Extensions
More often than not, we sometimes write code that’s out of alignment with the rest of the code. To fix this, we need to go back and fix the indentation in each line. In addition, we need to ensure braces and tags are properly formatted in a readable format. This process can quickly get tedious.
Luckily, we have extensions that can do the work for us. Please note extensions such as Prettier and Beautify can’t both be active simultaneously.
Prettier Code Formatter, by Esben Petersen. This is the most popular extension that supports formatting of JavaScript, TypeScript and CSS using Prettier. It has over 5.7 million installs to date. It’s recommended you install prettier locally as a dev dependency.
Beautify, by HookyQR. A jsBeautifier extension that supports JavaScript, JSON, CSS and HTML. It can be customized via a .jsbeautifyrc file. It’s now the second most popular formatter, with 4.4 million installs to date.
JS Refactor, by Chris Stead. This provides a number of utilities and actions for refactoring JavaScript code, such as extracting variables/methods, converting existing code to use arrow functions or template literals, and exporting functions. It has 140k+ installs to date.
JavaScript Booster, by Stephan Burguchev. This is an amazing code refactoring tool. It features several coding actions such as converting var to const or let, removing redundant else statements, and merging declaration and initialization. Largely inspired by WebStorm, it has 74k+ installs to date.

Source: vscode-javascript-booster
Continue reading 10 Must-have VS Code Extensions for JavaScript Developers on SitePoint.
by Michael Wanyoike via SitePoint https://ift.tt/2VvpsSb
0 notes