#Beginner's Guide to 3D
Explore tagged Tumblr posts
Visit Tumblr Blog
Explore Tumblr blogs with no restrictions, modern design and the best experience.
Last Seen Tumblr Blogs


Fun Fact
Tumblr was created by web developers David Karp and Marco Arment.
Text
Essential Tools for 3D Product Modeling: A Comprehensive Guide for Beginners

Creating realistic and detailed digital representations of physical objects has become essential in today’s digital world. 3D Product Modeling is a crucial aspect of industries like e-commerce, gaming, and architecture, making it necessary for professionals and beginners alike to understand the tools involved in this process. If you’re a beginner stepping into the realm of 3D design, having the right tools at your disposal can make all the difference.
Software for Beginners
Choosing the right software is the first step in mastering this art. Popular programs like Blender, Autodesk Maya, and SketchUp are ideal for newcomers. These tools offer intuitive interfaces and comprehensive tutorials to get you started. Blender, for instance, is free and open-source, making it accessible for beginners exploring 3D modeling services without a hefty investment.
Hardware to Enhance Efficiency
While software is essential, hardware plays an equally important role in delivering high-quality results. A high-performance computer with a powerful GPU, sufficient RAM, and ample storage ensures smooth rendering and modeling. For those working in professional environments or providing 3D product modeling services, investing in tools like 3D scanners and tablets can significantly enhance accuracy and efficiency.
Learning Resources
To build a strong foundation, beginners can explore online courses, tutorials, and forums. Platforms like Udemy, Coursera, and YouTube offer detailed guides on using tools effectively. Many 3D product modeling companies also share free resources and insights to help beginners gain industry-specific knowledge.
Conclusion
Mastering 3D modeling requires a mix of the right tools, consistent practice, and access to valuable resources. Whether you’re a hobbyist or an aspiring professional, these tools can help you unlock your creative potential. As a leader in product design and development, Advertflair provides innovative solutions tailored to meet industry standards, ensuring clients receive the best services in this dynamic field. Start your journey with the right tools, and watch your skills grow in no time!
0 notes
Text
─────── ༺ ❦︎ ༻ ───────
Beginners guide to manifesting!!
By love4ng1e 𝜗𝜚
Requested by @limitless180
You asked for techniques, but Imma give you the whole pack because i'm cool like that. I'm going to keep it simple so you don't overcomsume. I said this was going to take a day or so, but never mind because I manifested time to make this.
I did a separate post on some of those stuff, but this is it all together. This is the only post you need.
─────── ༺ ❦︎ ༻ ───────
1.0: What is manifesting?
By simple definition manifesting is getting what you want. There is no need to make it any more complicated.
2.0: How to manifest?
There's multiple ways to manifest and there's no wrong or bad way.
I am a master manifestor, so I'll be honest and say that I do absolutely nothing to manifest except simply just acting like a master manifestor. I'll still give you ways I used that worked for me when I was a beginner, and that works for other people, too.
2.1: Robotic affirming.
Robotic affirming is repeatedly repeating any affirmation of your choice. What that does is reinforce that you have your desire and then plays out in your 3d (I will talk about the 3d a little farther).
It's very important to persist when it comes to this technique. Your affirm until it is factual in the 3d. You do not take no for an answer. It has no choice, but to manifest.
You repeat the affirmation any time. Regardless of what you're doing. As much as you want/feel necessary. Before falling asleep and first thing in the morning are both very powerful times. If you tend to forget, you can set alarms.
If this gets tiring to you, please switch techniques. This isn't for everyone.
2.2: Subliminals.
Subliminals are hidden affirmations under music/sounds. These affirmations directly bypass the conscious mind, directly to the subconscious mind (I also will talk about that a bit farther).
There are plenty of subliminal channels out there, but not all of them are trustworthy.
Good ones are:
I want it, I got it > link (she's my personal fav)
Cee > link
Baejin Cafe > link
Moza Morph > link
Kottie > link
Eve > link
Enchanted Workshop > link
Crystie > link
The best way to know if a subliminal channel is trustworthy is to read the comments. If there's none, I would stay away.
You can listen whenever you want. Headphones/Airpods are recommended.
2.3: Vision boards.
You can use pinterest for that. You simply make a board full of pins of what it is you want to manifest. For example, if you want a cat, you make a vision board full of cats. After that, you visualize it anytime you want. You can mediate while visualizing.
2.4 The law of assumption/loa.
The law of assumption/loa, also just called the law, was popularized by Neville Goddard, It focuses on your belief system. The core idea is whatever you assume to be true will manifest in your life.
Assume the feeling of wish fulfilled - Instead of focusing on attracting something external, you convince yourself that you already have it internally. That belief shifts your reality to align with that assumption.
Step 1: Identify what you want.
Step 2: Assume it's already yours. Feel and act as if your desires is already yours.
Step 3: Persist in the assumption. Even if your external reality doesn't reflect it yet, hold on to the belief until it manifests.
3.0: The 3d and the 4d.
There's the 3d and the 4d. The 3d is your physical world/external world. The 4d is imagination. Imagination is creation. Manifestation happens in the 4d.
The 4d is the only thing you need to focus on. Nobody cares about the 3d. The 4d is where everything happens, and then it shows up in the 3d. Therefore, circumstances do not matter.
Also time does not apply in the 4d so do not wait for your desires. It is already yours.
3.1: The conscious mind and the subconscious mind.
This is my personal take on the conscious mind and the subconscious mind.
The conscious mind is the main part of your brain. It has rules and uses logic as its main principle. You live in xyz country, with xyz people, you go to xyz school, whatever.
The subconscious mind is more hidden. It's sort of like a blank canvas. It's influenced by the conscious mind. Whatever you get it to believe will show up in your reality. Logic is not its main principle, so nothing is impossible or absurd.
You do not need to convince the subconscious mind to manifest, but it can be helpful.
─────── ༺ ❦︎ ༻ ───────
─────── ༺ ❦︎ ༻ ───────
I hope I could be of help! Much love.
"Imagination is everything. It is the preview of life's coming attractions." - Albert Einstein.
─────── ༺ ❦︎ ༻ ───────

#beginners guide#beginners guide to manifesting#manifesting#law of assumption#law of attraction#loa#neville goddard#manifesting is easy#manifesting community#affirmations#master manifestor#3d#external reality#internal reality#4d#manifestation#subconscious mind#conscious mind#life is a blank canvas#new theme#albert einstein#ask me anything
103 notes
·
View notes
Text


School sketch and doodle right after playing Roblox rap battles and everyone calls my kafka avatar emo boy 😢😢
#bgh#kafka#bgh perc#beginner's guide to heresy#wait do i even want this in the tags#my art#guyyyssss guys stay tuned for the 3d model!
9 notes
·
View notes
Note
Hallo! Love your stuff! Hope things are well. If i may be asked, do you have recommendations for someone wanting to learn Blender but don't know where to start? Anyways- take care!
Before we begin, the most important key is F3 It is a search function, to find actions and tools you need. Just keep that in mind. _________________________________________________ I recommend starting by printing out a list of hotkeys and taping it up next to your monitor. For instance, here are some basic important ones you'll use all the time: R - Rotate S - Scale G - Grab/move A - Select All X - Delete Ctrl+Z - Undo Ctrl+Shift+Z - Redo E - Extrude new vertices F - Fill/connect vertices
_______________________________________________ You primarily move your view using the Middle button on your mouse: Middle click + drag - Rotate view around focus Shift + Middle Click + drag - Pan view Alt + Middle Click - Choose a focus ______________________________________________ When you open blender, you begin in Object Mode. You'll find the default cube in the center of the screen. If you click on it, you'll be able to use many of the above hotkeys to manipulate the whole object. Hit tab to switch to Edit Mode, and you'll find that you can select and manipulate individual vertices within that object. Many hotkeys act differently depending on which mode you're in, but you'll most often want to be in Edit mode. ____________________________________________ That's my beginner setup guide. I recommend just going into blender and trying each of these things for a bit. Past that point, you may be ready to google questions you have. (I recommend eventually watching all the "100 blender tips" videos you can find on Youtube. I binged dozens and kept learning useful things the whole time)
43 notes
·
View notes
Text

🎄 Make This Holiday Season Quantastic with QuantumX! 🎁
Looking for the perfect gift that’s as unique as the person receiving it? QuantumX has you covered! This holiday season, explore our exclusive collection of bold designs on Redbubble and Printful. From cozy mugs to eye-catching apparel, every piece is a masterpiece waiting to be unwrapped.
✨ Why Choose QuantumX for the Holidays? 🎁 One-of-a-Kind Designs – Stand out with art-inspired by creativity and technology. 🎄 Perfect Gifts for Everyone – Apparel, home decor, and more! 🛒 Easy Shopping – Browse, click, and deliver joy right to your door.
🔗 Shop Now: 🎅 Find us on Redbubble and make gift-giving extra special! 🎁 Visit Printful to customize holiday magic for your loved ones.
🎉 Don’t wait—get your gifts early and make this season truly Quantastic!
#fyp#100 days of productivity#mexico#tumblrboy#youtube#please share#3d printing#growth#tumblr#start#guide#beginners#stomach growling#growing gut#growing up#growl#your#comprehensive#1950s#60s#synthwave
2 notes
·
View notes
Text
1 note
·
View note
Video
Complex 3d Drawing in Autodesk Inventor || Inventor Tutorials || Autodes...
#youtube#Autodesk Inventor guide 3D modeling tutorial CAD design tips Beginner Inventor tutorial Inventor software walkthrough Step-by-step design in
0 notes
Text
Step-by-Step: Learning 3D Designing Using Illustrator's Tools

Embarking on the exhilarating journey of delving into 3D design may initially seem like a formidable task for newcomers. Yet, armed with the right tools and proper guidance, mastering the intricacies of three-dimensional design becomes not only attainable but also an immensely rewarding experience. In this comprehensive step-by-step tutorial, we will unravel the essentials of 3D design, utilizing the powerful array of tools provided by Adobe Illustrator.
Grasping the Fundamentals:
Understanding 3D Design:
Before immersing ourselves in the beginner's guide intricacies of Illustrator's tools, let's first grasp the basics of 3D design. At its core, three-dimensional design involves the creation of objects that exude depth, height, and width, imbuing your creations with a heightened sense of realism.
Getting Started with Adobe Illustrator:
Now equipped with a foundational understanding of 3D design, let's transition to the practical side. Launch Adobe Illustrator and initiate a new document. Familiarize yourself with the workspace, tools, and menus, creating a conducive environment for your design exploration.
Essential Illustrator Tools for 3D Design:
1. Extrude & Bevel:
Illustrator's Extrude & Bevel tool serves as the entry point for infusing depth into 2D shapes. Experiment with diverse settings to witness how this tool can elevate a flat object into a visually captivating three-dimensional masterpiece.
Pro Tip: Utilize the Extrude & Bevel tool strategically to impart a sense of dimensionality to your designs.
2. Revolve:
The Revolve tool empowers you to fashion objects by revolving a shape around an axis. This proves especially handy for crafting cylindrical or spherical elements within your 3D designs.
Pro Tip: Combine the Revolve tool with others for the creation of intricate and dynamic design elements.
Applying 3D Effects to Text:
Illustrator's versatility extends seamlessly to text, allowing you to metamorphose ordinary letters into enthralling 3D typography.
1. Text Extrusion:
Dive into the Text Extrusion feature to lend your text depth and make it command attention. Tweak the settings to exert control over extrusion depth and angles.
Pro Tip: Experiment with a variety of fonts to discover the perfect match for your 3D text.
2. Text Beveling:
Elevate the realism of your 3D text by incorporating bevels. This feature introduces subtle angles and edges, contributing to a polished and professionally finished look.
Pro Tip: Explore different bevel styles to achieve the desired visual impact.
Bringing It All Together:
Armed with a profound understanding of Illustrator's essential 3D tools, it's time to amalgamate your skills into a harmonious design. Construct a simple 3D scene, integrating shapes, text, and diverse effects to showcase your newfound proficiency.
Conclusion:
Kudos on completing this novice-friendly guide to mastering 3D design using Illustrator's tools. By diligently following these step-by-step instructions, you've erected a robust foundation for your expedition into the dynamic universe of three-dimensional creativity. Keep practicing, experiment with varied features, and above all, relish the process of breathing life into your ideas within the dynamic realm of learning 3D designing. Happy designing!
#learning 3D designing#beginner's guide#attitude academy#enrollnow#learnwithattitudeacademy#bestcourse#attitude tally academy
0 notes
Text
The Easiest Way to Manifest/The Ultimate Beginner’s Guide to Manifesting! (My Personal Method)
·:*¨༺ ♱✮♱ ༻¨*:· ·:*¨༺ ♱✮♱ ༻¨*:· ·:*¨༺ ♱✮♱ ༻¨*
What if I told you there was a way to instantly manifest whatever you’ve ever wanted?
·:*¨༺ ♱✮♱ ༻¨*:· ·:*¨༺ ♱✮♱ ༻¨*:· ·:*¨༺ ♱✮♱ ༻¨*
I’m talking like, you think it and it appears minutes (or even seconds with practice) right before your eyes?
If you’re interested, this is how.
·:*¨༺ ♱✮♱ ༻¨*:· ·:*¨༺ ♱✮♱ ༻¨*:· ·:*¨༺ ♱✮♱ ༻¨*
Introduction:
So, let’s get into it. Hey, if you don’t know me, I’m kinda new here on Tumblr—new like I just started posting today type shit. (I literally set up my account hours ago.) I’ve been scrolling on this app for atleast a month now and I’ve been seeing some posts that are pretty helpful, so I just want to give my personal advice to any of those who are struggling. (Because that used to be me.) I wanna start this off with a warning…
Warning: If this doesn’t resonate with you, take what you like and leave the rest. If my advice doesn’t help you out it doesn’t have to! And don’t force yourself to use my technique if it feels weird to do or something you aren’t comfortable with. But if my method doesn’t work for you, (which I highly doubt because this can work with anyone and everyone) then maybe it just wasn’t meant to be. And also, I am not a professional. I am merely a vessel trying to pass my knowledge on to others. But, I do consider myself a Master at Manifesting, only because I’ve Mastered it. And my only goal is to help you Master it too. If you have any questions or concerns, feel free to drop a comment or a DM. Thanks!
·:*¨༺ ♱✮♱ ༻¨*:· ·:*¨༺ ♱✮♱ ༻¨*:· ·:*¨༺ ♱✮♱ ༻¨*
The Law:
In this technique, I will be using the Law of Assumption. If you’re not sure what this is, let me explain…
The Law of Assumption is a universal Law for manifestation. As the name suggests, it means assuming. Everything you assume will become your reality. Practicing the Law of Assumption means realizing that the 4D (Your mental reality, your imagination) is the only thing that matters, not your 3D (Your physical reality, the thing you’re seeing right in front of your 2 eyes.)
·:*¨༺ ♱✮♱ ༻¨*:· ·:*¨༺ ♱✮♱ ༻¨*:· ·:*¨༺ ♱✮♱ ༻¨*
(Side Note: I use “LOA” to abbreviate/shorten “Law of Assumption.” Both of these terms will be highlighted in pink for your understanding. Also, the 4D is your imagination and the 3D is the physical world around you. I suggest you remember these terms.)
·:*¨༺ ♱✮♱ ༻¨*:· ·:*¨༺ ♱✮♱ ༻¨*:· ·:*¨༺ ♱✮♱ ༻¨*
An Example Scenario of Using The Law:
Example: Let’s say, I really want a soda. But I’m laying down in my bed, so obviously, I can’t see a soda in front of me. But, using the LOA, I can get my soda. Here’s how…
So, I’m sitting here in my bed really wishing I had a soda in my hands. To manifest a soda, I will use the LOA. To use the LOA, I will either think or speak out loud, whatever you want to do, to manifest. I will start thinking. “Damn. I really want a soda right now. I know I’ll get my soda. I want it so I can get it. I will have my soda, one way or another.” And a couple minutes later, I got a text from my parent saying they brought me a soda from the gas station. (Yes this example is a true story on how I started manifesting using the LOA for the first time.)
If you’re not picking up what I’m putting down, let me break it down. Here’s what just happened in that example:
1. I really wanted something (in this case the “something” was a soda)
2. I started to think about how I wanted it, then I assumed that I would get it, one way or another.
3. Boom! I got my desire. (Which was the soda in this case.)
·:*¨༺ ♱✮♱ ༻¨*:· ·:*¨༺ ♱✮♱ ༻¨*:· ·:*¨༺ ♱✮♱ ༻¨*
Breaking It Down:
See how easy that was? Within minutes I got my desire in only 3 easy steps. If you’re still confused, let me explain…
What happened there was I identified what I wanted (AKA: My desire being something I wanted.) Then, I used the LOA to manifest my desire to becoming my reality. Then naturally, the 3D followed what I thought in my 4D.
Literally the only thing I did was think what I wanted to happen and it happened in front of my eyes.
You: “But why? But how? How is that even possible—”
What happened was I thought something in my imagination (my 4D) and the physical world (the 3D) conformed because the 4D will always be in charge of the 3D.
Think of the 3D as a chief in a restaurant. The 4D is the waiter, and you are a customer in that restaurant. Let’s say you wanted to manifest a soda, so you’d say, “Waiter! I would like one soda please.” And the waiter, (The 4D) writes down in his notepad that you ordered a soda. The waiter would then go to the back and go tell the chief (The 3D) what you ordered, and then the chief would make it, and then you would get it.
That’s what the 3D and 4D are. You’d “tell the waiter what you want to order” (AKA: Think in your brain using your imagination/4D what you want to manifest) Then the “chief would cook up what you ordered and you’d get your order.” (AKA: The 3D will make what you manifested happen in your physical world and your manifestation would appear in front of your eyes.)
Hopefully now you understand what the LOA is, how to use it, and what happens when you do use it.
·:*¨༺ ♱✮♱ ༻¨*:· ·:*¨༺ ♱✮♱ ༻¨*:· ·:*¨༺ ♱✮♱ ༻¨*
What Happens When I Manifest Something and The 3D doesn’t conform?
Let me say this now: That is impossible. It is impossible for your 3D to not conform to the 4D. The 3D only will NOT conform when you ASSUME it won’t.
Your assumptions will become your reality. To change your assumptions, use your thoughts and imagination, (AKA: the 4D) and your 4D will become your 3D.
Assumptions are thoughts. Thoughts are your reality.
Read those 2 sentences again until they are memorized.
Don’t you see? Do you understand how easy it is?
So let’s say, you manifested something, imagined it (using the 4D) and it didn’t appear right infront of your eyes. Don’t panic. It’s okay. Take a breather, and tell yourself that you will get your desire. You imagined it in the 4D, and after reading this post, you’re sure that the 3D will conform because it WILL. Just persist in the fact that you WILL get your desire.
(Do you get what I’m saying here? Assume, assume, assume. Assume you will get your desire. Assume it will come quickly. Assume that it’s easy because it is! When in doubt, assume, assume, assume.)
If you don’t get your desire, it’s because you’re assuming (AKA: Thinking) that it won’t. Assume that you can and will manifest, and it will.
The 3D DOES NOT MATTER. You know why? Because, I’ll repeat,
Assumptions are thoughts. Thoughts are your reality.
·:*¨༺ ♱✮♱ ༻¨*:· ·:*¨༺ ♱✮♱ ༻¨*:· ·:*¨༺ ♱✮♱ ༻¨*
A Step By Step Tutorial:
1. Identify what you want to manifest.
2. Assume it will happen by thinking.
3. You get your desire.
You can assume things many ways. Here are my favorite ways in the form of sentences:
1. Assuming it will happen in the future. (Example: Using sentences containing “I Will.” Sentences in the future tense. “I know I will get desire one way or another.”)
2. Assuming it will happen in the present. (Example: You use sentences containing “I Am.”Sentences in the present tense. “I have my desire.”)
3. Assuming it already happened in the past. (Example: You use sentences containing “I Had.” Sentences in the past tense. This is also referred to as “Living in the End.” “I already have my desire.”)
Remember that all of these ways are ways to manifest. There is no better one than the other—use what works best for you! (I personally use all 3 ways all the time. They all work the same way and for me, not one is better then the other. They’re all great and they all work. Use what works best for you!!! Don’t let anyone tell you one works better then the other because that’s simply not true. I’ve manifested using all three and so can you!)
·:*¨༺ ♱✮♱ ༻¨*:· ·:*¨༺ ♱✮♱ ༻¨*:· ·:*¨༺ ♱✮♱ ༻¨*
Summary And Last Thoughts:
In order to manifest, you only need to figure out what you want to manifest, then think about it as an assumption, (one of the 3 ways I listed above, using a Past, Present, or Future sentence) and then just wait knowing you will get your desire.
Notice how in this post I never covered the “how” or the “when.” (The only “how” I covered was how manifestation works with the 4D and 3D, nothing beyond that.) Because you don’t need to focus on those things! Focus on manifesting, NOT how it happens or when. The only time you should be focusing on the when is when you are manifesting your desire to come quicker.
Also notice how in this post, it was a continuous cycle of…
Thoughts=Assumptions
Thoughts+Assumptions=Your Desired Reality
Anyone can manifest. And this isn’t the only way to manifest, this is one method of many. It’s easy when you assume it’s easy!
·:*¨༺ ♱✮♱ ༻¨*:· ·:*¨༺ ♱✮♱ ༻¨*:· ·:*¨༺ ♱✮♱ ༻¨*
I hope this post helped atleast someone. Have a good evening, morning, or afternoon. If you have a question or concern, feel free to drop a comment or send a DM.
The ultimate Law of Assumption song (You deserve your manifestation and that’s why you should get it!)
⬇️⬇️⬇️⬇️⬇️⬇️⬇️⬇️⬇️⬇️⬇️⬇️⬇️⬇️⬇️⬇️⬇️
Sincerely,
Your Neighborly Werido
#shifting#shifting diary#shifting script#shifting motivation#shifting community#shiftblr#shifting blog#shiftinconsciousness#reality shifting#shifters#shifting antis dni#loa blog#loassumption#loa tumblr#loablr#loa success#law of assumption#law of the universe#law of manifestation#law of creation#manifestation#manifesting#manifesation#Spotify#desired reality#scripting#4d reality#witchblr#pagan#paganism
1K notes
·
View notes
Text
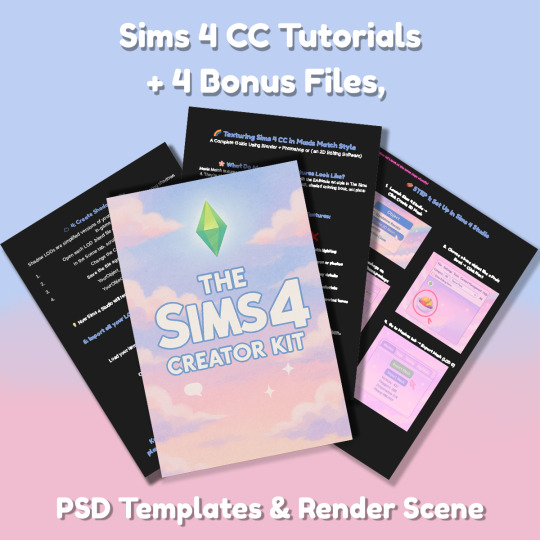
Sims 4 CC Kit — Make Your Own Lights, Decor, Clutter & Textures
Ever wanted to create Sims 4 clutter or decor CC but got stuck?
This kit is for you.
It’s a step-by-step guide that shows you how I make my own Sims 4 decor CC �� lights, clutter, textures — in a way that I found works for me. You get guides, cheatsheets, templates, and my personal workflow that I’ve figured out through trial & error.
This probably isn’t the “proper” way of creating CC — but it’s how I learned, and it works and I use it every single time I create something new.
⚠️ Just to be clear:
This is a written tutorial kit, not a video or image course.
BUT — I’ve included some visuals, some screenshots & cheatsheets to help you follow along but its alot of written stuff. It would also be beneficial for you to have some basic knowledge of blender.
✅ What You Get:
Decor, clutter, lights CC Creation Guide
Shadow Mesh Tutorial
Mesh Cleanup Workflow
LOD Creation Steps
Maxis Match Texturing Cheat Sheet
Alpha Textures Basics
Vertex Paint for Lights Guide
Custom Thumbnail Tutorial
Normal & Specular Map Basics
Blender Basics Recap
Sims 4 Studio Quick Fix Cheatsheet
Blender Hotkeys Cheatsheet
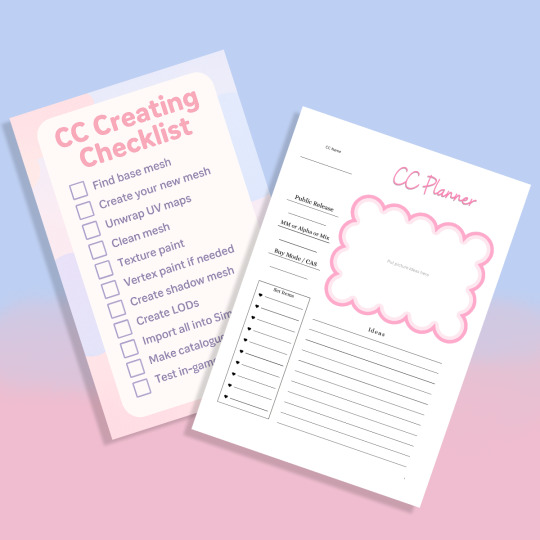
CC Planner to organize your ideas
CC Creating Checklist
PSD Thumbnail Templates (Decor)
Blank Normal & Specular Maps
Blender Render Setup File for Catalog Thumbnails
Texture Tips & Tricks
🎯 Why You’ll Love This:
No fluff — real steps, real help
Written for beginners who know basic Blender but need a hand
Includes a little bit of visual guides, printables & templates
Saves you HOURS of googling random problems
Helps you actually finish your CC & get it in-game
🖤 This is for you if:
You know basic Blender stuff (grab, rotate, edit mode) Got 3D Models you want to put into The Sims 4
You want to make clutter, decor CC and lights (not clothes or CAS yet)
You’re tired of tutorials that make you more confused
PS: Accessories & Clothing Creator Kits are coming soon.
If you get stuck, you can always join my Discord
(link’s on www.simmerkate.com).
Get Here (xx)
181 notes
·
View notes
Text
||☆•2 week affirmation challenge for beginners•☆||~(request)


<Hey guy it's been quite while,I shifted for a whole month(which will be 2 days here in my CR) in Koizora DR,for a break from my CR,anyways from the result from today's votes,>
Firstly something we all struggle as beginner to manifest is,obsession,desperation,doubts, procrastation and methods. But guys don't worry it's just a normal phase everyone go through after knowing that we can HAVE ANYTHING we want,logical or illogical. But here me out you don't have to force yourself to get completely rid of those negative,because they are always gonna come up,what YOU have to do is be in control of those thoughts,which mean don't let those thoughts guide you to get in a state of lack. You are more power then that so,flip that shit and focus on the new thought or new story.
I get as someone new to law you will be confuse on what to do,or what to manifest,but the most common is thinking HOW. How do I start,"how do I manifest it into my life?","how is it even possible,will it work for me?". It definitely will you've been manifesting your whole life,but since you are new that's why you're finding it hard to manifest. But let me tell you it's simple,if you are not able to embody state,use SATS,being etc.
So here is the routine you have to follow for the next 2 weeks.
🥗. Create a Pinterest vision board look at it,everytime you feel like you need external validation,or motivation.
🥗. Start your day with affirmations,and use this subliminal and loop it as you affirm. Use the sub atleast 1 hour or more while doing your morning routine and robotically affirming.
youtube
🥗. Now robotically affirm as you go on with your day. You can talk with others don't have to shut the world out as Sammy said. Or you can do 30 minutes affirmation 1 hour rest session.
🥗. On free time use this morphic field and continue affirming for atleat 30 minutes headphones are not needed foe morphic field so no need to use one since Sapien recommended himself. Also do atleast a proper 1-2 hour saturation session,you can also do other activities.
youtube
🥗. OK you have come so far don't give up take some breaks in between.
🥗. At night use these two subs by SLADE,and fall asleep as you affirm. You can loop is overnight too but it's upto you how long you want to use it.
youtube
youtube
🍋🟩That's it so let's see in brief.
★. Affirm as you wake up with the subliminal above.
★. Affirm for 30 minutes and take 1 hour rest or do robotic affirming the whole day.
★. On your free time use morphic field and do a proper saturation session of 1-2 hour.
★. As you fall asleep use two subs and loop it as you affirm to sleep.
Also you don't have to worry about all the emotions you feel,you wanna cry then cry,feeling guilty it's fine,feeling desperate it's fine. Let the emotions pass,people have affirmed while crying,to the point they throw up(me💀) with desperatation,you can obsess over your desires it'snot a big crime. But the biggest crime is not persisting and checking 3D also procrastinating. Also don't get discourage if 3d shows you something you don't like affirm against it because you are more powerfull then those thoughts.


#Youtube#affirmations#affirmation challenge#10k affirmation#manifest#2 weeks challenge#manifestation challenge#law of assumption#neville goddard#3d#4d#law#assumption#saturation#shift#desires#desire reality#SATS#void state#manifesting#self concept
638 notes
·
View notes
Note
Hello.
What are your most used references and choices (in medium etc) for studying? Also do you study regularly or is it in a "this time i want to focus on X" fashion?
I'm confident in my skills but it has been long since i actually grinded for them. I'm both in need of a guide and curious about what you do.
Thanks in advance.
Hi! Thank you for this inquiry cause hooo am I eager to yap about practice.
So, as for references and info, my most used resources are:
- Sketchfab, has anything from meticulous anatomical models to most random 3d scans.
- Line of Action, timed sketching as a warmup. - Google maps! Environment warmup.
- Pinterest is heaven, but you have to curate the quality yourself. It can be turned into the most valuable visual library or a landfill of AI slop and disposable tutorials.
As for the medium, I try to balance traditional/digital sessions. Most knowledge transfers between them well, but certain skills need extra time (colors work differently, pen sketching requires more focus and planning, etc). Even though digital art is my domain, I need to have a good chunk of traditional practice. It’s less forgiving, sure, but much more engaging. The feel, the smell, the sound. Besides, I rarely share traditional stuff, so there’s less pressure to make it “good”.
I used to study consistently years ago, but mental health + skill plateau took their toll. The further you go, the more subjects add up, the less obvious your progress is. As a beginner, I had a simple routine - a bunch of gesture studies, then color palettes, then some environments, rinse and repeat. Did challenges like 365 sketching days, Figuary, Huevember etc. But as I learned to see more, it became overwhelming. Like, okay, today’s an anatomy session. Do I focus on quick gestures? Or maybe delve into 1 h. lecture about back muscles? Different body types maybe?..
Combined with the amount of stuff I need to draw beside that, I can’t keep up with a consistent routine. This is where the “focus on X" approach saves me. I take notice of the subject that causes the most trouble at a given moment and pick up an exercise for it. BUT remember I’m too burned out to come up with a practice plan every time. To navigate art theory better, I boiled it down to an octagon of fundamentals, with more subjects branching off them (pic attached). Feeling stiff about composition? Go to a respective section, do a couple exercises, feel better.
A grindy version of it would be to go through the whole octagon lol. Wish I had a whole year dedicated to studies only, I’d test and perfect this system.


75 notes
·
View notes
Text
masterlist (2024)⋆.ೃ࿔*:・🪷

law of assumption and manifesting
how i write my scripts
a look into my own manifestation
some manifesting exercises
random success story
beginners guide to manifesting
robotic affirming
law of assumption ins and outs
reprogramming subconscious mind
rampaging with manifesting
valentines day prep challenge (day one)
valentines day prep challenge (day two)
valentines day prep challenge (day three)
valentines day prep challenge (day four)
valentines day prep challenge (day five)
valentines day prep challenge (day six)
valentines day prep challenge (day seven)
honeys tea on self concept (improved)
how i make affirmations tapes + affirmation tape
you know how to manifest
ways to apply the law
for when u think u "failed" at manifesting
reprogramming ur mind activity
building a new life and identity (remake)
what to do when the 3d hasn't aligned
how to deal with self doubt when manifesting
i pledge allegiance
how to manifest faster
dealing with the unfavorable
self care and beauty
for healthier hair
shampoo and conditioner recommendations
long list of self care practices
at home spa day
doll hand-book
maintaining a clean and fresh appearance
"your glowing"
general hygiene secrets and tips
hot girl summer prep
glazed doughnut skin secrets
things that are on my list to buy (beauty binder)
mental well being and healing
the feel better formula
the tea on self love
disconnect and heal
ways to feel better about ur appearance
sustained satisfaction
how to keep going
embracing being alone
for rest and relaxation
the happy pill
self care assessment
how to unwind
shadow work prompts
how to stop being toxic
how to feel enough
honeys girlblogging and that girl-ism
starting a video diary
how to deal with mean girls
ur guide to effortless glamor
little habits to adopt
embodying the wellness girlie aesthetic
the wizard liz mindset analysis
hyper girliness
dear diary
starting ur fitness girlie era
dopamine detox challenge
starting a collection
honeys guide to throwing a slumber party
HONEYS IT GIRL MAGAZINE - FEBRUARY EDITION
giving urself princess treatment
video dairy entry ideas
cultivating creativity and a deeper sense of self
starting and managing ur blog
how to be rich and luxurious
HONEYS BUSINESS INQUIRIES
a glamorous well being
incorporating luxury
HONEYS IT GIRL MAGAZINE - MARCH EDITION
productivity and self development
focusing on urself
getting seriously organized
honey's resource bundle
getting it together
a fresh start
trusting and betting on urself
becoming ur own project and self upgrading
reset routine
goal ideas
practicing self discipline
things to do while on a dopamine detox
making an effective planner
the art of conversation (from a professional yapper)
restocking and replenishing
school and studying
school notion tutorial
becoming an academic weapon challenge
studying methods + tips
how to get good grades without excessive studying
academic resources
ways im romanticizing school
pretty and well educated
notes from honey🎀🍰
places to go vision board
notes from honey - note one
notes from honey - note two
things that make my mornings a million times better
686 notes
·
View notes
Text
List of Video Games turning ten (10) years old in 2025
Alone in the Dark: Illumination (if you thought the AitD game from last year was bad, check this shit out).
Angry Birds 2 (yes, there was a 2).
Animal Crossing: Happy Home Designer
Animal Crossing: Amiibo Festival (two AC games from 2015 and neither of them were what people wanted).
Assassin's Creed Syndicate (the Bri'ish one).
Atelier Shallie
Axiom Verge
Batman: Arkham Knight
Battlefield: Hardline (the last game from Visceral Games, the guys who made the Dead Space series).
The Beginner's Guide (the second game from the creator of The Stanley Parable).
Bloodborne (anything for the 10th anniver-- no. Never gonna happen).
Broken Age
Call of Duty: Black Ops III
Chibi-Robo! Zip Lash
Cities: Skylines
Crypt of the NecroDancer
Devil's Third (one of the rarest Wii U games ever).
Disgaea 5: Alliance of Vengeance
Disney Infinity 3.0
Dragon Ball XenoVerse (the first one. not the second).
Dying Light
Evolve (these guys would go on to make Back 4 Blood).
Fallout 4
Fatal Frame: Maiden of Black Water
Final Fantasy Type-0 HD
Game of Thrones (the Telltale game)
Guitar Hero Live
Halo 5: Guardians
Hatred (a game so edgy and terrible that it got itself kicked off of Steam).
Helldivers (the first one).
Heroes of the Storm (the Blizzard MOBA).
Hotline Miami 2: Wrong Number
HuniePop (for all you pervs out there).
I Am Bread
Just Cause 3
Keep Talking and Nobody Explodes (the quintessential VR game)
Kerbal Space Program
Kirby and the Rainbow Curse (one of the few Wii U games that hasn't been ported to the Switch. And probably never will be).
The Legend of Heroes: Trails of Cold Steel
The Legend of Zelda: Majora's Mask 3D
The Legend of Zelda: Tri Force Heroes
Lego Dimensions (a crossover game with about a billion different franchises).
Lego Jurassic World
Life is Strange (controversial opinion: I sacrificed Chloe and felt nothing).
Mario Party 10 (the only MP on the Wii U)
Mario Tennis: Ultra Smash
Metal Gear Solid V: The Phantom Pain
Monster Hunter 4 Ultimate (back when the 3DS was single-handedly keeping MH alive)
Mortal Kombat X
Need for Speed (the reboot)
The Order: 1886
Ori and the Blind Forest
Pillars of Eternity
Pokemon Super Mystery Dungeon
Prison Architect
Rainbow Six: Siege
Rare Replay
Resident Evil: Revelations 2
Rise of the Tomb Raider
Rock Band 4
Rocket League
Saints Row: Gat Out of Hell (RIP Volition. You were too good for the modern day).
Shadowrun: Hong Kong
Skylanders: SuperChargers
Soma (the best horror game ever made. Play it if you haven't yet).
Splatoon
Star Wars: Battlefront (the EA reboot).
StarCraft II: Legacy of the Void (RIP StarCraft. You were too good for modern day Blizzard).
Steven Universe: Attack the Light!
Story of Seasons (the very fight one)
Super Mario Maker
Tales from the Borderlands (the best thing that Telltale EVER made).
Tales of Zestiria
Tembo the Badass Elephant (published by Sega and developed by Game Freak... the Pokemon guys).
Tony Hawk's Pro Skater 5
Total War: Attila
Transformers: Devastation (RIP PlatinumGames. You... kinda started sucking after Astral Chain).
Undertale (yep, it's happening).
Until Dawn
Warhammer: End Times - Vermintide
The Witcher 3: Wild Hunt (just in time for the 4th game)
Wolfenstein: The Old Blood (remember, kids: Nazi lives don't matter).
Xenoblade Chronicles X (finally escaping the Wii U this year).
Yakuza 5
Yo-Kai Watch
Yoshi's Woolly World
#alone in the dark#angry birds#video games#anniversary#10 years old#animal crossing#assassin's creed#axiom verge#atelier#batman arkham series#battlefield#bloodborne#call of duty#call of duty black ops#chibi robo#crypt of the necrodancer#disgaea#disney infinity#dragon ball#dying light#fallout#fatal frame#final fantasy#game of thrones#guitar hero#halo#helldivers#hotline miami#huniepop#just cause
102 notes
·
View notes
Text
Resources for Creating: My Go-To things.
Update: I’ll be updating the list on this page from now on, since Tumblr can’t handle so many hyper-links in one post, on Dreamwidth - right here, so I won't have to update it multiple times. Please note: I keep updating this list, and updates aren't showing up on reblogs. Please check the original post for the most up to date list.
Sooo this is going to be a long comprehensive list. I got back to this game after a long time and with a different computer, with a dedicated graphics card, hurray! It made me want to return to making things, so while gathering back all the necessary stuff, I've complied this list. It might be is updated as I go along, but these are the main things I use. Maby one day i'll even finish something. So here are my go-to resources & tutorials; I'm posting it here for safekeeping, and hopefully others will find it helpful. Everything that's listed is here free. So many wonderful things for free under the cut.
Programs – General:
Creating: Blender. Blender Addons: 3D Print Toolbox – comes with blender, enable it from within the program. Originally for 3d printing. Good for fixing flipped normals, and some quick general repairs. Source Tools And source tools wiki – for exporting as SMD!!!! (SimPe: to enable bump maps for the mesh on import). GMDC Addon for Blender 4.0+ by Nopke.
GIMP. GIMP Addons: G'MIC-Qt. Resynthesizer. Nvidia dds?. Doesn’t it come with Gimp?
Other: Nvidia Texture Tools Exporter (iirc it works with all graphic cards that are compatible, doesn’t require Nvidia). For making Normal / Bump / Cube Maps. For high quality compression.
NormalMaps - Online, For making all types of maps, has good setting menus. A very cool tool.
Converting: Umodel, for Unreal Engine (Static meshes: export as gtlf.2. Animated meshes: export as psk. Requires Add-on). AssetStudio, for Unity. AC Viewer, self implied (+ USD Addon for blender). QuickBMS* and support forum, for basically everything else. (don't forget the required scrips, down the same page). *I haven’t tested it fully yet, but it was recommended here. A tutorial for it is listed further down. Works like a charm.
UV Mapping: UV Mapper, Classic (free) and the most recent Demo (for visualization).
Programs – Sims:
Never Mind the Bollox, Here's Osab and MAGIkarp to the rescue!
Latest version of SimPe, works with a non-default installation path. Chris Hatch's updates.
Home Crafter installation, Post by Huge Lunatic at Sims2Artists.
Repository Wizard, by Pick'N'Mix Mods. A game changer.
DBPF Compare, by Pick'N'Mix Mods.
Object Relocator, also by Pick'N'Mix Mods.
SMD Tools, by Lazy Duchess.
The Compressorizer, by JFade – Lazy Duchess's edit.
Bulk Rename Utility, to change file names in well, bulk. As explained by io here.
Lot Adjustor, by Mootilda at MTS.
Tutorials:
Override the game's graphic settings via Nvidia, as explained by iCad. The settings to Nvidia Profile Inspector she linked to at MTS have been deleted for some reason, here they are via WebArchive.
Meshing in Blender:
Mesh Optimization Info (and links), by Crisps&Kerosene.
Additional - Reducing Polycount:
Tutorial, by Flaming-Chickens (another username on other sites perhaps?)
Edge – Un-subdivide, a quick one by CG Link.
Transfer high poly details to low poly object in Blender, by 3Dnot2D.
Shrinkwrap Modifier - Blender Tutorial for Beginners - Basics, by in2vert.
Placeholder for this Addon that I want to try but haven't found, something for AR that was on facebook's defunct AR.
Scaling tips, by Blender Secrets.
How to fix inverted/ flipped normals, by ipaintsmallthings.
Converting: How to Extract 3D Models, Textures, Music from Unreal Engine Games, by iwanMods.
Extract 2D/3D/SFX Unity Assets fast & easy from your Unity Game, by iwanMods as well.
How to use QuickBMS, by darkhorse.
Guide to Converting 3t2 and 4t2 Part 01 and Part 02, by Chiaroscuro/tenlittlepandas.
Converting TS4 Windows and Doors, by Crisps&Kerosene.
Using Different Material Maps as Shading/Details for Base Texture, in Gimp or Blender, by Pineapple Forest & Crisps&Kerosene: https://www.tumblr.com/crispsandkerosene/764893644571525120/great-info-thats-the-reason-some-conversions?source=share
Texture Editing in GIMP:
Using Gimp Add-ons: G'MicQT. Resynthesizer. Both by Davies Media Design. This guy's channel for Gimp in general – here's a good one to begin with. And another one about layer masks.
Making a texture Tile Seamless: 1. My favorite - How to Make Seamless Textures for Cinema 4D - 3 Levels of Photoshop Wizardry using iPhone Photos, by School of Motion.
2. Simple Trick for More Realistic Texture Patterns in GIMP, by Davies Media Design – Quick and simple, using the Resynthesizer plugin. Good for patterns.
Making walls in SimPe out of a square texture, with minimal quality loss. To be written.
SimPe: Cloneable Objects: A List of Good Objects for Cloning, by IgnorantBliss at MTS.
Huge Lunatic's Tutorials, Her website.
Object Creation for Absolute Beginners, by Moune.
Sims 2 start to finish Object Creation Tutorial, by JWoods, Numenor, Lethe_s & IgnorantBliss.
The Material Definition (TXMT) Guide, by PixelHate – very comprehensive. Part 5 is about Bump/ Normal maps.
Null (Texture-less) Groups, by Skell. For bodyshop, for Objects see an elaboration by Midge the Tree below.
Crisps&Kerosene discovered how to add specular maps to objects! It's incredible there are still new things to discover in this ancient game.
More on Specular Maps, by Pineapple Forest.
Making new flooring & walls with SimPE, by Charisa. Includes adding Bump/Normal maps. She added a file to clone from in the comments below. It works for normal maps as well. Here's cool discovery in the game files.
Expanding footprint: a mini tutorial, by Deedee.
How to add correct drop shadows to objects, by Yuxi, via Wayback Machine.
Making Objects Viewable in Neighborhood View, by iCad.
Making Objects Visible In Build/Buy Mode, Invisible In Live Mode, by Midge the Tree.
Making Seasons-Friendly Trees, by Echo.
Io/ Serabiet's resources list, mainly for Bodyshop but not just.
Pineapple Forest's Tutorials, useful tips for efficiency and optimization.
MTS modding forum in General.
The Sims 2 Tutorials, on Tumblr. A database, is more updated.
Sims2Artists tutorials section.
LeeFish modding forum.
Garden of Shadows, Tree of Knowledge section.
Troubleshooting: What to do if you get a System.OutOfMemoryException Error, SimPe Forum, via WayBack Machine. Thank you @fanseelamb for the find.
How to read object error logs: I just want to know what causes it!!, by Episims.
Common TS2 errors, by Midge the Tree.
General game fuckery: How to Stop Sims 2 Crashing (Memory Allocation Fix and 4GB Patch Repair), by Jessa.
Graphics card problems, LeeFish forum.
Graphics help - DIY, by Kiri. How to fix faulty Texture Memory allocation, and the problems that stem from it. Tumblr can't handle anymore hyper links so here it is: https://celebkiriedhel.tumblr.com/post/189431721483/graphics-help-diy
General: Switching between save folders without renaming them, by Nopke.
Resources:
3D Models Online*: Various furniture designers' websites: Porada, Zanotta, Muuto, Hay, Poltrona Frau, many luxury furniture designer basically.
3D Warehouse, belongs to Sketchfab (get the Collada files).
Scan the World.
Wikimedia Commons. And more.
*(NOT OPTIMIZED).
Textures: Architextures.
Fabrics & Wallpapers: Natural Stones: Wall Plasters:
iCad's Woods. Shastakiss's Cluedo Metals, Yeti Metals, Pirate Woods. Goat's Woods.
Textures from other games: Dishonored, Thieve and much more, by Saricoya at GoS. Dreamfell by io.
Resource sharing threads at Garden of Shadows.
SimPe - General: CEP Extras list, HugeLunatic at Sims2Artists.
TXMT settings for different materials, by Hafiseazale.
Extended SimStandardMaterial Shader for the Sims 2 + Optionally Brighter Sims, by Crisps&Kerosene.
Custom CubeMaps, by Crisps&Kerosene.
Shiny TXMT Settings & Cube Maps Packs, by Pineapple Forest.
Build/ Buy: Templates for Recoloring Maxis items; MTS Templates sction, Hafiseazale (+cc), ZeroDark.
Template for Seasonal Trees, Gwenke at Sims2Artists.
Making Roof Recolors, Tutorial & template by Numenor, great template by iCad.
Pack for making food clutter usable, by DeeDee.
CAS: Default Makeup Packages - BYO Packages, by Huge Lunatic.
Body shape, Io/Serabiet on Tumblr.
Skin template, Io/Serabiet on Tumblr.
Hair texture, iCad.
Color Actions, Pooklet on Tumblr.
That's it for now.
Edit: forgot about CEP extras. Added more links. Edit 02: Added Troubleshooting section under tutorials.
#ts2#ts2 resources#ts2 creation resources#ts2 resources for creators#the sims 2#sims 2#resources#ts2 cc#sims 2 cc#the sims 2 cc#well its cc related#sims 2 resources#the sims 2 resources
67 notes
·
View notes
Text
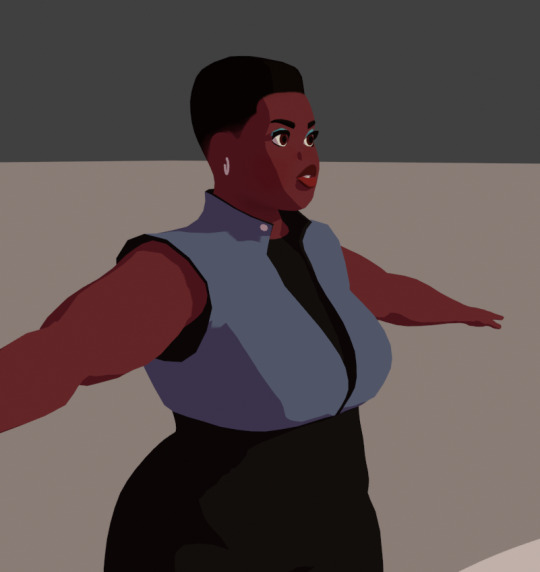
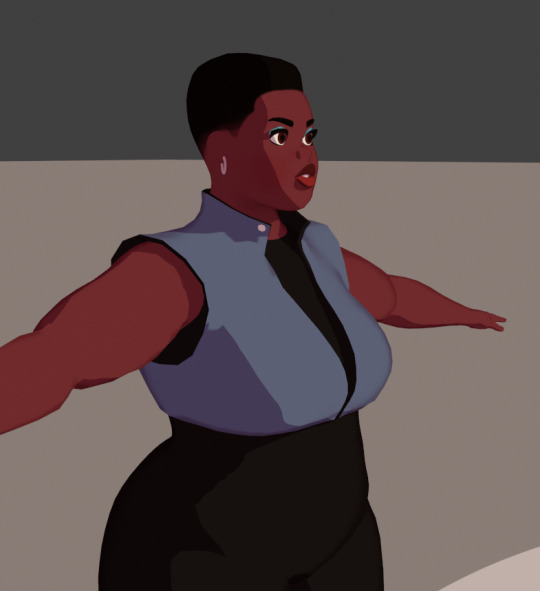
My model appeared on the Tumblr radar! I appreciate all the comments! It was interesting to hear that multiple people didn't realize it was a 3D model. I work a full-time job and modeling in Blender is one of my hobbies. Whenever I look back at my earliest models, I'm always shocked at my improvement. I look forward to seeing where I'll be at a year from now.
Multiple people asked how I was able to get my cel shader to look good. I've learned a lot from watching multiple videos and reading various blogs over the years. Here are a few things that I did for this model.
To start, here is how my shader graph looks like.
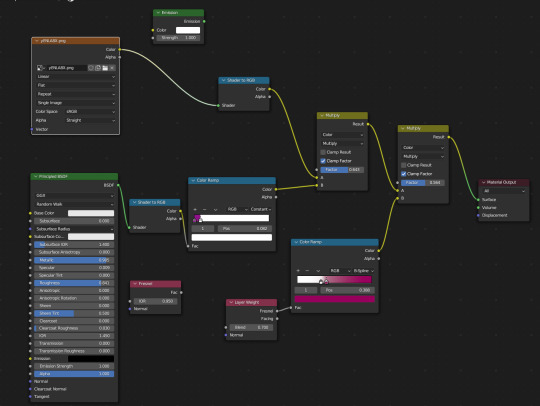
I have the Layer Weight plugged into the Color Ramp. This creates a soft outline around the model so that when objects of the same color overlap, it doesn't look flat. I've been experimenting with the options, but as of now, I like the way the B-Spline option looks.
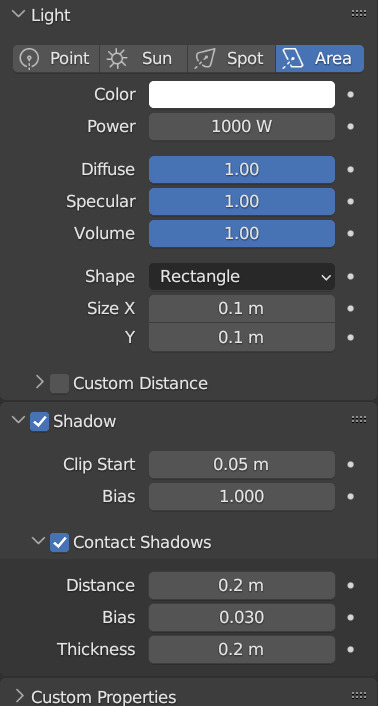
Something else that I change is the shadow color on the color ramp. By default, it's set to black. This always felt dull to me, so I will usually change it to a magenta or purple. I also keep an Emission node ready so I can switch the model to all white. This mostly helps when modeling so I can see how the light will interact with the model in this style. Adjusting the settings of the light also improves the shadows.
Also, change the Color Management from Filmic to Standard. This ensures that the colors you're using to paint your model will look the same in the viewport. This option can be found at the bottom of the Render Properties.
Check out these resources for more useful tips. Also, the props are from a Synty pack. I picked them up years ago when they were on sale.
Anime Shading In Blender (INTRODUCTION) Lightning Boy Shader - Beginner Guide - Shading & Modeling Tips
Synty™ Store - 3D Assets for Games (Unity + Unreal) – Synty Store
#3dmodeling#character modeling#cel shaded#blender3d#character design#character art#plus size art#tutorial#blender#original character
122 notes
·
View notes