#Digital art tutorials
Explore tagged Tumblr posts
Visit Tumblr Blog
Explore Tumblr blogs with no restrictions, modern design and the best experience.
Last Seen Tumblr Blogs


Fun Fact
When “GIF” was named word of the year in 2012, Oxford Dictionaries U.S.A. credited Tumblr for pushing the word.
Text
Kokabiel painting process
www.patreon.com/angelarium
1K notes
·
View notes
Note
ART TUTORIAL WHEN ?!
Actually... 👀 There are some on my instagram I did in collaboration with CSP, but I can post them here as well!
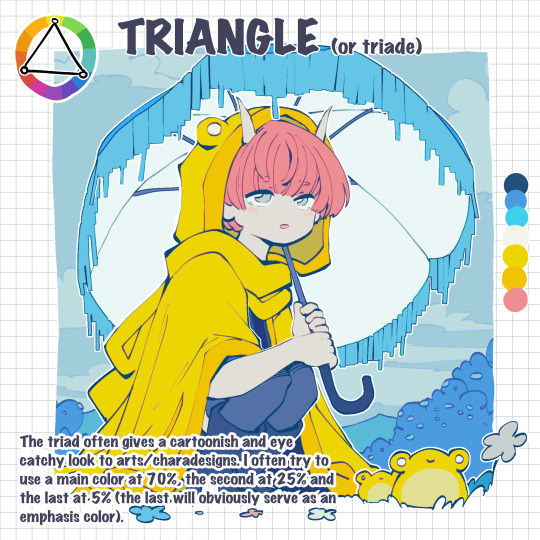
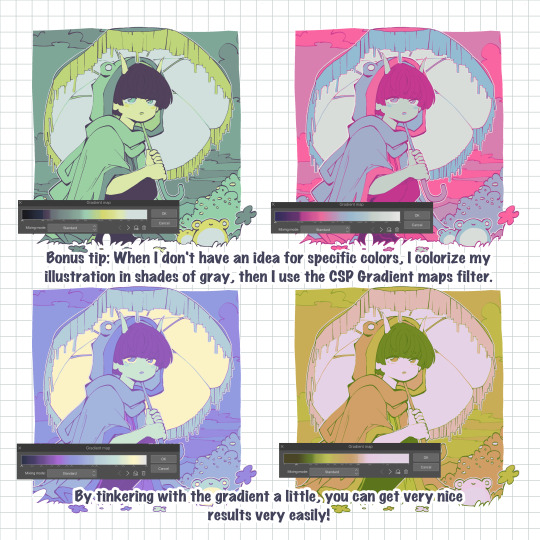
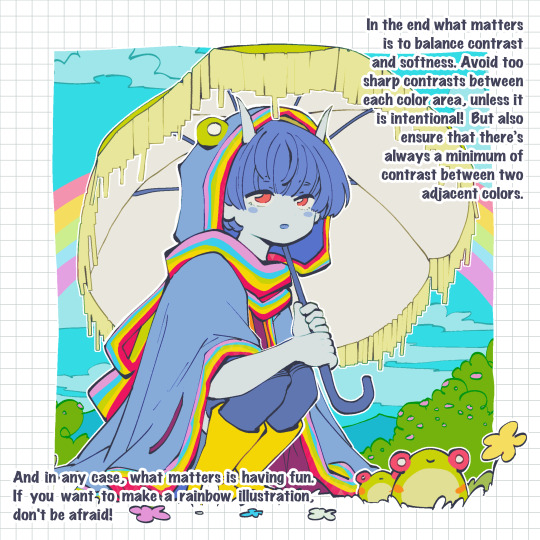
1- How I choose my colors


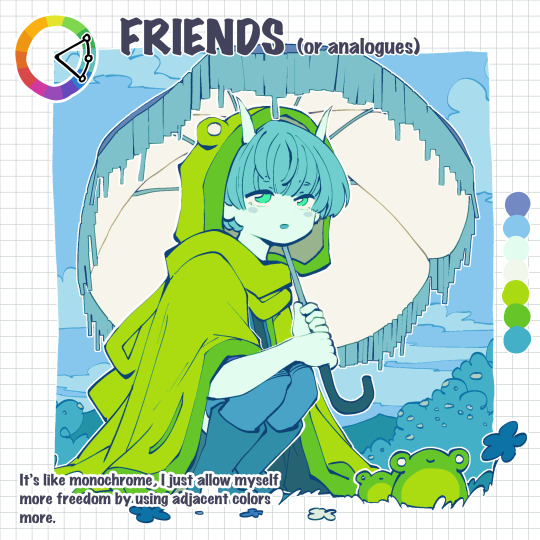
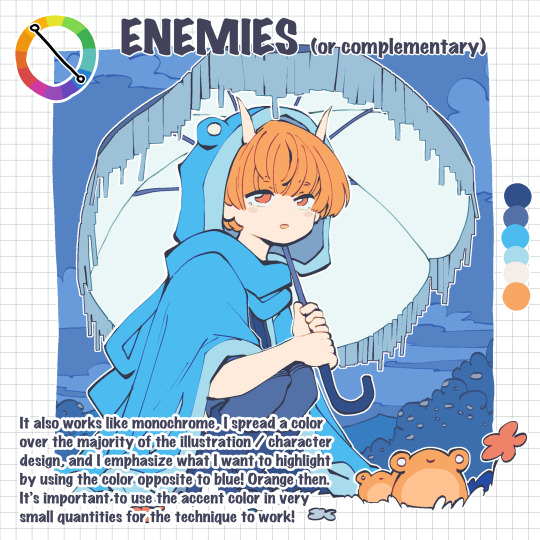

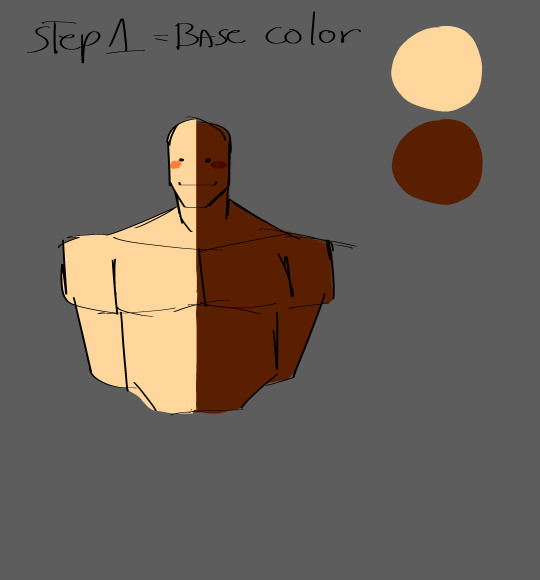
2- How I shade


Hope it'll help ❤
456 notes
·
View notes
Text
Abi & Noa's Mini Art Class (EP.1)


🎨Welcome to Abi and Noa's Mini Art Class! (EP. 1)
🩷Explaining 2 different rendering/coloring approaches.
💙Demostrated how saturation contrast influences rendering styles
⭐Your engagement is important for Abi and Noa(and me!)
💭Feel free to ask questions and give feedback😊
#art tutorial#art reference#color method#how to color#color theory#digital art tutorials#art theory#art tips#coloring#anime art#anime art tutorial
242 notes
·
View notes
Text

I get professors and students writing to me that my tutorials are a very efficient way to explain complex animation and art techniques. If you're using them in your class they're also on Player for Education ad-free now!
Animation Tutorials • Digital Art Tips • Scribble Kibble My YouTube Channel
68 notes
·
View notes
Note
hii! i hope your okay and doing well! ^.^ if you don’t mind, how do you render hair and skin so smooth????? it looks so yummy
Hello!!! I'm doing good and I hope your day/night is just as good!! 🫶🏼🫶🏼 Sorry it took so long but I made a tutorial for both and I really hope it's helpful 😭


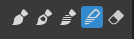
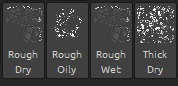
Plus the brushes I used 🩷


#artists on tumblr#my art#art tutorial#art#digital art#ibispaintx#art tips#tutorial#art asks#how to draw#how to draw hair#how to draw skin#digital art tutorials#digital art tips#digital artist#drawing tutorial#ibispaintapp#ibispen
92 notes
·
View notes
Text
A few people have recently asked me how I set up my digital canvas and references in Procreate, so I'm making a tutorial!
Some things to keep in mind: 1. This is in Procreate; doing it in other programs is possible but it would just require some slightly different steps. 2. This way of setting up the canvas won't necessarily save you time! I just like having a lot of references and for them to look clean (and thus be easier for me to use).
Alright here we go:

Step 1: Create your canvas (I'll be calling the actual file that you're working in the "true canvas") with the final resolution and size that you want your piece to be.

Step 2: Make the true canvas background a dark color (it doesn't matter what color in particular).

Step 3: Create a layer above the true canvas background and drop fill it with a lighter color than the true background. This new layer will be your working canvas.

Step 4: Resize your true canvas to add margins between your new working canvas layer and the edges of the true canvas. These can be however big you like, but I try to keep them relatively thin so that all my references are near the working canvas.

Step 5: Insert or paste all your reference images onto the top layers. At this stage I make them all have as transparent of background as possible (cropping several of them with the lasso tool), so there's less junk to look at.


Step 6: Merge all the reference layers into one layer and label it.


Step 7: Turn off your true background layer (un-check it) so that your working canvas appears to be floating (this is one of the only steps that you can't do in some other programs but it's purely for aesthetic so it's not a big deal).
And now you have a very functional canvas with references all around it! This method makes me feel like I'm drawing on a traditional art board with notes taped to the edges. Hope this was helpful!
142 notes
·
View notes
Note
Rendering tutorial pretty please?
Of course! Now at some point I will make a proper tutorial, but for now here’s progress shots and a timelapse! I hope you’re able to find these helpful, random anon!
I really recommend checking out LavenderTowne’s videos specifically on shading, they’ll help heaps (or honestly any of her tutorials :))

#cult of the lamb#cotl#cotl fanart#cult of the lamb fanart#cotl oc#cult of the lamb oc#art tutorial#art rendering#ask box#tutorial#digital art tutorials#shading tutorial#shading#art lesson#art advice
61 notes
·
View notes
Note
hey hey hey we need a tutorial on how to oil up characters
okay!! :D
TUTORIAL ON HOW TO DRAW THAT CHARACTER U LOVE OILED UP:
(I put a light skintone and a dark one so I can show both examples)(Even tho step 6 is optional, I HIGHLY RECOMMEND IT!!!)


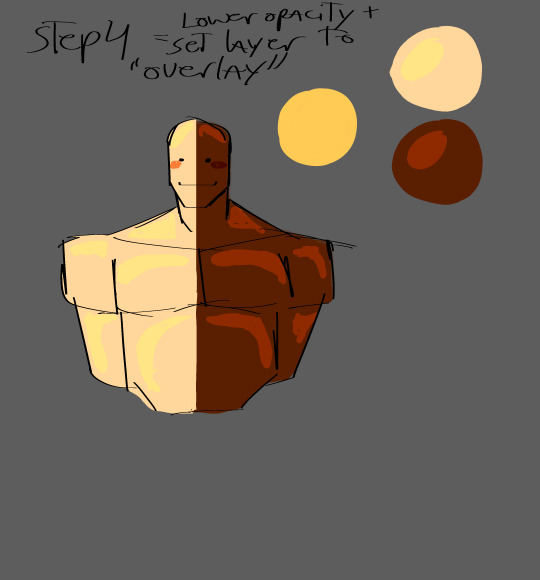


DONE!!:DD ENJOY OILING UR CHARACTERS OILED UP!!! PLS TAG ME IF U USE THIS TUTORIAL OR NEED HELP!!!!!! +
This wasn't free... draw heavy oiled up for me if u want to use this.

#deltas consulting room#deltas serious pencil grabbin#deltas yappin#deltas men obssesion#tf2#tf2 heavy#ask#asks#asks open#art tutorial#drawing tutorial#tutorial#digital art#artists on tumblr#digital artist#digital art tutorials#digital art tips#I WANT THIS TO GO VIRAL IDK WHY AKDJIOADOAWNOD
116 notes
·
View notes
Text
How I go from tiny thumbnail sketch to full rendered illustration! Using my MaoMao and Jinshi, The Apothecary Diaries poster design as an example

1: Making complex compositions is always easier when you start tiny! So I always start with at least 3-4 thumbnail sketches 2: Once I’ve chosen a thumb (which you guys helped me pick, thank you!) then I stretch it to make it full sized (in this case an 8x10” canvas)


3: From there I make a clean sketch on top, sometimes in flat grays as I go for clarity 4: This step is really important and I always regret it if I skip it! Next I block rough values in grayscale to create the exact contrast I want in the final render


5: Using the gray render as a base, I use gradient maps and multiple washes of color to create the color palette I want 6: This brings us to the most time consuming and also fun part: rendering! From here I merge my sketch and color layers and just go to town. Sometimes, I start from back to front, other times I just do whatever I feel like lol


7: Finish off with final details like texture and highlights and she’s complete!

#cindytranart#anime fanart#the apothecary diaries#kusuriya no hitorigoto#knh mamao#knh jinishi#jinmao#artist tips#art advice#art help#digital art tutorials
22 notes
·
View notes
Text
Arcane Grey Metal Tutorial (Ibispaint X)
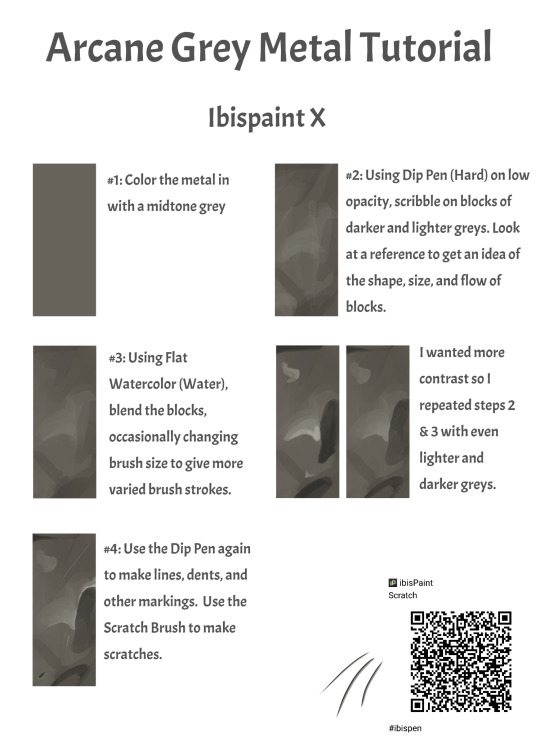
#arcane#art tutorial#metal texture#arcane metal#arcane art#arcane art tutorial#arcane fanart#arcane reference#texture reference#ibispaint#ibispaintx#ibispaint art#ibispaint x tutorial#ibispaint x#digital arwork#digital fanart#digital art tutorials
26 notes
·
View notes
Text


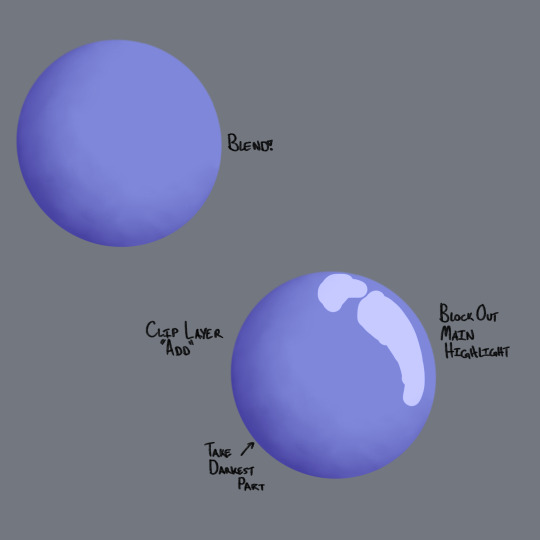
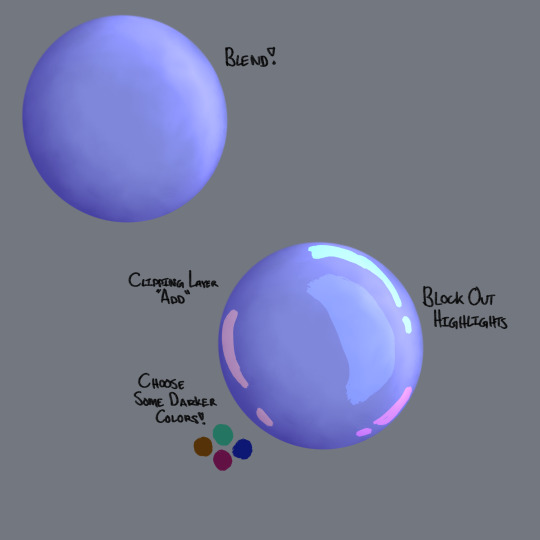


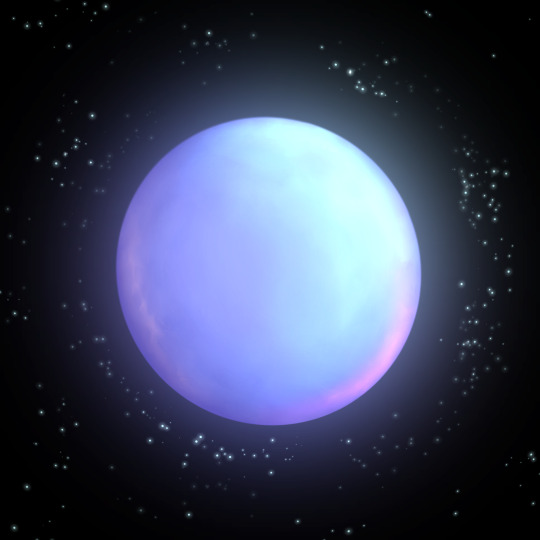
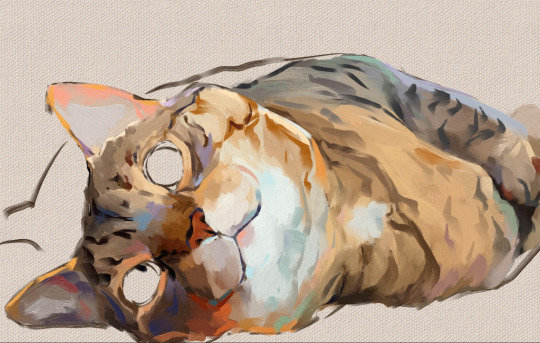
I've been working on a digital painting and I wanted to share some tips on how I'm rendering some things like shiny balloons!
♻️Please Reblog To Support The Artist♻️
#art#illustration#artists on tumblr#art tutorial#rendering tutorial#2d render#shiny#tutorial#how do i tag this#digital art#digital painting#digital art tutorials
86 notes
·
View notes
Text


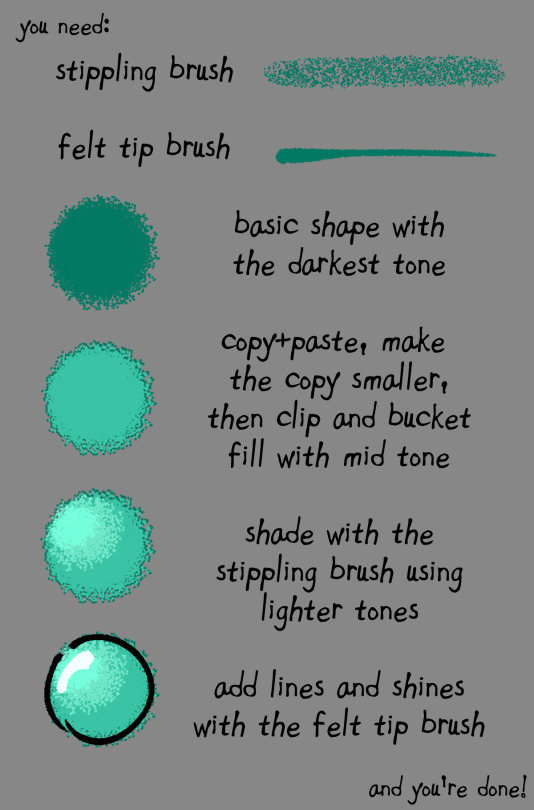
Made these for myself when i forget how to draw but some have asked for tutorials in the past so uh ;_;
#my fav stage of the entire art process is the go crazy stage i will admit#(go crazy just means highlight and define and shade until u're happy)#art tutorial#digital art tutorials#art tips#digital art#art process#workflow#my art <3
41 notes
·
View notes
Text
Also made a mini tutorial to show off what I learned from making my last post. I've never made a tutorial before so I hope it helps someone
7 notes
·
View notes
Note
hi chloe! such a huge huge fan of your art and the magic you do with color!! i’m currently teaching myself rebelle and was wondering if you’d be willing to share any brushes/tips that you use! thank you!
Yeah of course! I've uploaded my brushset onto the Rebelle website you can find it here (it deleted my username from the brushset for some reason)
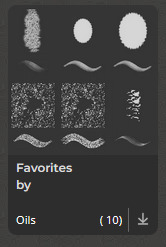
I use mostly one brush (my custom colorblock) for the rough colors of my painting. I don't mess with textured brushes until I have all the colors and shading put down in a way that I like.

The thing I find really helpful is the brush styles on the bottom right of the brush size bar. I use Paint & Mix (2 on keyboard) for my flat colors and Blend (4 on keyboard) to blend colors together or do texturing (fur, fabric, etc)

I set the background as a midtone or shadow (click on the canvas at the bottom and select texture and color

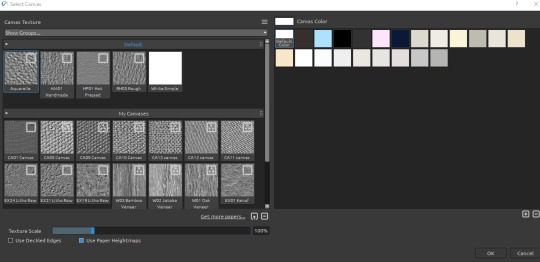
Then get everything down using the color block brush (using paint and mix [2]) I usually only use one or two layers for the figure as the paint only blends with the pigments on the same layer. Using directional strokes to paint the colors along the contours of the form really helps make it look much more '3D'

And then I go over those flat colors with a texture brush using Blend [4].
For the fur I use my Blend 3 brush, 'pushing' in the direction the fur would go in real life


For the backgrounds or aspects I want a bit rougher I use a combination of these brushes, putting down the colors using [2] and blending using [4] until I get something that I like. You can mess with the loading (how much pigment on the brush, similar to opacity in other programs) and oiliness sliders to get the right effects.
Rebelle has a lot of features and fancy brushes you can mess with, so it can get kind of overwhelming. But I find it much more effective to get everything down using one or two brushes and once you're finished with a really solid base use all the fancy blending and brushes. I'd be happy to help one-on-one if you (or anyone) has any specific questions about Rebelle or digital painting in general! Please do DM me, or if you'd like feedback or critique on a particular piece you can also submit it to my inbox!
I'll add a reblog with some color tips in a few days since this post is already getting pretty long.
15 notes
·
View notes
Note
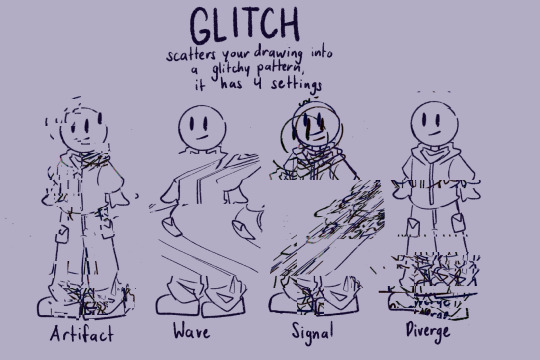
Glitchy effects, teach me yo ways I love that shi
Oh my god hi!!! I love all your interactions with the stickmin community!!1!! I wasn’t expecting you to find me so soon :DDD
Anyways, a lot of my glitch effects are procreate features, so here’s a tutorial for procreate users AND non-procreate users!!
Non-procreate version:


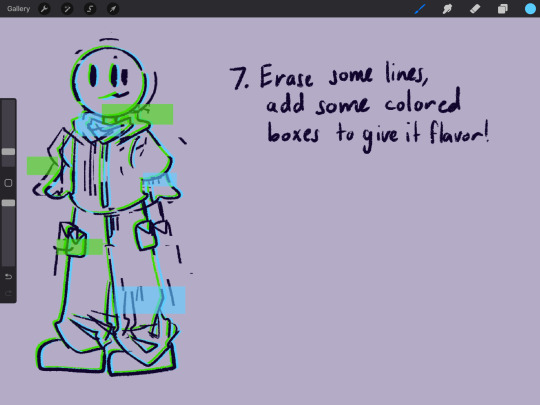
Procreate version:


42 notes
·
View notes
Text
I like this part cuz the before n after is so satisfying 😞
#art process#speedpaint#digital drawing#digital art#artists on tumblr#art#sketch#sketching#creative process#digital sketch#fixing art#silhouette#lex art process#my art#my artwork#my sketches#trust the process#idk how to tag this#tiktok#art tiktok#art tips#art hacks#art tutorial#digital art tutorials#digital art tips#clip studio paint#clip studio art#csp#cspaint
33 notes
·
View notes