#You have to manually click your followers list and remove them
Text
PSA: the bots are getting sneaky
Hey guys just fyi, I haven’t seen anything about this, but I don’t get a follower notification when a bot follows me anymore.
My follower count will magically go up, but my activity doesn’t notify me of being followed by them. But when I click on my list of followers, there they all are.
At first I thought this was an issue with my tumblr specifically, but I still get notified when other people follow me, so I think that the bots just found a work around.
#Thought you’d like to know#You have to manually click your followers list and remove them#sorry#spam bots#tumblr bots#bots#Tumblr#spam messages#hellsite#psa#important#this is important#signal boost#important stuff#important things#Boost#reblog#conspiracies#the bots are back#conspiracy#bots on tumblr#bots are annoying#bots be gone#bots are everywhere#bot trouble#AI#bots go away#followers#scams#tips
262 notes
·
View notes
Photo

KEYFRAME TUTORIAL FOR THOSE WITH A WORKING KNOWLEDGE OF PHOTOSHOP AND GIFMAKING
This is my gif with the coloring I want it to have eventually (including the manipulated color). I changed the yellows and reds in the scene to be purple. I want the majority of the gif to be purple and cyan, but do not want it to be on her skin.

First add a layer mask to the adjustments that are creating the color you want to remove. I used several layers to create the purple coloring, so I grouped them together and added the layer mask to the group instead of having to do them individually. In this case, I erased anywhere the purple was on her skin.

She is walking away in this scene, so this layer mask alone is not enough. This is where keyframes come in.
In the timeline window, scroll to the layer that your layer mask is on (or in my case, group). On the far left side, each of the layers should have an arrow which toggles a drop down menu. Click it and it will list options for Opacity, Layer Mask Position, and Layer Mask Enable. Make sure the current time indicator (small blue arrow and red vertical line in the timeline window) is positioned at 00:00:00 and then select the clock icon next to Layer Mask Position. It should place a small yellow diamond at the same place as the indicator. Each successive move of the mask will place a grey diamond at the timestamp that you move it.

CMD+click on the layer mask in the Layers window so that the area of the mask becomes outlined with a dotted line in the main workspace. Click the chain icon next to the layer mask in the Layers window to unlock the mask's movement.


The next steps are the most tedious. You have to manually move the layer mask every few frames to a new position that follows the movement of the gif. I usually zoom the timeline in so that each second is broken into six sections and pick a new layer mask position at approximately each section. If there is more rapid movement in the gif, you may have to pick new positions at more frequent intervals and vice versa.
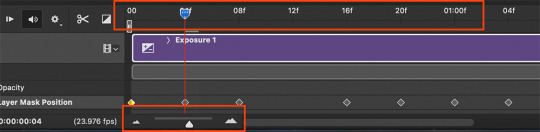
After the initial layer mask is set at the 00:00:00 point in the timeline, select the next interval that you want the layer mask to move to. Do this by moving the time indicator to your chosen point. Now with the move tool, click within the layer mask and drag it to where it needs to be to keep coverage on your desired area. The longer/more frames in the gif, the more keyframe points you will have to select. This gif was about 2.5 seconds long and I used 14 different points.


These are just a few of the keyframes I made on this gif. You can see here that the original area that I erased in the layer mask doesn't quite cover all of her skin throughout the movement. I just erase a bit more until I'm satisfied with the coverage.
Once you have mapped all the points out, deselect the mask area and click the blank space where the chain icon was to make it reappear and return the mask to a locked position.
Scrub through the gif to make sure that the mask covers everything you want and also that the keyframes make it move smoothly. Shorter intervals and minor position changes between keyframes usually keeps choppiness (this normally presents as the mask noticeably jumping to a new position) to a minimum. You should not be able to notice the mask's movement except in the way it removes color from specific areas as intended.
Export and save the gif as normal.
This is my finished result:

#userfanni#omgari#usersunny#userbells#userkraina#tuserabbie#tusergabriela#useroli#userangelic#supervalcsi#userphe#keyframes#*tutorial#tagging a couple of you who have been like ‘how tf did you make this’ on sets that i used this technique hope you dont mind#idk how coherently this reads or if it even explains it well enough but feel free to ask for clarification#there are also other keyframe tutorials on here that are written much better so check those out too if mine doesnt make sense#but yeah this is how i make my vibrant gifs that have movement in them#i'm going to make a tutorial explaining the actual coloring process too eventually#might make a part two of this explaining how to use this method for more complicated movements#like when your subject moves in multiple directions or there are multiple subjects#riah.gif#riah.txt
539 notes
·
View notes
Text
Permanent Blacklists for AO3
Would you like to permanently remove fics with your squicks, triggers, and dislikes from all AO3 searches by default so that you never have to think about or encounter them again? Well now you can!
The ability to do this has actually been around for a little while but it relies on some new CSS functionality that wasn't supported on all major browsers until fairly recently (though you may still have to enable it manually on some). I'm not going to explain how this method works or how to code AO3 skins in general, as I've only dabbled in it a little and there are already some very good tutorials out there. If you want all of the details, check out these guides:
Skins and Archive Interface FAQ – The official skins guide created by AO3. Lots of good information but might be overwhelming and confusing for a beginner.
A Non-Extensive Guide on How to Start Creating a Skin for AO3 by ao3skin – Some good, fairly easy to understand, beginner info on CSS and specifically how it applies to AO3 skins.
Permablocking Specific Tags - Site Skin by Eli0t – Everything you need to know to create permablock lists. If your blacklist doesn't seem to be working as expected, check this for troubleshooting tips.
What I can offer though are some handy pre-made blacklists that you can use as-is or as a starting point to create your own so that you don't have to go to the trouble of figuring out how any of this works or hunting down relevant tags. Just copy the code, open AO3, go to My Preferences > Skins > Create Site Skin, paste it in the box, title it, and click Submit!
Note: The following lists are very specific to me and my own personal tastes. Absolutely no judgement if you love any of the things that I choose to blacklist. You do you. I just happen to like my fics fucked up and relatively canonical.
★ No Reader Fic – Hides all self-insert and reader fic.
★ No Alternate Universes – Hides anything tagged with the most common AU tags. There are so many incredibly specific AUs there's no way to list all of them and AU tagging is also extremely inconsistent from fic to fic so this blacklist may only catch 80% of AUs, but that's better than nothing. You could always exclude the entire alternate universe tag, rather than trying to list specific ones, but unfortunately canon divergence and other less extreme AUs would get caught in the crossfire, which is not worth it for me.
★ No Fluff – Hides anything tagged with the most common fluff and romance tags. I specifically left out "fluff and angst" though because sometimes that's used for things that are mostly angst with only a bit of fluff and I do love angst.
★ Bonus: No Dead Dove – This list is not mine (for obvious reasons) but I know some people may find it useful. Hides anything with the main archive warnings and many common problematic, taboo, or controversial tags. Some of these I wouldn't even classify as dead dove, they're literally just kinks, so I'd suggest reviewing the list carefully and removing any that don't apply to you.
Additional Notes:
This system doesn't work exactly the same as AO3's exclusion filters because you can't use top-level wrangled tags to block all subtags. It only blocks exact matches.
Once the blacklist is implemented you'll see no indication that anything was blocked (except for fewer fics listed on each search page); the entire blurb will be hidden. The tags and fic counts listed in the filter bar will remain unchanged. If you want more advanced features like whitelisting or adding something to indicate when a fic was removed, check out the permablocking guide by Eli0t.
Here's a link with info on which browsers currently support the new "has()" element, which this blacklist system relies on. As of right now Firefox for desktop still has to be manually enabled (for instructions see the section on flag enabling in the permablocking guide). Firefox for iOS isn't listed on this website but it seems to work fine for me.
There are other browser-specific extensions that let you permablock tags, such as this one and this one, that may be more a little more user friendly, but I've never tried them so I can't vouch for them and they may not work consistently between different devices. The good thing about doing blacklists via skins is that, after setting it up once, it should work automatically on pretty much any device (as long as you're logged in to your AO3 account).
#I'm so stoked about this feature#it's a GAME CHANGER#I put a lot of effort into creating my blacklists#I couldn't not share them and hopefully make someone's life easier now that I've already done all the work#assuming anyone shares my preferences#ao3#ao3 skins#ao3 help#tutorial#wendy's help desk
130 notes
·
View notes
Text
The Sims 4: New Game Patch (December 5th, 2023)
Following last week’s Laundry List, there is a new game patch out today in preparation for the release of The Sims 4 For Rent Expansion Pack this Thursday (December 7th).
If you have auto updates enabled in Origin’s “Application Settings”, the game will auto-update once you open Origin. If you have auto-updates disabled, you will need to manually update by clicking the game in your library.Advertisement
To ensure your game is up to date, check the game version found in Documents > EA > The Sims 4 > GameVersion.txt. Your game should now read: PC: 1.103.250.1020 / Mac: 1.103.250.1220 / Console: 1.84
Sul Sul Simmers!
The newest expansion pack has been freely living in all our heads and For Rent is finally due! The Property Owner is coming to visit in just a few days, but in the meantime there’s a couple of Base Game additions and a bevy of fixes to call out and share. Our favorite SimGuruNova is going to go into details below. Thanks all!
– SimGuruNinja
What’s New?
Sink Assignments
The jig is up for Sims who had a penchant for shoving Harvestfest turkey bones down the drains of those poor, poor bathroom sinks. Starting today, all sinks can now be designated as Kitchen or Bathroom sinks.


The assignment you choose determines whether hands or dishes are autonomously washed in them. Unless, of course, you live for the chaos and assign the wrong labels to each sink. We won’t stop you from letting your Sims continue to be little freaks!
Switch Control to This Household
Listen, as much as we love the Manage Worlds screen, every healthy relationship requires a bit of space. So, we’ve declared a bit of independence from Manage Worlds, giving you the chance to switch your active household from Live mode directly with the “Switch Control to This Household” interaction! While we added this as a means to switch between units of your Residential Rental more seamlessly, this interaction will be available on the front door of all occupied residences, not just Residential Rental units. Rejoice with me, my fellow rotational gameplay Simmers!
Base Game Additions That’ll Knock Your Shoes Off
In celebration of the release of For Rent, we have a few housewarming goodies coming to the Base Game. Along with a cozy new outfit that’ll have your Sims lounging in style, Sims can now interact with the Men’s Shoe Rack and Women’s Shoe Rack items from Base Game to set rules for the house determining whether or not shoes are removed at the door. Which means everyone will know whether or not your Sim is wearing socks under those sneakers (please, for my sanity, make sure they are!)

Bug Fixes
Base Game/Multipack
Quick Meal interactions on fridges have been renamed to “Quick Meal or Drink” and “Microwaved Quick Meal or Drink”. Gone are the days of “Glass of Milk” erasure!
Sims who finish their drinks while also eating will now make sure to finish their meal afterward. That’s right, Mrs. Landgraab, chugging your Juice on the Rocks doesn’t count as “girl dinner”.
Child Sims with the Genius trait will no longer gain the Want to Solve Hard Problems, They’ll have to wait a few years before diving into such complex abstraction.
Sims with a Fear of Fire will no longer be tormented by constant, unavoidable fires starting while they are cooking.
On a somewhat related note, Sims will no longer be given the option to Cook Together on broken stoves.
In an attempt to curtail unwarranted surreal horror gameplay, household members should no longer randomly be labeled as neighbors and become unable to use doors.
In the spirit of respecting the laws of physics, towels hung on the wall are no longer translucent when hit with natural light.
Though they are things of beauty, certain columns will now, indeed, fade away… when they would otherwise be blocking the camera in Live Mode.
Sims will no longer be constantly using their phones at every hour of the day. Not a cell phone in sight, just simulated people living in the moment. Beautiful.
Hairy houseguests deciding to shave in your Sim’s bathroom will no longer cause the game to freeze.
Sims should now actually be able to finish writing songs. Perhaps those of us with closets full of unfinished projects should take notes.
Child Sims will now only have age-appropriate thought bubbles.
After plenty of confidence building exercises, certain table lamps will no longer snap to the wall when placed and will be comfortable standing wherever you place them.
Infants who age up in a dirty diaper will no longer produce stink clouds as if forced to wear that dirty diaper into adulthood (Rest assured, I hated writing that just as much as you hated reading it).
Sims will thankfully no longer slip and fall in mud puddles while holding an infant.
Adjusted frequency of body hair on randomized Sims to be slightly less excessive.
Some of the less friendly toddler and infant hairs have been taught proper conflict resolution and will now play nicely with hats.
Sims living on Private Dwelling lots are now willing to make exceptions for food deliveries. Because everyone loves a good pizza, even territorial curmudgeons.
Basement stairs should now play nicely with terrain when the lot has a raised foundation.
Changing foundation height should no longer stop windows from being placed on curved walls.
Sims have learned what it means to be that guy and will no longer constantly ask “What Happened?” for no apparent reason during conversations.
Sims who would invite themselves over and make themselves a little too welcome have relearned their manners and should now knock.
Much to the disappointment of illusionists everywhere, glass walls over basements should no longer hide basement walls when viewed from above.
We’ve educated Sims on the dangers of over-caffeination, so autonomous coffee making/drinking should happen a bit less frequently.
Blonde gardeners and redhead pizza deliverers everywhere can breathe a sigh of relief, because parents with graying hair swatches are now more likely to have children that match their base hair color, rather than unexpected red or blonde hair.
When loading back into a save and entering Manage Worlds, there’s no longer a chance that occupied lots appear empty.
A previously unnamed PooHoo bush has now discovered its true name.
Console
Hitting the Undo button on the controller no longer pulls up the search bar in Build Mode.
Kits
The nails from Poolside Splash are now tagged for both masculine and feminine frame Sims.
As fun as it was, Sims should no longer grow a second pair of feet when wearing the retro bikini from Poolside Splash.
Laundry Day
Hampers can now be dragged in and out of Sim inventories in Live Mode. The excuses for putting off laundry end here!
Dirty cloth diapers will now go into laundry hampers, where they belong, rather than the floor, where they do not belong.
Dream Home Decorator
The Standard Gas Oven by Blazin’ Ladles no longer disappears when placed on lots. May your ladles remain ever ablaze…
My Wedding Stories
Certain veils should no longer force Sims to have red hair (seriously, what is it with this update and red hair?)
Werewolves
Werewolves will no longer autonomously Check On infants during their rampage. And thank goodness for that.
Seasons
Plants no longer revert to dirt piles in dormant phases, and instead will simply stop growing. They should also now only become dormant when entering their off seasons, at the appropriate time.
Get Famous
Sims who have chosen to forgo the spotlight will no longer gain unwanted fame.
Cottage Living
Sims will now retain the Heroic Haggler buff when buying discounted items at village shops after haggling. Let them enjoy their Karen moment!
Your Sims will no longer be doomed to a life of Sisyphean crafting endeavors. They should now be able to complete the task to create a Cross-Stitch for the Taste for Adventure errand.
High School Years
The pink swatch of the Benchmark Seating chair is no longer masquerading as blue in the preview.
Teens who get more than 250 Social Bunny followers should now be able to complete the third level Admired Icon aspiration.
Growing Together
Playing other households will no longer cause Sims to forget certain achieved Milestones. In other words, the game will neither gaslight nor gatekeep your girlboss Sims anymore.
We gave that creepy tree in San Sequoia a stern warning. It should no longer be encroaching upon the buildable area of the Sequoia Cottage lot.
Sims will no longer earn the First Promotion milestone when getting a new job, no matter how much your Sim is willing to be annoying and debate the semantics of that.
Toddlers should now be able to Sing a Song with infants without being interrupted.
Horse Ranch
Your adorable little money laundering scheme has yee’d its last haw! Sims will no longer receive double the stated number of Simoleons for selling mini goats and sheep.
Sims riding horses should now have an easier time saying howdy (and other things) to other horses nearby.
Sims will no longer be taunted by an unreachable log filled with frogs in Chestnut Ridge.
The era of heavy metal square dancing has waned. Sims will now only autonomously perform Cowpoke Dance if Ranch music is playing.
For Rent
Fixed an issue where rent could go into negatives or be excessively high.
35 notes
·
View notes
Text
Manual to Blender navigation/object manipulation
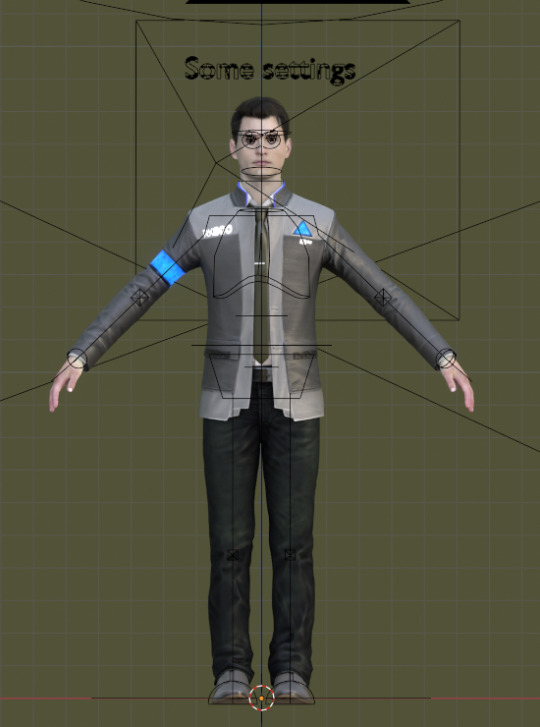
This post was supposed to be a manual on how to use Connor’s rig, but I started a bit too far from blender basics and it has gotten so long and I haven’t even gotten to the part where I’m actually talking about the rig, so I decided to split it into parts and this first one is just about blender in general.
( It doesn’t make sense for this post to have this screenshot of Connor at the beginning of it anymore, but HUH, l’ll just keep it as a reminder of what’s the end goal *paste a meme template with a bunch of connor pictures and the words “Do it For Him” * the next sentence below was written before I realised it's not going to to be about this rig anymore)
I’m not sure how far away I should start it, but the moment you open it, it should lok something like this:
For those who never used blender before, you should be first familiar with basic intarface/navigation, but in case you’re not really comfortable, here’s a quick(oh BOY no it’s not so quick anymore) sum on
1. How to navigate around blender
You can use those icons to navigate, but ideally you should be using an actual mouse and shortcuts. USE SHORTCUTS AND MOUSE, you’ll get used to it quickly:

The gizmo with XYZ to rotate around the scene. (shortcut: Middle mouse button + drag)
Hand icon to pan around without rotating (shortcut: Shift + Middle mouse button + drag)
magnifying glass to Zoom in and out (shortcut: mouse scroll wheel)
Okay, move around and get accustomed to it
2. Different modes (Object/Edit/Pose)
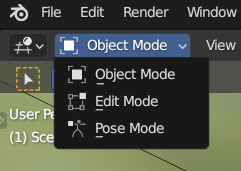
There are different modes in blender for different purposes, but for working with rig you’ll be generally working switching between Pose and Object modes.
You can change them in the upper left corner of working area or by using Ctrl + Tab to switch between the three. One thing to note: what you see in mode menu depends on what object is currently selected. If you select a mesh, the menu will look differently and will feature a bunch of other modes like sculpt and different paint modes, but no Pose mode:

To see the Pose Mode listed you must select the armature object (the rig itself), here it is named Main_Rig and here it is selected as orange


After selecting it (check that you only select it and nothing else)
Oh, by the way
3. How to (de)select things in blender
It’s simple,
To select things you click on them with left mouse button
To select multiple things things you either click and drag left mouse button (LMB) with a box select or click on individual objects while holding Shift, or you can combine the two
If you want to select everything (that is visible and not hided atm), press A.
If you want to deselect everything click on empty space on your scene or press Alt + A (or just click A two times quickly)
To deselect only some objects you could use Alt + Z to undo your last action (Ctrl + Shift + Z to redo it again) in case it was the last object you selected or you can use Ctrl + Left Click and drag to box select objects you want to remove from selection.
It is also handy to know how to invert selection aka select everything BUT a bunch of objects (Ctrl + I)
Maybe I’ll add more things to this list later, but you should be good to go with what is already listed.
Okay, back to the rig, select it and go to Pose Mode. Or wait, first, real quick about Object Mode
4. Object mode
Here you select objects and move/rotate/sclale(ooops! Careful here! Usually you don’t want to scale them in Object Mode and should use Edit mode instead, maybe later on I’ll explain why. In short - it can mess up the way things work)
4.1 Okay, Let’s move it
To move things around you select them first and then (Here I’ll deliberately ignore the existance of gizmos bc you should be using shortcuts, just believe me) you press G to move it freely around as it is following your mouse, click to fix it in new place or left click to reset the way it was before you decided to move it. Additionally, after pressing pressing G once you can follow it with X, Y or Z (you don’t need to press them at the same time, just one after another) to move it only along the way of one of those axis. This place here need a little further explanation about
4.1.2? The difference between Local vs Global transformation orientation

They can be changed in upper middle part of the working area. Basically Global orientation means that if you move an object and will try to move them along some specific axis (X/Y/Z) they’ll move accordingly right-left/forwards-backwards/up or down, aligned with those you see in a gizmo in upper-right corner of the screen. But it’s not the only way you can move things. In case you have an object that is slightly rotated you may want to move them along it’s local position in space. This is actually a time where gizmos can help visually understand what I mean
Here I rotated a cube slightly from it’s original rotation, and if I use Global Orientation and will try to move it along one of the axis, it will move in one of those directions as shown by arrows in the first picture. As you can see, they are aligned with visual representation of those global axis (here X and Y) you can see as Red and Green lines

If I switch into Local orientation, you can see that now arrows are aligned not with the world’s Up-Down/Left-Right/etc but with what’s Up-Down/Left-Right RELATIVE TO THE OBJECT ITSELF. (Which btw is something you can change)
Okay, enough about moving things, now about rotating
4.2 Rotating things
To rotate them you press R to rotate it around. Double-Click R to rotate it freely around all axis or, just like it was with moving things only around certain axis you can also rotate them around certain axis (with R -> X(or Y or Z, or Shift+X/Y/Z to rotate around all axis but this one)). Same with Global/Local orientations, just imagine that those arrows in pictures above are a representation of around what line in space an object will rotate from it’s pivot point (represented by this orange dot. It can be moved around and shit, but maybe I’ll talk about it later).
I could also mention that there are also different rotation modes like Euler/Quaternion and such a thing like Gimbal Lock, but those are some shit you encounter when you rig things and they start to spin not the way you want them to, driving you crazy about why isn’t this fucking shi-...nvm, moving on
4.3 Scaling shit
Press S to scale things. Just like before press S then X(Y or Z) to only scale them in one axis, or Shift+(axis of your choice here) to exclude it from the list of axis you want to scale it along. Here I should talk a bit about situations where you’re scaling a bunch of things at once and want to scale it relative to a specific point in space or use individual pivot points for each of the selected objects. You can change it here:

I’m getting lazy, so I won’t be explaning it in details here, but just be aware that this menu exists. It is actually useful for rotating things as well, but I more often use it for scaling, so I forgot to mention it in rotating section
Okay, I think we’re done manipulating things, and we haven’t even got to the part when I talk about the rig I was supposed to be writing about on the first place SHIT I should have started explaining those concepts within pose mode right away, but huh, those concepts for manipulating things are interchangeable for moving bones or rig controllers, so no time were wasted here, it’s all the same, if you know how to manipulate object in object mode you’ll use the same exact shortcuts and do it the same way, it this sense blender is really consistent with it shortcut-usage and G is always for moving, R for rotating and and S for scaling, whether you are scaling objects, bones, controllers or graph handles or distance between keyframes or...list is long enough, you got my point.
Okay, I think it’s enough for the first part and I’m scared that this website will glitch and erase all my work and it’s a bit too much to loose at this point. Hopefully in second part I get to the part where I’m talking about the rig but it’s possible I’ll get too excited talking about rigging concepts of Fk/Ik in general
23 notes
·
View notes
Text
Green and Digits First Meeting
I'm trying not to feel bad about how little progress I made on my WIP's this summer and it's a losing battle for sure. On the plus side I think a decent amount of this will make it into the story. Ah the fun of being a chaotic writer.
Tag list: @ezestreet @nanashi23 @winterandwords @jezifster @kingkendrick7 @aether-wasteland-s @dumbthunder @manathen @the-void-writes (Let me know if you want to be added or removed from the taglist!)
Green sat on Peace’s busted chair. Leaning back with a quiet grunt as she untucked her shirt. Huffing impatiently at the damp fabric.
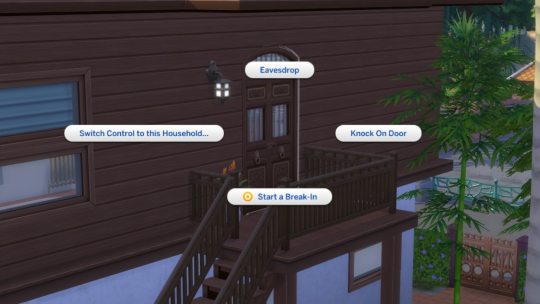
It was routine at this point. Coming back from a job that took her out of the city, and heading straight to Peace. Sometimes still bloody. There was no exception to that tonight. However, there was one annoyance sitting with both of their knees to their chest.
A construction worker sat on the rug Peace had offered to her. The reflectable patches on her shoulders attempted to blind Green.
“You Digits?” Green’s voice dropped, hitting the irritation range, not yet at full anger levels.
The construction worker looked away from the self-designated staring point. Bringing her eyes back to focus as she tapped absentmindedly on the floor in a slow practiced pattern. A soft clicking hitting Green’s ears when specific fingers moved.
Green made note of that. Undoing the top button of her sweat stained shirt. She’d be sure to break those fingers first.
“That’s me,” Digits finally responded, “Green?”
Green nodded at the acknowledgment, putting a bloody hand out for a shake. Now why was Digits here right now? Green thought on it, hoping she hadn’t got herself knocked around too much to have forgotten. Realizing her hand had not been grabbed yet, her thoughts broke. Almost offended until she noticed the blood.
“Some of it’s my blood if it makes you feel better,” Green stated with a crooked grin, dragging her hand down her sleeve.
She took notice of the alarm that took place in Digits’ watching eyes. Green was starting to enjoy the unintended amusement of it all. She was here for Peace but fucking with this construction person in awe of Peace might have to be a highlight. A short laugh rose from her chest at Digits’s resistance to staring at blood. She could think of tons of people she’d have put off with just that.
“I don’t think I want literal evidence on my hand.”
“Aw, I don’t really know if they’d check you anyway. You’re a common worker, too good to fuck up your record.”
Green realized shortly after her statement how condescending that sounded. Especially with her usual gruff voice. She knew Peace would give her a concussing slap to the back of her head if she was in the room. She derailed the conversation instead. It was too difficult to try to save that conversation right now. Especially after seeing a look that Green could only describe as looking like, she tears people apart with her teeth.
“A friend of Peace is a friend of mine by default,” Green started assuming Peace had wanted them to not kill each other before becoming acquainted, “Wish I got a warnin’ before seeing your ass in Peace’s room though.”
Digits grinned a little at the follow up an almost knowing look on her face.
“Did you both have something planned?”
Digits flexed her fingers slowly, manually stretching and flexing them with her other hand when they caught. Green rolled her eyes refusing to answer that. They needed to get acquainted, not have all their private lives known. The eyeroll had the construction worker chuckling.
“Where did Peace head off to?”
“She’s helping a group of her protestors pull out. Apparently, she has a bigger plan she wants to work through with us.”
Digits’ feet tapped happily on the floor simultaneously. So the construction worker was happy to be included, that’s good.
Green’s crooked grin returned. She knew if that went well they’d both be blessed when Peace was present again. She let the thought simmer there.
“You know Peace will probably rope us into insanity right?”
“Oh yeah,” Digits laughed, “She seems very capable though. Her and her protestors. I have no clue how I’m going to help.”
Green snorted a little at the confidence. Was it wrong to say Digits would probably be fodder? Maybe. So she bit her tongue on this one and brought up what really mattered.
“Be prepared for when Peace comes back tonight.”
“For?”
Digits crossed her arms, letting her legs slide back down to the ground. Green’s gaze focused on the door ears tinging red as she thought about how to describe it.
“The energy that ginger menace comes back with can sway you into doing anything just to see it again. Don’t let her hit you with that victorious smile,” Green sighed a little, “It’s over.”
Digits laughed a little. Imagining it Digits toyed with one of her piercings, going pink in the face.
“I think it’s already too late for me.” Digits said smiling.
Green relaxed in Peace’s chair, hearing music playing from another room. Most likely upstairs. It was difficult to find a Peace appreciator that could also get along with Green. They weren’t fully there but Green would have to call this an amazing first step.
“It’ll be even more powerful. I’m telling you.”
Green heard a screen door slam and listened to the chorus of footsteps flooding in. She sat up straight lifting her knife a bit from the holster. This was either Peace and the protestors she pulled or a raid. Rather safe than sorry, which Digits didn’t seem to fully follow just yet. Thankfully there was no need to as of yet when Peace’s tattered converses came down the hall to her open door. Peace’s hair bouncing as she ran. She opened her arms wide and whooped.
“Green! Digits!” Peace called out next charging into the room to wrap her sweaty arms around Green.
Green grinned and gave Peace an ecstatic squeeze. Peace then tugged Digits up from the floor, dragging her back over to Green. Enveloping them both in a group hug. Digits was gone, absolute putty in Peace’s hands. Green was almost there but held string onto her fading resolve.
“I need you both for my next big plan okay?” Peace carefully released them, smile full of teeth, “Green you’ll love it it’s destructive. And Digits you’ll be able to keep up with what we need right?”
Green laughed when she mentioned destructive, ready to hear more from the woman who often scolded her for damaging so much stuff, to begin with. Though Peace also had less of a tendency to charge straight in with a guess of a plan. She looked over to Digits after hearing Peace’s request knowing what was coming, she’d been a victim of it for years. Digits was met with dark brown eyes brimming with excitement, freckles that almost looked like they were dancing because of the close proximity, you gotta love your eyes working against you, and bright white teeth forming what would only be the equivalent of a kid just learning how to smile for a picture.
“I’ll be able to keep up with anything as long as my arms are functioning.” Digits said almost breathless.
Well, Digits is fucking gone.
#writeblr#random writes#if you couldn't tell I love writing gay ass dorks XD#As a part of the gay dork society it's my job
10 notes
·
View notes
Text
Mastodon is great for a quiet fandom life
Even before the buyout, Twitter has been an anxious place for a hobbyist like me.
I want to chill in my fandom bubble and find people who like the same characters I like to connect and chat maybe! I want to shitpost in peace!
Because of how twitter’s algorithm and search function works, I don’t want to force people who don’t like that sort of thing to see what I draw, so I’m careful with how I word my post.
I mark the pairing name somewhere so people can mute it. (or find it)
I censor full names or series titles so it ’s not found in search. I’ve been doing this for so long it shouldn’t be stressful, but getting stray comments reminds me to stay on my toes.
Mastodon, I realized, is close to perfect place for a peaceful fandom life.
Mastodon is compared to twitter a lot. That’s the wrong way of thinking about it. It’s not about trying to be “engaged” with the site 24/7. It wants to work for everyone, while keeping its focus on safety and making it harder to dogpile on others. That’s freakin’ awesome. Once you understand how it works.
So how to get started?
These were my top worries while figuring out Mastodon.
There’s so many instances! What if I join the wrong one?
This had me stuck deciding whether Mastodon was even viable. But there is no “wrong one.” you can join any instance, you can even make your own as the sole member. It’s simply having an address to be found.
HOWEVER
You might want to shop around first. When you sign up for an instance, their rules and which instances they don’t interact with are listed. I draw NSFW art, so I wanted to join an instance that allows that sort of thing.
AND
There’s no advantage joining a heavily populated instance. it could lag, more difficult to get into contact with the admins/support. The local timeline is a mess. Small and cozy is best. You can follow anyone, anywhere, anyway.
I don’t know how to follow others from different instances.
You don't have sign up to different instances to follow others. The easiest way to do that is to copy their profile URL and paste and search into your instance’s search bar. You can also copy and search their account name, usually displayed by their username. They look like “@[email protected]”
I tried doing a search for my favorite thing but got 0 results! I’m proud of this creation, how can others find it?
Mastodon’s search will only catch hashtags and URLs from all the instances. While I avoided hashtags with every fiber of my being on twitter, it’s vital to use them if you want public posts to be found by others. So don’t be shy and tag it up, use appropriate content warnings if needed on posts you want others to see!
Because of these search limitations, you don’t have to censor words without fear of being found in a random search anymore. It’s great.
Best of all, you can follow hashtags! This way, any post with that hashtag will appear in your home timeline whether you follow that person or not, even from other instances. It’s great to see new stuff without manually searching.
To do this, search your favorite hashtag names. Click the hashtag in the search results and in the upper right corner there’s an icon with a plus mark to click. You can remove it anytime by doing the same method.
But I want to follow others who speak different languages, twitter at least has a translate function (for now)
Mastodon does too! But it’s up to each instance’s admin to implement the feature. it doesn’t hurt to politely ask them to add it. If they don’t, some apps have it built in! I know Ice Cubes for Mastodon does at least.
Quick tips:
—You can change the default visibility of your posts in preferences
The default is “public” but if you’re like me, you don’t want every thought out on the public/local timeline. I have mine set for “unlisted” so only followers or profile visitors can see it. The many posting options Mastodon has are almost perfect. I hope someday they adopt Twitter’s circle function.
—You can add filters to words and hashtags you don’t want to see! It just works! This is in preferences.
—No more extra work when you have to delete and repost, the “delete and re-draft” function is the best option ever.
—For the most comprehensive FAQ that answers every little thing you want to know about how Mastodon works and why, https://fedi.tips answers and then some.
I'm still a newb to Mastodon but I love being there so much. If anyone else has tips I've missed I'd love to know!
33 notes
·
View notes
Text
Hello all you may remember me from such bangers as 'show me the proxies in marble hornets' and 'and another thing'
oday um here to talk about how we've fucking regressed as a fandom since creepypasta and marble hornets on ao3 got. presumably merged as a fandom tags bc sorting for exclude crossovers still shows creepypasta fic. in fact doing that just now to confirm this, the very first fic on the list was creepypasta.
so obviously this is a huge pain in the ass for anyone who wants marble hornets fanfic and only marble hornets fanfic. you cant even remove creepypasta fics with exclude crossover, youd have to do it manually with filtering options not everyone knows how to use. and we shouldnt have to yknow? you should be able to go in your fandom tag on ao3 and find only that fandom and crossovers (which should be easily filtered out by exclude crossovers) same as here on tumblr crosstagging is a huge issue but the worst part of it is that the continuous crosstagging in recent years has caused the fandom tags to be merged (not fully as shown by the fact that the numbers for amount of fic in each tag is different) but enough that they're considered the same universe by ao3 which is. blatantly untrue.
creepypasta is a catchall term for internet short stories made by a community, marble hornets is one single webseries online. fuck the creepypasta fandom wouldnt be what it is without huge swaths of shit stolen from marble hornets (like yknow, the pages, the operator symbol, masky and hoodie) but that doesnt mean they are marble hornets fans that doesnt mean theyre making marble hornets content. that would be like saying that since fnaf and batim are kinda similar and the fans have an overlap that means theyre the same and should be tagged the same. they arent, and shouldnt be yknow?
also apologies this isnt the best post im kinda fried rn and im stuck on mobile
that not withstanding its fucking depressing. this did not used to be an issue. thr only fics tagged with both were generally easy to ignore or a real honest to god crossover, but now i swear you look at the mh tag on ao3 and the majority of the recent fics are crosstagged crp fics with giant tag lists that tack up the whole page and tag anyone who is so much as mentioned
and maybe this is a step too far here. but i really think this is bc of tiktok. the people crosstagging posts and fics seem to be the same type to complain avout the 'ao3/tumblr algorithm' not favoring them. but there is no algorithm, just annoyed fans who have to dig for their actual content because people dont have common decency anymore. theres an etiquette you need to follow for shit like this. like how would you feel if like. i dunno. fucking... genshin (just an example of a large fandom or whatever made a character cameo out of like jeff the killer and suddenly all the crp tags were filled with genshin posts not even related to or barely mentioning the character, just ti try and get more clicks?
youd be pretty fucking annoyed having to scroll past all that to find actual creepypasta content huh?
thats the same issue happening here, and honestly i think its a huge issue. for obvious reasons but also bc its so much harder to find mh content now that im sure its incredibly disheartening to be a creator in the fandom rn and foe the past few years. you work and make content for your rather small fandom and its buried under barely related shit, its gonna feel bad yknow? especially when that content gets more clicks bc. frankly theres more creepypasta fans than mh fans just bc of what creepypasta is format wise. its collectively made shortstories. you can like one or two and bc a crp fan, its not like that for mh
this is going kinda off my starting topic but anyways if theres any ao3 tag wrangles following me or who see this.
please for the love of god i beg of you to do anything you can to unmerge those tags i will do anything ill get receipts proving they're separate things please unmerge the tags im dying here
#marble hornets#ao3#sorry im still reallt spacey rn cause i was high earlier today and im big adhd at the best of times#so someone with more brainpower than me rn id love some input#ill write a more coherent version lf this when im back home with my laptop after new years
35 notes
·
View notes
Text
wacom tablet + Ventura: how to fix
If you, like me, have a wacom tablet and are using iOS Ventura, you may be having some problems :'D My wacom tablet has been weird ever since I got it, and recently it bugged out really bad and I couldn't even use it. Cue the panic! I emailed wacom and asked for help. The instructions they sent didn't work, but I have modified them and NOW THE TABLET WORKS. I don't think this software is stable and I think it's likely to bug out again, but at least if it does, I know what to do.
Googling around I see a lot of people are having this problem so I hope with enough tags and google-able words, I can help someone else.
Instructions under the cut.
If your wacom uninstaller isn't working (maybe it freezes, like mine did), skip step 2 and go from step 1 to step 3.
The following is word for word instructions from wacom with some alterations from me.
1. First, disconnect the tablet from the computer.
2. Next, open Finder, click on Go (at the top of the screen near the Apple menu) and go to Applications. Locate any Wacom Tablet folder and open the Wacom Tablet Utility in it. Using this utility, please remove All User's preferences and uninstall the driver. (Click on the lock icon on the bottom of the window to enable this option. Make sure to create a back up of your preferences first if necessary.)
Restart the computer.
3. After removing the driver with the utility, please manually check if anything was left behind. Please open Finder, click on Go, and then click on Computer. Once there, please access your main hard drive (by default should be named Macintosh HD) and check if anything is left behind in the folders listed below. DELETE EVERY WACOM-RELATED FILE IN THESE FOLDERS, not just the ones listed below. Check every file name carefully. Obliterate anything with "wacom" in the name. You may or may not have all the files listed below:
In Macintosh HD:
Applications/Wacom Tablet
Library/Application Support/Tablet
Library/Frameworks/WacomMultiTouch.framework
Library/Internet Plugins/WacomTabletPlugin.plugin
Library/Launch Agents/com.wacom.wacomtablet.plist
Library/LaunchDaemons/com.wacom.displayhelper.plist
Library/LaunchDaemons/com.wacom.RemoveTabletHelper.plist
Library/LaunchDaemons/com.wacom.TabletHelper.plist
Library/PreferencePanes/WacomTablet.prefpane
Library/Preferences/Tablet
Library/PriveledgedHelperTools/com.wacom.RemoveTabletHelper
Library/PriveledgedHelperTools/com.wacom.TabletHelper
❗️ If you have more than one user on your computer, you will have to repeat this for every user. If you do not have more than one user on your computer, ignore this part.
This part is for if there is more than one user on the computer, which currently there is not
The same will have to be checked in any respective User’s folder on the system. To access it, you must select 'Go' from the top of Finder and select 'Go to folder...’. Here, enter ~/Library to access the current user's Library folder. Please check for Wacom related files in the Preferences folder and remove them if present:
Users/<your user>/Library/Preferences/com.wacom.ProfessionalTablet.plist
Users/<your user>/Library/Preferences/com.wacom.wacomtablet.prefs
Users/<your user>/Library/Preferences/com.wacom.wacomtouch.prefs
❗️ End of instructions for other users
Restart the computer.
4. Open Finder, go to Applications and then in Utilities. Please open the Disk Utility and use the First Aid tool to do a repair of your disk permissions.
5. Now download and install the latest driver from wacom. Search based on your tablet product number. Be sure to give permissions to the driver as they are requested during this installation process.
6. Once the installation is complete, and the system is stable, connect the tablet. As always, make sure your tablet is connected directly to your computer. Avoid using USB hubs, keyboard/monitor ports, or docking stations with the tablets, as they can cause inconsistent behavior.
THINGS TO MAKE SURE ARE ON:
System Settings → Privacy and Security → Accessibility → make sure all wacom-related things are turned on (“com.wacom” and “WacomTabletDriver” on my computer)
System Settings → Privacy and Security → Input Monitoring → make sure all wacom-related things are turned on (“WacomTabletDriver” on my computer)
If the above wacom things disappear, you can find them in:
Go → Applications → Wacom Tablet → push “cmd shift period” keys to show the hidden folder .Tablet → .Tablet has the driver things, you can drag them into the Accessibility and Input Monitoring panels
These instructions are relevant as of posting (Feb 5, 2023). If you find something has worked/doesn't work for you, feel free to put it in the notes or a reblog. I'm not an IT person. I just want people to be able to use their very expensive equipment 😫
#wacom#wacom tablet#troubleshooting#ventura#wacom ventura#plz wacom fix this#it's not just me#there's pple on reddit talking about this#def a wacom + ventura problem#it's scary when your tablet crashes your computer#I almost lost some stuff#makes your heart stop in your chest#so let's fix it!!
5 notes
·
View notes
Text
Facebook photo privacy hack

#Facebook photo privacy hack how to
#Facebook photo privacy hack archive
#Facebook photo privacy hack how to
Here’s how to retrieve deleted Facebook photos from your Windows or Mac.įirst, launch the Recoverit application on your Windows or Mac and select a location to scan. You can even preview your photos and select the media content you wish to recover. Recoverit will help you in every scenario. It doesn’t matter if your Facebook photos are deleted accidentally or the entire drive has been formatted. It is an extremely secure and user-friendly DIY recovery tool that can extract your photos from several sources. If your photos are deleted from your Windows and Mac as well, then you can try Recoverit Data Recovery. In this case, you can check the original location and see if you still have your photos. The chances are that you would have uploaded photos to your Facebook from any other source, like your computer. Method 2: Recover Deleted Facebook Photos from your Computer Afterward, you can browse your archived data and find the deleted Facebook photos manually. In the end, access the file, right-click, and extract it to a secure location.
#Facebook photo privacy hack archive
Just click on the "Download" icon and maintain a stable internet connection to save the archive file. Facebook will load a dedicated page, informing you about the archive and how to use it. Now, browse to your general account settings and click on the "Download a copy" link from the interface's bottom. Firstly, just log-in to your Facebook account and go to its settings from the hamburger icon on the top-right corner. To learn how to get deleted Facebook photos back from its archive, follow these steps: Though, you would have to spend some time scanning your data manually to find deleted Facebook photos. Therefore, if you have recently deleted something from Facebook, the chances are that you might be able to retrieve it from the archive. You might not know this, but Facebook keeps track of all the media content you post and keeps it archive. Method 1: Find Deleted Photos from the Facebook Archive Now when you know that it is possible to recover deleted photos from Facebook, let’s discuss some of these feasible solutions. Part 2: Recover Deleted Facebook Photos in 4 Proven Ways I have listed some of these solutions to recover deleted Facebook photos in the next section. While there is no definite answer or assurance, you can try some Facebook photo recovery solutions to get your data back. Even if they go to its URL, they get a prompt stating that the content is not available anymore.ģ. The photos will no longer be available on Facebook after deletion – neither you nor your friends can access them now. The location where it was hosted before becomes unavailable.Ģ. When you delete a photo (or an album), it is removed from Facebook, and your friends can’t access it anymore. Well, Facebook is a social networking platform where you can post your pictures and manage albums. What happens to the deleted photos on Facebook? Part 1: Can You Recover Deleted Facebook Photos?īefore I discuss things like how to recover deleted pictures from Facebook, it is important to cover some basics.ġ. Part 3: Bonus Tips for Facebook Photos Recovery.Part 2: Recover Deleted Facebook Photos in 4 Proven Ways.Part 1: Can You Recover Deleted Facebook Photos?.“When this field value changes to any other images ID, that image will be shown in the poll,” said Darabi.ĭarabi reported the bug to Facebook, and in return, he was paid an amount of $10,000. “Whenever a user tries to create a poll, a request containing gif URL or image ID will be sent, poll_question_data contains the uploaded image id,” Darabi said. This means a poll creator could delete anyone’s photo on Facebook by just using the image ID without needing to log in to a victim’s account. Once he deleted the poll, Facebook would remove the victim’s image as a poll property. After sending a request with another user image ID, a poll containing that image would be created. It allows users to create polls and also upload photos or GIFs to go along with each option. Darabi noted that whenever he tried to create a poll, a request containing gif URL or image ID was sent and when this field value was changed to any other images ID, that image will be shown in the poll. The researcher who goes by the name of Pouya Darabi, found the bug while going through new features introduced by Facebook and noted that that the newly added “poll feature” on the site carried the flaw that could be exploited to remove photos from an account without user knowledge or permission.įacebook introduced the poll feature earlier this month for its website and mobile app. Recently an Iranian security researcher discovered a critical bug that allowed anyone to delete any photo from any user on Facebook without having access to their account. The social media giant Facebook has more than 2 billion monthly active users so when there is a bug in it, that’s big news.
3 notes
·
View notes
Text
10 Ways to Enhance Your Gaming PC
Are you not able to enhance the gaming PC experience after trying everything? No need to give up on your favorite game but correctly optimize the gaming PC.
Let’s explore 10 efficient ways to optimize and enhance PC performance:
#1. Keep Your PC Dust-free
It is the first and foremost step to enhancing PC speed and performance. You do not need any technical skills for this job. Simple cleanliness can keep the PC running smoothly with fair airflow and no heating problem. All you need to do is to remove the dust from the computer, CPU, and every other component. Follow the specific and effective cleaning techniques for top gaming performance without a mucky screen.
#2. Upgrade Your PC From Time To Time
Upgradation of your PC is one potential way to enhance performance. Certain components can be upgraded easily - RAM, Storage, and Battery. RAM updates can provide additional memory to the gaming PC and make a massive impact. Using reliable hard drives or additional storage can improve gaming performance. You should be keeping a keen eye on the PC upgrades for optimum gaming.
#3. Update Your PC Drivers
Drivers play a vital role in ensuring the flawless performance of the gaming system. The PC running on macOS, Windows, and Linux OS comes up with almost similar sort of hardware. The drivers are the crucial factors making all the big differences. You should try to keep them updated to best gaming PC speed and performance.
#4. Update DirectX To Optimize Laptop Performance
DirectX is a vital factor facilitating the graphics in the video game. It facilitates the graphics quality in the PC. You should keep the latest version of DirectX on the laptop. It comes with various common yet useful libraries of Windows and Xbox gaming systems. You can check your system's DirectX version and keep it updated to your gaming PC system.
#5. Overclock the Laptop Graphics Card
It is one other manner in which a graphics card can contribute to improved PC performance. Overclocking the graphics card is going to extract additional performance for high-end gaming. Such useful graphics card tools are available for both AMD and Nvidia GPUs. You won’t need to face any trouble finding the right solution.
#6. Adjust System Power Settings
Power management is essential if you look forward to PC speed and performance. However, some laptops do not need it, yet consider checking them to stay on the safe side. The gaming PC can have detailed power management options for an uninterrupted and dedicated gaming experience.
#7. Switch Windows Gaming Mode On
Use this basic tip to enhance gaming PC performance in the long run. You can find a lot of gaming options and features like streaming, screen recording, and Game Mode. You can activate the mode and optimize the system for uninterrupted gaming and fun.
#8. Close Background Apps
Every game lover needs to make manual changes to gaming PC capabilities. Close background apps every time before launching the game. Keep a keen eye on the system tray and list of running applications in the background. Right-click and close it to match the relevance in the gaming experience.
#9. Check Your Network Speed
Make sure your internet speed is up to the mark for a high-end gaming experience. It is mostly based on the hardware, drivers, and computer configuration. A stable and faster internet connection is one of the crucial elements to gaming PC speed.
#10. Disable Automatic Updates
Whether you’re working on a laptop, automatic updates can be a big pain. The same applies when you’re using the system for gaming purposes. You should disable automatic Windows updates permanently to PC ability with no interruptions.
Final Word
Hence, these were 10 common tips to follow to enhance your gaming experience without compromising the fun time. If you’re not able to achieve the optimum gaming PC performance, follow the tricks to make it a fantastic experience.
2 notes
·
View notes
Text
Remove Unwanted Object from your Photos: 10+ Stepwise Solutions

During my last vacation, I took tons of photos, but most of them had unwanted objects that I wanted to get rid of. This made me look for all kinds of user-friendly solutions to remove unwanted object from any photo. After trying several online and mobile editing apps, I have decided to shortlist some of the best solutions to erase object from photo. Read on and learn how you can get rid of any unwanted object from your pictures without any editing knowledge.
Built-in Tool on your Phone to Clean up Photos
If you have a Pixel device or a Google One subscription, then you can take the assistance of Google Photos to remove unwanted things in photo. Google Photos has a premium feature, which is known as Magic Eraser. Using it, you can just highlight an object that you want to remove from your picture and get rid of it instantly.
Here’s how to erase something from a photo using Google Photos’ Magic Eraser feature:
Step 1: Load your photo and choose the Magic Eraser feature
Firstly, just launch Google Photos on your smartphone and browse the picture you want to edit. Once the picture is loaded on Google Photos, tap on the “Edit” feature from the toolbar.
From the list of various editing features, select “Magic Eraser” and wait as your brush would change.
Step 2: Erase unwanted things from your photo
Using the brush, you can just select the object on your photo that you want to remove. Now, tap on the “Erase” button and let Google Photos remove the object from the image.
Apart from erasing, you can also choose to camouflage the object and blend it with the rest of your photo.

Please note that this feature of Google Photos is only available for Pixel users or Google One subscribers.
5 Best Online Tools to Remove Unwanted Objects from Photos
Since the inbuilt editing tools on your system or phone can have limited features, you can choose to erase unwanted objects from photos online. Here are some of the best online photo cleanup tools that you can use.
Tool #1: iFoto Cleanup
With the help of iFoto Cleanup, you can instantly remove unwanted object from your photos. It is a part of the iFoto Studio that offers several visual editing features in one place (like background remover, AI fashion model, and more).
- Using iFoto, you can easily remove logos, individuals, objects, watermarks, etc. from your photos.
- You can just highlight the object that you want to remove and even fine-tune things by customizing the size of the brush.
- Since iFoto Cleanup uses an advanced AI algorithm, no technical or editing hassle is needed to get the desired results.
- iFoto yields exceptional and precise results by perfectly blending the image with the background.
Here’s how you can also use the iFoto object remover online to meet your requirements:
Step 1: Load your photo on iFoto
You can start by visiting the iFoto website and loading your photo on the interface. You can manually browse the image or just drag and drop it on iFoto.

Step 2: Highlight the object to remove
After the image is loaded, you can use its brush to select and highlight the object you want to get rid of.

You can also adjust the size of the brush from the side panel to make sure the entire object is highlighted.

Step 3: Remove the object and save your image
Once you have selected the object, just click on the “Remover” button and wait as iFoto erases it from the photo.

That’s it! Once the object is removed, you can review the changes, and save the photo on your system.

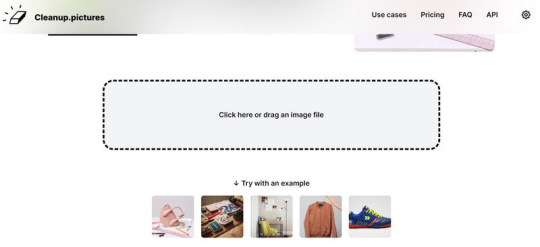
Tool #2: Cleanup Pictures
This is a dedicated online tool that can help you erase object from phone easily. Using its freely available version, you can export images in up to 720p quality, but for HD resolution, you have to update to its premium version.
You can simply access its online tool and use its inbuilt brush to remove unwanted things in photos in the following way:
Step 1: Load your photo on Cleanup Pictures
Just go to the Cleanup Pictures website on any browser of your choice and load the image from your system. You can also directly drag and drop your image to the browser.
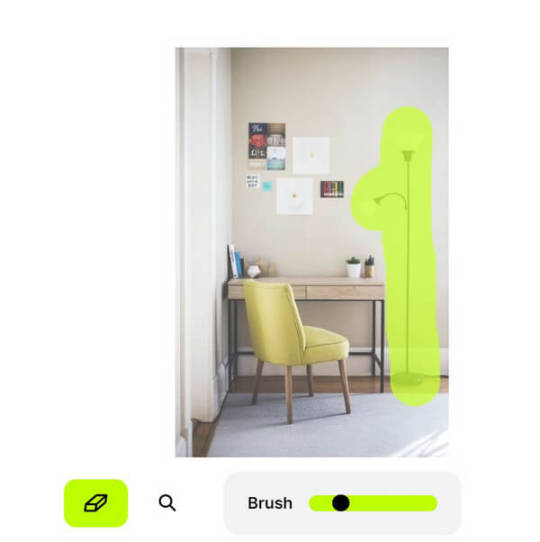
Step 2: Highlight the object you want to remove
To remove unwanted object from your photo, you can just use its brush and highlight the object. Once the object is selected, it will be highlighted in green. You can also adjust the size of the brush from the bottom panel.
Step 3: Save your edited image
After making the selection, click on the eraser icon and the object will be removed from the image. You can now preview the changes, make other adjustments, and save the photo.

Tool #3: PixelCut Magic Eraser
PixelCut also offers a hassle-free solution to erase unwanted objects from photos online – the Magic Eraser tool. Using the tool is quite easy and you just have to highlight specific objects to get rid of them. Here’s how you can use the PixelCut Magic Eraser tool:
Step 1: Upload your photo on PixelCut
Start by visiting the online PixelCut magic eraser tool and uploading your photo to it from your system.
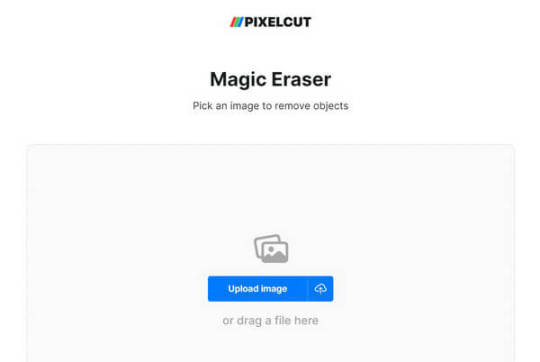
Step 2: Highlight the object to remove
The PixelCut object remover online will let you highlight any image that you want to get rid of. You can undo the selection and even change the size of the brush, if needed.

Step 3: Remove the object from the photo
After selecting the object, you can just click on the “Apply Magic Eraser” button from the side. This will remove unwanted object from your photo that you can review and download afterward.

Tool #4: Fotor Photo Cleanup
Fotor is another reliable online tool that can help you erase object from photo. The only issue is that if you are using its free version, then the image would have a significant watermark. Also, at times, users have observed that its end results are not that precise.
Step 1: Load your photo on Fotor
To give Fotor Cleanup a try, just head to its website, and drag and drop your image (or browse it manually).

Step 2: Select the object to remove
Once the photo is loaded on Fotor, you can use its inbuilt brush to highlight the object. You can adjust the size of the brush and can even do a “quick select” to save time.
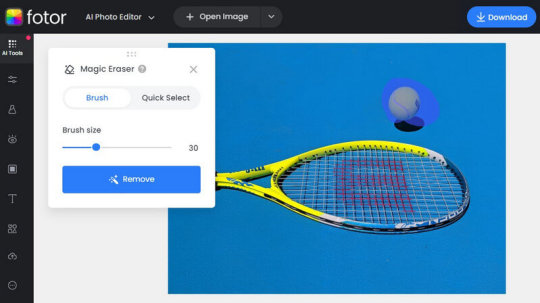
Step 3: Remove the object from the photo
After making the selection, just click on the “Remove” button on the side and wait as Fotor cleans up the image. In the end, you can review the results and download the edited image from Fotor.

Tool #5: Phot.AI
This is an AI-powered tool that can help you remove unwanted object from your photos in seconds. You can use it for free to clean images of different formats such as JPG, PNG, WEBP, BMP, and so on and of a maximum of 5 MB size.
Step 1: Load the photo to edit
To erase unwanted objects from photos online, just head to Phot.AI and upload your image from your system.

Step 2: Highlight the object to remove
You will get your image on the side and can use the tool’s inbuilt brush to select the object. In this way, you can easily highlight any object on the image and can also reset changes (if needed).

Step 3: Save your edited photo
Once the object is removed, you can check the changes on the edited photo. You can click on the “Download” button and enter your email ID where the download link of the photo will be sent.
5 Best Mobile Apps to Remove Unwanted Objects from Photos
Apart from online tools, you might consider using a dedicated mobile app to erase object from photos. In this case, you can simply consider using the following Android and iOS visual editing apps.
App #1: iFoto
You can use iFoto as an iOS or Android app as well (apart from its online tool) to remove unwanted object from your photo. Just like its online tool, the app is also quite user-friendly and is equipped with tons of features. You can use it to remove any object from your photos and blend it flawlessly with the picture in seconds.

From removing backgrounds to changing the color of clothes and swapping faces to generating AI models, you can do so much with the iFoto Studio. To remove any object from your photo with iFoto, follow this drill:
Step 1: Select iFoto Cleanup and load your photo
Simply launch the iFoto app on your device and tap on the “Cleanup Picture” feature. You can now load any photo from your device storage to the app.

Step 2: Highlight the object to remove
After loading the photo, you can use the inbuilt brush in iFoto to select the object. You can modify the size of the brush and seamlessly select the object to remove.

Once that is done, just tap on the “Remover” button and wait as the application removes the highlighted object.

Step 3: Save the modified image
In the end, you can preview the results on iFoto. You can make further adjustments (if needed) or save the image by tapping on the download icon.

App #2: Snapseed
Snapseed, which is owned by Google, is one of the most popular smartphone editing apps. While the app is not as user-friendly as other tools, it does provide free options to enhance your photos. You can use its “Healing” tool to remove some minor objects or blemishes from your pictures.
Step 1: Load the image to edit on Snapseed
If you are not using Snapseed already, then start by downloading it on the device. Afterward, tap on the add icon and load the image to edit on Snapseed.

Step 2: Remove any object of your choice
Once the photo is loaded, go to the editing options, and tap on the “Healing” option to remove unwanted object from the photo. You can now manually highlight the object you want to get rid of.
Step 3: Save the edited image
After healing the area and removing the object, you can zoom out to preview the results, and save the edited photo.
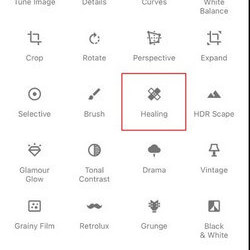
App #3: Adobe Photoshop Express
Adobe has also come up with a lightweight mobile application that you can use to make all kinds of edits on your photos. It lets us get rid of prominent objects from our pictures and even clear skin blemishes with its dedicated features. To learn how to erase something from a photo with Adobe Photoshop Express, follow these steps:
Step 1: Load any photo of your choice
Firstly, you can launch Adobe Photoshop on your smartphone and then choose to load an image from your phone’s local storage.
Step 2: Remove the object from your photo
Once the photo is loaded on Adobe Photoshop, you can go to its editing feature and tap on the “Healing” tool. Here, you can choose to remove any spot, do patch correction, or use Adobe’s Clone Stamp tool.
For instance, if there is a spot that you want to remove, then you can use the brush and highlight the region. Tap on the done icon and let Adobe clean the spot, blending it with the background.

Step 3: Save the edited image
After getting rid of the object, you can also use other features of Adobe Photoshop to edit your image. In the end, you can preview the changes and download the edited image to your phone.
App#4: TouchRetouch
TouchRetouch is one of the most popular mobile apps to remove unwanted object or clean up an image. The app is quite easy to use, and it provides dedicated options to remove objects, lines, clone stamps, and so on. Here’s how you can also use the TouchRetouch app on your phone.
Step 1: Launch the app and load your photo
You can start by launching the TouchRetouch app on your phone and tapping on the “Albums” button from where you can load your image.

Step 2: Select the object to remove
As the image is loaded on the app, you can go to the toolbar and select the “Object remover” feature. If you want, you can also choose its clone stamp or line remover feature too.

Now, all you need to do is use its inbuilt brush to highlight the object that you want to remove (you can also adjust the diameter of the brush).

Step 3: Remove the object and save your photo
You can even zoom in the image to make sure that all the edges are selected. Afterward, tap on the done icon at the bottom and let the app remove the selected object.

In no time, the object will be removed from the image. You can simply check the results and download the edited image.

App #5: Retouch: AI Remove Objects
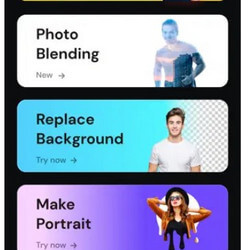
Lastly, you can take the assistance of the Retouch app to remove unwanted object from your photo. It uses a smart AI-powered algorithm that can automatically identify the edges of the selected object, providing a smooth finish and blend to the image. Apart from that, it also provides numerous other editing options like photo blending, portrait maker, background remover, etc.
Step 1: Load the image of your choice
To erase object from photo, just launch the Retouch app on your device, and tap on the “Remove Object” button from the home.
Step 2: Highlight the object to remove
Go to the “Eraser” tool after loading the image. Now, you can use its inbuilt brush to highlight the object to remove. You can also adjust the size of the brush to optimize your selection.

Step 3: Remove the object and save the image
Tap on the “Apply” button and wait for a few seconds as the application removes the selected object. You can now review the changes and simply download the edited image on your device.
Read the full article
0 notes
Text
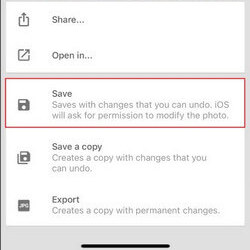
can remove outdated cisco vpn client from macos
🔒🌍✨ Get 3 Months FREE VPN - Secure & Private Internet Access Worldwide! Click Here ✨🌍🔒
can remove outdated cisco vpn client from macos
Uninstall Cisco VPN Client MacOS
To uninstall Cisco VPN Client on MacOS, you can follow a few simple steps to ensure a clean removal of the program from your system.
First, locate the Cisco VPN Client application on your Mac. This can typically be found in the "Applications" folder or by searching for it in Spotlight.
Next, ensure that the Cisco VPN Client application is closed before proceeding with the uninstallation process.
To uninstall the Cisco VPN Client on MacOS, you can simply drag the application icon to the Trash. This action will remove the application from your system, but there may be residual files left behind.
To completely uninstall Cisco VPN Client, you may want to also remove its associated files. These can often be found in the Library folder on your Mac. Navigate to the Library folder and look for any folders or files related to Cisco VPN Client. These may include settings, preferences, or other data that the application has stored on your system.
Once you have deleted all Cisco VPN Client-related files, remember to empty the Trash to permanently remove them from your Mac.
After completing these steps, you have successfully uninstalled Cisco VPN Client from your MacOS system. It is always a good idea to restart your Mac after uninstalling any application to ensure that all changes take effect properly.
By following these steps, you can easily uninstall Cisco VPN Client from your MacOS and keep your system clean and clutter-free.
Remove Cisco VPN Client from Mac
To remove the Cisco VPN Client from your Mac, follow these steps:
Close the Cisco VPN Client application if it is currently running on your Mac.
Open the Applications folder on your Mac and locate the Cisco VPN Client icon.
Drag the Cisco VPN Client icon to the Trash icon in the dock. Alternatively, you can right-click on the Cisco VPN Client icon and select Move to Trash.
Once the Cisco VPN Client icon is in the Trash, right-click on the Trash icon in the dock and select Empty Trash to permanently delete the application.
To ensure that all components of the Cisco VPN Client are removed from your Mac, you can also delete any associated files or folders. These may include configuration files or logs that were created during the use of the application.
To delete any remaining Cisco VPN Client files, you can use the Spotlight search feature on your Mac to locate and remove them manually.
After completing these steps, restart your Mac to complete the removal process.
By following these instructions, you can easily remove the Cisco VPN Client from your Mac and free up space on your computer. If you encounter any issues during the uninstallation process, you may contact Cisco support for further assistance.
Delete Outdated Cisco VPN Client
Title: How to Delete Outdated Cisco VPN Client: A Step-by-Step Guide
Are you struggling with an outdated Cisco VPN Client that's causing more headaches than security benefits? It's time to bid farewell to obsolete software and make way for more efficient solutions. Deleting the outdated Cisco VPN Client not only ensures your system's security but also enhances its performance. Here's a comprehensive guide on how to do it effortlessly.
Backup Important Data: Before you proceed with any software removal, ensure you've backed up all important files and data to prevent accidental loss.
Access Control Panel: Navigate to your computer's Control Panel. You can find this in the Start menu or by searching directly in the search bar.
Uninstall Programs: Within the Control Panel, locate the "Programs" section and click on "Uninstall a Program" or "Add or Remove Programs," depending on your operating system.
Find Cisco VPN Client: Scroll through the list of installed programs and locate the Cisco VPN Client. Click on it to select it.
Uninstall: Once selected, click on the "Uninstall" or "Remove" button at the top of the list. Follow any on-screen prompts to complete the uninstallation process.
Delete Remaining Files: After uninstalling the program, it's essential to delete any remaining files or folders associated with the Cisco VPN Client. Navigate to the installation directory (usually found in "Program Files") and delete the Cisco VPN Client folder.
Registry Cleanup (Advanced): For advanced users, you can also clean up any remaining registry entries related to the Cisco VPN Client. However, exercise caution when editing the registry, as improper changes can cause system instability.
Restart Your Computer: Finally, restart your computer to complete the uninstallation process and ensure all changes take effect.
By following these steps, you can seamlessly delete the outdated Cisco VPN Client from your system, freeing up valuable resources and ensuring optimal security. Remember to explore modern VPN solutions to meet your current needs effectively.
Eliminate Old Cisco VPN Client
Are you facing issues with your outdated Cisco VPN Client and wondering how to eliminate it from your system? Look no further, as we provide you with a comprehensive guide on how to remove the old Cisco VPN Client effectively.
Firstly, uninstalling the Cisco VPN Client from your computer involves a few simple steps. Begin by accessing the Control Panel on your Windows operating system. Locate the "Programs and Features" or "Add or Remove Programs" option, depending on your Windows version. Scroll through the list of installed programs until you find the Cisco VPN Client.
Next, select the Cisco VPN Client and click on the uninstall option. Follow the on-screen instructions to complete the uninstallation process. Once the uninstallation is complete, restart your computer to ensure that all remnants of the old client are removed.
Alternatively, you can use third-party uninstaller tools to thoroughly remove all traces of the Cisco VPN Client from your system. These tools can help clean up leftover files and registry entries that may be left behind after a standard uninstallation.
By following these steps, you can effectively eliminate the old Cisco VPN Client from your computer and pave the way for a smoother and more secure VPN experience. Remember to also consider upgrading to the latest version of the Cisco VPN Client or exploring alternative VPN solutions for enhanced security and performance.
Uninstall Legacy Cisco VPN Client
When it comes to removing outdated software like the Legacy Cisco VPN Client from your computer, it is essential to follow the correct steps to ensure a clean uninstallation process. The Legacy Cisco VPN Client may no longer be supported or updated, potentially leaving your device at risk of security vulnerabilities. Here's how you can uninstall the Legacy Cisco VPN Client from your system effectively:
Start by closing the Legacy Cisco VPN Client application if it is running. You can do this by right-clicking on the client icon in the system tray and selecting 'Exit' or 'Quit.'
Next, navigate to the Control Panel on your computer. You can access the Control Panel by searching for it in the Windows search bar or locating it in the Start menu.
Within the Control Panel, locate the 'Programs' or 'Programs and Features' section. Here, you will find a list of all the installed programs on your computer.
Scroll through the list of programs until you find the Legacy Cisco VPN Client. Click on the program to select it.
Once the Legacy Cisco VPN Client is selected, choose the option to uninstall or remove the program. Follow the on-screen prompts to complete the uninstallation process.
After the uninstallation process is complete, it is recommended to restart your computer to ensure that all remnants of the Legacy Cisco VPN Client have been removed successfully.
By following these steps, you can safely uninstall the Legacy Cisco VPN Client from your computer and free up valuable space while ensuring the security and performance of your device.
0 notes
Text
Ta-Da! List: Monday, April 1st

I share my “Ta-Da! List” every day so everyone gets a daily update and I have a reminder of what I’ve accomplished.
To learn more about “Ta-Da! Lists”, check out @adhdjesse‘s book Extra Focus.
Abbreviations
– O&T: Opinions & Truth Blog
– TMA: TitansMonriArt
– WGS: The Weekend Game Show
– ASO: Artist Shout-Out
– AUAMQ: Autism Acceptance Month Quote
– VGQ: Video Game Quote
– LQ: Literacy Quote
– IG: Instagram
– BMAC: Buy Me a Coffee
– TDL/TA: Ta-Da! List
Ta-Da! List
✧ throughout the day:
– kept emails manageable
– loaded the dishwasher
~~~~~~~~~~~~~~~~~~~~~~~~~~~~~~~~~~~~~~
✧ on the mobile phone:
– WGS IG: updated the links in the bio
~~~~~~~~~~~~~~~~~~~~~~~~~~~~~~~~~~~~~~
✧ on the bedroom setup:
– WGS: the 3 scheduled AUAMQs were posted, then they were manually shared on other social media
– TMA: the scheduled poem “I Am Autism”, was posted, then it was published on the TMA Medium, Ko-fi, and other social media
– Pixiv: continued the purge of who was being followed after seeing AI-prompters (to put it mildly) slipped through, made it to page 12 of 44
– O&T: removed the Instagram widgets due to them no longer syncing properly, then added a “Follow” button for the site; continued preparing the VGQ and LQs for Apr.; shared today’s TDL
~~~~~~~~~~~~~~~~~~~~~~~~~~~~~~~~~~~~~~
✧ on the office setup:
– WGS: gave a human artist, Quentin Papleux, a shout-out by sharing it on O&T, Tumblr, and other social media
– O&T: changed the dates of the “The Dangers of AI ‘Art’”, “If you are… don’t come in.”, and “What on Earth is ‘Neurodiversity’?” posts so they’re higher up the home page; increased the font size; added the “ASO April 2024” and “TA April 2024” Categories to the Site Menu
~~~~~~~~~~~~~~~~~~~~~~~~~~~~~~~~~~~~~~
✧ chores and miscellaneous:
– Movies: “watched” “Sin City” repeatedly
– went to the doctor for the neck, shoulder, and back pain
– checked the mail
– had tacos, a granola bar, cereal, and leftover Easter food for dinner
—
Well, these are all the updates I had for today!
Thank you for reading!
May every decision you make be *in the spirit of fairness* and may the rest of your day *NOT go to $#!7*!
~~~~~~~~~~~~~~~~~~~~~~~~~~~~~~~~~~~~~~~~~~~~~~~~
Enjoy what I do? Please consider supporting via Buy Me a Coffee (BMAC)!
Like what you see and want to know when there’s more?
Click here to subscribe for updates and/or hit the Follow button!
Watch MonriaTitans on Twitch and YouTube!
For more about MonriaTitans, click here!
The images were made in Canva!
View On WordPress
#Achievement#ADHDJesse#AffiliateLink#Amazon#Announcement#Announcements#BecomEmpowered#BecomeSmarterEveryday#BEmpowering#Blogger#Blogging#Book#Bookshoporg#Canva#DailyAchievements#DailyUpdate#DesignedWithCanva#ExtraFocus#LearnSomethingNewEveryday#MonriaTitans#MT#NDBlogger#News#OaT#ReferralLink#TaDaList#TaDaLists#TMA#WGS
0 notes
Text
Just How To Effectively Preserve Your Home Appliances
Appropriate servicing of home appliances is actually important to guarantee their durability, superior performance, and electricity productivity. Regular upkeep may likewise assist protect against costly repair work and expand the life expectancy of your appliances. Listed below are some basic rules to assist you maintain your home appliances efficiently:
Read the User Guides:
Always begin by reading through the user guides that possess your appliances. They provide useful information on suitable use, maintenance criteria, and troubleshooting pointers. Inform your own self along with the maker's referrals to guarantee you are following the appropriate procedures.
Tidy Regularly:
Dirt, gunk, and debris can gather on and inside your appliances, influencing their efficiency. Routine cleaning is important. Rub down the outside surface areas along with a damp towel, and well-maintained internal parts observing the producer's guidelines. For instance, clean the lint trap in your clothes dryer, the coils on your fridge, and the filters in your dishwasher.
Examine Seals and Gaskets:
Make certain that seals and coverings on appliances such as refrigerators, ovens, and dish washers are in great state. Harmed or worn out tapes can cause energy wastefulness and jeopardize the performance of the device. Switch out any tapes that present indicators of damage or damages.
Evaluate Hoses and Cords:
Frequently check tubes and power wires for indicators of wear and tear, damages, or even water leaks. For appliances like cleaning machines and dishwashers, examine the hoses for any kind of cracks, and change all of them if needed to have. Likewise, see to it wires are not frayed or wrecked, and substitute all of them if needed. This precaution can avoid water harm and decrease the danger of electric problems.
Run Maintenance Cycles:
Some appliances, like cleaning machines and dishwashing machines, have actually routine maintenance patterns designed to wash the inner elements. Operate these patterns occasionally to remove built-up remains and sustain superior efficiency. Refer to the user manual for certain directions on running upkeep patterns.
Level Your Appliances:
Make certain that your appliances equal to stop vibrations and unnecessary stress and anxiety on parts. Use Click Here to check and readjust the progressing feets of appliances like cleaning machines and refrigerators. This certainly not only aids with the device's stability however likewise supports its own appropriate performance.
Monitor Temperature Settings:
For appliances that possess temp environments, including refrigerators and fridges freezer, frequently examine and readjust the temperature to the supplier's advised levels. This makes sure that food is actually kept at the ideal temperature levels for protection and optimal quality.
Book Professional Maintenance:
Some appliances might demand qualified upkeep at routine intervals. As an example, have a technician assess your heating system and cooling down systems yearly, tidy and service your HVAC system, and conduct essential activities to keep it running effectively.
Usage Appliances According to Guidelines:
Follow the maker's guidelines for use. Overloading appliances or using them for objectives apart from their intended functions can result in premature wear and tear and tear.
Bear In Mind Energy Consumption:
Take into consideration energy-efficient process, like using appliances during the course of off-peak hours and disconnecting devices when certainly not in use. This certainly not only spares power but likewise helps in the general health and productivity of your appliances.
By including these servicing methods into your regimen, you may dramatically raise the life expectancy and functionality of your home appliances. Normal attention to these information can easily conserve you cash on repair work and replacements while making sure that your appliances work at their ideal.
0 notes
Text
Removing ghost, fake, bot, and inactive followers from your Instagram manually
Removing ghost, fake, bot, and inactive followers from your Instagram manually can help improve your engagement rates and overall credibility on the platform. Here's a step-by-step guide on how to do it:
1. Identify Suspicious Followers:
Start by going through your followers' list and identifying suspicious accounts. Look for profiles with generic usernames, no profile picture, low or no activity, and an unusually high number of following-to-followers ratio.
2. Review Engagement:
Check the engagement on your posts. If you notice accounts that consistently like or comment with generic phrases like "Great post!" or "Nice pic!" without any meaningful interaction, they may be bots.
3. Use Instagram's Built-in Tools:
Instagram has tools to help you identify and remove followers. Go to your profile, tap on your followers, and review the list. You can click on individual profiles to view their activity.
4. Manually Remove Suspicious Followers:
To manually remove a follower, go to their profile, tap the three dots (ellipsis) next to their name, and select "Remove." This action will remove them from your followers' list.
5. Block Suspicious Accounts:
You can also block accounts that you suspect are bots or fake. Blocking not only removes them from your followers but also prevents them from engaging with your content in the future.
6. Regularly Audit Your Followers:
Make it a habit to regularly audit your followers' list to identify and remove any new suspicious accounts that may have followed you since your last check.
7. Use Third-party Tools:
There are third-party tools and apps available that can help identify and remove fake or inactive followers in bulk. Be cautious when using these tools, as some may violate Instagram's terms of service.
8. Monitor Engagement Metrics:
After cleaning your followers' list, keep an eye on your engagement metrics. You should see an improvement in likes, comments, and overall engagement from real and active followers.
9. Avoid Buying Followers:
To prevent future issues with fake or ghost followers, avoid buying followers or engagement. Authentic growth is essential for building a genuine and engaged audience.
Remember that removing followers, even fake or inactive ones, can result in a temporary drop in your follower count. However, it's a necessary step to maintain a healthy and engaged audience on Instagram. Focus on building meaningful connections with your real followers, and your engagement and overall presence on the platform will benefit in the long run.

0 notes
Last Seen Blogs


trendinliveworld
Trend in Live World

devotionalsinspirations
Devotionals and Inspirationals

luhsueh
Private Areas

pokemanfusions
Fuse the Pokemans!