#call button html code
Explore tagged Tumblr posts
Visit Tumblr Blog
Explore Tumblr blogs with no restrictions, modern design and the best experience.
Last Seen Tumblr Blogs


Fun Fact
Tumblr is available in 18 languages.
Text
youtube
Learn how to add an email link in WordPress with this easy step-by-step guide. Increase communication with your audience by making it easy for them to reach out to you via email.
#how to add email link in wordpress#call with phone link#call on smartphone button#add a call button#call button html code#click to call with button#elementor add phone number#elementor phone number#elementor#elementor tutorial#make phone number clickable in wordpress#phone number clickable wordpress#Youtube
1 note
·
View note
Text
Neocities Websites for Decor (& Other Resources)
9/4 2:10pm
i've been working on my neocities website and wanted to compile a bunch of places where one can find decor. this is not an extensive list, but rather a bunch of places where you can start finding resources.
please note that various pages could strain the eyes, including flashing lights or colors. pages called 'blinkies' usually have flashing colors throughout. [* = prominent flashing lights]
all websites, resources, and thoughts are beneath the cut
decor
effects for mouse cursors, text, and sites - https://www.mf2fm.com/rv/
assorted decor, images, and more - https://shishka.neocities.org/shishka/toybox
* random gifs from the internet archive - https://gifcities.org
https://pinkukingdom.neocities.org/toybox
http://whimsical.heartette.net/material [has tos you need to follow]
https://cinni.net/?z=/toybox/ [love this website so much]
* assorted early internet graphics - https://www.glitter-graphics.com
https://graphic.neocities.org
https://strawberry-gashes.gensoukai.net/v2/
archived images - https://web.archive.org/web/20100211160439/http://neskaya.net/pixels.php
* https://kawaiiness.net/home.php [potential eye strain]
https://www.asterism-m.com/item/ [japanese site]
https://pixelsafari.neocities.org
https://foollovers.com/mat/index.html [japanese site. has tos]
* https://gothiclolita.neocities.org/materials
https://sozai.pooftie.me [pastels. very low contrast, hard to read warning]
https://scripted.neocities.org
https://arunyi.art/#goodies
https://nonkiru.art/resources
* https://animatedglittergraphics-n-more.tumblr.com / @animatedglittergraphics-n-more
https://drive.google.com/drive/folders/1eQx_UiPvEvI4ZZECoPOuRrLhIE_6XbBy [content guide here... 4k+ gifs and graphics by @topadie]
* https://cutewebgraphics.tumblr.com/directory / @cutewebgraphics
https://pngfarm.tumblr.com / @pngfarm
https://lostsozai.tumblr.com / @lostsozai
decor directories
https://directory.cinni.net/sozai/
https://pixelsafari.neocities.org/links/directory/
https://www.tumblr.com/gender444/680981849679511552/favorite-sozaiblog-materials-sites-fool-lovers
definitions
(for those who don't know and/or are just getting into website creation)
webmaster: person who coded/created the website
favicons: small icons or graphics, usually 16x16 pixels.
pixels: graphics either custom-made or found. i've seen this term used for favicons, adoptables, and other graphics.
emoticons: old term for emojis. typically custom emoji expressions
* blinkies: thin flashing or sparkling banners, usually with text, an image, and flashing lights. collectible.
toybox: collections of favicons, stamps, blinkies, buttons, and more. all up to the webmaster's discretion and preferences
* glitters: glittering or shimmering text or images
stamps: collectible rectangular images, usually 99x56px
buttons: images that are hyperlinked to other websites. often custom-made for one particular webmaster or site.
avatars: typically 100x100 pixel images
other websites
beginner's guide to html and css - https://webguide.neocities.org
dnd style character generator - https://harlekine.neocities.org
templates/themes - https://neothemes.neocities.org
photo editor - https://photomosh.com
rainbow text maker - https://www.glitter-graphics.com/generators/rainbow.php
various other resources - https://scripted.neocities.org
learn more about websites & neocities - https://sadgrl.online
assorted resources - https://www.tumblr.com/punkwasp/725206601551773696/neocitiesindie-webmastery-resources
get started with website creation - https://www.tumblr.com/oddmerit/685644129978499072/note-cause-im-getting-sick-and-tired-of-terfs
all types of resources - https://punkwasp.leprd.space/resources/
* = prominent flashing lights/colors

i suggest not linking back (aka hotlinking) to the resources on the website. instead upload it yourself onto either neocities or an image hosting site and include credit. this way, if the person hosting the image deletes their page or loses the image somehow, your website will still be fine. (i didn't do this and had to find everything all over again... )
i have found that the best websites to use as companions to neocities are w3schools, pinterest, tumblr, and any image hosting site. w3schools for coding tutorials. pinterest for inspiration or for graphics. tumblr for any type of decor and advice. to edit my code and have a live preview, i use codepen.io.
since you read through all this, maybe take a look at my neocities site and follow me! <3
#neocities#html#css#html css#neocity#favicon#web graphics#web design#web decor#pixel art#pixels#banners#webcore#read later#resources#website#carrd resources#indie website#indiedev#webdeveloper#2000s web#old web#geocities#geocity#neopets#neo y2k#y2k aesthetic
1K notes
·
View notes
Text
going on the twine rant again, lads. fair warning.
-
the twine editor is theoretically great software
which is to say, twine editor is far and away the best execution of "a text game maker for people who mostly make text and not games" that presently exists. it's notable for making wholly self-contained (read: does not require interpreter software) text games with functioning mechanics at about the level of code literacy you could feasibly ask from people who brushed off of other more complicated software
this is in large part because the text adventure and IF ecosystem has the same problem as the (similarly insular and incestuous) scorewriting ecosystem: all of the software is made to be used by a group of like 50 people who don't use anything else, so they just settle for whatever exists
twine solves a lot of these problems by simply existing as an html game maker that can automate all of the functions of a gamebook out of the box. the editor has features which (to me) seem to be inspired by scrivener, which is my favourite WYSIWYG writing software for longform fiction on the market (I prefer writing in LaTeX but I can acknowledge that's a habit I picked up and not an endorsement of LaTeX)
that being said, even though there's an obvious utility to being able to prototype out rpgs and such in twine incredibly quickly, I can't really recommend people... use twine for that. because of the problems.
the twine editor is also kind of beautiful for all the ways in which it issoftware designed to torture the user
twine exists with one foot in "games" and one foot in "writing" and this overlap is the totality of its intended use. this space of compromise is still the best that's been made for this specific scene, but it means that edge cases are (at absolute best) operating twine in much the way that someone being hanging onto the edge of a shattered cockpit is operating an airliner
I could go on and on about the specific elements of twine's design that drive me insane, and in how it punishes you both for making too much of a book and for making too much of a game, but there's one problem that kind of sticks out as a simulacrum of this whole issue
by design, twine organises its projects as a story map. this is kind of like the middle point between scrivener's storyboard and a whiteboard, but specialised for use in making text games. this means that each node on it is one screen, called a card, that you can open and edit
doing this opens a window for text input, and the exact contents of this window kind of depend on which format you're writing your story in, but as a rule, you write everything into these sub-windows and that's the game
because twine runs in one window, these cards open more like menus than true windows. you can have one open at a time, and when you need to test something, you close the window and press the button to test the game. simple as
now, for making software, it's helpful to have a versioning function of some sort in case, among other reasons, you fuck something up in a way you don't immediately notice
for writing, you usually want some sort of undo function, in case you accidentally delete something or edit over it
at the intersection of these two, twine does have an undo function. which works differently depending on which version of the editor you're using. in the web version, you get multiple layers of undo. that makes sense.
in the downloaded version, which is the version you have to use if you don't want to use your browser's local storage (?? you shouldn't be doing this) you get
one layer of undo.
in a modern text editor.
that you are expected to write in.
this is on top of the browser-hosted version of twine editor being significantly more stable than the desktop version, so that's obviously the version you're meant to use, which runs in stark contrast to like... how that should work. this should already be raising your blood pressure a little bit if you remember that the browser version of twine saves your project files to your browser's local storage
now, common to both versions is another important feature which seemingly exists to prevent data loss: twine automatically saves your changes when you exit out of a card
this means that, the moment you close a card to go test the changes you just made to your game, they are saved over the previous version of the game with no way to undo them
but there IS a way to get around this without having to write in an entirely separate word processor! several ways even. you can even use the downloaded version if you do this
duplicate the full project every single time you make changes that could necessitate an undo function
make a copy of every card you edit in case you need to revert to it after testing, then remember to delete it afterwards
if you're editing the cards themselves, see option 1, because there is no way to undo deletion of cards in the story map
and like... that's not good. it's kind of the hell machine for killing all human beings, actually
it's also not a problem remotely unique to twine, because this is the kind of thing you see in most niche-specialised software where there isn't really a distinction made between "this is an expected frustration of working on any artistic project" and "this is something completely insane that absolutely should not be the case and isn't tolerated in immediately adjacent comparable creative fields"
twine can be used to make longer projects, but at the point where you're recommending two layers of supporting software that overlap so hard with the editor that they should be redundancies, it becomes clear that the only thing it's really fit-for-purpose to do is non-linear fiction consisting of two or three paragraphs per card
and that's generally not what it's used for! because that sort of thing is almost universally understood as a stepping stone towards using twine for making either longform non-linear fiction or full-featured rpgs
twine could be really useful software, and in fairness it's generally better than the alternatives it supplanted in its niche (people making little interactive poems probably shouldn't be trying to use Inform or TADS), but it really seems like it was designed with as a cursed amulet meant to cause as much grief as possible while being difficult to justify throwing away
127 notes
·
View notes
Text
SysNotes devlog 1
Hiya! We're a web developer by trade and we wanted to build ourselves a web-app to manage our system and to get to know each other better. We thought it would be fun to make a sort of a devlog on this blog to show off the development! The working title of this project is SysNotes (but better ideas are welcome!)

What SysNotes is✅:
A place to store profiles of all of our parts
A tool to figure out who is in front
A way to explore our inner world
A private chat similar to PluralKit
A way to combine info about our system with info about our OCs etc as an all-encompassing "brain-world" management system
A personal and tailor-made tool made for our needs
What SysNotes is not❌:
A fronting tracker (we see no need for it in our system)
A social media where users can interact (but we're open to make it so if people are interested)
A public platform that can be used by others (we don't have much experience actually hosting web-apps, but will consider it if there is enough interest!)
An offline app
So if this sounds interesting to you, you can find the first devlog below the cut (it's a long one!):
(I have used word highlighting and emojis as it helps me read large chunks of text, I hope it's alright with y'all!)
Tech stack & setup (feel free to skip if you don't care!)
The project is set up using:
Database: MySQL 8.4.3
Language: PHP 8.3
Framework: Laravel 10 with Breeze (authentication and user accounts) and Livewire 3 (front end integration)
Styling: Tailwind v4
I tried to set up Laragon to easily run the backend, but I ran into issues so I'm just running "php artisan serve" for now and using Laragon to run the DB. Also I'm compiling styles in real time with "npm run dev". Speaking of the DB, I just migrated the default auth tables for now. I will be making app-related DB tables in the next devlog. The awesome thing about Laravel is its Breeze starter kit, which gives you fully functioning authentication and basic account management out of the box, as well as optional Livewire to integrate server-side processing into HTML in the sexiest way. This means that I could get all the boring stuff out of the way with one terminal command. Win!
Styling and layout (for the UI nerds - you can skip this too!)
I changed the default accent color from purple to orange (personal preference) and used an emoji as a placeholder for the logo. I actually kinda like the emoji AS a logo so I might keep it.
Laravel Breeze came with a basic dashboard page, which I expanded with a few containers for the different sections of the page. I made use of the components that come with Breeze to reuse code for buttons etc throughout the code, and made new components as the need arose. Man, I love clean code 😌
I liked the dotted default Laravel page background, so I added it to the dashboard to create the look of a bullet journal. I like the journal-type visuals for this project as it goes with the theme of a notebook/file. I found the code for it here.
I also added some placeholder menu items for the pages that I would like to have in the app - Profile, (Inner) World, Front Decider, and Chat.

i ran into an issue dynamically building Tailwind classes such as class="bg-{{$activeStatus['color']}}-400" - turns out dynamically-created classes aren't supported, even if they're constructed in the component rather than the blade file. You learn something new every day huh…

Also, coming from Tailwind v3, "ps-*" and "pe-*" were confusing to get used to since my muscle memory is "pl-*" and "pr-*" 😂
Feature 1: Profiles page - proof of concept
This is a page where each alter's profiles will be displayed. You can switch between the profiles by clicking on each person's name. The current profile is highlighted in the list using a pale orange colour.

The logic for the profiles functionality uses a Livewire component called Profiles, which loads profile data and passes it into the blade view to be displayed. It also handles logic such as switching between the profiles and formatting data. Currently, the data is hardcoded into the component using an associative array, but I will be converting it to use the database in the next devlog.

New profile (TBC)
You will be able to create new profiles on the same page (this is yet to be implemented). My vision is that the New Alter form will unfold under the button, and fold back up again once the form has been submitted.
Alter name, pronouns, status
The most interesting component here is the status, which is currently set to a hardcoded list of "active", "dormant", and "unknown". However, I envision this to be a customisable list where I can add new statuses to the list from a settings menu (yet to be implemented).


Alter image
I wanted the folder that contained alter images and other assets to be outside of my Laravel project, in the Pictures folder of my operating system. I wanted to do this so that I can back up the assets folder whenever I back up my Pictures folder lol (not for adding/deleting the files - this all happens through the app to maintain data integrity!). However, I learned that Laravel does not support that and it will not be able to see my files because they are external. I found a workaround by using symbolic links (symlinks) 🔗. Basically, they allow to have one folder of identical contents in more than one place. I ran "mklink /D [external path] [internal path]" to create the symlink between my Pictures folder and Laravel's internal assets folder, so that any files that I add to my Pictures folder automatically copy over to Laravel's folder. I changed a couple lines in filesystems.php to point to the symlinked folder:

And I was also getting a "404 file not found" error - I think the issue was because the port wasn't originally specified. I changed the base app URL to the localhost IP address in .env:

…And after all this messing around, it works!
(My Pictures folder)

(My Laravel storage)

(And here is Alice's photo displayed - dw I DO know Ibuki's actual name)

Alter description and history
The description and history fields support HTML, so I can format these fields however I like, and add custom features like tables and bullet point lists.

This is done by using blade's HTML preservation tags "{!! !!}" as opposed to the plain text tags "{{ }}".
(Here I define Alice's description contents)


(And here I insert them into the template)

Traits, likes, dislikes, front triggers
These are saved as separate lists and rendered as fun badges. These will be used in the Front Decider (anyone has a better name for it?? 🤔) tool to help me identify which alter "I" am as it's a big struggle for us. Front Decider will work similar to FlowCharty.

What next?
There's lots more things I want to do with SysNotes! But I will take it one step at a time - here is the plan for the next devlog:
Setting up database tables for the profile data
Adding the "New Profile" form so I can create alters from within the app
Adding ability to edit each field on the profile
I tried my best to explain my work process in a way that wold somewhat make sense to non-coders - if you have any feedback for the future format of these devlogs, let me know!
~~~~~~~~~~~~~~~~~~
Disclaimers:
I have not used AI in the making of this app and I do NOT support the Vibe Coding mind virus that is currently on the loose. Programming is a form of art, and I will defend manual coding until the day I die.
Any alter data found in the screenshots is dummy data that does not represent our actual system.
I will not be making the code publicly available until it is a bit more fleshed out, this so far is just a trial for a concept I had bouncing around my head over the weekend.
We are SYSCOURSE NEUTRAL! Please don't start fights under this post
#sysnotes devlog#plurality#plural system#did#osdd#programming#whoever is fronting is typing like a millenial i am so sorry#also when i say “i” its because i'm not sure who fronted this entire time!#our syskid came up with the idea but i can't feel them so who knows who actually coded it#this is why we need the front decider tool lol
24 notes
·
View notes
Text
I can understand some people being new around here and trying to get the hang of posting and rebloging. I get it.
But after a while, you start to get to know your reblog and like buttons and how to comment, how to handle your blog and even try some html coding to make it look neat and pretty. Tumblr has it's faults, but what I love about it is that it's very easy to grasp and start blogging.
Now, I've seen some people around the tags still being unsure of how to post stuff or reblog, so let me just say this.
Don't just copy/save gifs or art and then repost them on your own blog, and add under it "I dunno which person this gif this belongs too" or "Neat art". I've seen gifs from other gif makers and art from other artist getting reposted around here without even getting credited. I can recognize almost all the gif makers around here, especially when it comes to the #tropedit tag, by their unique colorings and ways to make beautiful gifsets. And when I see reposts getting more notes than their own original post...This is how this site looses it's gif makers and artists.
Right, so instead of going off and rant, I'm gonna turn this into a little tutorial.
Okay, so you see some cool gifs around here, and it's in a set. And you go "Aahh, I want this by its self for my mood board" or "This will fit my fanfic soooo nicely". Instead of going copy/save and then repost the same gif on your blog, here a cool little feature:

You click on that little blue button called GIF and a drop down menu pops up, featuring gajillion gifs that are all on this site.
"But, how do I find the gif that I want?" Have you noticed that every gifset or art that gets posted here, all have unique tags that are relevant to that artist or gifmaker? For example, here's one of my unique tags:
Now, you just need to scroll down and find the one that you've been looking for. OR from that gif, notice some other tags and you search for something else that you like.
Once you find it, you just click it and it does this:
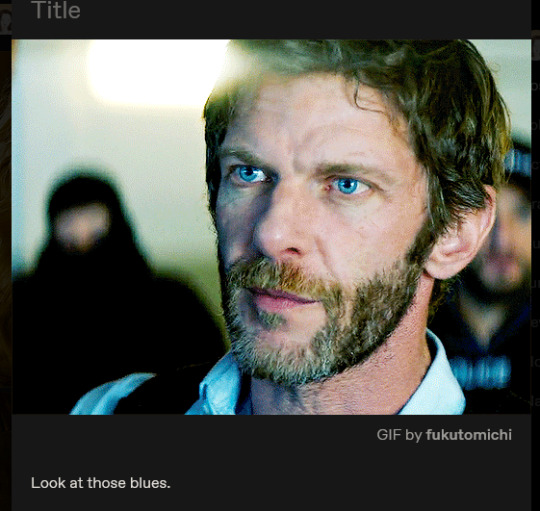
Voilà! Now, you can start writing, you can start adding other gifs! But, you do notice what's under the gif, right? It's you giving credit! No need for @, no need for asking around which gif this belong to. It's just does it's thing automatically, I get a notification that someone liked it a lot and used it in their post.
That's it! Nothing complicated.
Now, when it comes to art...Just reblog from the artist, please. Share the art around by rebloging directly from them, not doing the old copy/save/repost or @. Just reblog it from them. It's that simple!
Hopefully, this was helpful for any new people coming here and being too shy to ask about these things! Have fun posting!
#not being mad or anything i just wanted to share some helpful tips and explain some things#shut it fuku#the rings of power#rings of power#trop#rop
51 notes
·
View notes
Text
Hey you
all of you complaining about tumblr live

Seethe and cope 😎
Okay but seriously
Get yourself the Stylus extension For Firefox users: https://addons.mozilla.org/en-GB/firefox/addon/styl-us/ and for everyone else: https://chrome.google.com/webstore/detail/stylus/clngdbkpkpeebahjckkjfobafhncgmne
Get the Old Tumblr Dashboard Style: https://userstyles.world/style/11286/old-tumblr-dashboard-2023
You should get this stuff even if you don't plan to remove tumblr live :3 Now here is where the magic comes from:
Stylus allows you to add custom css styles to websites, and you can edit themes made by other people to fit your needs!

See that little fucker? How about we fuckin g kill it?
Press f12 to open the Developer Tools (or however it is called lmao)
Click on this little guy

Now you can select an element on the website, and it will show where it is in the html!
3. Point
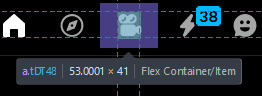
Click on it, and now we will see something like this in the inspector!

Collapse a bunch of this stuff, since here we only care about the list items, or <li>
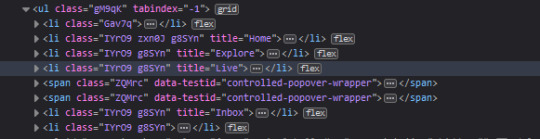
These are the different buttons in the banner
Now, how do we fucking kill that guy?
There are a number of ways to do this, so let's start with the simplest one
Delete
Just select the list item that has the title "Live" and press delete!

So it is gone now, right?
Well... not really. If you refresh the page, it is back. Which makes sense, since the only thing we did is remove that part of the "code" (if you can call html "code"), but when we refreshed it, the server gave us a version of the site that obviously had the button still there.
So what is a smarter way to get rid of it?
While you can't really delete a specific part of the site with just css, you can hide it! To do that, all you have to do is apply the style display: none;

Like that! While it doesn't fix the problem with the refresh, it brings us closer to the solution.
Remember when we got Stylus? yeah!
Go inside of it (😳), and inside the Old tumblr dashboard theme (😳😳), and now we just need to apply the css style of "remove that fucker" to the specific list item. How do we do that, since we can't add it directly into html? We use the attribute selector, and we look for title="Live"!
Where do I write this????
Well, css applies the styles from top to bottom of the style sheet (usually, this post is already too long), and you see how the list item has a few classes assigned to it? It so happens that they also modify the display property, so we have to override it by putting our selector after those in the css sheet... so basically you can just write the thingie at the end 😅
Here is how the attribute selector works!

the .IYr09 part is that specific class, so that if there is ever something on this page that has the title="Live" but isn't what we are looking for, it won't apply there (You don't need to do this, but whatever). The attribute selector is written in the square brackets, and you just... write the attribute that you are looking for there ;P
(I also did the same for the Explore button, but that can be an exercise for the interested ;P)
And now, BEHOLD

(How am I so popular that I got dms during the making of this >.<)
And it will stay like this, forever*
*except if something happens to the addon, theme, css of it or whatever, but you get the point!
#this post is too long#I could've just given the solution immediately#but this is funnier >:3#(am I on the autism spectrum? I kinda feel like it is the case tbh >.<)#Like this isn't how you write tutorials I think#whatever#css#tumblr live#fuck tumblr live#removing tumblr live#get stylus#get firefox too#idk at this point#196#pin
259 notes
·
View notes
Text
﹙ cafe v. ﹚ ─── A guide for tumblr text colour 𖹭 ݁


It is quite simple actually! 𖹭 Three big steps ( with some sub steps guys, you can do it, I believe in you ) is all you have to go through for you to find the colour for your blog aesthetic!
step 1 ) find a colour
first, you find the colour desired for your blog. You can do this by looking up sites such as:
HTML colour codes
colour designer ( you can play around with this one a lot !! )
or by simply looking up the hexcode of your desired colour if you already have one or more!!

step 2 ) formatting the colour into your posts
You guys still with after step 1? You're doing great! Gold star for you alright! you got the colour you want for your blog aesthetic! now, this is where it might seem a bit intimidating, but we assure you, it is not!
now, we are all excited to put in the colour, and we'd think: "it's time to put it onto tumblr!" but then suddenly you notice, that doesn't work?
that is because to put things into tumblr with colour. You must use a formatter site. odd, we know
the one we here at valentine café use is ( drumroll )
Roleplay formatter
let us show you how it is done with some small screenshots!
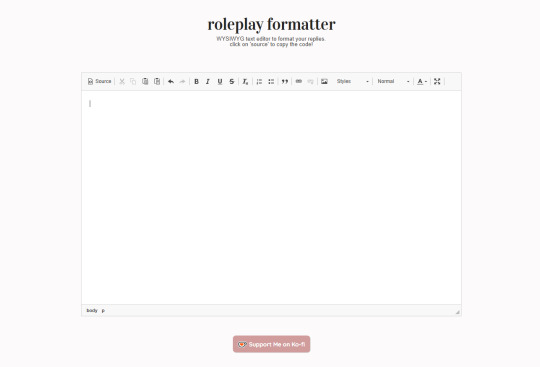
oh hey! good job you got on there with me! now just follow my steps, and you'll be good to go on your aesthetic adventure!
ready? okay let's go :DD !!
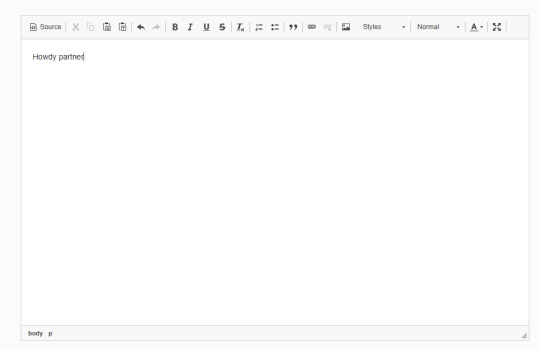
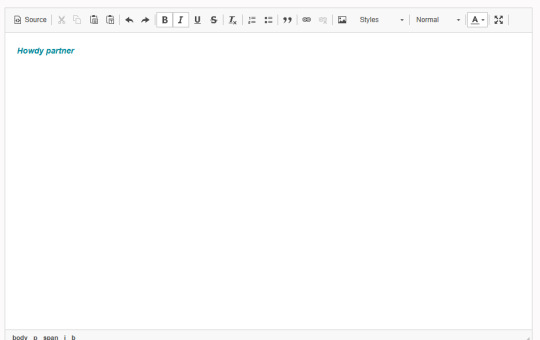
first, you write a little sentence ( you know, when eden first taught me this. I thought it'd be so complicated and hard, my brain couldn't comprehend it. I love my wife guys )

you then select your text, and then go to the little A in the corner! this is where you will find the colour options for your text, then at the bottom of the colour palate, there is an option that says "more colours"
jingle jingle jingle, pay attention. are you with? okay good! I give you a cookie and a gold star.
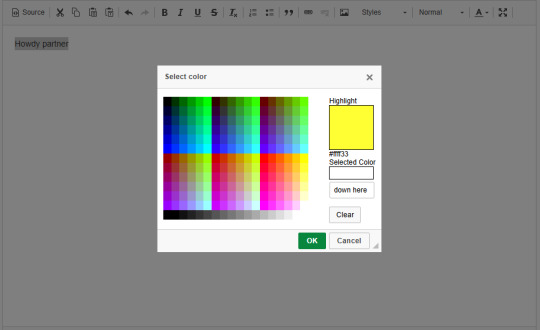
now that we are on more colours, you see the selected colour option in the corner! you paste the hexcode, right there <3
WHAPEESH, you got dat smexy colour down on your text now! What you do next, is perhaps the most intimdating of all. . . HTML ( screams of tired agony from Eden at 3AM )
You go up to the big tempting button that is called: "Source" and then you click on dat and-

oh my god bro. . . what IS THAT. That, my darling, is HTML and it looks like the link to hell I know. but this is what you use when you go to tumblr and go on the options button on post
Step 3 ) put the text into tumblr
okay guys, ( sobs ) it's been a journey. I'm so glad I can teach all of you about HTML and colour :,)) This is the last big step. . . Putting it into tumblr!! YIPPEE
What you will do now, is make the post for your fancy new text and smack that HTML onto it! But how do we do that?
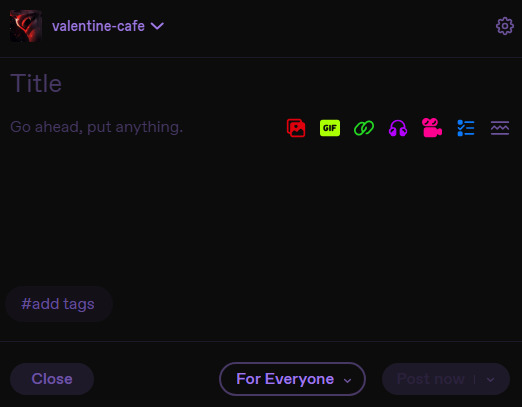
It's not too hard, don't worry, just a little clicking here and there you go onto the options and then right down by text editer!
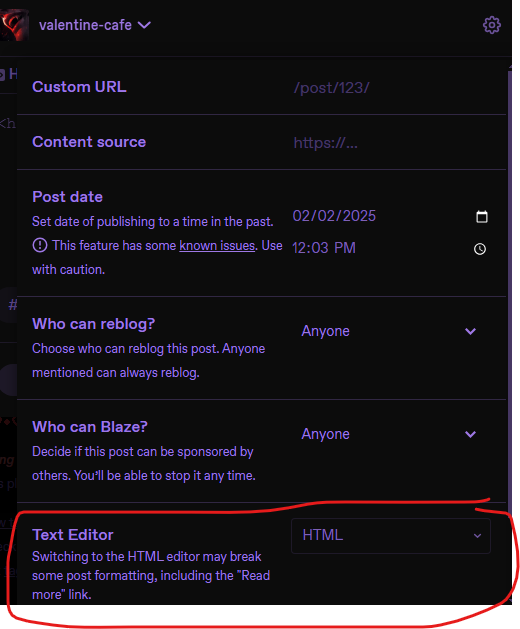
After that, your posting pop up on tumblr will tell you that you can copy the HTML you have onto the page and whambam thank you ma'am, you'll have that fancy schmancy text spread out on the paper sheet! You can sprinkle some more aesthetics onto the post even more for some extra good stuff!!
we really hope that this was of some help to those curious on how to make their blogs fit their own aesthetics more!
let us know if it helped!
18 notes
·
View notes
Text
JavaScript Fundamentals
I have recently completed a course that extensively covered the foundational principles of JavaScript, and I'm here to provide you with a concise overview. This post will enable you to grasp the fundamental concepts without the need to enroll in the course.
Prerequisites: Fundamental HTML Comprehension
Before delving into JavaScript, it is imperative to possess a basic understanding of HTML. Knowledge of CSS, while beneficial, is not mandatory, as it primarily pertains to the visual aspects of web pages.
Manipulating HTML Text with JavaScript
When it comes to modifying text using JavaScript, the innerHTML function is the go-to tool. Let's break down the process step by step:
Initiate the process by selecting the HTML element whose text you intend to modify. This selection can be accomplished by employing various DOM (Document Object Model) element selection methods offered by JavaScript ( I'll talk about them in a second )
Optionally, you can store the selected element in a variable (we'll get into variables shortly).
Employ the innerHTML function to substitute the existing text with your desired content.
Element Selection: IDs or Classes
You have the opportunity to enhance your element selection by assigning either an ID or a class:
Assigning an ID:
To uniquely identify an element, the .getElementById() function is your go-to choice. Here's an example in HTML and JavaScript:
HTML:
<button id="btnSearch">Search</button>
JavaScript:
document.getElementById("btnSearch").innerHTML = "Not working";
This code snippet will alter the text within the button from "Search" to "Not working."
Assigning a Class:
For broader selections of elements, you can assign a class and use the .querySelector() function. Keep in mind that this method can select multiple elements, in contrast to .getElementById(), which typically focuses on a single element and is more commonly used.
Variables
Let's keep it simple: What's a variable? Well, think of it as a container where you can put different things—these things could be numbers, words, characters, or even true/false values. These various types of stuff that you can store in a variable are called DATA TYPES.
Now, some programming languages are pretty strict about mentioning these data types. Take C and C++, for instance; they're what we call "Typed" languages, and they really care about knowing the data type.
But here's where JavaScript stands out: When you create a variable in JavaScript, you don't have to specify its data type or anything like that. JavaScript is pretty laid-back when it comes to data types.
So, how do you make a variable in JavaScript?
There are three main keywords you need to know: var, let, and const.
But if you're just starting out, here's what you need to know :
const: Use this when you want your variable to stay the same, not change. It's like a constant, as the name suggests.
var and let: These are the ones you use when you're planning to change the value stored in the variable as your program runs.
Note that var is rarely used nowadays
Check this out:
let Variable1 = 3; var Variable2 = "This is a string"; const Variable3 = true;
Notice how we can store all sorts of stuff without worrying about declaring their types in JavaScript. It's one of the reasons JavaScript is a popular choice for beginners.
Arrays
Arrays are a basically just a group of variables stored in one container ( A container is what ? a variable , So an array is also just a variable ) , now again since JavaScript is easy with datatypes it is not considered an error to store variables of different datatypeslet
for example :
myArray = [1 , 2, 4 , "Name"];
Objects in JavaScript
Objects play a significant role, especially in the world of OOP : object-oriented programming (which we'll talk about in another post). For now, let's focus on understanding what objects are and how they mirror real-world objects.
In our everyday world, objects possess characteristics or properties. Take a car, for instance; it boasts attributes like its color, speed rate, and make.
So, how do we represent a car in JavaScript? A regular variable won't quite cut it, and neither will an array. The answer lies in using an object.
const Car = { color: "red", speedRate: "200km", make: "Range Rover" };
In this example, we've encapsulated the car's properties within an object called Car. This structure is not only intuitive but also aligns with how real-world objects are conceptualized and represented in JavaScript.
Variable Scope
There are three variable scopes : global scope, local scope, and function scope. Let's break it down in plain terms.
Global Scope: Think of global scope as the wild west of variables. When you declare a variable here, it's like planting a flag that says, "I'm available everywhere in the code!" No need for any special enclosures or curly braces.
Local Scope: Picture local scope as a cozy room with its own rules. When you create a variable inside a pair of curly braces, like this:
//Not here { const Variable1 = true; //Variable1 can only be used here } //Neither here
Variable1 becomes a room-bound secret. You can't use it anywhere else in the code
Function Scope: When you declare a variable inside a function (don't worry, we'll cover functions soon), it's a member of an exclusive group. This means you can only name-drop it within that function. .
So, variable scope is all about where you place your variables and where they're allowed to be used.
Adding in user input
To capture user input in JavaScript, you can use various methods and techniques depending on the context, such as web forms, text fields, or command-line interfaces.We’ll only talk for now about HTML forms
HTML Forms:
You can create HTML forms using the <;form> element and capture user input using various input elements like text fields, radio buttons, checkboxes, and more.
JavaScript can then be used to access and process the user's input.
Functions in JavaScript
Think of a function as a helpful individual with a specific task. Whenever you need that task performed in your code, you simply call upon this capable "person" to get the job done.
Declaring a Function: Declaring a function is straightforward. You define it like this:
function functionName() { // The code that defines what the function does goes here }
Then, when you need the function to carry out its task, you call it by name:
functionName();
Using Functions in HTML: Functions are often used in HTML to handle events. But what exactly is an event? It's when a user interacts with something on a web page, like clicking a button, following a link, or interacting with an image.
Event Handling: JavaScript helps us determine what should happen when a user interacts with elements on a webpage. Here's how you might use it:
HTML:
<button onclick="FunctionName()" id="btnEvent">Click me</button>
JavaScript:
function FunctionName() { var toHandle = document.getElementById("btnEvent"); // Once I've identified my button, I can specify how to handle the click event here }
In this example, when the user clicks the "Click me" button, the JavaScript function FunctionName() is called, and you can specify how to handle that event within the function.
Arrow functions : is a type of functions that was introduced in ES6, you can read more about it in the link below
If Statements
These simple constructs come into play in your code, no matter how advanced your projects become.
If Statements Demystified: Let's break it down. "If" is precisely what it sounds like: if something holds true, then do something. You define a condition within parentheses, and if that condition evaluates to true, the code enclosed in curly braces executes.
If statements are your go-to tool for handling various scenarios, including error management, addressing specific cases, and more.
Writing an If Statement:
if (Variable === "help") { console.log("Send help"); // The console.log() function outputs information to the console }
In this example, if the condition inside the parentheses (in this case, checking if the Variable is equal to "help") is true, the code within the curly braces gets executed.
Else and Else If Statements
Else: When the "if" condition is not met, the "else" part kicks in. It serves as a safety net, ensuring your program doesn't break and allowing you to specify what should happen in such cases.
Else If: Now, what if you need to check for a particular condition within a series of possibilities? That's where "else if" steps in. It allows you to examine and handle specific cases that require unique treatment.
Styling Elements with JavaScript
This is the beginner-friendly approach to changing the style of elements in JavaScript. It involves selecting an element using its ID or class, then making use of the .style.property method to set the desired styling property.
Example:
Let's say you have an HTML button with the ID "myButton," and you want to change its background color to red using JavaScript. Here's how you can do it:
HTML: <button id="myButton">Click me</button>
JavaScript:
// Select the button element by its ID const buttonElement = document.getElementById("myButton"); // Change the background color property buttonElement.style.backgroundColor = "red";
In this example, we first select the button element by its ID using document.getElementById("myButton"). Then, we use .style.backgroundColor to set the background color property of the button to "red." This straightforward approach allows you to dynamically change the style of HTML elements using JavaScript.
#studyblr#code#codeblr#css#html#javascript#java development company#python#study#progblr#programming#studying#comp sci#web design#web developers#web development#website design#ui ux design#reactjs#webdev#website#tech
400 notes
·
View notes
Text
Coding On My Phone
I still find it so cool to code on my phone! I went to do further testing on using the editor and I like it a lot! The previous time I used it was to open a html file I sent to my phone and made small changes to the file but this time I wanted to start from scratch! I did this in the car on the way to church (I'm not the one driving-) (⌒‿⌒)
What I didn't realise from last time is that there's a preview button to see the code! I haven't tested it on non-HTML files like JavaScript code executing, but I like it! I wonder if I add CSS to it, will I be able to see it too via preview?? o( ❛ᴗ❛ )o
This is just one app though, I'll try some other ones to see which is my favourite to use on my phone!
The editor app is called 'Code Editor' on Google PlayStore
#xc: side note post#codeblr#coding#progblr#programming#studying#studyblr#computer science#tech#computer academia#programmer
188 notes
·
View notes
Note
Ahser, how do you make those nice colors on your text? They look so cool
hii! sorry it took me a while to get to this, it’s just a bit of a long process to explain. I’ll hopefully do my best at making it make sense, but if it doesn’t, there’s also a very good tutorial by @pixxiesdust:
https://pixxiesdust.tumblr.com/post/626456563152977920/how-to-make-text-in-captions-gradient-or/amp

how to make cool coloured text જ⁀➴
✩₊˚.⋆☾⋆⁺₊✧
⟢⠀ So, to do this you need to be off of mobile and on the actual Tumblr website, or else it won’t work. You’ll open up your draft or your post or whatever on the website, and in the top right corner you’ll find a settings button.
Like this.
⟢⠀ You want to click on it. Near the bottom it will open up a menu for the text editor. You want to change it to HTML, which will allow you to put in the hex codes for the colours you want your text to be!!
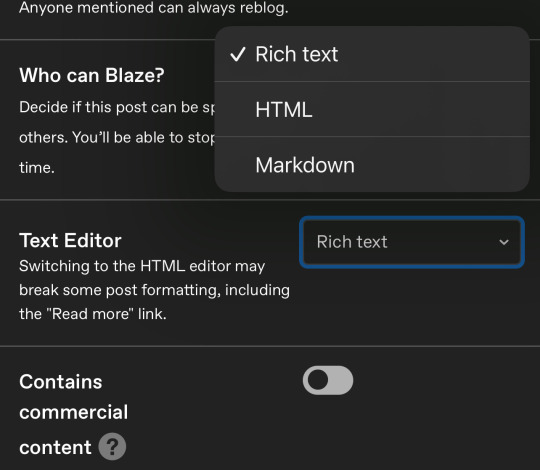
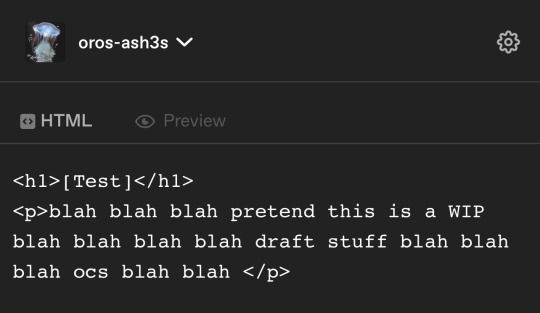
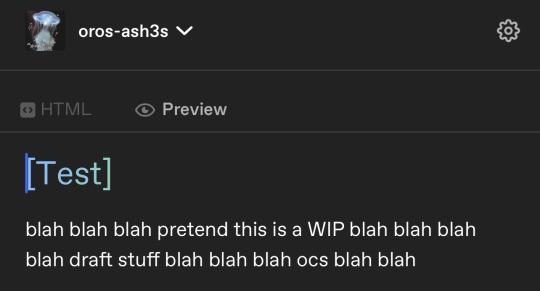
⟢⠀ Now, your text should look something like this:
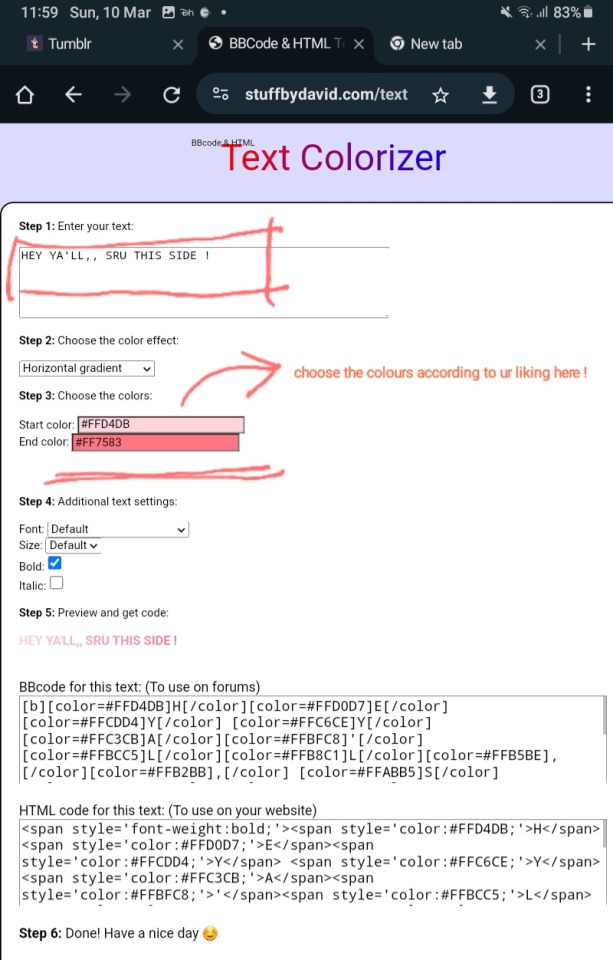
Next, the website I use is called Stuff by David. Here’s a link to it just in case: https://www.stuffbydavid.com/textcolorizer
⟢⠀ This is the best website I’ve seen, so I definitely recommend it over others!! Fortunately, the rest of the tutorial is in the very front page, as it gives you clear instructions on how to do everything.
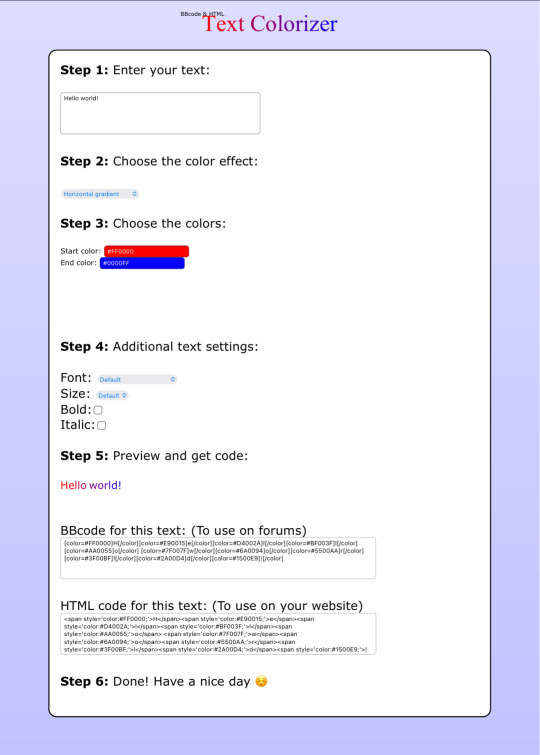
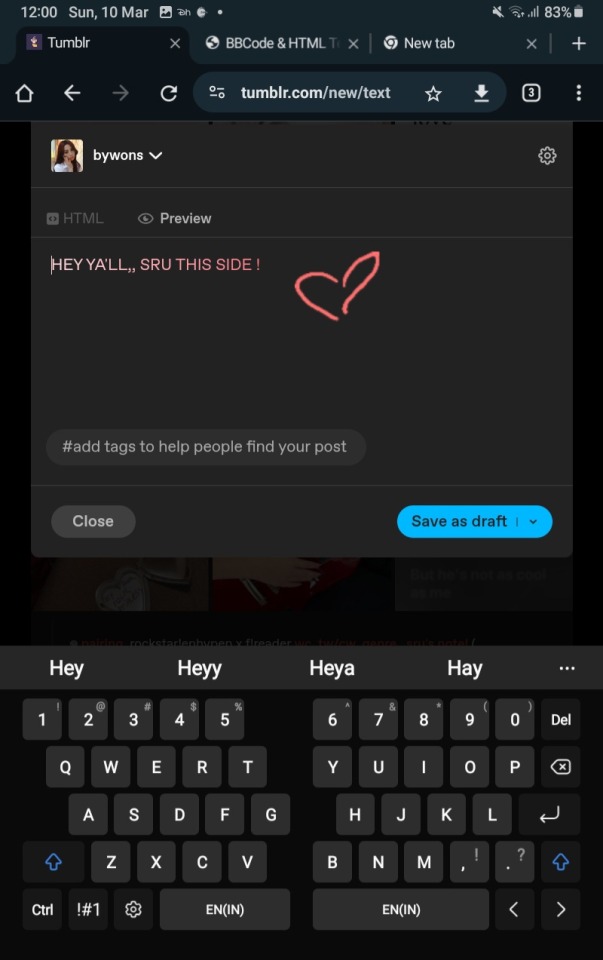
⟢⠀ Once you have your text all sorted out, you simply go and paste the HTML code into where your text would’ve went:
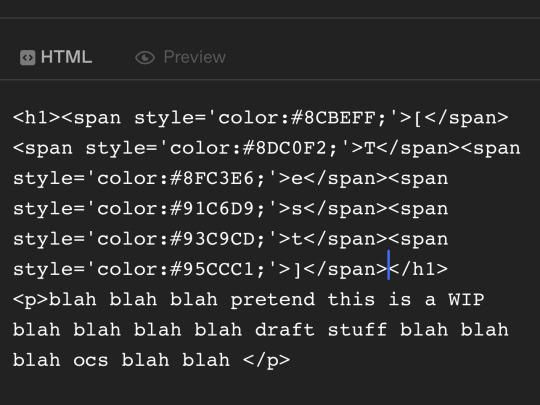
⟢⠀ And you’re done!! Hopefully this was at least a little bit helpful to you. I wish you luck with all your new gradients and colourful titles :]
14 notes
·
View notes
Note
girl how do u do the whole gradient thing in ur post
hey hey love 💏 i guess it's time for teacher sru (?) to give a tutorial to her beloved lovelies, let's gaur ! ◟(ˊᗨˋ)◞

STEP 001 : firstly you need to log in to your blr acc via ur computer or the chrome website cause it only works that way. in my midnight shenanigans post i did the whole colour thingy from my comp but in my recent one i did it from my tab cause my comp is acting up BIG TIME 🧍♀️
STEP 002 : after logging in, click on create and when a writing box (idk what to call it) pops up, click on the gear button on the upper right corner.
STEP 003 : then, scroll down a bit and u should see a text editor, change it to html.


STEP 004 : keep that there for a while and open a new tab and go to THIS website.
STEP 005 : there you will a text box which requires for you to fill with the text you want the gradient in.
STEP 006 : next, go down and you will find a colourizer or a spectrum colour choosing tool of two colour choice options. choose the gradient colours you want from there!
STEP 007 : then just below it you will see a generated html code, copy the whole thing.

STEP 008 : now come back to your draft in blr and paste the whole html code in the html text editor (step 3!) after that check ur preview and,
STEP 009 : ALL DONE! you now have ur gradient text ♡

i hope this helped you anon, and to anyone who wanted to know how it works ☆
33 notes
·
View notes
Text
100 days of code - days 13-14
October 27th, 2023
Well, usually making my daily post is the last thing I do in a day, but yesterday I was so tired that I just went to bed 😴. So today is two days in one post.
Day 13 🪨📜✂️
Yesterday I practice JavaScript by making a classic rock, paper, scissors game. It's very simple, just take a user's input and plays against a randomly generated choice by the computer. For now, it's only a terminal game, but I'll use this logic to implement a game with graphic interface in the browser.
Day 14 🛒
Today I read about DOM manipulation and events.
DOM (document object model) is a JavaScript object that allow us to modify the HTML of a web page. With this feature, we can create dynamic websites that the content can vary.
Events in JS and HTML let us handle some event, like mouse clicks, when the mouse is over something, key press, and others.
I did a little "app" to use this features that you can add and remove items from a shopping list.
Clicking the button is the event that calls a function that insert the text into HTML.
That's it ✂️✂️, I'm enjoying doing this web dev stuff 🤓
Also, two weeks!! 😯😊

#day 13#day 14#100 days of code#100daysofcode#codeblr#programming#progblr#studyblr#computer science#Rust#1000 hours#code#100 days of productivity#100 days of studying#software development#100 days challenge#tech#javascript#html css#coding
82 notes
·
View notes
Note
https://www.tumblr.com/satorena/771616112411656192/babessss-tut-on-ur-pinned-when
ma’am im sat.
this one is long so. . . stay with me now!


step #1: deciding aesthetics.
so! it’s been a while and i’m realizing i’m starting to hate my theme right? i decide it’s time to change. the very first thing to look into is what aesthetic you wanna work with. the past few months i’ve been following holiday themes, such as halloween and christmas ones. examples:
(i keep my themes on my side blog just in case)
this time, instead of following the frosty winter vibe i decided i wanted to base it off my latest obsession, sza’s deluxe album. from that point on, it was pretty simple. i typed “sza deluxe lana album” and pinterest gave me options (pinterest will be your best friend!).
step #2: editing/working on pinned
so technically i could’ve kept it as it was but i’m a complicated ass bitch so nothing is just simple with me lol. i decided to open capcut and add the parental advisory logo in the corner and added some filters/effects for an earthy vibe, because if you know sza then that’s basically her aesthetic. i also trademarked it for safety measures.
and since capcut works on making videos and tumblr is the shittiest app when it comes to videos, i opened a website to convert it into a gif.
i place it on my pinned (i run test trials on my side blog before putting it on this one) and usually add that glittery gif just to accentuate the image.
step #3: texts
this step isn’t too hard since i copy paste my texts (alias, age, etc.) but i do modify the caution warning based off my theme. since this time it’s based off an album, i used key words you’d associate with albums (tracklist for masterlist, deluxe for rules, features for tags and moots).
i then open picsart and identify the main colours of my main theme image to paste it onto certain texts, to make it more colourful (the draw button will help). the colours will come out in rgb so you’ll need to convert them to hex mode.
thennn, i open this website called stuffbydavid.com and place the hex code in the correct text box (the HTML option). it automatically shows the link you’ll need to paste the coloured text into tumblr. you’ll have to log into browser mode for tumblr, open your pinned, click settings and scroll until you see “rich text”, click on that and switch it to HTML. there will be different coding on your pinned and you can paste the link where you think fits.
(vegas made a post regarding it, i’ll link it here).
stay with me now! so when i’m done with pasting my links and i’m satisfied with the colouring, my pinned post is about finished. i’ll add in some tags related to my theme, throw in some more sparkles gifs and a thin divider. for the divider, i save the old one i had, open picsart and go back to the “draw” section, place in the rgb colour from earlier and just colour the divider, before saving it and putting it into my pinned. i also link my rules, masterlist and tags.
step #4: tweets
this is something i recently started in november, but i have this saved twitter template that i downloaded from a tumblr account (you can find these templates on tumblr). since it’s already in my previous works, i just click on them and modify them to my taste. my tweets will have something in common with my aesthetic (this time it’s lyrics off the album) and i’ll find a profile pic from pinterest.
i save them, then open background eraser to erase the background. on canva, the background colour i choose is red or green, that way the erasing app can easily erase the background colour without interfering.
then i save it from the app and open picsart to shrink their sizes. to do so, i open a blank space, click add photos and insert the first tweet. i make the image smaller by pinching the screen and move it to either the left or right side, then crop the image so the image can be saved horizontally (if you don’t understand what i mean, click my tweets and you’ll get it). i repeat the same steps with the second tweet.
after i’m finished, i upload it onto my pinned post, and then i’m finally done.
step #5: extra touches
first i’ll change the colouring of my background and accents. i often choose the colours i deducted from my main image in step 3, or if not, then i choose between black or white. i’ll paste the hex codes i feel fits the vibe.
after that’s done, i’ll work on my header. usually, i fuck around on picsart and slap images of gojo nendoroids and insert a silly text or sometimes a black girl as myself. but this time, since i’m following a theme, i remembered seeing an image for the lana album i knew i wanted as a header. however, it was in yellow and threw off the balance of the colours scheme.
so, i opened picsart on a blank space, filled in a blank text box and initially typed “lana sos deluxe”. but then, i realized rena and lana are pretty similar in writing, so i flipped shit around and decided to do that instead (sza if you see this don’t sue me thx!). i chose my fonts, saved the image and uploaded it on tumblr.
i always disable the stretch header button. it looks cleaner that way in my opinion. if the image ever looks too tiny, i crop it on picsart to adjust the size.
almost done! then i open pinterest and choose whatever profile pic i’m in the mood for. if i need to edit, i’ll open picsart. if i want a nendoroid character, i’ll open background eraser and erase the background. this time, i stuck with sza. i’ll then upload it as a pfp and choose to hide it, so you can clearly see my header.
nexttt, i choose what i want my description to be. again, i always base it off my current aesthetic, so this time i chose a song title. i’ll put in the hex code of the main colour of the theme so it changes to that. i like to stay on brand.
finally, i’ll change my inbox title. again, always sticking to aesthetics, so i chose the word “interlude” bc interludes are commonly found in albums. it’s also a pretty word lmaoo. and there you have it— a regular degular serena theme!
and then i move onto satorena and repeat most of these steps all over again ://
#─── (𝟏) 𝐍𝐄𝐖 𝐌𝐄𝐒𝐒𝐀𝐆𝐄. › from anon .ᐟ#this doesn’t mean copy theme down to the last word!#lemme make that clear
17 notes
·
View notes
Text
If you've seen the post circulating around that HR9495 - the bill to strip nonprofits of their tax-exemption - is a credible threat to AO3 and to download your fic, you may or may not be going 'oh fuck'. This might be because 9495 is a fucking abominable document...or it might be because you're like me and you have far too many fics to download one at a time.

Well, this is a bit quicker-and-dirtier than the post I'd planned on making next month, but as it's needed now:
Bulk Downloading from Ao3
Nianeyna has a program up on Github that can download Ao3 fics in bulk. You give it a starting URL (such as the start of your Bookmarks, or someone else's Works page) and tell it to either stop at a certain page or to keep going until it downloads the whole range. If you don't have code experience, that's fine, the linked page has a basic walkthrough on how to download and initialize the program.
Now, if you're also worried about fiction on other sites too...
Downloading from Fanfiction.net, SpaceBattles, SufficientVelocity, QuestionableQuesting, & More [WITHOUT Embedded Pictures]
Have you heard of FicHub? You have now.
FicHub only goes on fic at a time, and if you try and feed it too many URLs too quick it'll time out and you have to wait a bit to let it 'cool down', but it was the first program I encountered that could not only download fics from FF.Net, but also the forums where the Worm fandom is found.
Plus, that's not all it download from. To quote FicHub's site:
Supported Sites SpaceBattles, SufficientVelocity, QuestionableQuesting (XenForo) FanFiction.net, FictionPress Archive Of Our Own Harry Potter Fanfic Archive Sink Into Your Eyes AdultFanfiction.org Worm, Ward Partial support (or not tested recently): XenForo based sites (Bulbagarden Forums, The Fanfiction Forum, Fanfic Paradise) Fiction Alley The Sugar Quill (largely untested) FanficAuthors (minimal) Harry Potter Fanfiction (archive from pre-revival)
One thing I really like about FicHub is that it doesn't default to EPUBs. Like how Ao3's built-in downloader gives you file options, FicHub lets you choose between EPUB, a zipped HTML file, MOBI, PDF, and a 'sharable link to this export' which I've never used but sounds nice.
The downside of FicHub is that if a fic has embedded media - pictures, for example - you don't want to be using FicHub as it won't embed the picture. All it'll do is embed a link to were the picture was supposed to be drawn from. However, this isn't a concern for most-all FF fics as well as a good chunk of stuff from other sites. Just be warned that if you want media embedded, you want the next tool.
(You'll also want the next program if downloading from a forum and the OP who's fic you're downloading has a gigantic signature box: for some reason, FicHub adds the signature page to the bottom of each chapter in the document you download. Fine enough if it's a line or two, annoying if it takes up a page or more.)
Downloading from AlternateHistory.com, SpaceBattles, SufficientVelocity, QuestionableQuesting, & More [WITH Embedded Pictures]
This time we're looking at a Firefox addon: WebtoEpub.
According to its page, its download options include the following:
Baka-Tsuki.org (obviously) ArchiveOfOurOwn.org Blogspot (some) FanFiction.net. gravitytales.com hellping.org krytykal.org moonbunnycafe.com mugglenet.com nanodesu (some of the *thetranslation.wordpress.com sites) readlightnovel.com royalroad.com shikkakutranslations.org http://sonako.wikia.com And many other web sites.
It only downloads EPUBs, but if you're trying to grab a fic that has facecasts for characters, or maps, or anything like that...well, this actually grabs the pictures.
However, brief tip: I don't know how it is for any of the pages it actually lists, but if you use this for a fic from AH/SB/SV/QQ - the forums listed in the header - you want to open the page and then click the button that opens the whole index of threadmarks, and then call the function. If you don't do it that way, it won't know the full range of posts.
So, yeah...
While I hope HR9495 dies and isn't passed, it's better to prepare than to not. Even if it doesn't pass, I lived through the NC-17 purges on Fanfiction.net and saw thousands of fics vanish into the abyss; and I've seen authors delete fics or their whole collections off of Ao3 too. All that's taught me that I can't rely on just going to a bookmarked fic and expecting it to be there; if I want to be able to find and reread anything into perpetuity, I need to have a copy downloaded.
Hopefully this helps some of you download up the fics you want to have on hand, too.
#the monkey speaks#preparing for 2025 and after#he says 'its like all my birthdays have come at once'#building walls to keep the waves back (an ode to the archivists)#where did we come from (we don’t know: there’s nothing left of it)
7 notes
·
View notes
Note
Hi, sorry to interrupt, but I was looking at your fics, which are really good, and I came across something that I see in a lot of other fanfics and I don't know how to do it. How did you manage to set it indented?
hello! thank you for reading my fics, it means a lot!
I need to know what you mean by "indented." do you mean something like this summary?
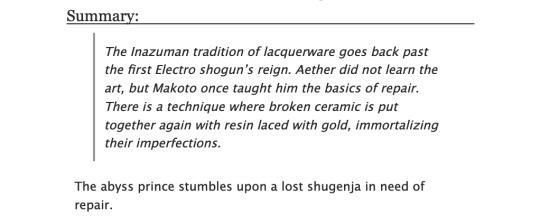
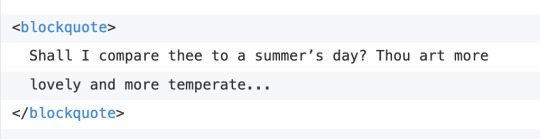
tumblr editor calls this "indented" for some reason, but what it's really called are "blockquotes." you don't need fancy css for this since it's available with just html. you can code it using the blockquote tag.
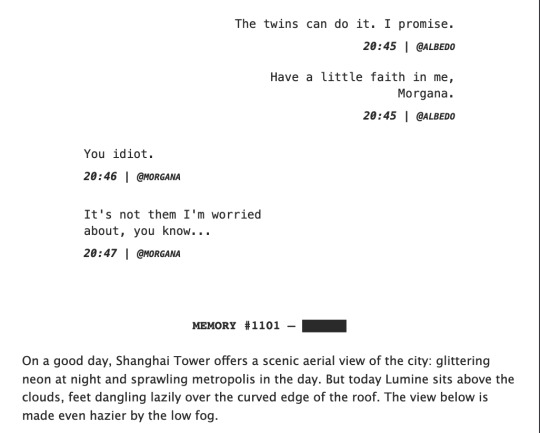
on the other hand, maybe you mean indenting as in adding spacing like in this chat?
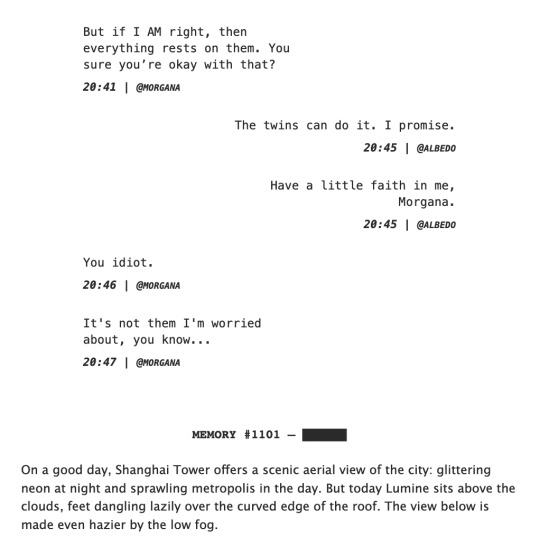
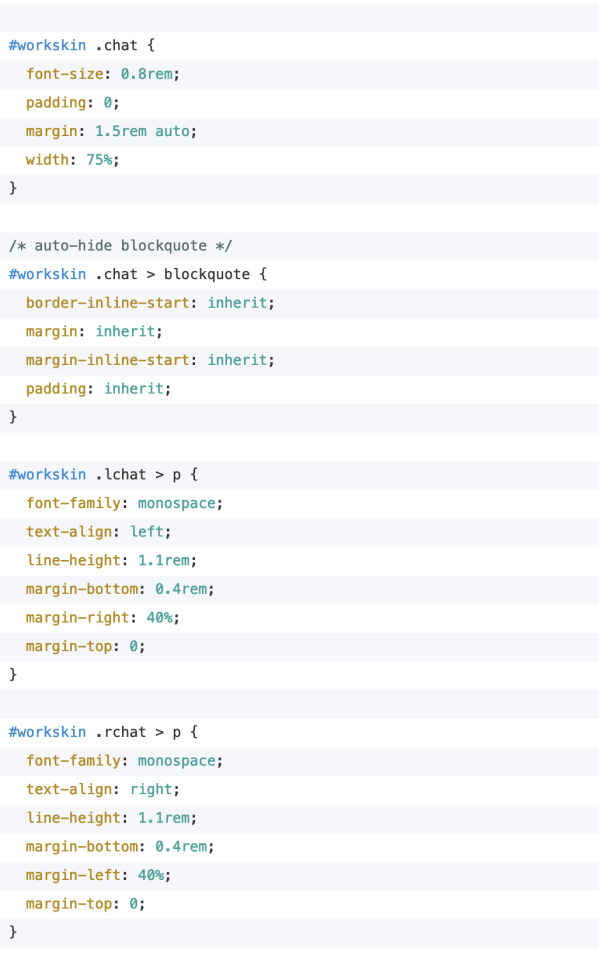
in this case, then yes you do need to add css to your workskin. here are the relevant parts of the code.
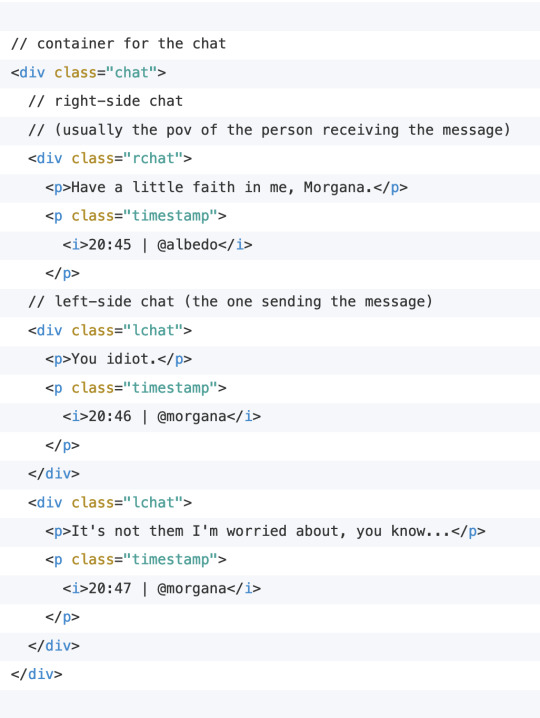
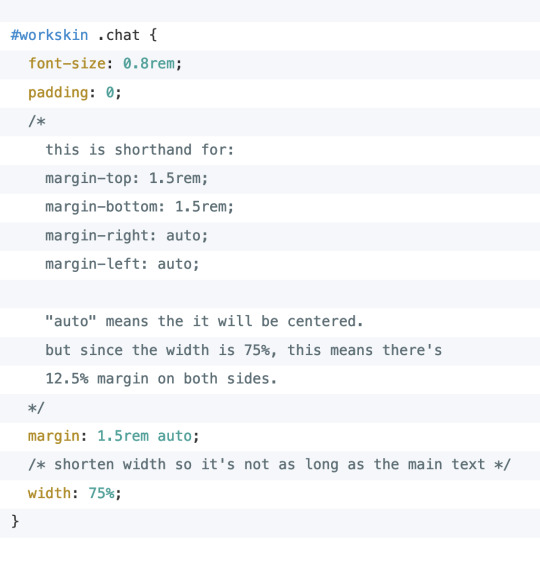
so the important things here are:
put your elements inside a container with the .chat class (or any other class name of your choosing)
make sure .chat has margin set to auto and width set to less than 100%.
I hope I was able to answer your question! I'm not sure if there are other examples of indenting that I used in fics; if you meant something else, just let me know so I can answer the question properly! 🙇🏻
the rest of my workskin code is always available to use as a reference (copy paste if you want): AO3 demo, html code, css code.
something extra under the cut:
bonus:
the above is a modified version of what I'm doing. I actually combined both methods in one, but that gets a little bit more complicated and it's probably more than what you need. I'll add the full code here under the cut if anyone's interested.

to note:
notice that I replaced the div containers with blockquote in the html. however, with workskins turned on, you won't see it! that's because I'm hiding it specifically when workskin is turned on.
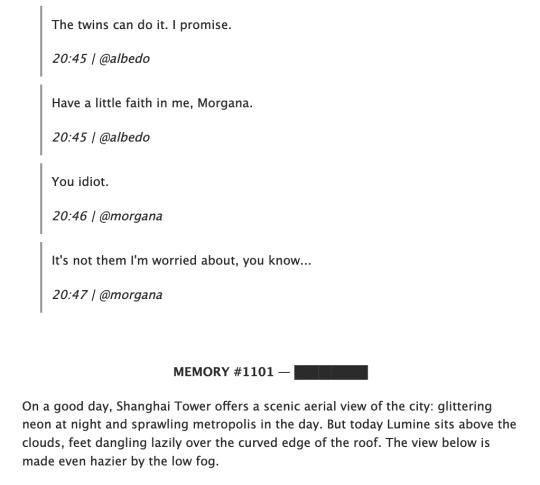
but if someone reads my fic with workskins turned off (the "hide creator's style" button AO3 provides at the top of the fic), then none of my styling will show up. I still want to make the grouping of the chat text and timestamp clear though, so I put them in blockquotes for this purpose.
here's how it looks like with and without workskins. I want to make sure that my fics are readable even if someone turns off workskins, or if they download my fic as an epub/pdf (which IIRC removes all the css styling as well).
14 notes
·
View notes
Text
The Old Web pt. 2: what's in a personal website?
The internet is full of possibilities.
This sticks out to you much more than usual when you start exploring the community of personal websites, many of which are hosted by neocities. With most social media, you have very limited customization of what your page looks like, what format of content you can post, and how users may interact with your posts. Personal websites change all of that and allow you to create something completely outside the box. You get to control every minute detail of how your website is viewed, from the fonts to the way the user's cursor looks.
For the sake of this post, a "personal website" is a website that someone created for their own personal use, not to promote a brand or sell a product. These websites are often made almost entirely from scratch using HTML and other coding languages. You can find many examples of these websites at this link. Warning: most of these websites are not meant to be viewed on mobile and might malfunction.
https://href.li/?https://neocities.org/browse
Personal websites are often a mishmash of different things the webmaster (the person who made the site) likes or finds important. Sometimes they focus on a single topic, a topic or fandom the webmaster is really into, or something they want to teach others about. While I browsed these websites I noticed a few tabs that often appear in the sidebars of these websites.
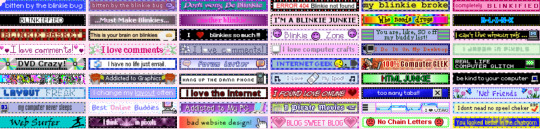
⋆。°✩₊ °✦ ‧ ‧ ₊ ˚✧₊ °✦Blinkies!⋆。°✩₊ °✦ ‧ ‧ ₊ ˚✧₊ °✦
Blinkies are little flashing images, usually with text, that are displayed on a website. There's a popular blinkie generator website called blinkies.cafe where you can make your own. Many personal websites have an entire page dedicated to listing all of the blinkies they've collected. It's hard to trace the origins of many because they can easily be downloaded and used without permission. Here are a few links to see some examples.
●○●○●○●○●○●○●○Webrings●○●○●○●○●○●○●○●
Webrings are described by webmaster neonaut as "curated link chains, or tiny community-shared directories where links are shared one at a time by clicking through to the next website." So rather than using google to find old web websites (impossible) many will link to other similar websites, so you can discover new websites by clicking on links, kind of like if you've ever fallen into a wikipedia rabbit hole.
Webrings are like little virtual clubs, and can have any theme from queer people who code to the art of being funky. Websites will link back to a centralized page, like the one shared above, or the websites will link directly to each other, having a buttons page with every other webring member's button.

●~●~●~●~●~Buttons●~●~●~●~●~●~
88x31 buttons are how a person gets from website to website on the old web. They look a lot like blinkies, something I eventually realized after frustratedly spam-clicking blinkies expecting them to link me somewhere. These are just as decorative, except they serve as a sort of advertisement to get someone interested in their website. They may have tiny images, colors, or fonts that match the aesthetic of their website. Buttons can have their own devoted section, or be a fixture on the side or bottom of a site.
✧・゚: ✧・゚: Shrines / Collections :・゚✧:・゚✧
A shrine is something you dedicate to something you love, perhaps a deity or ancestor you want to honor. A web shrine is a page or collection of pages dedicated to someone's interest, obsession, hyperfixation, or hobby. It tends to have lots of information about the topic, relevant pictures or videos, and the webmaster's own personal ties to the topic. A fandom blog could in a way be considered a shrine. There are tons of interesting, niche, and obscure shrines out there, such as this one about an old product called WebTV. There are also fairly common shrine topics like pokemon and hello kitty. Many shrines are combined with a collections page, where a webmaster shows off their collection of items. This can be a group of pictures of the actual items, or just pictures of ones that a person wishes they had.

⟡⋆⭒˚。⋆✧˖°⁺˚Pets, dollz, and toyboxes˖°.✧˖°.⟡⋆⭒˚。
Pets are little png images you put on your site because you like the way they look. They can be commissioned, pre-drawn and put up for paid "adoption" by artists, or just right-click-saved from directories like this one. A toybox is a page dedicated to storing all these pngs, many of which link back to where the webmaster found them. Dollz are sort of different. Dollz are kind of like a DIY dressup game, where artists create a base, clothing, hair, and other accessories, and you can mix and match in order to create your own unique look. This website goes into a bit more detail about the history of dollz.
📎📎📎📎📎📎📎📎📎📎📎📎📎📎📎📎📎📎📎📎📎📎
This is just a quick summary of all the things I've most commonly seen on personal websites, you can learn more by browsing the websites I've linked or browsing through all the different websites neocities has to offer. One of my favorite websites on neocities is called Lizzie Smithson, a webcomic detailing the adventures of a stylish cat thief who lives in the city.
Neocities is great because it offers a more intimate glimpse into someone's mind than you could ever find on mainstream social media. People who create personal websites do so just because they want to. They're not looking for likes and followers and validation. Maybe part of the reason personal websites have been on decline so much is that making content for the hell of it isn't all that common anymore. Capitalism tells us that we should try to monetize everything we do for enjoyment, it's not enough to just create something because we feel like it. And if you can't monetize it, you should seek some sort of validation through interactions, numbers created to hack our brains into churning out content that people want to see, regardless of if it's something WE want to make. This system, this Web 2.0, is what spawned the Old Web Movement, which is dedicated to creating an online space free from monetization, free from algorithms, where people can be truly creative and make great things. The Old Web movement and manifesto is what part 3 will be all about.
#old web#the old web#webcore#blinkies#personal website#cybercore#old internet#internet history#internet culture#neocities
35 notes
·
View notes