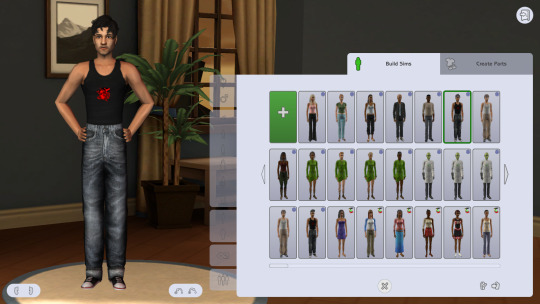
#change default interface
Explore tagged Tumblr posts
Visit Tumblr Blog
Explore Tumblr blogs with no restrictions, modern design and the best experience.
Last Seen Tumblr Blogs


prestasi-di-telkom-university
Prestasi di Telkom University: Mengukir Prestasi di Dunia Pendid
1 post


Fun Fact
Tumblr has been banned in Indonesia for providing people with access to pornographic content.
Text
You should be using an RSS reader
On OCTOBER 23 at 7PM, I'll be in DECATUR, GEORGIA, presenting my novel THE BEZZLE at EAGLE EYE BOOKS.

No matter how hard we all wish it were otherwise, the sad fact is that there aren't really individual solutions to systemic problems. For example: your personal diligence in recycling will have no meaningful impact on the climate emergency.
I get it. People write to me all the time, they say, "What can I change about my life to fight enshittification, or, at the very least, to reduce the amount of enshittification that I, personally, experience?"
It's frustrating, but my general answer is, "Join a movement. Get involved with a union, with EFF, with the FSF. Tell your Congressional candidate to defend Lina Khan from billionaire Dem donors who want her fired. Do something systemic."
There's very little you can do as a consumer. You're not going to shop your way out of monopoly capitalism. Now that Amazon has destroyed most of the brick-and-mortar and digital stores out of business, boycotting Amazon often just means doing without. The collective action problem of leaving Twitter or Facebook is so insurmountable that you end up stuck there, with a bunch of people you love and rely on, who all love each other, all hate the platform, but can't agree on a day and time to leave or a destination to leave for and so end up stuck there.
I've been experiencing some challenging stuff in my personal life lately and yesterday, I just found myself unable to deal with my usual podcast fare so I tuned into the videos from the very last XOXO, in search of uplifting fare:
https://www.youtube.com/@xoxofest
I found it. Talks by Dan Olson, Cabel Sasser, Ed Yong and many others, especially Molly White:
https://www.youtube.com/watch?v=MTaeVVAvk-c
Molly's talk was so, so good, but when I got to her call to action, I found myself pulling a bit of a face:
But the platforms do not exist without the people, and there are a lot more of us than there are of them. The platforms have installed themselves in a position of power, but they are also vulnerable…
Are the platforms really that vulnerable? The collective action problem is so hard, the switching costs are so high – maybe the fact that "there's a lot more of us than there are of them" is a bug, not a feature. The more of us there are, the thornier our collective action problem and the higher the switching costs, after all.
And then I had a realization: the conduit through which I experience Molly's excellent work is totally enshittification-proof, and the more I use it, the easier it is for everyone to be less enshittified.
This conduit is anti-lock-in, it works for nearly the whole internet. It is surveillance-resistant, far more accessible than the web or any mobile app interface. It is my secret super-power.
It's RSS.
RSS (one of those ancient internet acronyms with multiple definitions, including, but not limited to, "Really Simple Syndication") is an invisible, automatic way for internet-connected systems to public "feeds." For example, rather than reloading the Wired homepage every day and trying to figure out which stories are new (their layout makes this very hard to do!), you can just sign up for Wired's RSS feed, and use an RSS reader to monitor the site and preview new stories the moment they're published. Wired pushes about 600 words from each article into that feed, stripped of the usual stuff that makes Wired nearly impossible to read: no 20-second delay subscription pop-up, text in a font and size of your choosing. You can follow Wired's feed without any cookies, and Wired gets no information about which of its stories you read. Wired doesn't even get to know that you're monitoring its feed.
I don't mean to pick on Wired here. This goes for every news source I follow – from CNN to the New York Times. But RSS isn't just good for the news! It's good for everything. Your friends' blogs? Every blogging platform emits an RSS feed by default. You can follow every one of them in your reader.
Not just blogs. Do you follow a bunch of substackers or other newsletters? They've all got RSS feeds. You can read those newsletters without ever registering in the analytics of the platforms that host them. The text shows up in black and white (not the sadistic, 8-point, 80% grey-on-white type these things all default to). It is always delivered, without any risk of your email provider misclassifying an update as spam:
https://pluralistic.net/2021/10/10/dead-letters/
Did you know that, by default, your email sends information to mailing list platforms about your reading activity? The platform gets to know if you opened the message, and often how far along you've read in it. On top of that, they get all the private information your browser or app leaks about you, including your location. This is unbelievably gross, and you get to bypass all of it, just by reading in RSS.
Are your friends too pithy for a newsletter, preferring to quip on social media? Unfortunately, it's pretty hard to get an RSS feed from Insta/FB/Twitter, but all those new ones that have popped up? They all have feeds. You can follow any Mastodon account (which means you can follow any Threads account) via RSS. Same for Bluesky. That also goes for older platforms, like Tumblr and Medium. There's RSS for Hacker News, and there's a sub-feed for the comments on every story. You can get RSS feeds for the Fedex, UPS and USPS parcels you're awaiting, too.
Your local politician's website probably has an RSS feed. Ditto your state and national reps. There's an RSS feed for each federal agency (the FCC has a great blog!).
Your RSS reader lets you put all these feeds into folders if you want. You can even create automatic folders, based on keywords, or even things like "infrequently updated sites" (I follow a bunch of people via RSS who only update a couple times per year – cough, Danny O'Brien, cough – and never miss a post).
Your RSS reader doesn't (necessarily) have an algorithm. By default, you'll get everything as it appears, in reverse-chronological order.
Does that remind you of anything? Right: this is how social media used to work, before it was enshittified. You can single-handedly disenshittify your experience of virtually the entire web, just by switching to RSS, traveling back in time to the days when Facebook and Twitter were more interested in showing you the things you asked to see, rather than the ads and boosted content someone else would pay to cram into your eyeballs.
Now, you sign up to so many feeds that you're feeling overwhelmed and you want an algorithm to prioritize posts – or recommend content. Lots of RSS readers have some kind of algorithm and recommendation system (I use News, which offers both, though I don't use them – I like the glorious higgeldy-piggeldy of the undifferentiated firehose feed).
But you control the algorithm, you control the recommendations. And if a new RSS reader pops up with an algorithm you're dying to try, you can export all the feeds you follow with a single click, which will generate an OPML file. Then, with one click, you can import that OPML file into any other RSS reader in existence and all your feeds will be seamlessly migrated there. You can delete your old account, or you can even use different readers for different purposes.
You can access RSS in a browser or in an app on your phone (most RSS readers have an app), and they'll sync up, so a story you mark to read later on your phone will be waiting for you the next time you load up your reader in a browser tab, and you won't see the same stories twice (unless you want to, in which case you can mark them as unread).
RSS basically works like social media should work. Using RSS is a chance to visit a utopian future in which the platforms have no power, and all power is vested in publishers, who get to decide what to publish, and in readers, who have total control over what they read and how, without leaking any personal information through the simple act of reading.
And here's the best part: every time you use RSS, you bring that world closer into being! The collective action problem that the publishers and friends and politicians and businesses you care about is caused by the fact that everyone they want to reach is on a platform, so if they leave the platform, they'll lose that community. But the more people who use RSS to follow them, the less they'll depend on the platform.
Unlike those largely useless, performative boycotts of widely used platforms, switching to RSS doesn't require that you give anything up. Not only does switching to RSS let you continue to follow all the newsletters, webpages and social media accounts you're following now, it makes doing so better: more private, more accessible, and less enshittified.
Switching to RSS lets you experience just the good parts of the enshitternet, but that experience is delivered in manner that the new, good internet we're all dying for.
My own newsletter is delivered in fulltext via RSS. If you're reading this as a Mastodon or Twitter thread, on Tumblr or on Medium, or via email, you can get it by RSS instead:
https://pluralistic.net/feed/
Don't worry about which RSS reader you start with. It literally doesn't matter. Remember, you can switch readers with two clicks and take all the feeds you've subscribed to with you! If you want a recommendation, I have nothing but praise for Newsblur, which I've been paying $2/month for since 2011 (!):
https://newsblur.com/
Subscribing to feeds is super-easy, too: the links for RSS feeds are invisibly embedded in web-pages. Just paste the URL of a web-page into your RSS reader's "add feed" box and it'll automagically figure out where the feed lives and add it to your subscriptions.
It's still true that the new, good internet will require a movement to overcome the collective action problems and the legal barriers to disenshittifying things. Almost nothing you do as an individual is going to make a difference.
But using RSS will! Using RSS to follow the stuff that matters to you will have an immediate, profoundly beneficial impact on your own digital life – and it will appreciably, irreversibly nudge the whole internet towards a better state.
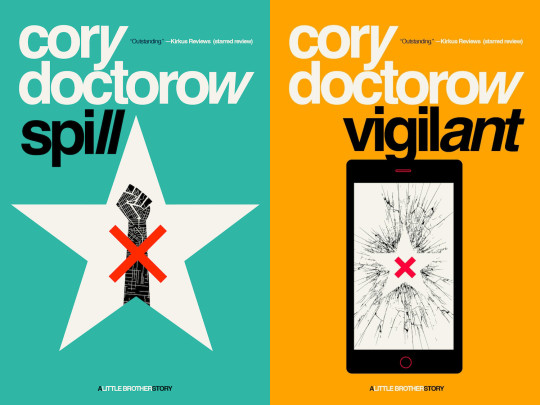
Tor Books as just published two new, free LITTLE BROTHER stories: VIGILANT, about creepy surveillance in distance education; and SPILL, about oil pipelines and indigenous landback.
If you'd like an essay-formatted version of this post to read or share, here's a link to it on pluralistic.net, my surveillance-free, ad-free, tracker-free blog:
https://pluralistic.net/2024/10/16/keep-it-really-simple-stupid/#read-receipts-are-you-kidding-me-seriously-fuck-that-noise
1K notes
·
View notes
Text
Big Awful Texture Locator

Download the latest version here
Find any texture in The Sims 2 that is too big, or is 'awful' (suboptimal texture format)
Features:
Find textures in any folder you choose
Filter by width, height, memory size, texture format, or number of mipmap levels
Preview and show details of textures the tool found
Remember 'known good' textures, which are optionally excluded from being shown in the list
Look up the path of the package, and the group and instance of the resource
Copy texture/resource details (right click)
Open the package in the default package editor (double click)
Dark mode/light mode and UI scale adjustable
Native on both Windows and Linux
Why?
The Sims 2 has had a long-standing problem known as 'pink flashing' or 'pink soup' when using too much custom content. The Sims 2 is a 32-bit program, which means that it normally has a maximum memory limit of 2GiB (2048MiB) and by using a so-called '4GB patch' you can raise this limit to -you guessed it- 4GiB, this limit might seem pretty large, but due to how the game works you might hit this limit sooner than expected!
Let's say you have 1024x2048 textures (which is the default for Sims 4 textures, and thus also often for 4to2 cc) in RGBA format, these textures will EACH take up 8MiB of texture memory! This means you could possibly only have only a MAXIMUM of 512 textures loaded in memory before you run out of memory completely. In practice, this limit will probably be lower due to other factors.
This tool will help you find textures that take up too much texture memory, and thus (hopefully) help alleviate some amount of pink flashing.
Tutorial
First, download the program from the link above and follow the instructions to open the program.
Now let's get the program looking the way you want: click on the sun/moon button on the top left of the program to switch light/dark mode and click the "UI Scale" number next to it and enter a new number to change the size of the interface.
Set the folder we want to search: at the top bar, search for the 'Downloads:' bar, then at the end click the button with the folder icon and select your folder. Once you've selected a folder the program will instantly start scanning, if you want to restart this scan then at any time you can click the text in the Downloads bar and press enter.
Currently this list will show all textures in the scan folder, which is probably not very interesting. To find some more interesting textures we can add some filters to the texture list. On the top bar, click on the 'Filter' button: this will open the filter list and it will be empty if you haven't added any filters previously.

These filters filter the texture list one by one, each filter removing more textures from the displayed list of textures. To add a filter, click the plus button, and to remove it click on the trashcan button at the start of the line.
To edit a filter, click on the first box to choose the filter type, click on the second box to choose the type of comparison, and select the number in the last box to set the number to compare with.
The comparison type can be < (smaller than), <= (smaller or equal), > (greater than), >= (greater or equal), == (equal), or != (not equal).
The Format filter is different: make a format filter, then click on the 'choose' button and choose the texture formats that you want to show in the texture list.

Let's edit some textures!
In the texture list, find a texture that you think is too big, and either double click on it to open it in the default package editor or right click on it to show a menu to copy the details of the package.
Finally, once you have the package opened in your favorite package manager, edit the texture to be smaller and/or a better texture format, save and ta-da! your game will now use less texture memory.
249 notes
·
View notes
Text
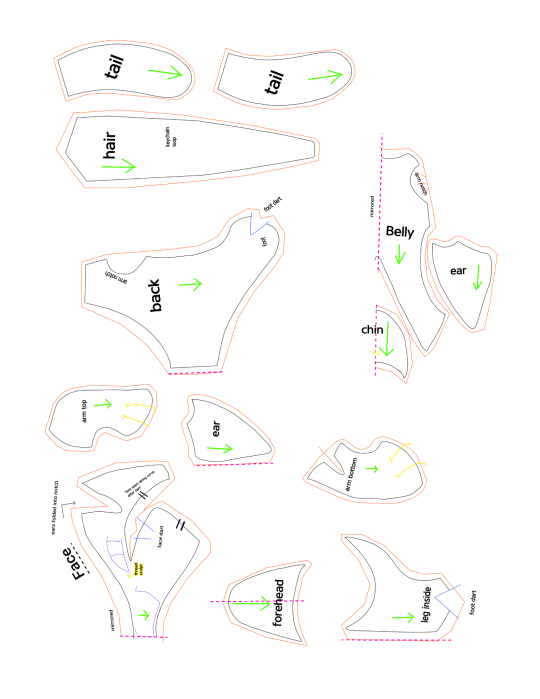
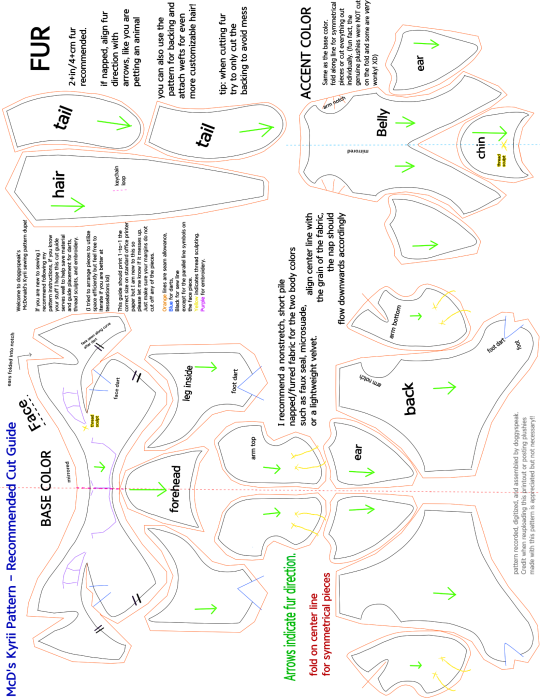
✩ Make your own Kyrii Plushie ✩
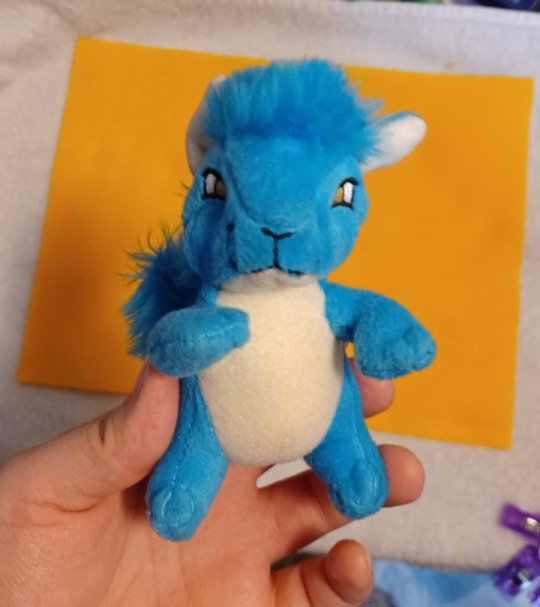
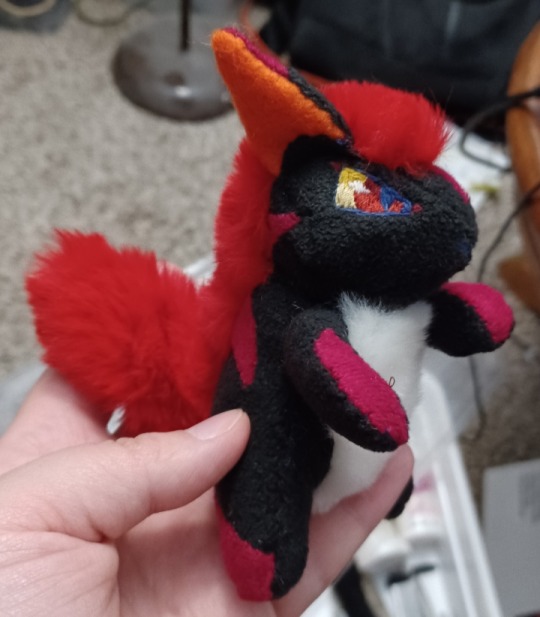
Thank you @free-sewing-patterns and @jestersneopia for asking so kindly for me to release my pattern dupe! :3 These guys are very intricate little plushies so I did my best to make something comprehensive. I also made detailed instructions which I will include after the readmore, so long post ahead!
McD's Plush Kyrii
What you will need:
•The two included images printed on 8.5"x11" (A4/Letter) paper.
•Enough of your desired Fabrics (reference the pattern size on your paper, you don't really need much at all)
✩ I recommend a short pile faux fur or other nonstretch fabric for the two body colors, and a long pile (1-4cm) faux fur for the mane and tail.
✩ You can also make the mane and tail using yarn or doll hair wefts by attaching them (sewn or glued) to a backing fabric like cotton or felt.
•Scissors or precision knife to cut fabric.
•Sewing implements (needle, pins, thimble, thread scissors, etc.)
•Thread matching one or both of your body color fabrics.
•black thread or embroidery floss for the mouth embroidery.
✩embroidery floss or thread in your desired eye colors (recommended a white for sclera, an iris color, and a black for outlines)✩OR✩buttons or safety eyes in your desired size and color.
•Stuffing (two or three handfuls of polyfill will do the job)
✩ribbon or cord to use as arm tension band and/or a loop to clip hardware like keychains and backpack hangers.
((✩ optional ))
General note: default suggested stitch length is 3mm apart unless stated otherwise.
Step 1
Print out the pattern, making sure to format your printer to use the full page with no margins. Check print preview to be sure nothing is cut off. (I made the piece inventory sheet to sort of offset any default margin weirdness but I'm new to this so let me know if it messes up.)
Step 2
Conceptualize your design and gather your materials. Are you cloning one of the plushies already out there, or making your own design? It is always good to keep reference on hand during any art project!
What special design elements are you translating to plush form? Keep in mind this pattern is small and intricate and it might be easier to omit or simplify certain design elements if you are working from something more detailed.
The cutting guide assumes 1 base color, 1 accent color, and 1 fur color with no significant shape, size, or design difference to the original McD's plushie. (Only a few fixes for symmetry and fur direction.)
Step 3
Prepare your base material for cutting. If you are doing embroidery or applique designs this may be easier while the fabric is flat and whole. Same with fur wefting, do anything like that while you have one big piece of fabric to work with. Trace the pattern pieces using chalk, heat erase pen, or some other washable marking tool using the cut guide provided. (I recommend cutting out any shape you need to add details to from the pieces inventory page, then trace those pieces on your fabric in roughly the same positions as the cut guide page.) Then do any embroidery or details you need to do while the pattern is flat.
Embroidery tips:
• Use a stiff backing piece like interfacing or felt behind your fabric to make the embroidery more durable and stiff.
•Use a back stitch or chain for lines, line in color for crisp color-changes.
•Parallel vertical lines close together catch the light and read as blocks of color best.
•Don't use stitches that are too long or loose, build stitches up diagonally like a brick pattern instead, the key is to attempt to stay parallel.
•If you are using sewing thread instead of embroidery thread, use two or three strands at once to save time.
•When you are done, cut away your backing fabric/interfacing a little outside where your embroidery stops so as not to interfere with future seams.
Step 4
Cut out your materials. If you didn't need to trace from the pieces inventory for pre-cut details, then you can just pin the cut guide paper to your fabric and cut it directly. Otherwise simply follow your trace and cut out your pieces. Be sure to keep track of which pieces go on the left and right of your plushie.
Step 5
Begin assembly by sewing all your darts first, those will be on each side of your face, inner leg, arm bottom, belly, and back pieces. Follow the blue lines that appear anywhere that says "dart" and any sew lines that create a V-like dip in the perimeter of the piece (like the arm bottom and belly pieces). Fold the seam allowance inside your seam so that the right sides of the fabric end up with a clean, unnoticeable seam. I recommend a tight, short straight-stitch about 2mm apart on darts.
Step 6
Make the loose body parts.
Sew together ears, arms, and tail by placing right sides together and sewing around based on the solid black lines in the pattern.
•Each ear will have a base color piece and an accent color piece. Make sure their shape lines up so that right sides of the fabric are together. The ear pieces are fairly flat and their sew lines should line up perfectly. Use any stitch you are comfortable with, straight stitch about 3mm apart works just fine.
•Sew one top arm piece and one bottom arm piece together for each arm. The discrepancy in their shapes creates a slight twist that gives the arm part a tube-like shape. I recommend pinning the pieces at the ends and wrist first to get the tension/gathering correct on the arm part. Any stitch works but a straight stitch will probably be easier to keep track of tension with or to rip if you make a mistake and need to retry. Keep it tight, about 2mm apart.
•For the tail, sandwich your pieces right sides together so that all the fur is tucked inside and you can sew the edges with a secure stitch like a whip or back stitch.(about 3-4mm apart) You might need to pick or brush out the fibers if they get caught in the seam.
Once you finish each piece, flip it inside out, wrong sides should remain inside while the right sides of the fabric show and all seam allowance remains inside. If any edges are having trouble flipping inside out, use a thin tool like a crochet hook or chopstick to prod them from the inside.
Stuff the 2 arms until they hold a 3D shape, firm fill recommended. Leave the other pieces in this step unstuffed.
You should have two ears, two arms, and one fluffy tail.
Step 7
Shape the face.
With the dart now sewn into the cheek, the two seams with the || registration marks should be much closer in length. Line the seam up according to the marks and fudge the rest of the length using tension. I recommend using a ladder stitch on the right sides while keeping in mind the general size of the seam allowance.
Repeat on the other side.
When you are done, your face piece should have curvy cheeks.
Step 8
Build up the head.
Connect the forehead piece to the face piece, the curve's center goes right above the nose.
Sew in the chin piece along lower jaw.
There is a bit of leeway into how long the ears will be and which angle they stick out. For best results, give it a test right side out and pin where you like the ears to stay.
The ears go into the notches on the top of the face piece, about half of the ear should fit into that notch. Sew it into that notch, any remaining ear folds around that top seam towards the forehead and is stitched down to give the ear a slight curve that helps it remain upright.
When you're finished you should have the (bald) head.
Step 9
Construct the body.
Sew the two inner leg pieces onto the sides of the belly piece.
Sew the back pieces onto the belly and inner leg piece, leaving the arm notches alone to make the arm holes. Sew all the way around the inner leg and to the center line on the belly where the dart seam sits. There may be some overlap/extra on the back piece.
Sandwich the tail between the two back pieces and sew them together. You can adjust the angle of the tail before you sew it in, the original plushie has its tail sticking up behind the back. (Tip: if you fully close the tail seam you can use a loose couple of stitches to attach it to the body to make a hanging tail that wags when you pick up and shake the plushie.)
Your current parts should be a head, a body, two arms, and the hair piece.
Step 10
Attaching the hair piece to the head.
(OPTIONAL): First, if you want to add a keychain loop like the original plushies, snip two tiny holes into the backing of your hair piece about 6mm apart and feed a small length of cord or ribbon inside to create a loop on the outside.
Leave plenty of slack on the ends of the loop for a more sturdy hold.
Secure the loop and holes with a lot of sewing and/or glue to keep the fur fabric from fraying. Stitch down the ends of the cord/ribbon to the backing of your hair piece.
Start sewing the hair piece to the head beginning with the hairline along the forehead to get it nice and clean. Next sew across the ears and down the face piece on both sides.
Your head should now have hair, with the rest of the mane hanging down behind.
Step 11
Sew head to body.
Make sure the chin piece lines up to the belly piece, the bottom of the head should line up with the rest of the back piece on either side.
Next, sew down one side of the hair piece to the back piece, connecting the bottom edge to the seam near the tail and stopping.
Leave the other side seam of the hair piece open for arm adjustment and stuffing.
Step 12
Attach the arms.
Tension Band Explanation:
The original plushies have an arm tension band inside to keep the plushie's shape and seams intact when pulling on the arms. Generally I think this can be skipped without much issue, but could be a good idea if you plan to use this as a bag hanger or keychain plush, as the arms are the extremities most susceptible to getting caught on things, and when they are secured more comprehensibly they are less likely to rip the plush apart when yanked. Not a big deal if you just plan to keep them around the house.
(OPTIONAL): If you want to install your own arm tension band, start with the plushie right-sides-out. Sew the band to one arm and pull it taught through the chest to the other arm, securing the tension band before sewing the arms into the body piece.
To sew the arms, be sure to pose them and pin them in place right-side out first. (originals usually have one arm down and the other up on their chins/waving, though they vary a lot and there are plenty of ways to position them for different expressions.)
Then, either turn insideout again or ladder stitch the arms into place.
Almost there! You should have all your pattern pieces together at this point.
Step 13
Stuffing the plushie.
Make sure your plushie is right side out, with no incorrect seams or holes other than one of the seams between the hair piece and back piece. If you need to, gently prod a crochet hook or chopstick along the backs of seams to turn them out.
OPTIONAL: To make a weighted plush, add a small mesh bag of plastic pellets or weight of your choice to the bottom of the plushie before stuffing.
Add in your polyfill, pillow fluff, yarn fibers, scraps, or whatever you decide to stuff the plushie with, paying attention to the density of the stuffing.
I recommend keeping the head and feet more densely stuffed to keep their shape while leaving the body a bit more loose for a squishable belly.
Step 14
Close up the last seam.
Using a ladder stitch, close up your last seam, pulling tight and tying off your thread at the end for a clean, invisible seam.
Now that all the seams are in, you can now brush or pick any long fibers from the hair and tail out of the seams.
The plushie is whole! You can keep it like it is, or do some thread sculpting for a more finished look!
Step 15
Thread Sculpting.
(OPTIONAL):
Using thread in the color of your body fabrics, you can pull tension at various points to create a more sculpted shape. The original had two through the face (vertically through the chin up behind the forehead, and horizontally between the corners of the eyes), and two over top of each hand and foot to look like the separation of the toes. See the original pattern pieces for precise placement.
And that's it! You should have a finished plush kyrii!
If you have any questions or concerns please contact doggyspeak. Feel free to use this pattern, share it, or edit it with or without credit.
PLEASE DO NOT SELL THIS PATTERN OR INSTRUCTIONS! IT IS BOTH NOT ORIGINALLY DESIGNED BY ME AND ALSO SOMETHING I'VE WORKED VERY HARD ON!
If you would like to see more pattern reconstructions from me, show me your finished plushies and provide feedback and suggestions to me. I would love to see what you have made and hear what you'd like to see next! ^o^
#neopets#Next time I make a new kyrii plush I will snap pictures of each step to add to the instructions!#doggyspeakart#plushie#plushie pattern#sewing patterns#bootleg#thanks for your patience I got over an illness 2 weeks ago and have spent most of my free days since then doing dentist or house stuff!!
226 notes
·
View notes
Text
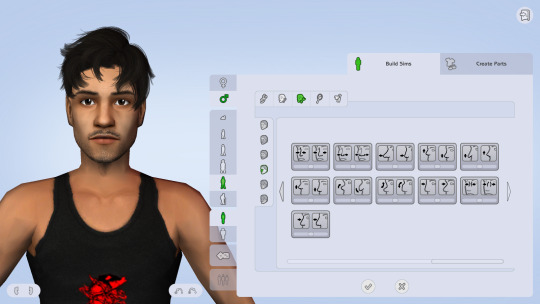
Updated Resource List: UI Edition (Updated 11/10/24)
This is all the mods in my downloads folder that changes the game UI and makes it look better on modern display, removes annoyances etc. My old resource list only listed 3 which have since been replaced.
I play on a 2k monitor with the game set to 1080p with the default UI because I like the nostalgic look.
If you use cleanUI by @greatcheesecakepersona, then many of the widescreen fixes are already included! Many of these also have an alternative version made for cleanUI.
Loading screen replacement:
UC loading screen by @eddysims replace the Fun With Pets logo and removes idle M&G sims on select menu (I use an older version to match the Super Collection for mac, but have combined with this to remove the idle sims).
UC startup strings by @simsllama replace the M&G text strings while loading to fit Ultimate Collection.
M&G to UC program name replacement (MTS) changes the program name to say Ultimate Collection on taskbar, when closing the game and in credits. I use the old original Sims 2 icon in start menu.
More UI mods below my loading screen.
Removed or disabled buttons:
No delete button in Sim Bin by Chris Hatch avoid accidentially deleting a family in the neighborhood.
No delete button in Buy/Build mode by Chris Hatch. I prefer to delete cc in the downloads folder instead.
Edited No useless town buttons by ePSYlord. Removes the AL, FT and Pets buttons from upper select menu in hood view. It also disables Custom Content Browser button to the old sims2 webpage, the camera and video buttons which I never use but always accidentially click.
Removed Auto Login button by ePSYlord. Removes the redundant option in settings.
No delete button in CAS, edited More Columns in CAS by ePSYlord. This is an edit of Chris Hatch's ui mod (cas300Extra) that adds the columns while also removing delete button from all categories. I had difficulty getting it to work for me, but managed after changing load order and removing specific cc hairs.
Remove hood popup dialog box reoploaded on MATY. No more nagging to add subhoods when entering a neighborhood.
Visual annoyances begone:
No CC icon in CAS (MTS) hides the star on custom content.
No pause frame by @simnopke removes the red frame from live, buy and build mode.
Add store icon to CAS by @jawusa. Restore the TS2 Store Edition icon on store content which can all be found here.
Widescreen fixes:
Wider change appearance by Chris Hatch.
Wider buy/plan outfits by Chris Hatch.
Wider family tree by SixAM!
Wider design tool by @lamare-sims.
Wider collections by Chris Hatch.
Menu fixes or addons:
Subhood selection by Mootilda changes menu from big button to list of selections instead. Useful if playing with multiple subhoods.
Select your cemetery (MTS) adds dialog box to move tombstones if all sims on a lot die.
Baby Last Name Chooser by @midgethetree adds dialog box to choose a baby's last name when born.
Marriage Last Name Chooser (MTS) adds dialog box to choose last name after sims gets married.
Misc. UI changes:
Clearer need bars by simnopke. It just looks nicer.
Season icons in color (MTS). Replace the blue with colorful icons.
LTW icons fixed by Lamare. Resizes the Life Time Wants icons to be consistent.
I think that was everything concerning the user interface in my game. A lot more than anticipated and most added in the last year or so. My game looks so nice now!
If you have other UI mods or dialog box addons that isn't on the list, then please leave a suggestion for me 🥰
313 notes
·
View notes
Text
I'm seeing some frustration over fandom creatives expressing anger or distress over people feeding their work into ChatGPT. I'm not responding to OP directly because I don't want to derail their post (their intent was to provide perspective on how these models actually work, and reduce undue panic, which is all coming from a good place!), but reassurances that the addition of our work will have a negligible impact on the model (which is true at this point) does kind of miss the point? Speaking for myself, my distress is less about the practical ramifications of feeding my fic into ChatGPT, and more about the principle of someone taking my work and deliberately adding it to the dataset.
Like, I fully realize that my work is a drop in the bucket of ChatGPT's several-billion-token training set! It will not make a demonstrable practical difference in the output of the model! That doesn't change the fact that I do not want my work to be part of the set of data that the ChatGPT devs use for training.
According to their FAQ, ChatGPT can and will use user input to train itself. The terms and conditions explicitly state that they save your chats to help train and improve their models. (You can opt-out, but sharing is the default.) So if you're feeding a fic into ChatGPT, unless you've explicitly opted out, you are handing it to the ChatGPT team and giving them permission to use it for training, whether or not that was your intent.
Now, will one fic make a demonstrable difference in the output of the model? No! But as the person who spent a year and a handful of months laboring over my fic, it makes a difference to me whether my fic, specifically, is being used in the dataset. If authors are allowed to have a problem with the ChatGPT devs for scraping millions of fics without permission, they're also allowed to have a problem with folks handing their individual fics over via the chat interface.
I do want to add that if you've done this to a fic, please don't take this as me being upset with you personally! Folks are still learning new information and puzzling out what "good" vs. "bad" use is, from an ethical standpoint. (Heck, my own perspective on this is deeply based on my own subjective feelings!) And we certainly shouldn't act like one person feeding a fic into ChatGPT has the same practical negative impact, on a broad societal scale, as a team using a web crawler to scrape five billion pieces of artwork for Stable Diffusion.
The point is that fundamentally, an ethical dataset should be obtained with the consent of those providing the data. Just because it's normalized for our data to be scraped without consent doesn't make it ethical, and this is why ChatGPT gives users the option to not share data— there is actually a standardized way (robots.txt) for website servers to set policies for how bots/crawlers can interact with them, for exactly this reason— and I think fandom artists and authors are well within their rights to express a desire for opting out to be the socially-respected default within the fandom community.
#maybe this is an ice cold take but i've been meaning to go off about datasets for a while so here we are i guess#i can respect what op's frustrations were and what they were trying to get at! but also i do not want my fic in chatgpt's dataset#regardless of whether it will make a practical difference#and again i don't think the people doing this are necessarily bad actors or having a huge negative social impact#chatgpt#chat gpt#ai#fandom#negative#(possibly! i'm trying not to be!! especially because this is very feelings-based and there are many things i am not considering)#the model may not demonstrably change because of your fic. but it does have your fic now and that does matter maybe idk
2K notes
·
View notes
Text
Basic Pathologic 3: Quarantine Cheats
To use any cheats, toggle open the developer overlay with Ctrl+Shift+`. This view will default to the Info menu, which displays information about your hardware and performance. Use the dropdown in the top left to switch between menus.
From the Settings menu, you can toggle on and off several useful cheats as well as in-game settings. Here are the most useful options:
Debugs:
UIVisible: Turning the entire user interface off is basically “photo mode�� – useful to take pretty screenshots. You’ll need to turn it back on to access the map or menus.
DebugMove: Get around quickly! Enables jumping, and boosts your running and jumping speed. This allows you to go out of bounds.
DevMenu:
DebugVisible: Enables a submenu of the Main Menu from which you can load saved games, and another that lets you load into any scene in the game. If you try to load a scene that doesn’t exist (like Grief’s lair), the game will hang while loading.
From the Console menu, you can enter commands to affect the game state. Type “?” to view the list of all commands.
camera: Use “camera Fly” and “camera FirstPerson” to toggle a fast fly camera mode which does not move the player entity.
game_save: Use this command to save your game. You can add a second argument to specify the save file name.
item_add: Type “item_add ?” to view the list of all items, then “item_add item_name.def” to add them to your inventory.
player_parameter: View and modify various player setting values.
time_set: Sets the time of day. For example, “time_set 13h 30m 2s” for 1:30:02 pm. This appears to only affect the skybox.
weather_set: Sets the current weather (type “weather_set ?” for the list). For example,
“weather_set Empty 0” disables all clouds.
“weather_set Clouds 0” makes the skies entirely overcast.
"weather_set "Rain 0.8" 0" makes it overcast and furiously raining.
“weather_set MainMenu 0” changes the weather to localized rain, while small clouds quickly blow past.
#The rest are either not super useful or we're still figuring them out :-)#quarantine#pathologic#console
145 notes
·
View notes
Text
Tumblr Hack Day, September 2024 Edition
Once again it was Hack Day at Tumblr! You've probably seen one of these posts before. A couple of times per year we slow down our normal work and spend a day working on scratching a personal itch or features we want as user and see how far we can get with our hacks. One thing from the last Hack Week in January made it out: new default blog avatars!
Here are some of the projects that got built for our most recent Hack Day in September. Some of these things you may also end up seeing on the site… and one of them isn’t included here because it’ll likely be a fun Halloween surprise. 👻
Advanced search operators
Instead of telling you about this here, we have the extreme pleasure of telling you that this already launched! Read all about it over on the Changes blog. Instead, what we can preview here are some potential new interface elements for these advanced search options, now that we have them thanks to @lesianlen:

“Live” engagements on posts
There are many thousands of reactions, likes, and reblogs happening on Tumblr every second. Right now you can only really “see” these happen if you are frantically refreshing your feed (which, we know, some of you do). Wouldn’t it be neat if the note count, reactions, etc, all update automatically as you scroll your favorite feed (or many feeds at once with Patio)? Check it out this hack from @leogcrespo:

Communities activity tracker
Likewise, some of our beta testing Communities are extremely active, with new members, comments, and reactions flying around. Right now we don’t have a way to show those actions, as they happen, inside the community, but we know we’ll need something like this. @yi5h hacked together a sidebar widget “activity tracker” that shows recent activity happening inside a community in near-real-time:

As always, stay tuned to the @changes blog to see if any of these hacks make it on Tumblr for real! Especially the aforementioned-but-as-yet-unrevealed Halloween surprise…
260 notes
·
View notes
Text
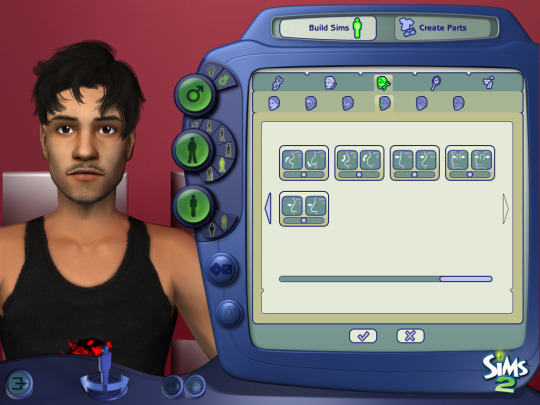
How to Fully Overhaul The Sims 2 Bodyshop (Mods List)
Here are all the mods you can use to make your BodyShop look like this:
or even something like this:

This is how the default BodyShop looks. Is small, dark, and kinda ugly:

Brightness
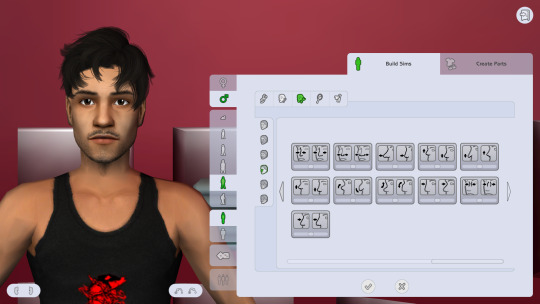
The Brightening up BodyShop mod by WesHowe on MTS will make BodyShop look like this:
There are 3 levels of brightness to choose from. I use the XB version.
Widescreen + Clean/Starship UI
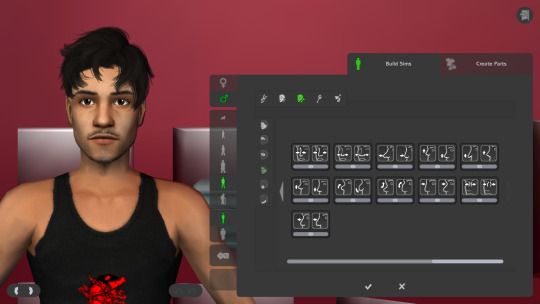
Using BodyShop Clean UI & Widescreen by SmugTomato on MTS with the previous mod, will make BodyShop look like this:
Or if you prefer a darker interface, you can use the Starship UI Bodyshop by redandvidya on MTS:
Backgrounds
There are two kinds of backgrounds on BodyShop; a 3D scene and a 2D image. The 3D scene is the one you see in the pictures above, and the 2D is a flat image that appears when you press F5. There are default replacements for both of these, and you can have one of each type at the same type without problems.
2D Backgrounds
If you want to change the background that shows when you press F5, you can use one of these plain color backgrounds by @kat-simss. Here's how one of these looks:
Or you can use one of these matching Clean UI backgrounds by @davely-1. Here's how one of these looks:

3D Backgrounds
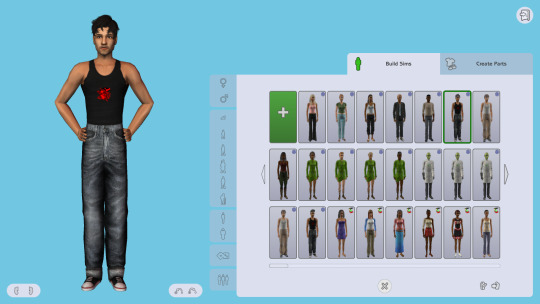
If you want to change the background that shows when you open BodyShop without you having to press F5, you can use one of these replacements by @socialbunny. Here's how one of these looks:
Or you can use one of these by windkeeper on MTS, that seem flat but are actually a 3D scene (so you can have 'flat' backgrounds without having to press F5 each time you open Bodyshop). Here's how one of these looks:

I think that's all!
#thesims2#sims2#ts2#sims2cc#ts2cc#s2cc#sims 2 mods#ts2 mods#bodyshop#sims 2 bodyshop#default replacement#ts2 defaults
849 notes
·
View notes
Text

Chop Shop is strictly 18+ for language, themes, and potential explicit content.
🔗 - Game Intro | Bug Report | Ko-Fi
Episode Three is now available! (+ 86,000) - PLAY HERE
Get your first taste of the underground car scene.
Meet some other players in the game.
Be made an offer.
5 achievements up for grabs!
And more!
AN: thank you so much for the patience - i've been dying to put this update out. lots of new characters and lots of variation!! there are 3 major paths to choose between in this ep, i recommend trying them all out! and thank you to my betas for keeping me sane lmao
This update comes with a patch and UI refresh (Version 1.1.2) Notes are under the cut. If preferred, you can access them in game in the start menu.
STORY
EPISODE 01:
MC should now be able to smoke! Buying cigarettes at the shop was not triggering correctly. If playing with an old save, you DO NOT have to restart as code at the beginning of EP 03 has resolved the error. Player will need to restart if they wish to read smoking related scenes in previous episodes.
Updated MC Name selection. Player can now choose from a list of names instead of having to input one to proceed.
Player can now give Taha their chocolate bar if it's in their inventory.
When asking Maz about their scars, the second choice 'You want to ask about it but you're going to keep your mouth shut.' should now take you to the correct response.
Extended and updated 'End Game' scenes.
EPISODE 02:
If MC is faint after exiting the car, but also drunk, they should now get the fainting scene, followed by Dilani helping the MC in the bathroom.
UI + TECHNICAL
SETTINGS:
Autoname Save is now defaulted to ON. This is to add ease and flow to gameplay, especially for mobile, tablet, and app users, instead of calling for an inputted saved name. If player wants to input save names, toggle Autoname Saves to OFF.
Autoname Save previously only used the forename of the MC but now includes the surname as well.
Removed the Fullscreen toggle as it is only intended for desktop use. Player can still toggle fullscreen function via the UI bar on the desktop interface.
Added a choice indicator toggle. (This probably won't come into effect until EP 04 or 05)
Changed serif font from Vollkron to EB Garamond.
OTHER:
Changing the MC's pronouns via the Dashboard has been updated. Additionally, after confirmation will take player back to the Dashboard and not close the dialog boxes entirely.
Hovering over 'Personality', 'Motives', and 'Skills' titles in the Dashboard will now display an information box with a definition. Mobile and tablet users will need to tap on the title.
'Resume Game' now only appears on the main menu when there is an autosave in the saves log.
Choices styling changes.
General UI and button style changes.
Fixed errors with the text message styling.
Added styling for reading text off of a page in game.
Darkened blue in light theme 'Skyline' to reduce eye strain.
CREATE A SAVE
Introducing Create a Save! This feature allows players to quickly manufacture a save file and start at a later point in the game.
Set your identity, appearance, history, and statistics; including personality, motives, and skills. Continue to set key decisions made in previous episodes.
Randomise options available for creating a PC and key decisions.
OTHER
Fixed gaps and spacing issues.
Minor phrasing and sentence structure changes.
Grammar and typo fixes.
whew -- that's a lot of patch notes! apologies for so much that needed to be fixed.
this update shouldn't break/ mess with saves but as a disclaimer i will say, if you spot anything funky, broken, or you don't think things are triggering correctly, try starting a new save. the new create a save feature is incredibly code heavy, and it's been tested relentlessly, but i wouldn't be surprised if something crops up.
if starting a new save doesn't resolve your issue - please submit to bug report or just send me an ask/message.
some things have been meaning to get fixed for Some Time - thank you to everyone that is using the bug report form!
apologies if there are typos and/or bugs - this was a long one to edit and my lovely betas did an OUTSTANDING job reading so much for ep 3 - thank you so much again!!! this time i am going to give it a bit more time before i put together a patch so i can grab more error responses haha.
create a save has also added a wee chunk to the word count, somewhere around 6k, but i'm not including it in the episode 03 word count as it's purely code. so, if you think the total wc is off, that's why!
if you've read this far, happy reading and thank you so much for the continued support!! :) - becky <3
679 notes
·
View notes
Note
Please, please explain how to install and use linux like I'm 5 years old. I'm so sick of windows adding AI and other bullshit to my already struggling elderly laptop but I'm really not good with computers at all so I have no idea where to start with Linux.
Okay, so, I'm going to break this down into steps I would give the average tumblr user first, and then if any of them are confusing or use words you don't understand, ask me and I'll explain that step in greater detail.
Step 0) BACK. UP. YOUR. SHIT.
NEVER EVER EVER CHANGE YOUR OPERATING SYSTEM WITHOUT A COMPLETE BACKUP OF ALL YOUR FILES.
Step 1) Learn your machine. You need to know:
How much RAM you have
If your processor is 32 or 64 bit
How big your hard drive is
On windows, you can find out all of this by going to the start menu, typing "about" and opening the first result on your system instead of the internet.
For additional instructions, visit this page.
Step 2) Pick your Linux.
There's like 10,000 kinds of Linux, each tailored to particular functions that the end-user (that is you!) might want to have. The sheer amount is very daunting, so first I'm going to give my suggestions, then I'll explain how to pick for yourself.
For Mac users, I suggest Kubuntu. For windows users, I suggest Mint Cinnamon. If your laptop is really REALLY old, I recommend Sparky Stable, which is the lightest weight Linux I would ever suggest for a new user. In every case, download the version suited to your processor (32 bit can be labelled "x86" or "32 bit"; 64 bit is always labelled "64 bit").
If you want to try a different type of linux, you'll need to make sure your laptop meets the "minimum specs" or "system requirements." These numbers tell you how much RAM, processor and hard drive space the linux will use. (That's why you needed those numbers at the beginning.)
Step 3) Collect your supplies. You're going to need:
An ISO burning program compatible with your current system, like Balena Etcher.
A copy of the ISO file for the Linux you want to use.
Your laptop.
An 8gb or larger USB flash drive.
Step 3) Make a bootable USB drive
Install Balena Etcher, hitting "okay" and "next" when prompted. Last I checked, Etcher doesn't have adware attached, so you can just hit next every time.
Plug your USB drive into the laptop.
Open Etcher.
Click "flash from file" and open the ISO file with your Linux on it.
Click "Select target" and open the USB drive location. Hit the "flash" button. This will start writing all the linux installer data to your flash drive. Depending on the speed of your machine, this could take as long as 10 minutes, but shouldn't be much longer.
Step 4) Boot to the USB drive
This is, in my opinion, the trickiest step for a lot of people who don't do "computer stuff." Fortunately, in a rare act of good will, Windows 10 made this process a lot easier.
All you'll need to do is go to settings, then recovery, then advanced startup and pick the button labelled "use a device."
This tutorial has images showing where each of those is located. It's considered an "advanced setting" so you may get a spooky popup warning you that you could "harm your system by making changes" but we're not doing anything potentially harmful so you can ignore that if you get it.
Step 5) Try out linux on the flash drive first.
Linux installs using a cool little test version of itself that you can play around in. You won't be able to make changes or save settings, but you can explore a bit and see if the interface is to your liking. If it's hideous or hard to navigate, simply pick a new linux version to download, and repeat the "make a bootable USB" step for it.
Step 6) Actually install that sucker
This step varies from version to version, but the first part should be the same across the board: on the desktop, there should be a shortcut that says something like "install now." Double click it.
Follow the instructions your specific linux version gives you. When in doubt, pick the default, with one exception:
If it asks you to encrypt your drive say no. That's a more advanced feature that can really fuck your shit up down the road if you don't know how to handle it.
At some point you're going to get a scary looking warning that says 1 of 2 things. Either:
Install Linux alongside Windows, or
Format harddrive to delete all data
That first option will let you do what is called "dual booting." From then on, your computer will ask every time you turn it on whether you want Windows or Linux.
The second option will nuke Windows from orbit, leaving only linux behind.
The install process is slower the larger your chosen version is, but I've never seen it take more than half an hour. During that time, most linux versions will have a little slideshow of the features and layout of common settings that you can read or ignore as you prefer.
Step 7) Boot to your sexy new Linux device.
If you're dual booting, use the arrow keys and enter key to select your linux version from the new boot menu, called GRUB.
If you've only got linux, turn the computer on as normal and linux will boot up immediately.
Bonus Step: Copy Pasting some code
In your new start menu, look for an application called "terminal" or "terminal emulator." Open that up, and you will be presented with an intense looking (but actually very harmless) text command area.
Now, open up your web browser (firefox comes pre-installed on most!), and search the phrase "what to do after installing [linux version you picked]"
You're looking for a website called "It's FOSS." Here's a link to their page on Mint. This site has lots and lots of snippets of little text commands you can experiment with to learn how that functionality works!
Or, if you don't want to fuck with the terminal at all (fair enough!) then instead of "terminal" look for something called "software manager."
This is sort of like an app store for linux; you can install all kinds of programs directly from there without needing to go to the website of the program itself!
296 notes
·
View notes
Text

Welcome back, coding enthusiasts! Today we'll talk about Git & Github , the must-know duo for any modern developer. Whether you're just starting out or need a refresher, this guide will walk you through everything from setup to intermediate-level use. Let’s jump in!
What is Git?
Git is a version control system. It helps you as a developer:
Track changes in your codebase, so if anything breaks, you can go back to a previous version. (Trust me, this happens more often than you’d think!)
Collaborate with others : whether you're working on a team project or contributing to an open-source repo, Git helps manage multiple versions of a project.
In short, Git allows you to work smarter, not harder. Developers who aren't familiar with the basics of Git? Let’s just say they’re missing a key tool in their toolkit.
What is Github ?
GitHub is a web-based platform that uses Git for version control and collaboration. It provides an interface to manage your repositories, track bugs, request new features, and much more. Think of it as a place where your Git repositories live, and where real teamwork happens. You can collaborate, share your code, and contribute to other projects, all while keeping everything well-organized.
Git & Github : not the same thing !
Git is the tool you use to create repositories and manage code on your local machine while GitHub is the platform where you host those repositories and collaborate with others. You can also host Git repositories on other platforms like GitLab and BitBucket, but GitHub is the most popular.
Installing Git (Windows, Linux, and macOS Users)
You can go ahead and download Git for your platform from (git-scm.com)
Using Git
You can use Git either through the command line (Terminal) or through a GUI. However, as a developer, it’s highly recommended to learn the terminal approach. Why? Because it’s more efficient, and understanding the commands will give you a better grasp of how Git works under the hood.
GitWorkflow
Git operates in several key areas:
Working directory (on your local machine)
Staging area (where changes are prepared to be committed)
Local repository (stored in the hidden .git directory in your project)
Remote repository (the version of the project stored on GitHub or other hosting platforms)
Let’s look at the basic commands that move code between these areas:
git init: Initializes a Git repository in your project directory, creating the .git folder.
git add: Adds your files to the staging area, where they’re prepared for committing.
git commit: Commits your staged files to your local repository.
git log: Shows the history of commits.
git push: Pushes your changes to the remote repository (like GitHub).
git pull: Pulls changes from the remote repository into your working directory.
git clone: Clones a remote repository to your local machine, maintaining the connection to the remote repo.
Branching and merging
When working in a team, it’s important to never mess up the main branch (often called master or main). This is the core of your project, and it's essential to keep it stable.
To do this, we branch out for new features or bug fixes. This way, you can make changes without affecting the main project until you’re ready to merge. Only merge your work back into the main branch once you're confident that it’s ready to go.
Getting Started: From Installation to Intermediate
Now, let’s go step-by-step through the process of using Git and GitHub from installation to pushing your first project.
Configuring Git
After installing Git, you’ll need to tell Git your name and email. This helps Git keep track of who made each change. To do this, run:

Master vs. Main Branch
By default, Git used to name the default branch master, but GitHub switched it to main for inclusivity reasons. To avoid confusion, check your default branch:

Pushing Changes to GitHub
Let’s go through an example of pushing your changes to GitHub.
First, initialize Git in your project directory:

Then to get the ‘untracked files’ , the files that we haven’t added yet to our staging area , we run the command

Now that you’ve guessed it we’re gonna run the git add command , you can add your files individually by running git add name or all at once like I did here

And finally it's time to commit our file to the local repository

Now, create a new repository on GitHub (it’s easy , just follow these instructions along with me)
Assuming you already created your github account you’ll go to this link and change username by your actual username : https://github.com/username?tab=repositories , then follow these instructions :


You can add a name and choose wether you repo can be public or private for now and forget about everything else for now.

Once your repository created on github , you’ll get this :

As you might’ve noticed, we’ve already run all these commands , all what’s left for us to do is to push our files from our local repository to our remote repository , so let’s go ahead and do that

And just like this we have successfully pushed our files to the remote repository
Here, you can see the default branch main, the total number of branches, your latest commit message along with how long ago it was made, and the number of commits you've made on that branch.

Now what is a Readme file ?
A README file is a markdown file where you can add any relevant information about your code or the specific functionality in a particular branch—since each branch can have its own README.
It also serves as a guide for anyone who clones your repository, showing them exactly how to use it.
You can add a README from this button:

Or, you can create it using a command and push it manually:

But for the sake of demonstrating how to pull content from a remote repository, we’re going with the first option:

Once that’s done, it gets added to the repository just like any other file—with a commit message and timestamp.
However, the README file isn’t on my local machine yet, so I’ll run the git pull command:

Now everything is up to date. And this is just the tiniest example of how you can pull content from your remote repository.
What is .gitignore file ?
Sometimes, you don’t want to push everything to GitHub—especially sensitive files like environment variables or API keys. These shouldn’t be shared publicly. In fact, GitHub might even send you a warning email if you do:

To avoid this, you should create a .gitignore file, like this:

Any file listed in .gitignore will not be pushed to GitHub. So you’re all set!
Cloning
When you want to copy a GitHub repository to your local machine (aka "clone" it), you have two main options:
Clone using HTTPS: This is the most straightforward method. You just copy the HTTPS link from GitHub and run:

It's simple, doesn’t require extra setup, and works well for most users. But each time you push or pull, GitHub may ask for your username and password (or personal access token if you've enabled 2FA).
But if you wanna clone using ssh , you’ll need to know a bit more about ssh keys , so let’s talk about that.
Clone using SSH (Secure Shell): This method uses SSH keys for authentication. Once set up, it’s more secure and doesn't prompt you for credentials every time. Here's how it works:
So what is an SSH key, actually?
Think of SSH keys as a digital handshake between your computer and GitHub.
Your computer generates a key pair:
A private key (stored safely on your machine)
A public key (shared with GitHub)
When you try to access GitHub via SSH, GitHub checks if the public key you've registered matches the private key on your machine.
If they match, you're in — no password prompts needed.
Steps to set up SSH with GitHub:
Generate your SSH key:

2. Start the SSH agent and add your key:

3. Copy your public key:

Then copy the output to your clipboard.
Add it to your GitHub account:
Go to GitHub → Settings → SSH and GPG keys
Click New SSH key
Paste your public key and save.
5. Now you'll be able to clone using SSH like this:

From now on, any interaction with GitHub over SSH will just work — no password typing, just smooth encrypted magic.
And there you have it ! Until next time — happy coding, and may your merges always be conflict-free! ✨👩💻👨💻
#code#codeblr#css#html#javascript#java development company#python#studyblr#progblr#programming#comp sci#web design#web developers#web development#website design#webdev#website#tech#html css#learn to code#github
66 notes
·
View notes
Text
Bodyshop Shortcuts Tutorial for Beginners (The Sims 2)
F3: Toggles the free camera mode. While in this mode, click and hold left mouse button to rotate, right mouse button to zoom in and out, and both mouse buttons to move the camera around.
F5: Toggles the Bodyshop background (the shelves with clothes, the rotating stage and all that) on and off. By default, turning it off will show a solid black background. You can change this background to any image by adding a bmp image file to your Documents/EA Games/The Sims 2 folder. Make sure the bmp file is called "userBkg.bmp".
F6: Sets the sim model to a T pose. This is useful for previewing retextured or custom clothes you made. To set the sim back to the regular pose, make any changes, like changing their clothes or hair.
F7: Sets the camera (while out of free camera mode) to the default full body position, the one that appears when you change skintones and clothes.
F8: Sets the camera (while out of free camera mode) to the default close up position, the one that appears when you change eyes, hair face details and accessories.
F9: Toggles the UI (user interface) on and off. When the UI is hidden, the sim snaps to the center of the window. The UI buttons won't work while the UI is hidden.
145 notes
·
View notes
Note
As one of your younger followers I’m surprised that blogs are. . . New? Newer than I thought at least. I guess I always misunderstood what Web 1.0 really was (I grew up web Web 2.0) and I always thought that, outside of informational topics, a big feature of Web 1.0 would be people talking about their lives and interests — tho granted with little to no communication/replies from others. Huh, TIL.
--
Yeah, things really changed a lot and perhaps even more quickly than now at some points in the internet's development.
At the start of the 90s, it was all Usenet groups and service providers with their own forums you could only see if you had that service.
Free e-mail addresses became a thing in the mid 90s. Prior to that, it was all paid stuff like AOL, and prior to that, it was your university or IT job e-mail with your actual name in it. There were very few services, paid or otherwise, that provided you with an e-mail and access to the internet generally: it was all about selling access to a given company's proprietary hangout. There were some. My e-mail is from one. But that wasn't the norm.
(And, of course, prior to like 1995, "the internet" did not by default mean the web. Now, everything is the web or a web interface for your e-mail or something.)
When eGroups and Onelist and then Yahoo Groups arrived, it really changed things for fandom because you could run your own mailing list without knowing technical things. Some of the action drained away from Usenet to mailing lists.
Fandom dipped its toes into blogging sites immediately, but the giant wave of people getting Livejournals wasn't until 2003. I had one in 2002 through a friend, and it really wasn't this big fandom thing at the time. Some time around 2002/early '03, fans started trying to round up invite codes and get their favorite writers on there, and then LJ dropped the need to pay or have a code, and the flood away from mailing lists began.
(I guess web-based forums go in here somewhere, but I wasn't as active on them.)
In some ways, Discord is more like fandom on the early internet than either the LJ era or Tumblr eras were/are.
Most of the 90s stuff was more topic-specific. People socialized because people are people and frequently off-topic, but you were hanging out in The Place For Anime Fanfic or something, not so-and-so's personal diary with a comments section.
97 notes
·
View notes
Text
Complete-ish Guide To Settings You Might Want to Change
These instructions will be for desktop, because the settings are easier to find there. You can do the same on mobile, but it might be in different places.
Dash settings

Your dashboard is broken down into several feeds, including "Following" and "For You".
"Following" is primarily the posts of people you follow, "For You" is algorithmic.
If you just joined, "For You" is default, if you're a longtime user it's "Following". You can change this in the settings on the right
A lot of longtime users will tell you that the Following feed is where we spend most of our time. But try out all the feeds, and see what you like most.
The settings that are settings:
To start, click the settings gear under the account icon (the abstract person head).

This should take you to the General tab. Key settings:
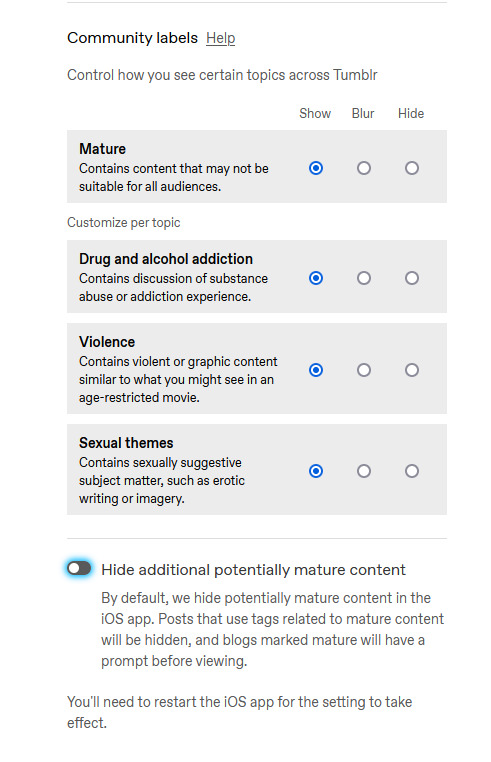
Community Labels: By default anything NSFW is silently hidden. You can change how each subtype is handled.
Hide Additional Mature Content: If you have an iPhone disable this or it'll hide every post from you on the off-chance it contains porn.
If you're under 18 as determined by the birthdate you entered on signup, you can't change these. (If you want them on, you'll have to make a new account and lie)
Under the "Dashboard" tab, you can enable timestamps, which is mostly just nice information to have. sometimes a post is from 2010 and you can be like wow.

The next four probably have the biggest impact on your tumblr experience, so I'm gonna do a breakdown.
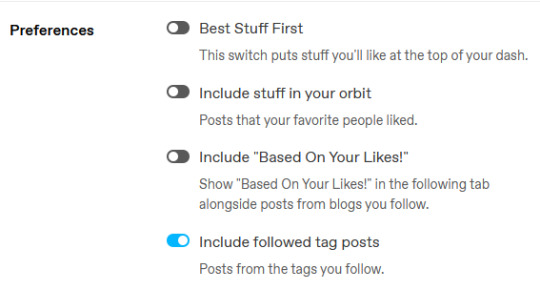
Best Stuff First reorders your "Following" to have popular posts at the top. Disabling it makes your feed chronological. I like it off, but up to you.
Include Stuff In Your Orbit and Based On Your Likes put various content from "For You" into "Following". Personally, I disable them to keep "Following" purely posts by people I follow, and then switch between feeds to get what I want.
Followed Tag Posts will put content from the "Your Tags" feed into your "Following" feed. Since you can go to the separate tags feed, I usually turn this off (it tends to show me a lot of duplicate posts), but up to you.
Under the "Notifications" tab you can tell Tumblr to stop sending you emails.

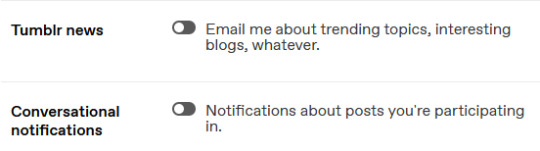
I'd recommend disabling all the emails--if you get a bunch of replies, Tumblr will happily send you dozens of emails, and you don't need that.
Notifications is the push-notifications in-app/in-website. The mobile app, for some reason, has a much better interface for controlling these, including the option to only get activity-notifications for mutuals. You can leave these on, or turn them off if you find the flood of notifications is distracting.
Tumblr News is a newsletter, it usually just has content from @fandom and the other staff-run recap blogs.
Conversational notifications sends you more emails.
Under the "Tumblr Labs" tab you can enable a bunch of cool beta tests.

I particularly suggest Reblog Graphs, What you Missed tab, & Popular Reblogs tab, but they're all fun to try out. A lot of these are honestly better than the For You dashboard.
For each blog you have, you can customize it's Blog Settings. Beyond things like setting an avatar or description, there's a few settings that are fun.

Custom Theme gives you your own subdomain at [blogurl].tumblr.com.
This makes your blog easier to search, and a lot of 3rd party tools depend on you enabling it. It also makes it easier to link your posts to people who don't have tumblr accounts.
You can completely customize the CSS/HTML/Javascript. you can go legitimately crazy. It's not a requirement, but if you want unlimited flexibility, go wild.
On the contrary, if you wanna run a more private blog, you can disable this and then hide your blog from search results/non-registered users.

Likes and Following are public by default. I like to turn these off so I don't have to worry about like, "what will people think if they see i'm following [...] or liking [...]". But it's also fair to keep them public if you'd like.
The other Blog Settings are important but pretty self-explanatory I think.
Finally, there's some useful tools I like:
XKit Rewritten - A bunch of scripts (like RES for Reddit). The one I really like is "mutual checker", which shows at a glance which blogs you are in mutuals with. Which is such a good feature it's included in the mobile apps by default i think.
siikr.tumblr.com - Tumblr search is bad, and google's indexing of tumblr blogs is worse. Siikr will find any post you've made on your blog. Because disk space is limited, only use it to search your blog, and if you're tech savvy consider running a local copy from source.
988 notes
·
View notes
Note
where do i go to draw with wiggly paint, (basically where do i go again but in a different form!) how do i draw with the wiggly paint,
you can play it on itchio! here's the link: https://internet-janitor.itch.io/wigglypaint
since it's a browser game you can technically open it up on your tablet, pc, or phone (i opened it up on my ipad) and it's a bit finicky on there since swipe down = exit full screen BUT with the power of very slow pencil strokes i managed to get around it
here's what the interface looks like when you first boot it up

on the side there are a bunch of fun brushes and colors to play with and the stick above the dynamite is the eraser, etc, etc. feel free to play around with it.
do note that the marker size only changes the brush size of the colors, not the size of the pens / airbrush / paintbrush
also also the little OOPS! button lets you undo and redo your last brush stroke

and while this is the default palette if ya press options down below

you're met with this menu and a whole slew of different color palettes to choose from

pick your fave, draw a little something something, and if ya want to save your wiggly little gif, just press export

name it, save it, post it, and you're done! there are definitely features that i don't know about, probably hidden in the tabs at the tippy top, but yeah hope this helped!

118 notes
·
View notes
Text
DEVLOG. Apple Bag
With 2025 approaching, it's time for a little update on our (potentially) murderous gals !
The development of Apple Bag has been slow, with many changes along the way, but progress has been made. Here’s what you can expect in the next demo update:
New GUI
The GUI design of the game is being reworked to better fit the aesthetic, replacing the default Ren'Py interface.
Additional Content and Demo Rewriting
The original demo, covering the prologue to Day 1, has been updated with improved writing to better introduce the characters.
Additionally, content from Day 2 to Day 4 will be included in the next demo. Starting on Day 2, events will diverge based on routes, and Day 4 will feature two different playable events. Upon release of the next update, there will be 15 days worth of content to play ( the lenght is still currently unsure )
Illustrations
The next update will include six brand-new CGs, with two for each love interest.

New sprites
All characters have been redrawn to match the current art style. This sprite update will also feature multiple outfit changes for recurring characters.

The development might be slow but Apple bag is not an abandoned project . Thank you for your patience and nice comments, hopefully I'll manage to offer you more content soon :}
If you haven't played yet, please consider taking a look at the current demo available on itch.io
#devlog#apple bag#my games#visual novel#amare game#dating sim#otome game#renpy game#indie dev#indie game#sapphic#indie visual novel#interactive game#romance game#idk what tag to add fam-#gay ass game ig
41 notes
·
View notes