#css text stroke
Explore tagged Tumblr posts
Visit Tumblr Blog
Explore Tumblr blogs with no restrictions, modern design and the best experience.
Last Seen Tumblr Blogs


Fun Fact
Tumblr’s website traffic is steadily declining.
Text

CSS Gradient Text Stroke
#html css#css text stroke#css text effects#css#html#frontend#css3#neduzone#css tutorial#frontenddevelopment#css tricks#html5#css effects#css gradient#css gradients#gradient text stroke
4 notes
·
View notes
Text
#workskin .rainbowStroke { -webkit-text-fill-color: black; background-image: -webkit-linear-gradient(-45deg,blue,magenta,red,orange,yellow,green,cyan); -webkit-background-clip: text; -webkit-text-stroke: 2px transparent; padding-left: 5px; margin-left: -5px; padding-right: 5px; margin-right: -5px;
}
edit: added four new lines to prevent bg clipping
spokeishere text (black text with rainbow stroke) if anyone wants it
idk if theres already a workskin that works just like/similar to this but i havent checked lol
breakdown of code for anyone too intimidated to play around with it (not an expert tho this is mainly just me listing down my conclusions after playing around with it, also written in a way thats assuming the reader knows fuckall about coding):
#workskin .rainbowStroke { -webkit-text-fill-color: black; background-image: -webkit-linear-gradient(-45deg,blue,magenta,red,orange,yellow,green,cyan); -webkit-background-clip: text; -webkit-text-stroke: 2px transparent; padding-left: 5px; margin-left: -5px; padding-right: 5px; margin-right: -5px;}
code name
> can be changed
> is what you use to define the code aka attach the properties to the actual text using text
text color
> webkit is what supports the existence of stroke hence why it's there and why you cant just use {color: black;}
> fill is what thickens the text, you can delete it but it makes the text harder to read
stroke colors aka the text outline
> deg is the way the colors are rotated, feel free to change the number and to make it positive or negative
what makes the stroke not just a square
> clipping for those of you unfamiliar with it just means it follows the shape of whats underneath it
stroke properties
> the px means pixels and indicates the size of the stroke
> transparent means it'll actually show whats underneath, it can be deleted but doing so will make the text moremuddy/desaturated
background overflow
> there to prevent the colors from being cut too short since nackground normally is almost the exact size of the text
> can be changed but will affect the colors, also having it too small will cause clipping
anything in black/white is code language properties, you cannot make anything without them
#writing#spokeishere#did this cause i wanted to try colorcoding in my fics but realized that spoke has a rainbow gradient thing going on#took me like 2 hours to get through all the technobabble and irrelevant info to find what i was actually looking for#https://stackoverflow.com/questions/61825324/css-gradient-text-with-opacity-and-gradient-text-stroke-outline#<---- shoutout to the guy from this question btw couldnt have done it without ya#https://stackoverflow.com/a/17756378#<------- also shout out this guy
6 notes
·
View notes
Text

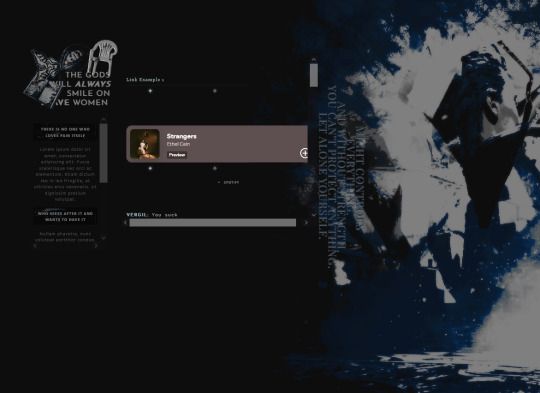
A masterpiece, truly. Waow. So professional, I only have one goddamn element and it's just to see what all of my damn links look like LMAO
h5 is giving me the most trouble. do you know how hard it is to add a stroke around text using css ? so you can have whatever headliner text you want instead of an extra image ? [ disgraced comedian dane cook voice ] do you even KNOW ?
anyway the three fonts are Playfair Display ( normal text ), Charm ( italic and strike-through ), and Victor Mono ( the sans serif font )
navigation links are going to change, I'm just working on the general text formatting before I do anything, and normal text is also going to be that same gray ( as you can see with H1, it's the color of the background grays ), and I'll probably change the text so it isn't italic and uppercase because that looks horrid ; I'll probably change the format of those two but this is what I got so far. Truly incredible.
Here's how Tumblr's going ( not much better, honestly ; that Spotify wrapper is giving me the MOST trouble . . . but look at my cute link icons hehe ). I'm probably going to shorten the Might Controls Everything text down so it's not a fucking paragraph of text, and all the other text is just a placeholder, obvs. and ofc i had to include the chair. it's his emotional support chair:
#▪──── ⚔ ❝ shall i entrust it... to him ? ❞ 「 mun 」#▪──── ⚔ ❝ ( I was going to wait to show off tumblr but I can't help it the icons are so cute ) ❞#▪──── ⚔ ❝ ( it's also not final I have to move a LOT of stuff around ) ❞
3 notes
·
View notes
Text
<!-------MUSIC PLAYER BY GLENTHEMES------->
<script src="//static.tumblr.com/gtjt4bo/QRmphdsdv/glenplayer02.js"></script>
<style type="text/css">
/*-------MUSIC PLAYER BY GLENTHEMES-------*/
#glenplayer02 {
position:relative;#container02;
bottom:0;
margin-bottom:0;
left:0;
margin-left:0;
display:flex;
z-index:99;
}
#glenplayer02 a {
text-decoration:none;
}
#glenplayer02 > div {
align-self:center;
-webkit-align-self:center;
}
.music-controls {
user-select:none;
-webkit-user-select:none;
width:25px;
font-size:20px;
cursor:pointer;
}
.playy, .pausee {
background: radial-gradient(circle, rgba(255,129,184,1) 0%, rgba(137,191,255,1) 100%);
-webkit-background-clip: text;
-webkit-text-fill-color:#FFFFC7A1;
-webkit-text-stroke-width: 0.4px;
-webkit-text-stroke-color: #ff2f8a;
-webkit-filter: drop-shadow(0px 0px 2px #fff);
} /* color of play & pause buttons */
.pausee {
display:none;
}
.sonata {
margin-left:3px;
margin-bottom:0;
color:#222; /* color of music note symbol */
}
.label text {
margin-bottom:0;
margin-left:0px;
font-family:courier new;
font-size:9px;
color:#222; /* color of song title */
}
</style>
<body>
<!-------MUSIC PLAYER BY GLENTHEMES------->
<div id="glenplayer02">
<div class="music-controls" onclick="songstart();">
<div class="playy">►</div>
<div class="pausee">❚❚</div>
</div>
<div class="sonata"></div>
<div class="labeltext"><img src="https://64.media.tumblr.com/0e377b53af377447f9b145b1fdcd8d4d/1cec31ea271359b0-d5/s75x75_c1/eedee452b4c4bf95c6b6ce67231db672f1436932.gifv"></div>
</div><!--end music player-->
<audio id="tune" src="https://dl.dropbox.com/scl/fi/swznmgg4dgvspnr5qt8cz/supernova-love-slowed.mp3?rlkey=kt9lwntaquvnz0io85gzazl01&st=6oxy14ea&dl=0"></audio>
<script src="//ajax.googleapis.com/ajax/libs/jquery/1.7/jquery.min.js"></script>
0 notes
Text
CSS text-stroke
This CSS property adds a stroke to the text and also provides decoration options for them. It defines the color and width of strokes for text characters.
This CSS property is the shorthand of the following two properties:
text-stroke-width: It describes the thickness of the stroke effect and takes the unit value.
text-stroke-color: It takes the value of a color.

0 notes
Text
5 Udemy Paid Courses for Free with Certification. (Limited Time for Enrollment)

1. Essential Photoshop Course for Beginner to Advanced
Learn Photoshop Layer, Image Color Adjustment, Retouching, Text Style, Shape, Symbol, Content-Aware
What you'll learn
Interface and Tools
Retouching
Masking
Layer
Shape and Symbol
Shadow
Transform, Warp & Distort
Export
Color and Adjustment
Content-Aware & Cropping
Gradient Stroke & Bevel
Blur & Filters
Take This Course
👇👇👇👇👇👇👇
5 Udemy Paid Courses for Free with Certification. (Limited Time for Enrollment)
2. Web Design Course for Beginners to Intermediate
Learn the Basics of HTML, CSS, and WordPress and get Started with Web Design
What you'll learn
Tag Element Attributes
Choosing Editor
Visual Studio Setup
Structure and Title
Text and Heading
Text, Font, Background Color
Text Formatting
Page Link and Hyperlink
Adding and Resizing the Image
Take This Course
👇👇👇👇👇👇👇
5 Udemy Paid Courses for Free with Certification. (Limited Time for Enrollment)
3. Google Ads 2024: How to Drive Sales With PPC!
Get started with Google Ads and launch effective PPC advertising campaigns to reach new customers and grow your business
What you'll learn
How Google Ads (Adwords) works, its pros, and cons
About the different types of PPC ads, including search, display, and social media ads, and how to create effective campaigns for each
How to create a Google Ads account and contact Google Ads Support
How to launch and optimize successful Google Ads Campaigns
Creating Google Ads Bidding Strategies
Setting up the campaign budget, bidding strategy, Ad rotation, and geo-targeting
How to write an ad and ad extensions
How to conduct keywords research and group keywords
How to determine a budget based on your keyword research
Working with Google Ads Editor
How to use Google Trends to understand your search demand seasonality
Setting up Google Analytics account and goals
How to list your macro and micro conversions
Installing Google Tag Manager, and Google Analytics tracking code
How to launch remarketing ads campaign to convert, up-sell, and retain customers
How to conversion tracking to get the most out of your advertising budget
Take This Course
👇👇👇👇👇👇👇
5 Udemy Paid Courses for Free with Certification. (Limited Time for Enrollment)
4. Facebook Ads MasterClass - All Campaign Creations & Features
Learn How To Create Campaigns, Pixel Setup, Facebook Retargeting, Custom Audience Targeting, A/B Testing
What you'll learn
Bring Sales, Leads & Website Traffic To Your Online Business
Get In-Depth Knowledge Of Facebook Ads To Grow Your Online Business
Learn To Create Sales Campaigns, Lead Gen Campaigns, Brand Campaigns, Traffic Campaigns
Setup Facebook Pixel To Boost Sales Of Your Online Business
Build Retargeting Campaigns To Follow Users On Facebook
Show Your Ads On Two Of The Biggest Social Network In The World - Facebook & Instagram
Target Different Types Of Audiences, Demographics, Behaviours To Reach Your Customers
Learn How To Do In-Depth Campaign Optimisations In Facebook Ads
Get Hands On Experience Of How To Use Automation In Facebook Ads
Take This Course
👇👇👇👇👇👇👇
5 Udemy Paid Courses for Free with Certification. (Limited Time for Enrollment)
5. 300+ Python Exercises (Simple, Intermediate & Complex)
Python Programming | 300+ Python Exercises to solve Exercises (Simple, Intermediate & Complex) with Source Code.
What you'll learn
After this course, your Python Programming Skill will Improve.
You will get in this course Simple, Intermediate and Complex Tasks with proper Algorithm and Support
After this course you will be able to Learn Properly as Artificial intelligence, Data Science, Web Development, Data Analytics etc.
This course will CLEAR 100% your weak Python Concepts
You will get Solution for each Problem with its Algorithm, PPT Notes, Special Support and Assignment
Ability to solve complex programming problems using Python.
Understanding of Python data structures (List, Tuple, Dictionary and SET)
Proficiency in Python syntax and control structures.
Ability to write efficient and optimized code in Python.
Understanding of object-oriented programming concepts in Python.
After this course, Ability to develop Python-based applications, including web applications and Desktop applications
Understanding of various Python libraries and frameworks.
Ability to design and implement Python-based data structures.
Familiarity with Python best practices and coding standards.
Ability to work with Python libraries for data analysis like numpy, pandas etc
Understanding of Python security practices and techniques.
Ability to write clean, efficient, and maintainable Python code.
Take This Course
👇👇👇👇👇👇👇
5 Udemy Paid Courses for Free with Certification. (Limited Time for Enrollment)
0 notes
Text
How to Create SVG Images Using Code?
SVG (Scalable Vector Graphics) images are created using XML-based markup language. This markup language consists of various code elements that define the image’s shapes, paths, colors, and other attributes.
In order to create an SVG image using code, you generally follow these steps:
SVG element: You need to start by creating an SVG element, which serves as the container for your entire image and is denoted by the tag.
Here is the editor
(for icons)
Attributes Setup: Now specify the attributes of the SVG element, width, height, background color, and other visual properties for instance. These attributes are defined using code within the opening tag.
Add shapes and paths: Now you have to use the SVG code elements to define the shapes and paths of your image. Some of the commonly used elements include (rectangles), (circles), (lines), (connected straight lines), (closed shapes with straight lines), and (custom paths). These elements are inserted within the tags and then configured with appropriate attributes like coordinates, sizes, colors, and styles.
Apply styling and colors: Next, we got CSS (Cascading Style Sheets) or inline styles to use so that you can control the visual appearance of the SVG elements. You can apply stroke color, fill color, width, opacity, gradients, and other styling properties. CSS styles can be applied in three ways, inline, externally, and by referencing an external CSS file as well.
Add text and labels: Now it’s time to include text elements () to add titles, headings, or any textual content to your SVG image. You also can position and style the text using attributes and CSS properties just like other SVG elements.
Save and embed the SVG code: Finally when have written the SVG code, save it as an SVG file with a .svg extension or you can directly embed the SVG code within an HTML file using the tags. You can insert SVG code inline or reference it using the tag with the src attribute pointing to the SVG file.
We hope you understood all of the steps. By following these steps and using the appropriate SVG code elements, attributes, and styles, you can create and customize scalable vector graphics programmatically.
0 notes
Text
New Post has been published on All about business online
New Post has been published on http://yaroreviews.info/2023/06/the-spying-scandal-inside-one-of-americas-biggest-power-companies
The Spying Scandal Inside One of America's Biggest Power Companies
.css-gqk1nbox-sizing:border-box;-webkit-text-decoration:none;text-decoration:none;min-height:32px;min-width:64px;cursor:default;overflow:hidden;border:none;-webkit-appearance:none;-moz-appearance:none;-ms-appearance:none;appearance:none;background-color:transparent;border-radius:2px;color:rgba(34,34,34,1);cursor:pointer;.css-gqk1n svgwidth:16px;height:16px;.css-gqk1n svgfill:rgba(34,34,34,1);.css-gqk1n:hover:not(:disabled)background-color:rgba(244,244,244,1);.css-gqk1n:active:not(:disabled)background-color:rgba(235,235,235,1);.css-gqk1n:disabledcolor:#ABABAB;.css-gqk1n:disabled svgfill:#ABABAB;.css-gqk1n:focus-visible:not(:disabled)outline-color:rgba(10,102,216,1);outline-style:solid;outline-width:2px;outline-offset:2px;@media not all and (min-resolution: 0.001dpcm)@supports (-webkit-appearance: none) and (stroke-color: transparent).css-gqk1n:focus-visible:not(:disabled)outline-style:auto;@media screen and (prefers-reduced-motion: no-preference).css-gqk1ntransition-property:background-color;transition-duration:200ms;transition-timing-function:cubic-bezier(0, 0, .5, 1);@media screen and (prefers-reduced-motion: reduce).css-gqk1ntransition-property:background-color;transition-duration:0ms;transition-timing-function:cubic-bezier(0, 0, .5, 1); .css-srw2jtmargin:0;padding:0;display:inline-grid;-webkit-column-gap:8px;column-gap:8px;grid-template-columns:repeat(2, auto);-webkit-box-pack:center;-ms-flex-pack:center;-webkit-justify-content:center;justify-content:center;-webkit-align-content:center;-ms-flex-line-pack:center;align-content:center;justify-items:center;-webkit-align-items:center;-webkit-box-align:center;-ms-flex-align:center;align-items:center;min-width:64px;min-height:32px;padding-inline:12px;padding-block:4px;box-sizing:border-box;-webkit-text-decoration:none;text-decoration:none;min-height:32px;min-width:64px;cursor:default;overflow:hidden;border:none;-webkit-appearance:none;-moz-appearance:none;-ms-appearance:none;appearance:none;background-color:transparent;border-radius:2px;color:rgba(34,34,34,1);cursor:pointer;.css-srw2jt svgwidth:16px;height:16px;.css-srw2jt svgfill:rgba(34,34,34,1);.css-srw2jt:hover:not(:disabled)background-color:rgba(244,244,244,1);.css-srw2jt:active:not(:disabled)background-color:rgba(235,235,235,1);.css-srw2jt:disabledcolor:#ABABAB;.css-srw2jt:disabled svgfill:#ABABAB;.css-srw2jt:focus-visible:not(:disabled)outline-color:rgba(10,102,216,1);outline-style:solid;outline-width:2px;outline-offset:2px;@media not all and (min-resolution: 0.001dpcm)@supports (-webkit-appearance: none) and (stroke-color: transparent).css-srw2jt:focus-visible:not(:disabled)outline-style:auto;@media screen and (prefers-reduced-motion: no-preference).css-srw2jttransition-property:background-color;transition-duration:200ms;transition-timing-function:cubic-bezier(0, 0, .5, 1);@media screen and (prefers-reduced-motion: reduce).css-srw2jttransition-property:background-color;transition-duration:0ms;transition-timing-function:cubic-bezier(0, 0, .5, 1);
.css-y5tzofill:rgba(34,34,34,1);vertical-align:unset;display:inline-block;@media screen and (prefers-reduced-motion: no-preference).css-y5tzotransition-property:fill;transition-duration:200ms;transition-timing-function:cubic-bezier(0, 0, .5, 1);@media screen and (prefers-reduced-motion: reduce).css-y5tzotransition-property:fill;transition-duration:0ms;transition-timing-function:cubic-bezier(0, 0, .5, 1);.css-y5tzo.css-y5tzowidth:24px;height:24px;
.css-suegqfmargin:0;font-family:Retina,Helvetica,Arial,sans-serif;font-size:12px;line-height:15.996px;font-weight:500;letter-spacing:0%;font-stretch:normal;text-transform:none;font-style:normal;padding:0.5px 0px;display:inline-block;.css-suegqf fontMetrics fontWeight010cap-height:700px;ascent:800px;descent:-200px;line-gap:200px;units-per-em:1000px;.css-suegqf::beforecontent:'';margin-bottom:-0.2665em;display:block;.css-suegqf::aftercontent:'';margin-top:-0.3665em;display:block;
Share
@media screen and (min-width: 640px).css-1ku37rkmargin-inline:8px; @media screen and (min-width: 640px).css-18b0uof-webkit-margin-end:8px;margin-inline-end:8px;
.css-zmr63box-sizing:border-box;-webkit-text-decoration:none;text-decoration:none;min-height:auto;min-width:auto;cursor:default;overflow:hidden;border:none;-webkit-appearance:none;-moz-appearance:none;-ms-appearance:none;appearance:none;background-color:transparent;border-radius:2px;color:rgba(34,34,34,1);cursor:pointer;.css-zmr63 svgwidth:16px;height:16px;.css-zmr63 svgfill:rgba(34,34,34,1);.css-zmr63:hover:not(:disabled)background-color:rgba(244,244,244,1);.css-zmr63:active:not(:disabled)background-color:rgba(235,235,235,1);.css-zmr63:disabledcolor:#ABABAB;.css-zmr63:disabled svgfill:#ABABAB;.css-zmr63:focus-visible:not(:disabled)outline-color:rgba(10,102,216,1);outline-style:solid;outline-width:2px;outline-offset:2px;@media not all and (min-resolution: 0.001dpcm)@supports (-webkit-appearance: none) and (stroke-color: transparent).css-zmr63:focus-visible:not(:disabled)outline-style:auto;@media screen and (prefers-reduced-motion: no-preference).css-zmr63transition-property:background-color;transition-duration:200ms;transition-timing-function:cubic-bezier(0, 0, .5, 1);@media screen and (prefers-reduced-motion: reduce).css-zmr63transition-property:background-color;transition-duration:0ms;transition-timing-function:cubic-bezier(0, 0, .5, 1); .css-294drsmargin:0;padding:0;display:inline-grid;-webkit-column-gap:8px;column-gap:8px;grid-template-columns:repeat(1, auto);-webkit-box-pack:center;-ms-flex-pack:center;-webkit-justify-content:center;justify-content:center;-webkit-align-content:center;-ms-flex-line-pack:center;align-content:center;justify-items:center;-webkit-align-items:center;-webkit-box-align:center;-ms-flex-align:center;align-items:center;width:32px;min-width:64px;height:32px;min-height:32px;padding-inline:8px;padding-block:8px;box-sizing:border-box;-webkit-text-decoration:none;text-decoration:none;min-height:auto;min-width:auto;cursor:default;overflow:hidden;border:none;-webkit-appearance:none;-moz-appearance:none;-ms-appearance:none;appearance:none;background-color:transparent;border-radius:2px;color:rgba(34,34,34,1);cursor:pointer;.css-294drs svgwidth:16px;height:16px;.css-294drs svgfill:rgba(34,34,34,1);.css-294drs:hover:not(:disabled)background-color:rgba(244,244,244,1);.css-294drs:active:not(:disabled)background-color:rgba(235,235,235,1);.css-294drs:disabledcolor:#ABABAB;.css-294drs:disabled svgfill:#ABABAB;.css-294drs:focus-visible:not(:disabled)outline-color:rgba(10,102,216,1);outline-style:solid;outline-width:2px;outline-offset:2px;@media not all and (min-resolution: 0.001dpcm)@supports (-webkit-appearance: none) and (stroke-color: transparent).css-294drs:focus-visible:not(:disabled)outline-style:auto;@media screen and (prefers-reduced-motion: no-preference).css-294drstransition-property:background-color;transition-duration:200ms;transition-timing-function:cubic-bezier(0, 0, .5, 1);@media screen and (prefers-reduced-motion: reduce).css-294drstransition-property:background-color;transition-duration:0ms;transition-timing-function:cubic-bezier(0, 0, .5, 1);
.css-13y18jldisplay:-webkit-box;display:-webkit-flex;display:-ms-flexbox;display:flex;height:100%;-webkit-align-items:center;-webkit-box-align:center;-ms-flex-align:center;align-items:center;-webkit-flex-direction:row;-ms-flex-direction:row;flex-direction:row;-webkit-box-pack:start;-ms-flex-pack:start;-webkit-justify-content:flex-start;justify-content:flex-start;@media screen and (max-width: 639px).css-13y18jl-webkit-margin-start:4px;margin-inline-start:4px;@media screen and (min-width: 640px).css-13y18jl-webkit-margin-start:auto;margin-inline-start:auto;
.css-l0jbh8-DividerContainerheight:24px; .css-ualp48-DividerContainer-webkit-margin-end:4px;margin-inline-end:4px;margin-block:4px;height:24px;
.css-1kw9c12-StyledDividerborder-color:rgba(204,204,204,1); .css-oad01l-StyledDividerborder-style:solid;border-color:rgba(34,34,34,1);border-width:1px;border-width:0px;margin:0;border-left-width:1px;display:inline-block;height:100%;border-color:rgba(204,204,204,1);
.css-1s2fiig-SquareButtonborder-radius:2px; .css-y5o35u-SquareButtoncursor:pointer;border-radius:2px;@media screen and (prefers-reduced-motion: no-preference).css-y5o35u-SquareButtontransition-property:background-color;transition-duration:200ms;transition-timing-function:cubic-bezier(0, 0, .5, 1);@media screen and (prefers-reduced-motion: reduce).css-y5o35u-SquareButtontransition-property:background-color;transition-duration:0ms;transition-timing-function:cubic-bezier(0, 0, .5, 1); .css-5espto-SquareButtonbox-sizing:border-box;-webkit-text-decoration:none;text-decoration:none;min-height:auto;min-width:64px;cursor:default;overflow:hidden;border:none;-webkit-appearance:none;-moz-appearance:none;-ms-appearance:none;appearance:none;background-color:transparent;border-radius:2px;color:rgba(34,34,34,1);cursor:pointer;border-radius:2px;.css-5espto-SquareButton svgwidth:16px;height:16px;.css-5espto-SquareButton svgfill:rgba(34,34,34,1);.css-5espto-SquareButton:hover:not(:disabled)background-color:rgba(244,244,244,1);.css-5espto-SquareButton:active:not(:disabled)background-color:rgba(235,235,235,1);.css-5espto-SquareButton:disabledcolor:#ABABAB;.css-5espto-SquareButton:disabled svgfill:#ABABAB;.css-5espto-SquareButton:focus-visible:not(:disabled)outline-color:rgba(10,102,216,1);outline-style:solid;outline-width:2px;outline-offset:2px;@media not all and (min-resolution: 0.001dpcm)@supports (-webkit-appearance: none) and (stroke-color: transparent).css-5espto-SquareButton:focus-visible:not(:disabled)outline-style:auto;@media screen and (prefers-reduced-motion: no-preference).css-5espto-SquareButtontransition-property:background-color;transition-duration:200ms;transition-timing-function:cubic-bezier(0, 0, .5, 1);@media screen and (prefers-reduced-motion: reduce).css-5espto-SquareButtontransition-property:background-color;transition-duration:0ms;transition-timing-function:cubic-bezier(0, 0, .5, 1); .css-1pj7jjc-SquareButtonmargin:0;padding:0;display:inline-grid;-webkit-column-gap:8px;column-gap:8px;grid-template-columns:repeat(3, auto);-webkit-box-pack:center;-ms-flex-pack:center;-webkit-justify-content:center;justify-content:center;-webkit-align-content:center;-ms-flex-line-pack:center;align-content:center;justify-items:center;-webkit-align-items:center;-webkit-box-align:center;-ms-flex-align:center;align-items:center;min-width:64px;height:100%;min-height:32px;padding-inline:12px;padding-block:4px;box-sizing:border-box;-webkit-text-decoration:none;text-decoration:none;min-height:auto;min-width:64px;cursor:default;overflow:hidden;border:none;-webkit-appearance:none;-moz-appearance:none;-ms-appearance:none;appearance:none;background-color:transparent;border-radius:2px;color:rgba(34,34,34,1);cursor:pointer;border-radius:2px;.css-1pj7jjc-SquareButton svgwidth:16px;height:16px;.css-1pj7jjc-SquareButton svgfill:rgba(34,34,34,1);.css-1pj7jjc-SquareButton:hover:not(:disabled)background-color:rgba(244,244,244,1);.css-1pj7jjc-SquareButton:active:not(:disabled)background-color:rgba(235,235,235,1);.css-1pj7jjc-SquareButton:disabledcolor:#ABABAB;.css-1pj7jjc-SquareButton:disabled svgfill:#ABABAB;.css-1pj7jjc-SquareButton:focus-visible:not(:disabled)outline-color:rgba(10,102,216,1);outline-style:solid;outline-width:2px;outline-offset:2px;@media not all and (min-resolution: 0.001dpcm)@supports (-webkit-appearance: none) and (stroke-color: transparent).css-1pj7jjc-SquareButton:focus-visible:not(:disabled)outline-style:auto;@media screen and (prefers-reduced-motion: no-preference).css-1pj7jjc-SquareButtontransition-property:background-color;transition-duration:200ms;transition-timing-function:cubic-bezier(0, 0, .5, 1);@media screen and (prefers-reduced-motion: reduce).css-1pj7jjc-SquareButtontransition-property:background-color;transition-duration:0ms;transition-timing-function:cubic-bezier(0, 0, .5, 1);
.css-vc7jzymargin:0;font-family:Retina,Helvetica,Arial,sans-serif;font-size:12px;line-height:15.996px;font-weight:500;letter-spacing:0%;font-stretch:normal;text-transform:none;font-style:normal;padding:0.5px 0px;.css-vc7jzy fontMetrics fontWeight010cap-height:700px;ascent:800px;descent:-200px;line-gap:200px;units-per-em:1000px;.css-vc7jzy::beforecontent:'';margin-bottom:-0.2665em;display:block;.css-vc7jzy::aftercontent:'';margin-top:-0.3665em;display:block;
Listen
.css-1dhrhw1margin:0;font-family:Retina,Helvetica,Arial,sans-serif;font-size:12px;line-height:15.996px;font-weight:300;letter-spacing:0%;font-stretch:normal;text-transform:none;font-style:normal;padding:0.5px 0px;margin-inline:0;.css-1dhrhw1 fontMetrics fontWeight010cap-height:700px;ascent:800px;descent:-200px;line-gap:200px;units-per-em:1000px;.css-1dhrhw1::beforecontent:'';margin-bottom:-0.2665em;display:block;.css-1dhrhw1::aftercontent:'';margin-top:-0.3665em;display:block;
(2 min)
0 notes
Photo

CSS Text Fill Animation Check out codenewbies YouTube channel for more
#CSS Text Animation#css text effects#css text stroke#css-tricks#css animation examples#cool css animation#learn css animation#css#css3#HTML#html5#webdesign#frontenddevelopment#codenewbies#code
0 notes
Text
editing on wikis is so nice like im in a discord server and all the admins are so kind there and help u out when you’re confused & answer your dumb questions without a second thought
#i thought it’d be like the stack overflow of discord communities#but everyone is cool#and also i get to do css which is good#bc i suck at css#like fuck yes sir 4 text shadows to emulate stroke text
0 notes
Photo

Stroke Text with Animated background
#navbar#navbar design#navbar html css#css stroke animation#CSS Text Animation#text animation css#pure css animation#codenewbies
0 notes
Text
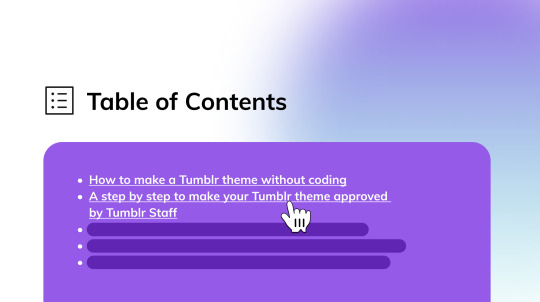
How to make a dynamic table of contents on Tumblr
It’s easy to get lost when reading a long text post on your blog. And you wonder, is it possible to put a table of contents on your blog? But wait, what's a table of contents anyway? It's a list found on a page before the start of the main content. This table will show the different sections of the title with a clickable link that will jump you to the relevant subheading.
Not every theme has that feature and this feature provides a quick way to jump down the page to the desired section. So today I am sharing this with you on how to make this implementation on Tumblr.
This post is not going to explain the details, you'll be just provided an instruction to implement this on your blog. You need to be familiar with HTML, CSS, and JavaScript before proceeding with this.
Adjust the HTML element on your theme
This is required. We only need to add this variable from Tumblr called {TagsAsClasses}. Depending on your theme, the structure may differ, put this variable where you render each post in your theme. This will look something like this.
{block:Posts} <article class="posts {TagsAsClasses}"> {block:Text}...{/block:Text} {block:Photo}...{/block:Photo} {block:Quote}...{/block:Quote} .... </article> {/block:Posts}
This variable basically adds a class based on your tag on the post. We need it because it gives us the flexibility of which posts need to be generated with the table of contents (so it won't be applied to all of our posts).
Implement the JavaScript and adjust the options.
First, include this script below on your code, preferably above the </body> tags.
<script src="https://static.tumblr.com/5ojoydj/gYZr51ivu/heading.js"></script> <script> {block:PermalinkPage} const TOC = new generateTOC({ selector: ".posts", heading: "Table of contents", icon: '<svg xmlns="http://www.w3.org/2000/svg" width="28" height="28" viewBox="0 0 24 24" fill="none" stroke="currentColor" stroke-width="1.5" stroke-linecap="round" stroke-linejoin="round"><line x1="8" y1="6" x2="21" y2="6"></line><line x1="8" y1="12" x2="21" y2="12"></line><line x1="8" y1="18" x2="21" y2="18"></line><line x1="3" y1="6" x2="3.01" y2="6"></line><line x1="3" y1="12" x2="3.01" y2="12"></line><line x1="3" y1="18" x2="3.01" y2="18"></line></svg>' }); {/block:PermalinkPage} </script>
After implementing the code above, there are some options that need to be adjusted.
Firstly, the selector. This is required so the script can detect which posts that need to be generated with the table of contents. Default is posts
The second one is the heading, this is optional. You can replace it with your own text.
And lastly is the icon. You can replace it with another SVG icon. I took the icon from here https://iconsvg.xyz/.
Styling the element
The styling for this is quite simple, I have also added the custom variables for easier editing. Please put this code above the </head> tag.
<link rel="stylesheet" href="https://static.tumblr.com/5ojoydj/Cynr51jpw/toc.css"> <style id="toc"> :root { --toc-bg-color:lightyellow; --toc-heading-color:#111111; --toc-link-color:#0D2454; --heading-size:22px; --icon-size:24px; } </style>
You can change the color to whichever you want!
Once everything is all configured and done. You can just tag your posts as “posts text” (without the quotation mark) and the table of contents will be automatically generated on your post details! And here's the live preview if you want to know what it will look like.
363 notes
·
View notes
Text
14 CSS TEXT-STROKE EXAMPLES Collection of free CSS text-stroke code examples from Codepen and other resources. → https://freefrontend.com/css-text-stroke-examples/
#html#html5#css#css3#javascript#frontend#codepen#web design#web development#web code#web inspiration
54 notes
·
View notes
Text
Weekly News for Designers № 723 - User Interface Typography Free eBook, You Don't Need JavaScript, CSS Wrapped 2023
New Post has been published on https://thedigitalinsider.com/weekly-news-for-designers-%e2%84%96-723-user-interface-typography-free-ebook-you-dont-need-javascript-css-wrapped-2023/
Weekly News for Designers № 723 - User Interface Typography Free eBook, You Don't Need JavaScript, CSS Wrapped 2023
An Interactive Guide to Making SVG Loading Spinners step-by-step instructions on implementing them using just a handful of straightforward SVG attributes, such as stroke-dasharray and stroke-dashoffset.
CSS & JavaScript Snippets for Gradients A collection of code snippets for creating amazing gradients.
On-Scroll Sliced Text Animation Tutorial Discover how to craft a scroll-triggered sliced text animation, in which segmented elements come together as you scroll.
Does Web Design Matter? Dan Mall discusses the direction web design is taking and whether the old ways of doing things are still worthwhile.
Is the Flat Design Trend Finally Over? Designers may find themselves at a crossroads, torn between the simplicity of flat design and the allure of more intricate and three-dimensional design elements.
User Interface Typography A free eBook that delves into the art of effective user interface typography. It covers everything from fundamental principles to constructing layouts and incorporating diverse design elements.
Psychology of Speed A detailed guide to perceived performance in web design.
Double Exposure & Duotone Photoshop Action Sets Transform your photos with stunning duotone or double exposure effects using these fully customizable and easy to use Photoshop actions.
The hanging-punctuation Property in CSS
You Don’t Need JavaScript for That Just because you know something needs JavaScript, doesn’t mean it still does.
CSS Wrapped 2023 Significant advancements were made in CSS this year. Explore the latest features and updates that were introduced in Chrome and across the web this year.
Retool State of AI Report 2023 Discover how many are actually using and building with AI.
10 Weird HTML Hacks That Shaped The Internet These HTML code quirks may seem unlikely to function, yet they manage to do so.
The State of UX in 2024 What to expect for User Experience (UX) Design in the next year.
The Lack of Compensation in Open Source Software is Unsustainable
CSS Hooks Hook into advanced CSS features from native inline styles.
Deceptive Patterns in UX: How to Recognize and Avoid Them
#2023#2024#ai#amazing#amp#animation#Art#Building#chrome#code#craft#CSS#Design#Designer News#designers#direction#double#easy#effects#Features#Fundamental#gradients#how#how to#HTML#Internet#it#JavaScript#JavaScript Snippets#matter
0 notes
Text
TUTORIAL: CAMBIO DE FONDOS.

Este tutorial es de nivel bajo "tirando a" intermedio, pero con paciencia y amor (?) se puede entender. Si no comprenden algo no duden en consultar ya sea por ask o por privado, últimamente ando ocupada con la universidad, pero encontraré espacio para responder <3.
Una solución más fácil es hacer ctr + F y buscar los #fff (o los #fafafa o los #ddd, #eee) en el código y reemplazarlos por el color básico de fondo que quieren ponerle, pero si el CSS no está en la tablilla (Sino en un link externo, por ejemplo), o es una tablilla de post, tendrán que aprender cómo hacerlo de esta forma.
Comenzaremos con: Call out my name, parte I.
INDICE.
Nos centraremos en el html la mayor parte del tiempo. Comencemos.
Primero hacemos click derecho a nuestra tablilla, buscamos abajo de todo que dice "Inspeccionar" y no saldrá como una pestaña lateral en la misma ventana. Ahí encontraremos el HTML y el CSS, nos saldrá información de muchas cosas pero nos tenemos que centrar únicamente en la tablilla que queramos editar. Para esto identificamos la primera etiqueta, en el caso de este paquete se llama ".bt5baul"

Vemos que en el CSS ya nos dice "border: 15px solid #fafafa;", "outline: 1px solid #ddd;" y "background: #fff;". Podemos cambiarlo en el CSS abajo del código como también cambiarlo desde el HTML (esta última sería la única opción para las tablillas de rol, por ejemplo). Nos centraremos en editarlo de la última forma.
Vamos al html, sin editar dice algo como:
<div class="bt5baul">...
Lo editaremos de esta forma:
<div class="bt5baul" style="background:#444; border-color:#555; outline-color:#666">..
Este es sólo un ejemplo. Con el "inspeccionar" podemos identificar los colores que debemos cambiar como también probarlo antes. Verán que la tablilla cambia de color pero recuerden que todas las modificaciones que se hagan en la pestaña "inspeccionar" no serán permanentes, sino que es una previsualización. Los colores se cambiaran editando el código.

Apretando en el cuadradito del color nos abrirá una paleta de colores y veremos como se va cambiando el color delante de nuestros ojos hasta conseguir el que queramos. Esto es muy útil para no tener que darle "previsualizar" al post para ver si nos gusta o no el color. Cuando por fin nos decidimos, lo editamos en el HTML.
Los siguientes pasos son repetitivos, cuando le tomen la mano verán que es lo mismo para todo.
Desde Inspeccionar iremos adentro de ese div apretándolo. Nos quedaría algo así:

Vemos que en "inspeccionar" de a poquito vamos entrando al código de una forma más fácil de ver (porque te lo va marcando con cuadraditos como parece del costado derecho)
Vamos a "b5b-portada" Y vemos que no tiene colores para editar.
Llegamos a "b5b-iconPrinc" y vemos que ya tiene un "style="background:#fafafa"" para editar en el HTML, así que lo cambiamos directamente de ahí por un #444 que va de acuerdo con la paleta que elegí para este tutorial.
Vemos que el icono del lobo esta en color blanco. Entramos por los divs hasta llegar al icono y vemos cómo esta hecho, en este caso tiene un "-webkit-text-stroke: 1.2px #fff;"
El icono sin editar en el HTML esta así: <span class="sf sf-wolf">
Lo cambio por: <span class="sf sf-wolf" style="-webkit-text-stroke-color:#444">
Como regla básica, al menos para mis códigos, si un ícono o letra está con color únicamente en sus bordes es porque usé "-webkit-text-stroke" y la forma de cambiarlo es agregarle un "-color" al final. Sino son colores de letras que se edita con "color" o fondos "background" o bordes "border-color" o outline "outline-color".
Seguimos, vamos directo al div de la imagen. Podemos ir abriendo los divs o poner el mouse sobre lo que queremos ver + click derecho + nuevamente "inspeccionar" y nos lleva a donde queremos ver.
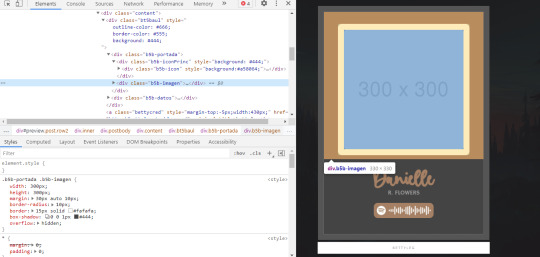
Vemos que abajo, en el CSS, tenemos un "border:15px solid #fafafa", lo vamos a cambiar.
El HTML sin editar es: <div class="b5b-imagen">...
Editado: <div class="b5b-imagen" style="border-color:#555">...
Y ya estaría terminado. Para los créditos modifiquen el HTML así: <a class="bettycred" style="margin-top:-5px;width:430px;background: transparent;border-color: transparent;color: #ddd;" href="http://bettyleg.tumblr.com/">bettyleg</a>
Y se vería acorde a todo. CRONOLOGÍA:
Hacemos lo mismo, identificamos el mismo div y lo cambiamos:
Sin editar: <div class="bt5baul" style="width:550px;">
Editado: <div class="bt5baul" style="width:550px;border-color: #555;outline-color: #666;background: #444;">

Más abajo vemos que hay un div llamado "listaDeTemas" con un background en claro, lo cambiamos en el HTML y nos queda: <div class="b5b-listadoDeTemas" style="background:#444">
Haciendo lo mismo notamos que el div de arriba "b5b-titulo" tiene un border-bottom con color claro, entonces en el HTML agregamos un <div class="b5b-titulo" style="border-bottom-color:#666">...
Adentro del listado de temas vemos otros div más que edito de esta forma <div class="b5b-temas bt-temasAbiertos" style="background:#444; border-color:#666">...
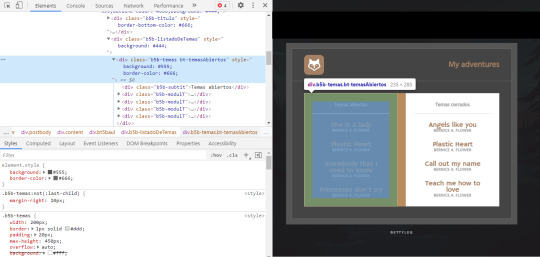
Y el de al lado igual. Para las relaciones es lo mismo.
AHORA, HAY UNA FORMA MÁS FÁCIL: Sí. ESTA NUEVA FORMA ¿SIRVE PARA POST DE ROL?: No.
Si quieres cambiar los colores del post de rol la única forma es la de arriba. ¿Por qué?
Cuando posteamos una tablilla funciona así. Ejemplo, yo tengo una tablilla con mis colores, editado justo como yo lo quiero, posteo y en la misma página oh casualidad otra persona postea la misma tablilla pero con sus colores editados (ambos en el CSS). Voy a ver mi post y ¡Me cambió los colores! Lo cito con desconfianza pero veo que mi edición está en el tema... Entonces ¿por qué no lo veo? Sucede que la segunda persona que posteó pisó todos tus cambios al tener el mismo nombre de clases hay una "jerarquía" que se cumple. Para los post de rol, tengo un tutorial aquí: https://bettyleg.tumblr.com/post/615971389252435968/se-te-adelantaron-y-cambiaron-los-colores-en-el Volviendo a los baúles, también se puede cambiar en el css. Ver dónde están los colores #fff, #fafafa, #ddd, #ccc que normalmente uso en casi todo. Más que nada los últimos para los bordes. y cambiarlo de esta forma:
... background:#444!important ...
Agregarle el "!important" hará que se aplique a todos los del mismo tema.. De esta última forma NO se tendría que agregar los "style" en el html y afectaría a todas las tablillas que postee abajo con el mismo nombre de etiqueta. Claro esta NO es recomendable para los post de rol, solamente úsenlo para el baúl o tablillas que usan ustedes (búsquedas, etc). Es una forma, pero es más "delicada" de usar para mi.
Recomendación: Si quieren aprender, prueben cambiar los colores de ambas formas para el índice (que es el más sencillo). Cuando ya sepan como funcionan puedo enseñarles otras formas en las que también se podría realizar.
Hay muchísimas formas de editar una tablilla depende de cuánto saben de css y html, pero todo se aprende. Igualmente de ahora en más haré estos cambios más fáciles de hacer en las tablillas del futuro (?). Si no se entendió algo por favor háganmelo saber ¡Saludos!
13 notes
·
View notes
Note
Is there a way to put the searchbar on the sidebar instead of the header in lilac? I know you have a link about how to add/create sidebars, but I've just wanted to add the one from the header (well, smaller ofc) to the sidebar instead, and I haven't managed to do that with the tutorial so I was wondering if that was something possible/that you could help with? Sorry.
yes; find and copy this portion of the HTML:
<form action="/search" method="get" class="find" name="sform"> <input type="text" name="q" placeholder="{text:search placeholder}" value="{SearchQuery}" value autocomplete="off"/> <svg xmlns="https://www.w3.org/2000/svg" width="48" height="48" viewBox="0 0 24 24" fill="none" stroke="currentColor" stroke-width="2" stroke-linecap="round" stroke-linejoin="round" class="feather feather-search"><circle cx="11" cy="11" r="8"></circle><line x1="21" y1="21" x2="16.65" y2="16.65"></line></svg> </form>
and in the section labelled <!----- SIDEBAR -----> paste it underneath </nav> but above </div>.
then, in the CSS, find:
.find { background-color: inherit; width: calc(100% - 6.75em); margin: auto auto auto 2em; border: 1px solid {color:borders}; background-color: {color:sidebar link background}; border-radius: 2em; padding: 1em 1.5em; box-sizing: border-box; vertical-align: middle; display: inline-block; }
change width: calc(100% - 6.75em); to width: 100%; and delete margin: auto auto auto 2em;
14 notes
·
View notes