#file share and collaboration platform
Explore tagged Tumblr posts
Visit Tumblr Blog
Explore Tumblr blogs with no restrictions, modern design and the best experience.
Last Seen Tumblr Blogs


Fun Fact
Tumblr has a low social media market share in South America.
Text
Discover the key features and benefits of eShare.ai’s cloud storage solution. From seamless file sharing and real-time collaboration to top-tier data encryption and unlimited storage, eShare.ai empowers individuals and businesses to organize, protect, and access their data anytime, anywhere. Go paperless, boost productivity, and simplify your workflow with a platform designed for modern digital needs.
#eShare.ai#cloud storage#file sharing#digital organization#online collaboration#secure storage#paperless office#cloud backup#unlimited storage#business productivity#file sync#SaaS platform#data access anywhere#digital workspace
0 notes
Text
NoMachine
NoMachine is a remote connection application for PCs that allows you to access file systems and control target systems with additional features like video and audio streaming. If you’re in search of a reliable software solution for remotely connecting to any computer and accessing your files quickly, NoMachine is the perfect tool for a seamless remote desktop experience. With its intuitive…
#audio streaming#Automation#cross-platform#desktop sharing#file transfer#IT Tools#multi-platform#multi-session#NoMachine#Remote Access#remote collaboration#remote desktop#remote desktop software#remote printing#remote work#secure connections#secure remote access#video streaming
0 notes
Text
Chatwise Shares is a dynamic


Chatwise Shares is a dynamic and forward-thinking tech company that specializes in creating innovative solutions for seamless communication and collaboration in the modern workplace. Their flagship product, Chatwise Connect, is a comprehensive platform that integrates chat, video conferencing, file sharing, and project management tools into one intuitive interface.
In an office scenario, employees at Chatwise Shares experience a highly interactive and collaborative environment. Teams use Chatwise Connect to stay connected, share ideas, and collaborate on projects in real-time. The platform's user-friendly interface makes it easy for employees to communicate across departments and locations, fostering a culture of teamwork and innovation.
One unique feature of Chatwise Connect is its virtual meeting rooms, which allow team members to join video conferences and collaborate on documents simultaneously. This feature is particularly useful for remote teams, as it enables them to work together as if they were in the same room.
Another key aspect of Chatwise Shares' office culture is its focus on work-life balance. The company offers flexible work hours and remote work options, allowing employees to manage their schedules in a way that suits their lifestyle. This flexibility helps employees maintain a healthy work-life balance, leading to increased job satisfaction and productivity.
Overall, Chatwise Shares is a company that values collaboration, innovation, and work-life balance. Through its innovative products and employee-centric culture, it has created a dynamic and engaging workplace where employees can thrive and succeed.
#writing#chatwise app benifits#chatwise app#Chatwise.co.uk#Chatwise Shares is a dynamic and forward-thinking tech company that specializes in creating innovative solutions for seamless communication#Chatwise Connect#is a comprehensive platform that integrates chat#video conferencing#file sharing#and project management tools into one intuitive interface.#In an office scenario#employees at Chatwise Shares experience a highly interactive and collaborative environment. Teams use Chatwise Connect to stay connected#share ideas#and collaborate on projects in real-time. The platform's user-friendly interface makes it easy for employees to communicate across departme#fostering a culture of teamwork and innovation.#One unique feature of Chatwise Connect is its virtual meeting rooms#which allow team members to join video conferences and collaborate on documents simultaneously. This feature is particularly useful for rem#as it enables them to work together as if they were in the same room.#Another key aspect of Chatwise Shares' office culture is its focus on work-life balance. The company offers flexible work hours and remote#allowing employees to manage their schedules in a way that suits their lifestyle. This flexibility helps employees maintain a healthy work-#leading to increased job satisfaction and productivity.#Overall#Chatwise Shares is a company that values collaboration#innovation#and work-life balance. Through its innovative products and employee-centric culture#it has created a dynamic and engaging workplace where employees can thrive and succeed.
0 notes
Text
#enterprise data security#Content Collaboration#Content Collaboration Platform#Collaboration Platform#Enterprise Content Collaboration#Compliance Content Collaboration Platform#Secured Document Sharing#Highly Regulated Industries#Controlled Data Sharing#file sharing
0 notes
Text
StreamBuilder: our open-source framework for powering your dashboard.
Today, we’re abnormally jazzed to announce that we’re open-sourcing the custom framework we built to power your dashboard on Tumblr. We call it StreamBuilder, and we’ve been using it for many years.
First things first. What is open-sourcing? Open sourcing is a decentralized software development model that encourages open collaboration. In more accessible language, it is any program whose source code is made available for use or modification as users or other developers see fit.
What, then, is StreamBuilder? Well, every time you hit your Following feed, or For You, or search results, a blog’s posts, a list of tagged posts, or even check out blog recommendations, you’re using this framework under the hood. If you want to dive into the code, check it out here on GitHub!
StreamBuilder has a lot going on. The primary architecture centers around “streams” of content: whether posts from a blog, a list of blogs you’re following, posts using a specific tag, or posts relating to a search. These are separate kinds of streams, which can be mixed together, filtered based on certain criteria, ranked for relevancy or engagement likelihood, and more.
On your Tumblr dashboard today you can see how there are posts from blogs you follow, mixed with posts from tags you follow, mixed with blog recommendations. Each of those is a separate stream, with its own logic, but sharing this same framework. We inject those recommendations at certain intervals, filter posts based on who you’re blocking, and rank the posts for relevancy if you have “Best stuff first” enabled. Those are all examples of the functionality StreamBuilder affords for us.
So, what’s included in the box?
The full framework library of code that we use today, on Tumblr, to power almost every feed of content you see on the platform.
A YAML syntax for composing streams of content, and how to filter, inject, and rank them.
Abstractions for programmatically composing, filtering, ranking, injecting, and debugging streams.
Abstractions for composing streams together—such as with carousels, for streams-within-streams.
An abstraction for cursor-based pagination for complex stream templates.
Unit tests covering the public interface for the library and most of the underlying code.
What’s still to come
Documentation. We have a lot to migrate from our own internal tools and put in here!
More example stream templates and example implementations of different common streams.
If you have questions, please check out the code and file an issue there.
5K notes
·
View notes
Text
To everyone who asked, and to everyone who didn't:
Yes. I have somewhere between 1,000 and 2,000 of TwoSet's videos, all in HD quality. LINK BELOW
Earlier this year in 2024, I downloaded every single TwoSet Violin public video from their YouTube and scoured other sites like Bilibili and Facebook to get videos they'd deleted from at least one platform. My goal was to make some fandom compilation videos that'd require going through every video.
I do not have the last few months of 2024 (which I'm kicking myself for... I literally almost did a download update on SUNDAY). But I have almost everything.
2 mil, 3 mil, 4 mil, Fantasia, Hilary Hahn or Ray Chen collabs, Producer Shaun, professional versus beginner, violin charades, that cheeky skit you shared on Facebook in 2016
Their world tour VODs, including my own personal captures of their latest VOD stream
Some of the content from their Facebook kickstarter livestreams that I found from other fans.
I've been collecting all their TikTok videos currently, too. I've downloaded a spattering of their Instagram stories from 2024 and might have a small collection of recent Instagram videos, too.
I do not have everything, but I have a fuckton and I want to share it with as many people as possible, and collaborate with as many people as possible to fill in the missing pieces.
Please contact me if you have your own archives or know people working on other archives. I'm talking with a few people about starting a Google Drive project, but I don't know the big names in the TSV fandom and thus could be missing out on people who've done a lot of other work
It's more likely that this will clear over in the coming days / weeks / month / whatever and we'll have their official channel again. I'm still going to keep believing that. But it doesn't erase the importance of making sure the media we love doesn't become lost media. I have respect for content creators to monitor what does and doesn't stay on their platform, but for the sake of preservation of media, for the sake of helping a community, I want to make sure this archive is in place and widely accessible to TwoSetters.
My current cloud server is VERY MUCH a work in progress. I am in the middle of an extremely busy week and trying to do this around an office job and a half. It will take me time to upload everything, and even more time to organize everything. But the cloud server link is active, and I will keep people updated about the progress of my archiving through a PDF text file (not yet uploaded) in said cloud. If I collaborate with people for Google Drive systems, if I do other backups, I will let people know there and on my other social media accounts.
I am new and naive to Terabox. I started with Terabox because it's free to upload up to a terabyte of content. I think it should be free to download everything in full quality, but I don't know. People should inform me how it works. It's currently -- I'm sorry -- VERY poorly organized and requires Scrolling (TM), but short of that issue (which will be fixed with organization), I hope it gets people what they need.
Also: Reddit has suspended me for a few days lol (really I'm getting a slap on the wrist for how blatantly I was marching about), so if people want to start spreading this link to others in private chats elsewhere with known TwoSetters, the more the merrier! The purpose of this is to be a resource, either short-term or long-term.
387 notes
·
View notes
Text
Writing Notes: Book Cover

“Don’t judge a book by it’s cover!” We’ve all heard the phrase and we all know that’s impossible. Because the cover of a book is the first thing a potential reader sees—it should stop them in their tracks. It’s a very powerful marketing tool; having a well-designed book cover is crucial.
Tips for Making a Great Book Cover Design
Using more than two to three typefaces on a cover is discouraged, as it can look really messy.
Keep things simple. Your cover will be in a sea of other covers so try to keep your design from getting muddy and make sure it stands out.
Show your designs to people who have a design eye and/or you trust. It’s great to get feedback.
If you hire a professional designer, write a brief and send them info. Be really clear on what you want. Designers usually do a certain number of design rounds included in the agreed upon fee and any extra rounds of design will be extra.
If you hire a professional designer, they will likely have ideas about printing and may have connections to printers. They are a resource so don’t forget to ask questions.
Don’t forget: a book cover is an important part of selling any book. Whether you decide to do it yourself or collaborate with a professional, pay special attention to this part of the process, as a great cover goes a long way.
6-Step Guide: Professional Book Cover
STEP ONE Generate Ideas. Look around at book covers you like. Go to a bookshop and peruse what’s currently happening in book cover design. Take notes of what elements you like on the cover image. A certain typeface? Color? Do you prefer an image or an illustration or something purely typographic on the cover? Another option is to create a mood board. You can use a platform like Pinterest or Evernote, or create a folder on your desktop, and pull book cover inspiration from the web. While you’re gathering inspiration, keep in mind what genre your book is and what kind of book design feels appropriate.
STEP TWO Find a Designer (Who Could Be You!). Do you have design skills? If so, your next step is to begin layouts and mock-ups of the covers. You should use whatever software program you are comfortable with. Most professional book cover designers use a program from the Adobe Creative Suite:
InDesign. InDesign is a multi-page design platform but can also be used for single page design.
Photoshop. Used to manipulate and experiment with photography.
Illustrator. Illustrator is a vector-based program, which means you can create graphic art that can be scaled up or down without loss of quality.
Photoshop and Illustrator. These can also be used together as you can bring your Photoshop file into Illustrator to set the type after you have worked with your cover image.
If you don’t have design skills, now is a great time to hire a book cover designer. The first step is to figure out what kind of budget you have for this. A designer’s fee will range depending on their expertise. Get a figure in mind and then write a design brief which should include the book specs:
Size
Print-run
Intended audience
Where and how the book will be published
Anticipated publish date
You should also include a summary of what the book is about and what you are looking for in a cover. Also share the inspiration you’ve gathered with the designer.
If you don’t have design skills but want to create the cover without the help of a professional, there are a few software programs you can use, such as Canva or 100 Covers, design tools that allow you to DIY the cover (for free or a fee).
STEP THREE Decide on the Dimensions. If you’re self-publishing and printing with a local printer you can work with them to make sure your book dimensions will fit on their printer (remember a book prints front, back, and spine in one sheet of paper). It’s also a good idea to find examples of books whose size you like and feels good to hold. Use that as a jumping off point for your book.
Book Cover Dimensions List. If you are printing for a specific market, from print to ebook, here is a handy list:
Amazon Kindle Direct Publishing File Format: JPEG or TIFF Cover Size (Recommended): 2560x1600 pixels Cover Size Requirements: between 1000x625 pixels and 10,000x10,000 pixels (one side must be at least 1000)
Apple iBooks File Format: JPEG or PNG Cover Size (Recommended): 1400x1873 or 1600x2400 pixels Cover Size Requirements: at least 1400 pixels wide
Barnes & Noble File Format: JPEG or PNG Cover Size (Recommended): Rectangle height and width, at least 1400 pixels Cover Size Requirements: Min. 750 pixels height and width
Kobo Books File Format: JPEG or PNG Cover Size (Recommended): 1600x2400 pixels Cover Size Requirements: Min. 1400 pixels width
Smashwords File Format: JPEG or PNG Cover Size (Recommended): 1600x2400 pixels Cover Size Requirements: Min. 1400 pixels width Draft2Digital
File Format: JPEG Cover Size (Recommended): 1600x2400 pixels Cover Size Requirements: Tall rectangle
STEP FOUR Choose Your Style
Photo-based cover. If you’re creating an photo-based book cover, you’ll need to source stock imagery. There are lots of great resources online to find stock imagery including ShutterStock, Getty Images, and Adobe Stock. (Keep in mind: most photography archives require payment to use their images. Always investigate the copyright of images you’re interested in using.) Look for images that convey or allude to your book’s genre. You can use programs like Photoshop to manipulate your image, making it black and white instead of color or cropping it in a certain way.
Illustration-based cover. If you’re considering a more graphic approach to your cover, Illustrator is the tool to use. You can bring hand-drawn drawings into it and outline them to create scale-able, high-res illustrations which you can manipulate within the program. You can also create shapes, patterns, experiment with typography within illustrator and play with color, transparency, size and much more.
Typography-based cover. Finally, many successful book covers use typography as the main graphic device. This takes some skill and knowledge of typefaces, the historical context of a typeface, and how to manipulate it thoughtfully. That said, using type as a graphic can be very impactful.
STEP FIVE Pick a Typeface (Font). No matter what kind of cover you are designing, you are going to need the title of the book and the author’s name on the cover. As mentioned above, picking an appropriate typeface is very important. You want to pick something that feels right for your book—is it a sans serif or serif? A heavy weight or lighter weight? You want to make sure it’s not something with a lot of baggage, like Comic Sans or Papyrus. It is a good idea to actually do a little research on when, where, and who your typeface was designed by to give you context and feel out if it will be right for your book. You might also consider using up to two different typefaces, one for the title and one for your name. A serif and sans-serif mix can give a bit of contrast and visual interest. There are some typefaces that pair really well together. Check out the website TypeWolf to get ideas of what fonts pair well together.
STEP SIX Test, Tweak, and Repeat. Once you have a few versions of your cover, print them out on your home printer and take a look with a critical eye. Does the type size feel chunky? Too bold? Too small? How does your image look? Is it cropped right? Are the lines of your illustrations too thin and not showing up? Go back and refine your design and then repeat! Don’t forget to look at your book cover as a small thumbnail as well. People are on their mobile phones and you want to make sure your cover still stands out and is impactful.
Book Cover - serves as your first impression with potential readers—and though book covers don’t always look the same, they do tend to contain the same essential elements.
Design standards may be different in the world of traditional publishing than they are in self publishing, and book cover templates for physical paper books may differ from those of ebooks—but they all serve the same purpose.
Some Functions of a Book Cover
A book’s cover provides essential information. At its most elemental, a good cover includes a book’s title, the author’s name, the publisher, and the price.
A good cover offers clues about your book’s content and tone. Your cover design indicates whether your book is a work of high-minded literary fiction, a pulpy page turner, or a compelling work of non-fiction.
A front cover reveals a book’s genre. You can usually tell if you’re holding a thriller, a memoir, a sci-fi epic, or a nineteenth century classic just by looking at a book’s cover art and typography.
A back cover offers broader context. It may feature quotes from reviewers and fellow authors. Softcover books may contain a plot summary or author biography on the back; those summaries and bios are typically moved to the inner flaps of a hardcover book.
How to Hire a Professional Book Cover Designer
Book covers are marketing materials, and a well-designed professional cover can make your book stand out among the competition. If you want someone with expertise in the realm of cover design to work on your book, you may want to hire a professional book cover designer. Here are some steps to consider when hiring creatives to design your book cover:
Hire a cover artist. A cover artist produces the cover art and imagery that will appear on your book cover, either on their own or with heavy input from an author or publisher.
Hire a graphic designer. Certain graphic designers specialize in layout; they incorporate cover art that you provide them—whether that’s an original illustration, photograph, or even a stock image—into the overall design of the cover.
Find a cover designer online. Reedsy is one of a number of online resources for independent authors, self-publishers, and anyone connected to the world of books. Many professional book designers list their services on Reedsy.
Use your personal network. Seek out writers’ groups, either locally or on Facebook. In these groups, people share professional referrals and help support one another when a member has a new book in the works. A group of like-minded individuals can be an invaluable resource when creating your own book cover for the first time.
When to Call a Pro:
You have a budget (a designer’s fee will vary depending on experience and location).
You have enough time to work with the designer.
You have a clear idea of what you want or at least what you don’t want.
You don’t have any design skills.
You don’t want to invest in the design software.
Your book isn’t selling.
How to Design a Book Cover Yourself
If you don’t have the budget for a pro designer or just have a DIY itch you want to scratch, it is easier than ever to design your own book cover. While it may not be quite as rudimentary as when you covered your textbooks in a brown paper bag back in fifth grade, modern technology has made cover image design accessible to anyone with a computer. Here are some tips:
Use a template. There are numerous websites that offer book cover templates and step-by-step tutorials covering basic cover design skills. Some even have a free book cover creator tool, along with cover ideas, design tips, pre-made design templates, and digital cover image tools.
Use standard design software. Book covers can also be made using standard home computing software including Photoshop, Microsoft Word, and even (with a little sweat equity) Google Docs. This is particularly easy if you are importing a pre-made cover image from another source.
Make a prototype. The process for assembling a book is straightforward and satisfying. If you want to test out how your book will appear in print, you can learn to bind a copy yourself.
When to DIY:
You don’t have any budget for design.
You have design skills to do it yourself.
You have the design software.
You have a template and know exactly what you want.
You have people with an eye for design that can guide you.
How to Make a Hardcover Book
So you’re ready to bind your own book. Here’s what you’ll need:
Content, of course.
Uncoated printer paper for book pages
Decorative paper for endpapers, such as wrapping paper or cardstock
Davey board (aka bookbinder’s board), thin chipboard, or cardboard for the book covers
Craft knife
Polyvinyl acetate (PVA) glue such as Elmer’s glue
Hot glue gun and glue sticks
Ruler or straight edge
A long stapler
Thin fabric or book cloth for cover
Binder clips
Thick decorative paper (optional, for dust jacket)
Paper trimmer (optional, for trimming book pages)
Paintbrush (optional, for spreading glue)
There’s more than one way to bind a book, and you’ll find tons of great tutorials online for making homemade books, including Japanese bookbinding and perfect bound softcover books. The most popular style of hardcover book binding is called case binding, which is traditionally done by stitching pages together with thread. Here is how to make a hardcover book step-by-step—no sewing or special materials required:
Assemble the content. The number of pages and the type of paper you work with depends on whether you’re binding a novel, a full-color photo book, or a sketchbook. Familiarize yourself with the format by taking some hardcover books down from your bookshelf and observing how they were made.
Format your pages. If you’re creating a blank book, you can skip this step. If you’re printing a book with text, you'll need to format the text so that you can print it into a book. You can get help with this at a copy shop, or you can download book design software and print at home. Eventually, you’ll end up with a PDF with a page count. This page count has to be divisible by four so that your book can be bound as folios made up of eight sheets of paper (32 pages) each. You may need to add some blank pages at the end of the book to keep your page count correct for the folios.
Print and fold. Once all of your pages are printed, fold pages in half and stack eight within each other, making sure the pages are in the correct order. Staple the folios together in the folds, alternating the location of the staples so that you don’t end up with a bulge in the spine.
Bind your folios together. Arrange all of the folios in the correct order and flatten them between heavy books. Once your folios are flat, it’s time to glue them together. Hold the folios together with binder clips and use a glue gun to glue the folios together along the stapled edge. This will become your book’s spine. Be careful not to overdo it on the glue: Use just enough to keep the folios together. Before the glue cools, use a thin piece of fabric to cover the spine only.
Even out the pages. Carefully trim the edges of the pages with a paper trimmer or craft knife, if needed.
Make the hardcovers. Cut two pieces of cardboard for the front and back covers of your book. For the spine, cut a piece of cardboard that is the same height as the front and back covers, with a width equal to the thickness of the spine plus the front and back covers.
Attach the hardcovers. Paint the cardboard (both covers and the spine piece) with a thin layer of PVA glue and attach to the cloth you’ll use to cover your book, leaving a space between the covers and the spine equal to one and a half times the thickness of the cardboard. Let dry.
Assemble the book. Use PVA glue to attach the fabric-lined spine of your bound folios to the cardboard spine. Keep the book propped up between other books while you wait for it to dry.
Attach the endpapers. Trim the paper lining so that it’s twice the size of the first page and fold it in half. Paint glue onto the inside of the front cover and the front page, and attach paper lining. Repeat with the back cover.
Make the dust jacket. If you’d like to cover your book with a dust jacket, measure a piece of thick decorative paper as tall as your book and as wide as the entire book, plus a few extra inches to fold over the edge of the cover. Fold the dust jacket over the bound book. Lay another heavy book on top of it to help the dust jacket keep its shape. This is the place to add a cover design, if you’d like.
Sources: 1 2 3 4 ⚜ More: Notes & References ⚜ Writing Resources PDFs
#books#book cover#writing tips#writeblr#booklr#literature#writers on tumblr#writing reference#dark academia#spilled ink#writing prompt#creative writing#bookblr#writing inspiration#writing ideas#writing advice#on writing#light academia#writing resources
118 notes
·
View notes
Text

Welcome back, coding enthusiasts! Today we'll talk about Git & Github , the must-know duo for any modern developer. Whether you're just starting out or need a refresher, this guide will walk you through everything from setup to intermediate-level use. Let’s jump in!
What is Git?
Git is a version control system. It helps you as a developer:
Track changes in your codebase, so if anything breaks, you can go back to a previous version. (Trust me, this happens more often than you’d think!)
Collaborate with others : whether you're working on a team project or contributing to an open-source repo, Git helps manage multiple versions of a project.
In short, Git allows you to work smarter, not harder. Developers who aren't familiar with the basics of Git? Let’s just say they’re missing a key tool in their toolkit.
What is Github ?
GitHub is a web-based platform that uses Git for version control and collaboration. It provides an interface to manage your repositories, track bugs, request new features, and much more. Think of it as a place where your Git repositories live, and where real teamwork happens. You can collaborate, share your code, and contribute to other projects, all while keeping everything well-organized.
Git & Github : not the same thing !
Git is the tool you use to create repositories and manage code on your local machine while GitHub is the platform where you host those repositories and collaborate with others. You can also host Git repositories on other platforms like GitLab and BitBucket, but GitHub is the most popular.
Installing Git (Windows, Linux, and macOS Users)
You can go ahead and download Git for your platform from (git-scm.com)
Using Git
You can use Git either through the command line (Terminal) or through a GUI. However, as a developer, it’s highly recommended to learn the terminal approach. Why? Because it’s more efficient, and understanding the commands will give you a better grasp of how Git works under the hood.
GitWorkflow
Git operates in several key areas:
Working directory (on your local machine)
Staging area (where changes are prepared to be committed)
Local repository (stored in the hidden .git directory in your project)
Remote repository (the version of the project stored on GitHub or other hosting platforms)
Let’s look at the basic commands that move code between these areas:
git init: Initializes a Git repository in your project directory, creating the .git folder.
git add: Adds your files to the staging area, where they’re prepared for committing.
git commit: Commits your staged files to your local repository.
git log: Shows the history of commits.
git push: Pushes your changes to the remote repository (like GitHub).
git pull: Pulls changes from the remote repository into your working directory.
git clone: Clones a remote repository to your local machine, maintaining the connection to the remote repo.
Branching and merging
When working in a team, it’s important to never mess up the main branch (often called master or main). This is the core of your project, and it's essential to keep it stable.
To do this, we branch out for new features or bug fixes. This way, you can make changes without affecting the main project until you’re ready to merge. Only merge your work back into the main branch once you're confident that it’s ready to go.
Getting Started: From Installation to Intermediate
Now, let’s go step-by-step through the process of using Git and GitHub from installation to pushing your first project.
Configuring Git
After installing Git, you’ll need to tell Git your name and email. This helps Git keep track of who made each change. To do this, run:

Master vs. Main Branch
By default, Git used to name the default branch master, but GitHub switched it to main for inclusivity reasons. To avoid confusion, check your default branch:

Pushing Changes to GitHub
Let’s go through an example of pushing your changes to GitHub.
First, initialize Git in your project directory:

Then to get the ‘untracked files’ , the files that we haven’t added yet to our staging area , we run the command

Now that you’ve guessed it we’re gonna run the git add command , you can add your files individually by running git add name or all at once like I did here

And finally it's time to commit our file to the local repository

Now, create a new repository on GitHub (it’s easy , just follow these instructions along with me)
Assuming you already created your github account you’ll go to this link and change username by your actual username : https://github.com/username?tab=repositories , then follow these instructions :


You can add a name and choose wether you repo can be public or private for now and forget about everything else for now.

Once your repository created on github , you’ll get this :

As you might’ve noticed, we’ve already run all these commands , all what’s left for us to do is to push our files from our local repository to our remote repository , so let’s go ahead and do that

And just like this we have successfully pushed our files to the remote repository
Here, you can see the default branch main, the total number of branches, your latest commit message along with how long ago it was made, and the number of commits you've made on that branch.

Now what is a Readme file ?
A README file is a markdown file where you can add any relevant information about your code or the specific functionality in a particular branch—since each branch can have its own README.
It also serves as a guide for anyone who clones your repository, showing them exactly how to use it.
You can add a README from this button:

Or, you can create it using a command and push it manually:

But for the sake of demonstrating how to pull content from a remote repository, we’re going with the first option:

Once that’s done, it gets added to the repository just like any other file—with a commit message and timestamp.
However, the README file isn’t on my local machine yet, so I’ll run the git pull command:

Now everything is up to date. And this is just the tiniest example of how you can pull content from your remote repository.
What is .gitignore file ?
Sometimes, you don’t want to push everything to GitHub—especially sensitive files like environment variables or API keys. These shouldn’t be shared publicly. In fact, GitHub might even send you a warning email if you do:

To avoid this, you should create a .gitignore file, like this:

Any file listed in .gitignore will not be pushed to GitHub. So you’re all set!
Cloning
When you want to copy a GitHub repository to your local machine (aka "clone" it), you have two main options:
Clone using HTTPS: This is the most straightforward method. You just copy the HTTPS link from GitHub and run:

It's simple, doesn’t require extra setup, and works well for most users. But each time you push or pull, GitHub may ask for your username and password (or personal access token if you've enabled 2FA).
But if you wanna clone using ssh , you’ll need to know a bit more about ssh keys , so let’s talk about that.
Clone using SSH (Secure Shell): This method uses SSH keys for authentication. Once set up, it’s more secure and doesn't prompt you for credentials every time. Here's how it works:
So what is an SSH key, actually?
Think of SSH keys as a digital handshake between your computer and GitHub.
Your computer generates a key pair:
A private key (stored safely on your machine)
A public key (shared with GitHub)
When you try to access GitHub via SSH, GitHub checks if the public key you've registered matches the private key on your machine.
If they match, you're in — no password prompts needed.
Steps to set up SSH with GitHub:
Generate your SSH key:

2. Start the SSH agent and add your key:

3. Copy your public key:

Then copy the output to your clipboard.
Add it to your GitHub account:
Go to GitHub → Settings → SSH and GPG keys
Click New SSH key
Paste your public key and save.
5. Now you'll be able to clone using SSH like this:

From now on, any interaction with GitHub over SSH will just work — no password typing, just smooth encrypted magic.
And there you have it ! Until next time — happy coding, and may your merges always be conflict-free! ✨👩💻👨💻
#code#codeblr#css#html#javascript#java development company#python#studyblr#progblr#programming#comp sci#web design#web developers#web development#website design#webdev#website#tech#html css#learn to code#github
93 notes
·
View notes
Text
hi! i just wanted to come on here again to encourage everyone to please please participate in the boycott against sm! this doesn’t just help in getting justice for seunghan, but also helps in addressing and advocating the fan parasocial relationships & bullying/mistreatment issues in the industry! please unfollow all official accounts on all platforms and avoid streaming any official content and music— here is a link of someone who made mp3 files of riize music for the boycott & for spotify users, there are podcasts with the boycotted music so that we won’t give any streams to sm! also please sign this petition if you haven’t already, and encourage other people to participate in the boycott as well!
as much as it may seem like sm had no intentions of bringing him back w the szn greetings announcement & removing him from under the riize list on their website, there is so so much progress being made with this boycott!:
- our efforts have reached many kpop stores internationally, all of which have decided to halt restocking riize merch! this also include subk which is huge considering that they have collaborated with sm artists before!
- constant trends between the hashtags on twt
- we’ve gotten the support of plenty of non-briize kpop fandoms & non-kpop fandoms (arianators, harries, swifties, beliebers, etc.)
- plenty of large influencers and creators on youtube and tiktok speaking on the situation! there is also the spread in recognition of the situation overall across social media with many videos (such as evidence of the bullying) going viral!
- we’ve reached the recognition of others in the industry, such as a tweet that was retweeted by leeteuk (an artist under sm) & a tweet by jae (former day6 member) talking about the situation!
- i believe pineapple manager also liked an ot7 post on insta?? but pls correct me if i’m wrong!
- drop of riize twt followers from 809k to 730k & riize insta from 4.2m to 3.9m
- the petition has over 260k signatures
- we’ve gotten many big and well-known news sources writing articles on the boycott and the bullying situation with seunghan as well as regarding sm and their treatment of their artists
- tons of korean news sources have released articles on the situation as well as the boycott and updates on it!
- the naver article that covered seunghan’s departure was taken down!
- recent events of ot7 k-briize joining the effort (lots of have tweeted about the hope they have for this!) and organizing a protest outside of sm on friday, the 18th!
- i believe there have also been accounts of people on twt seeing some knetz/ot6s attempting to delete evidence and/or admitting to what they did which shows that our efforts are reaching them! (PLEASE correct me if this is misinformation bc my sources are a few accts on twt!)
please let me know if i am missing any other points of progress and i will add it!
if you would like to continue to make a change beyond unfollowing official accounts:
- if you have twitter (x), please please continue to share the ongoing hashtags we have for seunghan, it is important that we don’t let them drop!
- ALSO!! do not engage with any official accounts regardless of what they post, it will defeat the purpose of the boycott!
- regarding ot6 comments, especially on wv, do NOT interact with them, ignore them! ignoring will help prevent any traction towards their comments, and help increase our efforts!
- helping with funding for ongoing fan projects! one that i’ve seen recently is the sunflowers for seunghan project! this tweet has all the info on it if you’re interested!
— MAJOR UPDATE on the flower project here pls click the link and help in any way!
- some other projects that i’ve heard of but will update more on are the airships (this link includes funding for day 2 of the flowers as well!) & there are ongoing trucks being sent that you can help support!
- there is also the protest happening on the 18th, so if you are or will be in korea during that time, please participate!
- emailing other big accounts that you may know, news sources, or those who write articles on this, or stores that still supply riize merch! (templates & links below):
— template for emailing stores who supply merch!
— template for emailing news sources!
— template for emailing journalists!
— template for other contacts within the media!
— there is also the kwangya project, here is the template!
— template for emailing sm ent!
- there are also tons of updates on the boycott on this account as well as their linktree which has so much info on what you can do for the boycott, such as plenty of email templates as i mentioned above, which i suggest everyone to look at!
again please let me know if there is anything i’m missing on any ongoing projects or updates!
89 notes
·
View notes
Text


The Mr. Handy is a multipurpose robot developed by General Atomics International before the Great War and refined in collaboration with RobCo Industries. It was an incredibly popular model, used by government agencies, private companies, and individual citizens across the United States. So reliable that it only received one major hardware update in 2039, to eliminate a bug causing interference in the operation of the multiple arms. The Calpower 238B nuclear power unit and self-maintenance modes were key to its success, ensuring each robot's longevity. To minimize maintenance overhead, each Mr. Handy was designed to perform its nuclear fuel replacement and radiation cleansing. Each unit could carry out maintenance and repairs on other units (it could not carry it out on itself).
By contrast, the Robobrain, as the name implies, is a form of cyborg. Developed by General Atomics International and the US Army with indirect support from RobCo Industries, the Robobrain was designed from the ground up as a multirole platform for use by military and civilian clients. They are more flexible and powerful than robots due to the fact that their central control and processing unit is an actual brain, rather than an artificial facsimile. Coupled with a robust, all-terrain tracked chassis and powerful armaments, the Robobrain was on the forefront of a new revolution in combat robotics.
Both bots are fully recolorable and have a number of faction swatches. The center arm for the Mr Handy doesn't move, so no luck there. I've extended the lower body piece for the robobrain, so that's why it looks so tall. As you can see in the pictures, I've updated the existing fallout plumbots, giving them full recolorability, faction swatches, lower poly counts, and better bones for movement. I've made the securitron torso smaller and merged it with the screen. Files have been updated, so please redownload. Requires into the future, please enjoy!
Mr Handy Google Drive: https://drive.google.com/file/d/1YZf2mED3cuJMXGzzv1VqHxqokWmd-63c/view?usp=sharing
Mr Handy SimFileShare: https://simfileshare.net/filedetails/5260243/
Robobrain Google Drive: https://drive.google.com/file/d/1AsuqsruOHsbj6kw-llT611Simp7ZMgon/view?usp=sharing
Robobrain SimFileShare: https://simfileshare.net/filedetails/5260244/
#ts3cc#sims 3#sims 3 conversion#into the future#sims 3 into the future#fallout#sims 3 itf#fallout 76#sims-tec download#mr handy#robobrain#update#upgrade
24 notes
·
View notes
Text
Achieve faster task completion and improve daily workflow efficiency with eShare.ai — the smarter alternative to traditional file-sharing platforms. Our intelligent cloud tools are designed to streamline your work processes, reduce time spent on repetitive tasks, and provide seamless collaboration. Whether you're managing projects, sharing files, or collaborating with teams, eShare.ai empowers you to move faster and get more done with less effort.
#eshare.ai#task management#productivity boost#complete tasks faster#file sharing platform#cloud collaboration#digital workspace#workflow automation#smart file management#cloud productivity#increase work speed#fast file access#collaboration tools
0 notes
Text
20 q's for fic writers
tagged by @crushribbons love you Laney😙😙😙😙💓💓💓
How many works do you have on AO3? I am a humble baby writer so I only have three...so far
What's your total AO3 word count? 99,211...before I joined tumblr and fanart hell (affectionate) I was writing SO MUCH...I started in January bahahahahhahahahahahahah
What fandoms do you write for? Hogwarts Legacy, but in the future I'll probably do Tomione…beginning of death eaters super evil but sexy 1940s Tom Riddle making Hermione turn evil… (among others). Tbh (fanart-wise NOT writing) I also want to draw harvest moon…stardew valley…x files… I would love to attempt writing for P&P bc I have so many ideas, but I am too lazy to make sure they're historically accurate and it would drive me crazy if they arent so I'll just enjoy them hehe
Top five fics by kudos? I only have three published so far, but the most popular is my Ominis oneshot, legilimency. I have no idea how that one actually got readers...but I'm happy bc I really like it too and I reread it sometimes!! My main fic is actually doing a lot better than I expected too, bc when I started posting I was just shouting into the void and I wasn’t part of the community or anything🥹 the little excerpts I post here too, that go along with my writing, also do a lot better than I expected and it makes me so happy to read your comments💓
Do you respond to comments? yes!!!!! Comments/hashtags always make me SO HAPPY and these interactions are the fun of sharing these things with you all. I get swamped by notifications sometimes so I might respond super late but I always try to bc I LOVE YOU ALL SOOOOOOOOO MUCH!!
What is the fic you wrote with the angstiest ending? my main fic...I have a horrible ending planned but I might chicken out at the end and make it happy. in my fanarts I can make them happy so that might be enough for me...and I’ll go with the evil ending muahahahahahaa
What is the fic you wrote with the happiest ending? the Imelda/Poppy fic. Honestly it's not popular but it holds SUCH A SPECIAL PLACE IN MY HEART...it’s popular to me😤 I reread it a lot...my love letter to Imelda
Do you get hate on fics? I don't think so...If I do I'm out of the loop bahahahhahahahaha. Honestly I've had haters before on other platforms and it's not something that really bothers me bc if I don't personally know someone, I don't care what they think...and like Laney said...if they don't like something they should just make what they want to see instead lol
Do you write smut? yes😳
Craziest crossover? None I Am A Boring Girl
Have you ever had a fic stolen? not that I know of!!!!! But I also just started writing this year. I've had my art stolen sooooooo many times before though on IG and tiktok (not here yet that I know of…). If it's just copying my art I don't mind that much with these fanarts because that's how you learn and a copy will never look like the original but...
Have you ever had a fic translated? nope!!
Have you ever co-written a fic before? No but I'm collaborating with @versailles-black for fanart shenanigans bc our MCs are cousins🥹💓 plus the whole Leo/Bea thing with @the-ozzie …I’m actually considering writing a oneshot about the two of them so I think it counts!!
All time favorite ship I have two...Elizabeth/Mr Darcy have had me in a vicelike grip for my whole life...but so have Scully and Mulder...
What's a WIP you want to finish but doubt you ever will? I really really really want to write my Ominis longfic that's a continuation of my oneshot, but it's hard to find the time to write lately bc I've been so busy!!! like...even finding time to do these fanarts is a struggle these days. I still have hope I'll finish it though bc apart from ME wanting to read it there are a few others who are also looking forward to it!!!
What are your writing strengths? no idea🥲
Thoughts on dialogue in another language? I personally like it!!! But only if it's used correctly...I've seen Spanish in fics before where the person CLEARLY doesn't speak it and it drives me crazy, esp if the character is supposed to be Spanish-speaking. Or...when people add random phrases in with the rest English, bc as a bilingual person I feel like it doesn't really work like that lol. I added some Spanish to the Imelda oneshot I wrote and I like to read it when it's done naturally, and if anyone asks me for translation in the comments I’m happy to oblige🥰
First fandom you wrote in? Hogwarts Legacy is my first fandom ever bahahahhahahahahah
Favorite fic you've written? tbh I love all three that I've written so far!!!!!! I can't choose🥹🥹
Laney said there's no 20th question…I love you all😙😙😙
zerooo pressure tags for @kay9leo @writing-intheundercroft @heyitszev @noxxytocin and anyone else who thinks it would be fun to answer🥹💓😙💓😙
#tbh I don’t know many authors here but I want to change that!!!#bc it’s funny I actually started out writing#and these fanarts were just a way for me to add some illustrations#but then I got sucked in and here we are……..#this was fun to think about though bc writing was my FIRST foray into the fandom but I neglect it a lot🥹🥹#hogwarts legacy#hphl#hogwarts legacy fanfic#also it’s funny bc I went to the Imelda x poppy tag#and literally everything is just my art😆😆 I’m sketching up my next one of them NOW
23 notes
·
View notes
Text
A significant leak has exposed details about who is receiving payments for Russian propaganda activities in Bulgaria, OFFNews reported. Danish public broadcaster DR obtained a massive trove of documents - over 49,000 emails and more than 22,000 files - from a confidential source tied to a Russian state-backed group called the Fund for Support and Protection of the Rights of Compatriots Living Abroad, commonly known as Pravfond. The investigative outlet BIRD.bg is reporting on this extensive cache, which sheds light on the financing behind Kremlin-linked propaganda efforts within Bulgaria.
Pravfond, created by a presidential decree in 2011, is widely recognized as a Kremlin instrument aimed at spreading disinformation and influence operations across Europe. Previous investigations by DR and various European intelligence agencies have confirmed its role in orchestrating propaganda campaigns.
DR collaborated with the Organized Crime and Corruption Reporting Project (OCCRP) to analyze the documents, joining forces with 28 media partners including BIRD.bg under a joint investigation titled “Dear Compatriots.” The emails span the entire activity period of Pravfond, from its start in 2012 until November 2024, involving communications from at least 21,043 individuals.
Among the revelations are more than 360 grant agreements, with a majority—at least 260—issued between 2020 and 2024. The total funding Pravfond has directed to recipients across Europe and beyond amounts to at least .6 million. The numbering system for grants hints at an additional 713 grants not present in the leaked archive, indicating a possibly even larger scope of financing.
In parallel, the Baltic investigative platform Re:Baltica shared a related leak of over 35,000 emails and around 2,300 documents from IMHOclub, a Kremlin-funded Russian-language opinion site based in Latvia, further mapping the network of influence.
Looking specifically at Bulgaria, Pravfond’s local beneficiaries received over 6,000 from 2014 through 2024, representing roughly 7% of the fund’s total grant allocations. While the emails mention other grants, some documentation is missing from the leak, leaving parts of the picture incomplete.
Most of the money has gone to Bulgarian media outlets and organizations that stage events aimed at promoting pro-Kremlin narratives and policies. Although Pravfond’s stated primary mission is to provide legal support to Russian citizens abroad, the funding for such legal aid in Bulgaria appears minimal.
The main recipients of these grants, transferred in euros or dollars via bank payments, are several Bulgarian-registered entities closely tied to key individuals:
Federation "Union of Compatriots," led by Marina Dadikozyan, which organizes conferences and events;
National Association Together with Russia, also under Dadikozyan, focused on similar activities;
Interros Media Association, managed by Dadikozyan, which publishes the Russian-language portal "Vsemirnaya Rossiya";
BRIP OOD (Bulgarian-Russian Information Pool), run by Svetlana Sharenkova, publisher of the weekly “Russia Today” and event organizer;
Forum Bulgaria - Russia Association, another Sharenkova-linked group involved in conference and event organization.
BIRD.bg is currently preparing detailed reports on how these funds are used and the nature of the projects financed by Pravfond in Bulgaria, aiming to provide a clearer understanding of the Kremlin’s influence channels in the country.
6 notes
·
View notes
Text
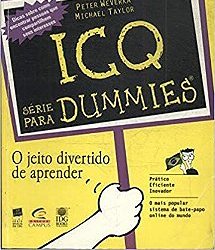
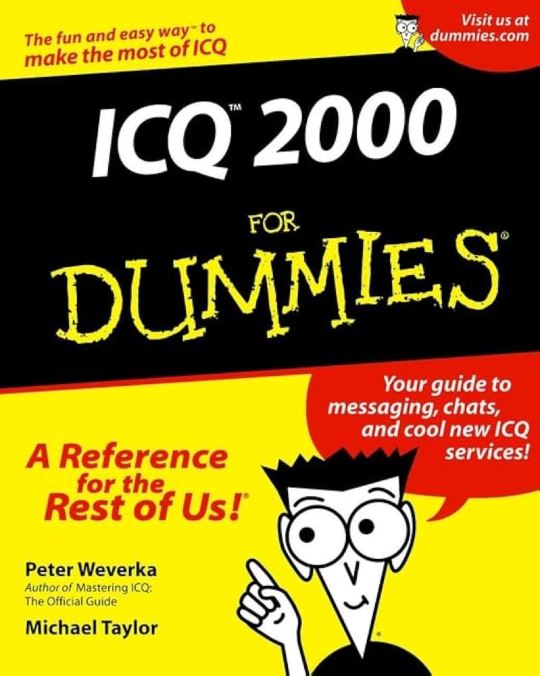
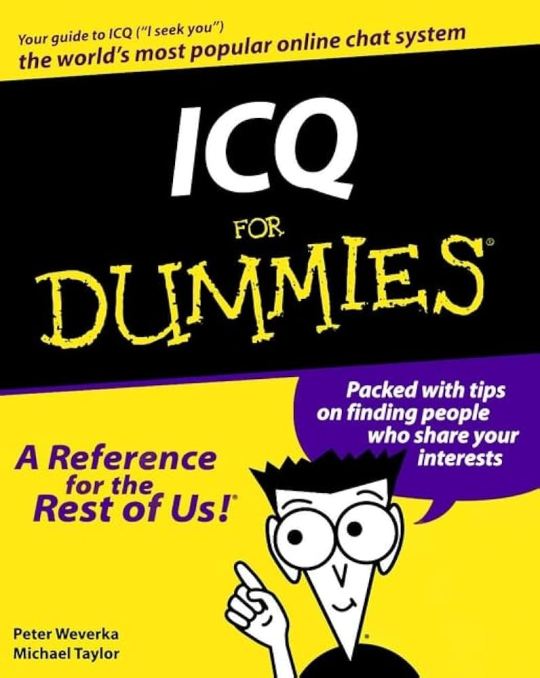
💬📖 Released in 1998, "ICQ for Dummies" by Peter Weverka and Michael Taylor was the go-to guide for navigating the world of instant messaging. At a time when the internet was still new to many, ICQ (I Seek You) changed how people connected online—long before WhatsApp, Facebook Messenger, or Discord.
💻 The book walks readers through everything they need to know about ICQ, from installation to mastering its features. It starts with a step-by-step guide on how to download, install, and set up an ICQ account. Once online, users learn how to add contacts, send instant messages, share files, and even send SMS messages through the platform.
📟 Beyond basic messaging, the book dives into chat rooms, status updates, and away messages, helping users make the most of ICQ’s social features. It also covers customization options, such as changing sounds, skins, and using plugins to enhance the experience. For those running into trouble, a troubleshooting section offers tips on solving common issues and staying safe online.
🌍 ICQ was one of the first real-time messaging platforms, pioneering features like unique user IDs (UINs), offline messaging, and “Uh-oh!” message notifications. It set the foundation for modern instant messaging and changed how people interacted online.
🖊️ Peter Weverka is an experienced writer specializing in technology and software guides. He has written multiple books in the For Dummies series, covering topics like Microsoft Office, Windows, and the Internet. His easy-to-follow writing style made technical concepts accessible to a broad audience. Michael Taylor is also a technology expert and author, collaborating with Weverka on "ICQ for Dummies" and other software-related books. Together, they created a practical and user-friendly guide that helped countless people navigate the world of online messaging.
📖 While ICQ is no longer a household name, this book remains a fun time capsule from the early days of the internet boom—a reminder of how exciting and revolutionary online chat once was.
💬 Who remembers their first ICQ number? Drop it in the comments if you still remember!
#ICQ #ICQMuseum #ICQNew #InstantMessaging #TechNostalgia #90sInternet #ICQForDummies #OldSchoolTech #InternetHistory #ThrowbackTech #ChattingBeforeItWasCool #AOL #AIM #AmericaOnline #AIMessenger #OldWeb #Y2K
#america online#aol#company#early internet#icq#icq new#instant messaging#instant messenger#messanger#old internet#icq forever#icq museum#icq for dummies#for dummies#book#y2k blog#y2k aesthetic#y2k style#old web#old technology#old tech#old computers#aol time warner#aol instant messenger#messenger#internet#companies#communication#save icq#software development
10 notes
·
View notes
Text
Which tools every UIUX designer must master?
Gaining proficiency with the appropriate tools can greatly improve your workflow and design quality as a UI/UX designer. The following are some tools that any UI/UX designer has to know how to use:
1. Design Tools:
Figma: One of the most popular and versatile design tools today. It’s web-based, allowing real-time collaboration, and great for designing interfaces, creating prototypes, and sharing feedback.
Sketch: A vector-based design tool that's been the go-to for many UI designers. It's particularly useful for macOS users and has extensive plugins to extend its capabilities.
Adobe XD: Part of Adobe's Creative Cloud, this tool offers robust prototyping features along with design functionalities. It’s ideal for those already using other Adobe products like Photoshop or Illustrator.
2. Prototyping & Wireframing:
InVision: Great for creating interactive prototypes from static designs. It’s widely used for testing design ideas with stakeholders and users before development.
Balsamiq: A simple wireframing tool that helps you quickly sketch out low-fidelity designs. It’s great for initial brainstorming and wireframing ideas.
3. User Research & Testing:
UserTesting: A platform that allows you to get user feedback on your designs quickly by testing with real users.
Lookback: This tool enables live user testing and allows you to watch users interact with your designs, capturing their thoughts and reactions in real time.
Hotjar: Useful for heatmaps and recording user sessions to analyze how people interact with your live website or app.
4. Collaboration & Handoff Tools:
Zeplin: A tool that helps bridge the gap between design and development by providing detailed specs and assets to developers in an easy-to-follow format.
Abstract: A version control system for design files, Abstract is essential for teams working on large projects, helping manage and merge multiple design versions.
5. Illustration & Icon Design:
Adobe Illustrator: The industry standard for creating scalable vector illustrations and icons. If your design requires custom illustrations or complex vector work, mastering Illustrator is a must.
Affinity Designer: An alternative to Illustrator with many of the same capabilities, but with a one-time payment model instead of a subscription.
6. Typography & Color Tools:
FontBase: A robust font management tool that helps designers preview, organize, and activate fonts for their projects.
Coolors: A color scheme generator that helps designers create harmonious color palettes, which can be exported directly into your design software.
7. Project Management & Communication:
Trello: A simple project management tool that helps you organize your tasks, collaborate with team members, and track progress.
Slack: Essential for team communication, Slack integrates with many design tools and streamlines feedback, updates, and discussion.
8 notes
·
View notes
Text
Tips: Studying at Home

Adjust your learning
The first thing to acknowledge is that an online education demands a different style of learning as opposed to the traditional classroom environment.
You should be aware that you will need to adjust your learning style to ensure you get the most out of any online learning experience by doing things such as:
Fully commit yourself to join in with digital discussions so you are still actively learning and developing key skills such as debating and listening.
Be prepared to try new tech - with new online learning platforms and video calling functions, prepare to become adaptable and open to trying new technologies.
Collaborate with others - whether that’s over instant messenger outside of class/tutoring time, or with online discussions - get involved and you’ll make the most out of your learning experience.
Be self-disciplined - You will need to ensure that you’re ahead with the class work, pre-reading course materials where you can and ensuring excellent time management to prevent missing classes. All of this will help you to get the most out of your online learning.
Clear Distractions
When setting up your home study and/or work space, make sure there is nothing in the background that may distract you or your classmates/co-workers.
That includes putting your phone in a separate room or turning it off completely to avoid taking your attention during your online learning.
It’s important to note that you may also need to move your work space throughout the day - perhaps you may need to move as sunlight comes through your window to avoid screen glare.
So have a think about this before you are forced to move and re-position halfway through a learning session.
Use headphones and a microphone (where possible)
If you have them, make sure you use headphones and a microphone so you can clearly hear your tutor/classmates, as well as deliver clean and clear audio for easy flow of communication.
Even if you don’t have access to this, most laptops do have a reasonably high-spec audio and microphone set already built into them, however having a specific kit will always elevate your sound and audio quality.
Make sure your camera is stable
Again, to help avoid distractions during your online learning, make sure your laptop or webcam is sturdy and pointing ahead to avoid any strange angles.
Also, don’t sit too close to your camera either as the audio could muffle if you are sitting close to the microphone on your device.
Prevent interruptions
We’ve all seen that BBC News video interview - and we know you certainly don’t want to have the same happen to you.
To avoid this, make sure anyone you live with is aware that you will be doing some online learning from home and to ask them to leave you alone to concentrate.
If you can, close a door and stick a sign on the outside of it, making it clear that you cannot be disturbed.
Pre-prepare resources
If you have work that you want to share with your tutor or other students during a video lesson, make sure you have them ready and waiting on your desktop with clear file names, and are ideally already open and waiting before you start.
This will avoid time-wasting if you need to hunt around your downloads folder and browser tabs.
Strong Wi-Fi connection
Before joining an online session, make sure your Wi-Fi session is working and up to scratch.
The website; Speed Test will help you to see what sort of internet speeds you’re currently getting, and whether they will be strong enough to support video calls.
There are a few obvious steps too to try and consider to improve your Wi-Fi strength, such as putting your internet box up high on a sideboard, making sure nothing is covering it, and setting up your work space close to where the box is.
If you do have a poor Wi-Fi connection, you may struggle to host a video call, so it’s worth considering if there’s any other locations you could use for your learning session - perhaps a friend or relative’s home?
Pre-read material
If possible, review any resources and material that you’ll be studying before your online learning session.
This will give you the chance to prepare for any discussions, have questions ready to ask about subject matter that you haven’t quite fully understood, as well as help the new knowledge to be absorbed ever so slightly easier.
Source ⚜ More: Writing Notes & References
#studyblr#dark academia#study motivation#light academia#spilled ink#writers on tumblr#poets on tumblr#study inspiration#study inspo#study tips#albrecht anker#art#realism
81 notes
·
View notes