#how to bookbind
Explore tagged Tumblr posts
Visit Tumblr Blog
Explore Tumblr blogs with no restrictions, modern design and the best experience.
Last Seen Tumblr Blogs


Fun Fact
Users from the US are the majority of Tumblr visitors.
Text
On Writing and Hand Binding Your Novel
I've been given the wonderful opportunity to talk about a personal project completed last summer, one that took over a year to finish actually! It's what made me get into writing and book binding.
So, without further ado, last year I wrote a novelized version of the homebrewed dnd campaign I was in for about two years. And not only did I write it, I illustrated a cover, made a pretty typeset, printed the pretty typeset, and hand bound two copies of what eventually became titled "That Time I Nearly Broke Down & Cried (and other such stories)".


For some progress shots and more about what I put into it:
The Story
Near the end of the campaign, I decided to take my notes and write them as novelized journal entries from my character, Casrius Diki's, perspective (this man right here)

This ended up taking me over 6 months to complete as I started to enjoy the writing more and, thus, each journal entry got longer and more complicated. During that time, our campaign also imploded in a fairly soul crushing way. So there I was, with all these feelings and a creative project half done that brought up these feelings, and a general sense of no closure for anything. So, I decided to change that. For both.
I was already interested in book binding. And I had a novel length book almost-written. Why not end the campaign for me, on my terms, with a project I could be proud of?
So, the writing continued, followed by some serious editing.
And before long, I had formatted my writing for printing, and it was off to be bound.
The Creation
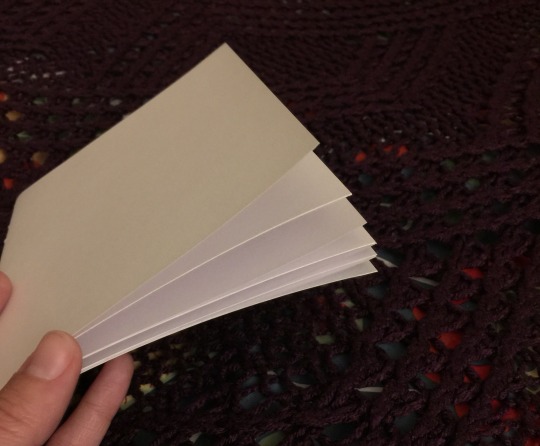
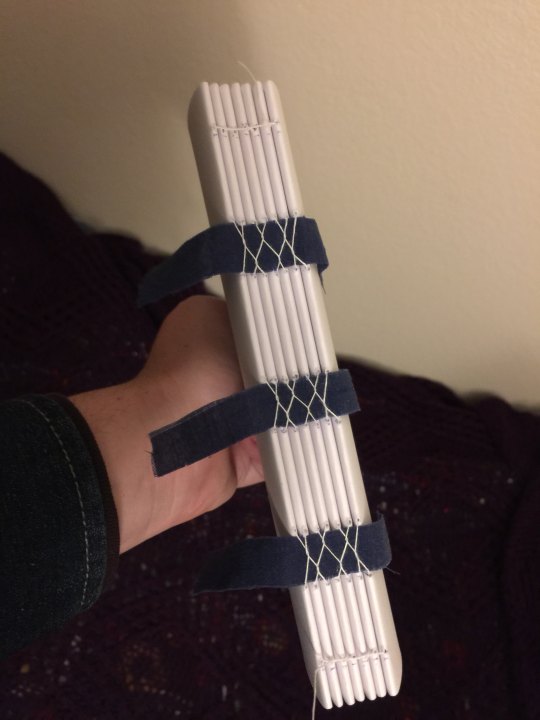
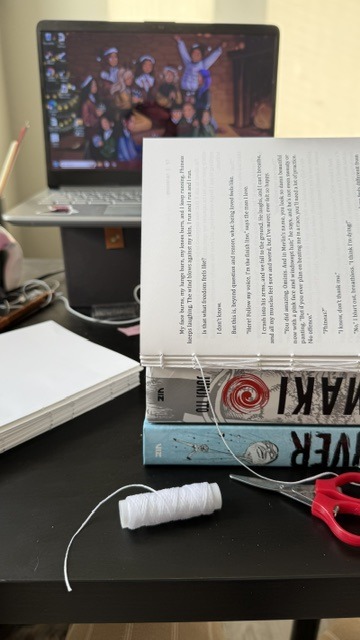
My novel ended up having enough words for 327 pages when formatted for printing, or 17 signatures to fold and sew together, the largest book block I have ever worked with.


(don't mind my non-setup, this was done over many days, and even involved a move to a new apartment.)
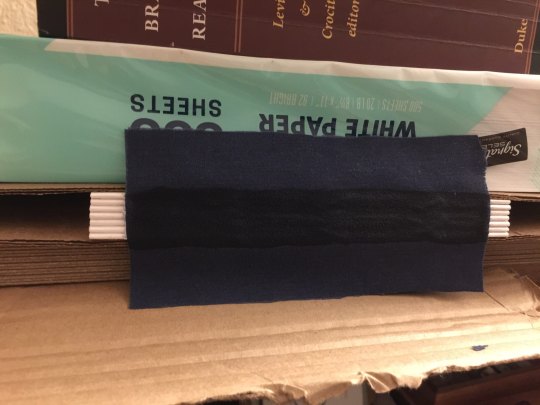
The book press is plywood from Home Depot that was cut into 12x12" squares, then clamped with plastic clamps. String, beeswax, needle, bone folder, PH neutral PVA glue, and headbands were all purchased from Hollander's. I used normal printer paper for the pages to attempt to keep the thickness down.
For the cover, I had previously drawn the illustration of the team in the forest as an anniversary drawing for our first year. But it didn't have the proper dimensions for a book cover, so I had to expand the illustration and give it more space for the title and such.


The text was done in Canva, then the whole cover was printed on 13x19" Canon Matte Photo Paper. I had read that this was a good paper to use for book covers, but I don't know if I would use it again in all honesty. Any glue that came into contact with the print rubbed it away, making the whole cover feel a little fragile.


For a final touch, I painted the edges of the book block a solid turquoise. This was done just as sprayed edges were starting to become popular for books, so I thought it would be cool and make this feel more special, but now it is so mainstream that I honestly don't know if I like it on my book anymore oops

The Fun Stuff
Here's where I show off the parts of the book that make me really happy!
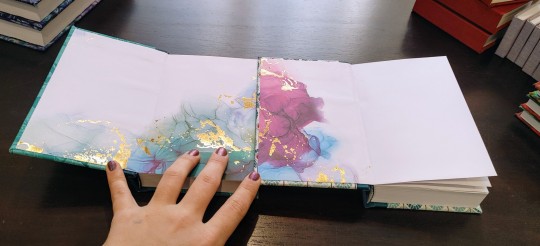
The endpapers feature paintings of the group that I had done as another gift. They are in ornate frames and "hung" off the endpaper - I actually cut them out of a thicker cardstock and glued them onto the book so they have a little depth to them!


This specific page ( a fake copyright with lots of fun goodies)

The list of contents, both for the fun chapter titles (one chapter for one session) and for a playlist created during the campaign


Speaking of the music, the footnotes on each page where a song is relevant, explaining where and why it is relevant:

And finally, the typeset itself, which is peppered with illustrations I did at the table for fun little moments in the campaign


All in all, truly a labor of love for my character and for the campaign. regardless of other emotions attached to it. I gave myself, and the dnd version of Cas, closure. I also discovered how much I love writing and making physical copies of my writing. Is there another personal writing project of mine that ended up in a book that I have not ever mentioned? 100% yes. Maybe one day it will get its own post.
Anyways, thanks for sticking around! I hope you enjoyed/maybe even learned something about bookbinding. I'm pretty new at it, but if you have any questions, I will do my best to answer lol. And if you have ever thought about book binding or writing or any other creative endeavor that you have wanted to try but just haven't, in the most immortal words of all...

#writing#how to bookbind#dnd#personal project#bookbinding#ranthebowart#ranthebow oc cas#sorry if this was long#tutorial#kind of#how to#my thoughts
19 notes
·
View notes
Text


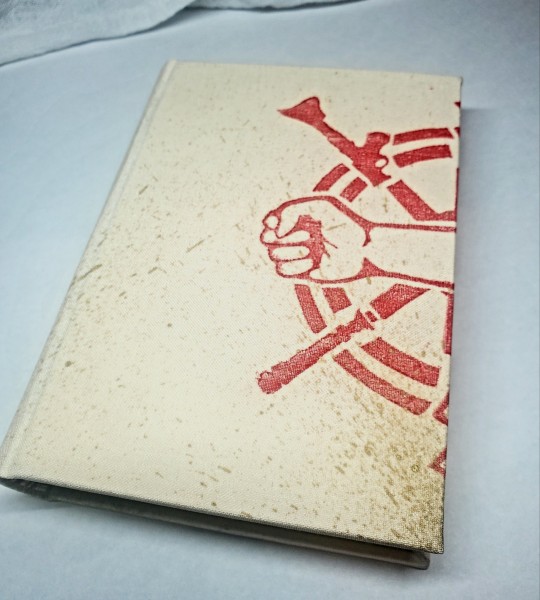
Handmade embroidered hardback copy of Red Valley S1 transcript
#red valley#red valley pod#red valley podcast#audio drama#bookbinding#embroidery#fanbinding#(please be gentle it's my first hardback ever and my first time embroidering on a stiff cloth. hell of a process but i had lots of fun.)#(really happy with how it turned out)#(LMAOO APPARENTLY THis has been in my drafts for ... since november............. i haven't posted this before???)#(weird time to post considering….. but it's honest work ig....... )
744 notes
·
View notes
Text
Book Decoration: AKA All The Ways I Don't Use a Cricut
(this post is for people who don't want to buy an expensive cutting tool, or for those that do have an expensive cutting tool that would like to mix things up a little)
1. Print That Shit
If you're already printing your own textblocks, an easy step for titles is to print them. Above is a title printed onto an "obi" of decorative paper. I measured out where I wanted things on the finished book and laid it out in Affinity, then printed it on a full sheet & trimmed it down to wrap around the book. A more simple method is to print & glue on the label into a slight indent in the cover (to protect it). A third option is to do the spine in bookcloth, while you print on paper for the cover and then glue that paper onto the boards (this usually looks even better when it is a three-piece bradel bind).
2. Foil Quill / Heat Pens
The heat pen is one of my go-to tools, but it can be a bit touchy about materials. The most popular version is the We R Memory Keepers' Foil Quill (which is one of the most ergonomic), but other pens exist that can get you to a higher heat temp, finer lines, or more consistent foil. For example, I have a pen created by a local Japanese bookbinding studio that fares way better on leathers than the WRMK quill & with a finer tip, but it's hell to control. Best results in general are on paper or smooth bookcloth (starched linen, arrestox, colibri - even duo will work but its less solid). The fuzzier a bookcloth is, the less your foil quill wants to deal with it. This means the heat n bond method of making bookcloth does not play nice with a heat pen usually, but there are two solutions: 1) use this tutorial on paste + acrylic medium coated bookcloth instead that will get you a perfect surface for the heat pen, or 2) use the pen on paper & then glue onto the cloth. I did a video tutorial for both foil quill use and this type of homemade bookcloth for @renegadeguild Binderary in 2023.
You get the most consistent results by tracing through a printed template that is taped in place, as I do in the video above.
3. Paint That Shit
Acrylic paints will do you fine! The above is free-handed with a circle template, because I wanted that vibe. If you need straight lines that won't seep, lay them down with tape first & then paint over it first with a clear Acrylic medium, then your color. Same goes for stencils. Two more examples of painted bookcloth:
4. IT'S GOT LAYERS

By using layers of thinner boards, you can create interesting depths & contrasts on your cover. You can also make cutouts that peep through to the decorative paper behind. The most important part to this technique is the order in which each edge is wrapped. To get a good wrapped inside edge, you will split the turn in into tabs to get them to conform to a curve. You can also layer multiple colors of bookcloth without multiple layers of board, as seen below left, so long as you mind your cut edges for fraying.
5. Inlaid... anything
Mirrors! Marbled paper! I saw someone do a pretty metal bookmark once! The key is creating a little home for it to live in, which is pretty similar to the above layering method. On one layer you cut the shape, & glue that layer onto the bottom solid board before covering. You can do the top layer as an entire 1 mm board (like I did for the mirrors) or a sheet of cardstock, like I would use for inlaid paper.
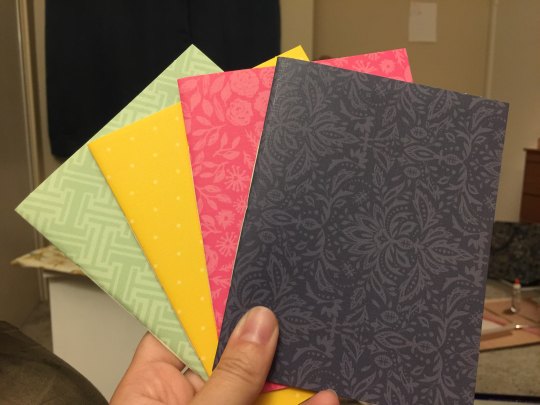
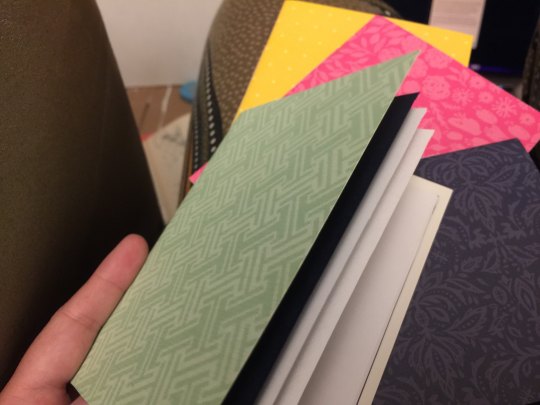
6. Decorative Paper
Decorative paper is always helpful & adds to the paper hoard... & its effects can be layers with other techniques, as below. Marbles, chiyogami, momi, or prints & maps of all kinds can be great additions. Some papers may need a protective coating (such as wax or a sealer).
7. Stamps (with optional linocut)
While I've not used many more regular rubber stamps, I do know some who have, successfully! And I've used one once or twice with embossing powder (see photo 3 up, the gold anchor on the little pamphlet bind). What also works is to carve your own linocut or stamp, & then use block printing ink to ink it onto your fabric (as i did above). A bit time intensive, but it was nice how easily reproducible it was, and I liked the effect I got for this particular bind.
These methods are not exhaustive, just ones I've used, and there are of course many others. I haven't gone too into detail on any of these for the sake of length (& post photo limits) but feel free to ask about more specifics. Usually I'm using them in combination with other options.
#fanbinding#bookbinding#celestial sphere press#ficbinding#in progress review#bookbinding how to#i am not particularly anti-cricut or anything#it's just a very expensive tool#and its prevalence sometimes makes new binders think they HAVE to get one#when they absolutely do not#you can make pretty books without it
1K notes
·
View notes
Text
I've always wanted to learn bookbinding, ever since I was a wee little nerd, but there are a lot of things I've always wanted to learn, and this one has both a daunting upfront materials cost and a daunting upfront research cost. however, my sister is a jewel among siblings and gave me for christmas last year a handy dandy bookbinding manual, a block of good paper, and a little bag of tools.
but I still didn't have a suitable workspace, nor any of the many important tools and materials that she didn't include in her gift. so I just read the manual and pined. until maybe a month ago I got fed up with pining, flattened a cardboard box for a cutting mat, and went to town.
and I'm real proud of myself, so here's me rambling, plus photos!
I went to the thrift store and got glue + some fabric to bind the cover, went to Michaels for a paintbrush (and later went back for a metal ruler lmao it's amazing how useful it is to have a straightedge for cutting the paper), and...could not find material for the cover boards. so I went home and pined some more. but the urges were too strong, so after a couple hours of moping I got a stack of printer paper at the grocery store (I could not bring myself to use the good paper for my first, inevitably weak attempts, I just couldn't do it) and started making a little booklet. which was a great idea, it turned out, since it makes for good practice with cutting the paper, measuring things, punching holes in the signatures, etc.
I have a big box of greeting cards from Michaels, which I used for the covers. it didn't feel like I was making a Real Book, so I got some colored paper from the stationery store and used that for end papers.
so fancy~
galvanized by this success, I ordered a stack of chipboard online to use for cover boards; and once I was confident that I could cut paper without making it look too stupid (getting that straightedge ruler sure helped lol), I made signatures out of the good paper, left them under some heavy books overnight since I don't have a book press, and then punched holes in them! (huzzah for this nice video on getting the holes right)
my sister's gift included good linen thread. it's unwaxed, but after some poking around on r/bookbinding it looks like that just means I'll have to be more careful to avoid tangles and keep good tension. I am fine with this. I can be extra attentive. (I considered just running it over a beeswax candle, but one commenter said if your wax has paraffin in it, it could melt in a hot car, ruining the spine. I can't guarantee my candle is 100% beeswax, I didn't make it, so maybe we just move on.)
I don't have good linen fabric to use for the tapes, but the important part there is that the fabric be thin, sturdy, and not stretchy. the probably-cotton I got from the thrift store fits the bill, so it'll do!

this is a french link stitch, which I got from this exceedingly good tutorial. apparently it's strong enough on its own that for a book of this size, I don't actually need tapes, but I'd already cut the things so eh here we are. and tapes plus french link will make it a stronger binding still (according to a friendly redditor on r/bookbinding), so we carry on.
specifically we carry on to the gluing step. now as I mentioned, I do not have a book press, and you....kinda need one for this step. you need to hold the book block in place with the signatures facing upwards, pressed together hard enough that the glue won't run down between them and stick the pages together (though you do want the glue to get between them just a little, just for like a 16th of an inch). you at least need some clamps and a couple boards to sandwich the book block with.
but you know what? I'm not a professional, this is my first ever book, if it's a little bit off it'll be fine. so we grab all the heaviest books off the bookshelf and improvise.
it's fine! I'm sure it's fine! and just in case it's not, I've tucked a bit of cardboard underneath to catch any glue that drips down so it won't land on the floor. see? I'm prepared! I'm acing this.
and actually, it really was fine. I used clear elmer's glue, applied with a flat paintbrush from the art supplies aisle at Michael's, and frankly I liked the way the flat paintbrush let me slip glue in between the signatures. I did poke around on a couple bookbinding sites to see what kind of glue I should use, and the gist is that although there are better options than this, elmer's glue is perfectly serviceable, and the main downside is it's not archival grade. but I don't need my first bookbinding attempts to last 200 years, that's fine.
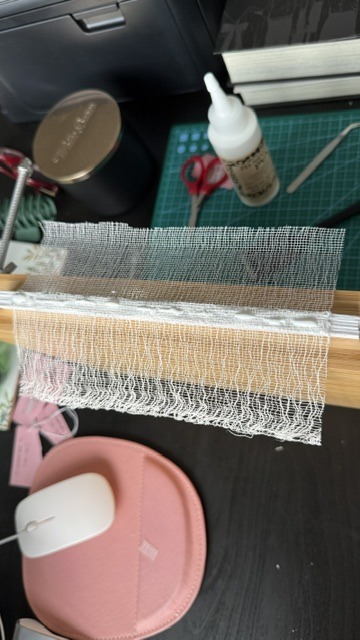
the next step is to add the mull. mull is a specific type of fabric – extremely loose-weave linen – and the idea is to paste it down over the spine to essentially hold the tapes and signatures all in place in relation to each other.
but I don't have mull! so I'm using more of the thrift store probably-cotton, because it's thin enough and not really stretchy at all. I'm sure this will be fine too. I painted a layer of glue onto the spine, then left it to dry a bit while I measured and cut the fabric, then painted a generous stripe of glue down the center, where it'll affix onto the spine. then I added a bit more glue to the spine, just to be sure, and pressed the mull into place, rubbing it thoroughly to make sure it's firmly affixed to every signature, with no creases in the fabric or air bubbles beneath it.
honestly I might have overdone it on the glue. I've never done this before, I don't know! I think it's okay, though – I tried not to ever let it become a thick layer, just a slight coating, since the danger of too much glue is that it might crack once dry and weaken the spine.
and now we leave it in the press overnight to dry, and pick up the next step in the morning!
#finx rambles#bookbinding#finx makes stuff#technically this is the second hardcover book I've made#but it's the first I'm making using Approved Techniques™#instead of watching a handful of half-relevant youtube videos and making up the rest#which was fun!#but did mean that once I was done I didn't know where to go from there#and at the time I couldn't find better resources#(I really wanted better youtube videos! just didn't know how to find them idk)#(it was 2020 I was unwell. as I'm sure we all understand)#but now I have an abundance of good sources#and I'm determined
586 notes
·
View notes
Text
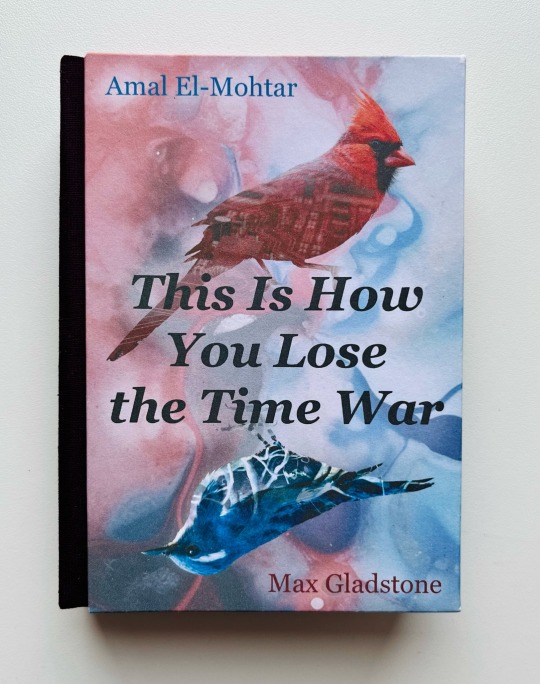
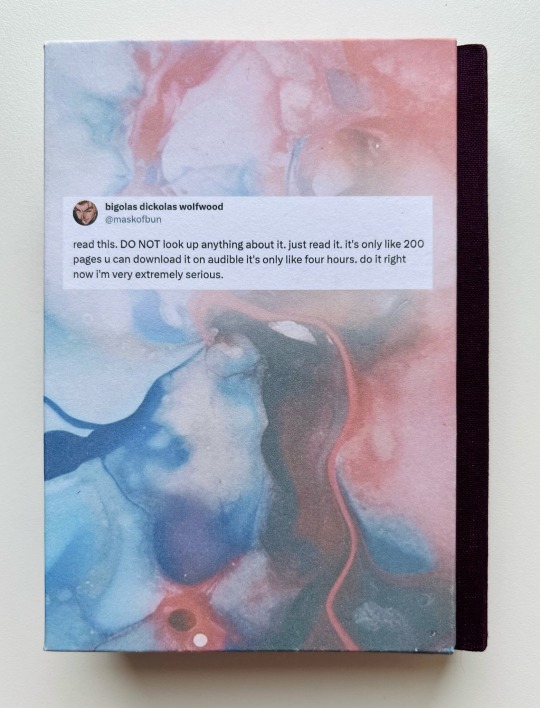


I rebound This Is How You Lose the Time War because I wanted MORE COLORS.
(And also maybe the idea of using that tweet by Bigolas Dickolas as a blurb tickled me greatly. Because that whole situation was a highlight of my month.)
❤️ Did the cover with the same birds but added plot relevant double exposure effect I’ve loved since my True Detective days.
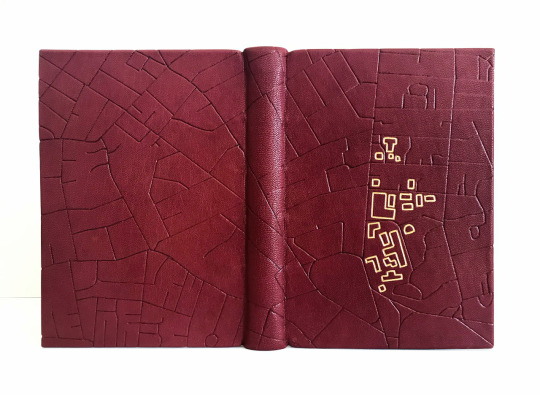
💜 Used purple fabric for the spine, painted the edges in a fun gradient, sewn the endbands;
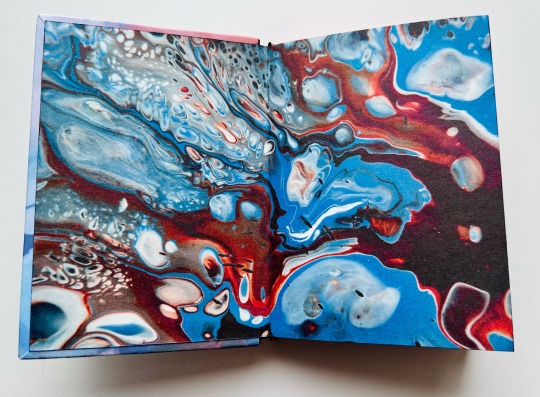
💙 and used lovely fluid art by Marek Okon for endpapers.
Now no one in my household stands a chance of avoiding exposure to this gorgeous story ❤️💜💙
#bookbinding#mythril thread books#rebinding#this is how you lose the time war#max gladstone#amal el mohtar#bigolas dickolas wolfwood
2K notes
·
View notes
Text
Bookbinding: The New Deal by Closer


Moar bookbinding! This one is a Suits fanfic that I bound for @brambleberrycottage's birthday (pictures shared with the author's permission).
[Same disclaimer as always applies: I do this for fun; no money has been made from this project!]
Notes on the binding: This was my third leather book, but my first time sewing on cords (my previous leather books were both split boards). The actual sewing process was definitely...something. Sewing is usually my favorite step of a bind, but not this time. (Possibly because I was sitting on the floor at the base of the stairs sewing the book on a shelf under my desk, as that was the easiest sewing frame hack I could come up with - once I rig something that will allow me to sit up like a human being and not be scrunched up like a hermit crab, I am sure I will enjoy the process more.)
So the sewing itself was a bit painful, but I did really love how the board attachment played out in the end, with the cords laced into the boards. It is SO satisfying not to be doing case bindings anymore! It's the same feeling of relief I had when I first learned how to do split board bindings - you have so much more control over the placement of the cover boards, so much less opportunity for skew, so much more stability. No more casing-in anxiety necessary. (You do acquire all-new steps to be anxious about, but for me, it's worth it).
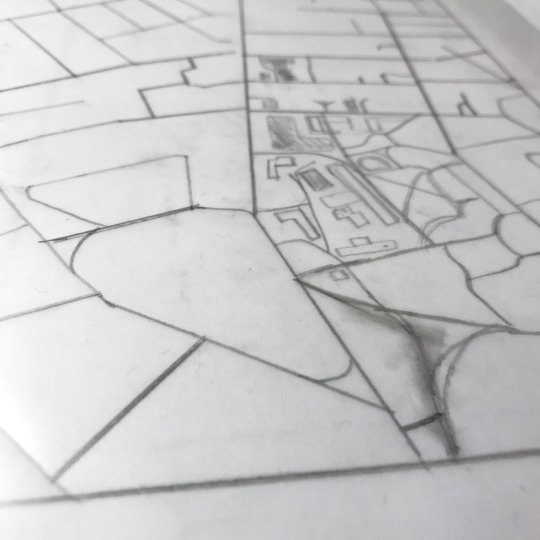
Notes on the design: I've never actually watched Suits, but the fic itself takes place in and around Harvard Law, so I used that as my inspiration for the book's design. The book is covered in crimson leather from Siegel. Endbands are handsewn with metallic red and gold threads. The blind tooling on the cover is a street map of Cambridge, MA, which I drew onto tracing film and then tooled through the film onto the leather. (So far I've only used a foil quill heat pen to do this, because brass tools are expensive. I'm taking a class on traditional tooling soon and I'm VERY excited for it, but for now, this is what I have access to.)
The gold outlines in the design highlight the buildings of Harvard Law. (These lines are also not actual gold tooling - paint pen for now.)
^ early design work, featuring unsightly eraser smudges.
I followed a similar theme/color scheme for the interior. For the endpapers, I used acrylic paints and a dry sponge to make a crimson and gold pattern:

For the title page, I modified an image of Harvard's Veritas shield to display the fic's title and author.

The chapter headers may not immediately ping an association for anyone who doesn't live here/spend a lot of time on the T, but they were the first thing I came up with - they're designed to look like the signage for the Red Line, which is the subway route that serves Harvard Square.


Notes for future me: The one thing that went "wrong" with this bind was that the endpapers ended up being short at the foreedge. I knew this was going to happen before I pasted them down, but I had to make a choice between two undesirable results - the boards were already VERY slightly curved inwards after doing the fill-in, and if I used paste on the endpapers (so they would stretch), I was worried it would pull too hard as it dried and make the boards curve too much. But if I used PVA, the endpapers wouldn't stretch enough and would end up being short. I decided I would rather have short endpapers than warped boards, so that's what I went with, but next time I might try doing one less lining inside the boards and hope that the pastedown will handle more of the counterpull.
Despite little things like that, I had a great time with this! Every time I make something I learn new things, and every time something goes "wrong" it's good to look back and be like "ten years ago I was duct taping the spines of loose pages that I covered in cardstock! i'm doing fine, actually." Lots of progress has happened and lots of fun has been had, which is ultimately the point.
Big thank yous are owed to @brambleberrycottage for letting me send her all my bookbinding experiments, and also to Closer for a) writing this fic in the first place and b) okay'ing the sharing of photos! Much appreciation goes out to both of you :)
#i love how much i've been able to learn with the resources that are out there now#it has helped me so much!#wild to look back and remember that these things did not exist when i started doing this#there was no discord#there was no das (imagine...what a world)#every time i look at my older stuff and want to be like 'this looks it was made by a toddler' i have to check myself like#'ok but back then there was no incredibly endearing australian guy making in-depth tutorials for free' XD#bookbinding
90 notes
·
View notes
Text


I made a fanbind of the incredible Anastasis by @chthonion!! This fic series is truly something special, and even on my first read I knew that I wanted to bind it. This was also my first bookbind where I fully felt like I knew what I was doing, and I'm incredibly proud of how it came out!!
Art inspo: Stellar Corona by eradelphic and Through Window Up by Ninhol Cover/back/spine art has been uploaded here! <3 EDIT: Typeset has been added to the google drive with author permission as well!
#bookbinding#fanbinding#silvergifting#lord of the rings#silmarillion#rosa binds#there are some that might say a bookbind can have too much foil effects#but NOT I!!!!#pictures of the cover don't do it justice#ITS JUST SO SHINY#also my favorite detail is how the endpapers continue through the book#also to anyone reading this that hasn't read Anastasis I beg of you to fix that#it and its sequel The Harrowing are my new obsession#like#some of the most brilliant character writing I've read in fiction period#let alone fanfiction#I'm so glad I have this copy I can display now <3#ficbinding#fanfiction#tolkien#celebrimbor#annatar#sauron
183 notes
·
View notes
Text
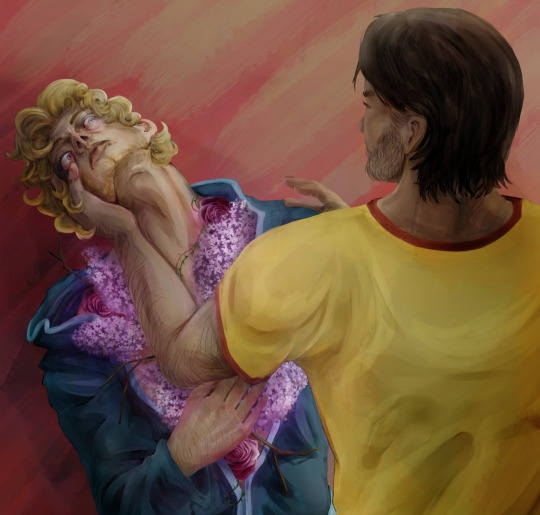
"and then finally take root and grow into a wild garden the floral sweetness of his blood fresh lilacs and roses almost nauseating with just how sweet they are"
A Mouthwashing fic no alarms and no suprises by @stupidcanofpeaches that has been on my mind for the past few months. Believe me when I say no fanfiction has ever made me sick to my stomach as much as this one. Truely a piece of stellar writing.
Heed the warning, trough: the mature label is there for a reason.
#mouthwashing#curly mouthwashing#jimmy mouthwashing#I swear I saw 'lilacs' and had a neuron activation moment#anyway if there's something I need to trigger tag in this just lmk#look at these ugly bitches. I don't really like how this turned out but oh well#I wanted to make fanart for this fic for the longest time#I really love this fic. if I had access to a printer and a go ahead from the author I'd try bookbinding#with a hand-painted spine and gilded edges. it's what that writing deserves.#god i could yap about it for eternity#but most of the time i'm simply rendered speechless#vum's art
66 notes
·
View notes
Text
i found this weird book in my room this morning….i dont remember buying it…..every time i try to read it i get distracted and forget i have it…can someone help me identify this book?
happy halloween!! i wasnt actually planning on posting this today but i managed to finish it just before the hallows eve struck!
for anyone still wondering this is a handmade bookbind of There Is No Antimemetics Division by qntm! this is just a hardcover rebind made from a paperback i bought online so no fancy typesetting here unfortunately. BUT i am happy with the cover design at least
closeup pics and thoughts abt my process below!


i wanted to keep the covers pretty minimalistic to make the book seem more mysterious and to draw more attention to the square window i cut out of the cover boards. fun fact, that square is supposed to represent SCP-055! theres only so much i can do to represent something indescribable, but its not round, so at least i have that

originally i was planning on making the text along the spine white so it would have a sort of disappearing effect against the white fabric, but it didnt really work out so i printed just the shadow of the text instead for a there-not-there look


something i really wanted to try while making this was to paint the edges of the textblock black. i think it came out nicely! it looks neat contrasted to the white cover :p


now the ENDPAPERS!! i had actually imagined the design for these way before anything else. i tried to go for a sort of fractal pattern of fingers like the monster from Fresh Hell. i quite like it in combination with the window on the front cover :3
okay thats all thx for coming with me on my journey ^_^
#scp#there is no antimemetics division#bookbinding#tinad#scp foundation#scp wiki#fifthism#fanbind#ark’s art#one thing i do regret is how small i made the coverboards. that hinge is WAY too big lol#the window also isnt as clean as i would like and the endpapers dont perfectly line up but whateves
138 notes
·
View notes
Text
I er, may have taken one of my fav books to bookbind a few of my favorite fanfics into a lil collection (all by THE Transformers writer of all time @doomspoon888 ).
It was a gift to my friend @not-a-mang0 ^w^


I kept the sleeve to easily disguise the book on a shelf (Well, it’s book #7 of a series by itself but shhh)
#transformers#maccadam#I er may or may not have a whole list of fanfics to bind and 90% of them mayyyy be by Spoon#I literally spotted Spoon online yesterday and today they came back from their break like WOAH#I may or may have not also thought they might’ve been dead for good-#Like I was talking about it with my friends ab how long it’d been and checked their tumblr to confirm that yeah#it had been 4-ish months but I wanted to be sure and spot the green symbol of life#… THE SIGH OF RELIEF I HAD WHEN WE REALIZED WE HADNT KILLED SPOON ON ACCIDENT (a whole story for another day)#dial a medic#concealed carry#Rumor Con#Motor Mouth#starscream#megatron#megastar#bookbinding#Anyways I’m rambling again in the tags but still!#I had a blast working on this and essentially rereading every fic 4 times to properly format it for binding#I would’ve bound Accidental War Crimminal Aquisition BUT ITS 2 CHAPTERS AWAY FROM BEING COMPLETE NOOOOOO#I think I read that one 4 times over as well coz I just love Ratchet and Star’s dynamic
110 notes
·
View notes
Text

hashtag starvingartist. hashtag hellskitchen
#head in hands#he literally sounds like my dad telling me about how he was a bookbinders apprentice at 19 and lived in the little studio apartment above#the shop#what is it w dadlore like where do they get this shit#eric bogosian
47 notes
·
View notes
Text
"The New York Femmes, 1991" by Morgan Gwenwald
source: The Persistent Desire: A Femme-Butch Reader, edited by Joan Nestle
#once i get a proper scanner it's over for all of you#unfortunately my printer is SHITE#also unfortunately the way a lot of these books are bound#i'm pretty sure getting a good scan would require taking the binding apart so i can get a clean scan of each pag#and i have found bookbinders in my area#i am admittedly very nervous to take these books apart though at least not without more knowledge#i'll have to ask for the advice and assistance of one of these bookbinders#let them tell me how before i ruin everything ya know#lesbian literature#lesbian#dyke#archived#thatbutcharchivist#femme#femme lesbian#femme dyke#black femme#black femme lesbian#poc femme#lesbian history#black lesbian history#black lesbian#poc lesbian#lesbian books#lesbian photography#author: joan nestle#the persistent desire#year: 1992#publisher: alyson publications inc.#photographer: morgan gwenwald
262 notes
·
View notes
Text
I think the most frustrating thing about the chevron endband is that you basically uave to sew the thing twice. and then you don't see half the work.

you are never going to see this again except for a stupid tiny slip of yellow. & it took me just as long as a regular endband. now I have to sew another on top of it.
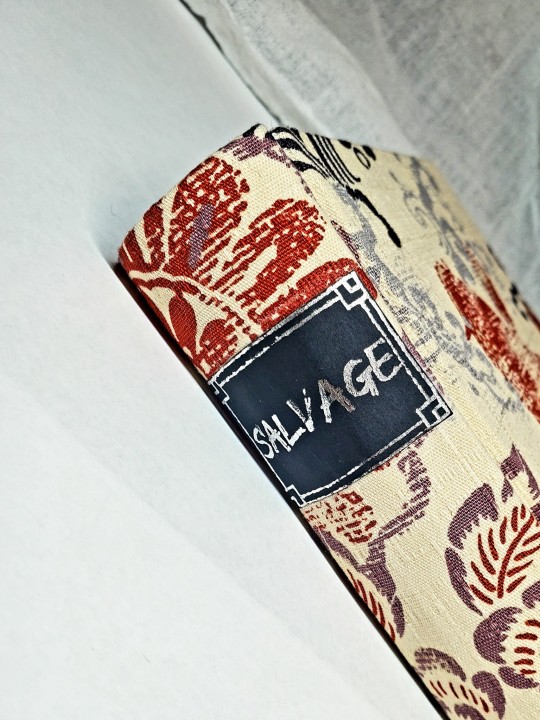
#and you might ask yourself: how did i get here?#man. praise kinked into it i guess#fanbinding#bookbinding#celestial sphere press#in progress review
73 notes
·
View notes
Text
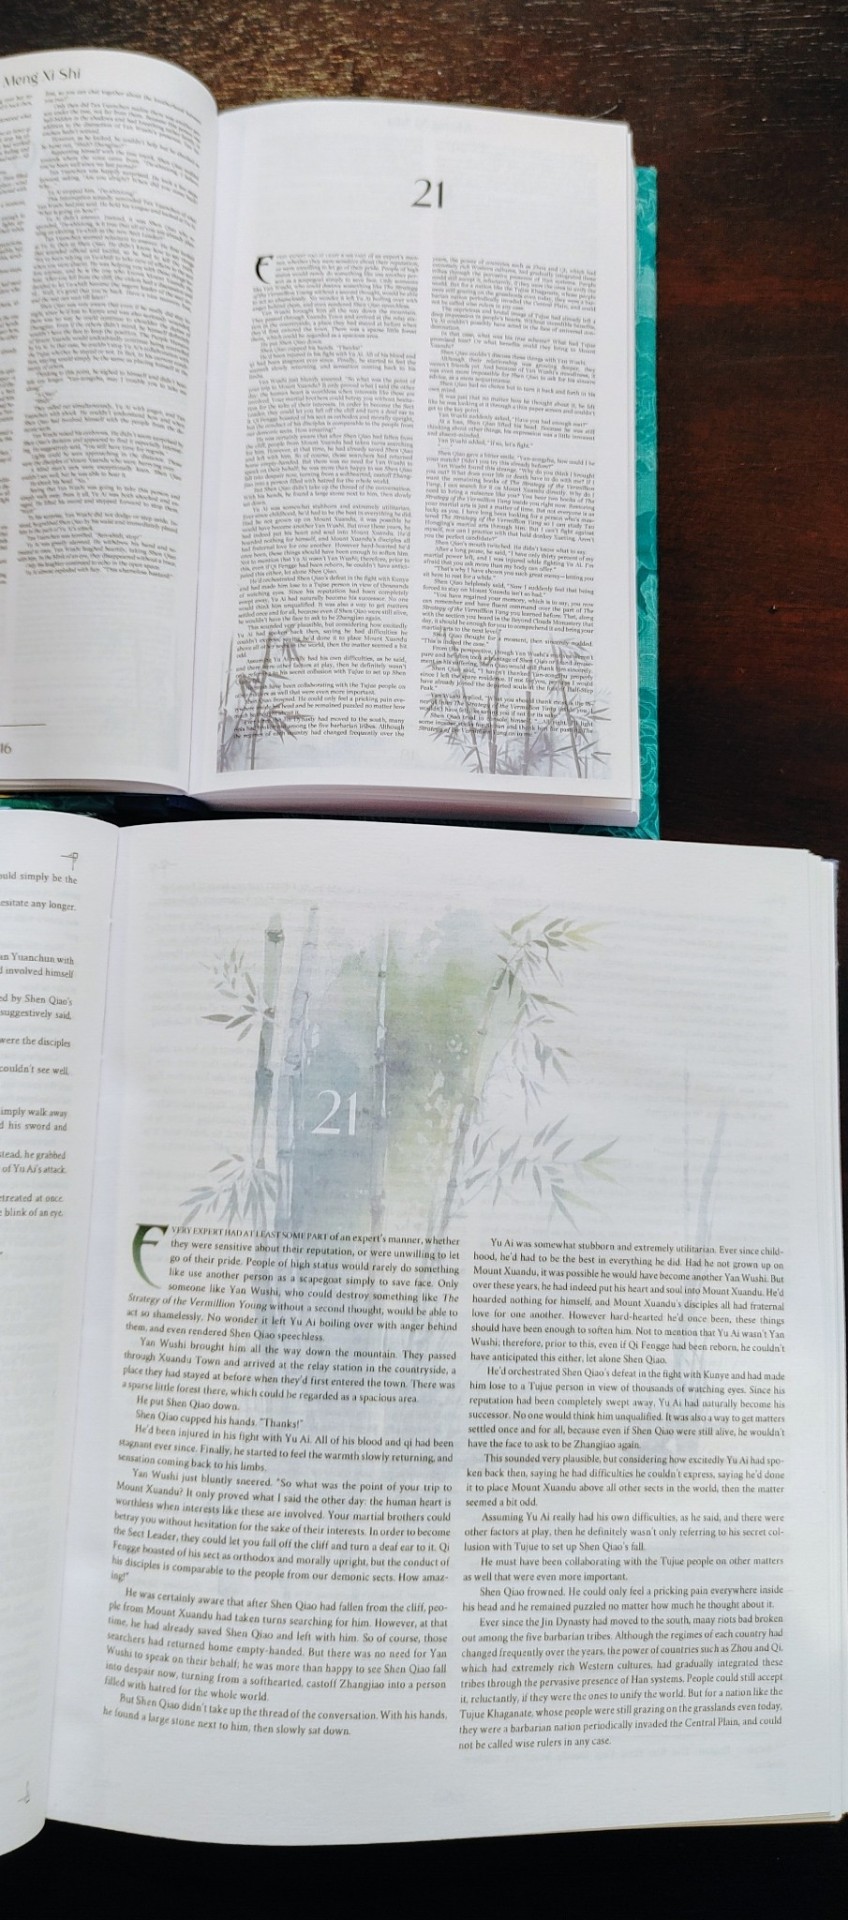
And finally, the big conclusion! When I was planning to not really binderary, getting copies of these books was my big goal. And then when I did binderary after all, I, uh, ended up with two sets of two books. And let's not even talk about how late these are in the grand scheme of things, these have been in my plans for literal years, and I originally intended to get them done well before official translations started releasing (I'm doing great!!). But here they are! Thousand Autumns and Peerless! TWICE!!!!

Okay. Okay. So here's the thing. These books are long. Thousand Autumns is something like 450k, and Peerless is closer to 550k. I hate splitting cnovels. I didn't want to sand instead of trimming. I wanted to keep these books as pairs (because Peerless has my favorite danmei ship of all time, but doesn't hit as hard without the Thousand Autumns context, and EVERYTHING hits less hard without knowing that yan wushi is out there. existing.)
These goals are not terribly well aligned with the facts! The facts are that those are awfully big books to fit into a single volume, if I want to use my guillotine! This is another driving force behind my small text theme of the month. It made the typesets a goddamn nightmare, and my initial copies of the books were done on half-legal paper, which I've never done before and may never do again. I finished those, and those are... big, heavy books. Not super portable. Time to see if my eyes are good for four point georgia, and spoilers, they ARE.
Set one, the large set, I wanted to use more of my snake leather. I had this GORGEOUS purple and green and black iridescent hide that i was determined to use, and fortunately I had just enough of the perfect fabric to pair with it.
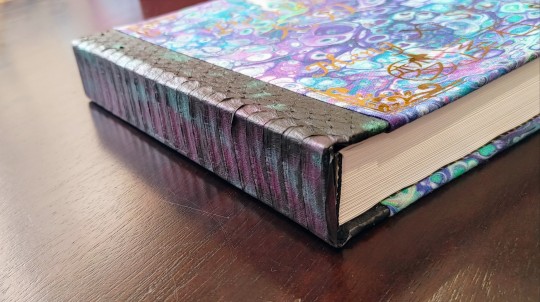
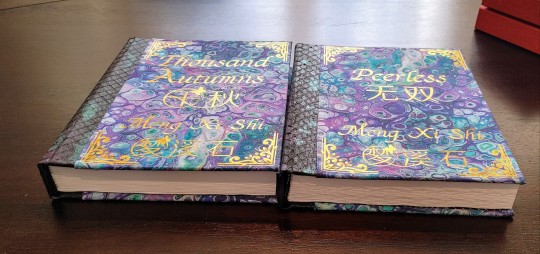
But.... meanwhile, I've been buying peacock fabrics since 2021 for the sake of Feng Xiao. I had to use at least ONE of them! Fortunately, I've hoarded enough fabric that I was able to find a nice harmonious floral fabric to cover thousand autumns, and then had a nice duo bookcloth to make spines for them both! These books are quarter-legal, and the font is genuinely SO small, but still, pleasantly readable for me, my favorite customer 😂
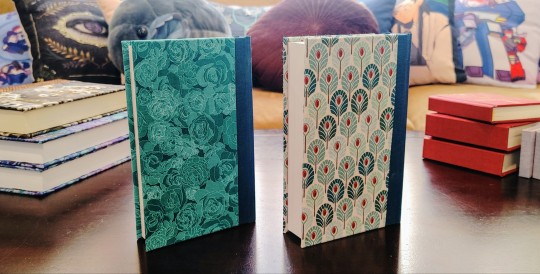

These books were SO MUCH work to typeset snd bind, but I'm still so excited about how both sets came out! Because of my own impatience with repeating myself like, literally two days later, i redid a number of decorative elements in the typeset as well as the binding. Different chapter headers, different dividers, totally different vibes for the endpapers! This was a big project to ask from myself in such short order, especially when I was starting to flirt with burnout, but I genuinely couldn't be happier with the results :D


#crafts#bookbinding#binderary#oh no how have i tagged either of these#thousand autumns#peerless#qian qiu#wushuang
304 notes
·
View notes
Text
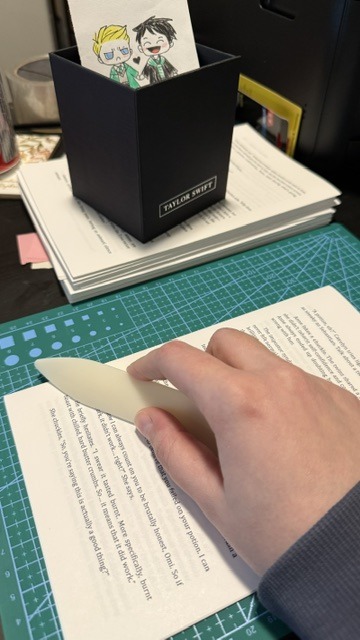
How obsessed and hyper-fixated are you with your fanfic characters?
Me:
BOOKBINDING!
Ominis and Phineas now sit on my shelf along with my other books ♡
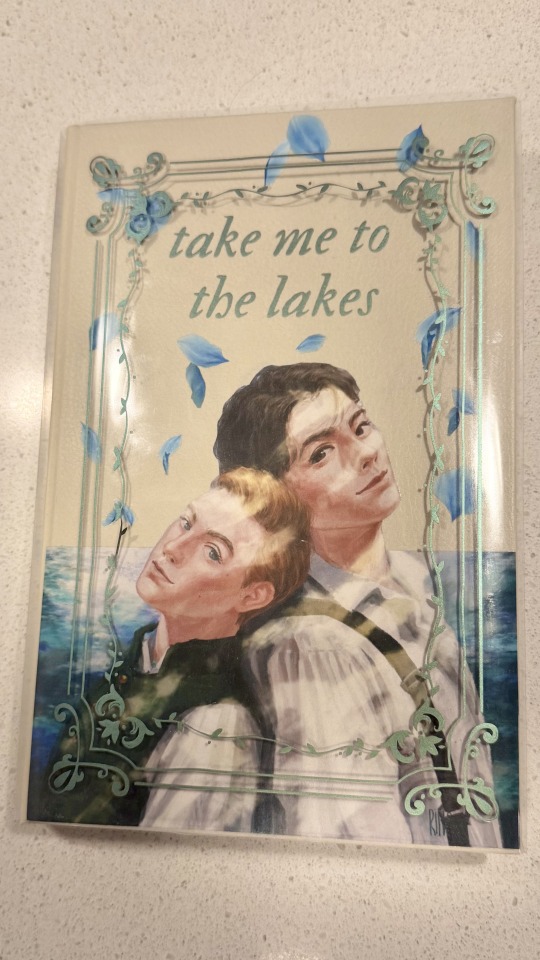
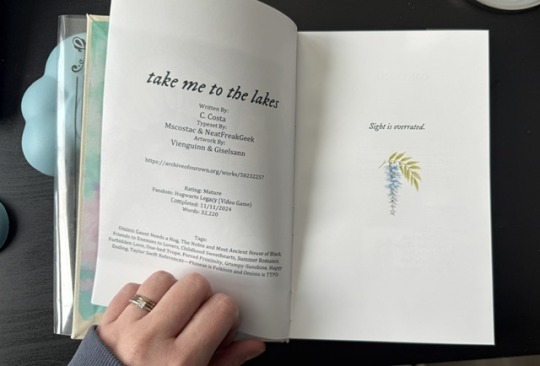
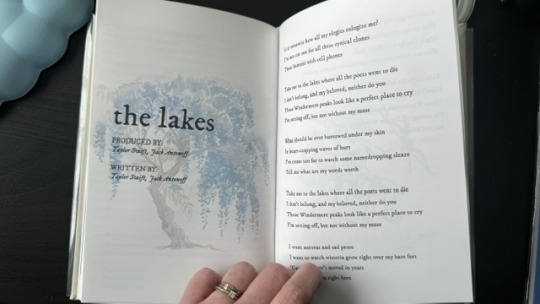
This was my first time binding fanfic, and no better choice than my own, "Take Me To The Lakes" (AO3 / Wattpad)
update (March 30): New cover art by the amazing @rinthecap 🩵
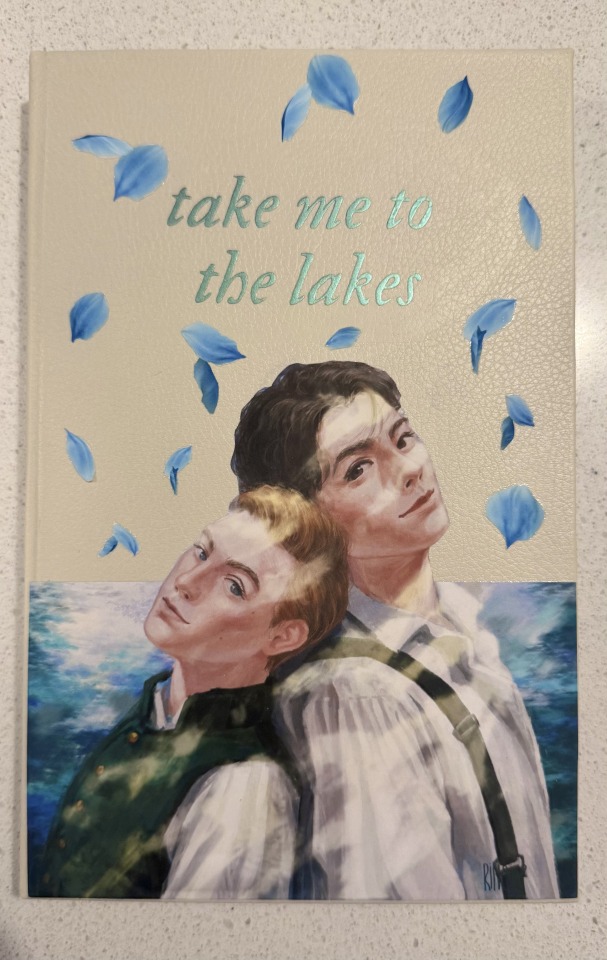
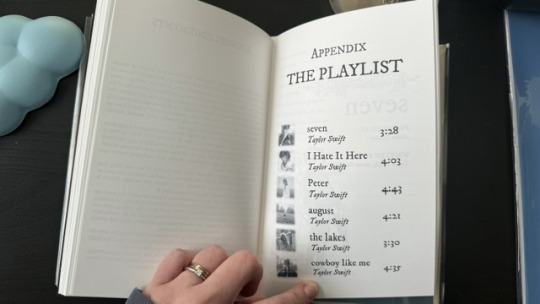
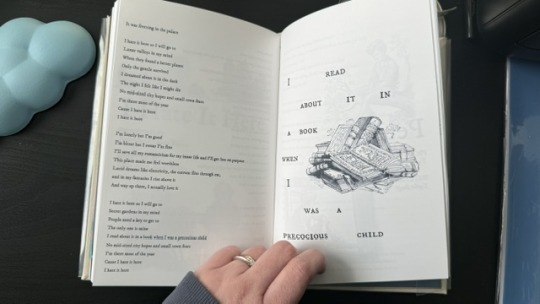
More photos and the step-by-step after the cut! (+ the appendix with Taylor Swift songs in a stylised lyric book)
I'm all about my crafty hobbies. I've been eyeing bookbinding for a while, and the algorithm finally convinced me to dive into it so I'd have a reason to procrastinate on writing
Having written a shorter fic ("Lakes" is roughly 35k words) gave me the perfect opportunity to start with something simpler.
The main tutorial used is the one by NeatFreakGeek on Tiktok.
Step 1: The typeset
I used the base template file by NeatFreakGeek, which already had the settings for printing in formatted book signatures.
With the basic body of the document formatted and ready, I started the personalization: choosing the fonts, spacing, sizing etc.
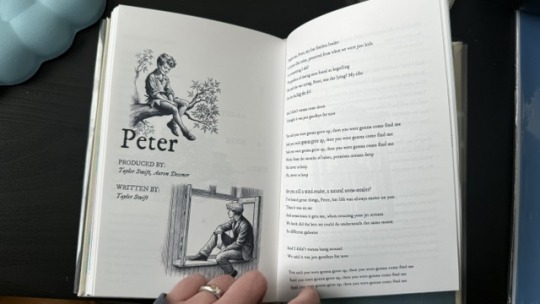
For the quote at the beginning, I chose one of the lines I wrote for Ominis + the wisteria.
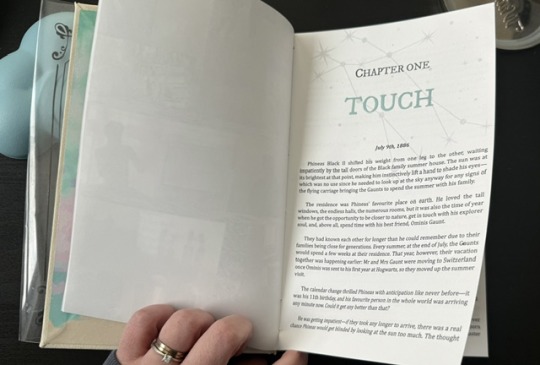
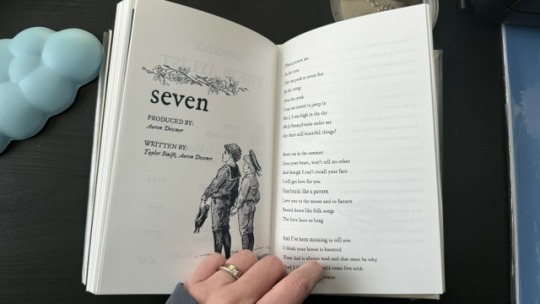
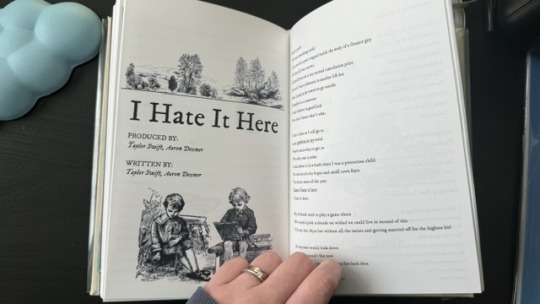
For chapter headers, I chose the Gemini constellation. (In the story, Ominis and Phineas got their middle names from the stars in the same constellation, Castor and Pollux.)
I also made the chapter titles with the HTV to give it an extra glow.
Sight is overrated. Phineas makes all my senses the very essence of life itself.
Since the story was rather "short", in order to have a thicker spine, I added an appendix with the stylised "lyric book". This was probably my favourite part of typesetting!

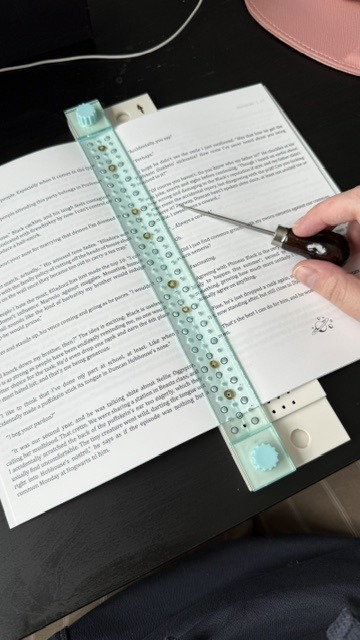
Step 2: The textblock
With a little lot of trial and error and more mathematics than expected, I printed each signature at a time, then folded each at a time, making sure it didn't get mixed up across the signatures. My printer does front/back automatically, but to print the commissioned arts as borderless, I gave myself a headache, printing it separately and manually. This step could have been done considerably faster with a laser printer and b&w content only :)
Next, it was sewing and glueing. I won't go into detail here because the video tutorials are way better at explaining. All in all, with the right tools, this was done rather easily and with barely any mistakes, so I didn't have to print anything again, thankfully.
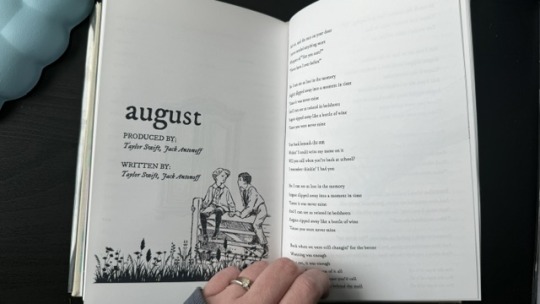
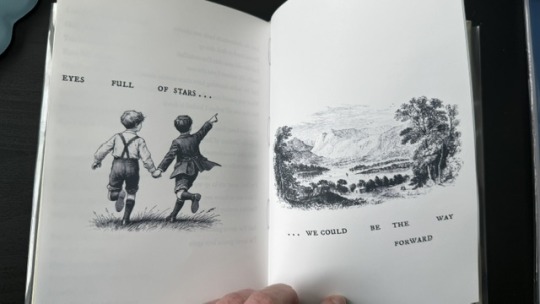
Step 3: The endpapers
I got a scrapbook 12x12in block in this abstract colours. I had many different ideas on how to match the theme, but I ended up choosing these colourful patterns that align with how Ominis perceives the world. Then, I added the quotes from the story.
The endpaper of the front got this sky-like print to go with the dialogue Ominis and Phineas have when they are children.
P: How would you know what blue skies look like? O: I don't know. And I don't mind not knowing.
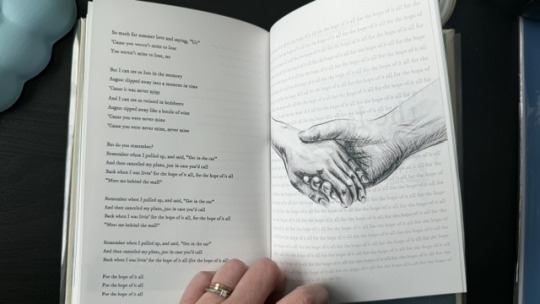
The endpaper of the back is in green x blue shades, colours that are also a big part of the story. For the quote, I chose one of their last lines when their relationship is established.
P: Ominis, you always care too much about the others... but who takes care of you? O: No one ever did. P: Let me care for you. Please. Let me love you, Ominis Gaunt. O: Will it make any difference if I say no? P: Absolutely not. O: Will it make any difference if I love you back? P: Fucking absolutely yes.


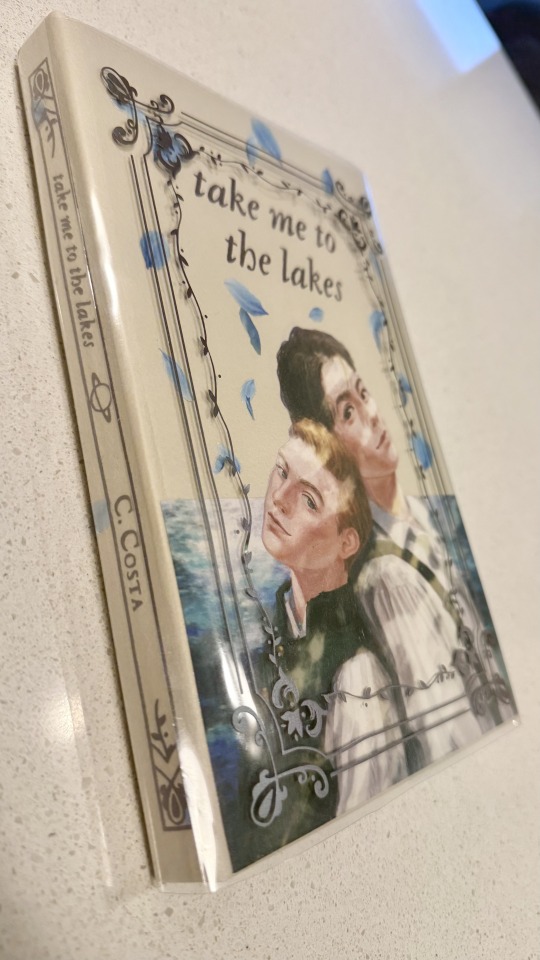
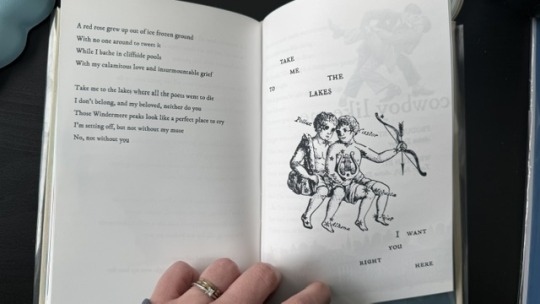
Step 4: The cover! (Yes, the most interesting part!)
This was the most challenging step in both the conception of the design (too many ideas to choose from) and the execution (I've never hated box cutters so much.)
With the basic cardboard casing cut and glued, I chose a faux leather material as a book cloth. This might be the choice I regret the most, because the glue it comes with is not that strong, so it would often unstick easily, and also, it's a bit too thick, leaving the corners a bit weird. But the final result was a bit worth it.
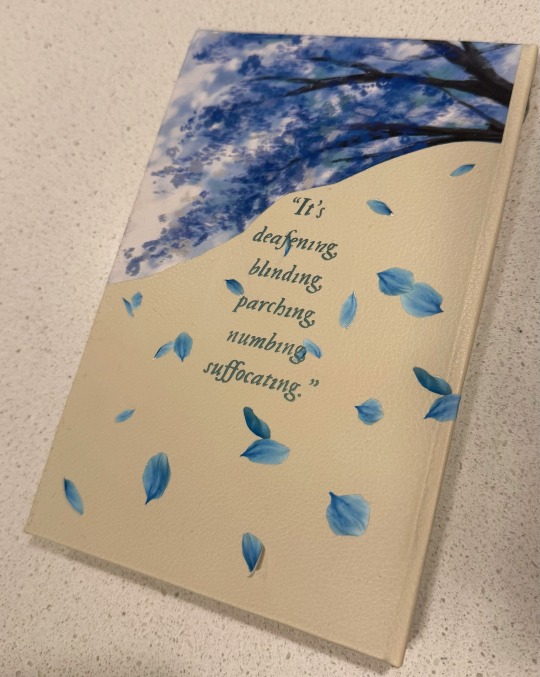
For the cover design, I printed the art with fabric HTV and ironed it on. On top of it, I threw in some wisteria petals (a reference to the song "the lakes", by Taylor Swift), and another quote of the story at the back.
I didn't have a cricut machine back then for the vynil pieces, so I ordered it online. This part was harder than I thought, once again because of the faux leather choice: as I ironed the HTV, some parts of the material melted lol.
Lastly, I decided last minute to create a clear dust jacket because the combination of the faux leather + printed HTV seemed tro fragile to be handled. I liked the final result, but ironing the HTV on the acetate was a pain lol.
In summary, this was so much fun and not as hard as I expected, craft-wise. The designing of it all took the most time just because I wanted every little detail to have a meaning :)
I made two copies to gift one to a friend, so it gave me the opportunity to make the first one and mess it up, then, for the second one, I had already learned from my mistakes.
There are many things I'd do differently for my next binds, but that's the most fun part: experimenting with materials, themes, and processes.
#I have a lot of free time#In crafts we trust#now I'm even more motivated to finish my other fics just so I can print them#my family asked for a copy now I don't know how to explain that I won't let them read my fic in a million years#hogwarts legacy#ominis gaunt#ominis gaunt fanfic#ominis x mmc#book binding#bookbinding#fanfic binding#gay fanfiction#gay#lgbtqia
69 notes
·
View notes
Text
Did I impulsively learn how to book bind so I could turn tma episode 1 into a book? yes, yes I did.
Did my dyslexic ass think it was a good idea to write the whole thing down for around 6 hours, instead of just printing it out? Yes, yes It did...
(also changed my mind on the pen almost halfway through)

#and did i make my own stamp of the institute logo? yes yes i did#yes i have autisum (and possible adhd) how did you know?#tma#the magnus archives#jonathan sims#bookbinding#book#tma anglerfish
68 notes
·
View notes