#if you are on desktop or using a browser you can click the link I put above & it'll lead you to the archive of all the posts from the tour
Text


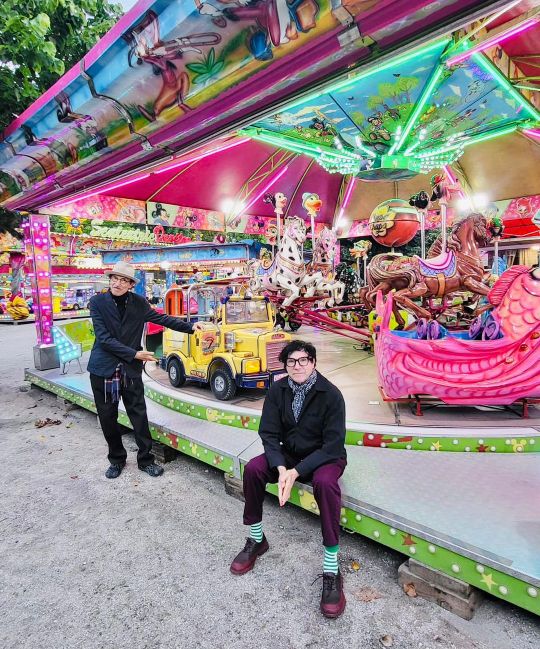


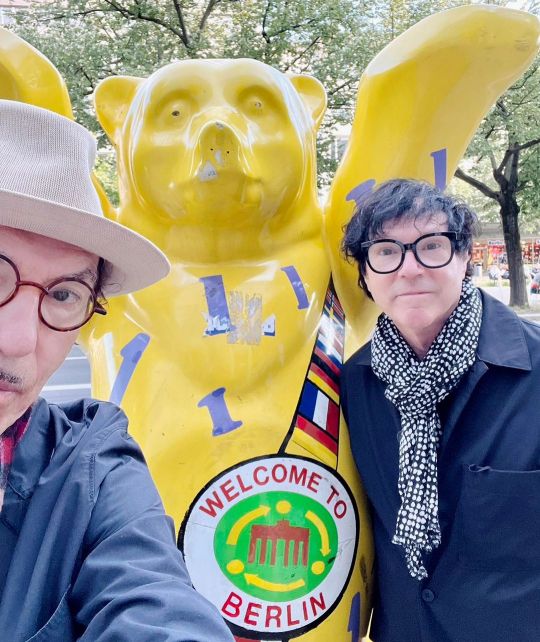

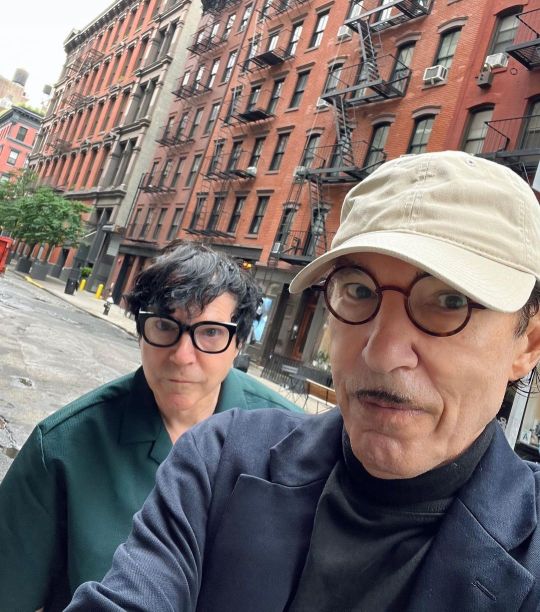
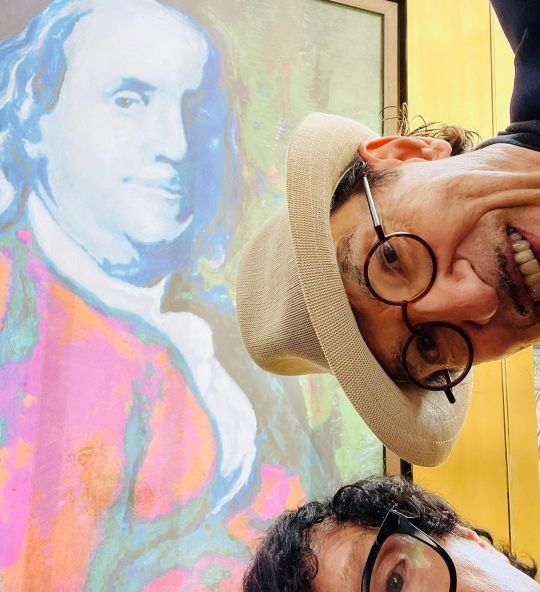


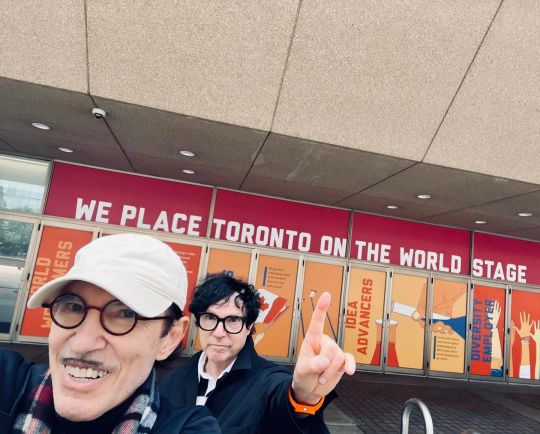


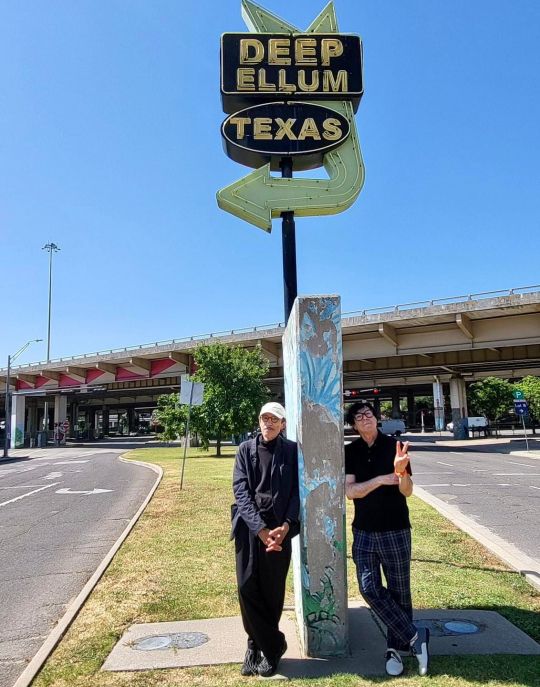


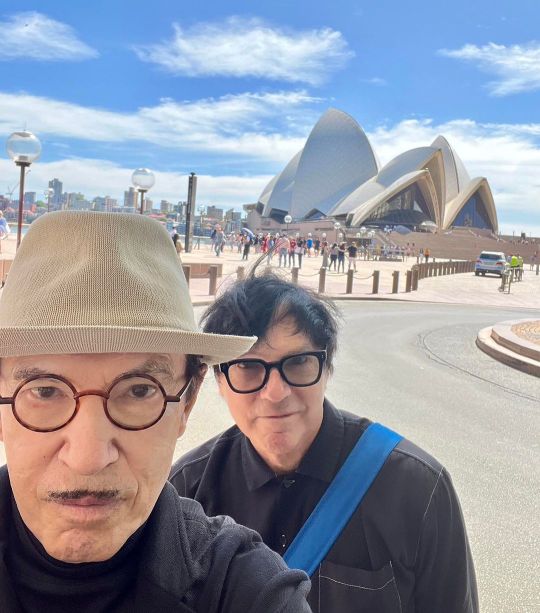

Sparks tour 2023
#I thought it would be nice to put all their photos from the tour in one post because I love seeing them all together :)#(there were so many though - I sadly had to leave 5 photos out)#best tour. 10/10. zero notes. <3#everything I could find from the tour that was already posted has been reblogged ^^ (if I missed any of your posts: let me know!)#a little explanation about the archive (maybe I should write a proper thing on how to navigate it sometime):#I've tagged posts with the city things happened in so you can find them that way through tags#posts have additionally been tagged by date following the format Month Day Year like so: june 16 2023#if you are on desktop or using a browser you can click the link I put above & it'll lead you to the archive of all the posts from the tour#I still have a lot of things to add (including my own tour experiences) so I'm not done with tour posting!#I'll post any new posts the normal way and in a week or so I'll send them back in time so they'll show up at the right dates in the archive#End of PSA!#sparks tour 2023#sparks tour 2023 photo#2023#sparks#russell mael#ron mael
61 notes
·
View notes
Text
I have hacked the mainframe (Inspect Element)

It seems like WOW starts at 4000 boops given, OMG at 2000, MAX at 1000
Adding on all the tiers I've found so far
MAX - 1000
LOL - 1500?(Missed the window, can't confirm)
OMG - 2000
WOW - 4000
*-* - 5000
WHY - 6000
PLZ - 7000
AAA - 7500
;_; - 8000
0_0 - 8500
T_T - 9000
MAX - 9200+? (I think the counter bugged? idk)
<33 - 9500
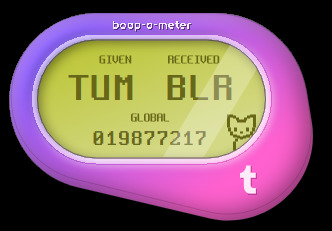
TUM - 10000 given
BLR - 10000 received
How to Super Boop
On desktop, hover your mouse over the Boop button for around 5 seconds, and it will do 2 spins.
Once the button is done spinning, click on it and you can send a Super Boop!
EVIL BOOPS can be accessed by allowing the animation to play 3 times before clicking
One way to get Super Boops on mobile is using a web browser to access tumblr. Use "Desktop Site"/"Desktop Mode", then click and hold the button to send the boop. That'll convert it to a Super Boop button. It seems pretty inconsistent though.
For all clicking enthusiasts, do click this too, trust me, it's just as satisfying
Omg thanks everyone for the boops, I've been butterfly clicking the boop button for so many different people for the past 6 hours and I'm exhausted
I'm pretty sure this is also my most engaged post on any platform I've ever used, thanks for all the RBs and likes <3 <3 <3
If anyone's crazy enough to try reaching 10k without an autoclicker, here's what I did
Ok, one more tutorial for the boops before I go to bed for real.
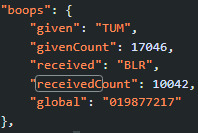
How do I check my exact given and received boop count?
NOTE: You'll need to refresh the page to update the counters, unless there's another method to check the live count
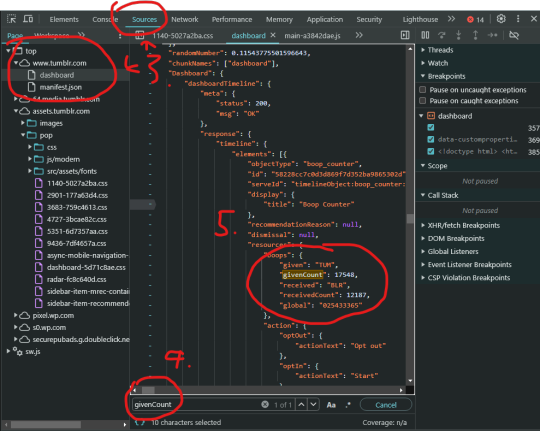
Chrome
Go to your dash ("home" tab).
Press f12, or right click and select "Inspect Element"
In the window that pops up, click on "Sources" then "dashboard" under "www.tumblr.com" (Pic below for reference)
In the window showing the code, press Ctrl+F and type in either "givenCount" or "receivedCount".
Ta da! (Pic below for reference)
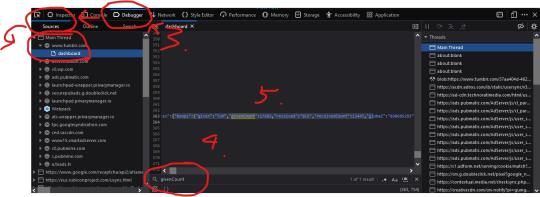
Firefox
Go to your dash ("home" tab).
Press f12, or right click and select "Inspect Element (Q)"
In the window that pops up, click on "Debugger", then "Sources" and "dashboard" under "www.tumblr.com" (Pic below for reference)
In the window showing the code, press Ctrl+F and type in either "givenCount" or "receivedCount".
Enjoy formatting (Pic below for reference)
Gonna take a break from Tumblr for now, my fingers are in shambles and I'm pretty sure I can hear the mouse clicks echoing around inside my skull. Thanks to everyone for making this random Singaporean guy's day, mbrine signing out! ❤
Here's a link to my Twitch and Instagram for those who're interested, seeing as the standard procedure for when a post blows up online is to shamelessly plug lol ;)
Happy April Fool's Day!

11K notes
·
View notes
Photo
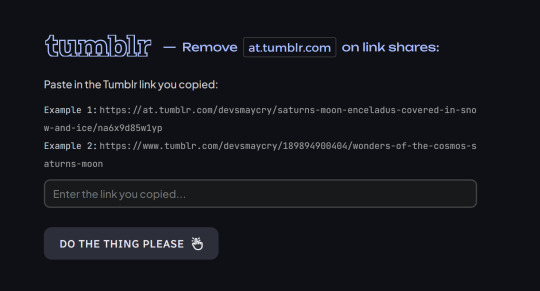
🔗 ;⸺ at.tumblr.com links remover
[image description: a screenshot of an online tool that says “tumblr - remove at.tumblr.com on link shares”. The prompt label says “Paste in the Tumblr link you copied”, and includes two examples of such links. It finishes with a button that says “Do the thing please”, with all the words capitalized, and a click icon. end ID ]
📢 As of 2023/03/24, Tumblr are no longer enforcing at.tumblr.com links when you copy a link from the mobile/app. [Read More]
When a post link is copied via mobile, it can appear as the following variants:
𝟙 〜 at.tumblr.com / {𝚞𝚜𝚎𝚛𝚗𝚊𝚖𝚎} / {𝚌𝚊𝚙𝚝𝚒��𝚗_𝚝𝚎𝚡𝚝} / {𝚝𝚛𝚊𝚌𝚔𝚒𝚗𝚐_𝚒𝚍}
𝟚 〜 at.tumblr.com / {𝚞𝚜𝚎𝚛𝚗𝚊𝚖𝚎} / {𝚙𝚘𝚜𝚝_𝚒𝚍} / {𝚝𝚛𝚊𝚌𝚔𝚒𝚗𝚐_𝚒𝚍}
𝟛 〜 tumblr.com / {𝚞𝚜𝚎𝚛𝚗𝚊𝚖𝚎} / post / {𝚙𝚘𝚜𝚝_𝚒𝚍}
I made a tool that converts them back to their original permalinks so when they’re shared on social media, the previews should show again.
👉🏼 at-tumblr-links.glitch.me
You can bookmark this on your phone or your desktop browser so you can quickly access it when you need it!
Currently, it’s not known which at.tumblr.com link format will proc under what circumstances. If it has a 𝚙𝚘𝚜𝚝_𝚒𝚍 in it, that’s good news. If it doesn’t, we need to ask a URL un-shortener service to follow the redirects for us. But this tool should accommodate any format regardless. It’s not perfect, but I hope it helps.
Read more about at.tumblr.com tracking links [here].
If you run into any issues, you can report them to me via Discord or Tumblr ask.
#tumblr#at.tumblr.com#tracking links#tumblr links#tumblr bullshittery#utility#resources#please don't crash please don't crash please don't cr-
6K notes
·
View notes
Text
Setting up AO3 Enhancements on a mobile browser
Hey there! Do you:
read fic primarily on your phone?
feel tired of having to punch in a lot of filter tags every time you browse for fics?
have an android device?
then I might be able to help you make fandom a cozier place! (and hopefully nip future drama in the bud, lol)
With this post, I'm gonna guide you through the process of installing the AO3 Enhancements browser extension, normally only available on desktop, on your mobile device. It works a charm, and I've been using it for months, and it's made the Undertale tag navigable again despite my utter disinterest in AU content.
Here's an archived version of the full post in case my dumbass accidentally deletes it for some reason
Let's get started!
UPDATE: For IOS users! You can download the browser app "Orion" which allows firefox extensions! No need to do this procedure, just install it and download the extension as you normally would from Firefox Add-ons
1) Download Firefox Nightly.
For those who are hearing of it for the first time, Firefox Nightly is a separate Firefox browser made specifically for developers. The name itself is due to the fact that it's patched and updated on a daily (er, nightly) basis. This makes it more prone to crashing and issues than the standard Firefox app, but I've switched over to nightly as my main browser months ago now, and if I ever encounter a problem, I just... download the latest update and I'm good to go.
What's crucial about Nightly, however, is that it gives the user access to various additional features. One of them being desktop extensions on mobile, which is what we're here for.
Here's the Google Play link.
2) Make a Firefox Account
This will be necessary to install the extension later
Once you've done that, go to the Firefox add-ons website and log into your account in the upper right (where it says "Biscia" in the screenshot below). Click on "View My Collections"

3) Making an add-on collection
Since browser extensions are technically blocked from being directly installed by the browser, Nightly offers a workaround.
Create a collection, and give it a name without spaces to avoid errors.
4) Adding the extension
Here is the link to ao3 enhancements (if it's not showing up, try reloading the page in desktop mode). Scroll down until you see the option "Add to a collection" and select the one you just created.
You can do it with any extension! Go nuts. There's lots of good stuff out there. Just remember that it's not guaranteed every one of them will work, since they aren't intended to be used on a mobile device.
5) Activating debug mode.
In your browser, tap the little sandwich menu in the bottom right, scroll down and click Settings. It should be under "Save to Collection".
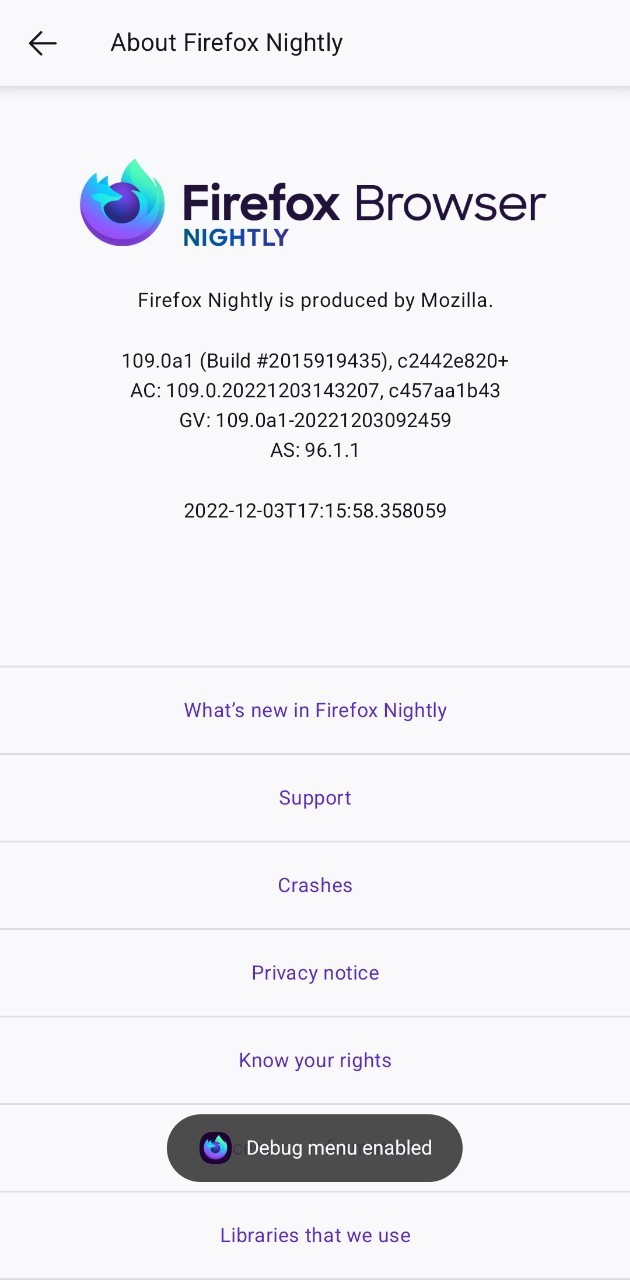
Scroll down even more until you reach the "About" section, and click on "About Firefox Nightly"

Click on the firefox logo 5 times, and it should be done.
6) Activating your add-ons
Go to "View my profile" as seen in the screenshot in step 2. At the end of the link, there should be a string of numbers. Copy it.
After this, go back to the browser settings again, scroll down until you reach the add ons section and click on "custom add on collection". Paste the numbers you copied from your profile where it says "User ID", and the name of your collection EXACTLY as it appears in the link, where it says "Collection name". Mind, it's case sensitive.
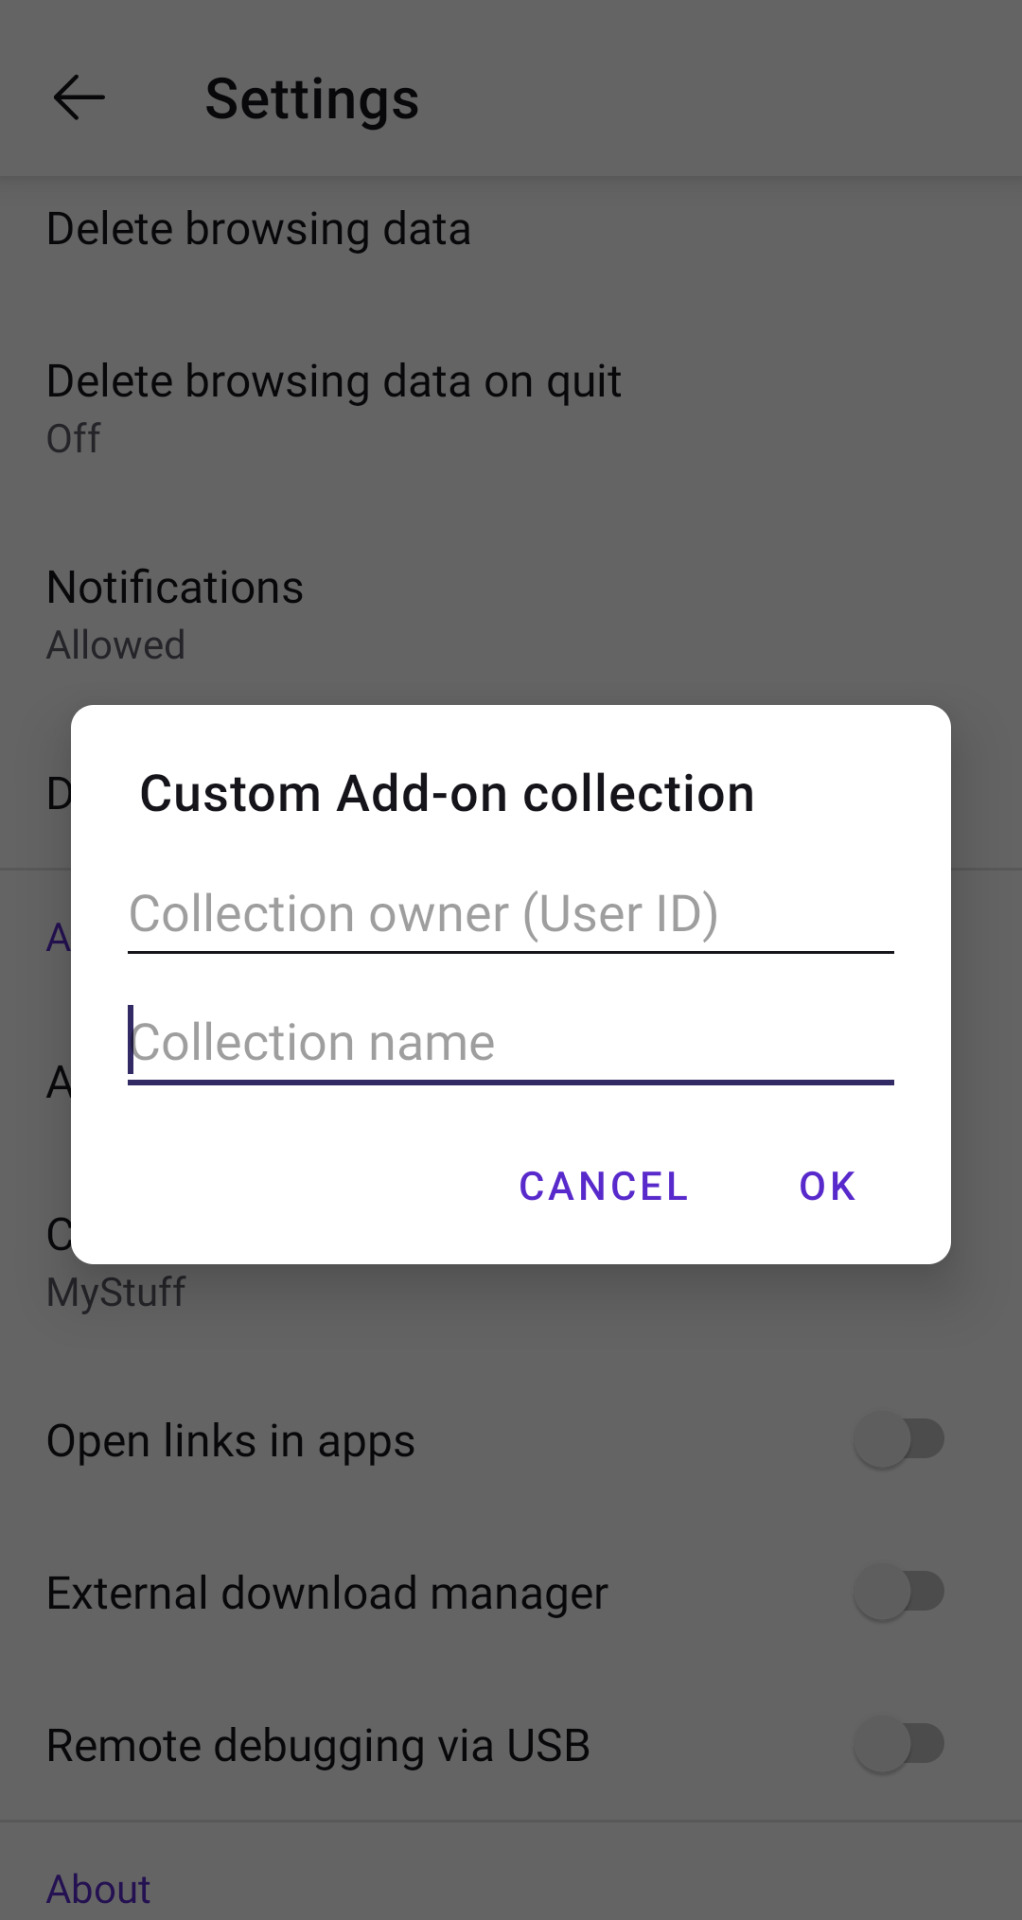
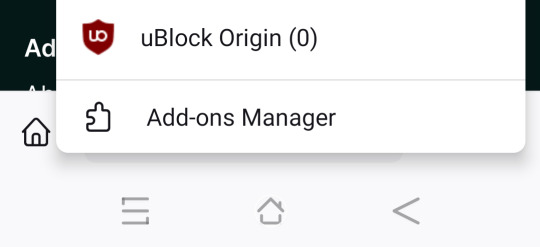
Press okay, and it should kick you out of the app. Open it again and, going in add-ons then add-ons manager, you should be able to add your extension.
ATTENTION!! If you get the error message "failed to query add-ons" you either inputted the wrong user id or the wrong collection name
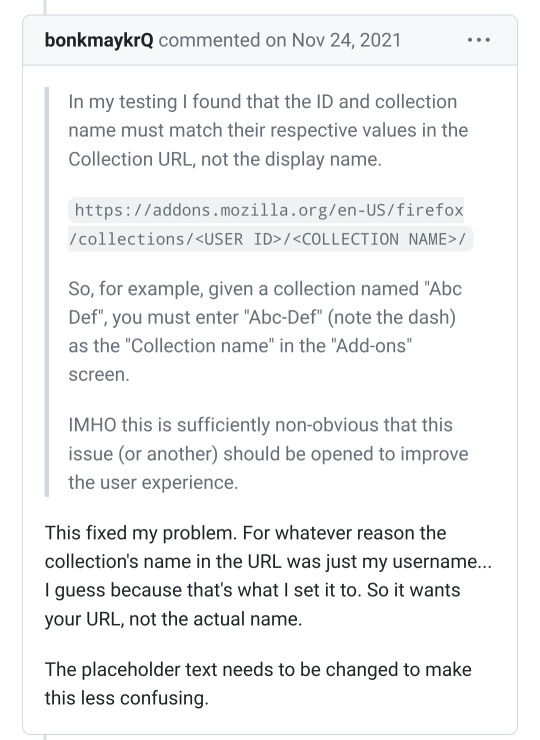
To avoid this type of issue, don't name your collection something that has spaces or punctuation in it, as it might mess with the link formatting.
7) Setting up your AO3 enhancements filters
If everything's worked out fine, you should be able to visit ao3 and see a new drop-down window.

Click on it, click on option, and it should open up a new window with all the settings available! Tweak them to your heart's content. Though mind, the background tag wrangling done by the ao3 volunteers doesn't work with this extension, so the extension is going to hide only the works tagged EXACTLY what you filtered. Character for character. This makes things a bit tricky when people aren't consistent with their tagging, but if it proves to be enough of a problem, you can just filter out the author name in full and be done with it.
You can choose to hide the fic behind a "show" button, or make it not show up at all. If you choose the latter option, and you blocked a tag that has lots of fics, it might look like certain pages of searches are almost empty, since all the fics were hidden.
And that's it! I sincerely hope this helps people avoid their triggers and other topics that make them uncomfortable. No more excuses fellas. You find a tag you haven't filtered yet? You add it to the list and move on. Easy peasy.
Hope I haven't missed anything. Let me know if you need any help!
2K notes
·
View notes
Text
You can stream almost any movie or tv show (usually with subtitles) for free on anything that can run a web browser by visiting fmovies.to
If the ads are egregious then get an ad blocker. It's easy to do if you're on desktop. If you're on mobile then Firefox supports ad blocking, but Chrome doesn't. You can still block ads while using Chrome on Android though by installing Adguard.
If you want a higher quality and local copy of a movie or show then install a torrent client (I use Deluge) and find an active torrent for whatever you're looking to download. You can find torrents by going to 1337x.to, searching, choosing on of the top results, and then clicking the magnet link. If the magnet link doesn't automatically open the torrent in your torrent client then right click on it, copy the link, and past it into it (how you do this will probably vary slightly depending on what torrent client you're using).
You can also find movie torrents at yts.mx (which I like using just because it's a nice spot for browsing new releases when I'm not looking for anything in specific).
If you're worried about getting in trouble for torrenting (in canada ISPs are legally required to pass along any threatening copyright notices that they receive for your IP address, but you can and should just ignore these notices) then (instead of paying for a VPN) the website seedr.cc will torrent things for you and give them to you as regular downloads (that way your IP address isn't exposed to anyone other that seedr) (using it also means you won't need to install a torrent client). You don't get much space, but you can get more (without paying) by referring people (who also don't have to pay).
Running a random torrented windows executable can be sketchy sometimes, but you aren't going to get a virus from a pirated movie or song or a console video game rom.
791 notes
·
View notes
Text
About deco my tree
If you, like me, used the decomytree-site to receive and send messages lately, you've probably also seen the post warning that the site might have nefarious intentions. This is likely correct. When I went to look at my messages today, it told me "Currently, only the app can open messages due to high usage." That is clearly complete bullshit. It's probably self-evident, but DO NOT DOWNLOAD THE APP. This is base level scam stuff: trick people into getting excited about a service, then lock it to only one platform where the user will have to give up some information in order to get what they want.
(Obviously, I can't say with 100% certainty that something sus is afoot, but my warning bells are ringing very loudly. I am leaning towards this being more of an attempt to lure money out of people than an information stealing attempt, but you can never know.)
I took a look at what the app requirements are:
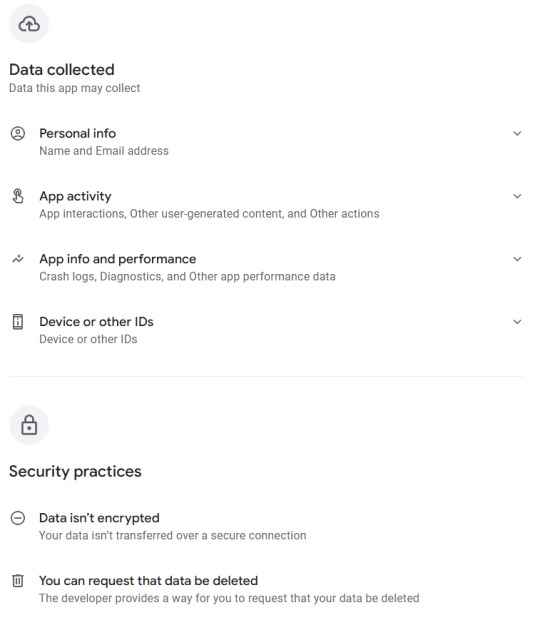
This ain't great for something that allegedly only is for leaving cute messages for other people. I'm looking specifically at the "Data isn't encrypted" part. If you've taken a look at your tree today, you've probably noticed that ads for an AI app have appeared here and there in the UI; this is by the same company behind deco my tree.
Now. If you still want to see your messages, there is the option of running the app in a virtual environment that isolates it from the rest of the device, and thus from the data on it. I think iOS and Android both might have native sandbox environments, but I'm not familiar with them. What I did was download an android emulator to my computer and installed the app there. It's completely separated from the rest of my OS and will cease to exist when I nuke the session after reading and saving all my messages.
The emulator I used is called Bluestacks. It has ads and will take up ca 5GB of space, but it's a reputable emulator, and I've used it before to play android games on my desktop. Once you're in there, you can navigate to your tree in the already existing Chrome browser on the desktop (or home screen, I suppose), and find the link to their help center, where they have a download link for the apk file without needing to go through the Play Store (which you'd have to log in to using a google account). Also a bit suspicious, but handy in this case. I've also included the links above for you to use. Once you've downloaded the .apk the app will open and you'll be able to log in and see your messages.
Side note - if you used a generic password that you use in several other places for this tree, I highly recommend changing it in all other places, especially if you usually combine it with the same email you used for decomytree.
Another fun thing I noticed is that the app refuses to load the earliest three messages on my tree, for whatever reason. But when I navigate back to the website (inside the emulator), it now opens the messages just fine since it can tell I have the app installed. 🙃 The app also continuously displays ads for the same AI app mentioned above, trying to trick you into clicking on them when you're swiping through your messages. It also does this fun thing:

Yeah. Bypassable, but highly irritating, and guaranteed to catch at least some poor people that don't know what to click on to make it go away.
TL;DR: don't download the app directly to your phone, use a sandbox to isolate it to see your messages, and then ask it to delete your account (and hope that it works, because so far the so-called verification code has failed to appear in my inbox). And change your password if you've used the same one elsewhere on the internet.
211 notes
·
View notes
Text
A few tips for new Tumblr users wanting to write here
Yo if you're here from Reddit or Twitter or some other site and just wanted to give this a shot you may have seen some blogs that are dedicated to writing headcanons or short fics or even original works for their own OCs and you may be thinking "hey I wanna give that a shot! I like to write!" then I have some tips to make it easier on you and people who see your content.
1. First off, if you're writing a pretty long piece the you should probably put it under a read more, it'll look like this on mobile

and this on desktop
or you can write :readmore: on a line by itself and press enter.
2. Now if you're gonna write for a whole bunch of different fandoms and you wanna make a master list then I suggest making an actual list with the fandoms you write for and then making more lists with the actual content as a you go along because you can only have 100 links in one post (I know that sounds like a lot but as someone who has around 300 Transformers things written trust me you fill up a post quicker than you expect, especially if you take requests from other people). The way I typically do it is like this

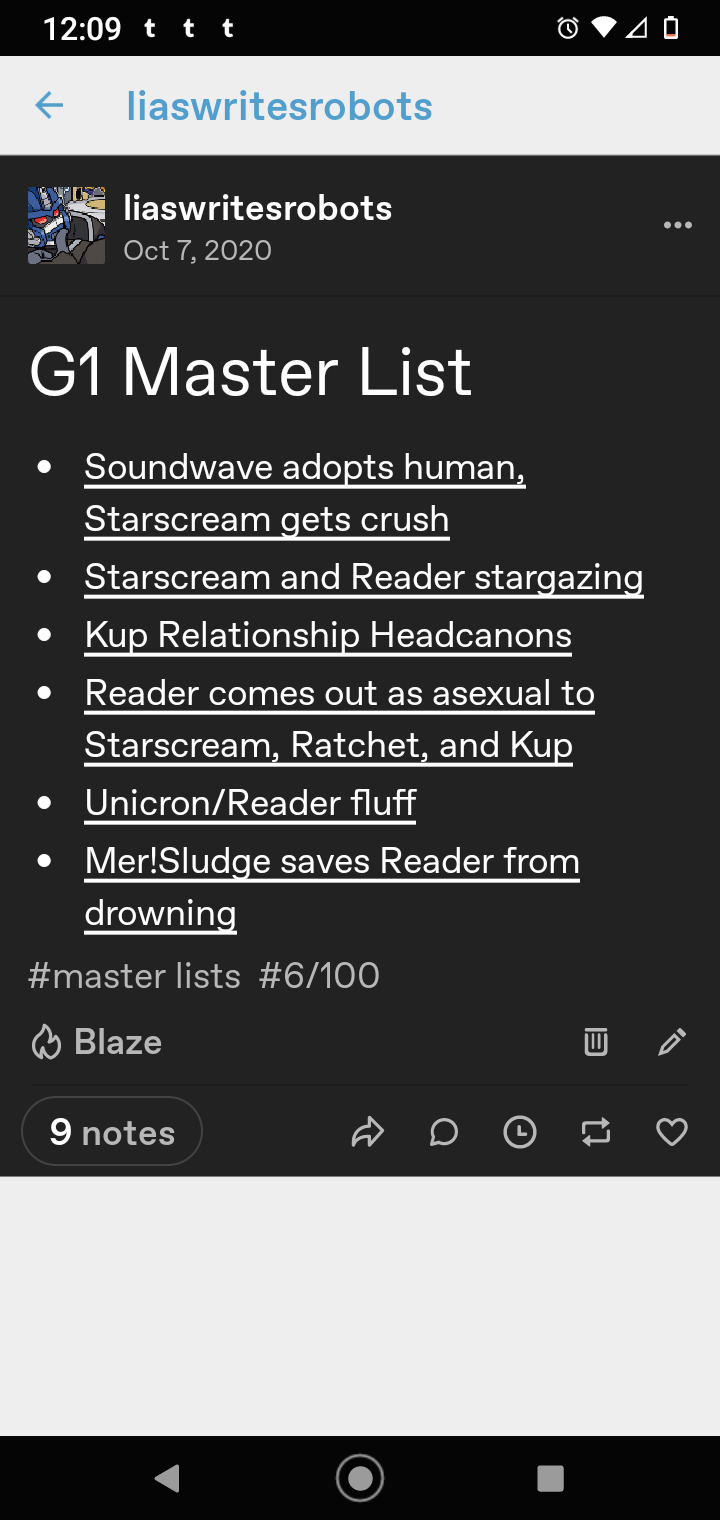
The first pic is the MASTER master list that lists everything I write for and when they're underlined like that it means they're links. The second pic is after clicking the G1 link, it's a separate post that has the actual fics and headcanon links. Note the 6/100 in the tags, this is how I keep up with how many things I've added. You can of course just use the numbers options from here

or just number them manually from your keyboard like I'm doing with this post. Adding links has no barring on what else you add to the post so you can add yourself some fancy header or divider pics if you want.
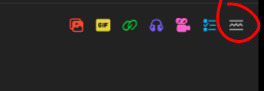
3. Adding links! Links can look like this https://www.tumblr.com/wingwaver/721887224846778368/test-post-for-reasons?source=share or like this https://wingwaver.tumblr.com/post/721887224846778368/test-post-for-reasons depending on whether you're linking from mobile or desktop/browser Just highlight the text you wanna add a link to and a the little chain will move to the end, click it and paste your url you want to link to and press add link, then press post/save draft/save (whatever the blue button says)

Now you've successfully linked a post to another post!
4. Tagging! To get your fics and headcanons seen to build an audience you usually wanna tag the stuff correctly. If you're posting a fic about Miles Edgeworth and Phoenix Wright from Ace Attorney then you'll tag it with #Ace Attorney, #Miles Edgeworth, and #Phoenix Wright in the tags area. But it's also a good idea to mention if it's a ship or general fic in the tags too. If so then putting ship names and #Miles Edgeworth x Phoenix Wright and #Miles Edgeworth/Phoenix Wright in the tags will help everyone know this is a ship fic. Tagging with characters or fandoms that aren't apart of the fic just clogs the tags for people looking for content of said characters and fandoms so it's very looked down on here and will likely get some of your stuff reported for spam so only use the relevant tags. Also tagging for triggers can be tricky here because of how fucky tumblr is but please don't tag censor tags. Tagging things like #a**** or #a*use or even #abu$e doesn't work here because people who have #abuse blacklisted will be able to see this content because it wasn't tagged properly. Also if you're writing for OCs or reader inserts it's common courtesy to tag those appropriately too. Someone looking for a reader insert may not want to read an OC and vice versa. Also many people filter those out so try to add tags like #x reader, #*fandom name* x reader, and #*character name* x reader for easier filtering. Also people cruise those tags too so it'll help people who fo want to read that content find your stuff!
#tumblr tips#writeblr#twitter migration#reddit migration#reddit blackout#twitter refugees#196#r/196#Twitter#Reddit#fanfiction#writing#writing blogs#tumblr help
447 notes
·
View notes
Text
how to use xkit rewritten / trim reblogs on mobile:
updated for december 2022
this method is beta editor / npf compatible
my previous tutorial to trim posts technically still works, but as tumblr is discontinuing legacy posts that method is already outdated and unhelpful for people who have no other option than to use the beta editor.
but fear not! i've figured out how to use xkit rewritten on mobile and it's VERY easy.
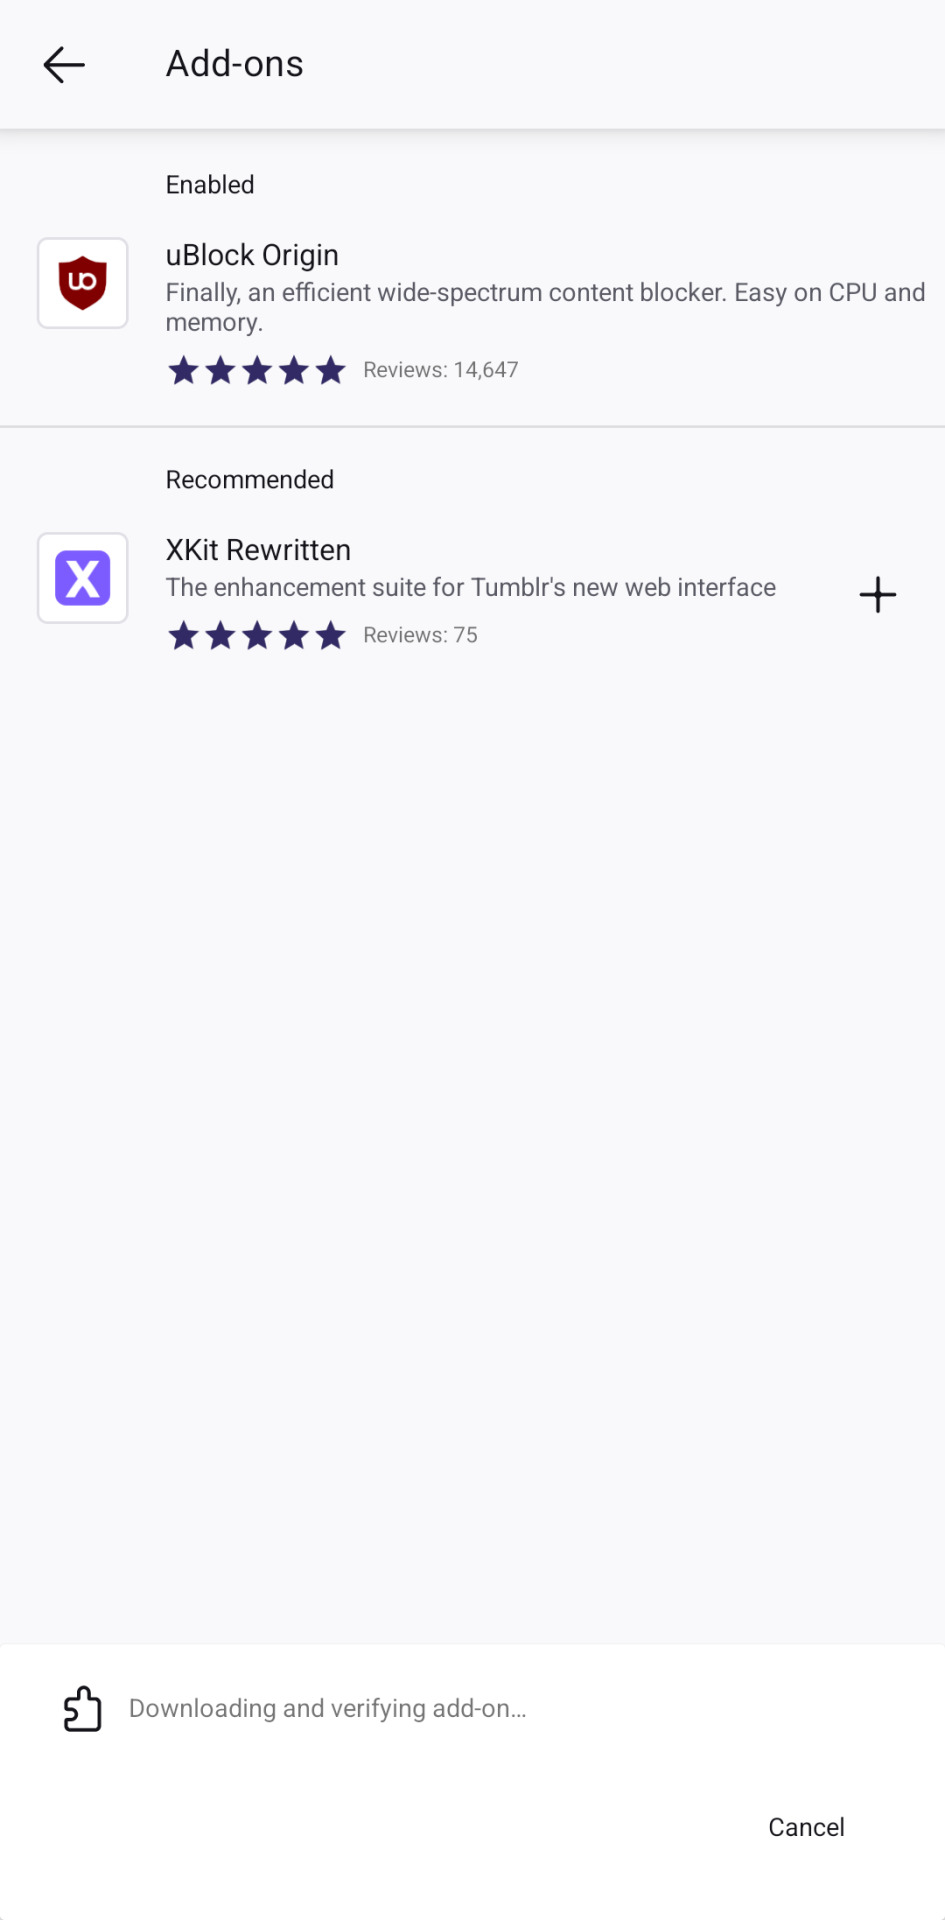
install "firefox nightly for developers" OR "firefox beta for testers". must be one of these two, not regular firefox.


go to settings, scroll down to the "about firefox" page at the end and then click on the logo 5 times until debug mode is enabled.

back to settings and below add-ons you'll see the 'custom add-ons collections' option.
add 17683742 as the ID and name it 'tumblr' like so:

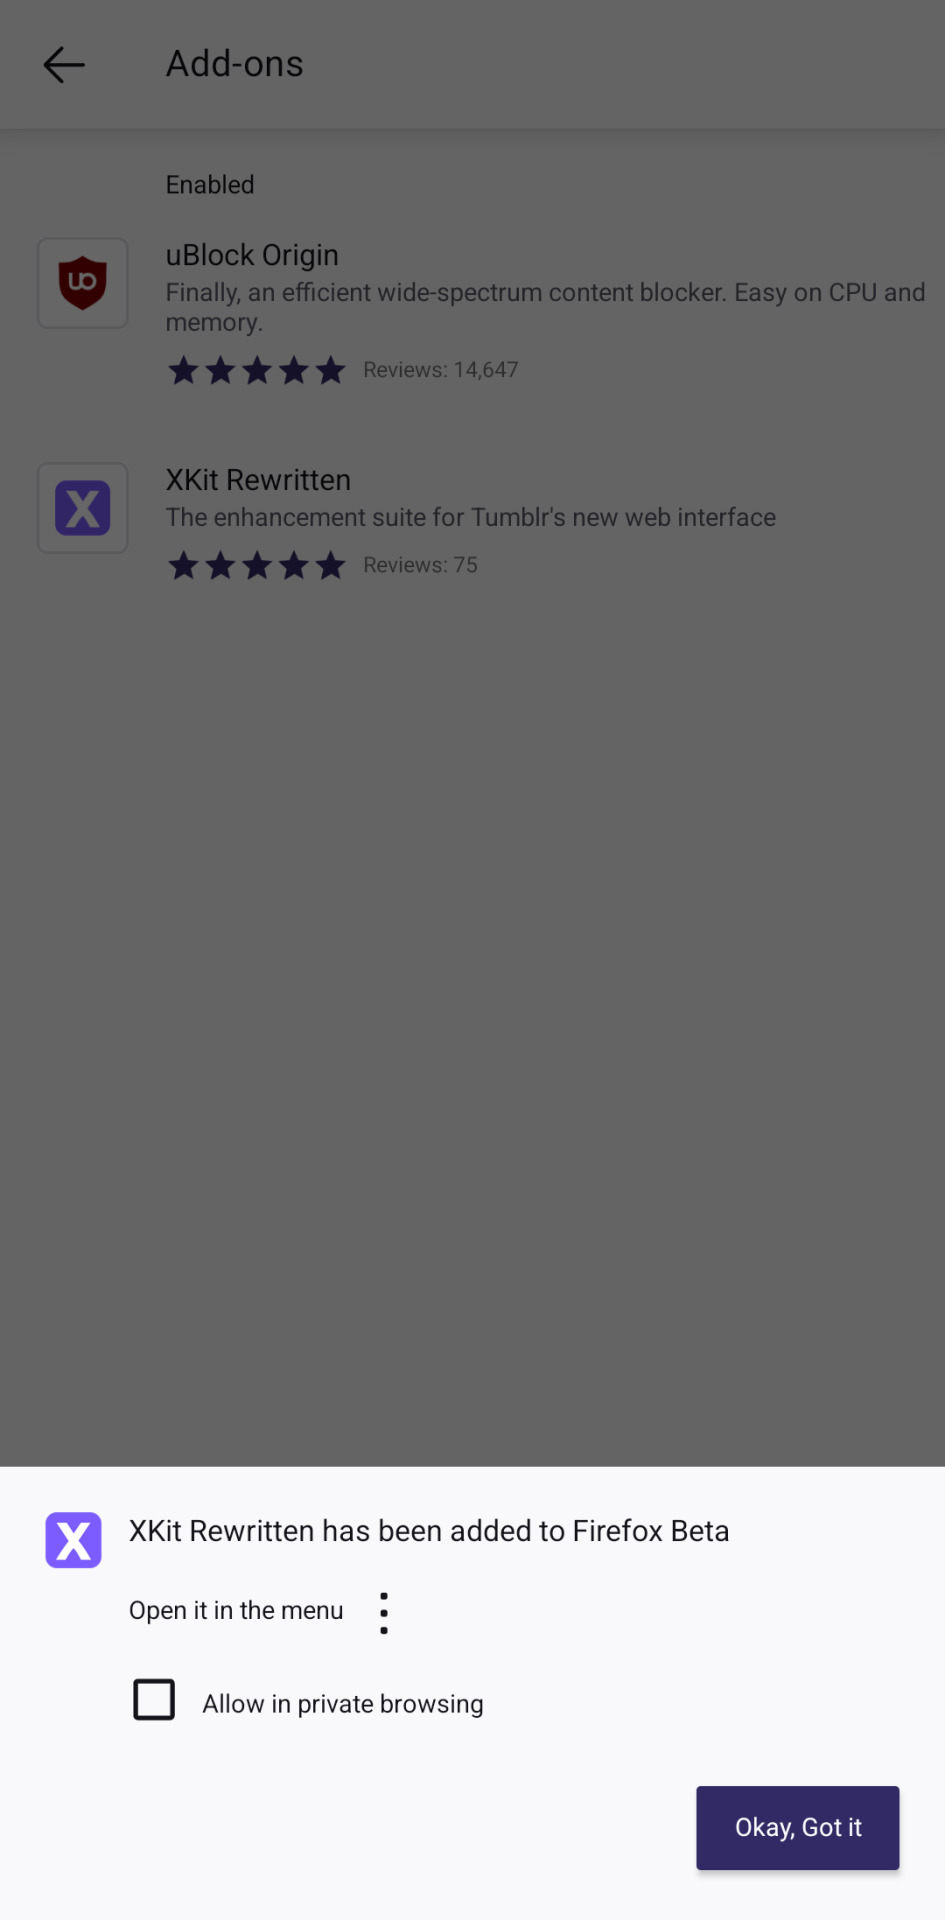
the browser will give you a little pop up that the extension is being added and the app is being restarted.
now enter the app again, go to the add-ons section and xkit rewritten should be loaded there. i've included ublock in the collection so you can use both because you absolutely should.
on firefox beta you'll see the extension with a +, click on it to add it.
now cut your replies the same way you do it on desktop with xkit rewritten!
save the post as a draft
click on the scissor button
it's done!


please consider that this is experimental so not all of xkit rewritten's features will work on mobile. trim reblogs does work though!
i still recommend using my roleplay formatter for formatting your replies and then copy pasting the html on your reblog.
other useful links :
this post explains the differences between the two editors and why we're switching.
this post is a tutorial on how xkit rewritten's 'trim reblogs' feature works.
1K notes
·
View notes
Text
Permanent Blacklists for AO3
Would you like to permanently remove fics with your squicks, triggers, and dislikes from all AO3 searches by default so that you never have to think about or encounter them again? Well now you can!
The ability to do this has actually been around for a little while but it relies on some new CSS functionality that wasn't supported on all major browsers until fairly recently (though you may still have to enable it manually on some). I'm not going to explain how this method works or how to code AO3 skins in general, as I've only dabbled in it a little and there are already some very good tutorials out there. If you want all of the details, check out these guides:
Skins and Archive Interface FAQ – The official skins guide created by AO3. Lots of good information but might be overwhelming and confusing for a beginner.
A Non-Extensive Guide on How to Start Creating a Skin for AO3 by ao3skin – Some good, fairly easy to understand, beginner info on CSS and specifically how it applies to AO3 skins.
Permablocking Specific Tags - Site Skin by Eli0t – Everything you need to know to create permablock lists. If your blacklist doesn't seem to be working as expected, check this for troubleshooting tips.
What I can offer though are some handy pre-made blacklists that you can use as-is or as a starting point to create your own so that you don't have to go to the trouble of figuring out how any of this works or hunting down relevant tags. Just copy the code, open AO3, go to My Preferences > Skins > Create Site Skin, paste it in the box, title it, and click Submit!
Note: The following lists are very specific to me and my own personal tastes. Absolutely no judgement if you love any of the things that I choose to blacklist. You do you. I just happen to like my fics fucked up and relatively canonical.
★ No Reader Fic – Hides all self-insert and reader fic.
★ No Alternate Universes – Hides anything tagged with the most common AU tags. There are so many incredibly specific AUs there's no way to list all of them and AU tagging is also extremely inconsistent from fic to fic so this blacklist may only catch 80% of AUs, but that's better than nothing. You could always exclude the entire alternate universe tag, rather than trying to list specific ones, but unfortunately canon divergence and other less extreme AUs would get caught in the crossfire, which is not worth it for me.
★ No Fluff – Hides anything tagged with the most common fluff and romance tags. I specifically left out "fluff and angst" though because sometimes that's used for things that are mostly angst with only a bit of fluff and I do love angst.
★ Bonus: No Dead Dove – This list is not mine (for obvious reasons) but I know some people may find it useful. Hides anything with the main archive warnings and many common problematic, taboo, or controversial tags. Some of these I wouldn't even classify as dead dove, they're literally just kinks, so I'd suggest reviewing the list carefully and removing any that don't apply to you.
Additional Notes:
This system doesn't work exactly the same as AO3's exclusion filters because you can't use top-level wrangled tags to block all subtags. It only blocks exact matches.
Once the blacklist is implemented you'll see no indication that anything was blocked (except for fewer fics listed on each search page); the entire blurb will be hidden. The tags and fic counts listed in the filter bar will remain unchanged. If you want more advanced features like whitelisting or adding something to indicate when a fic was removed, check out the permablocking guide by Eli0t.
Here's a link with info on which browsers currently support the new "has()" element, which this blacklist system relies on. As of right now Firefox for desktop still has to be manually enabled (for instructions see the section on flag enabling in the permablocking guide). Firefox for iOS isn't listed on this website but it seems to work fine for me.
There are other browser-specific extensions that let you permablock tags, such as this one and this one, that may be more a little more user friendly, but I've never tried them so I can't vouch for them and they may not work consistently between different devices. The good thing about doing blacklists via skins is that, after setting it up once, it should work automatically on pretty much any device (as long as you're logged in to your AO3 account).
#I'm so stoked about this feature#it's a GAME CHANGER#I put a lot of effort into creating my blacklists#I couldn't not share them and hopefully make someone's life easier now that I've already done all the work#assuming anyone shares my preferences#ao3#ao3 skins#ao3 help#tutorial#wendy's help desk
160 notes
·
View notes
Text
Mini React.js Tips #1 | Resources ✨
I thought why not share my React.js (JavaScript library) notes I made when I was studying! I will start from the very beginning with the basics and random notes I made along the way~!
Up first is what you'll need to know to start any basic simple React (+ Vite) project~! 💻
What you'll need:
node.js installed >> click
coding editor - I love Visual Studio Code >> click
basic knowledge of how to use the Terminal

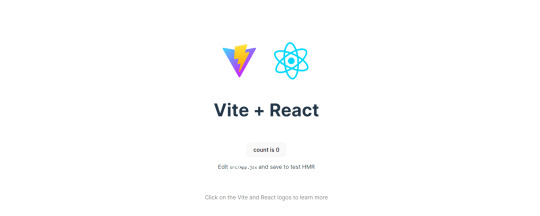
What does the default React project look like?
Step-by-Step Guide
[ 1 ] Create a New Folder: The new folder on your computer e.g. in Desktop, Documents, wherever that will serve as the home for your entire React project.
[ 2 ] Open in your coding editor (will be using VSCode here): Launch Visual Studio Code and navigate to the newly created folder. I normally 'right-click > show more options > Open with Code' on the folder in the File Explorer (Windows).
[ 3 ] Access the Terminal: Open the integrated terminal in your coding editor. On VSCode, it's at the very top, and click 'New Terminal' and it should pop up at the bottom of the editor.


[ 4 ] Create the actual React project: Type the following command to initialize a new React project using Vite, a powerful build tool:
npm create vite@latest
[ 5 ] Name Your Project: Provide a name for your project when prompted.

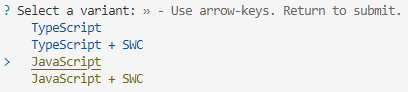
[ 6 ] Select 'React' as the Framework: Navigate through the options using the arrow keys on your keyboard and choose 'React'.

[ 7 ] Choose JavaScript Variant: Opt for the 'JavaScript' variant when prompted. This is the programming language you'll be using for your React application.
[ 8 ] Navigate to Project Folder: Move into the newly created project folder using the following command:
cd [your project name]
[ 9 ] Install Dependencies: Execute the command below to install the necessary dependencies for your React project (it might take a while):
npm install

[ 10 ] Run the Development Server: Start your development server with the command (the 'Local' link):
npm run dev

[ 11 ] Preview Your Project: Open the link provided in your terminal in your web browser. You're now ready to witness your React project in action!
Congratulations! You've successfully created your first React default project! You can look around the project structure like the folders and files already created for you!
BroCode's 'React Full Course for Free' 2024 >> click
React Official Website >> click
Stay tuned for the other posts I will make on this series #mini react tips~!
#mini react tips#my resources#resources#codeblr#coding#progblr#programming#studyblr#studying#javascript#react.js#reactjs#coding tips#coding resources
99 notes
·
View notes
Text
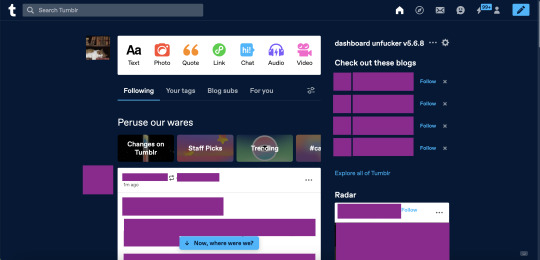
how to install dashboard unfucker (for desktop)
hi i use desktop and i use the dashboard unfucker extension by dragongirlsnout and you should too because it's awesome. i don't know much about computers so it was intimidating to set up but ended up being really easy.
but first:
what is dashboard unfucker?
dashboard unfucker is an extention that makes being on tumblr bearable again.
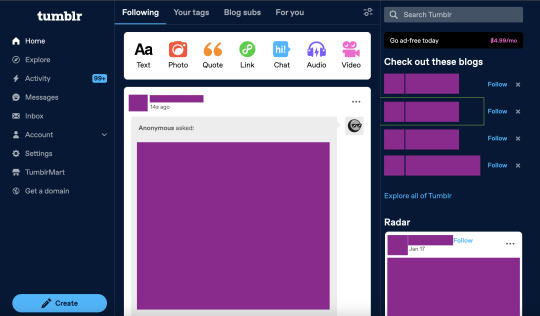
(ID: 2 screenshots of tumblr with urls/posts etc censored. the first is with the new layout, with labels on the left, the ad-free button, "check out these blogs," "explore all of tumblr," the radar, and no easy way to access your own blog. the second is with the extension enabled, the left hand side of the screen is empty, posts are wider, navigation icons are back at the top right, and the only thing on the right-hand side of the dash is the dashbaord unfucker and limit checker and tag replacer from xkit. end ID)
i got it for layout changes like these- the first is cramped and ugly and i feel like i'm on twitter. the second is warm and comfy and i can make my posts wider (i dont like all the empty space). (limit checker, tag replacer, and post color were done on xkit and palettes respectively, not unfucker, btw)
with the dashboard unfucker you can:
hide the following/blog subs/for you etc tabs
get rid of the changes/staff picks/etc carousel
hide recommended blogs and tags
add profile pics back to posts
hide the radar
hide the explore page
hide tumblr shop
hide user badges
highlight bots in ur activity feed
show who follows u in the activity feed
make posts wider/slimmer and move the dash posts position to the left/right
revert messages design (and make the messages box bigger)
revert activity feed to the old design
display vote counts on polls
show poll results without clicking (no more skewing polls or "see results"!!)
disable tumblr domains
add polls to reblogs
disable "post without tags?"
show ns.fw posts
and other things that i probably missed copying this from the settings!!
so how do you do it? it seems scary but it's easy actually. take my hand
(note: i did this on firefox and tested it on chrome, i'm not familiar with other browsers, also use firefox if at all possible fuck chrome)
how to install dashboard unfucker
step 1: install either tampermonkey, tampermonkey beta, greasemonkey, or violentmonkey (if you don't already have it)
note: im using tampermonkey as an example because it's what i use
step 2a: go to firefox extensions/chrome web store/your browser's equivalent
step 2b: look up "tampermonkey" and click "add to firefox/chrome/whatever" and confirm
step 2c: you're done! yayyy
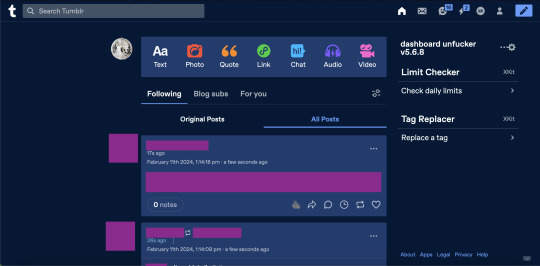
step 2: click this link. look under "installation" where it says "Click on unfucker.user.js to install or update". and click that
(ID: a screenshot of the tampermonkey install page, showing dashboard unfucker v5.7.8 installation information, the source code, and the install/cancel button. end ID)
(it should open in a new tab and look like this)
step 3: click install! (when i did this it didn't look like much happened and i got scared. dont get scared take my hand)
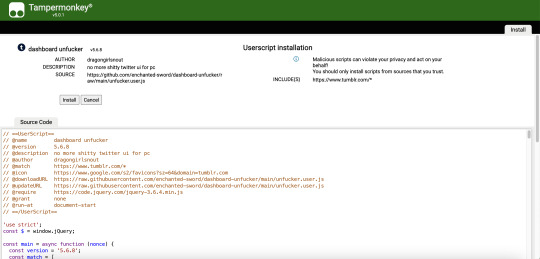
step 4: go to www.tumblr.com and to the right of the dash it'll have the dashboard unfucker label to the right!
(ID: the default dash again, but with the dashboard unfucker title at the top right of the right-hand side of the dash. end ID)
step 5: click the little gear icon and all the options will pop up! u can fuck around with em to ur heart's content. i recommend exporting after ur done and saving it somewhere in case u have to uninstall/reinstall to troubleshoot or smth
you're done! now u can see the results of polls without clicking them and other such things

(ID: a poll i have not voted on. it has 17 votes and 23h 56m remaining. the title is "poll :)" and the answers are "answer 1" "answer 2" and "see results". there are no percentage labels, but the amount each answer has is indicated by light blue bars in each result, as they would be if i had voted. end ID)
note: i'm not sure how/if this aspect of the extension is indicated for screenreaders
THIS POST IS TRANSGENDER BTW!
88 notes
·
View notes
Text
Another thing for new Tumblr users: Read Mores
We don't use excess spaces or ROT13 or anything to avoid spoilers here! We use a Read More cut. This is also handy for shortening long posts.
As of July 2 2023 (it can and does change over time, but mostly in where to find things) on desktop when making a hard return space in your post it pulls up the formatting menu for selecting images, gifs, links, etc. The last icon on the list--the straight line, squiggly line, straight line--is your Read More cut

On my iOS tablet app, the menu's found at the bottom of the post editor.

This lets you hide spoiler content and/or trim down longer posts, like long lists or longer fanfiction or character info or lore or whatever.
Now, this is also where your blog's customization comes in; someone clicking on a Read More cut will be taken from the dashboard to your blog post, to read it with your font and color choices. Please make sure they're actually readable and accessible. Even with only a minor astigmatism correctable by glasses, I've run into a LOT of unreadable blogs.
For readers, a way around this on Desktop is the XKIT REWRITTEN browser extension. Handy for a lot of ways to tweak your Tumblr browser experience in general, one of the options also lets you open Read More cuts directly on the Dashboard, which can be a lifesaver if avoiding badly formatted or inaccessible blogs.
Another strong word of warning: Read Mores link back to the original post. Handy if you want to Edit what came under the cut. But also--if you delete the post, or change your blog name/URL, it may break the Read More link on reblogs. The information is either gone or unable to be found, due to how Tumblr structures posting and reblogs, especially in the older text editors. This is often why you'll see people advocate not putting image or video descriptions under a Read More, even if they get long. Other vital information on a post can be lost this way as well.
So go forth without stretching your mutuals' dashboards or worrying about spoiling folks who haven't filtered their tags/words properly!
(Speaking of: please use filtered words and tags for things you don't want to see or interact with!)
If you want to make static Tumblr pages (like all the ones I have on my blog), or have questions about how and why to Customize your blog (don't be mistaken for a spambot and also gain access to your full blog features!), I have other tutorials for that!
#Tumblr#Blogging#Social Media#How To#Tutorial#Read More#Cuts#Haven't used LJ in like 15 years and still say 'under the cut'
157 notes
·
View notes
Text
WeHeartIt: How to Save Your Hearts
Hi everyone! I’ve put together a multi-step comprehensive guide on how to save your hearted collections and articles from WeHeartIt. If you have any questions after reading this or need someone to walk you through it, just let me know and I’ll be happy to help.
The information I’m using here is compiled from my own knowledge and uses links provided from Reddit user NTataglia, who is the real MVP here.
Please do this on your PC web browser, I don’t think it will work on your phone browser and it’s not possible to do anything in the app!! If you try this on your phone, it will not work!!! It might be possible on a tablet, but if you can, please use your laptop or desktop to do this. I used my Lenovo YOGA 7i with Windows 11 and Google Chrome to do this, but any PC and browser should be able to do this.
How to Save Your Images
Step 1:
On your PC, go to www.weheartit.com and log in to your account. Hover your cursor on the arrow next to your icon, and you will see a drop-down list. On this list, click on settings.

Step 2:
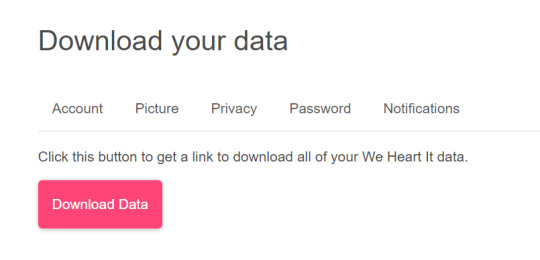
From here, you will see the settings options for your account, including a tab beside settings titled “Download Your Images”. Don’t click this, it will only save the images that you yourself have uploaded and has nothing to do with your collections. Instead, go to the tab titled “Privacy”, and you will see an option saying Download your data. Click this.

It’ll take you to a button titled “Download Data”. Click it, and your data will download to your PC.
Step 3:
The data should download as a .json file. Your download should look something like this:

This file alone is basically useless, just a notepad file showing dead links and data, so to access the information on it we will be using the links shared by NTataglia.
First, we are going to go to the We Heart It data explorer. Open a new tab in your browser and go to https://whi-data-explorer.vercel.app/
It should look like this:

Click on “Choose File”, and select the .json file that you just downloaded. Now the Data Explorer should look similar to this, only with your images and collections:
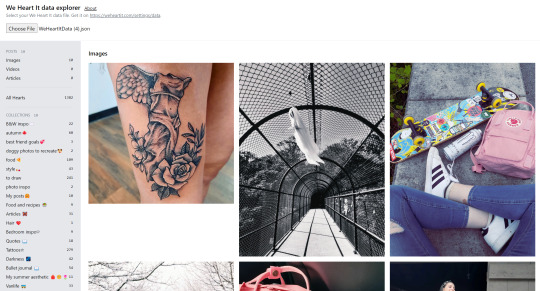
All of your uploaded images, your saved images, and your collections and articles are now here. Unfortunately, this is where it gets time consuming. There’s no way (that I’m aware of) to mass save every image, so you have to go through individually and right-click save each image to your PC. I recommend you to make a specific folder just for WeHeartIt, and to keep it organized have subfolders titled to match your collections and save your photos accordingly. Not every image will show up, as a few are already being removed from the site, but you’ll be able to save most of your collections and images.
How to Save Your Articles
A fair warning with this one: the articles show up in the Data Explorer as the images that they’re displayed with. There is no easy way to see which image is an article, or which is just an image. Hopefully you have a collection made specifically for your articles, or you can remember by image which is an article and which was just an image, or you have the patience to test each image one-by-one, otherwise this will be tricky for you. I do have a few tips for identifying some images from articles though: right-click it to open the image in a new tab. Does it look smaller, or like a different resolution than typical images do? Might be an article.
Here's how to access your articles and how to save them as a PDF.
Step 1:
Right-click on an article image from your collection or that you have hearted and open it in a new tab. Check the web address for the ID number, as seen in this screenshot:

Highlight the numbers and either right-click or Crtl+C to copy them.
Step 2:
In a new tab in your browser, go to https://weheartit.com/entry/(articleidnumber)
Go to the web address and where it says (articleidnumber) highlight it, and replace it by pasting in the ID number you copied from the image article. You can paste by either right-clicking and selecting paste or by hitting Ctrl+V.

Hit enter and the article will load on WeHeartIt. From here you will see the full article as normal, however the only links you can click on are links to other articles; profile and collection links no longer work.
Step 3:
To save the article to your PC as a PDF, hit Crtl+P or manually go to print the webpage. Do not actually print!! Your screen should look something like this:
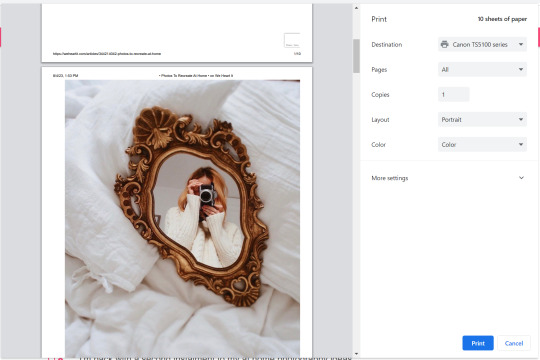
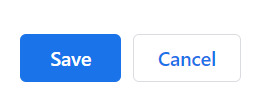
Where it says “Destination”, click on that, and find the option “Save as PDF” or something similar.
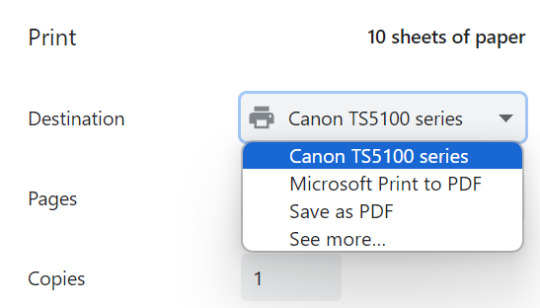
Now, the “Print” button should be replaced by “Save”. Click that, and you’ll have the article (albeit badly formatted) saved as a PDF on your PC!
Tagging people who interacted with my OG post:
@hidekomoon @takemyrevolution1997 @volodiunacapinera @opheliathegrey
#weheartit#we heart it#aestethic#aestheitcs#asthetic#aesthetic#love all the different tags spelling aesthetic lol#share this to other weheartit girlies#vibes#hopefully this helps#if i missed anything please lmk#guide#eatsless guides
142 notes
·
View notes
Text
Archiving Fanfic / Evernote
There’s been some discussion lately, which seems to come round every few years, of fanfiction loss and what happens when archives unexpectedly collapse, or even just when people delete their personal archives. It’s why when I find myself enjoying a fanfic or a juicy bit of meta, I usually clip it to Evernote.
Evernote -- essentially a web clone of Microsoft OneNote -- acts like a bookmark in that it retains a link to the original material, but also clones the page you’re clipping and stores it for you as a page in a private archive, which you can back up to your desktop using the Evernote app. It creates an editable copy, usually retaining embedded images and other text formatting, that you can sort into “notebooks” (folders) and free tag (the tags can also be grouped, and it will suggest tags on newly clipped material).
You can sign up at evernote.com and download the web clipper here; when you’re at the page of a fanfic you want to save, just click the green elephant head in your browser toolbar and it will outline everything it will save for you (you can adjust the outline appropriately in several ways -- full page, condensed page, “more than that”, “less than that” etc). You can then access your copy of the fic through Evernote when logged into the Evernote site, or through the Evernote app.
I just tested it on fanfiction.net and it works fine; it’s always worked extremely well on AO3, and works fair-to-middling on Tumblr (it tends to get a little buggy when fancy tumblr layouts are involved). As far as I’m aware there’s no mass-scrape ability so you do have to go to each page individually to clip them, but it is faster and in some ways more easy to organize than right-click-save-as or copy-paste (the latter of which you can’t do on FFN anyway).
Nothing that I love lives only online -- fanfic, television, art, what-have-you. If I love it, I own a copy of it that I can access without internet, that’s just my policy. Not always possible for everyone or in every condition, but it’s rarely done me wrong.
There’s more info about Evernote, some of it outdated, in my Evernote tag; happy clipping!
#evernote#fanfiction.net#archival#fandom history#thebibliosphere#possibly relevant to your readers' interests
460 notes
·
View notes
Text
chatplots interest check + beta testing!
hey, pssst! touya-nii would like to have a little chat with you. well? what are you waiting for! go talk to him!
note: currently, chatplots works best on a mobile device!
you can find the faq beneath the cut! <3 please read through the entire thing before sending in any questions or playing the game; there's a lot of important info in there about how the game works!
click here to submit your feedback!
WHAT IS CHATPLOTS?
chatplots is a simulation game where you can enter into various situations with specific characters and 'message' them. each chat has multiple choices for the player to choose and at least two endings. your choices and behaviour throughout the chat will influence how the character reacts and responds to you, and will ultimately determine which ending you get!
it is essentially like a playable oneshot! chatplots IS NOT AI. it is a game that was written by me and developed by my boyfriend. each conversation was painstakingly crafted by me; it is all my writing, and it will always be completely and entirely written by me.
HOW DOES IT WORK?
chatplots can be downloaded as a web app on your home screen if you'd prefer to have it on your phone! (this is the option i personally recommend hehe)
but chatplots can also be played on any device in any mobile or desktop browser, accessible through this link: https://chatplots.inkyclari.com.
how to download it on ios:
go to chatplots.inkyclari.com
tap the share icon (on safari: the little square with the upwards arrow, in the middle of the bottom of the screen, next to the bookmarks option; on chrome: the little square with the upwards arrow at the end of the address bar)
scroll down and select 'add to home screen'
you're done!
how to download it on android:
go to chatplots.inkyclari.com
on chrome, press the three dots in the upper righthand corner
click 'install app'
you're done!
here's how it'll all go down once the chat is open:
touya-nii will send a message (or several messages)
the response button (the button with the little paper airplane) will begin pulsing when you can respond back to him
pressing the button will open up all of your available response options. you can then choose which one to send back to him.
this will continue until you reach the end of the game. the response button will begin pulsing with your ending, which is a piece of prose 700-900 words long. the chat takes about 10-15 minutes to play though once.
notes:
touya-nii will refer to you by name. the name you input at the start of the game will be the name he uses, though this name can be changed at any time in the settings (the little gear in the bottom left corner!). also! check out the settings while he's still typing for a cute lil surprise ehehe c:
touya-nii will behave like a real human throughout the duration of the chat. he takes a moment to read your message before he responds, and the time it takes him to type out a response is akin to that of a real person—meaning if his response is longer, he will take longer to type it than a response that is only a word or two.
THINGS TO KEEP IN MIND:
this is a beta, which means it is not the finished product.
the chat you are playing is technically only half of what the full chat would be; you are only playing one route with a few different branches and two variations of the same single ending. (in other words, there are several different ways to reach the same ending, and each branch has slight variations).
a full chat would have at least two separate routes within the same scenario/setting, and at least two different endings.
we encourage you to play through the chat several times to discover which choices yield which results, and to explore all touya-nii has to say!
WHAT IS THIS SHORT KEIGO CHAT?
the short keigo chat is a sfw test chat i made specifically for my best friend. it only takes 1-3 minutes to play through and has options that are specifically tailored to my best friend's personality and tastes. you are welcome to play through it as well if you'd like! just bear these things in mind hehe
WILL OTHER CHARACTERS BE ADDED IN THE FUTURE?
yes, of course! any of my iterations of ANY character has the potential to be added to the game in the future. i am also open to taking suggests and prompts from you all for future chat scenarios!
HOW MUCH WILL THE FULL GAME COST?
chats would either be sold on an individual basis, where you can buy each chat separately for $4-$6 USD depending on the length, complexity, number of endings, etc OR through a monthly subscription of $7 USD, enabling you to have continual access to the entire catalogue of chats as it grows, with the minimum number chats being released at least two per month.
please let us know which option appeals to you more right here! <3
WE NEED YOUR FEEDBACK!
after you've played through the chat a couple of times, we would be extremely grateful if you would take a moment or two to answer a few questions in order to help us gauge interest and further determine the direction we should move forward in.
you are also, of course, always welcome to send your feedback and thoughts through my ask box!
we can't wait to hear from you, and we hope you enjoy the beta! <3
#SCREAMING#IT'S BEEN SO LONG IN THE MAKING i can't believe its finally here!!!!!!!#i hope you guys have fun with him!!!#please heed the warnings at the beginning of the chat of course as always#inky.chatplots
62 notes
·
View notes
Text
Embedding images on AO3: A Guide V2
Hi,
So, I thought I would go back and make an updated version of the A03 embedding image guide I made back in September of 2022.
This choice was mainly due to one of the options being viable.
Discord.
Due to the rise in malware distribution, Discord has set expirations on Discord links. This only applies to links that are used outside of Discord.
This short video explains this well
youtube
So, If we wanted to use the option, we would need to update the link every 24 hrs in your work.
Not great.
I know I also feel the salt.
Well, with that out the way, let's dive in.
A03 doesn’t actually allow for image hosting itself, so that’s why third-party hosting is needed.
In this guide, we will use these as possible choices to host our images
Google Drive
Tumblr
Imgur
https://postimages.org/
Other contenders:
IMGBB https://imgbb.com/
imgbox https://imgbox.com/
IMGBAM https://www.imagebam.com/
Image venue https://www.imagevenue.com/
Paste board https://pasteboard.co/
(Most if not all if these options listed require signup)
But really there are many options to choose from. If you have any recommendations, comment, and I’ll add them in.
Before we upload, you may need to compress your image(s) to shave them down to size, as some of these options upload size caps.
I recommend https://compressjpeg.com/ for this task. Or you may choose whatever your preference is.
Hosting options:
Option 1: Google Drive
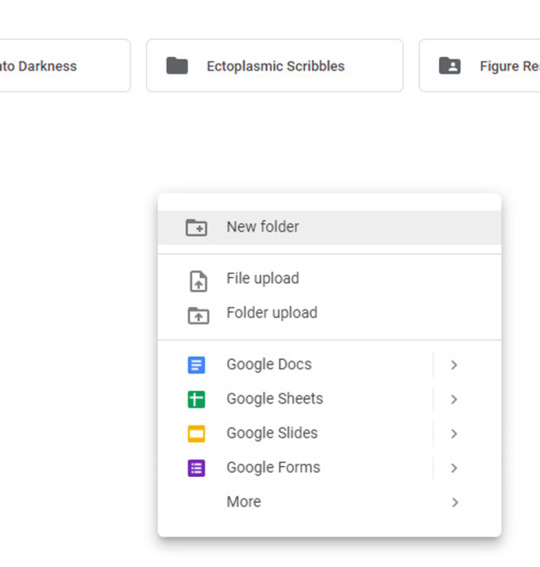
In Google Drive, create a new folder with the image(s) or subfolders for further organization.
Right-click and select New Folder, and name this folder whatever you want.
Now upload your image(s)
Right-click on your image and hit share.
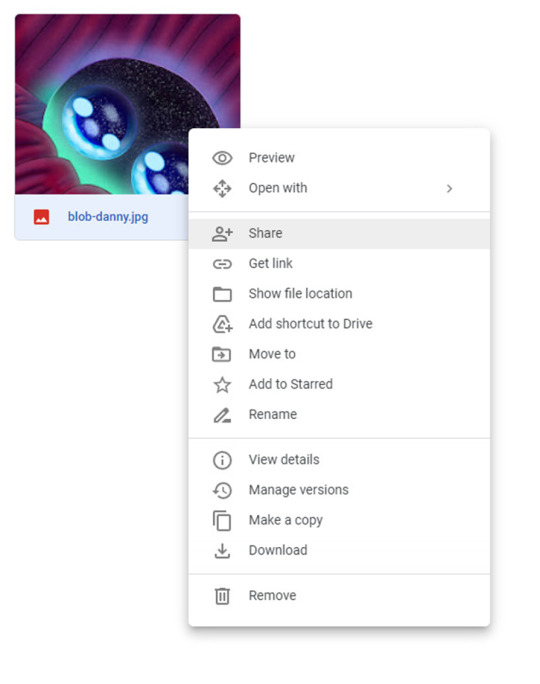
Hit Copy link
The link you have should look something like this
https://drive.google.com/file/d/1Nt17i9jx8LYffyQQew6D2x4HYxXFM0_B/view?usp=sharing
But as is it won't work! We need to modify it first!
Remove the
/view?usp=sharing
at the end of the link to work with AO3
Now, you have a working link from Google Drive that is ready to use.
Your modified link should look like…
https://drive.google.com/file/d/1Nt17i9jx8LYffyQQew6D2x4HYxXFM0_B
This Google Drive portion was from this guide here: https://archiveofourown.org/works/28132845
Option 2 Tumblr:
Tumblr is not always the best platform to use, as blogs can get deleted or URLs can change. But I’ll include it here anyway.
On mobile
Long tap the image you wish to use in a post.
You will be presented with this menu.
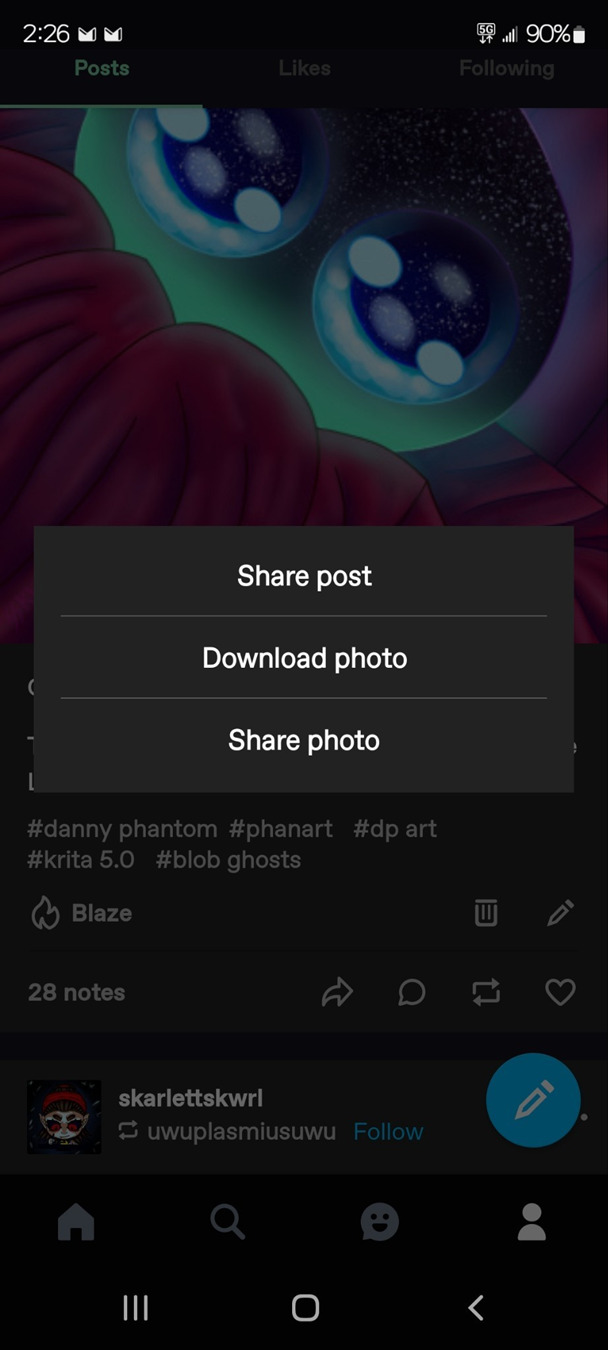
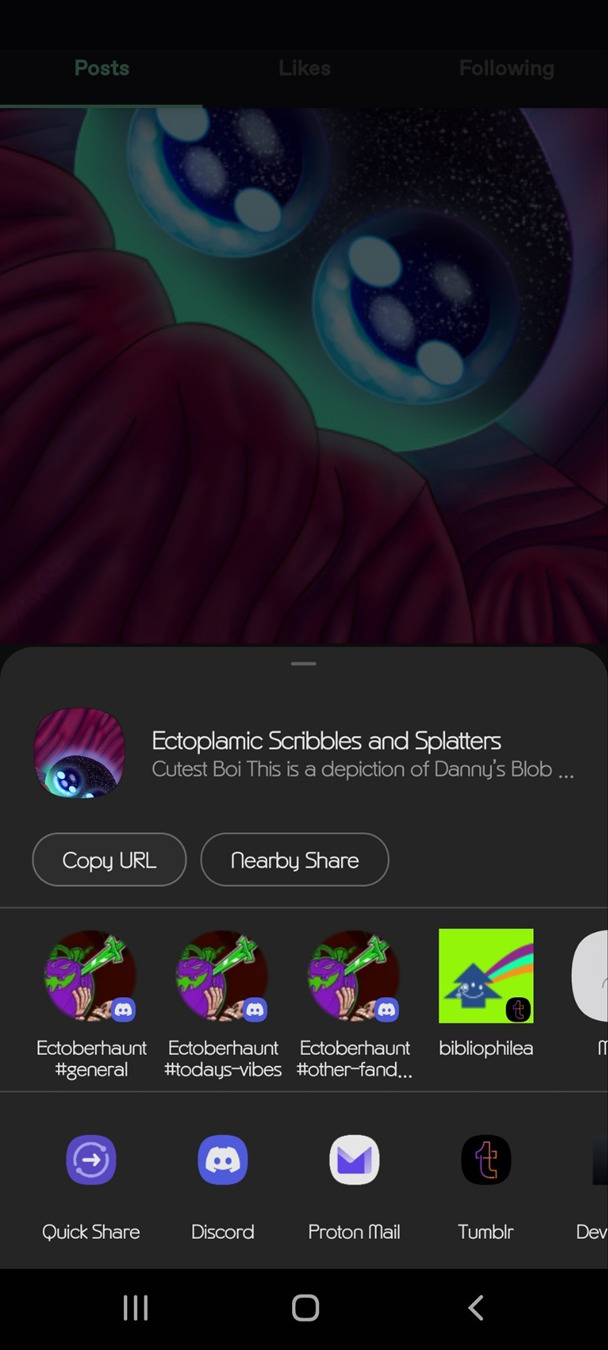
Tap share photo.
Then, you will be presented with another menu.
On the desktop, it will basically be the same.
Right-click on the image and hit copy image address.
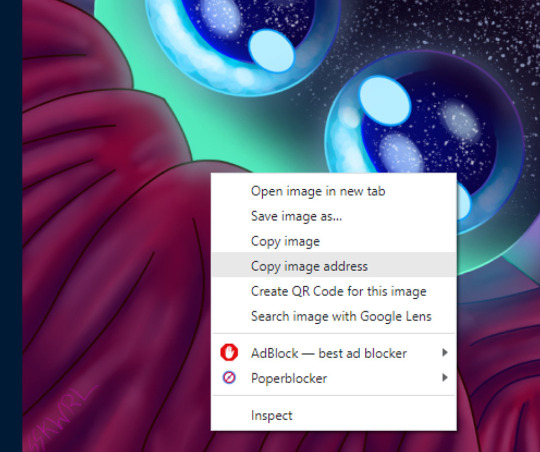
Now, you have a working link from Tumblr that is ready to use.
Option 3: Imgur
First sign up for an account. I would recommend this because last year, Imgur began deleting images not tied to a user account. This means that if you upload an image without an account, the image link may eventually expire and the image will be deleted.
Create a new post
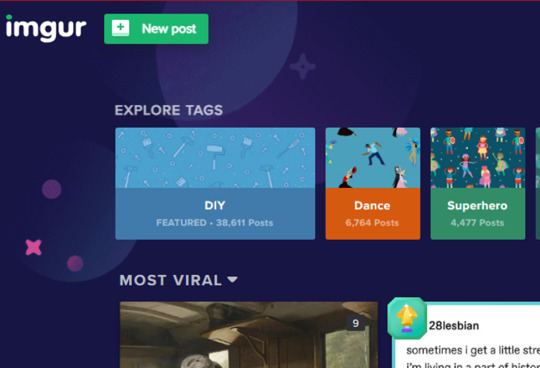
Upload your desired photo(s).
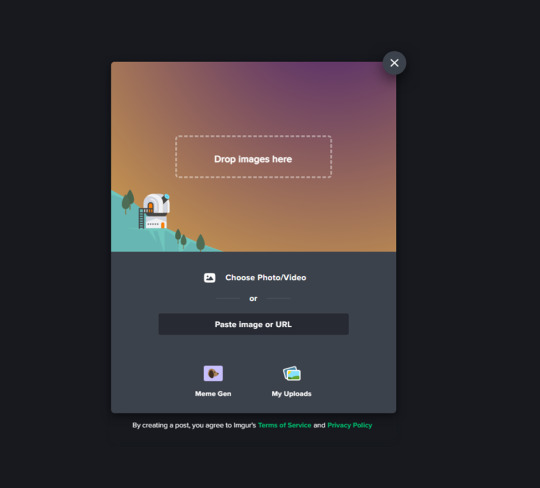
Do not hit the Grab Link button
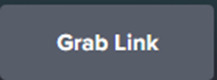
It will not work with AO3
Instead, right, click on the image and hit copy image link or address, depending on your browser.

Now your Imgur Link is ready to use.
Option 4: Using an image hosting service like postimages.org
You can create an account for free with this one. This is pretty straightforward, so I’ll gloss it over.
Once logged in you will be presented with this page.
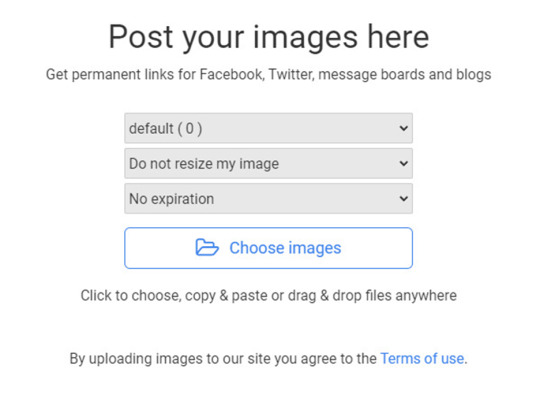
Upload your image, and you will be taken to this page.
Copy Direct link
Now, you have a working link from postimages ready to use.
Step 2: Inserting and fitting the image
Head over to Ao3.
Go to the new or existing chapter in which you wish to embed image(s).
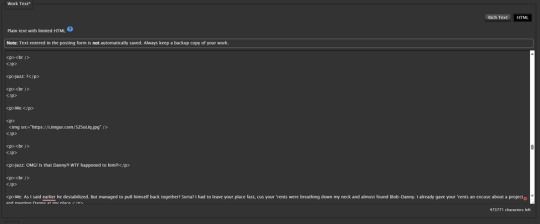
HTML OPTION:
Make sure in the HTML editor view.

This is located next to the rich text button in the Worktext section, as shown.
Now, find the place in the text where the image should go...
Now, preview your work to confirm the link is correct.
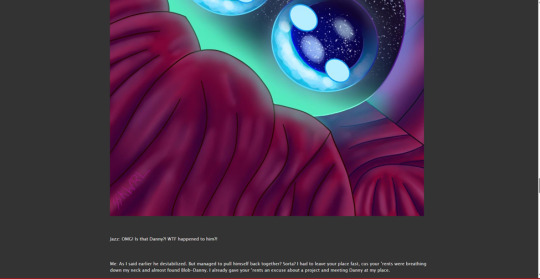
As you can see the image worked but in my case the image was waaaayyy too big.
So, we can add the width and height attributes to scale the image to a more comfortable size.
First, we need to know the exact dimensions of the image.
This can be done by looking at the size in an image app or can be done with an online tool.
Record these values
In this example, the image is 1080x2400
Now divide each by the same factor; this is important to avoid compressing or stretching the image.
In this example, We quartered/ divided them by 4.
Width = 1080/4 = 270px
Hieght = 2400/4 = 600px
Record these values
And update the img tag
<p>
<img src="" alt="" width="" height=""/>
</p>
src is the path to the URL.
alt is the alternative text for the image. This is used for accessibility as well as be a modern web standard.
width is the image width in pixels
height is the image height in pixels
You insert your values in between the double quotes.
ALWAYS TO REMEMBER:
to close your quote _
to close your image tag
to close and include your units
Here it is much better.
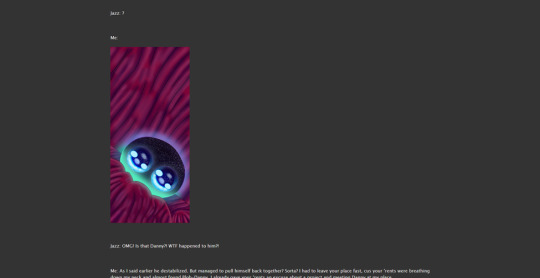
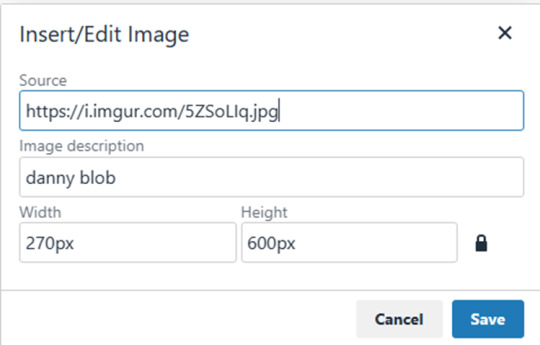
RICH TEXT OPTION:
Make sure in the Rich Text editor view.

Set the cursor where you want the image. Click the image icon.

Set the values in this form.
Use the URL we generated in one of the previous 4 options.
Set the Image description
The width and height may be input automatically; if you are unsure, consult the HTML OPTION to find the dimensions and how to rescale an image.
Here’s how it looks after posting
Well, that concludes my simple guide to AO3 image embedding. Thanks for reading to the end.
18 notes
·
View notes
Last Seen Blogs

lucarionycteus
Lucario and Nycteus

loutus
loutus

overdrivecow
I saw a bird today

lordy01
Untitled

fleetwoodmace
mila • reco dni