#learn web tech
Explore tagged Tumblr posts
Visit Tumblr Blog
Explore Tumblr blogs with no restrictions, modern design and the best experience.
Last Seen Tumblr Blogs


Fun Fact
Users from the US are the majority of Tumblr visitors.
Text
Essentials You Need to Become a Web Developer
HTML, CSS, and JavaScript Mastery
Text Editor/Integrated Development Environment (IDE): Popular choices include Visual Studio Code, Sublime Text.
Version Control/Git: Platforms like GitHub, GitLab, and Bitbucket allow you to track changes, collaborate with others, and contribute to open-source projects.
Responsive Web Design Skills: Learn CSS frameworks like Bootstrap or Flexbox and master media queries
Understanding of Web Browsers: Familiarize yourself with browser developer tools for debugging and testing your code.
Front-End Frameworks: for example : React, Angular, or Vue.js are powerful tools for building dynamic and interactive web applications.
Back-End Development Skills: Understanding server-side programming languages (e.g., Node.js, Python, Ruby , php) and databases (e.g., MySQL, MongoDB)
Web Hosting and Deployment Knowledge: Platforms like Heroku, Vercel , Netlify, or AWS can help simplify this process.
Basic DevOps and CI/CD Understanding
Soft Skills and Problem-Solving: Effective communication, teamwork, and problem-solving skills
Confidence in Yourself: Confidence is a powerful asset. Believe in your abilities, and don't be afraid to take on challenging projects. The more you trust yourself, the more you'll be able to tackle complex coding tasks and overcome obstacles with determination.
#code#codeblr#css#html#javascript#java development company#python#studyblr#progblr#programming#comp sci#web design#web developers#web development#website design#webdev#website#tech#html css#learn to code
2K notes
·
View notes
Text
Introduction To HTML
[Note: You need a text editor to do this. You can use Notepad or Text Edit. But it's so much better to download VS Code / Visual Studio Code. Save it with an extension of .html]
HTML stands for Hyper Text Markup Language
It is used to create webpages/websites.
It has a bunch of tags within angular brackets <....>
There are opening and closing tags for every element.
Opening tags look like this <......>
Closing tags look like this
The HTML code is within HTML tags. ( // code)
Here's the basic HTML code:
<!DOCTYPE html> <html> <head> <title> My First Webpage </title> </head> <body> <h1> Hello World </h1> <p> Sometimes even I have no idea <br> what in the world I am doing </p> </body> </html>
Line By Line Explanation :
<!DOCTYPE html> : Tells the browser it's an HTML document.
<html> </html> : All code resides inside these brackets.
<head> </head> : The tags within these don't appear on the webpage. It provides the information about the webpage.
<title> </title> : The title of webpage (It's not seen on the webpage. It will be seen on the address bar)
<body> </body> : Everything that appears on the webpage lies within these tags.
<h1> </h1> : It's basically a heading tag. It's the biggest heading.
Heading Tags are from <h1> to <h6>. H1 are the biggest. H6 are the smallest.
<p> </p> : This is the paragraph tag and everything that you want to write goes between this.
<br> : This is used for line breaks. There is no closing tag for this.
-------
Now, we'll cover some <Meta> tags.
Meta tags = Notes to the browser and search engines.
They don’t appear on the page.
They reside within the head tag
<head> <meta charset="UTF-8"> <meta name="viewport" content="width=device-width, initial-scale=1.0"> <meta name="description" content="Website Description"> <meta name="Author" content="Your Name"> <meta name="keywords" content="Websites Keywords"> </head>
Line By Line Explanation:
<meta charset="UTF-8"> : Makes sure all letters, symbols, and emojis show correctly.
<meta name="viewport" content="width=device-width, initial-scale=1.0"> : Makes your site look good on phones and tablets.
<meta name="description" content="Website Description"> : Describes your page to Google and helps people find it.
<meta name="author" content="Your Name"> : Says who created the page.
<meta name="keywords" content="Website's Keywords"> : Adds a few words to help search engines understand your topic.
_____
This is my first post in this topic. I'll be focusing on the practical side more than the actual theory, really. You will just have some short bullet points for most of these posts. The first 10 posts would be fully HTML. I'll continue with CSS later. And by 20th post, we'll build the first website. So, I hope it will be helpful :)
If I keep a coding post spree for like 2 weeks, would anyone be interested? o-o
#code#codeblr#css#html#javascript#python#studyblr#progblr#programming#comp sci#web design#web developers#web development#website design#webdev#website#tech#html css#learn to code#school#study motivation#study aesthetic#study blog#student#high school#studying#study tips#studyspo#website development#coding
100 notes
·
View notes
Text

DIGITAL_NECROPOLIS.exe - HTML Neocities/Nekoweb profile page template

LIVE PREVIEW
DOWNLOAD
#old web graphics#css#cybercore#html#html css#htmlcoding#web graphics#neocities#neocities template#web resources#neocities theme#neocities graphics#neocities themes#nekoweb#old tech#old internet#old web#oldweb#html theme#frontend#javascript#learn to code#ko fi shop#ko fi link#code#coding
96 notes
·
View notes
Text
Victoria and her relationship with Tinker Tech is so funny because she inherently believes it will explode.
Seriously, when you scroll through Ward, almost any time she is handling Kenzie or Dragon tech, she’s like, “Will this explode if I drop it? If I hold it too tightly, will it explode? It’s out of power right now, can someone make it into a bomb so it can explode?”
Victoria. My love. My dear.
What is the deal with you and tinker tech explosions. Did Dean explode once? Did his tinker armor burst into flame one time and you had to dunk him in the bay? Tell me when a tinker tech hurt you.
#so funny too when she learns Dragon’s origins#she doesn’t give a fuck that Dragon is an AI#she’s horrified to learn Dragon is tinker tech#“that bitch is gonna fucking explode and take the internet with her I swear to god#parahumans#wildbow#ward#worm#victoria dallon#ward web serial#antares#glory girl#worm web serial#wardblr
459 notes
·
View notes
Text
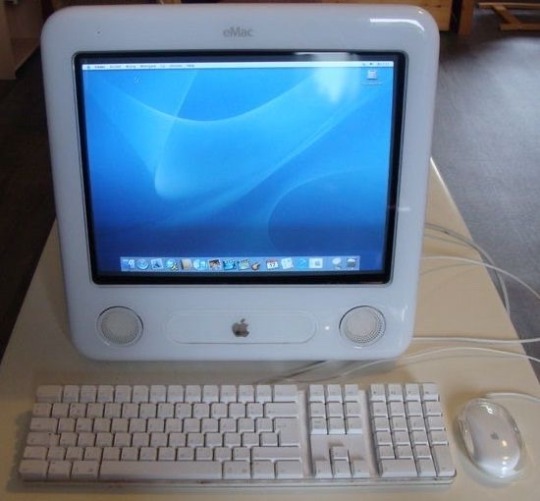
eMac, 2002, iMac for education
instagram: cheri.png
#good morning septembercore did u have this at school? for sure I didn’t#I didn’t know about this one I’m learning with you too#old apple#emac#imac g3#cybercore#old internet#old web#y2k#00s#cyber y2k#2000s#moodboard#tech#cyber core#techcore#macintosh#early 2000s#y2kcore#y2k nostalgia#nostalgiacore#nostalgia#tech blog#apple
397 notes
·
View notes
Photo

What is an Algorithm in 30 Seconds?
An algorithm is simply a series of instructions.
Think of a recipe: boil water, add pasta, wait, drain, eat. These are steps to follow.
In computer terms, an algorithm is a set of instructions for a computer to execute.
In machine learning, these instructions enable computers to learn from data, making machine learning algorithms unique and powerful.
#artificial intelligence#automation#machine learning#business#digital marketing#professional services#marketing#web design#web development#social media#tech#Technology
69 notes
·
View notes
Text
Wix Learn's Free Web Accessibility Certification | Resources ✨

Hiya! 💗 Today, I stumbled upon an absolute gem that I wanted to share with all of you. If you're learning about web design and inclusivity as I am, this is something you might want to look into~!
Introducing the Web Accessibility Course by Wix Learn - a game-changer for anyone striving to create websites that cater to all users, regardless of impairments. This comprehensive course covers everything you need to know to build an inclusive online space that leaves no one behind. AND IT COMES WITH AN EXAM AND CERTIFICATE (all free too hehe).
In this course, you'll gain mastery over essential skills, including:
🌐 Creating Inclusive Sites: Learn the best practices to make your websites accessible to people with various impairments, ensuring equal access for everyone.
📚 Accessible Title Tags and Headings: Dive into the world of proper title tags and heading structures, making navigation a breeze for every visitor.
👁️🗨️ Crafting Alt Text and Alternative Media: Discover the art of writing meaningful alt text and incorporating alternative media, providing a seamless experience for those with visual challenges.
⚙️ Optimizing Navigation for Assisted Technology Users: Enhance site navigation for individuals relying on assisted technologies, making their browsing experience smooth and efficient.
💬 The Power of an Accessibility Statement: Learn to create a compelling accessibility statement, showcasing your dedication to inclusivity and informing visitors about your website's accessibility features.
They even have prep courses for the exam! 🤗✨
Here's the link to the course: LINK
Hope this helps someone out there, I will be trying it out and seeing how it goes! 👍🏾
#resources#web accessibility#coding#codeblr#programming#progblr#studyblr#studying#tech#software developer#comp sci#programmer#learning to code#webdesign#web design#web development
289 notes
·
View notes
Note
What’s Mina doing with her/Maddie’s time off?
Holding this entire operation together.
#also learning as much new tech as she can get her hands on#Mina Harker vs. The World Wide Web#the holmwood foundation#the holmwood foundation podcast#Mina Harker#maddie townsend#Dracula
12 notes
·
View notes
Text
How to get into Coding!
Coding is very important now and in the future. Technology relies on coding and in the future you will need to know how to code to get a high-paying job. Many people consider having Computer Science field-related jobs, especially in AI. What if you are interested it in general or as a hobby? What if you don't know what you want to do yet for college?
Pick a language you want to learn: Personally, I started out with HTML and CSS. I recommend if you want to do web design HTML and CSS are good languages to start with. Otherwise, start with JavaScript or Python.
2. Find Resources: Basically you want to look at videos on YouTube, and take classes that have coding like AP CSP, AP CS A (harder class), Digital Information Technology, etc. You can also attend classes outside in the summer like CodeNinjas and use websites like code.org, freeCodeCamp, and Codecademy. Also, ask your friends for help too! You can find communities on Reddit and Discord as well.
3. Start Practicing: Practice slowly by doing small projects like making games for websites and apps. You can work with friends if you are still a beginner or need help. There's also open-source coding you can do!
4. Continue coding: If you don't continue, you will lose your skills. Be sure to always look up news on coding and different coding languages.
5. Certifications: If you are advanced in coding or want to learn more about technology, you can do certifications. This can cost a lot of money depending on what certification you are doing. Some school districts pay for your certification test. But if you take the test and pass, you can put it on your resume, and job recruiters/interviewers will be impressed! This can help with college applications and show initiative if you want a computer science degree. This shows you are a "master" of the language.
#tech#coding#learning#education#hobby#fun#jobs#high school#college#university#youtube#reddit#certification#javascript#java#python#html css#css#html#ap classes#ap csp#information technology#technology#computer science#programming#software engineering#web design#web development#discord chat#discord server
10 notes
·
View notes
Text
Frontend Projects Ideas
ADVANCED
1. E-commerce Website
2. Social Network
3. Online Learning Platform
4. Music Streaming Service
5. Real Estate Listing
6. Project Management Tool
7. Chatbot Interface
8. Job Board
9. Weather Forecast with Al
10. Stock Trading Platform
11. loT Dashboard
12. Voice Assistant Interface
13. Expense Report Generator
14. Augmented-Reality App
15. Interactive 3D Graphics
16. Blockchain Explorer
17. Machine-Learning Dashboard
18. Language Learning App
19. Financial Planning
20. Astronomy Viewe
#codeblr#code#coding#learn to code#progblr#programming#software#studyblr#front end developers#front end development#web developers#full stack web development#full stack developer#full stack development#learning#tech#technology#my projects
31 notes
·
View notes
Text

Welcome back, coding enthusiasts! Today we'll talk about Git & Github , the must-know duo for any modern developer. Whether you're just starting out or need a refresher, this guide will walk you through everything from setup to intermediate-level use. Let’s jump in!
What is Git?
Git is a version control system. It helps you as a developer:
Track changes in your codebase, so if anything breaks, you can go back to a previous version. (Trust me, this happens more often than you’d think!)
Collaborate with others : whether you're working on a team project or contributing to an open-source repo, Git helps manage multiple versions of a project.
In short, Git allows you to work smarter, not harder. Developers who aren't familiar with the basics of Git? Let’s just say they’re missing a key tool in their toolkit.
What is Github ?
GitHub is a web-based platform that uses Git for version control and collaboration. It provides an interface to manage your repositories, track bugs, request new features, and much more. Think of it as a place where your Git repositories live, and where real teamwork happens. You can collaborate, share your code, and contribute to other projects, all while keeping everything well-organized.
Git & Github : not the same thing !
Git is the tool you use to create repositories and manage code on your local machine while GitHub is the platform where you host those repositories and collaborate with others. You can also host Git repositories on other platforms like GitLab and BitBucket, but GitHub is the most popular.
Installing Git (Windows, Linux, and macOS Users)
You can go ahead and download Git for your platform from (git-scm.com)
Using Git
You can use Git either through the command line (Terminal) or through a GUI. However, as a developer, it’s highly recommended to learn the terminal approach. Why? Because it’s more efficient, and understanding the commands will give you a better grasp of how Git works under the hood.
GitWorkflow
Git operates in several key areas:
Working directory (on your local machine)
Staging area (where changes are prepared to be committed)
Local repository (stored in the hidden .git directory in your project)
Remote repository (the version of the project stored on GitHub or other hosting platforms)
Let’s look at the basic commands that move code between these areas:
git init: Initializes a Git repository in your project directory, creating the .git folder.
git add: Adds your files to the staging area, where they’re prepared for committing.
git commit: Commits your staged files to your local repository.
git log: Shows the history of commits.
git push: Pushes your changes to the remote repository (like GitHub).
git pull: Pulls changes from the remote repository into your working directory.
git clone: Clones a remote repository to your local machine, maintaining the connection to the remote repo.
Branching and merging
When working in a team, it’s important to never mess up the main branch (often called master or main). This is the core of your project, and it's essential to keep it stable.
To do this, we branch out for new features or bug fixes. This way, you can make changes without affecting the main project until you’re ready to merge. Only merge your work back into the main branch once you're confident that it’s ready to go.
Getting Started: From Installation to Intermediate
Now, let’s go step-by-step through the process of using Git and GitHub from installation to pushing your first project.
Configuring Git
After installing Git, you’ll need to tell Git your name and email. This helps Git keep track of who made each change. To do this, run:

Master vs. Main Branch
By default, Git used to name the default branch master, but GitHub switched it to main for inclusivity reasons. To avoid confusion, check your default branch:

Pushing Changes to GitHub
Let’s go through an example of pushing your changes to GitHub.
First, initialize Git in your project directory:

Then to get the ‘untracked files’ , the files that we haven’t added yet to our staging area , we run the command

Now that you’ve guessed it we’re gonna run the git add command , you can add your files individually by running git add name or all at once like I did here

And finally it's time to commit our file to the local repository

Now, create a new repository on GitHub (it’s easy , just follow these instructions along with me)
Assuming you already created your github account you’ll go to this link and change username by your actual username : https://github.com/username?tab=repositories , then follow these instructions :


You can add a name and choose wether you repo can be public or private for now and forget about everything else for now.

Once your repository created on github , you’ll get this :

As you might’ve noticed, we’ve already run all these commands , all what’s left for us to do is to push our files from our local repository to our remote repository , so let’s go ahead and do that

And just like this we have successfully pushed our files to the remote repository
Here, you can see the default branch main, the total number of branches, your latest commit message along with how long ago it was made, and the number of commits you've made on that branch.

Now what is a Readme file ?
A README file is a markdown file where you can add any relevant information about your code or the specific functionality in a particular branch—since each branch can have its own README.
It also serves as a guide for anyone who clones your repository, showing them exactly how to use it.
You can add a README from this button:

Or, you can create it using a command and push it manually:

But for the sake of demonstrating how to pull content from a remote repository, we’re going with the first option:

Once that’s done, it gets added to the repository just like any other file—with a commit message and timestamp.
However, the README file isn’t on my local machine yet, so I’ll run the git pull command:

Now everything is up to date. And this is just the tiniest example of how you can pull content from your remote repository.
What is .gitignore file ?
Sometimes, you don’t want to push everything to GitHub—especially sensitive files like environment variables or API keys. These shouldn’t be shared publicly. In fact, GitHub might even send you a warning email if you do:

To avoid this, you should create a .gitignore file, like this:

Any file listed in .gitignore will not be pushed to GitHub. So you’re all set!
Cloning
When you want to copy a GitHub repository to your local machine (aka "clone" it), you have two main options:
Clone using HTTPS: This is the most straightforward method. You just copy the HTTPS link from GitHub and run:

It's simple, doesn’t require extra setup, and works well for most users. But each time you push or pull, GitHub may ask for your username and password (or personal access token if you've enabled 2FA).
But if you wanna clone using ssh , you’ll need to know a bit more about ssh keys , so let’s talk about that.
Clone using SSH (Secure Shell): This method uses SSH keys for authentication. Once set up, it’s more secure and doesn't prompt you for credentials every time. Here's how it works:
So what is an SSH key, actually?
Think of SSH keys as a digital handshake between your computer and GitHub.
Your computer generates a key pair:
A private key (stored safely on your machine)
A public key (shared with GitHub)
When you try to access GitHub via SSH, GitHub checks if the public key you've registered matches the private key on your machine.
If they match, you're in — no password prompts needed.
Steps to set up SSH with GitHub:
Generate your SSH key:

2. Start the SSH agent and add your key:

3. Copy your public key:

Then copy the output to your clipboard.
Add it to your GitHub account:
Go to GitHub → Settings → SSH and GPG keys
Click New SSH key
Paste your public key and save.
5. Now you'll be able to clone using SSH like this:

From now on, any interaction with GitHub over SSH will just work — no password typing, just smooth encrypted magic.
And there you have it ! Until next time — happy coding, and may your merges always be conflict-free! ✨👩💻👨💻
#code#codeblr#css#html#javascript#java development company#python#studyblr#progblr#programming#comp sci#web design#web developers#web development#website design#webdev#website#tech#html css#learn to code#github
93 notes
·
View notes
Text
Day 6 [Forms In HTML]
Introduction To HTML
Day 2 [Multimedia Elements In HTML]
Day 3 [Table in HTML]
Day 4 [Link Tag In HTML]
Day 5 [Lists In HTML]
Forms are basically used for collecting user information. And they are really important to learn. Here's a simple form in HTML:
Code:


Line By Line Explanation:
<form>: Used for creating forms. All the form elements go in this tag. Action: When submitted, data is sent to this file or URL [index.html] Method="post": Sends data
<label> : This describes the input tag for="___": Connects the label to the input with id="name" id : gives a unique identification to the tag <input>: It's used to make the form elements
<input> Type Elements :
type="text" : A simple text box is created.
type="email" : A box to input email.
type="checkbox" : A small square that users can tick. Can select multiple options using this.
type="radio" : A small circle, you can only select one option.
type="submit" : A button that submits the data to the server.
<textarea>: Accepts multiple lines of text. rows="4": It creates 4 lines cols="30": It creates 30 characters
<select> : Creates a drop-down list <option>: Creates an item in the dropdown. value="colorname": This is the data sent to the server if chosen.
Output For The Code:

_______________________
Hope This Helps !!
#code#codeblr#css#html#javascript#python#studyblr#progblr#programming#comp sci#web design#web developers#web development#website design#webdev#website#tech#html css#learn to code#school#study motivation#study aesthetic#study blog#student#high school#studying#study tips#studyspo#website development#coding
34 notes
·
View notes
Text
The Future of AI: What’s Next in Machine Learning and Deep Learning?

Artificial Intelligence (AI) has rapidly evolved over the past decade, transforming industries and redefining the way businesses operate. With machine learning and deep learning at the core of AI advancements, the future holds groundbreaking innovations that will further revolutionize technology. As machine learning and deep learning continue to advance, they will unlock new opportunities across various industries, from healthcare and finance to cybersecurity and automation. In this blog, we explore the upcoming trends and what lies ahead in the world of machine learning and deep learning.
1. Advancements in Explainable AI (XAI)
As AI models become more complex, understanding their decision-making process remains a challenge. Explainable AI (XAI) aims to make machine learning and deep learning models more transparent and interpretable. Businesses and regulators are pushing for AI systems that provide clear justifications for their outputs, ensuring ethical AI adoption across industries. The growing demand for fairness and accountability in AI-driven decisions is accelerating research into interpretable AI, helping users trust and effectively utilize AI-powered tools.
2. AI-Powered Automation in IT and Business Processes
AI-driven automation is set to revolutionize business operations by minimizing human intervention. Machine learning and deep learning algorithms can predict and automate tasks in various sectors, from IT infrastructure management to customer service and finance. This shift will increase efficiency, reduce costs, and improve decision-making. Businesses that adopt AI-powered automation will gain a competitive advantage by streamlining workflows and enhancing productivity through machine learning and deep learning capabilities.
3. Neural Network Enhancements and Next-Gen Deep Learning Models
Deep learning models are becoming more sophisticated, with innovations like transformer models (e.g., GPT-4, BERT) pushing the boundaries of natural language processing (NLP). The next wave of machine learning and deep learning will focus on improving efficiency, reducing computation costs, and enhancing real-time AI applications. Advancements in neural networks will also lead to better image and speech recognition systems, making AI more accessible and functional in everyday life.
4. AI in Edge Computing for Faster and Smarter Processing
With the rise of IoT and real-time processing needs, AI is shifting toward edge computing. This allows machine learning and deep learning models to process data locally, reducing latency and dependency on cloud services. Industries like healthcare, autonomous vehicles, and smart cities will greatly benefit from edge AI integration. The fusion of edge computing with machine learning and deep learning will enable faster decision-making and improved efficiency in critical applications like medical diagnostics and predictive maintenance.
5. Ethical AI and Bias Mitigation
AI systems are prone to biases due to data limitations and model training inefficiencies. The future of machine learning and deep learning will prioritize ethical AI frameworks to mitigate bias and ensure fairness. Companies and researchers are working towards AI models that are more inclusive and free from discriminatory outputs. Ethical AI development will involve strategies like diverse dataset curation, bias auditing, and transparent AI decision-making processes to build trust in AI-powered systems.
6. Quantum AI: The Next Frontier
Quantum computing is set to revolutionize AI by enabling faster and more powerful computations. Quantum AI will significantly accelerate machine learning and deep learning processes, optimizing complex problem-solving and large-scale simulations beyond the capabilities of classical computing. As quantum AI continues to evolve, it will open new doors for solving problems that were previously considered unsolvable due to computational constraints.
7. AI-Generated Content and Creative Applications
From AI-generated art and music to automated content creation, AI is making strides in the creative industry. Generative AI models like DALL-E and ChatGPT are paving the way for more sophisticated and human-like AI creativity. The future of machine learning and deep learning will push the boundaries of AI-driven content creation, enabling businesses to leverage AI for personalized marketing, video editing, and even storytelling.
8. AI in Cybersecurity: Real-Time Threat Detection
As cyber threats evolve, AI-powered cybersecurity solutions are becoming essential. Machine learning and deep learning models can analyze and predict security vulnerabilities, detecting threats in real time. The future of AI in cybersecurity lies in its ability to autonomously defend against sophisticated cyberattacks. AI-powered security systems will continuously learn from emerging threats, adapting and strengthening defense mechanisms to ensure data privacy and protection.
9. The Role of AI in Personalized Healthcare
One of the most impactful applications of machine learning and deep learning is in healthcare. AI-driven diagnostics, predictive analytics, and drug discovery are transforming patient care. AI models can analyze medical images, detect anomalies, and provide early disease detection, improving treatment outcomes. The integration of machine learning and deep learning in healthcare will enable personalized treatment plans and faster drug development, ultimately saving lives.
10. AI and the Future of Autonomous Systems
From self-driving cars to intelligent robotics, machine learning and deep learning are at the forefront of autonomous technology. The evolution of AI-powered autonomous systems will improve safety, efficiency, and decision-making capabilities. As AI continues to advance, we can expect self-learning robots, smarter logistics systems, and fully automated industrial processes that enhance productivity across various domains.
Conclusion
The future of AI, machine learning and deep learning is brimming with possibilities. From enhancing automation to enabling ethical and explainable AI, the next phase of AI development will drive unprecedented innovation. Businesses and tech leaders must stay ahead of these trends to leverage AI's full potential. With continued advancements in machine learning and deep learning, AI will become more intelligent, efficient, and accessible, shaping the digital world like never before.
Are you ready for the AI-driven future? Stay updated with the latest AI trends and explore how these advancements can shape your business!
#artificial intelligence#machine learning#techinnovation#tech#technology#web developers#ai#web#deep learning#Information and technology#IT#ai future
2 notes
·
View notes
Text
Life Update things!
Started my morning with a meeting from the uni I'm about to start in September. They were super lovely about my health needs, and I'm excited to start the course!
I'm still working through my current separate course to become a full stack developer and doing my best to practice a bit of code each day. The course I'm currently on is partnered with Codecademy, so I'm currently working through their career path.
There are so many projects to get through on codecademy, which can be a bit daunting...but I have to keep telling myself that it will all get easier with practice.
Practice, practice.... practice!!
My stupid health may have turned my life upside down in terms of what I wanted to do career....but I'm not giving up my chances of having a good job and a good life. So....
...
Screw you, Fibromyalgia.
I'm gonna do all the things you keep trying to stop me from doing.
#learning to code#programming#web development#coding#codeblr#learning#motivated#university#computing#tech#chronically ill#chronic illness#fibromyalgia#career switch#career change
7 notes
·
View notes
Photo

The Frame Problem: AI's Unseen Nemesis
The frame problem is AI's Achilles' heel, lurking since the 1960s and still unresolved.
1. The Robot Dilemma
Daniel Dennett's thought experiment illustrates the issue: a robot must save its battery from a room with a bomb.
Initially, the robot pulls the battery on a cart but also drags the bomb out, unaware of this side effect.
Solution attempts include programming awareness of side effects, leading to analysis paralysis as the robot debates endless possibilities.
2. The Side Effect Spiral
When programmed to consider all side effects, the robot wastes time on irrelevant details—like pondering wall color changes.
This shows how difficult it is for AI to filter relevant from irrelevant information without getting bogged down.
3. Human Intuition vs. AI Logic
Humans effortlessly ignore irrelevant details, making quick decisions in complex contexts.
Programming AI to mimic this selective ignorance is resource-intensive and remains a significant challenge.
The frame problem underscores a subtle yet crucial aspect of human intelligence: our ability to instantly prioritize relevant information. As we advance in AI development, solving this problem will be key to creating truly intelligent systems.
Got thoughts on tackling the frame problem? Share your ideas!
#artificial intelligence#automation#machine learning#business#digital marketing#professional services#marketing#web design#web development#social media#tech#Technology
21 notes
·
View notes
Note
You're so right abt all these websites looking freaking the same. Too polished, corporate typa style bs. And it's not only websites, it's applicable to books too. Everything looks bland and the same. I honestly miss early 2000s style. I don't care if it was tacky or anything. At least they were interesting and each one was unique in it's own brand of quirk lol
Hiya! 💗
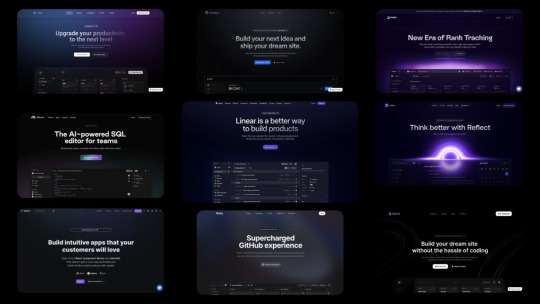
I agree! I love different styles shown in websites! Everything nowadays are following this trendy of "spacey subtle but a lot few colours" and they say it's all for user experience so I wonder is it the users' fault or are the designers just following a trend they got from another designer and so forth and not really what the user wants? I mean, I bet now the users who view the websites are noticing, like we have, that oh the same style again. I don't know as I'm not a UX/UI designer so I can't judge entirely but from a user perspective I am tired of websites all looking the same, I mean even those old government websites look better than this gradient spacey look that's going on.
But just as they're a trend, they will die out soon. I remember when glassompishm was super duper trendy, when I started learning how to code websites around 2021-2022, it was everywhere and now it's not as popular, I see less of it now, so we'll see what's next 🤞🏾
On that, this is why I like neocites with it's diversity and uniqueness! Also check out mine hehe~!
#my asks#codeblr#coding#progblr#programming#studying#studyblr#learn to code#comp sci#tech#programmer#ui ux design#uidesign#web design
60 notes
·
View notes