#Creator Workflows
Explore tagged Tumblr posts
Visit Tumblr Blog
Explore Tumblr blogs with no restrictions, modern design and the best experience.
Last Seen Tumblr Blogs


Fun Fact
Mobile US users spent an average of 115.8 minutes on Tumblr app monthly.
Text
Innovate, Create, Transform: ServiceNow Creator Workflows at Work
ServiceNow Creator Workflows emerge as a potent solution to drive innovation from within. In this blog, we'll explore how these workflows are transforming the way businesses operate, enabling them to innovate, create, and ultimately, transform.
Innovation is the cornerstone of growth in the digital age. However, it's not limited to a dedicated innovation team; it should permeate throughout an organization. ServiceNow Creator Workflows empower employees from diverse departments to be active participants in the innovation process.
1. Democratizing Workflow Creation
ServiceNow Creator Workflows break down traditional barriers to innovation by empowering non-technical individuals, often referred to as "citizen developers," to create and automate workflows. These citizen developers understand the intricacies of their own roles and can identify bottlenecks or opportunities for improvement.
Imagine a scenario where a marketing manager wants to streamline lead generation and tracking. With ServiceNow Creator Workflows, they can design a workflow to capture leads, automate nurturing, and seamlessly hand over qualified leads to the sales team. This democratization of workflow creation puts innovation in the hands of those closest to the business challenges.
2. Rapid Solution Deployment
ServiceNow Creator Workflows empower organizations to rapidly deploy solutions to address specific challenges or seize opportunities. These workflows can be designed and implemented quickly, reducing time-to-market and allowing businesses to stay nimble.
For instance, imagine a customer support manager facing a sudden surge in support requests. With Creator Workflows, they can create an automated system for ticket routing, prioritization, and resolution. This rapid response not only improves customer satisfaction but also demonstrates the organization's adaptability.
3. Integration and Collaboration
One of the strengths of ServiceNow Creator Workflows lies in their ability to promote integration and collaboration across departments and systems. They serve as bridges between different tools and processes, ensuring that data flows seamlessly and information is accessible where and when it's needed.
Consider a scenario where an HR manager aims to streamline the employee onboarding process. With Creator Workflows, they can integrate HR systems, IT provisioning tools, and even employee training platforms. This end-to-end automation simplifies onboarding, enhances the employee experience, and fosters cross-departmental collaboration.
4. Scalability and Adaptability
Innovation isn't a one-time effort; it's an ongoing journey. ServiceNow Creator Workflows are designed for scalability and adaptability. They allow organizations to start small and gradually expand the scope of their workflows as needs evolve.
For example, a finance director can start by automating expense approvals and later expand the workflow to include budget tracking, financial forecasting, and vendor management. The scalability of Creator Workflows ensures that innovation can grow in tandem with the organization's ambitions.
Innovate, Create, Transform
ServiceNow Creator Workflows are the catalyst that propels organizations forward in their quest for innovation and transformation. By democratizing workflow creation, enabling rapid solution deployment, promoting integration and collaboration, and offering scalability, these workflows turn ideas into reality.
In a business landscape where agility, efficiency, and innovation are paramount, organizations must harness the power of ServiceNow Creator Workflows. It's not just about automating processes; it's about fostering a culture of innovation and enabling employees at all levels to contribute to the organization's success. With ServiceNow Creator Workflows, businesses have the tools they need to innovate, create, and ultimately, transform their operations and customer experiences.
For More Details And Blogs : Aelum Consulting Blogs
For ServiceNow Implementations and ServiceNow Consulting Visit our website: https://aelumconsulting.com/servicenow/
0 notes
Text

🧠 "When your first UV map EVER has to be a complex project and end up looking just like a subway map. Baking became a full-body workout that required numerous attempts. Still, I pushed through and will be included in Greenhouse Haven Reloaded pt. 1 with 10+ swatches and BGC! 💪🎨 #blenderpain
Find out my sneek peek on my Patreon
#ts4cc#sims4cc#thesims4cc#sims 4 custom content#sims 4 modding#blender cc#blender sims 4#sims 4 blender#uv mapping#texture baking#blender problems#cc creator life#sims 4 build cc#sims 4 clutter cc#blender workflow#cc in progress#wip cc#behind the cc#simblr#simblr community#simblr creators
2 notes
·
View notes
Link
Se hai mai avuto un'idea brillante per un'app ma non hai avuto le competenze tecniche per realizzarla, il 2025 potrebbe essere l'anno giusto per te. Sta emergendo un nuovo approccio allo sviluppo software, che consente ai creatori con conoscenze tecniche minime di creare app, siti Web e strumenti funzionali in ore anziché mesi. Ecco a voi: vibe coding!
I giorni in cui era necessario imparare linguaggi di programmazione complessi solo per creare software semplice stanno rapidamente svanendo. Con i giusti strumenti di intelligenza artificiale, ora puoi creare un'app funzionale semplicemente descrivendo ciò che desideri, anche se non conosci la differenza tra Python e JavaScript.
Ho sperimentato questi strumenti per mesi ormai e sono sinceramente entusiasta di cosa significhino per i creatori come noi. Lasciate che vi spieghi cos'è il vibe coding, come funziona e perché potrebbe essere la soluzione perfetta per i creatori che vogliono creare strumenti per il loro pubblico.
Cos'è il Vibe Coding?
"Vibe coding" è stato coniato da Andrej Karpathy , un ingegnere di intelligenza artificiale che in precedenza ha lavorato presso Tesla e OpenAI. All'inizio del 2025, lo ha descritto in un tweet che ha trovato eco in molti sviluppatori:
"C'è un nuovo tipo di codifica che chiamo 'vibe coding', in cui ti abbandoni completamente alle vibrazioni, abbracci gli esponenziali e dimentichi che il codice esista. È possibile perché gli LLM (ad esempio Cursor Composer con Sonnet) stanno diventando troppo buoni. Inoltre, parlo solo con Composer con SuperWhisper, quindi tocco a malapena la tastiera. Chiedo le cose più stupide come 'diminuisci la spaziatura sulla barra laterale della metà' perché sono troppo pigro per trovarla. Io 'Accetta tutto' sempre, non leggo più le differenze. Quando ricevo messaggi di errore, li copio e incollo senza commenti, di solito questo risolve il problema. Il codice cresce oltre la mia solita comprensione, dovrei davvero leggerlo per un po'. A volte gli LLM non riescono a correggere un bug, quindi ci lavoro intorno o chiedo modifiche casuali finché non scompare. Non è male per progetti usa e getta del fine settimana, ma è comunque abbastanza divertente. Sto costruendo un progetto o webapp, ma non è propriamente programmazione: vedo cose, dico cose, eseguo cose, copio e incollo cose, e per lo più funziona."
In parole povere, il vibe coding è l'uso dell'IA per creare software semplicemente descrivendo ciò che vuoi. Invece di scrivere codice da solo, dici a un'IA cosa stai cercando di creare e questa genera il codice per te. Quando sorgono problemi, descrivi il problema e l'IA lo risolve.
Non è una metodologia di sviluppo formale, è più un cambiamento culturale reso possibile dai recenti progressi nell'AI. Il termine è un po' ironico, ma descrive un fenomeno reale: i non programmatori possono ora creare software funzionale lavorando con l'AI anziché scrivere codice direttamente.
In che modo la codifica Vibe differisce dallo sviluppo tradizionale
Per capire perché il vibe coding è importante, confrontiamolo rapidamente con gli approcci tradizionali allo sviluppo software:
Codifica tradizionale
Competenze richieste: linguaggi di programmazione, framework, debug
Processo di sviluppo: scrivere il codice riga per riga, eseguire il debug, testare
Investimento di tempo: settimane/mesi per imparare, giorni/settimane per costruire
Flessibilità: illimitata (può costruire qualsiasi cosa)
Relazione con il codice: Manipolazione diretta di tutto il codice
Piattaforme a basso codice
Competenze richieste: conoscenza di base dei concetti di programmazione
Processo di sviluppo: trascinamento dei componenti, configurazione delle impostazioni
Investimento di tempo: ore/giorni per imparare, giorni per costruire
Flessibilità: limitata alle capacità della piattaforma
Relazione con il codice: astratto, raramente si vede il codice
Codifica delle vibrazioni
Competenze richieste: capacità di comunicazione in linguaggio naturale
Processo di sviluppo: descrivi ciò che desideri, ripeti la conversazione
Investimento di tempo: minuti per imparare, ore per costruire
Flessibilità: ampia ma con limitazioni sulla complessità
Relazione con il codice: il codice esiste ma potresti non leggerlo mai
La codifica Vibe rappresenta essenzialmente il passo successivo nell'evoluzione dello sviluppo software, in cui descriviamo l'intento anziché scrivere codice.
Perché il Vibe Coding è importante per i creatori
Per i creatori, questo è potenzialmente un punto di svolta. Siamo già sotto pressione per creare contenuti, gestire community e gestire le nostre attività. Imparare a programmare è sempre stata un'impresa enorme, difficile da giustificare, anche se spesso abbiamo grandi idee per strumenti che potrebbero aiutare il nostro pubblico.
Il Vibe coding riduce drasticamente questa barriera. Non devi passare mesi a imparare un linguaggio di programmazione o assumere costosi sviluppatori per creare un semplice prototipo. Puoi semplicemente descrivere ciò che vuoi, iterare con l'IA e costruire qualcosa di funzionale nel giro di giorni o addirittura ore.
Ciò significa:
Puoi creare strumenti personalizzati per il tuo pubblico , risolvendo i loro problemi specifici in modi che i software generici non riescono a risolvere.
Puoi testare le idee rapidamente , senza investire mesi di tempo o migliaia di dollari in costi di sviluppo.
Puoi aggiungere nuove fonti di reddito vendendo l'accesso agli strumenti che hai creato.
Puoi creare strumenti interni per rendere più efficiente il tuo flusso di lavoro.
Come funziona in pratica il Vibe Coding
Lasciatemi illustrare il processo di base per creare qualcosa con il vibe coding:
Scegli uno strumento : seleziona una piattaforma di codifica AI (più avanti spiegherò le opzioni).
Descrivi la tua idea : spiega in dettaglio cosa vuoi realizzare.
Esamina il risultato : guarda cosa ha creato l'IA e testalo.
Perfeziona tramite conversazione : indica all'IA cosa cambiare o correggere.
Distribuisci e condividi : pubblica la tua creazione affinché altri possano utilizzarla.
La differenza fondamentale tra il vibe coding e lo sviluppo tradizionale è il processo conversazionale iterativo. Invece di scrivere codice direttamente, stai dialogando con l'IA su cosa vuoi creare.
[…]
Esempi concreti
Non si tratta solo di teoria: con questo approccio si stanno già realizzando strumenti utili e talvolta straordinari.
Strumento di marketing creato da un non sviluppatore
Martin, un addetto al marketing con zero competenze di programmazione, ha utilizzato l'agente AI di Replit per creare uno strumento di marketing chiamato "Content Genie" in soli 30 minuti. L'app aiuta a fare brainstorming e generare idee di contenuti, qualcosa per cui in precedenza pensava di aver bisogno di uno sviluppatore.
Content Genie è un'app che prende un URL di YouTube e lo converte in una bozza di post di LinkedIn. Incolla un link di TED Talk e voilà, hai un post di LinkedIn pronto per essere modificato.
Nel suo blog , Martin ha descritto di essere stato inizialmente scettico, ma poi stupito da come l'IA gestiva tutto: "Ho condotto un esperimento: creare e distribuire un'app senza digitare una sola riga di codice. Mi sentivo come un ingegnere informatico, senza le nottate passate".
Il risultato non era perfetto, ma era un'app web completamente funzionale che poteva condividere immediatamente. Il consiglio di Martin: "Se hai un'idea che sta prendendo polvere perché non sei 'tecnico', smettila di aspettare. Provala. Resterai sorpreso da ciò che puoi realizzare".
Provatelo voi stessi!
Product Hunt colpito da zero competenze di programmazione
Dopo essere stato licenziato, Rasit (che non aveva alcuna conoscenza di programmazione) ha deciso di creare una raccolta di 100 semplici strumenti web su un sito web utilizzando Cursor AI. Ha semplicemente descritto ogni mini-app all'AI, che ha generato tutto il codice per lui.
Ogni volta che si bloccava, sollecitava l'IA per correzioni o miglioramenti. Il risultato è stato JustBuildThings.com, un sito one-stop per utili utilità web. Senza alcun budget di marketing, il suo progetto ha raggiunto il terzo posto come Prodotto del giorno su Product Hunt.
"Sono stato licenziato dal mio lavoro. Non so programmare. Ho deciso di costruire cose con Cursor", ha condiviso Rasit su Reddit . Il suo successo dimostra come un singolo creatore non tecnico possa costruire e lanciare un progetto complesso che normalmente richiederebbe un intero team.
Ci sono un SACCO di piccoli strumenti interessanti sul suo sito. Nessuno di loro è complesso, ma è il genere di cose che tu e il tuo pubblico potreste voler usare in un modo particolare. E qualcosa che potreste realizzare voi stessi, molto facilmente, proprio come Rasit!
Scopritelo voi stessi!
Simulatore di volo di Pieter Levels
Pieter Levels (noto per PhotoAI NomadList e altri prodotti) ha recentemente creato un gioco di simulazione di volo multigiocatore in un solo giorno usando l'intelligenza artificiale. Ha semplicemente descritto ciò che voleva, ha ripetuto più volte e l'ha pubblicato. Nel giro di 24 ore, migliaia di persone ci giocavano contemporaneamente.
Ecco da dove è partito:
Il gioco non vincerà alcun premio: è pieno di glitch e ha funzionalità limitate, ma il fatto che qualcuno sia riuscito a creare un gioco multigiocatore funzionale in un giorno, scrivendo pochissimo codice da solo, è notevole. Provatelo voi stessi!
Il nostro viaggio con Alitu (sicuramente non codificato)
In The Podcast Host, abbiamo visto in prima persona quanto possano essere potenti strumenti di creazione per il tuo pubblico. Anni fa, abbiamo identificato un problema comune tra i nostri lettori: la modifica dei podcast era troppo tecnica e richiedeva troppo tempo. Abbiamo finito per creare Alitu, uno strumento per la creazione di podcast che automatizza la modifica e la pubblicazione.
All'epoca, dovevamo assumere sviluppatori e investire molto tempo e denaro per realizzare la nostra prima versione. Oggi, potremmo probabilmente creare il prototipo iniziale con l'aspetto di un terminale anni '90 in una frazione del tempo usando strumenti di codifica Vibe.
Alitu alla fine è diventata la nostra attività principale, generando più entrate di quanto non abbiano mai fatto i nostri contenuti. Questa trasformazione da creatore di contenuti a società di software è ora accessibile a quasi tutti i creatori con una buona comprensione delle esigenze del loro pubblico. QUESTO è ciò che mi entusiasma di più del vibe coding.
I migliori strumenti per la codifica Vibe
Esistono diverse piattaforme che consentono il vibe coding, ciascuna con diversi punti di forza. Ecco un confronto degli strumenti che ho trovato più utili:
Agente di replicazione
Ideale per: Creatori che desiderano la massima flessibilità e non hanno problemi a imparare un po'.
Punto di forza: controllo completo del progetto con capacità full-stack (frontend, backend, database)
Cosa amare: Replit gestisce la distribuzione automaticamente: quando la tua app è pronta, puoi condividerla all'istante con un URL. Questo rende il test e la condivisione della tua creazione indolori.
Prezzo: $ 20/mese per il piano Replit Core
Replit Agent agisce come un ingegnere software AI in grado di generare codice front-end e back-end, impostare database e persino correggere bug in modo autonomo. È incredibilmente versatile e supporta molti linguaggi di programmazione e framework.
L'interfaccia è essenzialmente un IDE (Integrated Development Environment) con una barra laterale AI, che alcuni principianti potrebbero trovare intimidatoria. Tuttavia, è potente perché ti dà accesso completo al codice se vuoi approfondire.
Un vantaggio importante è che Replit gestisce automaticamente la distribuzione: quando la tua app è pronta, puoi condividerla all'istante con un URL. Questo rende il test e la condivisione della tua creazione indolori.
Caratteristiche:
Capacità full-stack (frontend, backend, database)
Supporto per numerosi linguaggi di programmazione
Debug e distribuzione integrati
Accesso completo al codice per la personalizzazione
Amabile
Ideale per: veri principianti che desiderano un'esperienza il più semplice possibile.
Punto di forza: anteprima in tempo reale e interfaccia intuitiva
Cosa amare: la piattaforma è progettata per essere completamente no-code: descrivi semplicemente ciò che vuoi e Lovable lo costruisce mentre guardi. Non c'è bisogno di capire il codice che viene generato.
Prezzi: livello gratuito disponibile; i piani a pagamento partono da $ 20/mese
Lovable presenta un'interfaccia a due riquadri con una chat con prompt AI sulla sinistra e un'anteprima live sulla destra. Il suo motto è "Dall'idea all'app in pochi secondi" e mantiene davvero questa promessa.
La piattaforma è progettata per essere completamente no-code: descrivi semplicemente ciò che vuoi e Lovable lo costruisce mentre guardi. Non c'è bisogno di capire il codice generato; puoi semplicemente concentrarti sulla descrizione della tua visione.
Caratteristiche:
Anteprima in tempo reale delle modifiche
Sollecitazioni in linguaggio naturale
Interfaccia pulita e intuitiva
Esportazione del codice se necessario per una personalizzazione avanzata
Bolt.nuovo
Ideale per: prototipazione rapida con configurazione minima.
Punti di forza: tempo di installazione pari a zero e sviluppo basato su browser
Cosa amare: basta andare sul sito web e iniziare a costruire. L'ambiente è uno spazio di lavoro di codifica live nel tuo browser, che genera un'app dal tuo prompt e ti consente di vederla funzionare immediatamente.
Prezzi: gratuito con limiti di utilizzo giornaliero dell'IA
Bolt.new rende l'avvio di un progetto semplice come descriverlo in una frase. È molto accessibile e non richiede alcuna configurazione: basta andare sul sito Web e iniziare a costruire.
L'ambiente è uno spazio di lavoro di codifica live nel tuo browser, che genera un'app dal tuo prompt e ti consente di vederla funzionare immediatamente. Come Replit, gestisce la distribuzione con un singolo clic.
Caratteristiche:
Avvio immediato (non è richiesta la configurazione dell'account)
Ambiente di sviluppo basato sul browser
Integrazione Netlify per la distribuzione
Interfaccia pulita e minimale
Intelligenza artificiale Rosebud
Ideale per: progetti creativi che vanno oltre le tipiche app web.
Punto di forza: creazione di giochi ed esperienze interattive con generazione di immagini AI integrata
Cosa amare: promuove una "cultura del remix" in cui è possibile iniziare con il progetto di qualcun altro e modificarlo, trattando sostanzialmente un'app esistente come un modello.
Prezzi: livello gratuito con limiti settimanali; piani a pagamento da $ 10/mese
Rosebud AI consente non solo app Web, ma anche giochi ed esperienze interattive senza codice. Include immagini generate dall'intelligenza artificiale e modelli 3D senza costi aggiuntivi, il che è un enorme vantaggio se il tuo progetto ha bisogno di grafica.
La piattaforma promuove una "cultura del remix", in cui è possibile partire dal progetto di qualcun altro e modificarlo, trattando in sostanza un'app esistente come un modello.
Caratteristiche:
Creazione di giochi ed esperienze interattive
Generazione di immagini e risorse AI integrata
Progetto comunitario remixing
Supporto per contenuti 2D e 3D
Pulsante dati
Ideale per: sviluppo di app più strutturate e incentrate sul business.
Punto di forza: approccio alla pianificazione del progetto e alla suddivisione delle attività
Cosa amare: fornisci un brief dell'app e l'agente AI suddivide lo sviluppo in attività e le esegue. Questo approccio guidato è utile per i titolari di attività.
Prezzi: i piani partono da circa $ 20/mese con componenti basati sull'utilizzo
Ora esaminiamo più nel dettaglio ogni strumento:
Databutton si definisce "lo sviluppatore AI per i non esperti di tecnologia" e adotta un approccio più di project management. Fornisci un briefing dell'app e l'agente AI suddivide lo sviluppo in attività e le esegue.
Questo approccio guidato è utile per i titolari di aziende perché l'intelligenza artificiale gestisce le decisioni tecniche mentre tu ti concentri sulla visione del prodotto.
Caratteristiche:
Pianificazione del progetto e suddivisione delle attività
Capacità di database integrate
Modelli incentrati sul business
Supporto di dominio personalizzato su piani superiori
Prezzi : i piani partono da circa $ 20/mese con componenti basati sull'utilizzo.
Come iniziare con Vibe Coding
Se sei incuriosito e vuoi provare a costruire qualcosa, ecco i miei consigli per iniziare:
1. Scegli un primo progetto semplice
Non cercare di costruire il prossimo Spotify o Airbnb come primo progetto. Inizia con qualcosa di piccolo che risolva un problema specifico per il tuo pubblico.
I primi buoni progetti potrebbero includere:
Una calcolatrice o uno strumento di conversione pertinente alla tua nicchia
Un semplice quiz o valutazione
Un generatore di modelli personalizzabili
Un database di base o uno strumento di monitoraggio
2. Crea prompt efficaci
La qualità di ciò che ottieni dipende molto da quanto bene descrivi ciò che vuoi. Ecco come scrivere prompt che ottengono risultati:
Struttura di base del prompt:
I want to create a [type of app] that [main purpose]. Key features: 1. [Feature 1] that does [specific functionality] 2. [Feature 2] that allows users to [specific action] 3. [Feature 3] with [specific characteristics] Design-wise, it should [design description] with [color scheme/style notes]. The target users are [brief audience description].
Esempio di prompt errato:
"Costruiscimi un sito web per podcast."
Esempio di un buon prompt:
"Creami un sito web per un podcast sul giardinaggio. Dovrebbe avere pagine per gli episodi, informazioni sull'ospite, informazioni di contatto e un modulo di iscrizione. La combinazione di colori dovrebbe usare verdi e marroni e il design dovrebbe sembrare organico e naturale. Il pubblico di riferimento sono giardinieri urbani tra i 30 e i 45 anni che cercano consigli pratici sul giardinaggio."
Tecniche di prompt avanzate:
Riferimento a prodotti esistenti : "Simile a Calendly, ma focalizzato sulla programmazione di interviste podcast"
Specificare le tecnologie : "Utilizzare React per il frontend e Firebase per l'archiviazione dei dati"
Includi scenari utente : "Un visitatore dovrebbe essere in grado di sfogliare gli episodi, quindi cliccarne uno per ascoltarlo e vedere le note dello spettacolo"
Menzione ispirazione per il design : "Il design dovrebbe essere moderno e minimale, simile al sito web di Apple"
3. Procedere a piccoli passi
Invece di cercare di ottenere tutto perfetto in una volta sola, costruisci il tuo progetto in piccoli incrementi. Inizia con la funzionalità principale, testala, quindi aggiungi le funzionalità una alla volta.
Per esempio:
Costruisci la struttura di base
Aggiungi stile e migliora l'interfaccia utente
Aggiungere account utente o persistenza dei dati
Integrazione con altri strumenti o servizi
4. Padroneggia l'arte della raffinatezza
Quando rivedi ciò che l'IA ha creato, vorrai quasi sempre apportare delle modifiche. Ecco come perfezionare efficacemente il risultato:
Specifica cosa cambiare : "Il colore del pulsante dovrebbe essere #3366FF invece che rosso"
Spiega perché qualcosa non funziona : "Il modulo non viene inviato quando clicco sul pulsante"
Richiedi spiegazioni : "Puoi spiegare come funziona l'archiviazione dei dati?"
Usa un linguaggio visivo : "Rendi l'intestazione più evidente e la barra laterale più stretta"
Mantieni il contesto : "Mantieni lo schema di colori esistente ma adatta il layout per renderlo reattivo"
5. Eseguire test approfonditi
Durante l'iterazione, assicurati di testare attentamente la tua creazione:
Prova tutti i pulsanti e i link
Test con input diversi (inclusi casi limite)
Controlla come appare su dispositivi mobili e desktop
Chiedi ad altri di provarlo e di fornire feedback
6. Non aver paura di ricominciare
A volte è più veloce ripartire da zero che sistemare un'implementazione problematica. Se il tuo progetto inizia a girare a vuoto, prendi in considerazione di descrivere di nuovo la tua idea da zero.
7. Impara dal processo
Anche se non scrivi codice tu stesso, fai attenzione a cosa funziona e cosa no. Ogni progetto ti renderà migliore in:
Descrivere chiaramente le tue esigenze
Capire cosa possono e cosa non possono fare gli strumenti di intelligenza artificiale
Pianificare progetti più ambiziosi
Identificare quando coinvolgere sviluppatori umani
Limitazioni del Vibe Coding e come superarle
(o: come ho imparato a smettere di preoccuparmi e ad amare la follia)
Sebbene il vibe coding sia potente, non è proprio magico. Ecco le limitazioni che devi conoscere e alcune strategie pratiche per affrontarle e superarle:
Complessità tecnica
Limitazioni : più sono complessi i requisiti, più è probabile che si incontrino delle limitazioni. Gli strumenti di codifica AI eccellono nei pattern standard e nelle funzionalità comuni, ma funzionalità altamente specializzate o innovative potrebbero essere impegnative.
Come superarlo :
Suddividere i progetti complessi in componenti più piccoli e gestibili
Utilizzare l'intelligenza artificiale per costruire le basi, quindi assumere uno sviluppatore per le funzionalità specializzate
Prova diversi approcci di sollecitazione: a volte descrivere la stessa caratteristica in modi diversi può produrre risultati migliori
Utilizzare esempi di riferimento: "Farlo funzionare come [prodotto noto]" può aiutare l'IA a comprendere funzionalità complesse
Qualità e prestazioni del codice
Limitazione : il codice generato dall'IA funziona, ma non è sempre ottimizzato per le prestazioni. Per applicazioni con molti utenti o operazioni complesse, l'implementazione predefinita potrebbe essere inefficiente.
Come superarlo :
Richiedi ottimizzazioni specifiche: "Ora ottimizza questo per prestazioni migliori"
Testare con volumi di dati realistici prima del lancio pubblico
Utilizzare l'intelligenza artificiale per spiegare le scelte del codice e suggerire miglioramenti
Per le applicazioni critiche, chiedi a uno sviluppatore di rivedere il codice generato
Sfide di debug
Limitazione : quando qualcosa non funziona, può essere più difficile risolverlo se non si comprende il codice generato dall'IA.
Come superarlo :
Copia i messaggi di errore direttamente sull'IA: spesso può risolvere i propri problemi
Chiedi all'IA di spiegare il problema e le possibili soluzioni
Effettua piccole richieste di modifica mirate piuttosto che revisioni all'ingrosso
Tieni traccia delle modifiche: se qualcosa si rompe, puoi identificare la causa
Manutenzione e aggiornamenti
Limite : man mano che il tuo strumento si evolve, la manutenzione del codice generato dall'intelligenza artificiale può diventare complicata se non ne capisci il funzionamento.
Come superarlo :
Documenta ogni iterazione: tieni un registro di ciò che hai chiesto e delle modifiche apportate
Chiedi all'IA di generare la documentazione che spiega come funziona il codice
Considera la strategia a lungo termine: per progetti di successo, potresti aver bisogno di coinvolgere uno sviluppatore
Utilizzare l'intelligenza artificiale per comprendere il suo stesso codice: "Spiega come funziona questa funzionalità"
Considerazioni sulla sicurezza
Limitazione : gli strumenti di intelligenza artificiale potrebbero non implementare sempre perfettamente le best practice di sicurezza. Per le applicazioni che gestiscono dati sensibili, vi è un rischio.
Come superarlo :
Richiedi esplicitamente funzionalità di sicurezza: "Implementa l'autenticazione sicura" o "Assicurati che i dati utente siano crittografati"
Utilizzare servizi di terze parti consolidati per componenti critici come pagamenti e autenticazione
Chiedi all'IA di condurre una revisione della sicurezza del proprio codice
Per le app con dati sensibili, investi in un audit di sicurezza professionale
Da creatore a imprenditore del software, la storia di Colin Alitu
L'aspetto più entusiasmante del vibe coding per i creatori è il potenziale di trasformare il tuo modello di business. Invece di vendere semplicemente contenuti o corsi, puoi creare e vendere strumenti che risolvono i problemi del tuo pubblico.
Come abbiamo fatto la transizione
Noi di The Podcast Host abbiamo sperimentato questa trasformazione in prima persona con Alitu. Anni fa, Colin (il nostro fondatore) ha identificato un problema comune che il nostro pubblico affrontava: l'editing dei podcast era troppo tecnico e richiedeva troppo tempo.
All'epoca non avevamo strumenti di vibe coding: dovevamo assumere sviluppatori e investire molto tempo e denaro per realizzare la nostra prima versione. Oggi, potremmo probabilmente creare il prototipo iniziale in una frazione del tempo usando strumenti di vibe coding.
Ciò che è iniziato come una semplice idea per aiutare il nostro pubblico è rapidamente diventato il nostro business principale, generando più entrate di quanto i nostri contenuti abbiano mai fatto. Ciò che è notevole è il modo in cui l'approccio software ha completamente trasformato il nostro rapporto con il nostro pubblico:
Invece di spiegare semplicemente come modificare un podcast, abbiamo risolto il problema direttamente
Passare da accordi di affiliazione e vendita di corsi a un modello di abbonamento ha stabilizzato il nostro reddito
Potremmo aiutare migliaia di podcaster contemporaneamente
L'intera identità della nostra azienda si è evoluta
Perché i prodotti software sono preziosi per i creatori
I prodotti software spesso:
Hanno un valore percepito più elevato rispetto al contenuto : le persone pagheranno di più per strumenti che fanno risparmiare tempo o risolvono i problemi direttamente
Genera entrate ricorrenti tramite abbonamenti : creazione di entrate mensili prevedibili
Scalabilità più semplice rispetto alle aziende basate sui servizi : puoi servire migliaia di clienti senza aumentare proporzionalmente i costi
Crea relazioni più profonde con il tuo pubblico : gli utenti interagiscono regolarmente con il tuo prodotto, creando fedeltà
Risolvi i problemi in modo più diretto rispetto ai contenuti educativi : invece di insegnare a qualcuno come fare qualcosa, fallo e basta per lui
Come il Vibe Coding cambia le cose
In passato, la barriera alla creazione di software era enorme: competenze tecniche, costi di sviluppo e investimento di tempo lo rendevano poco pratico per la maggior parte dei creatori.
Con la codifica delle vibrazioni puoi:
Testare rapidamente le idee software : creare un prototipo in pochi giorni anziché in mesi
Ripeti in base al feedback : apporta modifiche facilmente man mano che scopri cosa desidera il tuo pubblico
Ridurre al minimo il rischio di investimento : iniziare con un prodotto minimo praticabile prima di impegnare risorse serie
Concentrati sul problema, non sulla tecnologia : usa la tua competenza nella tua nicchia piuttosto che preoccuparti del codice
Se un'idea riscuote successo tra il tuo pubblico, puoi perfezionarla utilizzando strumenti di codifica vibe e potenzialmente creare un nuovo flusso di entrate significativo per la tua attività, o addirittura trasformare l'intero modello di business, proprio come abbiamo fatto con Alitu.
Ottenere i tuoi primi utenti
Questo è un argomento a sé stante. Una volta che hai costruito qualcosa, come fai a convincere le persone a usarlo? Ecco alcune strategie:
Inizia con il tuo pubblico attuale, ovvio! – Si fidano già di te e ti forniranno feedback preziosi.
Offri un livello o una prova gratuita : riduci i rischi per i primi utenti.
Concentrati su un problema specifico : più la tua soluzione è mirata, più facile sarà trovare gli utenti che ne hanno bisogno.
Raccogli rapidamente testimonianze : la prova sociale aiuta a superare lo scetticismo sugli strumenti basati sull'intelligenza artificiale.
Sii trasparente sui limiti : stabilisci aspettative appropriate su ciò che il tuo strumento può e non può fare.
Quindi, cosa hai intenzione di far esistere?
Il Vibe coding rappresenta un cambiamento significativo in chi può creare software. Non hai più bisogno di una laurea in informatica o di anni di esperienza di programmazione per creare strumenti utili per il tuo pubblico.
Questa democratizzazione dello sviluppo software apre nuove possibilità per i creatori ovunque. Che tu voglia risolvere problemi per il tuo pubblico, diversificare i tuoi flussi di entrate o semplicemente sperimentare nuovi tipi di espressione creativa, questi strumenti lo rendono possibile.
Il nostro viaggio con Alitu ci ha mostrato quanto possano essere potenti gli strumenti di costruzione. Ciò che è iniziato come una semplice idea per aiutare il nostro pubblico a modificare i podcast più facilmente è diventato il fulcro della nostra attività. Oggi, puoi intraprendere un viaggio simile con un investimento di tempo e risorse molto inferiore.
Quindi, quale strumento costruirai? Quale problema risolverai? Le barriere non sono mai state così basse e le opportunità non sono mai state così grandi.
1 note
·
View note
Text


Instagram's square grid goes bye-bye! 👋 As disconcerting as this has been for some designers, it's a valuable teaching moment for us creatives to design with the future in mind. Here are 3 tips to help infuse this mantra into your workflow when creating social content ✨🔮
•
"The Social Media Creative Creature: An Introductory Guide to Social Media Video Content Creation for Brands" is now available on bluntspear.com/shop and all major ebook providers!
APPLE BOOKS: http://books.apple.com/us/book/id6502885528
KINDLE: https://www.amazon.co.uk/dp/B0D56K3TL3
GOOGLE PLAY: https://play.google.com/store/books/details?id=xu0IEQAAQBAJ
OFFICIAL SITE: https://bluntspear.com/product/the-social-media-creative-creature/
•
#socialmedia #instagram #design #designtips #socialcontent #socialmediacontent #motiongraphics #brandfilm #smcc #thesocialmediacreativecreature #videocontent #contentcreation #brandcontent #brandfilm #roi #designer #design #ebook #tutorial #creativetips #advice #tiktok #engagement
#dulani wilson#bluntspear#the action pixel#motion graphics#social media#london motion graphics#social media content#social media engagement#the social media creative creature#social media manager#content creation#video content#design#motion graphics design#design tips#content creator#brand film#branded content#London creative#workflow#instagram#TikTok
0 notes
Text
Understanding NDI Versions: Full NDI vs. NDI|HX, HX2, and HX3
New Post has been published on https://thedigitalinsider.com/understanding-ndi-versions-full-ndi-vs-ndihx-hx2-and-hx3/
Understanding NDI Versions: Full NDI vs. NDI|HX, HX2, and HX3

BirdDog recently published an article comparing the different versions of NDI, a game-changer in live video production. Since Full NDI debuted in 2015, new iterations like NDI|HX, HX2, and HX3 have emerged, offering improved efficiency and flexibility. Each version serves different production needs, balancing quality, latency, and bandwidth usage.
The Evolution of NDI and Video Technology
Just as video codecs evolved from MPEG-2 to H.265 for better efficiency, NDI technology has also advanced. Full NDI, based on MPEG-2, delivers top-tier quality with ultra-low latency but requires significant bandwidth. In contrast, newer versions like NDI|HX3 support H.264 and H.265, optimizing network performance without sacrificing quality.
NDI has revolutionized video production by enabling high-quality video transmission over standard IT networks, eliminating the need for expensive cabling. This has made professional-grade video accessible across industries, including broadcasting, corporate livestreams, sports, and education.
Full NDI vs. NDI|HX Versions
Full NDI remains the best option for studios needing the highest quality and lowest latency, but it demands more bandwidth. NDI|HX was introduced to provide a more network-friendly alternative using H.264 compression, making it ideal for setups with bandwidth constraints. NDI|HX2 further optimized network efficiency for remote video contributions, while NDI|HX3 enhances image quality, reduces latency, and ensures seamless device compatibility.
Choosing the Right NDI Format
Each NDI version caters to different workflow needs. Full NDI is ideal for high-end production, while NDI|HX, HX2, and HX3 offer more bandwidth-efficient options. With its balance of quality, efficiency, and interoperability, NDI|HX3 is quickly becoming the preferred choice for modern live video production. Understanding these differences helps content creators select the best solution for their setups, ensuring smooth, high-quality live streams.
Read the full article from BirdDog HERE
Learn more about BirdDog below:
#Article#compression#content#creators#education#efficiency#Evolution#Full#game#Industries#interoperability#it#latency#Learn#low latency#network#networks#performance#Production#Read#remote#Sports#streams#technology#Version#Video#video production#vs#workflow
0 notes
Text

AI is reshaping YouTube—join the creative revolution! 🎥✨ From smarter editing to personalized recommendations, AI tools are transforming how creators produce, share, and grow. Don’t get left behind—embrace the future of content creation today! 🚀💡 Click this link : https://tinyurl.com/3tyr7c8x
#ai powered#youtube revolution#content creation#smart tools#creator success#digital innovation#channel growth#youtube trends#ai for creators#effortless workflows#creative tech#boost your channel#tech tools#digital#youtube tips#creator community#digital marketing#youtube growth#ai#content strategy
0 notes
Text
AI-Enhanced Content Workflows: A Game-Changer for Content Marketing in 2025
In recent years, artificial intelligence (AI) has transitioned from a buzzword to an essential tool in a wide range of industries. Content marketing is no exception. AI-enhanced content workflows are quickly becoming a driving force behind more efficient and impactful content creation. As we look ahead to 2025, the role of AI in content marketing will only continue to grow, and businesses that…
#AI#Artificial Intelligence#Branding#Content Creator#Digital Marketing#Marketing#social-media-marketing#Technology#Workflow
0 notes
Text
Logitech Unveils the MX Creative Console
Logitech has officially launched its highly anticipated MX Creative Console, a revolutionary tool aimed at transforming how digital creators work. This innovative product is designed to provide creators with instant access to critical controls and fully customizable features, simplifying workflows and automating repetitive tasks, making it an ideal companion for artists, designers, and content…
#3D design#Adobe#Adobe Creative Cloud#Adobe plugins#After Effects#AI integration#AI workflows#analog navigation#artists#Audition#carbon footprint#content creation#creative professionals#creative tools#creators#custom controls#customization#deep integration#Design#designers#dialpad#digital creation#dynamic display keys#free membership#FSC-certified#Generative Fill#Illustrator#keypad#Logi Marketplace#Logi Options+
0 notes
Text
The AI-Powered Creative Workflow: How the Creative TechnoStack is Shaping the Future of Creativity
Discover how an AI-Powered Creative Workflow is transforming the way creators work! Learn how the Creative TechnoStack blends AI and traditional tools to shape the future of creativity. Ready to unlock your full potential? Dive in now!
Unlocking the AI-Powered Creative Workflow: The Rise of the Creative Technomancer Creativity is entering a bold new era—one where human ingenuity is supercharged by artificial intelligence, and the boundaries between artistic disciplines blur into seamless, multimedia experiences. Just as software developers pioneered the concept of full-stack to describe those who could manage both front-end…
#11Labs#Adobe Creative Suite#AI tools for creators#AI-powered workflows#Automation in creative projects#ChatGPT#Creative collaboration#Creative innovation#Creative TechnoStack#Digital creativity#Full-stack creator#Future of creativity#Graeme Smith#MidJourney#Multimedia production#thisisgraeme#Udio
0 notes
Text
ServiceNow Creator Workflows: Fueling Business Transformation
ServiceNow Creator Workflows is a dynamic and transformative approach to business process automation that fuels innovation and drives business transformation.
The Imperative for Business Transformation
In a world where change is constant, business transformation isn't a luxury; it's a necessity. Organizations must continuously adapt, innovate, and streamline their operations to stay competitive. ServiceNow's Creator Workflows provide a powerful toolbox to achieve this transformation.
1. Empowering Citizen Developers
ServiceNow Creator Workflows empower non-technical individuals—often referred to as "citizen developers"—to automate and streamline business processes without needing extensive coding knowledge. This democratization of workflow creation enables employees across departments to contribute to innovation.
Imagine a marketing manager who wants to automate lead generation and tracking processes. With ServiceNow's Creator Workflows, they can design and deploy a workflow to capture leads, nurture them through automated communications, and hand them over to the sales team seamlessly, all without IT intervention.
2. Rapid Solution Deployment
ServiceNow's Creator Workflows enable organizations to rapidly deploy solutions to address specific challenges or seize opportunities. These workflows can be designed and implemented quickly, reducing time-to-market and allowing businesses to stay agile.
For instance, a customer support manager facing a sudden surge in support requests can use Creator Workflows to create an automated system for ticket routing, prioritization, and resolution. This rapid response not only improves customer satisfaction but also demonstrates the organization's adaptability.
3. Integration and Collaboration
ServiceNow Creator Workflows promote collaboration and integration across departments and systems. They serve as a bridge between different tools and processes, ensuring that data flows seamlessly and information is accessible where and when it's needed.
Consider a scenario where an HR manager wants to streamline the employee onboarding process. With Creator Workflows, they can integrate HR systems, IT provisioning tools, and even employee training platforms. This end-to-end automation not only simplifies onboarding but also enhances the overall employee experience.
4. Scalability and Adaptability
Business transformation isn't a one-time event; it's an ongoing journey. ServiceNow's Creator Workflows are designed for scalability and adaptability, allowing organizations to evolve their workflows as their needs change.
For example, a finance director can start by automating expense approvals and gradually expand the scope to include budget tracking, financial forecasting, and vendor management. The scalability of Creator Workflows ensures that the organization's transformation journey can grow alongside its ambitions.
Fueling Business Transformation with ServiceNow
ServiceNow Creator Workflows are the catalyst that propels organizations forward in their quest for business transformation. By empowering citizen developers, enabling rapid solution deployment, promoting integration and collaboration, and offering scalability, Creator Workflows turn ideas into reality.
In an era where innovation and agility are paramount, organizations must harness the power of ServiceNow's Creator Workflows to remain competitive and resilient. This transformational approach isn't just about automating processes; it's about fostering a culture of innovation and enabling employees at all levels to contribute to the organization's success. With ServiceNow's Creator Workflows, businesses have the fuel they need to power their transformation journey and stay ahead in today's dynamic business landscape. For More Details And Blogs : Aelum Consulting Blogs
For ServiceNow Implementations and ServiceNow Consulting Visit our website: https://aelumconsulting.com/servicenow/
0 notes
Text
5 Epic Ways DaVinci Resolve 19 Beta 5 Will Revolutionize Your Edits
Excited about DaVinci Resolve 19 Beta 5? Share your thoughts and experiences in the comments below!
Hold onto your hats, video editing aficionados! Blackmagic Design has dropped a bombshell with DaVinci Resolve 19 Beta 5, and it’s not just a minor tweak – it’s a full-on glow-up. We’re talking features that editors have been clamoring for (finally!), AI wizardry that’ll make your footage shine, and enough under-the-hood improvements to make your editing rig purr like a kitten. Whether you’re a…
#AI#Beta 5#Blackmagic Design#color grading#creative workflow#DaVinci Resolve#DaVinci Resolve 19#editing tools#film editing#film look creator#HDR#media file resync#new features#post-production#software update#Super Scale#video editing software
0 notes
Text
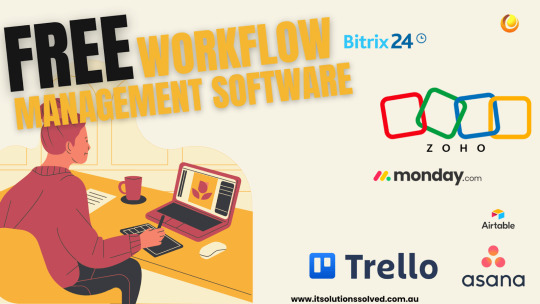
Free Workflow Management Software for Your Business
Still haven’t integrated Workflow Management Software into your business processes? You might be missing out due to a lack of awareness, investment, or skills. According to McKinsey research, half of all work can be automated and over 30% of businesses have automated at least one function.
Introduction to Workflow Management Software
What is Workflow?
A workflow is a sequence of tasks that processes data from initiation to completion. It typically involves three stages: planning, execution and review. Workflows are crucial in fields like software development and project management. Without them, tasks can become disorganised or get lost. Workflow management software helps streamline business processes, connecting your team to the right data at the right time. This organisation makes tasks easier to understand and execute.
When Should You Create a Workflow?
Workflows are essential at the team level, providing clarity and increasing efficiency. Effective workflows can be created for various purposes, such as onboarding new employees, managing marketing campaigns, or tracking bugs and content calendars. Workflow management software helps ensure tasks are not lost or disorganised, boosting productivity and efficiency.
Zoho Creator
Zoho Creator, from Zoho Corporation, is a low-code application development platform. It allows users to develop and run business software with powerful automation tools. Its drag-and-drop elements make it easy to create workflows, such as automating emails and updating CRM. If you want to understand more about Zoho, click here to learn more!
Advantages of Zoho Creator
- Ease of Use: Simple drag-and-drop UI for building workflows.
- Customisability: Tailor workflows to specific business needs.
- Enhanced Collaboration: Teams can visually design and optimise workflows.
- Mobility: Accessible on both Android and iOS.
- Integration: Connects with various applications like APIs, CRMs, databases and payment gateways.
- Cost-Effectiveness: Efficiently automates business processes, used by millions worldwide.
Disadvantages of Zoho Creator
- Dependency on Internet: Requires a stable internet connection.
- Limited Customisation: This may be insufficient for highly specialised workflows.
- Learning Curve: Initial learning phase for new users.
Monday.com
Monday.com is a cloud-based workflow management software that allows project management, team collaboration and business process automation. It offers a free plan for up to 2 users.
Advantages of Monday.com
- Visually Appealing: Intuitive, simple and minimalist UI.
- Templates Library: Over 200 customisable templates.
- Multiple Views: Includes Gantt charts, timelines and Kanban boards.
- Low-Code Automation: Easy to set up automation without coding.
- Detailed Analytics: Time tracking and reporting features.
- Real-Time Communication: Notifications and task-level discussions.
- Integration: Extensive library of integrations, including Google, Dropbox and Slack.
Disadvantages of Monday.com
- Limited Free Plan: Only for 2 users, with restricted features.
- Expensive Plans: Higher cost compared to competitors.
Asana
Asana is a popular work management platform designed to help teams track projects and tasks, share documents and communicate effectively.
Advantages of Asana
- Attractive Interface: Interactive and user-friendly UI.
- Centralised Work Management: Manage all tasks and projects in one place.
- Customisable Workflows: Create templates, automation and views to fit business needs.
- Improved Collaboration: Shared spaces and progress tracking enhance team collaboration.
- Wider Visibility: Timelines and dashboards for better team visibility.
- Automation: Streamline repetitive tasks with rules and integrations.
Disadvantages of Asana
- Limited Free Plan: Suitable for smaller teams, with limited features.
- Learning Curve: Requires time to learn, though resources are available.
- Complicated Methods: Complex tracking across multiple projects.
- Scrum Support: Basic Scrum workflows, requiring third-party integrations for advanced features.
Bitrix24
Bitrix24 offers comprehensive free workflow management software with features like project and task management, CRM and website builder.
Advantages of Bitrix24
- Free Plan: Unlimited users.
- Comprehensive Features: All-in-one CRM with project management, HR management and more.
- Deep Customisation: Extensive options for CRM fields, workflows and processes.
Disadvantages of Bitrix24
- Learning Curve: Initially complex to understand.
- Limited Features: Advanced features are available only in paid plans.
Trello
Trello is a visual workflow management software known for its ease of use and scalability. It organises projects into boards, making collaboration simple and intuitive.
Advantages of Trello
- Free Plan: Suitable for small teams and projects.
- Intuitive UI: User-friendly design.
- Real-Time Updates: Instant reflection of updates for seamless collaboration.
- Visual Organisation: Easy organisation of projects and tasks.
- Integration: Connects with popular tools like Google, Jira and Slack.
- Automation: Automate tasks with features like Butler.
- Security: Enterprise-level security with admin controls, single sign-on and two-factor authentication.
Disadvantages of Trello
- Limited Customisation: This may not be sufficient for complex projects.
- Limited Scalability: Better suited for small to medium-sized teams.
Airtable
Airtable is a cloud-based platform for organising and managing data, suitable for project management, CRM, inventory management, event planning and more.
Advantages of Airtable
- Free Plan: Free-forever plan with limitations.
- Flexibility and Customisation: Create databases and interfaces tailored to business needs.
- Extensive Integrations: Over 1,000 integrations and an API for connectivity.
- Engaging Views: Offers views like Kanban boards and Gantt charts.
- Collaboration Features: Tagging, commenting, collaborators and time-sequenced notes.
Disadvantages of Airtable
- Learning Curve: Initial difficulty due to extensive features and customisation.
- Complexity: Customisation options can be overwhelming.
- Limited Free Plan Features: Restrictions on users and records.
Conclusion
Choosing the right workflow management software depends on your business's nature, requirements and market. Small businesses might find Trello and Airtable sufficient, while medium-sized companies might benefit from Asana and Bitrix24. Larger organisations may prefer Zoho Creator and Monday.com. Free trials and demos can help determine the best fit for your needs.
Investing in workflow management software or consulting with experts can save your business from costly mistakes. Each platform has unique strengths, whether it’s Zoho’s integration capabilities, Monday.com’s intuitive design, or Trello’s simplicity.
Thank you for reading. If you need assistance with digital transformation, feel free to contact us.
Contact us for assistance in digital transformation by clicking the button below.
#Workflow Management Software#Business Processes#Automation#Zoho Creator#Monday.com#Asana#Bitrix24#Trello#Airtable#Digital Transformation
0 notes
Text
youtube
Seamless Workflow: Copy to Clipboard and Paste to the Timeline in Green Screen by DoInk
Unlock a world of efficiency in your Green Screen by DoInk projects with this game-changing tutorial. In this blog post, we'll guide you through the step-by-step process of copying content from any website and seamlessly pasting it onto your timeline. Whether you're a teacher curating educational resources or a content creator pulling in diverse elements for your videos, this tutorial will elevate your workflow and make the most out of the Copy to Clipboard and Paste features.
What you will learn:
Introduction to the Copy to Clipboard and Paste to the Timeline features in Green Screen by DoInk
Step-by-step guide on copying content from any website
Demonstrating the seamless process of pasting content onto the timeline
Real-world examples for inspiration and application
Enhancing your projects with a diverse range of online resources
Copy to Clipboard and Paste to the Timeline features in Green Screen by DoInk open up new possibilities for your creative journey. Whether you're a teacher or a content creator, harness the power of seamless workflow integration and elevate your projects.
#Green Screen by DoInk#Copy to Clipboard and Paste to the Timeline Tutorial#Seamless Workflow Integration#Diverse Online Resources for Projects#DoInk Tutorial for Educators and Content Creators#Creative Asset Integration#Time-Saving Features in Green Screen by DoInk#Enhance Your Projects with Copy-Paste Efficiency#Optimize Workflow in Video Editing#Pulling Content from Websites into Green Screen Projects#Do Ink#DoInk#How to use DoInk#How to use Do Ink#Youtube
0 notes
Text
OWC Gemini: A Comprehensive Review of this Cost-Effective Drive Soluti - Videoguys
New Post has been published on https://thedigitalinsider.com/owc-gemini-a-comprehensive-review-of-this-cost-effective-drive-soluti-videoguys/
OWC Gemini: A Comprehensive Review of this Cost-Effective Drive Soluti - Videoguys

Explore the capabilities of the OWC Gemini, a versatile drive solution tailored for content creators, musicians, photographers, and influencers. Learn about its features, connectivity options, and suitability for managing high-resolution media projects.
Discover how the OWC Gemini can streamline your creative workflow. This review delves into its specifications, connectivity, and performance for handling 4K and 8K video projects efficiently.
The OWC Gemini is a game-changer for content creators seeking a cost-effective storage solution. Offering built-in USB-C, USB-A, and Ethernet connections, it’s designed to meet the demands of multiple connectivity needs. With a two-bay RAID system and storage capacities of up to 40 terabytes, the Gemini provides ample space for high-resolution media files.
For video enthusiasts working with 4K footage or photographers dealing with high-res stills, the OWC Gemini shines. It can be further optimized by outfitting it with SSDs, making it capable of handling even the most demanding 8K video and ultra-high-resolution raw files. This versatility makes it an ideal companion for professionals looking to scale their creative endeavors without compromising on speed or storage capacity.
The OWC Gemini is not just a storage device; it’s a tool that empowers content creators to manage clutter and unleash their creative potential. If you’re in the market for a reliable, high-capacity drive solution, consider the OWC Gemini for its affordability, connectivity options, and performance in handling demanding media projects.
Ready to streamline your creative workflow? Explore the OWC Gemini today and experience the power of seamless storage for your next big project.
youtube
OWC Gemini Thunderbolt (USB-C) Dock and Dual-Drive SSD RAID External Storage Solution
OWC Gemini Thunderbolt (USB-C) Dock and Dual-Drive HDD RAID External Storage
#4K#8K#comprehensive#connectivity#content#creators#Features#game#gemini#hdd#High-Resolution#how#influencers#it#Learn#media#performance#power#project#resolution#review#scale#Space#speed#Storage#tool#usb#USB-C#Video#workflow
0 notes
Text
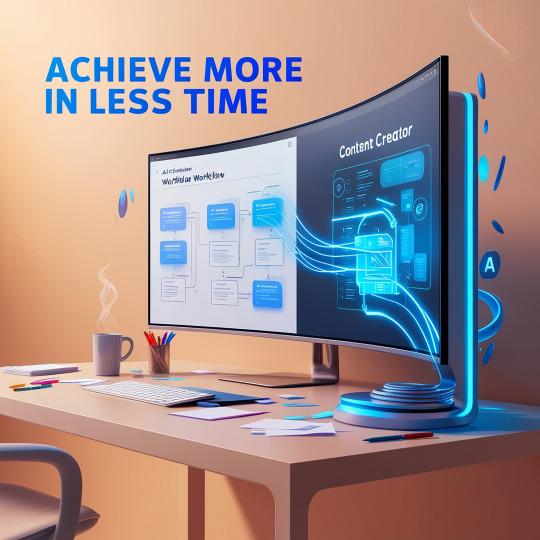
tools streamline content creation, helping you achieve more in less time! 🎥✨ From effortless editing to smart automation, these tools make creating and managing content a breeze. Work smarter, create faster, and grow bigger! 🚀💡 Click this link : https://tinyurl.com/3tyr7c8x
#ai powered#content creation#boost efficiency#smart tools#creator success#youtube growth#effortless workflows#digital innovation#ai for creators#work smarter#channel growth#youtube success#youtube tips#content strategy#ai#tech tools#digital#creator community#digital marketing
0 notes
Text
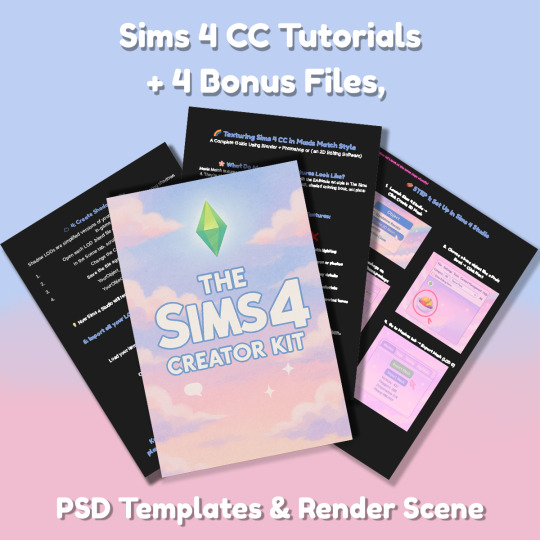
Sims 4 CC Kit — Make Your Own Lights, Decor, Clutter & Textures
Ever wanted to create Sims 4 clutter or decor CC but got stuck?
This kit is for you.
It’s a step-by-step guide that shows you how I make my own Sims 4 decor CC — lights, clutter, textures — in a way that I found works for me. You get guides, cheatsheets, templates, and my personal workflow that I’ve figured out through trial & error.
This probably isn’t the “proper” way of creating CC — but it��s how I learned, and it works and I use it every single time I create something new.
⚠️ Just to be clear:
This is a written tutorial kit, not a video or image course.
BUT — I’ve included some visuals, some screenshots & cheatsheets to help you follow along but its alot of written stuff. It would also be beneficial for you to have some basic knowledge of blender.
✅ What You Get:
Decor, clutter, lights CC Creation Guide
Shadow Mesh Tutorial
Mesh Cleanup Workflow
LOD Creation Steps
Maxis Match Texturing Cheat Sheet
Alpha Textures Basics
Vertex Paint for Lights Guide
Custom Thumbnail Tutorial
Normal & Specular Map Basics
Blender Basics Recap
Sims 4 Studio Quick Fix Cheatsheet
Blender Hotkeys Cheatsheet
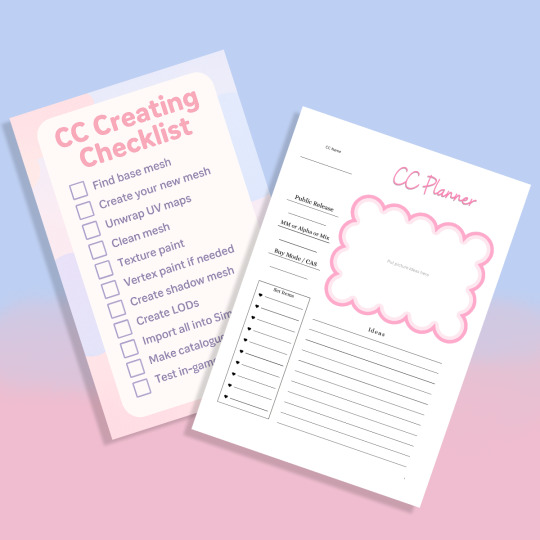
CC Planner to organize your ideas
CC Creating Checklist
PSD Thumbnail Templates (Decor)
Blank Normal & Specular Maps
Blender Render Setup File for Catalog Thumbnails
Texture Tips & Tricks
🎯 Why You’ll Love This:
No fluff — real steps, real help
Written for beginners who know basic Blender but need a hand
Includes a little bit of visual guides, printables & templates
Saves you HOURS of googling random problems
Helps you actually finish your CC & get it in-game
🖤 This is for you if:
You know basic Blender stuff (grab, rotate, edit mode) Got 3D Models you want to put into The Sims 4
You want to make clutter, decor CC and lights (not clothes or CAS yet)
You’re tired of tutorials that make you more confused
PS: Accessories & Clothing Creator Kits are coming soon.
If you get stuck, you can always join my Discord
(link’s on www.simmerkate.com).
Get Here (xx)
181 notes
·
View notes