#Graphic design tips and tricks
Explore tagged Tumblr posts
Visit Tumblr Blog
Explore Tumblr blogs with no restrictions, modern design and the best experience.
Last Seen Tumblr Blogs


Fun Fact
Tumblr has been providing a Korean-language service since 2013.
Text
Graphic Design Tips for Social Media | Liveblack

As humans, we are attracted to aesthetically pleasing visuals, and why not? We love to see our surroundings have beauty, creativity, and artistry. Whether you’re watching billboards on the way, TV ads, social media posts, banners, or anything else, if they are visually not pleasing, you will not remember them for a long time.
We see content here and there and everywhere, but what if it does not interest anyone? Then how will you expand your business in such a situation? Creative and engaging graphic visuals are the way you can reach many people and open your brand up to the world in the most artistic way possible.
Graphic design should create a visible sensation and pleasing visuals that attract customers and increase reach and sales.
Social media is one of the most crucial ways to show off your brand as visually attractive and rich in content. It is of great significance for your brand to be outstanding with visuals. Now, the question is how to create graphic design for social media. What are the techniques that are more ingenious and efficient in drawing attention to your brand? Let us tell you the tips and tricks for that.
As a graphic designer or digital marketer, you already know the tactics used in creating the best social media graphics, but non-designers may lack in-depth knowledge. So here are the ways and Social media graphic design examples that you can improve.
Graphic design tips for social media include,
1 — Colors -
Colours are the most essential part of our lives. We are living in a colourful world. Everything in this world, from our veins to our skin, nature to artificial wonders, is covered in colours. Ever imagined a world without colours? It would be boring to live without colours. That’s what happened with the graphic design as well.
Not that you can’t put monochrome or black-and-white images on your social media grid, but deciding on a colour palette makes your feed look excellent and attractive. This way, your posts are easily and instantly identifiable by your audience and establish a clear image for your brand.
Colour psychology works wonders when you understand how colours affect people’s moods and behaviour. Colours can create an atmosphere where people, whether they love to stay or escape. Each colour has its impact and meaning, which helps you design better. Uscoloursrs that reflect your brand, and be aware of colours or s and which colours influence people to take any action.
Contrasting colours ideally create wonders for your social media feed and brand. Colours play a prominent role in your social media graphic design.
2 — Captivating Thumbnail for Videos -
Videos make everything work beautifully. Smooth and crystal-clear videos are a handy weapon to keep your audience busy. When you post any video on your social media, the platform will automatically choose the thumbnail for the video or set it manually as per your choice. Not every time, your video has that first frame be more eye-catching, so be aware of choosing what you will post.
Be selective with your first frame or thumbnail because it will attract attention to your brand. What you might find visually appealing, but that frame or thumbnail to show off your creativity. This thumbnail communicates the most before someone starts the video.
3 — Text -
There is a big difference between text and typography; remember that. Also, never over-crowd your image with text, as people will be okay with ignoring posts that do not clearly define what you want to say. The creative social media post design is not just a piece of cake. It takes brainstorming, an out-of-the-box approach, and keen attention to detail to set your brand apart from the crowd.
Whatever your content is, ensure the text will be easily readable and understandable by the audience. Maintain the order, grammar, and spelling to make what you write in your post. Try to keep your text short or limited to one or two-liners. Ensure you use light-coloured text on a dark background.
The sense of importance for text is to pass the clear message your brand wants to convey.
4 — Maintain Consistency -
The main part of social media grid design is to maintain consistency. If your social media content makes everyone feel connected, your audience will form a relationship with your brand effortlessly and pass the purpose of your brand. Set a goal to convey the message of why people choose your brand, what you offer, and what advantages you bring through your product or service. Don’t post random stuff to make your audience confused.
Give your audience a reason to discover your content in their feed. Keeping up with Consistency makes sure all your designs and content are relevant and engaging throughout all social media platforms.
Use templates and design tools to quickly create content for announcements, promotions, or anything else.
Consistency is what you need to expand your brand’s identity.
5 — High-Quality Images & Videos -
Blurry images never win hearts, except when your design aims to blur some parts of the image for a valid reason. High-quality images and videos make your feed look amazing and display what you want your audience to see. Visual content is the first thing that appears in front of people, and ensuring your visual doesn’t get out of focus is important.
High-quality images and videos are great to look at. Its impact lasts for a long time. It presents your products nicely and clearly. Accomplish every goal by posting quality content.
6 — Put Logo -
Remember to put a logo in your images or videos. It will give an impression and identity to your audience about your brand. When visually sharing your content, it is a good idea to include a logo to make your brand recognizable through every platform. Good branding is the way to achieve every business goal. Make sure your logo is unique, shows off your brand’s purpose, and is clear to see and understand.
Make sure your logo is balanced with images. If the colour of your logo conflicts with the main image, make changes accordingly to make the image and logo crystal clear.
7 — Understand Copyright Issues -
Understand copyright issues for both your content and images or photos. Don’t copy anything from anywhere because it affects your brand’s image. Use original content, or if you want to take content or images from anywhere else, give credit to their respective owner.
Make an effort to be original, creative, and insightful if you want your brand to succeed. In this digital era, many competitors are running in our way, but by being authentic, honest, and original, you make a lot of difference.
These are some graphic design tips and tricks to make your designs stand out and look more creative: Balance, Contrast, Alignment and Repetition. Follow these design principles and Stay Updated with Design Trends.
Liveblack gives you an idea or concept of being different from your competitors. We provide services that make your content wiser and brilliant. We are based in Ahmedabad and are a full-stack agency for your every digital need.
#engaging graphic visuals#graphic design for social media#Graphic design tips for social media#creative social media post design#social media grid design#Graphic design tips and tricks#Graphic design tips for beginners#Social media graphic design examples#graphic design tips#Liveblack
0 notes
Text

Look at the first design, and you immediately think: "Oh, it's simple, I know how to design it too."
And do you know what? 95% of people who think it's simple couldn't do it, or at least they did it wrong.
I just uploaded a tutorial video on Illustrator tips will blow your mind and change the way you design. I hope it proves helpful to you. If you like it, please give me a thumbs up. Thank you!
Video:👉 These Illustrator Tips will Blow Your Mind (Part 1)
#logo#logo design#logotype#logo inspiration#graphic design#logo designer#design#illustrator tips#illustrator tutorial#illustrator tips and tricks#adobe illustrator#design tips#illustrator for beginner#advanced illustrator tutorial#dainogo#tutorial#logo tutorial
29 notes
·
View notes
Text
WFH Burnout is Real. Here's How to Beat It 🔥💻
Working from home sounded like a dream... until it wasn't. Blurred lines between work and personal life, zero human interaction (except maybe with your cat), and the constant temptation to raid the fridge? WFH burnout is a real struggle, but don't worry, we've got you covered.
Boundaries are Your BFF
First things first, set some boundaries, fam. Create a dedicated workspace (even if it's just a corner of your kitchen table), establish set work hours, and stick to them. And for the love of all that is holy, close your laptop when the workday is done. Your Netflix queue will thank you.
Find Your Flow
WFH can get monotonous, so spice things up! Take breaks to stretch, go for a walk, or blast your favorite tunes. And don't be afraid to switch up your workspace. Try working from a coffee shop or a co-working space for a change of scenery and some much-needed human interaction.
Need some inspiration to create a WFH space that sparks joy (and productivity)? Check out my shop for designs that celebrate creativity, self-care, and the art of conquering the WFH life. 🙌
#wfh#work from home#remotework#worklifebalance#productivityhacks#productivitytips#mental health#wellbeing#burnout#self care#motivation#inspiration#homeoffice#decoration#tips and tricks#gen z#millennials#small business#shop small#etsyshop#creative entrepreneurship#artistsoninstagram#digital art#graphic design#cozidreamsreimagine#blog post#redbubble#onlineshopping
2 notes
·
View notes
Text
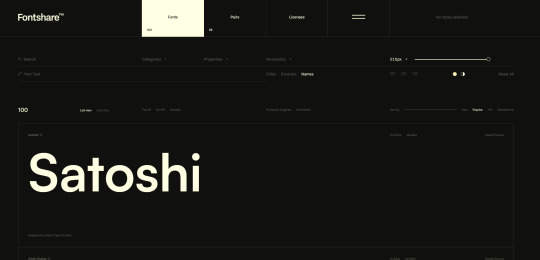
Useful links for (graphic) design
'sup folks, I've compiled a list of links of websites and tools that are useful for designing stuff! They're divided in different sections.
FONTS - All of them are free and easy to use, unless otherwise stated.
https://www.freefaces.gallery/
https://www.fontshare.com/
https://dirtylinestudio.com/freebies/ (These are the free versions only for personal use, so no selling stuff with it)
https://velvetyne.fr/
https://usemodify.com/ (Make sure to check the license to see if it's free to use)
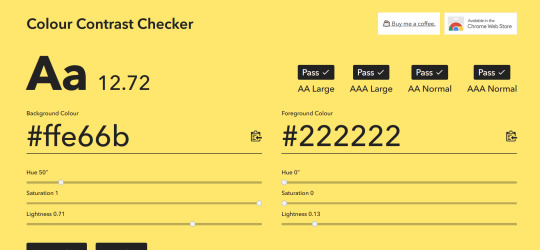
COLORS - Helps you pick colors in different ways
https://colourcontrast.cc/ (Helps you see if your font and colors provide enough contrast)
https://picular.co/ (Type a prompt and it will give you colors associated with that prompt)
https://pigment.shapefactory.co/ (Gives you a wide selection of dual color palette's that have a lot of contrast)
https://t-o-n-e.com/ (Gives you color palette's that have the 60-30-10 applied to it)
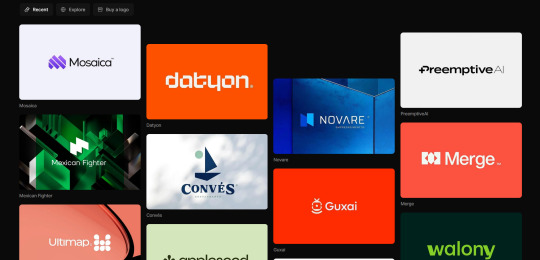
LOGO INSPIRATION- Searching for logo inspiration
https://logosystem.co/ (Gives you a big variety of logo's)
https://dribbble.com/search/logo (Dribbble also shows other stuff than logo's)

GENERAL USEFUL LINKS - As the name says
https://freedesignresources.net/ (Here you can find a lor of free stuff like vectors, images, font's etc.)
I'm going to update as I learn and use more of them later down the line on this website that I made: https://design-links.carrd.co/ .
#illustration#digital art#queer artist#art#inspiration#procreate#design#graphic design#creative#designinspiration#tips and tricks#how to#tools#useful#graphic art#typography#logo#layout#graphic source
12 notes
·
View notes
Text
youtube
5 Useful Text Effect Tips & Trick
In this video, I will show you 5 Adobe Illustrator text effect tips and tricks that might be useful for you.
#graphic design#youtube#illustrator tutorials#education#3d text effect#text design#text effects#Text Effect Tips & Trick#adobe illustrator tutorial#adobe illustrator tutorials#free education#educate yourself#graphic designers#typography tutorial#typography tutorials#typography tips#Youtube
2 notes
·
View notes
Text
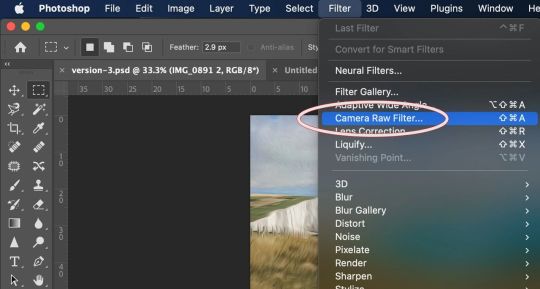
Advanced Photoshop Tutorial: Mastering Camera RAW Filter for Photograph Enhancement
Introduction: Adobe Photoshop's Camera RAW filter is a powerful tool for enhancing the quality of your photographs. It allows for non-destructive adjustments to exposure, colour temperature, clarity, and more. In this tutorial, we'll explore advanced techniques to make the most out of the Camera RAW filter to transform your images into stunning works of art.
Step 1: Open Your Image in Photoshop Start by opening your image in Photoshop. Go to "File" > "Open" and select the image you want to enhance.
Step 2: Access Camera RAW Filter Once your image is open, go to "Filter" > "Camera Raw Filter" or use the shortcut Ctrl+Shift+A (Cmd+Shift+A on Mac) to access the Camera RAW filter.
Step 3: Basic Adjustments The Camera RAW filter interface provides various panels for adjusting different aspects of your image. Start with the "Basic" panel, where you can adjust exposure, contrast, highlights, shadows, whites, blacks, and clarity. Use these sliders to balance the overall tonality and contrast of your image. Pay attention to the histogram to ensure you're not clipping any highlights or shadows.
Step 4: White Balance Next, move to the "White Balance" panel to adjust the colour temperature and tint of your image. You can use the Temperature and Tint sliders to correct any colour casts and achieve a more natural look. Experiment with different settings until you find the right balance.
Step 5: HSL Adjustments The "HSL/Grayscale" panel allows you to fine-tune specific colours in your image. HSL stands for Hue, Saturation, and Luminance. Use these sliders to adjust the hue, saturation, and luminance of individual colours. This is particularly useful for making colors pop or toning down distracting elements.
Step 6: Detail Enhancements In the "Detail" panel, you can enhance the sharpness and reduce noise in your image. Use the Sharpening sliders to increase the overall sharpness while paying attention to avoid introducing artifacts. Additionally, adjust the Noise Reduction sliders to reduce any visible noise in the image, especially in areas with low light or high ISO settings.
Step 7: Lens Corrections If your image has any lens distortions or chromatic aberrations, you can correct them in the "Lens Corrections" panel. Enable the "Enable Lens Profile Corrections" option to automatically detect and correct distortions based on the lens used. You can also manually adjust vignetting and chromatic aberration sliders if needed.
Step 8: Effects and Vignette The "Effects" panel allows you to add creative effects such as vignettes and grain to your image. Experiment with the "Post-Crop Vignetting" slider to add a subtle vignette that draws attention to the subject. You can also adjust the "Grain" slider to add texture and character to your image, especially useful for achieving a vintage look.
Step 9: Graduated Filters and Radial Filters For selective adjustments, utilize the Graduated Filter and Radial Filter tools available in the Camera RAW filter. These tools allow you to apply adjustments selectively to specific areas of your image. Use the Graduated Filter for linear adjustments like sky enhancements or the Radial Filter for circular adjustments like spotlight effects.
Step 10: Final Touches and Output Once you're satisfied with the adjustments, click "OK" to apply the changes and return to Photoshop. You can further fine-tune your image using additional Photoshop tools or proceed with any further editing. Finally, save your enhanced image in your desired format.
Conclusion: Mastering the Camera RAW filter in Photoshop opens up a world of possibilities for enhancing your photographs. By following these advanced techniques, you can take your images to the next level, achieving professional-quality results with ease. Experiment with different settings and adjustments to develop your unique style and make your photos stand out.
#my art#artists on tumblr#art#photoshop#disabled artist#photographers on tumblr#adobe photoshop#graphic design#tutorial#art tips#art resources#art help#art tutorial#art reference#landscape#digital art#photographer#original art#how to draw#tips and tricks#useful#tips
4 notes
·
View notes
Video
youtube
How to edit freepik template in canva | Canva tutorial for Freepik lovers
#youtube#Canva#Canva design#canva tutorial#Canva designer#Canva tips and tricks#Freepik#Freepik template#Canva design tips#tutorial#graphic design#Canva freepik#Canva templates#How to#Canva tutorial for beginner
1 note
·
View note
Text
Career in Graphic Designing? Start with Adobe Photoshop to Level Up

Introduction
If you're thinking about a career in graphic designing, there’s no better way to begin than mastering Adobe Photoshop. This powerful software is the foundation for countless creative projects—from social media content and marketing banners to website designs and brand identity. Whether you're an aspiring designer or just someone curious about the field, learning Photoshop can be your first step toward becoming a professional graphic designer.
Why Start with Adobe Photoshop?
Photoshop isn’t just for editing photos—it’s a powerful creative tool for so much more. It’s a full-fledged design environment where you can bring your imagination to life. From beginners to professionals, it’s widely used in graphic designing courses in Delhi, and mastering it is considered a key milestone in the design industry.
Here’s what makes Photoshop essential:
User-Friendly Interface: Even beginners can quickly understand its tools and start creating.
Creative Control: Offers full freedom to design from scratch or enhance existing images.
Industry Standard: Most graphic design institutes in Delhi include it as a core part of their curriculum because it’s used across various design industries.
What You’ll Learn in a Graphic Designing Course with Adobe Photoshop
When you enroll in a graphic designing course in Yamuna Vihar or graphic designing course in Uttam Nagar, Photoshop is usually the first module. The course typically covers:
Basics of the Photoshop interface
Layering and masking techniques
Retouching and manipulating images
Creating layouts for print and web
Typography and color theory
These skills prepare students for real-world projects and help build a strong portfolio, which is essential to land freelance gigs or full-time roles.
Where to Learn Photoshop: Choosing the Right Institute
If you're looking for professional training, you’ll find a variety of Graphic Designing Coaching Centers in Yamuna Vihar and Graphic Designing Institutes in Uttam Nagar that offer beginner to advanced level courses. Opting for a reputed Graphic Designing Training Institute in Yamuna Vihar or Multimedia Training Institute in Uttam Nagar ensures you learn from industry experts with hands-on experience.
Some of the best graphic designing classes in Delhi focus heavily on practical training with Adobe Photoshop and provide certification, which adds value to your resume.
Career Opportunities After Learning Photoshop
After completing a graphic designing training course in Yamuna Vihar, doors open to various creative job roles such as:
Graphic Designer
Visual Designer
Photo Editor
UI Designer
Creative Executive
You can also work as a freelancer, take up online projects, or even start your own design venture. Those who pursue graphic designing diploma courses in Delhi often find roles in advertising agencies, digital marketing firms, and e-commerce companies.
Final Thoughts
A career in graphic designing begins with the right foundation—and Adobe Photoshop is exactly that. When you join a graphic designing training institute in Yamuna Vihar or graphic designing coaching centre in Uttam Nagar, you start a journey of creativity, innovation, and professional growth.
So, take your first step today. Enroll in a graphic designing course in Delhi that specializes in Photoshop and start building your future in design.
Suggested Links:
Adobe Premiere Pro
Website Designing Training
Digital Marketing
Graphic Designing
#graphic design tips#graphic design tutorials#adobe photoshop#graphic designers#photoshop tricks and tips#learn graphic design
0 notes
Text
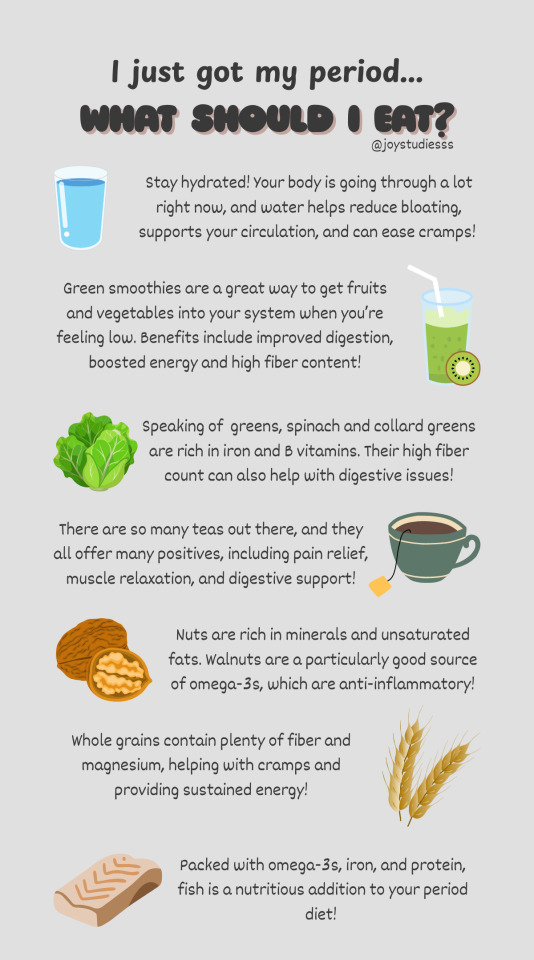
an infographic i made. i hope this helps someone!! <3
made with CanvaPro
0 notes
Text
Design Your Poster - Effective
#applications#creative#creativity#design#graphics#grow rich#ideas#industry#poster designing#posters#software#tips#tools#tricks#work hard
1 note
·
View note
Text
🎯 Take Your Logo Design to the Next Level! Learn the secrets behind professional logo design with this FREE online course. Master advanced typography, Photoshop techniques, and converting raster images to vector shapes. Plus, discover expert tips for finding clients and setting your rates. 🚀
✨ Start today and create logos that stand out!
#tricks and techniques of logo design#free courses#logo design free course#logo design tips#graphic design course#photoshop skills#typography lovers#learn logo now#freelance tips#online learning#design community#creative skills boost#design education#free education#master logo design#next level#vector shapes#expert tips#find clients#set your rates#shine now#career boost
0 notes
Text
Plant Parent Problems: When Your Greenery Ghosts You 🌿👻
Okay, plant lovers, let's be real. We've all been there. You bring home a new plant baby, shower it with love and attention, only to watch it slowly wither and die. What gives?! Don't worry, you're not alone. Even the most experienced plant parents have faced the dreaded plant ghosting.
Decoding the Drama
First things first, don't take it personally. (Your monstera doesn't actually hate you.) Most plant problems come down to basic needs: light, water, and drainage. Do some detective work. Is your plant getting enough sunlight? Are you overwatering or underwatering? Is the pot the right size? A little investigation can go a long way.
Green Thumb 101
Becoming a successful plant parent is all about learning from your mistakes. Don't be afraid to experiment, research different plant care tips, and even join online plant communities for support. And remember, every plant is different. What works for your succulent might not work for your fern. So pay attention, adjust your care routine as needed, and watch your plant babies thrive. 🌱
Want to show off your plant parent pride (or maybe commemorate a fallen plant friend)? Check out my shop for designs that celebrate the joys and struggles of plant parenthood. We're all in this together! 🪴
#plants#plant parent#gardening#indoor plants#plantcare#home decor#lifestyle#mental health#wellbeing#nature#greenthumb#tips and tricks#gen z#millennials#small business#shop small#etsyshop#creative entrepreneurship#artistsoninstagram#digital art#graphic design#cozidreamsreimagine#redbubble#blog post#onlineshopping
1 note
·
View note
Text
0 notes
Text
Pelajari apa itu mahasiswa, peran pentingnya sebagai agen perubahan, dan tugas utama mereka dalam masyarakat.
#blogger#creativemultiplepost#kontenkreator#artists on tumblr#education#blog post#microblog#tips and tricks#magang mahasiswa#anime#graphic design#sekolah ataupun mahasiswa.
0 notes
Text
Advanced Photoshop Techniques: Elevate Your Design Skills
Introduction
Once you've mastered the basics of Photoshop, diving into advanced techniques can significantly enhance your creative projects and workflow. These advanced skills will allow you to push the boundaries of your creativity, creating professional-grade designs that stand out. In this guide, we'll explore a variety of advanced Photoshop techniques to help you elevate your work.
1. Mastering Layer Styles and Blending Modes
Understanding and utilizing advanced layer styles and blending modes can create stunning effects and bring your designs to the next level. Layer styles like Bevel & Emboss, Drop Shadow, and Gradient Overlay can add depth and dimension to your designs. Experiment with blending modes such as Multiply, Screen, Overlay, and Soft Light to blend layers creatively and achieve unique visual effects.
2. Advanced Masking Techniques
Mastering advanced masking techniques allows for precise control over image adjustments and compositions. Using layer masks, you can seamlessly blend multiple images or selectively apply adjustments to specific areas. Refine Edge and Select and Mask tools help create intricate selections for complex subjects like hair or transparent objects, ensuring smooth and realistic composites.
3. Non-Destructive Editing with Smart Objects
Smart Objects offer a powerful way to apply transformations and filters non-destructively, preserving the quality of your original images. Convert layers to Smart Objects before resizing, warping, or applying filters. This way, you can make changes without degrading the image quality, and you can always revert to the original state if needed.
4. Creative Use of Filters and Effects
Applying creative filters and effects can transform your images and add unique artistic touches. Use the Liquify filter for surreal distortions, the Oil Paint filter for a painterly look, or the Tilt-Shift filter for miniaturization effects. Combine multiple filters and effects to develop your own signature style, and use the Filter Gallery to preview combinations.
5. Advanced Retouching and Healing Techniques
Advanced retouching and healing techniques can help you achieve professional-quality results in portrait and product photography. The Healing Brush and Clone Stamp tools are excellent for removing blemishes, imperfections, and unwanted elements. Frequency Separation is a technique that separates texture and color, allowing for precise and natural-looking skin retouching.
6. Using Actions and Scripts to Automate Workflow
Automating repetitive tasks with actions and scripts can streamline your workflow and save valuable time. Photoshop Actions record a sequence of steps that you can apply to multiple images with a single click. Scripts, written in JavaScript, offer even more advanced automation possibilities, such as batch processing and complex adjustments.
7. Creating Complex Selections with Channels
Channels provide a powerful method for creating complex selections, especially when dealing with intricate details like hair or fur. By isolating the color information in different channels, you can create precise masks. Use the Alpha channel to store and refine selections, combining them with layer masks for detailed compositing work.
8. Advanced Typography and Text Effects
Elevate your text designs with advanced typography techniques and text effects that stand out. Use Layer Styles to add shadows, glows, and textures to your text. Explore the capabilities of the 3D Text tool to create dynamic and realistic text effects. Combine text with clipping masks and layer blending modes for creative and impactful typography.
9. 3D Effects and Compositing
Explore the world of 3D in Photoshop to create immersive effects and complex composites. Use the 3D workspace to build, texture, and light 3D objects. Integrate 3D elements with 2D images to create realistic scenes. Experiment with depth maps, extrusions, and 3D layers to add an extra dimension to your designs.
10. Leveraging the Power of Camera Raw
The Camera Raw filter offers advanced tools for photo editing, providing greater control over exposure, color, and detail. Use Camera Raw to make global adjustments, such as correcting white balance, enhancing contrast, and sharpening details. The local adjustment tools, like Graduated Filter and Adjustment Brush, allow for precise, targeted edits to specific areas of your image.
Conclusion
By incorporating these advanced Photoshop techniques into your skill set, you can push the boundaries of your creativity and produce professional-grade designs. Mastering layer styles, blending modes, and advanced masking techniques will refine your compositing skills, while non-destructive editing and automation will streamline your workflow. Embrace the power of Photoshop's advanced features, and watch your design capabilities soar.
#photoshop#onlineducation#hrishionlinebuddhi#onlinelearing#career#course#graphic design#Photoshop#graphic design tutorials#Photoshop tutorials#learn graphic design online#best graphic design software#free Photoshop course#graphic design courses#advanced Photoshop techniques#graphic design certification online#Photoshop for beginners#graphic design inspiration#Photoshop tips and tricks#online graphic design degree#how to use Photoshop#graphic design portfolio examples#free graphic design resources#graphic design trends 2024#Photoshop editing techniques#graphic design jobs
0 notes
Text
how to get Digital Signature - Photoshop Tutorial
Email: [email protected]
#photoshop#graphic design#designrockdh#tips and tricks#design tips#adobe photoshop#digital signature
0 notes