#Text export to PDF
Explore tagged Tumblr posts
Visit Tumblr Blog
Explore Tumblr blogs with no restrictions, modern design and the best experience.
Last Seen Tumblr Blogs


Fun Fact
The KCSC sent more than 20K requests to delete posts related to prostitution and porn to Tumblr from January to June 2017.
Text
I ended up grabbing csp in the sale a couple weeks ago, but I haven't actually used it yet because it doesn't fit neatly into my deranged workflow for the menu last week
but like, now that I have another banner coming up I'm kinda curious whether I can get any use out of it there
#I do the layouts in indesign cs2 which only exports awful jpegs or pdfs#and then for some reason krita imports pdfs and csp doesn't#the thing is I like doing most of the stuff in illustrator because it's really good for dicking around with text and it looks really clean#so idk#I guess the first banner used some rasters#I'm also kind of interested in the affinity suite cuz that's got replacements for indesign and illustrator#but that's slightly outside the price range currently
4 notes
·
View notes
Text
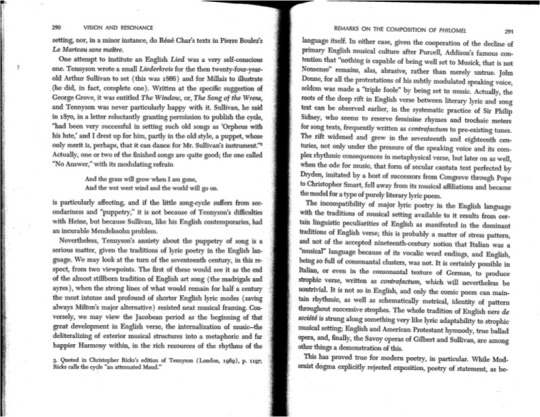
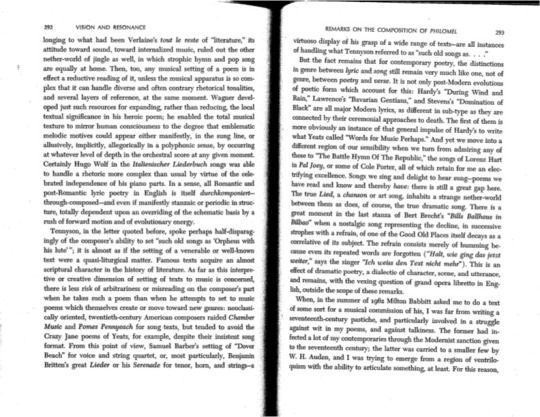
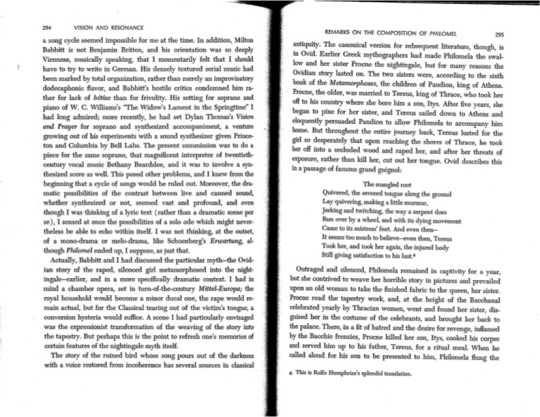
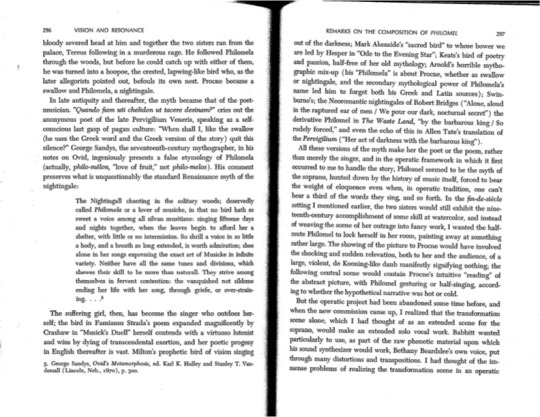
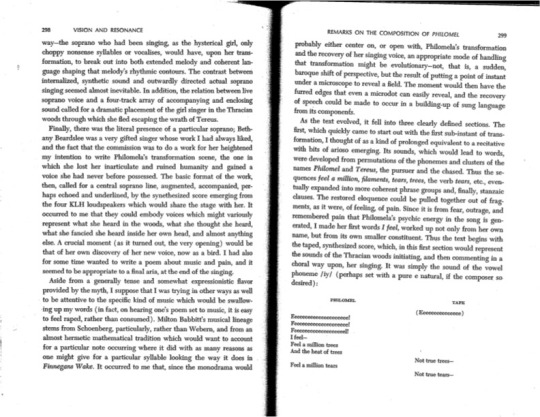
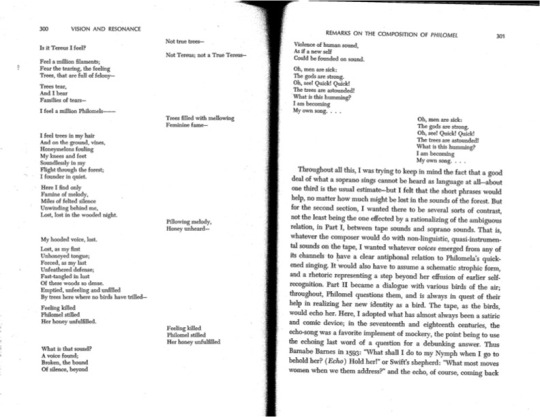
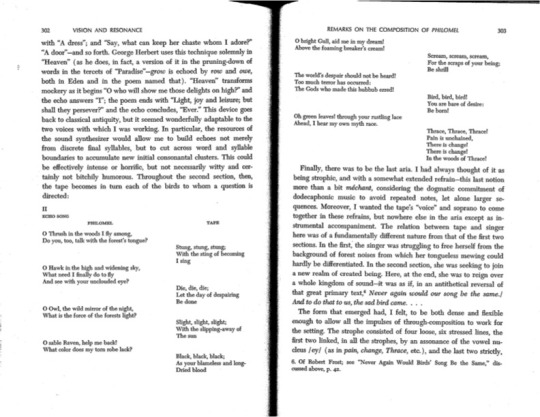
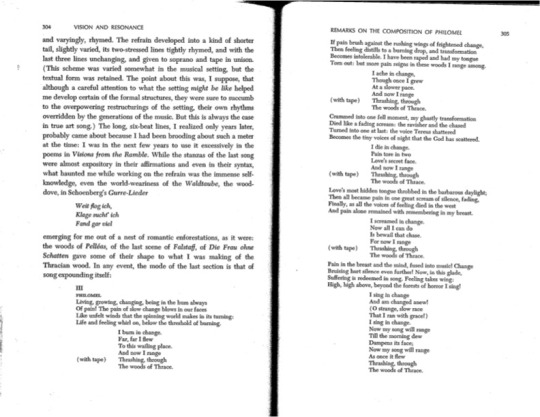
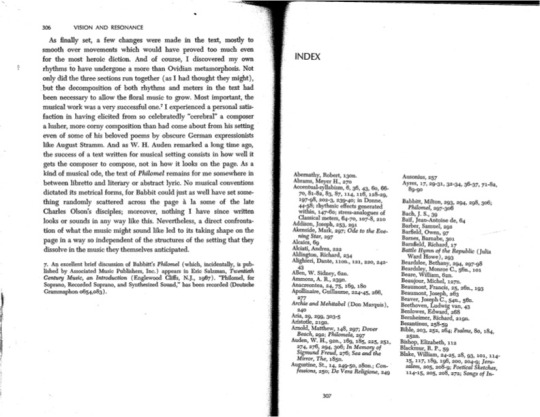
john hollander, "a poem for music: remarks on the composition of philomel" in vision and resonance, 1975
#john hollander#texts#diss#opera#ugh the scan –> pdf –> jpg export process was not kind on the quality of this. if you're interested happy to send you the pdf directly
3 notes
·
View notes
Note
genuinely sorry for reblogging like, half your blog going back an absurd amount of time, I just have repcomm brainrot and think your brain is huge. (im the #1 vau hater who comments on your ao3 and is ur new biggest fan.) love you!
OMG HIIIII DONT BE SORRY <3 i go through my OWN blog for fun sometimes
teehee thank you :3
#ask kae#REPCOMM FRIENDS REPCOMM FRIENDS#DONT BE SHY I ALWAYS WANNA TALK ABOUT REPCOMM#this week i exported all the pdfs to word docs and then changed the background and text color#and then exported them back to pdfs#because somebody said the ONLY thing stopping them from reading the books is that they couldnt get them in dark mode#I AM AN ENABLER
1 note
·
View note
Text
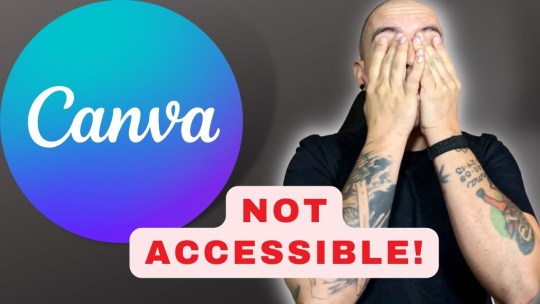
Canva PDFs are not accessible
Explore the challenges of Canva PDFs being inaccessible to those with disabilities, and discover the secret tip to make them accessible. Watch step-by-step video guides on how to tackle common issues, such as reading order and tagging.
This post aims to explore how Canva PDFs are not accessible to people with disabilities. It seems like such a basic need at this point for any modern website to allow for exporting with a structure in place. This simply is not the case for Canva PDFs. Would you rather just have me make your Canva doc exports accessible for you? Get accessible Documents Now Video Overview of the Problem The…
View On WordPress
#Accessibility Compliance#Accessible PDF Solutions#Adobe Acrobat Print to PDF#Alternative Text for Images#Assistive Technologies#Canva PDF Accessibility#Educational Barriers#Inaccessible PDF Consequences#Legal Requirements for Accessibility#Navigation Challenges in PDFs#PDF Export Issues#PDF Remediation#PDF Tagging Problems#reading order tool#Screen Reader Incompatibility#Video Guide for PDF Accessibility#Visual Impairment#Workplace Inequity
0 notes
Note
As you've asked for asks!:
Do you have any quick-and-dirty book/fic binding methods a terrified-of-failure novice could use to bang something out to get over the first collywobbling step of Actually Doing The Thing? (this may be something I've been meaning to ask for ages)
yes! I absolutely do! in my opinion the best quick-and-dirty bookbinding method is a no-glue pamphlet: you don't have to mess with glue or measuring or cutting anything, all you need is your text, some paper, a needle and thread. you can use the same needle to punch holes if you don't have an awl.
this is going to be a little long but that's because I'm going to write out some fairly detailed instructions for an A5 sized pamphlet. If you don't want detailed instructions and think you can glean the necessary info from photos, just skip to the photos! I've also linked tutorials.
for preparing the text to printing, in whatever software you use (word, libreoffice, gdocs, whatever) make sure your document is set to page size A5. make it look readable. then save as/export that document as a straight-paged PDF. now go to the bookbinder JS tool (https://momijizukamori.github.io/bookbinder-js/), and upload the PDF. source manipulation: none printer paper size: A4 display unit (you can ignore, or choose cm if it gives you anxiety that it automatically displays points) printer type: select single-sided or duplex accordingly* rotate paper: ignore flip on long side: check if you are printing duplex and if your duplex printer flips the paper on the long side page layout: tick folio page scaling: original page positioning: centered ignore the rest flyfleaf: ignore signature format tick: standard signatures. in the length drop down, this depends on the type of pamphlet you are doing. for folio i generally find 4-5 pages per signature a comfortable thickness. if you have 6 whole A4 pages you can still do that as a single signature or you can split it into two signatures 3 pages each. wacky small layouts: ignore this signature info click the generate preview button to see what your PDF looks like imposed! I love this step especially when I'm doing quarto (A6) or octavo (A7) sized books generate output - click this to generate an imposed PDF
for A6 and A7 sized books the instructions are much the same, except for these you make sure the page size is A6 or A7 in your software, and then you choose quarto or octavo instead of folio. for signature length drop down I keep signature length to 1 for octavos typically and 2 for quartos, as this still refers to sheets of paper, and for octavo 1 sheet of A4 paper will turn into 4 smaller sheets in one signature once folded and cut.
*if you don't have a duplex printer you will have to manually turn the paper to print on the other side. I cannot be arsed with this so I bought a printer capable of duplex printing (I didn't have a printer anyway). if you already have a printer check what it can do as you might be surprised and go from there.
now to the pamphlets! you don't need a cover - I have one for the long stitch pamphlet but for the saddle stitch one I didn't bother and just made sure the first page had a title on it. you can always take a different piece of paper and print a cover on or or just use coloured cardstock and create a simple cover, but a cover is not necessary unless you're doing a long stitch pamphlet. all you need to do is to punch holes and start sewing. there are a few different stitch types below, I wouldn't say any of them are more difficult or easier than others, but they do look different so...pick one you like the look of and go from there?
pamphlet stitch (uneven number of holes) I haven't ever done a pamphlet stitch but here's a tutorial for how to do it: https://www.starpointestudio.com/simple-pamphlet-stitch-book-step-by-step/
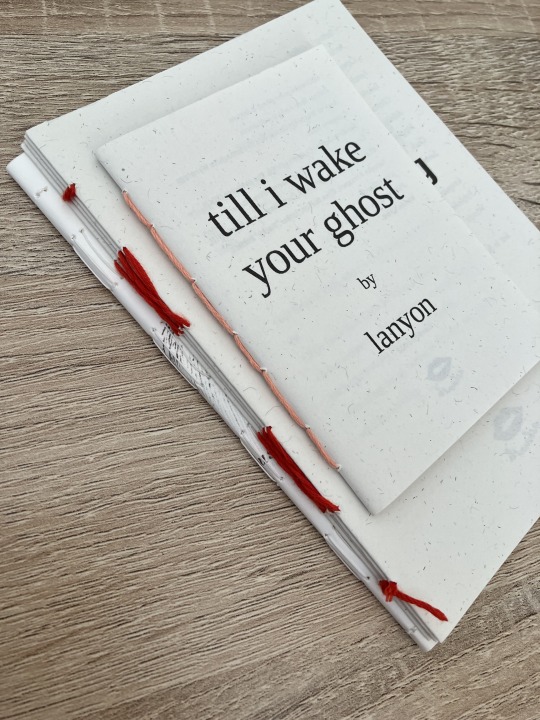
saddle stitch (uneven number of holes) I realised that what I was thinking of as a pamphlet stitch is actually saddle stitch, as in this A7 pamphlet:
here's a tutorial for how to sew saddle stitch: https://www.bookbindingworkshopsg.com/saddle-stitch-bookbinding-tutorial/ here's a video tutorial: https://www.youtube.com/watch?v=aWHkY5jOoqM (sealemon has a lot of bookbinding tutorials and I know many people who like her videos, I used her tutorial for coptic binding way back when I first made a book but I can't otherwise vouch for the quality as I haven't used her videos)
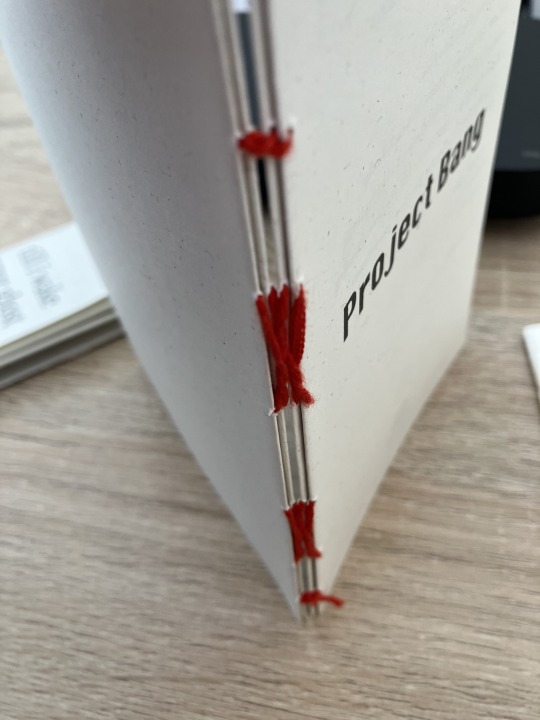
french link stitch (even number of holes) in this one I used french link stitch which I typically use for thicker textblocks that i'm not planning to use tapes with as the french link gives it some robustness, I used it here because I had never done it before and wanted to try it out. I am planning to take these stitches out and re-sew this pamphlet with a cover now that I've found a suitable piece of transformer fanart to use as a cover:
french link tutorial. it's quite long but it has a colour coded bit towards the end that shows how the thread is supposed to link which i find very helpful to visualise: https://www.handmadebooksandjournals.com/bindings/french-link-stitch-binding/
here's a video tutoral from DAS bookbinding (he is my go to for techniques and he has the most soothing Australian accent as well, though fair warning not all of his videos are for beginners): https://www.youtube.com/watch?v=O4ZPdbaM-Ws
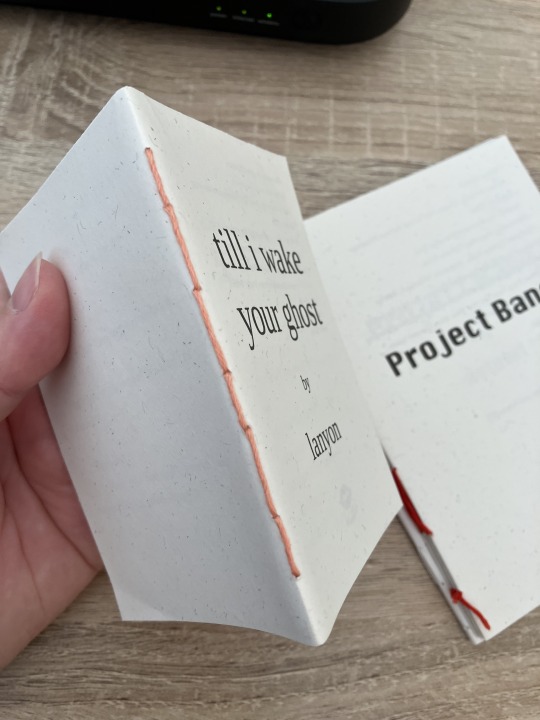
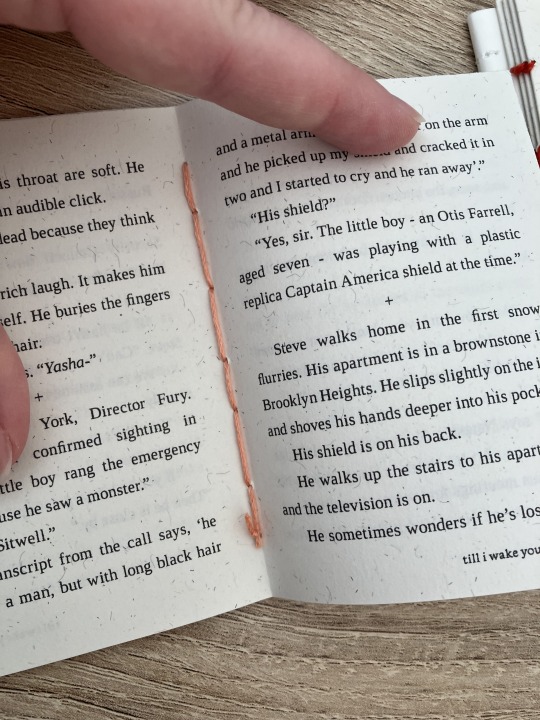
long stitch (even number of holes) for this one I used long stitch and I had a cover. this one is my favourite variation because I can make these pretty and simple covers and the stitch looks nice on the outside as well, so this one scratches the 'i want to make a book' itch for me.

here's a tutorial that also includes a how to on a cover that is different from my cover: https://lccprintmaking.myblog.arts.ac.uk/files/2020/06/Long-Stitch-Tutorial-A4.pdf DAS also has a video tutorial for long stitch but it's like three videos long, maybe watch it later :'D here's one I haven't watched but seems decent: https://www.youtube.com/watch?v=XnignTL_wDQ
you can use saddle stitch for this kind of pamphlet as well, that's what I did for dozens of ships and hundreds of souls (https://ashmouthbooks.tumblr.com/post/681587080267202560).
I hope this helped!!
2K notes
·
View notes
Text
How to format, print, and bind a zine

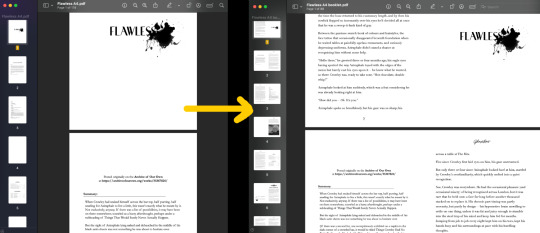
This is a consolidated version of previous posts on zine making, with more detail and screenshots. For a version of this post on gdocs, click here.
This is a step-by-step guide on how to use InDesign (or similar programs) to format and print a zine. This can be used for fanzines, sketchbooks, anything. It’s also only one way to do things - there are as many methods as there are zines under the sun. If you’re interested in other ways, searching for zinemaking on youtube would be a start.
If you are printing your zine, your total page count must be a multiple of 4.
Examples of multiples of 4 ✅
4, 16, 112
Not a multiple of 4 ❌
7, 99, 31
This is because our book will be made of folded A4 sheets (that’s regular printer paper). 1 folded A4 makes 2 A5 pages. Each A5 page has a front and back. Therefore each sheet of paper makes 4 pages.

How to format
Open InDesign. Go to Create New > Print. Choose A5 and tick Facing Pages. Enter your page number (this can be changed later). I’ve put 12. Hit Create.

Locate the Rectangle Frame Tool.

Draw a rectangle over your whole page, or just the part where you want your images to go.

Press Ctrl+D and insert the image you want on that page.

That’s it! Repeat on every page and you’ll have a book. Promise.

Further reading
I need a free alternative to InDesign.
InDesign is free for the savvy but I also recommend Scribus which is free and open source and very lightweight. The method is exactly the same but the Rectangle Frame Tool is called Image Frame and the Ctrl+D shortcut will now be Right click > Get Image instead.
I need help with designing my A5 pages.
For my first sketchbook zines, I arranged several images on an A5 canvas in a program like CSP or Procreate and exported them as a JPG into InDesign or Scribus. You can do this if your images aren’t already A5 size or you don’t want to waste time with InDesign’s formatting tools.
I need to get fancier with it, format text, or export my file as small as possible.
Here are the InDesign tutorials I used and liked:
How to Add Page Numbers
How to keep Page Numbers on Top
How to Create a Table of Contents
What is Overset Text and How to Fix It <- essential for formatting text onto multiple pages
How to Reduce InDesign File Sizes
Formatting best practices
Remember that in addition to your front and back cover you also have an inside front and inside back cover. You can leave these blank or create an endpaper with a pattern or include a short message or something. Look inside any books or zines on your shelf for inspiration. Or don’t listen to me and put your first drawing or poem there. Just be aware printer paper is thin so you might be able to see it through the cover.
Avoid putting anything important in the gutter (inside edge) or outside edges of the page. Also be careful of creating double page spreads that go across the centre of the book. Because of how we will print and fold the pages, each half of your spread might not meet up perfectly.

How to print it out
Open your completed book’s PDF file in Acrobat Reader (free download: https://get.adobe.com/reader/)
Print with the following settings: Booklet, and Booklet subset: Both sides.
We can see a preview of our print-out on the window on the right. The pages will look jumbled up, but form the book in order when folded.

Congratulations! Now you’ll have a stack of paper. Once it’s folded it should resemble your (unbound) final book. Use a bulldog clip or similar to keep your pages together neatly.

How to bind (2 methods)
If your book is less than 30 pages, I recommend using a long arm stapler, or a stapler that can open to lay flat. They are cheap.
There are also special book binding staplers or heavy duty staplers, if your book is thicker than 30 pages. Just position your book so the staples are in the middle of the spine (or as close as you can get) and send it. They will be a little wonky… that’s fine.
You can also separate your book into staple-able segments and then join them into 1 big book with tape or thread.
For my 112-page zine, I used thread to bind it.
These instructions are copied from the video ‘How to Print & Bind a Zine’ by LFONinja.
You can watch it here: https://www.youtube.com/watch?v=zKYy6G7lIy8
You will need: Ruler, awl, thread, sewing needle
Make 5 holes in the crease of the pages like so. (½ page, then ½ of that, then ½ of that again)

If the paper is thick, be careful when making the holes. It helps to have a piece of blu tack, putty, or soft eraser underneath the spine of the book as you work for the point of the awl to push into.
I don’t recommend separating the papers into smaller stacks as your measurements will likely vary and the holes won’t align.
Use a needle and thread to go through the holes in the following pattern. At the end, tie a knot with the ends of the thread (1 and 9) in the centre of the book. You’re now done.

About page creep
Because we are using folded pages inserted into each other, they push each other out like so:

From: https://www.greenerprinter.com/ support/page-creep/
You can use a heavy duty or industrial paper cutter/trimmer to remove this edge. This is why we kept any important contents away from the edge of the page during formatting, because we don’t want this process to destroy our book’s contents.
About image edges
Because of how the printer works, the images in the book don’t extend all the way to the very edges of the paper and have a thin white border on all sides. It’s possible to crop these edges from your book with a heavy duty paper cutter. Be careful and start small (3mm or less). Depending on how much your pages move during the printing process, the size of the white edge can be different on different pages. Or you can just leave them in.
To read some of the zines featured in this post, check out naumin.itch.io.
103 notes
·
View notes
Text
──────── · · ─ ·𖥸· ─ · · ────────
I bound The Rape of Ganymede by @duchessonfire
──────── · · ─ ·𖥸· ─ · · ────────


──────── · · ─ ·𖥸· ─ · · ────────
This was my first miniature bind, born out of the need to have this one shot in print, even though it’s sadly too short for a normal-sized book. I’m really happy with how it turned out though and learned a lot in the process, so I really can’t wait to try this again.
First, I downloaded the fic, formatted it (I even added this little Ganymede painting just for fun), then exported the doc as a pdf and then converted that pdf into individual jpeg images.
──────── · · ─ ·𖥸· ─ · · ────────


──────── · · ─ ·𖥸· ─ · · ────────
I found this template online and calculated where the page numbers needed to be for it to form proper signatures. The font turned out to be far too small so I had to redo all of what I just described. But after all of that I could finally start sewing the signatures together, cutting the text block, sewing the endbands and last but not least, designing the cover.
──────── · · ─ ·𖥸· ─ · · ────────


──────── · · ─ ·𖥸· ─ · · ────────
I did have to shorten the title, just so it would fit onto the cover. I was also inspired by hawthornandvinebooks. Their rebinds are gorgeous. I really fell in love with Ferrier’s Ganymede, so I half removed the background, printed it on iron-on transfer paper and ironed it onto my book cloth. Adding the htv on top of that can be tricky, as the protective film is sticky and will rip parts of the image off if I’m not careful.
──────── · · ─ ·𖥸· ─ · · ────────
#fanfic binding#negan fanfiction#ao3 fanfic#ao3#fanfiction#fanfic#book binding#bookbinding#cegan#cegan fic#negan smith#negan smut#carl x negan#twd negan#the walking dead negan#negan#ficbinding
73 notes
·
View notes
Text
Okay so having a really quick play about with Ellipsus, loving what I'm seeing so far.
1 - FOLDERS (suck it, Google Docs). And SUBFOLDERS!!!!! (I just really love folders okay don't judge me)
2 - The draft management actually looks fantastic. Need to investigate it a little more but really impressed with that (being able to side-by-side, lock scroll, AND the merge function looks great? Being able to give them designated names??)
3 - Really easy document navigation using the headings and outline feature. The main reason I don't like doing longer documents in Word, takes a bit of a faff. This is as easy as selecting a heading and BAM done.
4 - I don't do a lot of collaborative writing but this looks like it would be amazing for that. There's comments, collaborators, but also a CHAT feature. Makes me think this could actually be good for RPs as well as story collaboration if folks wanted, especially people who like to convert RPs into stories after the fact.
5 - Exporting work looks quite easy. Buttons for PDF, rich text - and also HTML! That could be really useful for AO3. Definitely going to give that a try with my next fic.
6 - The phone UI seems pretty nice as well, which is huge for me as I love getting some words in when I can't sleep or am hanging about waiting for something.
I wish I had the brain power to actually DO some writing right now but I don't lol. Excited to give this a try though after I've had another 30 or so hours sleep.
137 notes
·
View notes
Note
what writing program do you use?
I use LibreOffice, a free open source word processor. It's very customisable, I change my document bg to medium grey so that my eyes don't hurt. It saves documents as .odt by default
When I was finished a book I would open it in Word to run a spelling and grammar check as Word used to have more sophisticated proofreading abilities but the last time I did it it was absolute tripe due to increased implementation of ai. I also use Word to format the pdf for printing
To turn the .odt document into an epub novel i save as .html and open in Calibre to format the ebook. You can then read it using google books or apple books on ur phone
Other programs I've used/tried:
Google docs - the only reason anyone should use this is if they're writing cross platform in which case it can be useful. Hands-down the worst spelling suggestions out there and stupidly lacking in functionality on mobile
Bear (iOS) - it's nice if you like markdown and only exporting as .rtf files in the free version. Works well, stores documents offline, and uses a nice tag system to organise stuff. I wrote all my Siren prose in this
Scrivener - overcomplicated and distracting
Discord - honestly prefer it when writing cross platform over gdocs, sometimes I'll write a paragraph or so on mobile and just paste it into my libreoffice when I get home. My pc is immovably large & I don't own a laptop
Word (for writing) - if you click & drag to highlight text in libre, it will highlight only the exact letters you selected. Word has a fun feature where it makes assumptions about what you REALLY wanted to do and tries to fight you on it. Fuck Word
104 notes
·
View notes
Note
since we’re on the topic of bookbinding, i’ve been wanting to get into it but i haven’t actually done any research (yet) other than vibes, so do u have any tips for complete beginners?? :)
@geminibookbinding is who inspired me to finally look up the whole process and figure out where to start! this is the super helpful tutorial i got from them
i had dabbled with binding before though, using Sea Lemon's tutorials to make blank sketchbooks yearsss ago. i still use her text block and diy hardcover videos as a refresher/reminder while i bind!
the biggest thing that stopped me from learning to bind printed fiction was not understanding how to print the text from home, specifically how to get the pages in the right order for signatures. it's actually so easy with some very simple to use programs: QuantumElephant for PC users (free), and I use BookletCreator on Mac ($20)
i want to go into more detail about my process and supplies from a beginner perspective, i hope this helps:
format the text in a word processor
export your document as a single page PDF
enter that PDF file into Quantum Elephant or BookletCreator, to rearrange the pages for your signatures. your program will give you a new PDF file that you can then print.
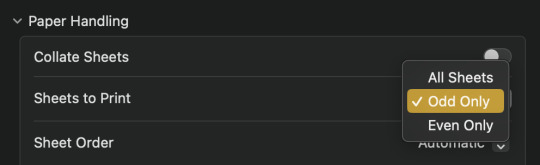
4. double sided printing: i was so so scared of this at first, but it's incredibly simple. no matter what printer you have, somewhere in your print settings will be an option to print even or odd pages.
print all the even pages first, then when the stack is finished printing, flip them over, insert them back into the paper feed, and print the odd pages.
5. fold the signatures together so you have a stack of little booklets, then mark on the spine where your sewing holes need to be. manually punch the holes using an awl, or diy an awl by stuffing a cork on the end of a straight needle.
6. sewing: take regular sewing thread and run it over a block of beeswax. this makes the thread easier to manage and holds it in place better while you sew. a curved needle is also much easier to use than a straight one, especially for a kettle stitch (using Sea Lemon's tutorial)
7. gluing: glue decorative pages (or plain, but thicker paper) to the front and back to create your end pages, then press the book flat to apply PVA glue to the spine. press it overnight so the glue dries flat. (optional: glue a ribbon to the top of the spine, then sew on headbands) finally glue an additional piece of paper (or mull) around the spine to strengthen it.
8. optional: trim the edges of your book down to create a smooth edge. this one's given me the most trouble because it's very hard to get right with a knife, and the proper supplies are expensive. check your local stationery shop (i.e. Officeworks, Staples) for an industrial guillotine service
9. cover: once you have the final measurements of your text block you can start making the cover. this is essentially gluing cardboard, binders board, or plywood etc to a sheet of fabric. the fabric either needs to be bookcloth, or have some kind of non-porous back so the glue doesn't seep through. you can diy bookcloth from any fabric with tissue paper. then glue the decorate end pages to your cover to attach the textblock!
128 notes
·
View notes
Text
Meet the Team!
Who are we?
Just a few Interactive Fiction enthusiasts who love sharing their interests with the rest of the internet!
But we're also:
-=-
Heyo! I'm Aj (she/her)
I got into IF through the app called Choices way back in 2017 and since then there was no turning back. It wasn't until last year when I got into text-based IFs. A friend on tumblr reblogged 'Defiled hearts', it caught my interest and here I am deep down in the trenches of IFs.
Listing my favourites isn't an easy thing cause there are so many I love. So I will list some that have been on my mind for a while: Infamous, Press Play, College Tennis: Origin Story, Drink your Villain Juice, Golden, The Golden Rose, Our Life Now and Forever, We Wretched Creatures, TWC , The Lonely Shore, Blood Choke and Midnight Sun.
I mostly help out with finding IF news and game updates in the wild.
-=-
How you doing?!? I'm Bex (she/her)
I started my journey with Voltage (now Love365) and dating sims or Otome games on my PSP Vita *sheds a tear*. I honestly don't know how I came upon IF, but I fell in love with Our Life: Beginnings & Always around 2021?
My favourites? Hmm, currently it would be: Love and Leases, Adoriel's Tears, The Abyssal Song, Keyframes, Our Life 2 and a bunch of Kickstarters that I can't wait for!
Personally, I'm married with no kids! And I work full-time as an administrator. Boring, I know.
In regards to the Zine, I normally do the formatting. Basically taking everything the peeps have found and putting it all into the Zine. I try and write some of the Highlights and try to dabble in the Editorial (if my work doesn't get edited).
-=-
Hello!!! This is Briar! (she/her)
I am one of the interviewers!
I got into IFs this year, and boy, my eyes were opened, and I got so obsessed that I decided to write my own (The Mighty Shifter). My personal favourites are TWC, Infamous, God-Cursed, and Viatica.
I am a uni student who is studying English literature. What else...? Have an amazing day/night!
-=-
Hey, hi and hello! I'm Dion (they/he) *on hiatus
I started my journey into IF through Episode, but due to poor non-female MC representation, I soon began to look for something else. My friend then introduced me to text-based games through The Wayhaven Chronicles and Mind Blind. I've been going deeper down the rabbit hole since!
I'm literally majoring in interactive media. IF is my life now, send help. (/j)
Some of my favourites would be: Mind Blind, Shepherds of Haven, Reanimated Heart, Seven days in purgatory, Chronicles of Taldun: The Remainder, seekL, LLLLL (aka LATEX, LEATHER, LIPSTICK, LOVE, LUST) and a lot of the stuff DOMINO CLUB does. (There isn't only IF, but that's what I usually go for. Definitely check them out if you're into creepy indie stuff!)
I'd call myself the jack of all trades concerning the zine. As of now, my main job is to be the social media guy and to do the different exports (playable Zine, Tumblr, PDF/.txt). But I also help out with news-searching and compiling + editing stuff for the editorial, column, highlight, letter and thanks portions.
-=-
Hey all, this is Jenn (she/her) *on hiatus
I am a youth sports coach (fútbol, softball, basketball) based in Los Angeles. I am in the process of applying for a master’s program (Sports psychology).
I did write and code a couple of IF games but never finished. I am a perfectionist and I couldn’t publish something not up to my standards. I started reading IF a couple years ago and I couldn’t possibly name my favorite. Some of the most memorable IFs are: The Exile, TWC, Crown of Ashes and Flames, Infamous, WWC, Zombie Exodus: SH, The Golden Rose, The Fernweh Saga, and Crown of Exile. I can definitely add more…
Basic responsibilities: Scouring the internet for IF news and frequently updating our existing database. I honestly enjoy the challenge. On a good day I can find upcoming IF titles and newly released demos. It’s so exciting to find new IF because I know someone will eventually see the same potential I do in that new IF.
-=-
Ssuuuupppp, I’m Sir tuskhany (He/Him)
I am one of the lovely interviewers who’ll be asking questions, you know grilling fellow authors on their IF, WIPS and favourite characters. The usual. As to why or how I started, I gotta say its cause of books and great authors like Robert Jordan and Brandon Sanderson. And their respective series wheel of time and basically the whole Comsere universe. I tried following in their footsteps writing a few books of my own. But like every writer most of these ended up being WIPs I either abandoned or stopped. Still I didn’t let that stop me and started posting some of them, I am the writer of Borne of the sands a static webnovel with a few chapters and Dusk and Dawn my current ongoing project(Still a work in progress so forgive the grammatical errors. T-T).
My favourite series are the Keeper of the Day and Night, Infamous, Wayhaven Chronicles and Blood Moon.
The current story I’m working on was inspired by these however most of my inspiration came from static or interactive cyoas like the Slayers v4, Supernatural Investigator, Demigod v4, A Traveller!s Tale and Universal War. If you haven’t heard of them please give them a go they are amazing.
Have fun and stay posted!
-=-
58 notes
·
View notes
Text
5 Days of Helping You Outline Your Next Novel

Day 5: Obsidian for Outlining
Find all 5 installments of the mini series: helping you outline your next novel
*I have added a layer of “static” over my screenshots so they are distinctive enough to stand apart from the surrounding text
did you miss this series? here you can find all posts here: [day 1] [day 2] [day 3] [day 4]

Do you use Obsidian?
What is Obsidian?
A note-taking and knowledge management tool that allows you to create and connect notes seamlessly.

Uses a local-first approach, meaning your data is stored on your computer, not the cloud (unless you choose to sync).
Features bidirectional linking, which helps create a non-linear, networked way of organizing ideas—great for brainstorming and outlining.
Why should you use Obsidian?
Flexible & Customizable – Unlike rigid writing apps, you can design your own workflow.
Distraction-Free Writing – Markdown keeps the focus on text without extra formatting distractions.
Ideal for Outlining & Organization – Connect story ideas, characters, and settings effortlessly.
Obsidian for Writing
Outlining
Creating a One Pager
Create a single markdown note for a high-level novel summary.
Use headings and bullet points for clarity.
Link to related notes (e.g., character pages, theme exploration).
Here’s an example of an outline I’m currently using. This is what my website will have on it (and what goals I hope to achieve w my website)

Using the Native Canvas Tool
Use Obsidian’s native Canvas tool to visually outline your novel. (Best on PC)
Create a board with columns for Acts, Chapters, or Story Beats.
Drag and drop cards as the story evolves.
Writing
Why Write Directly in Obsidian?
Minimalist interface reduces distractions.
Markdown-based formatting keeps the focus on words.
No auto-formatting issues (compared to Word or Google Docs).
Why is Obsidian Great for Writing?
Customizable workspace (plugins for word count, timers, and focus mode).
Easy to link notes (e.g., instantly reference past chapters or research).
Dark mode & themes for an optimal writing environment.
Organization in Obsidian
Outlining, Tags, Links
Each chapter, character, important item, and setting can have its own linked note.
Below, for example, you can see the purple text is a linked page directly in my outline.

Use bidirectional linking to create relationships between (story) elements. Clicking these links will automatically open the next page.
Tags can be used for important characters, items, places, or events that happen in your writing. Especially useful for tracking.
Folders for Efficient Storage
Organize notes into folders for Acts, Characters, Worldbuilding, and Drafts.
Use tags and backlinks for quick navigation.
Creating a separate folder for the actual writing and linking next (chapter) and previous (chapter) at the bottom for smooth navigation.
You can also create and reuse your own internal templates!
Spiderweb Map Feature (Graph View)
Visualize connections between characters, plot points, and themes. Below you’ll see the basic mapping of my website development project.

This view can help you spot disconnected (floating) ideas and create bridges to them.
Exporting
Why Export?
Ready to format in another program (Scrivener, Word, Docs, Vellum, etc).
Need a clean version (removing tags, notes, etc) for beta readers or editors.
Creating a backup copy of your work.
When should you export?
Personally, I like to export every 5 chapters or so and update my live version on Google Docs. This allows my family, friends, and beta readers to access my edited work.
After finishing a draft or major revision.
Before sending to an editor or formatting for publication.
Where should you export?
Personally I copy and paste my content from each chapter into a google doc for editing. You may also want to make note of the following export options:
Markdown to Word (.docx) – For editing or submitting.
Markdown to PDF – For quick sharing
Markdown to Scrivener – For those who format in Scrivener.
To Conclude
Obsidian is an invaluable tool for novelists who want a flexible, organized, and distraction-free writing process.
Try setting up your own Obsidian vault for your next novel! Comment below and let me know if this was helpful for you 🫶🏻

your reblogs help me help more ppl 💕
follow along for writing prompts, vocabulary lists, and helpful content like this! <333
✨ #blissfullyunawaresoriginals ✨
#writeblr#writers on tumblr#creative writing#writerscommunity#fiction#character development#writing prompt#dialogue prompt#female writers#writer blog#blissfullyunawaresoriginals#blissfullyunawares#writing life#fiction writing#writers#writer life#tumblr writers#writing inspiration#writing#writerslife#writer stuff#writing community#writer#obsidian for writing#obsidian#writers life#writing tool#writing tips#writer moots#tumblr moots
20 notes
·
View notes
Text
No-Google (fan)fic writing, Part 1: LibreOffice Writer
Storytime
The first documents and fanfictions I wrote on a computer were .doc documents written with Microsoft Word 98. At least those I remember.
From there, I sort of naturally graduated to following versions of Microsoft Word, the last one I’ve actively used to write texts of any considerable length (more than half a page) being Word 2007 (but only under duress from my employer).
That was partly due to the fact that the Microsoft Office suite has always been expensive and there were times I simply didn’t want to spend the money on it. So I started using OpenOffice Writer fairly early on, “graduating” to LibreOffice Writer once that was available.
Word versus Writer
What are the differences between Word (Microsoft) and Writer (LibreOffice)?
Cost
Firstly, Writer is free. It comes as part of the LibreOffice Suite, which has a replacement for almost every application Office has. The ones it hasn’t, you won’t need for writing fanfic, trust me.
So, +1 for being freely available.
Interface
Interface-wise – well, it might look a little old-fashioned to those used to Google docs and Word. Back in the day, it was mostly that the buttons looked differently. However, Writer did not adopt the “ribbon” Word has shipped and continues to have customisable bars. For me, that’s a huge +1 argument for using Writer over Word or Google docs, because I can edit these bars and only keep the buttons I actually need – unlike the Word ribbons, which drove me to despair and ultimately away from Word after 2007 appeared.
Features
Other than that, it really isn’t all that different from Word. You can use document structures like headings, subheadings, track changes, compare documents, footnotes, endnotes, everything else Word can do. It really is a proper, great replacement for Word – it even is mostly compatible with Word in that .doc and .docx documents can be opened with Writer, even if the layout may look a bit off.
So +1 – your old files are compatible with it.
File formats
Files written with Writer are stored as .odt (Open Document Text), but there are options for export into other formats, such as PDF, EPUB or XHTML. Exporting to AO3 is simple – copy the text you want, set the AO3 text editor to Rich Text and paste.
Easy +1.
Syncing
LibreOffice does not offer cloud-storage. So if you want your files available on several devices, you need a different solution. As I write more for this series, I’ll describe the different options in more detail, but Dropbox, GIT or, depending on which provider you’re using, your email providers cloud storage are options. OneDrive, if you mind Microsoft less than Google.
Or an old-fashioned USB in combination with an automatic backup application.*
Ease of use for Word/Google doc-users
As someone who came straight from Word (although a very old version) to Writer, I’ve always found it very easy to use. What I particularly like is that the interface is much less cluttered than the Word ribbons and I can customise the bars. In all honesty, if it weren’t for that cosmetic difference, I think many users wouldn’t be able to tell the difference between Writer and Word.
So if you’re just looking for something to replace Word or Google docs, Writer is definitely a good option.
*I’m not recommending USBs because I’m of the opinion that it’s a convenient solution. I’m doing it because I’m a cynic. Every time a company tells me I can have something for free, my first question will be “what will I be paying with instead?”
Because if I don’t pay money, I’ll pay with my data. That’s one of the main reasons I never started using Google. It’s just too good to be true, all those services for free.
So, you know, if you’re good with data being collected on you or you can’t afford to pay for a syncing service, by all means, use unpaid services. Just be aware of what comes with it. You will pay, one way or the other, with money or your data. Nothing in the world is for free, especially not those apps companies are trying to get you to use.
#fanfiction#fanfic writing#fic writing#degoogle#degoogle your fics#degoogle your writing#software recommendations#no-google (fan)fic writing#resources#libreoffice writer
22 notes
·
View notes
Text
This is a total shot in the dark, but is anyone familiar with Figma?
I'm trying to export some pages on Figmas for an art book as PDFs, but all the raster image artwork in the PDF are coming out as JPEGs instead of PNGs, which is causing distortion/compression/artifacting in them. I know it's possible to export PDF with PNG raster images because I did it last year for a previous book––it was completely lossless––but I can't seem to do it now.
I specifically need it as a PDF export because I need the text to stay vectors.
#ask you#personal#delete later#i know figma's not for print design but we've been using it for years and other options cost money
72 notes
·
View notes
Note
Hey there, would you be able to go a bit further on your ‘visual diary’ I’m thinking of making one for the new year but was wondering how to create it or what to include in it. Thanks!
I basically made a list of all my goals for the year.
I divided that list into categories like self care, hobbies, health, mental health, career, etc.
I looked for relevant pictures on pinterest for each category and saved them.
I used Apple pages (you can use word as well) to add the images and a little bit of text. I’ve attached pictures for reference.
I put a new category on a new page (see below). Exported it as a PDF, and saved to Apple Books so that I can reference it whenever.


90 notes
·
View notes
Text
"I have seen three pictures of the man".
Picture_01
The boy stood still, staring at the camera, his gaze fixed, unyielding. A absent smirk, just the stark, unadorned plane of his face. It was a face that already knew the weight of scrutiny, the silent judgment that settled like dust. No empathy, but a rigid mask, the skin stretched taut over the bones, revealing nothing.
"What a dreadful child!", a silent testament to the cruelty of first impressions. "What a hideous little boy! A monkey! That's why he looks so miserable and nobody wishes to play with him.". Parents would quietly whisper to each other upon seeing him arriving at the playground, shamelessly blessing God for having not so ugly sons.
Even in childhood, the contours of our features are being etched into a narrative not of our making. A single, unyielding look, and the world begins to define us: dreadful, wizened, hideous. Labels whispered and solidified, a prison built of glances. How swiftly the gaze of society could strip innocence, how easily a child could become a stigma, a grotesque caricature, simply for the way he appears, and becomes no longer human.
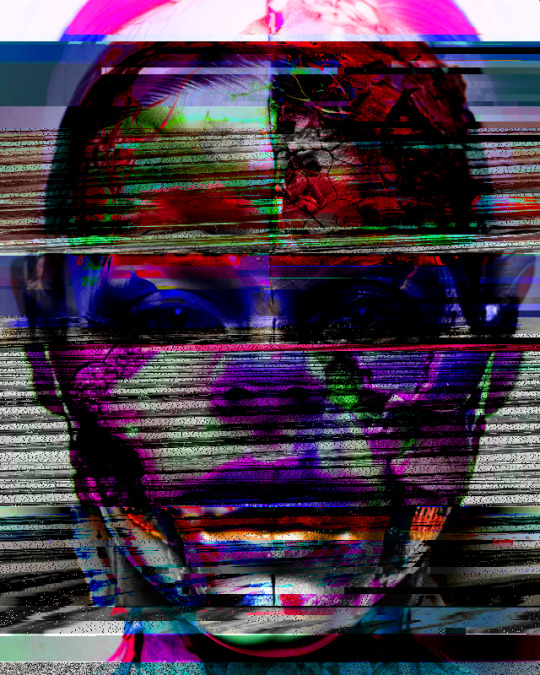
#GlitchArt + #AIportrait + Text inspired by a paragraph from No Longer Human by #OsamuDazai.

Childhood and Body Shaming.
Society's judgmental and pitiful gaze.
Physical appearance and discrimination.
Art inspiration and creative process.
Experimental Art and New Media.
Body Horror and Body Positivity.
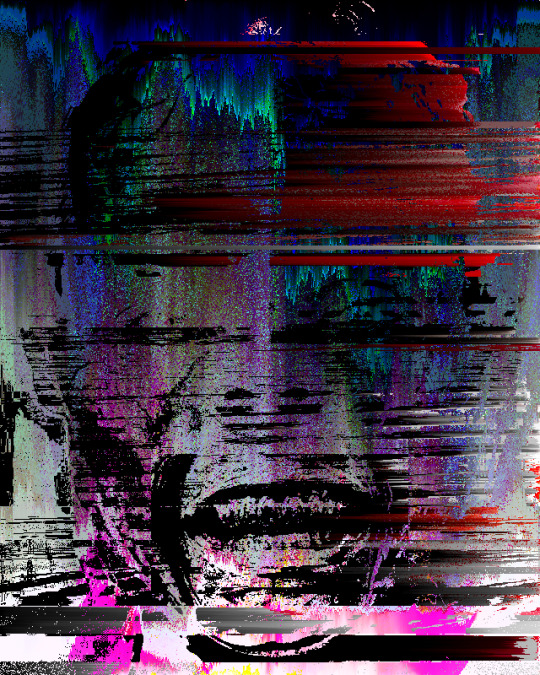
How was the video made?
Initial AI Image Generation and Glitching:
Eight AI-generated portraits were compiled into a PDF (JPG compression).
The PDF's raw data was manipulated using a text editor (Notepad++) by replacing hexadecimal characters, creating initial glitches.
The glitched PDF was viewed in SumatraPDF.
Each glitched image was copied and pasted into a single Photoshop file as separate layers (PSD).
The PSD file's raw data was again manipulated in Notepad++, further glitching the image layers.
The glitched layers were then adjusted in Photoshop using Hue and Saturation adjustments.
All layers were blended into a final PNG image.
Image Sorting and Animation:
The PNG image was processed using the "UltimateSort" script by GenerateMe, creating a series of sorted frames.
A selection of these frames was exported.
The frames were compiled into an animated GIF.
The GIF was encoded into an MP4 video.
The GIF's raw data was databended in Note++
The glitched GIF was played in IrfanView and screen recorded via ShareX.
The two MP4 video files that were made from the GIF were edited together in Adobe Premiere.
Video Glitching and Audio Integration:
The edited video track was exported as an MP4.
The MP4 was converted to an AVI file using the ASV1 codec.
The AVI video's raw data was imported into Audacity as a RAW file, glitched, and saved.
The glitched AVI was converted back into an MP4 video using FFmpeg.
The glitched video was imported into Adobe Premiere.
Audio was added: a Mubert-generated musical track and a voiceover.
The voiceover was created using TTSMaker, based on text generated by Gemini 2.0, which drew inspiration from a paragraph in No Longer Human.
#digital art#new media art#artificial intelligence#glitch art#glitch#art#artists on tumblr#databending#dark art#macabre#dark aesthetic#dark artwork#glitchart#glitch aesthetic#glitchartistscollective#glitch artists collective
13 notes
·
View notes