#Windows 10 Update Version
Explore tagged Tumblr posts
Visit Tumblr Blog
Explore Tumblr blogs with no restrictions, modern design and the best experience.
Last Seen Tumblr Blogs


Fun Fact
69% of Tumblr users are millennials.
Text
Circling back in a less snarly, more desperate tone: how difficult to use are LibreOffice's equivalents to Tracked Changes and Comments?
#This update was really bad in ways painful to me personally#I'm reversing the update and it looks like Windows will stop supporting version 10 in October of this year#Which might be just fine!#But the writing's on the wall
4 notes
·
View notes
Text
oooo we installing
#took a while because i had to find the previous version of a certain disk burner since the up to date one doesnt work on windows 10#then i had to find out you have to repeatedly mash two buttons to open the bios#but we are here and so far the cinnamon ui is so cute#my second monitor flashes when i dont have any windows open on the main monitor#but we can fix that once its installed. i probably have to update the graphics driver or something#i love that theres this little trial before you install to get to know the ui and see what os specific apps they offer#no regrets so far
0 notes
Text
youtube
How to Check BIOS Version | Two Way Easily | Windows 10 | By Sachin Sharma
#how to check bios version#bios current version#bios upgrade#bios update#bios#computer tricks#windows 10#check bios version windows 10#check bios version#check windows 10 bios version#find windows 10 bios version#definite solutions#how to find bios version in windows 10#Youtube
0 notes
Text
GOOD MORNING! here is my attempt to recap everything we've found so far on deltarune.com
for those unaware, last night toby released a new newsletter giving information about deltarune's release date. he also released a clip of an alternate ending for the sweepstakes for if silence would've been chosen instead of freedom. (for those even MORE unaware, the spamton sweepstakes were a 2022 2-day event raising money for a charity where all sorts of hidden pages were shown on the DR website.
now, my (and many other people's) immediate reaction to seeing this, as well as this passage in the newsletter,
was that surely the site had been updated with some new content. and it has, a lot of it! and so this is my attempt to document everything so far.
/sweepstakes/silence/
youtube
this page features this short video revealing the alternate ending for the sweepstakes. in it, spamton a. spamton is simply wiped out of existence. not that exciting, but fun to see!

the page also includes a barren version of the main /sweepstakes website, with all the text deleted.
HOWEVER! at the bottom of this page, we can see two links. both of these lead to pages already found in the ORIGINAL run of the sweepstakes.
the rest of this will be under the cut, to avoid spoilers for those interested in exploring the site themselves.
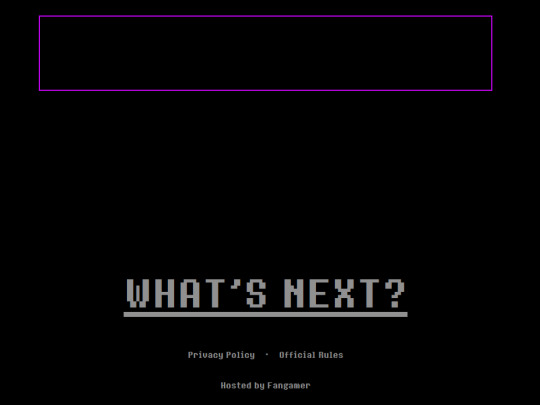
/code

this page is accessible by clicking on the purple square. it was originally found from the main sweepstakes page, on the listing for noelles "fur-thentic cardboard box" from chapter 2. this link leads to the /catpetterz page of noelle's blog, which explains how the Cat Petterz 2 breeding system works. it ends in "Until one day..." which leads to /egg, continuing the story on the previous page. the link at end of /egg brings you to /code, which links back to /egg.
nothing seems to be actually changed on this version of the site, and it only serves as a way to get you back onto /egg.
/egg
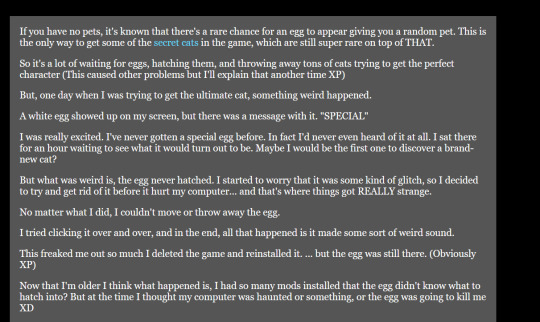
this page has all the same text as the 2022 version of the site did, with one exception: the text "secret cats" is now a link! this link leads to /rain.
/rain
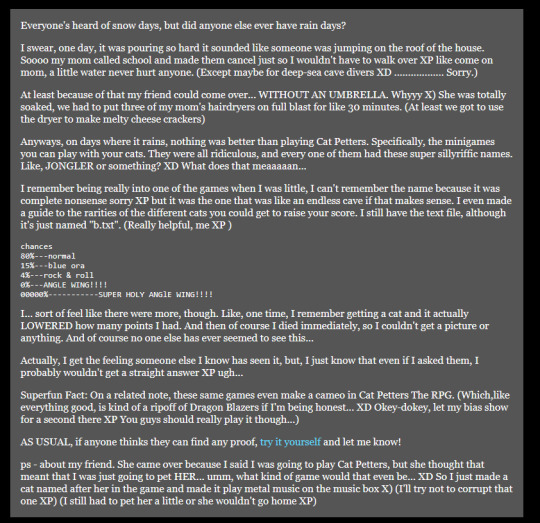
this page is an as of yet unseen post from noelle's blog. she describes the experience of staying home from school because of the rain, and a friend coming over to play cat petters. this friend is called "she," making it unlikely to be kris, and as this story takes place in her childhood, it's unlikely to be susie. the postscript says that her friend came over because "she thought that means that I was going to pet HER," which makes me think it might've been catti? if anyone else has any theories, let me know.
the rest of the page discovers another one of noelle's strange cat petters glitches. her "guide to the rarities of different cats" includes "blue ora (aura?)," "rock & roll," and "angle wing" and "super holy angle wing" are listed at 0% and 00000% respectively. another addition to the pile of mysterious connections between noelle and angel symbolism....
she also describes finding a cat that "lowered the amounts of point she had," making her die immediately. the MOST significant thing on this page by far though is a link to "try it yourself," which leads to a simulation of the cat petters minigame she described.
/rarecats

this page links to a cat collecting minigame. one of these green dancing cats will bounce around the screen like the DVD logo, and clicking on it gives an amount of points. the tab title simply displays the number of points so far.
cat-001.gif
this cat gives 10 points. it's probably the "normal" cat that noelle describes.
cat-002.gif

this cat gives 50 points. it's probably the "blue ora" cat that noelle describes.
cat-005.gif

this cat gives 250 points, and plays a guitar chord instead of the sparkling sounds that clicking the other 2 does. it's probably the "rock & roll" cat that noelle describes.
cat-006.gif

this cat gives 1000 points, and plays a very dramatic musical flourish. it also causes a window sprite to briefly appear before disappearing, as seen below.

this sprite links to the /windows page when clicked on. this cat is probably the "ANGLE WING!!!!" cat that noelle describes.
cat-007.gif

this cat gives 3000, and also generates a window sprite linking to the /windows page. it plays a more extended musical flourish as well. it is probably the "SUPER HOLY ANGlE WING!!!!" cat that noelle describes.
other cats
cat-003.gif
this cat looks like a yellow version of the "blue ora" cat. i don't think there's a way to get this cat in the game.
cat-004.gif
this cat looks like the "rock & roll" cat without the flame effect. i don't think there's a way to get this cat in the game.
cat-008.gif

this cat seems to be an even more powered version of the other two angel cats. it may be possible to get in game with even smaller odds, but since noelle's page only lists 2 "angle cats" i think it's unlikely.
cat-009.gif

this is a png of the yellow and pink smile that appears in spamton's basement. the inclusion of it here suggests to me that it is in fact some kind of "cheshire cat" character/allusion, like people have theorized before!
/windows

this page is simply the stained glass window sprite from /rarecats looped over and over. the tab title reads "Are you forgetting something?" each of these links to a page with the words "forest" "grow" "lost" "the" "where" and "would," in seemingly random order. an example of a few of these are
/wherewouldforestlostgrowthe /thegrowlostwouldforestwhere /thewheregrowwouldforestlost /growwherethelostforestwould
only one of these actually leads anywhere, the rest all lead to the "dogcheck" page which is the default for broken links on deltarune.com.
/lostwheretheforestwouldgrow

this page contains an image of a tree, overlayed with an edited version of the water image that seems to be a recurring motif in deltarune, used most recently in "jockington grows the beard". clicking on it plays a solemn piano chord. after clicking a few times, it instead links to /window. the tab title reads "ROOTS."
/window

this page contains the same repeating stained glass windows as /window did. the tab title once again reads "Are you forgetting something?" this time, each links to page with the letters "cdeehhilnooprrt", in seemingly random order. an example of a few of these are
/lonpecrrohedhit /pdolhehrnriceto /ecrorltipendhoh /creohnptredilho
once again, only one of them leads anywhere.
/thepoorchildren

this page is another black screen. this time, you have the ability to draw with the mouse. clicking creates a trail of white squares. the tab title reads "Therapy".

drawing in the middle of the image for around a minute causes a sprite of the "egg room" tree to slowly fade in.

after drawing for a bit, the tree will move to the front and become clickable. clicking on this just returns you to the /egg page mentioned earlier.
as far as i can see, this is everything to be found on the "noelle's blog" side of updates, the ones accessible from the purple square. unfortunately, tumblr has a limit for how many images i can include in a post, so the stuff from the other link i will include in a reblog! be sure to check it out, it's where stuff gets REALLY crazy!
857 notes
·
View notes
Text
4t2 Lovestruck Expansion Pack

A fruit of our labour with @platinumaspiration (featuring moral support and useful advice from @lordcrumps 😀) is finally here!
Key features:
138 objects 24 beddings 7 seasonal plants 9 windows 6 doors 10 fences 2 arches 2 columns 69 floors 199 walls
Smoothed out meshes, no shine (except when necessary), quarter tile placeable;
All garden plants are seasonal, have undersides and all original recolors;
Fences are included but don’t show in the collection file because it’s not possible to add them.
Everything that doesn't look like deco and is meant to function - is functional (all lights light up; fans are animated; surfaces have slots; doors, windows and curtains have diagonal versions, book pile is functional, costume trunk is a wardrobe etc etc...);
Thank's to Nikki's perseverance, the guitar is functional too (requires Argon's Custom Instruments mod, included in the archive);
Picnic table was cloned from an object by Inge Jones. In order for sims to sit on the bench, you need either my edited version of Inge's Hidden Picnic Chair (called Tvickiesims_ijHiddenPicnicChair, included in the archive) or the original one from the link above). You'll also need her other mod called "IsChairABooth" (included in the archive).
My edit of Inge Jones' Hidden Picnic Chair was cleaned of some resources, has a new mesh, doesn't contain textures, is easier to grab and click, costs 0 (you already payed for the table) and becomes invisible in live mode (inspired by @lamare-sims's Invisible Kitchen Surface);
Wall fan and water tower reduce bills;
Armchairs and sofas have morphs (Nikki has my eternal gratitude💗);
Heart bed (Vibromatic Nuevo) vibrates and lights up 😏, all thanks to Nikki;
Basic Breakup Double Bed was turned into a blanket (works with @lamare-sims's Unmade Bed mod);
Most wallpapers were cut in half to preserve their patterns (thus their quantity). These walls have clear numbering system and will appear close to each other in catalog;
Romance Rendezvous Bar Back's mirror has wonky reflection. It can't be fixed;
Everything is separated between two collection files - one for buy mode and the other for build mode;
@lordcrumps' shadow file is required for the shadows to work (included, delete if you already have one copy in your downloads folder).
Buy mode:

Build mode:

Hidden Picnic Chair placement for the picnic table (like a normal chair basically, no cheats needed):

Objects we didn't like enough to bother with (not converted):

Compressed, meshes merged with recolors, clearly labelled, picture and collection files are included.
🫶💐❤️Download at SFS❤️💐🫶
UPDATE 19/08/2024
Edited Ash tree and Thunderclap to drop leaves in autumn, smoothed Thunderclap's trunk. Fixed Tri Aviary LoveSymphony Sculpture's one recolor.
UPDATE 20/08/2024
The Flame Of Love Candlestick and Sequence Of Love Candle Bunch had a small shadow issue, it's now fixed.
UPDATE 22/08/2024
Fixed Lovestruck Fountain's price (was set to 0).
1K notes
·
View notes
Text
PICK A CARD: 10 fun facts about your future spouse
Hello and welcome to this new reading! I will tell you 10 fun facts about your partner/future spouse. I hope you all enjoy it!
FREE READING: a subscription to my Patreon before February 1st, no matter the tier, will give you a free question of choice. I updated the overall look of my patreon so feel free to look!
Masterpost > Paid Readings > Subliminal Channel > PATREON Masterlist [NEW]
The extended version (10 more fun facts) of this reading can be found on my Patreon, the link of which is here
~pick a card~
Pile 1:
1. They would love to draw you as their muse;
2. They enjoy shows that have incredibly dangerous and insane stunts (because why would you want to do that);
3. They can be very catty when it comes to their words if they’re annoyed; giving shade like a high-schooler;
4. They love their alcohol, but it has to be a specific kind;
5. They enjoy beautiful gardens and would love to have one to tend to themselves (but they aren’t good at it at all, you’ll probably be helping in the future);
6. Your future spouse loves thinking back to their high-school times with old friends, re-experiencing all of it;
7. Your future spouse is open to learning from mistakes and growing from past experiences;
8. Your future spouse would love to sleep in the forest with you sometimes; just you two, or your little family if you two have kids, in the forest with some fire and marshmallows on sticks;
9. They think a fun date in the future for the two of you would be picking fruits from trees;
10. They love acting as a joke; they have a whole alter-ego.
Extended reading
Pile 2:
1. Your future spouse enjoys driving cars a lot; they love the feeling it gives them;
2. They have a very small friend group (around 2 friends), but they’re so close they’re basically siblings;
3. Your future spouse has a tendency to let things go their way and just see what happens, even if preparing would’ve been a better idea;
4. Your future spouse will constantly giggle if they’re drunk;
5. They really enjoy cats, and most of guys their future spouse’s have had a cat when they were younger;
6. They find celebrating birthdays difficult and will act a bit ‘against’ it, but secretly they do enjoy it;
7. Your future spouse is good at imagining things (they prefer to imagine fantasy scenario’s);
8. Your future spouse loves being with friends and having a fun drink;
9. They will be causing mayhem to get a reaction out of you simply because they are bored;
10. They have a decent amount of influence on people; but they only really use it to fuck around and have fun.
Extended reading
Pile 3:
1. Your future spouse can enjoy a good book every once in a while;
2. They enjoy stargazing through windows something (they don’t prefer the outside often, given they get cold very quickly and dislike a ton of layers in order to do so);
3. They like circuses;
4. Your future spouse sometimes has nightmares, they’ve had this their whole lives. They have more then usual, and enough to be an issue in their lives;
5. Even though your future spouse will claim they’re not superstitious at all, they will always make a wish at a falling star;
6. Your future spouse loves to think about moral problems;
7. They would enjoy it to have a fish as a pet;
8. They’d like to sit in a dark forest alone and not do anything; they see the situation as something very peaceful and nice;
9. Your future spouse is very detail-oriented;
10. Your future spouse is often at the back near a wall at bigger gatherings, preferring to see everything instead of standing in the middle of it all.
Extended reading
#tarot#tarot reading#tarotoftheday#tarot readings#tarot deck#tarot cards#tarotblr#tarotcommunity#spirituality#spiritual#pick a card#pick a photo#pick a picture#pick a pile#pick an image#divination#future spouse readings#future spouse reading#future spouse#fs#fs reading#love reading#love readings#fun facts#future relationship#witchblr#readings#patreon#free reading#loa
698 notes
·
View notes
Text
My GIF Making process: Screen capturing using MPV player, Organizing files, 3 Sharpening settings, Basic Coloring PSD + Actions set

This is a very long post so heads up.
I’ll try to be as thorough and true as much as possible to the way I make my gifs (I already use Photoshop Actions which I’ve long since set up but now for this tutorial I’m reviewing them to show you the exact steps I’ve learned to create my gifs 😃) and present them to you in a semi-coherent way. Also, please bear with me since English is my second language.
First things first. Below are the things and tools we need to do this:
Downloaded 4K or 1080p quality videos (let’s all assume we know where to get these—especially for high definition movies and tv series—so this post doesn’t get removed, okay? 😛)
Adobe Photoshop CC or the CS versions can work as well, but full disclosure I haven’t created gifs using the CS versions since 2020. I’m currently using Adobe Photoshop 2024.
mpv player. Use mpv player to get those frames/screenshots or any other video player that has a screen grabber feature. I’ve used adapter for the longest time but I’ve switched to mpv because the press to screenshot feature while the video is playing has been a game changer not to mention ultimate time saver for me. For adapter you need to play it in another video player (like VLC player), to get the start and end timestamps of the scene you want to gif which takes me ages before I can even open Photoshop.
Anyway! Please stop reading this post for a moment and head over to this amazing tutorial by kylos. She perfectly tells you how to install and use mpv player, both for Mac and Windows users.
One thing I have to share though, I had a tough time when I updated my MacOS to Sonoma since MPV is suddenly either duplicating frames or when I delete the duplicates the player seems to be skipping frames :/ I searched and found a solution here, though it didn’t work for me lol. My workaround for this in the meantime is decreasing the speed down to 0.70 then start screenshotting—it’s not the same pre Sonoma update but it works so I’ll have to accept it rather than have jumpy looking gifs.
Now, after this part of kylos’ tutorial:

you can continue reading the following sections of my gif tutorial below.
I want to share this little tip (sorry, this will only cater to Mac users) that I hope will be helpful for organizing the screenshots that MPV saved to the folder you have selected. Because believe me you don’t want to go through 1k+ of screenshots to select just 42-50 frames for your gif.
The Control + Command + N shortcut
This shortcut allows you to create a new folder from files you have pre-selected. As you can see below I have already created a couple of folders, and inside each folder I have selected screenshots that I want to include in one single gif. It's up to you how you want to divide yours, assuming you intend to create and post a Tumblr gifset rather than just one gif.

Another tip is making use of tags. Most of, if not all the time, I make supercorp gifs so I tag blue for Kara and red (or green) for Lena—just being ridiculously on brand and all that.
Before we finally open Photoshop, there's one more thing I want to say—I know, please bear with me for the third? fourth? time 😅
It's helpful to organize everything into their respective folders so you know the total number of items/frames you have. This way, you can add or delete excess or unnecessary shots before uploading them in Photoshop.
For example below there are 80 screenshots of Kara inside this folder and for a 1:1 (540 x 540 px) Tumblr gif, Photoshop can just work around with 42-50 max number of frames with color adjustments applied before it exceeds the 10 MB file size limit of Tumblr.

Sometimes I skip this step because it can be exhausting (haha) and include everything so I can decide visually which frames to keep later on. You'll understand what I mean later on. But it's important to keep the Tumblr 10 MB file size limit in mind. Fewer frames, or just the right amount of frames, is better.
So, with the screenshot organization out of the way, let's finally head over to Photoshop.
Giffing in Photoshop, yay!
Let’s begin by navigating to File > Scripts > Load Files into Stack…

The Load Layers window will appear. Click the Browse button next.
Find your chosen screenshots folder, press Command + A to select all files from that folder then click Open. Then click OK.
After importing and stacking your files, Photoshop should display the following view:

By the way, I'll be providing the clip I've used in this tutorial so if want to use them to follow along be my guest :)
If you haven't already opened your Timeline panel, navigate to Windows > Timeline.
Now, let's focus on the Timeline panel for the next couple of steps.
Click Create Video Timeline, then you’ll have this:

Now click the menu icon on the top right corner then go to Convert Frames > Make Frames from Clips

Still working on the Timeline panel, click the bottom left icon this time—the icon with the three tiny boxes—to Convert to Frame Animation
Select Make Frames From Layers from the top right corner menu button.
So now you have this:

Go and click the top right menu icon again to Select All Frames
Then click the small dropdown icon to set another value for Frame Delay. Select Other…

The best for me and for most is 0.05 but you can always play around and see what you think works for you.
Click the top right menu icon again to Reverse Frames.
I think Photoshop has long since fixed this issue but usually the first animation frame is empty so I just delete it but now going through all these steps there seems to be none of that but anyways, the delete icon is the last one among the line of feature buttons at the bottom part of the Timeline panel.
Yay, now we can have our first proper GIF preview of a thirsty Lena 😜

Press spacebar to watch your gif play for the very first time! After an hour and half of selecting and cutting off screenshots! 😛 Play it some more. No really, I’m serious. I do this so even as early (lol) as this part in the gif making process, I can see which frames I can/should delete to be within the 10 MB file size limit. You can also do it at the end of course 🙂
Now, let’s go to the next important steps of this tutorial post which I’ve numbered below.
Crop and resize to meet Tumblr's required dimensions. The width value should be either 540px, 268px, or 177px.
Convert the gif to a Smart Object for sharpening.
Apply lighting and basic color adjustments before the heavy coloring. I will be sharing the base adjustments layers I use for my gifs 😃.
1. Crop and Resize
Click on the Crop tool (shortcut: the C key)

I like my GIFs big so I always set this to 1:1 ratio if the scene allows it. Press the Enter key after selecting the area of the frame that you want to keep.
Side note: If you find that after cropping, you want to adjust the image to the left or another direction, simply unselect the Delete Cropped Pixels option. This way, you will still have the whole frame area available to crop again as needed and as you prefer.
Now we need to resize our gif and the shortcut for that is Command + Opt + I. Type in 540 as the width measurement, then the height will automatically change to follow the ratio you’ve set while cropping.
540 x 540 px for 1:1
540 x 405 px for 4:3
540 x 304 px for 16:9
For the Resample value I prefer Bilinear—but you can always select the other options to see what you like best.
Click OK. Then Command + 0 and Command + - to properly view the those 540 pixels.

Now we get to the exciting part :) the sharpen settings!
2. Sharpen
First we need to have all these layers “compressed” intro a single smart object from which we can apply filters to.
Select this little button on the the bottom left corner of the Timeline panel.


Select > All Layers
Then go to Filter > Convert for Smart Filters
Just click OK when a pop-up shows up.
Now you should have this view on the Layers panel:

Now I have 3 sharpen settings to share but I’ll have download links to the Action packs at the end of this long ass tutorial so if you want to skip ahead, feel free to do so.
Sharpen v1
Go to Filter > Sharpen > Smart Sharpen…
Below are my settings. I don’t adjust anything under Shadows/Highlights.
Amount: 500
Radius: 0.4
Click OK then do another Smart Sharpen but this time with the below adjustments.
Amount: 12
Radius: 10.0

As you can see Lena’s beautiful eyes are “popping out” now with these filters applied. Click OK.
Now we need to Convert to Frame Animation. Follow the steps below.
Click on the menu icon at the top right corner of the Timeline panel, then click Convert Frames > Flatten Frames into Clips
Then Convert Frames > Convert to Frame Animation
One more click to Make Frames From Layers
Delete the first frame then Select All then Set Frame Delay to 0.05

and there you have it! Play your GIF and make sure it’s just around 42-50 frames. This is the time to select and delete.
To preview and save your GIF go to File > Export > Save for Web (Legacy)…
Below are my Export settings. Make sure to have the file size around 9.2 MB to 9.4 MB max and not exactly 10 MB.

This time I got away with 55 frames but this is because I haven’t applied lighting and color adjustments yet and not to mention the smart sharpen settings aren't to heavy so let’s take that into consideration.
Sharpen v1 preview:

Sharpen v2
Go back to this part of the tutorial and apply the v2 settings.
Smart Sharpen 1:
Amount: 500
Radius: 0.3
Smart Sharpen 2:
Amount: 20
Radius: 0.5
We’re adding a new type of Filter which is Reduce Noise (Filter > Noise > Reduce Noise...) with the below settings.

Then one last Smart Sharpen:
Amount: 500
Radius: 0.3
Your Layers panel should look like this:

Then do the Convert to Frames Animation section again and see below preview.
Sharpen v2 preview:

Sharpen v3:
Smart Sharpen 1:
Amount: 500
Radius: 0.4
Smart Sharpen 2:
Amount: 12
Radius: 10.0
Reduce Noise:
Strength: 5
Preserve Details: 50%
Reduce Color Noise: 0%
Sharpen Details: 50%
Sharpen v3 preview:

And here they are next to each other with coloring applied:
v1

v2

v3

Congratulations, you've made it to the end of the post 😂
As promised, here is the download link to all the files I used in this tutorial which include:
supercorp 2.05 Crossfire clip
3 PSD files with sharpen settings and basic coloring PSD
Actions set
As always, if you're feeling generous here's my Ko-fi link :) Thank you guys and I hope this tutorial will help you and make you love gif making.
P.S. In the next post I'll be sharing more references I found helpful especially with coloring. I just have to search and gather them all.
-Jill
#tutorial#gif tutorial#photoshop tutorial#gif making#sharpening#sharpening tutorial#photoshop#photoshop resources#psd#psd coloring#gif coloring#supercorp#supercorpedit#lena luthor#supergirl#my tutorial#this has been a long time coming#guys. i'm BEGGING you. use the actions set - it was a pain doing all this manually again ngl LMAO#i've been so used to just playing the actions#so this has been a wild refresher course for me too 😆
764 notes
·
View notes
Text

EA: Origin shutdown - date and information
"On April 17, 2025, Origin will shut down, as Microsoft has stopped supporting 32-bit software. If you use Origin, you need to upgrade to the EA app, which requires a 64-bit version of Windows. If you need help, learn how to: - update to Windows 10 or Windows 11 - download and install the EA app."

"The EA app doesn’t support 32-bit versions of Windows. You’ll need to upgrade to a 64-bit operating system on your device to play your games. See if the version of Windows you’re running is 32 or 64-bit."
[source and more info]
328 notes
·
View notes
Text
About Sims 4 Mod Manager

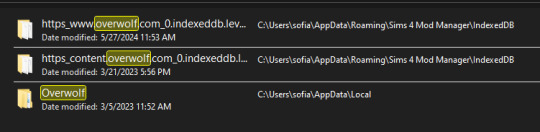
It came to my attention a few days ago that a popular program used for sorting custom content, Sims 4 Mod Manager, is based on Overwolf software. The issue with this is that ad placements on Overwolf programs give a 20-30% cut to Overwolf directly. As stated on their website. I know it is an Overwolf program because you can find Overwolf files within it:
Personally, I do not mind un-obstructive ads on free programs as long as they are vetted by the developer, but I do not want to give Overwolf any money. So I will be kindly contacting the developer via the contacts on his website and ask he divest and use a different avenue with the ads. Maybe moving to github instead. He is also recently released a curseforge integrated app.
If you are to request the divestment, please please do so with respect as to invite people INTO the conversation and not put them in a defensive position. No one likes to listen when they are being threatened or harassed. 🤷♀️
I know many will be disappointed with this news as it is a great, one of a kind program, so I wanted to offer some alternative methods besides manually sorting custom content:
Sims 4 Mod Assistant: A small app used to find duplicates and mod conflicts. Also supports filtering and moving files to other folders. Available on Mod the Sims and Github.
S4Pavir: It's not that pretty, but it can be used to view, remove, and sort cc. Available on Github.
You can also use sims tray importer to sort through cc. Dress your sims in all the cc you want to remove or place build/buy items on a lot. Save the sim/lot to your library and use Sims 4 tray importer to view the list of cc used, and open its file location to delete. Available on Luniversims (.fr)
Sims 4 Studio can also be used to view, edit, and delete cc. Available here.
Let me know of any other methods you know or notify me if there are any issues with these two programs.
Hopefully there is a positive outcome with reaching out to the creator. Please be respectful and you can use my pinned post as a reference for why curseforge is a problem. 🙏
Edit:
Update on Sims 4 Mod Manager
After going through the older versions of Sims 4 mod manager I have found out that Version 1.0.9 Beta (Windows 10, 11 for me) does not have Curseforge ads. I think this is suitable option to use the mod manager without giving direct ad revenue to Overwolf/Curseforge.

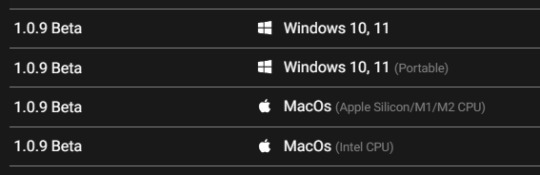
When you go to the Sims 4 Mod Manager site, click other versions and scroll until you find this version. It does not have all the current features, but it works. You can uninstall your current version by searching the app in your start menu (Windows), right click and select 'uninstall', and click 'uninstall' again once you find it in the list that comes up.
(I do not have Mac, so I do not know if the later version 1.1.3 Beta, will also not have ads. If you download it please let me know.) I will update my original S4MM post with this info and also put it in a reblog so hopefully everyone can see this.)
It doesn't have the sort to subfolders option, but my way around that is to sort cc into a "moving folder" and then open your regular file explorer and cut and paste those items to your sub-folder manually. Easy peasy!
551 notes
·
View notes
Text
Have YOU got an old Windows PC Microsoft has told you can't run Windows 11? It's time to give it a new life!
How to install Windows 11 on unsupported PC Hardware using Rufus. You can also disable some other Windows 11 bullshit like data harvesting and needing a Microsoft account.
It has been in the news a lot lately that Windows 11 isn't allowed to be installed on PCs without certain requirements, including the TPM 2.0, a chip that was only included in PCs made in 2018 or later. This means that once Windows 10 stops receiving security updates, those PCs will not be able to (officially) run a safe, updated version of Windows anymore. This has led to an estimated 240 million PCs bound for the landfill. Thanks Microsoft! I get you don't want to be seen as the insecure one, but creating this much waste can't be the solution.
(I know nerds, Linux is a thing. I love you but we are not having that conversation. If you want to use Linux on an old PC you are already doing it and you don't need to tell me about it. People need Windows for all sorts of reasons that Linux won't cut.)
So lately I have been helping some under privileged teens get set up with PCs. Their school was giving away their old lab computers, and these kids would usually have no chance to afford even a basic computer. They had their hard drives pulled so I have been setting them up with SSDs, but the question was, what to do about the operating system? So I looked into it and I found out there IS actually a way to bypass Microsoft's system requirement and put Windows 11 on PCs as old as 2010.
You will need: Rufus: An open source ISO burning tool.
A Windows 11 ISO: Available from Microsoft.
A USB Flash Drive, at least 16GB.
A working PC to make the ISO, and a PC from 2018 or older you want to install Windows 11 on.
Here is the guide I used, but I will put it in my own words as well.
Download your Windows 11 ISO, and plug in your USB drive. It will be erased, so don't have anything valuable on it. Run Rufus, select your USB drive in the Device window, and select your Windows 11 ISO with the Select button. (There is supposed to be a feature in Rufus to download your ISO but I couldn't get it to work.?
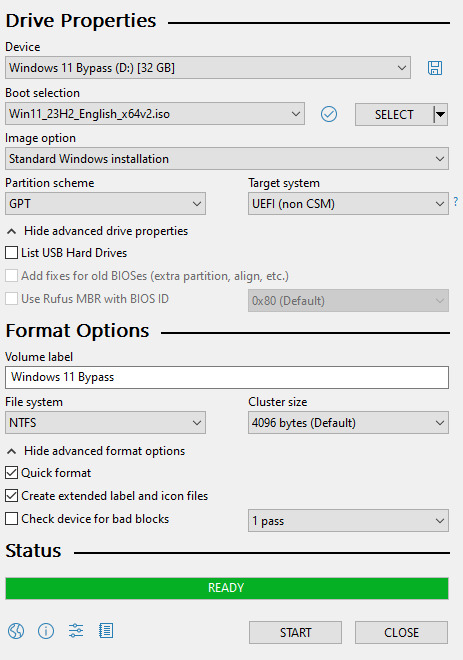
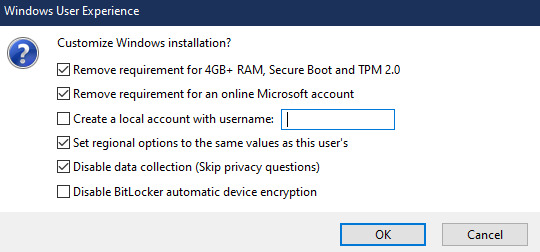
Choose standard windows installation, and follow the screenshot for your settings. Once you are done that, press Start, and then the magic happens. Another window pops up allowing you to remove the system requirements, the need for a microsoft account, and turn off data collecting. Just click the options you want, and press ok to write your iso to a drive.
From there you just need to use the USB drive to install windows. I won't go into details here, but here are some resources if you don't know how to do it.
Boot your PC from a USB Drive
Install Windows 11 from USB Drive
If you had a licensed copy of Windows 10, Windows 11 will already be licensed. If you don't, then perhaps you can use some kind of... Activation Scripts for Microsoft software, that will allow you to activate them. Of course I cannot link such tools here. So there you go, now you can save a PC made from before 2018 from the landfill, and maybe give it to a deserving teen in the process. The more we can extend the lives of technology and keep it out of the trash, the better.
Additional note: This removes the requirement for having 4GB Minimum of RAM, but I think that requirement should honestly be higher. Windows 11 will be unusable slow on any system with below 8GB of RAM. 8GB is the minimum I think you should have before trying this but it still really not enough for modern use outside of light web and office work. I wouldn't recommend trying this on anything with 4GB or less. I am honestly shocked they are still selling brand new Windows 11 PCs with 4GB of ram. If you're not sure how much RAM you have, you can find out in the performance tab of Task Manager in Windows, if you click the More Details icon on the bottom right. If you don't have enough, RAM for old systems is super cheap and widely available so it would definitely be worth upgrading if you have a ram starved machine you'd like to give a new life.

#Windows#Windows 11#tech#tech advice#pc#TPM 2.0#rufus#open source#open source software#technology#tech tips
725 notes
·
View notes
Text
Fixing Windows 11 - A Masterpost
Windows 11 is absolute crap for a good bunch of stuff so yeah, have a masterpost with most of the things I've found around to fix it haha (they're not all here because I did stuff around and I don't remember what)
YES, I KNOW at this point Linux would be a better alternative, however some here can't use Linux due to some proprietary programs that are not on Linux. This Masterpost is for the people in the same situation as I, aka those who have to have Windows or they can't do their job.
I am currently unemployed and haven't worked enough for the government to help me. I have a ko-fi if ever you want to help.
Stopping W11 from making you create an account/setting up your computer without internet (with a way to create gpedit.msc if your version doesn't have it)
Fixing the Taskbar (in case you also don't like the grouped Battery/internet/sound or the way the windows look)(there's more to it, check the settings)
There is the chance that Windows can't update because of this, you just have to uninstall it and reinstall it afterwards. They also completely nuked the Windows 10 look in the 24H2 update, so use the "Windows 10 (Explorer Patcher)" option instead of the plain "Windows 10".
Removing the rounded windows (since ExplorerPatcher doesn't do it anymore on 24H2)
https://github.com/valinet/Win11DisableRoundedCorners
How to move the volume and luminosity pop ups (so you can finally see those sweet sweet subtitles)
In case ModernFlyouts doesn't automatically start up, possible solution
Fixing the Start Menu (ExplorerPatcher can do that too, btw)
How to show all options right away
A way to bring back the Calendar
https://github.com/matej137/OutlookRemover
MICROSOFT FULLY NUKED THE CALENDAR!!! Possible fix is to downgrade the app (which is fine if you don't use the Mail), but do use the OutlookRemover to stop the automatic installation of the new version.
https://github.com/matej137/OutlookRemover/issues/15
Your Bluetooth suddenly doesn't work???
It happens sometimes for no clear reasons so here are a few things you can do:
Check if the icon is in the Taskbar. If not, verify if it is available in the pop up menu (the one from the gear icon)
If it's not here, check your parameter to see if you have the option to turn it on.
If it's still not here, reboot your PC.
If it's STILL not working, update your Bluetooth driver. You can do so by looking for "driver" in the menu and opening the Device Manager, then right click on the right Bluetooth component and update its driver.
If Windows says that the driver is up to date, try checking out this helper: https://support.microsoft.com/en-us/windows/fix-bluetooth-problems-in-windows-723e092f-03fa-858b-5c80-131ec3fba75c
If really nothing help, download and install a recent Bluetooth Driver. Be careful of what you download and from where.
Someone who stumbled on this post fixed it by downloading the Bluetooth Driver 5.0.1.1500 from Softonic (https://www.softonic.nl/download/bluetooth-driver/windows).
How to remove Copilot if you have it (I don't, but it might be because I'm in Europe??)
Archive
Apparently Copilot is being forced on people so hummm
Other stuff not specifically related to the shit W11 did
Changing the size of the scroll bars
How to fully remove Cortana
Website with tools to fix W10 and W11
2K notes
·
View notes
Text

Create Your Own Main Menu for The Sims 4 - Tutorial
Hey folks!
This tutorial will walk you through creating your own main menu override for The Sims 4 based on my custom repository.
_________
What is required:
JPEXS Free Flash Decompiler
Sims 4 Studio
Raster graphics editor (e.g. Photoshop, Gimp, Photopea)
Your Own Main Menu repository
_________
Step 1: Download and unzip the Your Own Main Menu repository
It's available on my Patreon page for free.
_________
Step 2: Prepare your custom images
There are two images that you need to customize:
SimMattically_YourOwnMainMenu_MainBG.pngThis is the main background image, where you want to put the desired graphic.Size: 1440px x 1200px
SimMattically_YourOwnMainMenu_BarBG.pngThis is the second background for the navigation bar on the right.Size: 480px x 1200px
Prepare your own images based on these templates. Do not change the size of the images.
Tips: If you're using a more complex background, such as a screenshot from your game, I recommend blurring the Bar_BG with a Gaussian Blur (~60px). Additionally, I suggest adding a white overlay with ~50% opacity and a 5-pixel wide white bar on the left edge with ~10% opacity. This helps improve the readability of the navigation bar buttons and adds an extra layer of detail to your menu design.

The repository also contains the optional file "SimMattically_RefreshedMainMenu_ScenarioButton.package" from my other mod, which replaces the Scenario button icon with a semi-transparent white version. It's up to you whether you want to use it.
_________
Step 3: Import the images to the .GFX file
Firstly, open JPEXS Free Flash Decompiler and then open my SimMattically_YourOwnMainMenu_Template.gfx with it.


Select "No to all" when prompted.

On the left, choose "images" and scroll to the bottom where you will see the images you just edited in their original form. Right-click on each and select "Replace." Select the custom images you prepared in step 2.


Save the file.
_________
Step 4: Import the .GFX file into the .package file.
Open Sims 4 Studio, then click on "My Projects" and open SimMattically_YourOwnMainMenu.package. Select "Scale Form GFX" (the one with the "gameentrylauncher" description) and click on "Import." Select the modified .GFX file and import it. On Windows OS, you need to switch from .binary to all file types to see the file.


Save the .package file via File -> Save As... Give it a custom name and place it in The Sims 4/Mods folder.
That's it! Enjoy!
_________
IMPORTANT INFORMATION/TERMS OF USE:
Main menu overrides can become outdated with some game updates, causing them to break the game. You will have to remake your custom main menu with a new, updated template in this case. Always make sure you are using the latest available template and that it's not outdated.
Since these mods can break the game, I do not advise sharing your custom main menus with other players. You are free to do so, but be aware that since you're relying on this repository to create your own version, you most likely won't be able to update the mod and resolve issues for other players on your own, so you take responsibility for breaking their game.
If you decide to share your version with other players, please credit my repository and link to my Patreon post.
Do not put your custom main menu based on this repository behind any paywall or early access. I made this repository and tutorial free for everyone, so keep it fair.
I do not take responsibility for people misusing this repository or breaking your game with incorrectly modified files. I do not provide support for custom main menu overrides created by other creators using this repository.
_________
#sims#thesims#thesims4#sims4#sims 4 mods#sims 4 custom content#simblr#s4cc#ts4#main menu override#sims tutorial
314 notes
·
View notes
Text


whoo now that i'm back from kumoricon, my online shop is open again!! to celebrate, i'm running a sale from now until nov. 17th 11:59 PM PST - use the code ICEBERG10 for 10% off (applies to both storefronts).
✨ shop link for orders to the USA and Canada ✨ shop link for international orders
for more frequent merch/shop updates, please feel free to join my discord server! server invite link
update details below the cut:
new merch: ♡ new superbat prints have been added! i am a little low stock for some designs/sizes but i will restock them if they sell out.
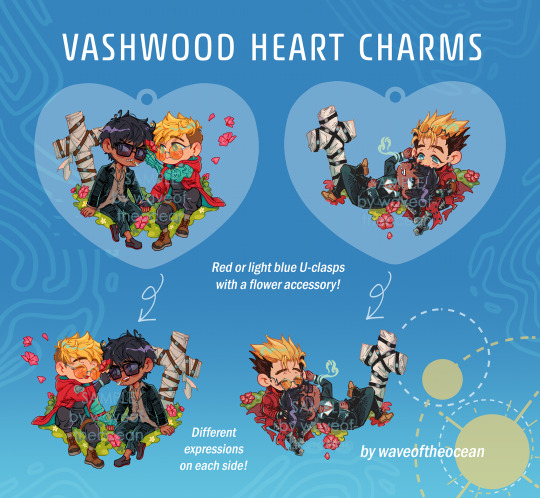
♡ since i won't be able to restock my vashwood potion bottle charms for a while, i've made a regular acrylic version!
♡ new vashwood print (#2)! i've also consolidated most of my trigun prints into one listing.
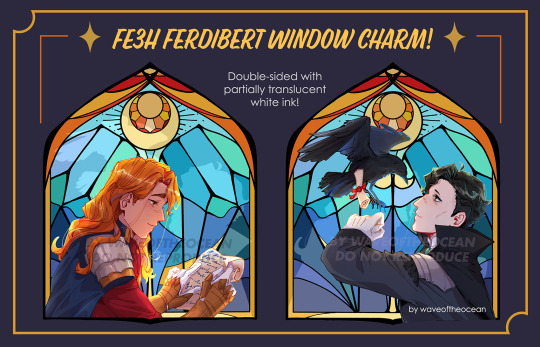
♡ ferdibert window charm - clear acrylic with partially translucent white ink for the window! they're double-sided with hubert on one side and ferdinand on the other.
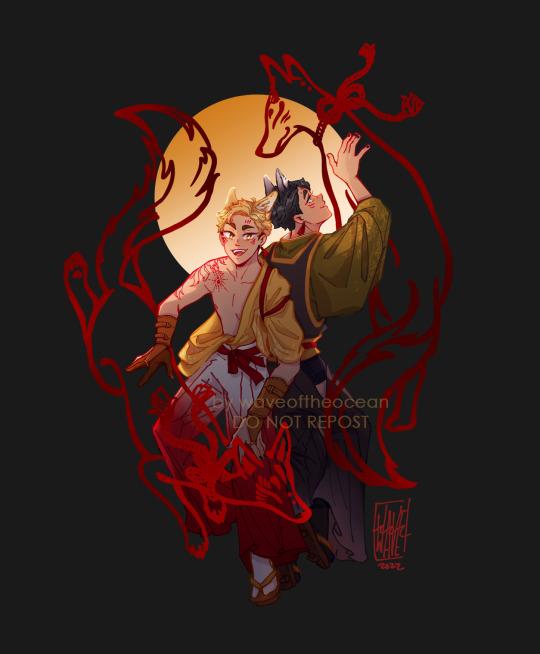
♡ added a red foil print version of my miya twins yōkai AU design!
♡ trying out something new - mystery grab bags (only through my bigcartel storefront)!! they can be either print or charm bundles, and you get to select one item per bundle to ensure that you get something you like!!
restocks: ♡ bokuto, atsumu, and sakusa stickers
♡ iwaoi reunion hug print set
#superbat#vashwood#ferdibert#iwaoi#trigun#dc comics#fe3h#shop update#merch stuff#my art#mine#dcu#trigun maximum#trigun stampede#haikyuu!!#miya twins
222 notes
·
View notes
Text
Re-Introducing the A.N.I.M. TTRPG Book Club & FAQ

Alright, so, we have this discord server called the A.N.I.M. TTRPG Book Club, and it’s exactly what it sounds like. A discord server, run by the A.N.I.M. Team, for reading, analyzing, and playing TTRPGs. It’s free to join, and at the time of writing this it has a community of nearly 200 members.
Also at the time of writing this, for a limited time, you can get a FREE PDF of the July 11th update of Eureka: Investigative Urban Fantasy just by joining the A.N.I.M. TTRPG Book Club! This is a huge upgrade over the free May 10th version!
Here’s how the book club operates:
Nominations. Members nominate RPGs they wanna play.
Voting. After we finish the current RPG, we vote on what the next one will be. You can vote for as many nominations as you want, and nominations with the most votes wins.
Reading. We encourage you to buy the winning game to support the developers, but if you can’t for any reason, we will find a way to get you a PDF. A rough deadline is set that will allow everyone to read the rulebook at a rate of about 10 pages a day, though reading faster or slower is okay.
Playing. We assign GMs on a volunteer basis, and players are assigned to groups with GMs based on schedule compatibility. Each group plays the same adventure module, so each group will have commonalities in their adventure that they can talk about and compare their experiences with, even with different GMs, players, and characters.
Repeat. Voting begins anew with the nominations that we have accumulated in the mean time.
A.N.I.M.’s current Patreon goal is also tied to the Book Club. If y’all can raise our Patreon income to $310/month, that will allow us to set aside manpower to carve out and organize a small additional space within the ANIM TTRPG Book Club server for other games which do not fit the nomination criteria for the main book club! At the time of writing this, it sits at $259/$310. Signing up to the patreon grants you access to monthly rulebook updates as we continue to finish the game, adventure modules, short fiction, and our patreon discord server.
Below is a bit of an FAQ as an attempt to quell any concerns or hesitations
“The Book Club games probably don’t fit with my schedule.”
They might! Because we assign multiple different groups based on schedule compatibility, the book club games are actually very very schedule-flexible! You might be surprised!
And if they still don’t, even just reading the rulebook and joining in on discussions is a valuable form of participation!
“I’m afraid to play with strangers.”
They won’t exactly be strangers if you hang out around them in the book club long enough! Yes we do get what you mean, but there’s nothing to worry about. The A.N.I.M. TTRPG Book Club is a safe community, and we have rules and, more importantly, procedures designed to make playing with relative strangers as smooth an experience as it can be!
“What if I don’t like the RPG that wins the vote?”
While we encourage you to step a little out of your comfort zone, participation in any given round of the book club is not mandatory, there’s no punishment for sitting out! It’s cool to just hang around in the discord server and discuss virtually anything if you want to.
Elegantly designed and thoroughly playtested, Eureka represents the culmination of three years of near-daily work from our team, as well as a lot of our own money. If you’re just now reading this and learning about Eureka for the first time, you missed the crowdfunding window unfortunately, but our Kickstarter page is still the best place to learn more about what Eureka: Investigative Urban Fantasy actually is, as that is where we have all the fancy art assets, the animated trailer, links to video reviews by podcasts and youtubers, and where we post regular updates on the status of our progress finishing the game and getting it ready for final release.
Beta Copies through the Patreon
If you want more than just status updates, going forward you can download regularly updated playable beta versions of Eureka: Investigative Urban Fantasy and it’s adventure modules by subscribing to our Patreon at the $5 tier or higher. Subscribing to our patreon also grants you access to our patreon discord server where you can talk to us directly and offer valuable feedback on our progress and projects.
The A.N.I.M. TTRPG Book Club
If you would like to meet the A.N.I.M. team and even have a chance to play Eureka with us, you can join the A.N.I.M. TTRPG Book Club discord server. It’s also just a great place to talk and discuss TTRPGs, so there is no schedule obligation, but the main purpose of it is to nominate, vote on, then read, discuss, and play different indie TTRPGs. We put playgroups together based on scheduling compatibility, so it’s all extremely flexible. This is a free discord server, separate from our patreon exclusive one. https://discord.gg/7jdP8FBPes
Other Stuff
We also have a ko-fi and merchandise if you just wanna give us more money for any reason.
We hope to see you there, and that you will help our dreams come true and launch our careers as indie TTRPG developers with a bang by getting us to our base goal and blowing those stretch goals out of the water, and fight back against WotC's monopoly on the entire hobby. Wish us luck.
#ttrpg#indie ttrpgs#ttrpgs#dungeons & dragons#dungeons and dragons#dnd 5e#d&d 5e#5e#ttrpg design#indie ttrpg#ttrpg community#ttrpg tumblr#osr#queer community#rpg#critical role#dimension 20#monster of the week#mothership rpg#motw rpg#mothership
357 notes
·
View notes
Text
Can someone summarize what is happening with the windows 10 to 11 topic?
Last year I read about what windows 11 is all about and was disgusted with all the AI bullshit that is nothing but spy ware, like for example to check if you have a crack version of a program, so you‘re forced to buy a monthly subscription. I dunno if that is already happening with the first updates tough
Now I read that windows is actually forcing you to change to windows 11 or otherwise your pc is not useable in a way? „Trade in or recycle“ is what they say about it. Like you have to buy a new pc for w11 to work. I can’t imagine that a new system is coded in a way that altogether makes a new pc necessary. Sounds like swindling to customers…
Just trying to understand if this is all really necessary tech wise or just unethical money milking again and what bad stuff revolves around w11 already. Because all I find so far are articles (that are windows bought i bet) that try to put it in a positive light or it‘s forums and tech sites that talk too much in tech language I don’t understand.
EDIT:
Currently going through further sites and for example the time limit to change from one OS to another is too short. Just a year. Which can lead to massive pc waste because for example companies where cyber security is a strict must have to exchange quicker. Others that keep w10 will have to pay 30$ for every year. Additionally, due to recent cyber security attacks it was perfect timing from windows aka enforced cash grab.
Here from @everfascinated a link with an article about what options you have right now. Also shining light on the fact that you can upgrade your w10 to w11, but it sounds like a hassle. Many hoops windows makes you jump through to get it done and may even damage your pc.
Also tried to read through this. Though I am no computer expert and only understand half of what they say it may be helpful for some of you.
85 notes
·
View notes
Text
Some Resources To Help With Commenting
If you have ever gotten a comment full of pull-quotes, you know it is a joy to get as an author. You get to know exactly which parts of a fic stood out to someone! Which lines made them keysmash or delve into character or made it all click! Amazing!
If you've ever tried to write one yourself, you know that scrolling to the bottom of the screen to get to the comment box again and again is an exercise in frustration only matched by repeatedly closing your hand in a door while the fire alarm goes off. So. Here are some resources to help with that!
(Note: The high-tech versions below are for Ao3, but they replicate functionality Wattpad already has built in— you can comment line by line on that site! The low-tech resource linked below should work for any site that allows you to leave comments.)
The High Tech:
There is an amazing use script written by @ravenel which gives you a comment box that floats on your screen, which is detailed below.
It can be intimidating to install a use script, so @bourbon-ontherocks wrote a tutorial about it here:
For people who use Ao3 site skins, here's the code to make an Ao3 site skin and add a bookmarklet that turns having your comment box at the bottom of the screen on and off. Bonus: this will also work on mobile!
Here is an alternate Ao3 comment box that lets you open a box, type your commentary in the moment, and then send it down to the comment box at the bottom of the page, and then close it again! Includes an update by @aidaronan which was designed to work on mac and firefox!
The Low Tech:
Honestly I have been meaning to install one of these cool scripts, but I keep putting off installing them, so I just use my notes app. I open up a new note, and on my computer I put it behind my browser window so I can click to it, and on my phone I just keep it so that I can swipe across apps. So Then I copy-paste the quotes I want, dump them in the notes app, and put my commentary below! Simple, fast, and fantastic for when you are stuck on the bus for an hour.
So what do you comment?
What kind of commentary, you ask? I will be honest, a lot of the time the commentary is me going OH NO or keysmashing after lines. And that's also okay! I have been told so by authors before!
I know I have personally gotten comments where commenters did delicate character analysis after lines and those comments are in my treasured forever box, and I also have comments where someone went OH NO OH NO AOHNFDIOFNDISJFODISJIDJSIOFD YOU DIDN"T AUTHOR NO and I also hold them dear to my heart all the same. The author gets to know the reaction a work got from their reader! And that's fantastic!
The point of the pull quotes comment is showing the impact a work is having on you as you go through the work, section by section, and sometimes that's a digression about how this line made you think about the characters relationship and how he DESERVES THIS HAPPINESS, and sometimes it's responding to a heartbreaking line with twenty weeping emoji. The impact of opening up a comment email and seeing 10 lines of quotes of your own work will hit whether you have thoughtful commentary or you are rolling yourself into a little ball like an octopus and tumbling across the screen (ordinary standard unhinged comment I have left on the works of writers who make me feel Like That).
Go forth! Comment in detail! Let the authors know which lines made you go "oh no" out line in the kitchen as you made soup! Let them know about callbacks that you just realized and now you figured out the whole mystery! Let them know about how this one bit was so cute you had to step away from the computer for a sec! Let them know what you thought!

165 notes
·
View notes