#and replace it with a new one
Explore tagged Tumblr posts
Visit Tumblr Blog
Explore Tumblr blogs with no restrictions, modern design and the best experience.
Last Seen Tumblr Blogs


Fun Fact
Forty percent of Tumblr users are between the ages of 18 to 25.
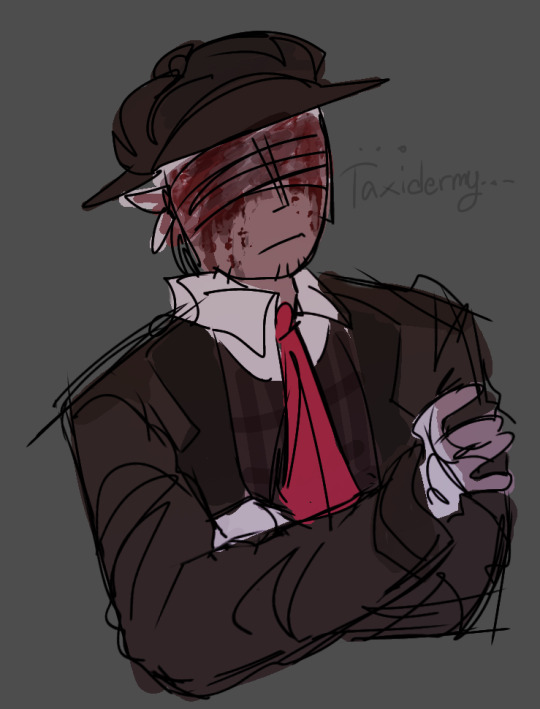
Text
Hey y'all if I am considering getting a toy robot of some kind to re-cover with a new plushie body so I can make a moving animatronic-y thing, do you have any recommendations for which one I should get? I'm looking for the intersection of "easy to cover" and "not very expensive" but the only robot toy things I can think of are furbies, tickle me elmo, and that robot spider that sprints at you when you scream
#the person behind the yarn#this is a medium-to-long-term project#idk what I'd want to make#I mean knowing me probably a monster#but idk what kind of monster#hmmmm I might have to cover the inside seams if I use faux fur#to keep the fluffs from getting in robot joints#but I can do that! I have the technology!#the technology I do not have is a robot to disassemble#well not really disassemble#remove the outer covering of#and replace it with a new one#every possible way I am coming up with how to word that is worse
25 notes
·
View notes
Text

FNAF Mimic plays pretend with Gregory…
#myart#chloesimagination#comic#fnaf#five nights at freddy's#fnaf fanart#fnaf mimic#burntrap#fnaf gregory#david murray#tiger rock#tales of the pizzaplex#security breach#the mimic makes me sad BAHA#I for one like the idea the mimic us looking for a new ‘David’#just someone to replace that connection he had#Gregory being that makes sense to me#with the whole GGY story and what not#and how through SB Vanny kidnaps gregory but never tries to kill him outright#makes sense the mimic is just trying to get Gregory back#trying to get David back
5K notes
·
View notes
Photo


beyond the heavy rain is a rainbow 🌈
#One Piece#opgraphics#Straw Hat Pirates#Monkey D. Luffy#Roronoa Zoro#Nami#Usopp#Sanji#Chopper#Nico Robin#Franky#Brook#Jinbei#*mine#wahhh the new opening is so beautiful and it made me cry 😭#and man i'm gonna need some time to get used to Franky's new VA...#seriously Kazuki Yao is a legend and he'll be deeply missed :(#i just hope there never comes a day where Tanaka Mayumi retires and is replaced because NO ONE can voice Luffy but her#ABSOLUTELY NO ONE!!!
1K notes
·
View notes
Text

one more warm summer one last

#Orion's Art#Kingdom Hearts#Kingdom Hearts 2#Sora#“one more day / inside this life”#I don't think I've drawn him in this outfit without the jacket#when the idea came to mind while half-asleep#I was thinking of the dark blue of the undershirt#with the white lining#so there was no particular reason for it to be KH2#that said#as I was filling out his room#rather than deviating from the in-game space#I thought it'd be more meaningful if I kept it the way it was#I had to replace my tablet on short notice#went with an XP Deco because it was cheap#the pen is... not good#I contacted them about it & they sent a new one#it's better in some ways but still not good#sigh...#I'll have to deal with it for now but urgh my hand
3K notes
·
View notes
Text


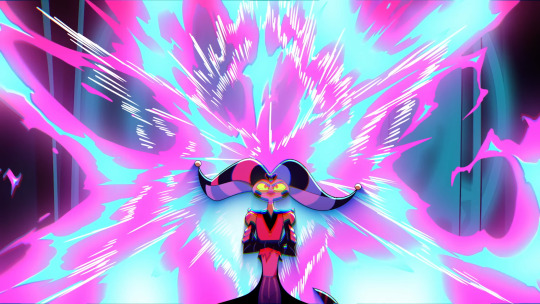
I just noticed when Ozzie appears behind Fizz, the initial explosion shows his sigil for exactly ONE frame (replacing Mammon's sigil we've seen plastered throughout the episode). I just thought it was a neat little detail, Asmodeus essentially summoned himself in that moment.
#helluva boss#asmodeus#fizzarolli#helluva boss asmodeus#helluva boss spoilers#fizzmodeus#fizzarozzie#gotta love the protective monster boyfriend trope#so many delicious freeze-frame bonuses I'm still finding new ones#dramatically summon yourself three paces to establish dominance#also; summon yourself in your monster form to protect boyyfriend is SUCH A STOLAS MOVE lol#also the symbolism of the sigil being behind Fizz changing from Mammon's to Ozzie's - Ozzie has replaced Mammon as Fizz's support/family
10K notes
·
View notes
Text


Ghost King Phantom's secret twin brother WHO?!?!?😱😱😱
#ft me trying to figure how to draw klarion like 5 times over#found one dpxdc fic with klarion in it and remembered he's literally my favorite little guy#stealing from those fics where damian is danny's brother and then replacing damian with klarion#also I know my klarion looks like young justice but know that I am mixing him with new earth klarion for backstory reasons#apologies for the radio silence recently#I have fallen down the dpxdc rabbit hole#danny with a snake familiar >>>#snake danny agenda strikes again#dpxdc#dc#danny phantom#klarion bleak#klarion the witch boy#batman#dick grayson#jason todd#tim drake#damian wayne#ghost king danny#ghost king phantom
2K notes
·
View notes
Text


Just because you don't love yourself it doesn't mean I will stop loving you.
#my art#goro akechi#persona 5#shuake#p5r#ren amamiya#persona 5 royal#akeshu#for some reason i wrote a dif caption on all socmed#i like them all#u know me and my poetry and shuake i cant stop coming up w lines so oh well collect them all#twt tumblr and bsky#twt and tumblr are similar#oh right i have never told ppl i have either of those here#tumblr is my true home so i forget#anw enjoy my tablet pen is dying and replacement is 350 euros cause its a wacom display tablet from 2013-17 and yeah. fuck me :)#cant even say i will do comms to pay for a new one cause its maddening to draw on it rn#idk how i managed to draw this one - passion for shuake ig#ok thats too much rambling even for me oops#its been a bad week lots of expenses for someone who quit her job to do a post grad on my savings lol#im getting better though
1K notes
·
View notes
Text
imagine if after the transmigration shen qingqiu became a combination of shen yuan and shen jiu, not in a "second person living in my head" kind of way, but a "this house is haunted and carries the echoes of the dead" kind of way; imagine shen yuan having nightmares about a house, a fire, a faceless boy behind a door he can't remember; imagine him having flashes of emotions he doesn't understand, rage at a name he doesn't recognize, helplessness when yue qingyuan apologizes for something he won't mention, nausea when ning yingying says the name "a-luo"; imagine parts of his own self have changed too, how he now likes bows in his hair, pretty flowers and flowing robes, but can no longer stand a stranger's touch, a man's touch, yet he longs for the brothels, but never sexually, only fondly, like there's something there he misses. there are many empty spaces in his heart where he feels something is missing
#imagine if one day shen qingqiu wakes up and he no longer knows which one he is#imagine the guilt too. for not just taking a body but their self too. their memories and wants and needs and feelings#maybe it differs per day#sometimes he is more shen jiu. snappy and defensive and aloof#sometimes hes more shen yuan. silly and bumbling and trying so hard#and maybe. maybe. if you want to tear your heart a little more:#most disiciples and peak lords sit out the days where parts of shen jiu surface waiting for shen yuan to come back#theres a metaphor about the ship of theseus in here somewhere. its on the tip of my tongue#something something replacing all the parts one by one. is it still the same ship or has it become something new?#svsss#scum villian’s self saving system#shen jiu#shen qingqiu#shen yuan#scum villain#mxtx svsss#mxtx#luo binghe#bingqiu#svsss thoughts#yue qingyuan
1K notes
·
View notes
Text
people complain about long-term settlements in fallout being too ramshackle, and basically looking like they were just built despite the fact that the nuclear apocalypse happened 200 years ago. "people should be building proper, long-term structures and not just building shacks out of rubble at this point" is the argument i hear, applied to places like the new vegas strip or diamond city in fallout 4.
and i don't 100% disagree, but i do feel like this logic assumes that the bombs dropping 200 years ago is the only disruptive thing that's happened in these places? "the wasteland is a living place, people should be rebuilding and not just living in rubble" <- yes, but the wasteland is also a living place filled with constant power struggles and warring factions and regime changes. maybe that city isn't what they managed to build in the last 200 years since the bombs dropped, maybe it's what they managed to build in the last 30 years since the last time they got attacked by another place and almost wiped out.
it just doesn't seem that unrealistic to me, is all, especially if you've been to areas that have been afflicted by poverty and scarcity for hundreds and years and seen that these sorts of conditions do actually exist. humans persist under all sorts of harsh circumstances.
ETA: this post got a lot more attention than i expected, and people are taking it as some bethesda fallout vs non-bethesda fallout thing, which i don't get because i think all of the games are guilty of the "people living in 200 year rubble" thing that gets criticized so much. as i mentioned in the tags, this post was inspired by a cleanup mod for new vegas. and to be clear, i'm not saying that all the games necessarily execute this concept well, but it does make sense as a concept and isn't the gaping plothole a lot of people take it to be. like, look up what slums in the poorest countries in the world look like. imagine what what would happen to social norms in a world where everything blew up and you had to start over with practically no resources and no central government.
#mine#fallout#this thought inspired by this really well made mod i saw that replaces the walls around the strip with like#professional looking reinforced ones#and gets rid of all the rubble#which like. yeah i think the strip could have a BIT more cleaning up but still#fallout meta#fallout new vegas
410 notes
·
View notes
Text
no put your clothes back on let’s talk about the gilderat cologne lore and how this is the next rarepair—>popular ship we will see in the marauders fandom
#nobody could make me hate you gilderat#those edits HIT#that one girl on tt with all the lore yes maam#they are the new jegulus#but nobody will ever replace my precious jegulus and wolfstar im sorry#i love them too much#jegulus4eva#jegulus#regulus black#james potter#gilderat#gilderoy lockhart#peter pettigrew#wolfstar#ao3#sirius black#remus lupin#marauders era
530 notes
·
View notes
Text
I usually hate modern aus but can't stop thinking about my Rook pulling up to the big double gates of the Dellamorte Estate in her beat up old SUV she inherited from Varric, driving down the long driveway to this old, historic, three story mansion before getting out to ring the doorbell in her scuffed up Doc Martins, thrifted goth couture, and jingling with every step with the amount of bracelets, necklaces, and chains she's got on her with a giant bouquet of red roses in hand. Lucanis practically flings the door open with excitement and takes the roses with the biggest, sappiest smile and then quickly starts ushering Rook back into the car while she's in the middle of saying something dumb and cheesy like "your chariot awaits" because he doesn't want Caterina or Illario showing up.
Meanwhile Caterina and Illario are posted up in one of the upstairs windows with opera glasses to catch a glimpse of Lucanis' mysterious new sweetheart and are sharing mutual looks of disgust as they watch Lucanis and his three piece designer suit (because he panicked and way overdressed for the chic wine bar Emmrich suggested they go check out for date night) get his ass in the dirty 20 year old junker Rook is driving around in. After all these years single the fact that Lucanis is settling for whatever the fuck Rook has going on (because she definitely radiates gremlin energy) is absolutely baffling.
The fact that the car is covered in bumper stickers that say things like "I EAT SAND just a little sometimes as a snack" and "these curbs aren't gonna hit themselves!" is not helping Rook's first impression. To be fair to Rook though half the stickers on the car are left over from the Kirkwall Crew slapping them on over the years but Rook did add those two herself because she thought they were funny.
#Varric is alive in this au its just that Harding finally convinced him to get a new car and Varric decided to pass his old one down to Rook#there are lot of memories in that car and Varric wasn't ready to part with them so he let Rook have the car#replacing watcher rook's grave gold with a bunch of jingly silver chains because my girl is definitely some flavor of alt#this post brought to you by a post about some absolute insane bumper stickers I saw on twitter#rook#lucanis dellamorte#rookanis#caterina dellamorte#illario dellamorte#morticia ingellvar posting#bianca the suv au
523 notes
·
View notes
Text
CHONNY'S CHARMING CHAOS COMPENDIUM FAUX ALBUM+BACK COVER!!!!!!!💥💥💥💥


AKA CONCEPT ART OF AN ALBUM COVER FOR A CONCEPT ALBUM OF A COVER ALBUM!!!!
(aka a final for an illustration class:])
some mockups+ illustrations without text:3


#DISCLAIMER: THE ORIGINAL ALBUM ART FOR CCCC IS PERFECT AND THIS IS NOT ME TRYING TO “REPLACE” IT#IN ANY WAY SHAPE OR FORM. THIS IS JUST MY OWN FUN EXPERIMENTAL AND AMATUER ATTEMPT AT AN ALBUM COVER#THIS WAS FOR AN ILLUSTRATION ASSIGNMENT. I HAD THE OPTION OF MAKING AN ALBUM COVER AS MY FINAL AND HOW COULD I EVER PASS UP THE OPPORTUNITY#TO MAKE MY FINAL CCCC-RELATED. IT WAS WORTH IT! I PASSED WITH AN A IN THE CLASS!!!#i win forever#chonny jash#cccc#chonnys charming chaos compendium#chonny jash fanart#cj mind#cj heart#cj soul#cj darrell#jaggy posts#jaggy art#sometimes art school is u bashing ur head trying to learn new programs and sometimes you are making the most self indulgent fanart ever#thats what its all about baybee#anyway the last two posts were semi related to this project^_^#one was supposed to be a sticker the other as u can see was for the vinyl art#souls face on the record is slightly different than the actual final illustration i goofed and had to redraw it(oopsie)(do not tell my prof)#the grades r already in lol its ok#anyway in my head i was calling this black and white week^_^(it was only four posts. it was not a week. i used gray and red as well. wrong)#i hope you enjoyed. im going to hibernate now
374 notes
·
View notes
Text
nature is healing <3

#real talk though my library is about to get chaotic#i have no idea what i'm doing about my playlists#i have literally hundreds and most of them contain taylor#with each new tv release when i deleted the original album i went through and replaced the songs with the tv ones#so now i'm like do i leave it like that#and continue with the tv ones as my defaults and just listen to the ogs when they come up on shuffle or whatever#or do i do a full switch back to the ogs and keep the tvs just as extras#talking#taylor swift
225 notes
·
View notes
Text
I have a short walk through my neighborhood to get to work and there's always been so many fucking signs and flags for Trump in that ~5 minute walk. Over the last couple months though, I realized that they've been steadily disappearing. I thought it was a coincidence or that I was reading too much into it until I saw today that the last one left, a fairly tattered one that has been there since November at the latest, is gone.
It's been replaced by one depicting Bigfoot holding the American flag.
I am cautiously optimistic.
195 notes
·
View notes
Text


Forgot i made this from weeks ago
#artist on tumblr#the sillies#art#narcolphanom#repo#r.e.p.o game#huntsman#little nightmares#little nightmares 2#hunter#Hunter x Huntsman#BlindBag#yes im tagging this#Hunter was just helping huntsman with replacing his dirty bloody bandages with a new one
162 notes
·
View notes
Text


The Slow Horses (and Jackson Lamb) missing Slough Houses’s mother hen Catherine Standish 🐌🐎
#the tone in which marcus and shirley ask her if she’s back#i can almost picture two children clinging to their mother’s legs after she’s been gone somewhere for about five minutes#marcus sounds so happy to me when he says her name 😭#also shirley practically telling moira ‘well that’s now how my mum does it so 😌’#as if she’s a wicked stepmother daring to replace her#louisa being like ‘WHY ARENT YOU ANSWERING.. also hi mum how have you been 🥰❤️💕’#they all missed herrr#especially jackson#he does n o t want a new secretary because he’s holding out on ignoring those resignation forms because he knows she’ll be back#i do hope we get some kind of acknowledgment of her being back in the first episode of s5#we should’ve gotten a scene with her and lamb at the end of the last one when taverner left#where they would’ve confirmed that she was coming back officially#so it’s only fair that they acknowledge it this time around#i have a feeling it’s going to be something to do with her fixing up the bullet holes or some other damage left by patrice#slow horses#catherine standish#saskia reeves#jackson lamb#gary oldman#river cartwright#jack lowden#louisa guy#rosalind eleazar#shirley dander#aimee ffion edwards#marcus longridge#kadiff kirwan#moira tregorian#joanna scanlan
150 notes
·
View notes