#hosting tutorial
Explore tagged Tumblr posts
Visit Tumblr Blog
Explore Tumblr blogs with no restrictions, modern design and the best experience.
Last Seen Tumblr Blogs


Fun Fact
Total funding amounts to $125.3M.
Text

Quick Guide: Stay Safe While Downloading Sims 4 CC & Mods
I just published a quick guide to help you download Sims 4 CC & mods safely. ⚠️ From trusted sources to spotting red flags. Keep your game clean and secure! 😊
Read it now
#avoid malware in sims 4 mods#how to avoid malware sims 4 mods#how to download mods safely sims 4#patreon sims 4 cc download#safe sims 4 cc creators#safe sims 4 download sites#sims 4 cc best practices#sims 4 cc community guide#sims 4 cc download checklist#sims 4 cc education#sims 4 cc folder structure#sims 4 cc mod manager#sims 4 cc mod security tips#sims 4 cc mods support guide#sims 4 cc protection#sims 4 cc safe download#sims 4 cc safe hosting platforms#sims 4 cc safety guide#sims 4 cc safety tutorial#sims 4 cc virus warning#sims 4 cc zip file tips#sims 4 custom content security#sims 4 custom content tips#sims 4 mod folder organization#sims 4 mod malware prevention#sims 4 mod safety#sims 4 mod safety checklist#sims 4 modding guide#sims 4 mods antivirus#sims 4 script mod warning
281 notes
·
View notes
Note
Can you tell me how you post your art on Ao3? I keep trying and failing. Maybe it's my image hosting site?
Hey! Sure I'll attempt to explain. It's possible it's your hosting site, but hard to say. I use a site called Maltshop, or more accurately MLTSHP. It's been working great for me since I started using it but the downside is that it is a paid hosting service at $3 per year. I know not everyone can do that though, but if you're able to throw them $3 per year it could be worth it. At that tier they allow for up to 300MBs per month uploads. They have a $24 per year tier that is unlimited file size uploads. Another benefit - and this may not apply to you, but maybe someone who's reading this - is that they allow for Adult/Mature/NSFW whatever you want to call it image hosting.
Here's my process - and keep in mind this is just for adding an image. If I'm adding an image to a fic then I start a new post on Ao3, paste the fic in first, then add the image in the body of the fic where I want it also following this process:
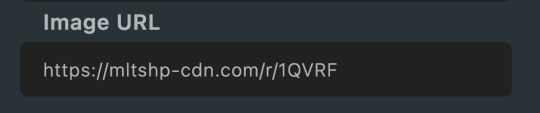
I go to MLTSHP and upload my image. It thinks for a second then gives me two URLs. A "post url" and an "image url." I copy the "image url"
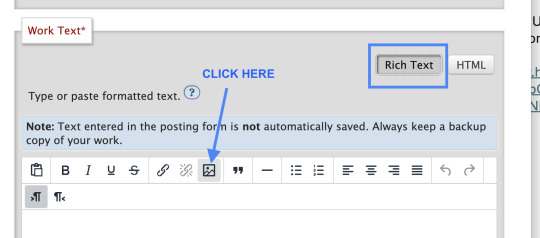
2. Then I go over to Ao3, click "new post," add all that necessary stuff it asks you to add like title, tags, summary, etc. then in the actual Work Text editor box I click "Rich Text." That's key as it defaults to "HTML" editor when you start your new post and while some people are awesome and good at HTML, I am not that "some people" and need my Rich Text editing box.
3. When you're in the Rich Text editor version of the Work Text box, click the little image icon

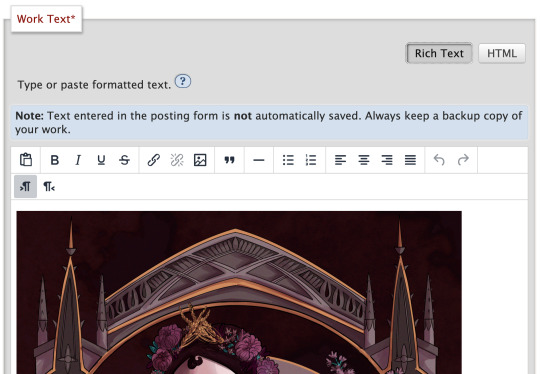
4. A dialogue box will pop up where you can paste that Image URL link from step 1 above. You can then add your Alt Text (called Image Description) and adjust the size of your image, then click save

5. Then I futz with the sizing for a bit, make sure all the necessary post info is included, add text if there's any to go along with your image - ya know like if you have a whole fic you're posting, then preview, then post the image and voila!
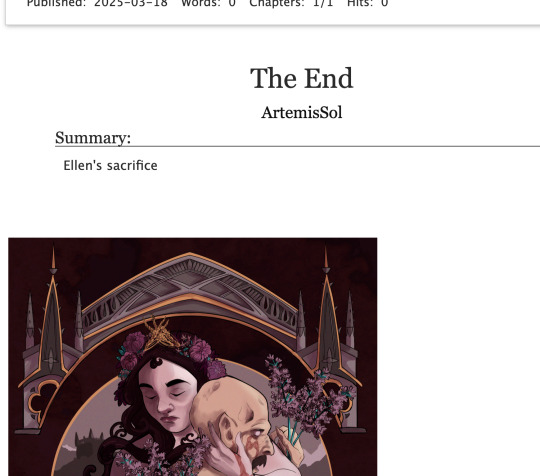
And that's my entire image posting on Ao3 process! I hope it helps, but if you need further help, feel free to DM me!
136 notes
·
View notes
Text
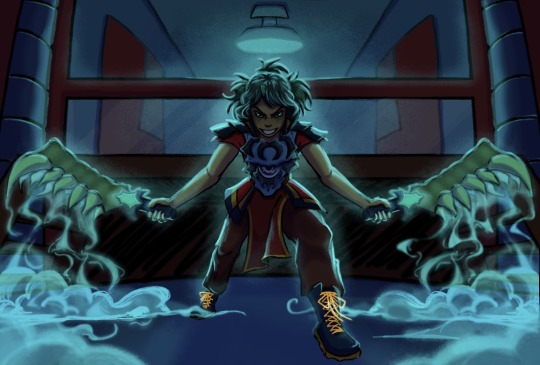
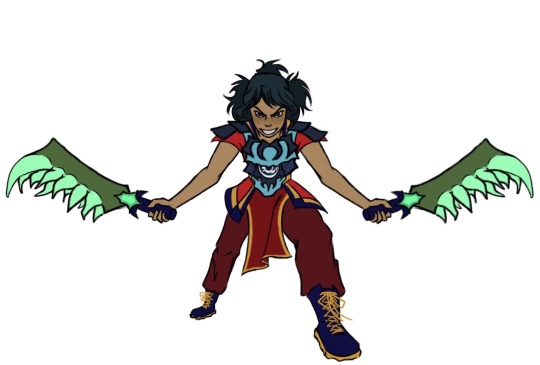
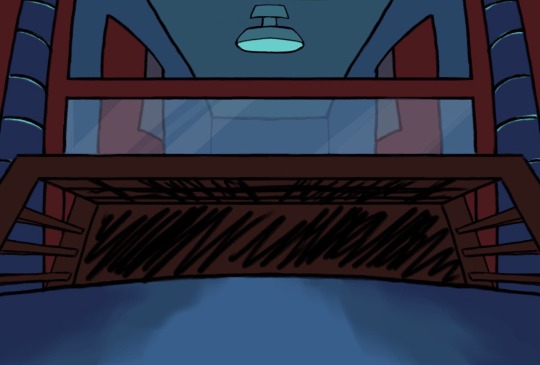
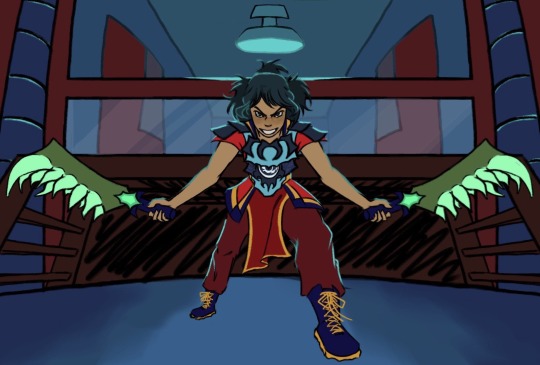
MORROTOBER SECRET SANTA FOR @dzyntara WHOOOOHHHH 2 IN 1 PROMPT

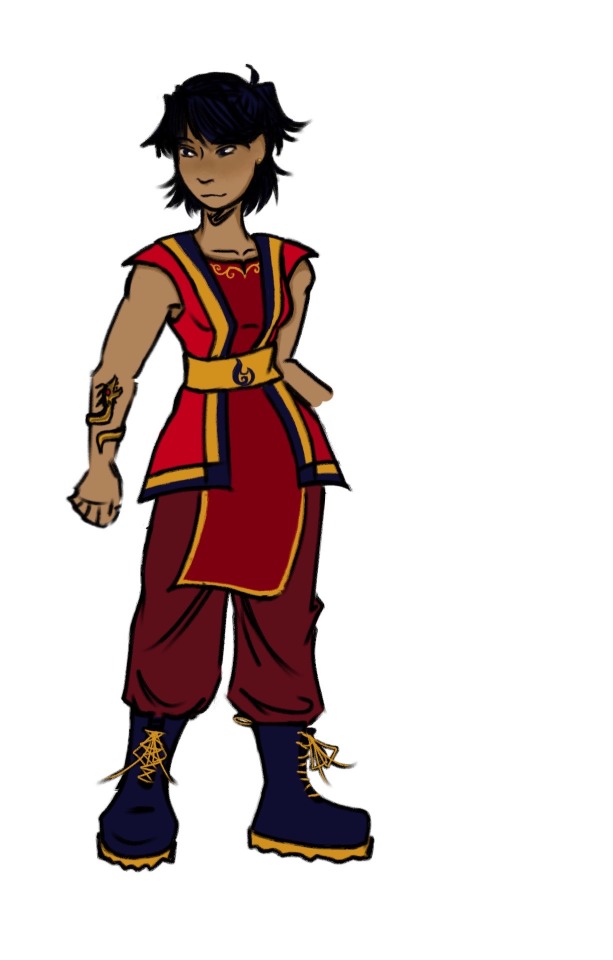
screenshot redraw + possessing another character !! thats nya if you cant tell idk shes got a weird ass outfit. you had such good prompts you need to share them with the world OK TIME TO YAP
@morrotober
OKAYY so of course you know i need to do wojiro duo. i could have done kai and somewhat hit another prompt but i didnt want to figure out his hair so. nya it is. they kinda look too similar but by the time i realized that i was like halfway so i went with it. i FORGOT she was supposed to be green until literally the very end. lowkey i think i went a little overboard with the lighting but its ookaayy. for the teeth,, sword,, things i was kinda winging it i had a more dry ice type of smoke in mind but we ball. the whole way through i was thinking to myself hmm its missing something and the SECOND i added those two clouds in the foreground i was like o yeah this fucks. also i was STRUGGLING with the lighting and rendering or whatever cause i haven’t done a fully detailed thing in forever. i was using red?? for the shadows?? and then i realised it looked too gray and i wanted the whole thing to look a little more teal so i used purple and i think it looks better. lowkey it’s really funny how i have a different rendering process for every single piece i do call it experimenting. don’t mind the background idk also does it look really crunched to you i promise it looks better than that guys
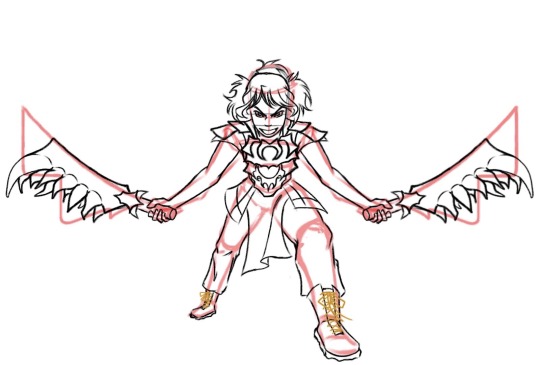
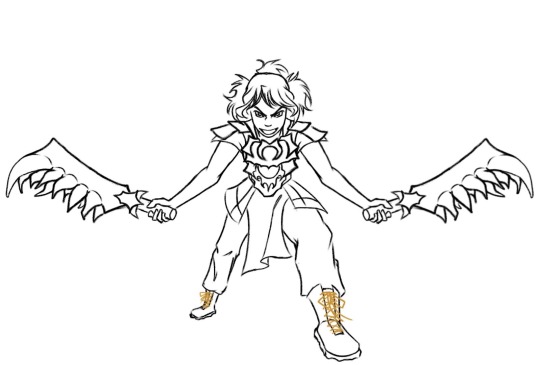
PROCESS
#LETS GOOOO#if tumblr crunches it cause the canvas is too big i’ll cry#ninjago#lego ninjago#morro ninjago#ninjago morro#ninjago nya#god i spent so long on this#THIRTY SIX HOURS#a good portion of that was spent trying to follow painting tutorials and giving up#i may have gotten a little carried away on. all of it#is it supposed to be this detailed#at least you can’t say i don’t COMMIT.#thank you morrotober for hosting 🗣🗣🗣#jellos scribbles
137 notes
·
View notes
Text


🌸🎨🌊 It's 2am. Enjoy all my mistakes for this spur of the moment tutorial on how I've been doing my recent artworks. I'm currently working on redoing an Ouran one that is nearly 10 years old and thought I'd show the progress. I haven't finished the Ouran one so things like colour correcting at the end hasn't been completed but it's something I do as well. I also haven't obviously added in the water on their bodies... Let me know if you take anything away from this and want to attempt it! Ko-Fi
#artists on tumblr#ouran high school host club#ohshc#ouran#ouran host club#ouran high school host club fanart#ohshc fanart#ouran fanart#ouran host club fanart#haikyuu#haikyuu fanartt#art tutorial#my art#i've done 3 and a half hosts so far#this was more of a way of preserving my steps for myself if i should forget in the future XD#because there are certain effects i know in my past works that i can't recall how to do anymore#can we praise me for getting over my aversion to drawing male nipples? I added them in this time XD such as basic af thing#but i think i didn't do them in the og bc they're not shown in the anime and i went 🤷♀️ sure
21 notes
·
View notes
Text
hello guys, i return with my beatle ponies. WHICH is very different this time. because it's ALL of them for once!!! yes, i have broken out of the george pony cycle.... (not really)


OKAY there's moonshine geo and pyramus paulie from the beatles shakespeare play, mmt wizard geo, help! ringo, and get back john. dont mind how off pyramus looks, i tried my best.
also a special thank u to the sgt. pepper paul that recognized me 😭 and clay!!!!!!!!!!!!!!!!!!!! who has very awesome skins the best imo
#tutorial very soon maybe#im very happy that ppl actually like these!!!#it is my special interest rn. I guess??#the beatles#pony town#george harrison#ringo starr#paul mccartney#john lennon#alright i gts now#and now... ur host for this evening...#the pt beatles!!!#rib pt ponies
41 notes
·
View notes
Text
would anybody be interested if i made a hpcc fandom discord server lmk!
#albus severus potter#hpcc#hp next gen#scorpius malfoy#harry potter and the cursed child#i mostly wanna make one so i can host movie nights with the hp movies or slime tutorial of hpcc or avpm
17 notes
·
View notes
Text
host your gif packs on google sites
Since I received a question from an anon about how I upload my gifs to the google site, you can find the answer here. This is my first tutorial, and english is not my native language, but I hope it will be understandable and sorry if I wrote something wrong in english. I hope it's understandable and good luck, feel free to write if you have any questions and I'll try to help.
First of all, I always create the gif pack page on tumblr, it's easier to see the code there, it's easier for me to change things, because there is more space. And there I can see if everything is okay. However, it is important that there is a few code that works here, but not on the google site. When I find everything in perfect, I copy the code of the gif page and paste it to the google site page.
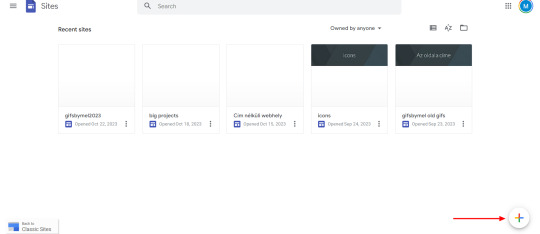
So I always open the google site page (You must log in with your gmail account to be able to use it.) : https://sites.google.com
When you open it, it will be a blank page, but there will be that colored plus sign at the bottom right. You can create a new page with it. I already have several, I tried to organize things there.
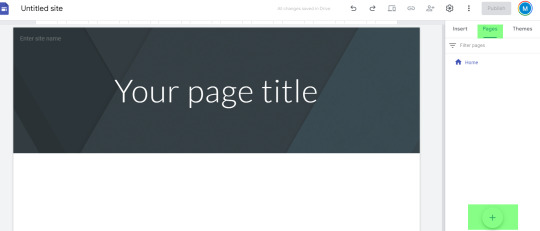
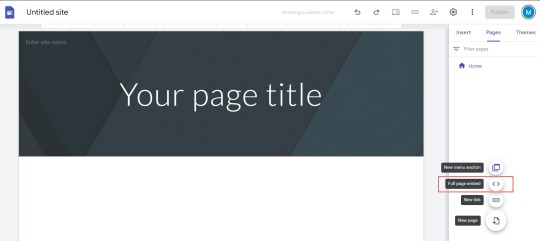
4. If you click on the plus sign, it brings up this, I don't usually change anything here. In the right-hand bar, there is "pages" (marked in green in the picture), you have to select it.
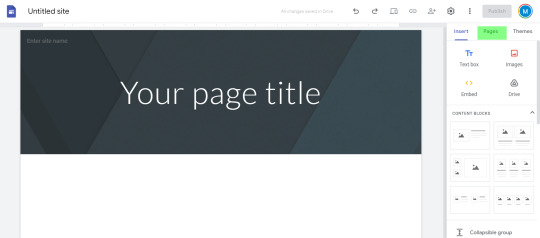
5. If you have selected the pages menu, you will see a plus sign again in the lower right corner. Click on it and select "full page embed". (I circled it in red in the second picture)
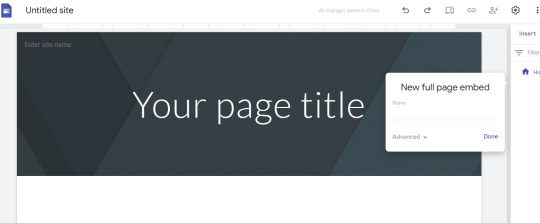
6. If you selected this, it will ask you to name the page. Enter the name you want. I usually include the name of the actor/actress + the name of the series and the episode in various formats. (Since I create the page both here and on the tumblr page, sometimes I copy the name given on the tumblr page.) When you press done, you will see what is in the second picture.
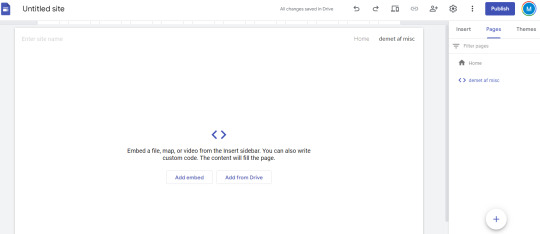
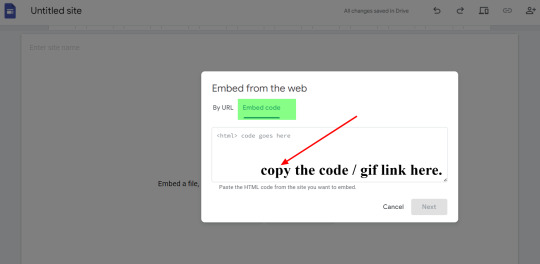
7. If you move the mouse over the part marked in green, i.e. on the name of the created page, 3 small dots will appear on the far right. Click on it and select "hide from navigation". If this was the case, then the small sign will be crossed out in front of the page name in the right side bar and there will be no menu bar at the top of the displayed page. After that, all that's left is to paste the code of the gif page, i.e. the gifs. You have to click on the "Add Embed" , which is in the middle and can be clearly seen in the picture. And choose "Embed code" and copy the cod / gif link here. [second picture]
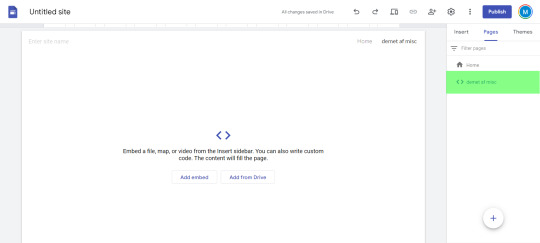
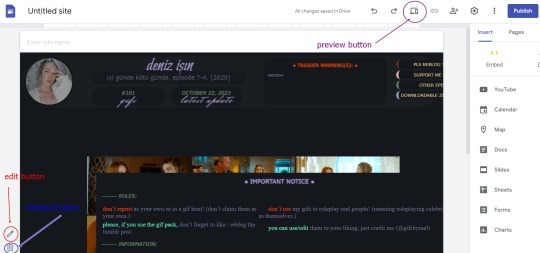
8. I have marked on the picture where you can find after this, the edit button [in red], if you want to delete the page [in blue], or if you would like to preview it. [with purple color in the picture]
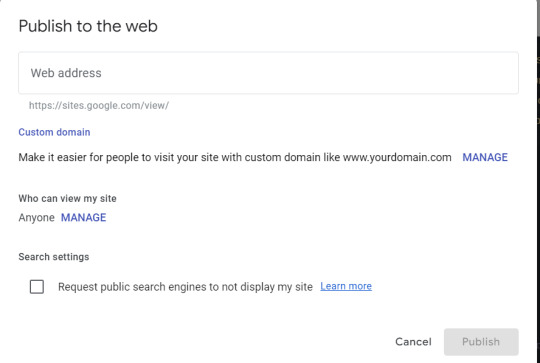
9. If you find everything OK, then all that's left is to press the "publish" button in the upper right corner. The previous picture shows where you can find it. Then it will ask you to enter a name for your web adress. Name it whatever you want, think of it as the name of a main tumblr page where you can always create gif packs. This only needs to be entered once, unless you want several main pages, as I have several (as can be seen in the very first picture). Eg: I named the current one gifsbymel2024.
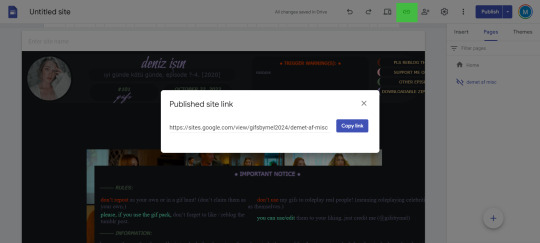
10. I marked the paper clip / chain (?) icon in green on the picture, you have to click on it and then the link of the created page will pop up and you can share it with whoever you want.
11. If you always want to upload a new gif pack to your page after that, all you have to do is open the Google site page, select your page from the already created "recent sites" section and then go to the "pages" tab on the right side and repeat the steps as before featured. Only the name of the "recent site" will be omitted if you add the gif packs to an existing one.
#host your gif packs on google sites#tutorial#gif pack tutorial#gif page tutorial#google site#google site tutorial#m.txt#suggestion by anon#gif page
106 notes
·
View notes
Text
A free image hosting solution for AO3 and elsewhere - A Tutorial (mobile-friendly!)
See the demo site made from this template IN ACTION: https://hotlink-archive-template.pages.dev/
This guide is for an easy, mobile-friendly way to host files for hotlinking on AO3 or elsewhere, using github and cloudflare pages.
I've encountered far too many dead links in fanfics and forums simply because a hosting service decided to dump older files, or they decided to change their TOS to no longer allow hotlinking or certain kinds of content (nsfw, fictional graphic content). See Optional Steps for even more options.
This is an easy, barebones way to permanently host images that you don't want deleted unexpectedly or that you can't host elsewhere. (Emphasis on barebones. This will not be a nice portfolio style site. Unless you decide to code that yourself!) You can follow the link above for an example of this type of site.
It is also EASY to upload and use on mobile devices after initial setup!
Tools you will need:
Cloudflare Pages/Workers is a free to use static site hosting service. This will publish your files and make them available online. This will publish your files and make them available online. There is a limit to the amount of data you can upload for free, but you can pay for proper hosting if you want to exceed it.
Github is a code sharing/storage platform. Your files will go here first before being published on Pages. You can edit and upload files through your browser at github.com, or through Github Desktop, a program you install on your computer. There are limits to Github repositories, but they are also generous (suggested 1GB to 5GB per repo).
Basic Setup
1. Create a github account
2. Copy this template repository hotlink-archive-template
Your website will be contained in a repository, a place where all the files and the revision history for your project are stored.
This template repository uses an "Action" (using python) to automatically create a "home" page with an Index of all the files in your repository every time it is updated.
NOTE: I recommend you set your repository to Private. Github's history feature is extensive, so if you have sensitive content or think you might want to delete something later, it will be hard to get rid of it completely once it's been committed and publicly available.
3. Enable Action permissions
In order for the Action script to work, you need to give Actions permission to read and write in your repository.
Within your repository, go to the tab Settings > Actions > General > Workflow Permissions

4. Create a Cloudflare account
5. Create a Pages (or Workers) project and link it to your Github repository
Your Pages project will create the front end of the site where the images will be displayed. You will be able to link those images to other platforms like AO3.
You can create either a Workers or Pages project by going to Add > Pages (or Workers). Name your project WISELY! This name will be your site's URL.
Workers vs. Pages
Workers is subsuming Pages on Cloudflare and now has all the same static hosting capabilities, in addition to its original server-side processing services. If you'd like to, read more about this.
While Workers has similar capabilities, I recommend Pages for this project. Pages has the added bonus of a cleaner URL if you do not have your own domain: “MySite.pages.dev” in Pages vs Workers' “MySite.username.workers.dev”
You will be prompted to import an existing Git repository. You will need to give it access to your Github to do this.

Select the repository on your Github you made for your project, then hit "Begin Setup".
Name your project WISELY! This name will be your site's URL.
You do not need to change any settings on the next page, so hit "Save and Deploy". Your image hosting site will now be live!
The URL will be "https://ProjectName.pages.dev". It may take a few minutes to become accessible.
Now you're done with the basic setup!
How to Add files
You can add any files you want to link to on AO3/elsewhere through mobile, desktop browser, or the Github desktop program!
Here is how to do it on Github.com:
Open up the repository that you made (it can be found at github.com/username/repositoryname). You will see a list of folders and files that are in that repository.
Click into the folder "fan-stuff".
In the top right, go Add file > Upload files and drag in the images you want added. You will need to name the images BEFORE you upload them, as there is not an easy renaming feature within Github's browser interface.
In the Commit changes box, choose a title for what action you are doing. This will help you backtrack uploads if needed.
For example, it could be "Uploaded Batman Art". Make sure it's set to "commit directly to the main branch", then commit those changes. This will upload the files.
Now, if you visit your site, you will see your uploaded image under the "fan-stuff" folder!
To embed/link your image, navigate to your file on your Pages site and copy the URL in the address bar. This URL is what you will use to embed your photo (using HTML or "add image as URL" tools some sites have).
Continue onto More Setup to customize your site and implement more advanced settings. See Tips/Troubleshooting if you're running into problems.
More Setup
Perform site customization/advanced setup with Github Desktop on your PC
Github’s web UI is great, but it has major limitations. I highly recommend that you use Github Desktop during the initial setup, as well as when you want to make major organizational changes to your files/site. Once you have everything set, though, you can use Github in your browser to upload whatever files you want to hotlink at the moment.
Download Github Desktop and “clone” (download a copy of) the repository you made.
This is the best time to rename/rearrange folders + files, etc.
There are other methods in the Troubleshooting section if you need, but Github Desktop is by far the easiest way
see Adding/Renaming Folders for important info on how to properly rename/add folders
see About the Index Page for how to customize your Index pages
Once you’re done editing, “push” (upload) all the changes you made to your online Github repository.
Having some sort of text editor like Notepad++ is useful for editing any code, the automatic color-coding is very helpful. You can edit in plain old Notepad as well, it just won’t look as nice.
About the Index Page
The template repository uses a python Action to automatically create an HTML "home" page with an Index of ALL the files in the folder every time it is updated.
This is particularly convenient for mobile use, as you can upload a file, and the python action automatically updates the Index page.
If you don’t want this, just disable the “create-index” Action and delete the .py files. You can just type in the file locations to get to each file, or you can manually maintain an home/Index page yourself, which isn't hard if you know some basic HTML and can remember to do it consistently.
Also note that if you wish to change any of the content on your Index pages, you must edit the "index.py" file, not the "index.html" file. The "index.html" file gets re-written every time the "create-index" Action is run in order to keep the file index up to date.
Adding/Renaming/Deleting Folders
Disclaimer: This is a bit convoluted because I am extremely unqualified to be working with python OR HTML. There’s probably an easy way to do this, but I don’t have the skill to do it, and most of the stuff here is copied from stuff I found around. If you know a better way to do things, please let me know, it’d make my life easier too!
Adding or renaming folders involves some extra steps.
1. The "index.py" file inside the folder needs to be edited to match the parent folder name.
The place you need to do this is found near the top of the file (highlighted below)

2. Then the outer-most "create-index.py" file needs to be updated to match the new name as well. If you’ve added a new folder, duplicate and adjust the code to match.
The place you need to do this is found at the bottom (highlighted below)

If you don’t need any folders at all, great! Just delete them and their contents! No need to edit any files. (Don’t delete “index.html” or “create-index.py” or “.github/workflows”!)
If you would like to have these folders for later use, leave them as-is and simply edit the index files.
The relevant lines of code at the bottom of "create-index.py" like in the previous step for renaming folders. You may delete this code, or comment it out (using # at the beginning of a line will make it “invisible” to the computer)
Then, add the folder’s name to the “exclusions” list at the top of the "create-index.py" file so that it doesn’t show up on your Index page (highlighted below)

You can also use this same concept to create "invisible" files/folders. Any files/folders included in the "exclusions" list in "(create-)index.py" will not be listed on the Index page, however they can still be found through the direct URL to the file.
On the flipside, this means simply hiding the file/folder from the Index page does not get rid of the file from your site. Anyone who has the URL will be able to find that file unless you remove it, or move its location to change the URL
Tips/Troubleshooting
(Re)name your files before uploading
It’s not possible to rename image/media files on Github’s web UI (it is possible with the local Git program). The "create-index" Action lists out the names of your files exactly, so you will end up with ugly strings of numbers and letters on your Index page if you don't rename them, which is terrible to look at and also plain old CONFUSING to navigate.
So if you're uploading on mobile or through Github on browser, name your files with easy to remember and distinctive filenames before you go ahead and upload them. This makes everything much easier, and it makes your Index page look nice :)
My website isn’t updating when I edit my Github repository!
Check to see if your Pages is retrieving from the correct branch, and if it has automatic deployments enabled.

Can’t see your Github repository when trying to link it on Cloudflare?
Check your Github applications Repository Access settings. Go to your ACCOUNT Settings > Integrations - Applications > Cloudflare > Repository Access

Index action is failing!
Go back to step 3 in Basic Setup and check if you’ve given Actions permission to read and write. If that’s not the issue, check to see if you’ve set up your "index.py" files correctly. The folder names should correspond to the parent folders, and the "create-index.py" file in the outer-most folder should have the correct folder names at the VERY BOTTOM.
How do I rename a folder (or move a file) in Github’s web UI?
It isn’t possible to directly rename a folder in Github’s web UI, doing it using Git on your computer is the most foolproof way to do it. But there is a way (except for media files).
Go into the folder you want to rename and select a file such as “index.html” and enter the “edit” mode.
Go to the file name and backspace until you can edit the parent folder name as well. This will create a new folder with the new name.
You’ll have to do this to every file in the folder until they’re all in the new folder.
Unfortunately, you can’t do this with media files like png/jpg/etc, because entering the “edit” mode on a photo “breaks” it somehow, and bye-bye image :’) (Don’t worry if this happens, just don’t commit the change or roll it back in your history).
Optional Steps
Make deployment (semi-)Manual
You can play with cloudflare and github to make deployment of your site a manual step you have to trigger, instead of automatic with each commit (default setting). This is a safeguard in case you accidentally make a change or delete something from your github, it won't affect your website.
Deploy w/ Branches
You could do a semi-automatic deployment with a "Production" branch on your github that is separate from the branch you edit. This creates an extra step before anything is published on Cloudflare. A safeguard against accidental changes/deletion of sorts :)

Go to Settings > Build tab > Branch Control
Choose your Production Branch (MAIN or CLOUDFLARE) and enable (or disable) automatic deployments
If you choose MAIN, every change you commit to MAIN will be published to Pages
If you choose CLOUDFLARE, any changes you make to MAIN will not show up on your Pages site until you Pull from MAIN to CLOUDFLARE
To Pull changes from MAIN to CLOUDFLARE, go to your github repository
Above your files on the Left, you will see a toggle to choose which branch you are on.
Choose Cloudflare. There will be a message like "This branch is 7 commits ahead of, 2 commits behind main." Click "2 commits behind"
Click "Create a Pull Request". Then click "Merge Pull Request". If everything is correct, this should trigger a build on your Cloudflare
Deploy w/ Github Actions
Or you can create a manual command that you have to enter on github to trigger a deployment on cloudflare. If you're paranoid about anything happening to your site due to a mishap on the Github side, this is a safe choice. Unless you manually trigger the command, your Pages site will be completely untouched no matter if something happens to your repo.
This can be done in many ways, I think the most straightforward is with Deploy Hooks (maybe in conjunction with Actions if you want to make it mobile-friendly), and might be a bit complicated, but not too hard to figure out with some Google-fu.
Here’s some links I think will be useful (note: I don’t use this method, so these haven’t been tested)
Manual trigger action tutorial
How to configure Github webooks
Storing Locally instead of on Github
Although this guide is written with Cloudflare's Github integration in mind, particularly for easy online/mobile access, you can also keep your files locally on your PC and directly upload your assets onto your Pages project. This gives you full control over what happens to your files. (Keeping backups is a good idea. You can still use Github Desktop to do this, just keep your repository on your PC.)
Simply clone/download the repository as it is, customize it as you like, and create a NEW Pages project on Cloudflare, using "Direct Upload" to upload your files
Once you have connected a Pages project with Github, there is no way to change the deployment method to Direct Upload or vice versa. Direct Upload is also not available for Workers.
One thing that will NOT work the same is the "create-index" Action that only works on Github.
I have made a "create-index.exe" that will execute the "create-index.py" files in the exact same way as they would work with the Action. You do not have to install python for this to work (if I did everything right). Simply run "create-index.exe" whenever you make a change and want to update the "index.html" files
Remember, this is EXACTLY THE SAME as the "create-index" Action, meaning you have to edit each "index.py" file when you rename folders, add a folder, want to exclude a file from the Index page, etc. (See Adding/Renaming Folders for how to do this)
Find me on Bluesky. Or if you have a problem, open an Issue on this project :)
I'll try to answer your questions as best I can! But really, I am the most amateur of amateurs and figured this all out using Google, so I might not be of much help ^^;
I also recommend Squidge Images (an offshoot of Squidge.org) as a fairly trustworthy alternative. However, Squidge Images does have some additional rules that Squidge does not, and what crosses the line is at their discretion.
I also posted this over on AO3!
5 notes
·
View notes
Text

Edited the masterpost image to be a title image for when I eventually figure out how to get images on a03
Edit: ima start moving stuff now :DD
I am so flippin new to this site so if anyone has 2 cents on how to make this look better or be categorized better or anything, Help me XD
#rune factory 5#rune factory#rf5#aashi doodles#some tutorials are telling me i need to have the link from a hosting site rather internal from my computer so gonna see if tumblr works#ill figure this out soon i think#edit: holy shit it worked!#good thing i have this masterpost oh my god this is gonna be a game of dancing around to get stuff on there :OOO
18 notes
·
View notes
Text
helping my dad make a personal website for his work and suddenly im researching how to get into web development
#im getting so pissed off that i dont know anything so im going to teach myself damnit#like it frustrates me to just blindly follow along a ‘how to hook up wordpress to a host site tutorial’#I WANT TO KNOW WHY IM DOING THIS 😭#rambling
3 notes
·
View notes
Text
#Minecraft mods#Minecraft resource packs#Minecraft shaders#Minecraft texture packs#Minecraft maps#Minecraft guides#Minecraft skins#Minecraft server hosting#Minecraft updates#Minecraft download#Minecraft mods for 1.21#Minecraft tutorial#Minecraft crafting recipes#Minecraft survival tips#Minecraft adventure maps#Minecraft cheats#Minecraft builds#Minecraft challenges#Minecraft multiplayer#Minecraft PvP servers#Minecraft mods installation#Minecraft free mods#Minecraft server setups#Minecraft news#Minecraft gameplay#Minecraft tools#Minecraft crafting guide#Minecraft block designs#Minecraft building ideas#Minecraft world generation
2 notes
·
View notes
Note
tahir
tahir ⇢ what part of writing do you want to get better at?
To be honest, all of it! Especially, I think, not getting embarrassed at my own writing. I feel like I just need to start learning how to take a more objective view, instead of trying to refine, refine, and refine.
Another thing I would like to work on is my atmosphere! I hope to add more atmospherism into my writing, as some of my favorite authors do (a great example being @anya-dev and @manonamora-if, especially their game DOLOS)!
#not if related#ask aalaa!#lovely anon <3#no but seriously manon is so impressive#she literally cranks out SO many games throughout the year#not to mention guides#tutorials#and many other coding resources#as well as hosts game jams#shes so cool!!#AND she does all that without once dropping the level of coding#production#and writing#we've come to know and love from her!#and what am I gonna say about scout...#that game#along with a tale of crowns#as well as ascendance#got me to make thrill seeker#!!
13 notes
·
View notes
Text
5 Common WordPress Hosting Issues And How to Fix Them
Having a WordPress website is a fantastic way to share your passions and ideas or run a business online. WordPress is easy to use, beginner-friendly, and allows you complete control over its core software, plugins, themes, etc. But sometimes, technical difficulties can arise, leaving you frustrated and unsure how to fix them. This beginner-friendly guide will equip you with the knowledge to…
2 notes
·
View notes
Note
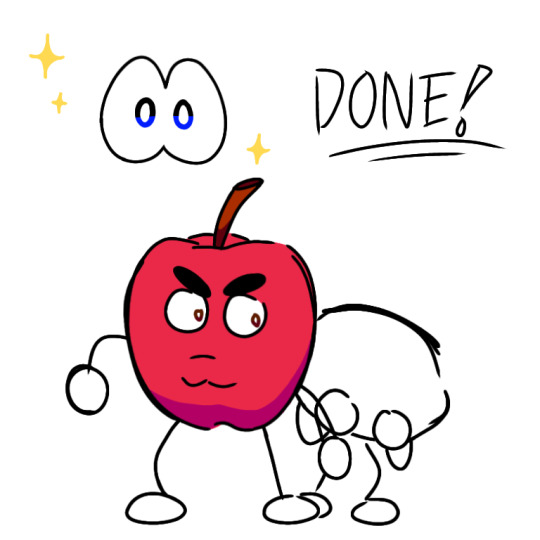
hai again!!
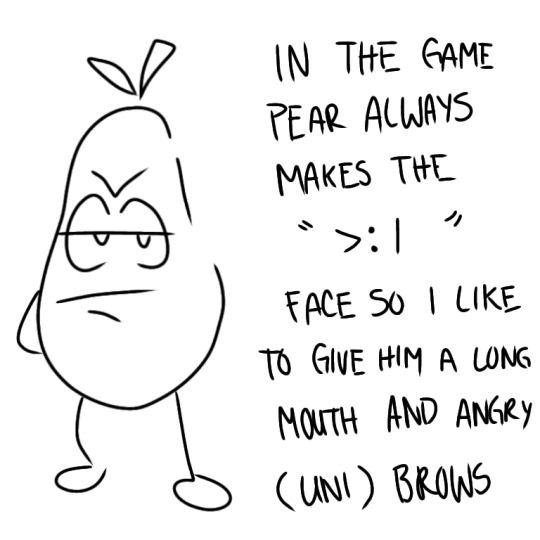
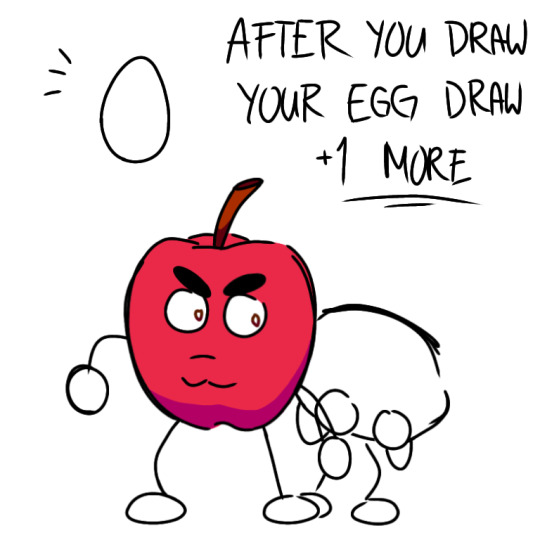
im learning how to draw pear, is there any tips that u can show me on to draw pear and the rest of the swbg characters in the game??
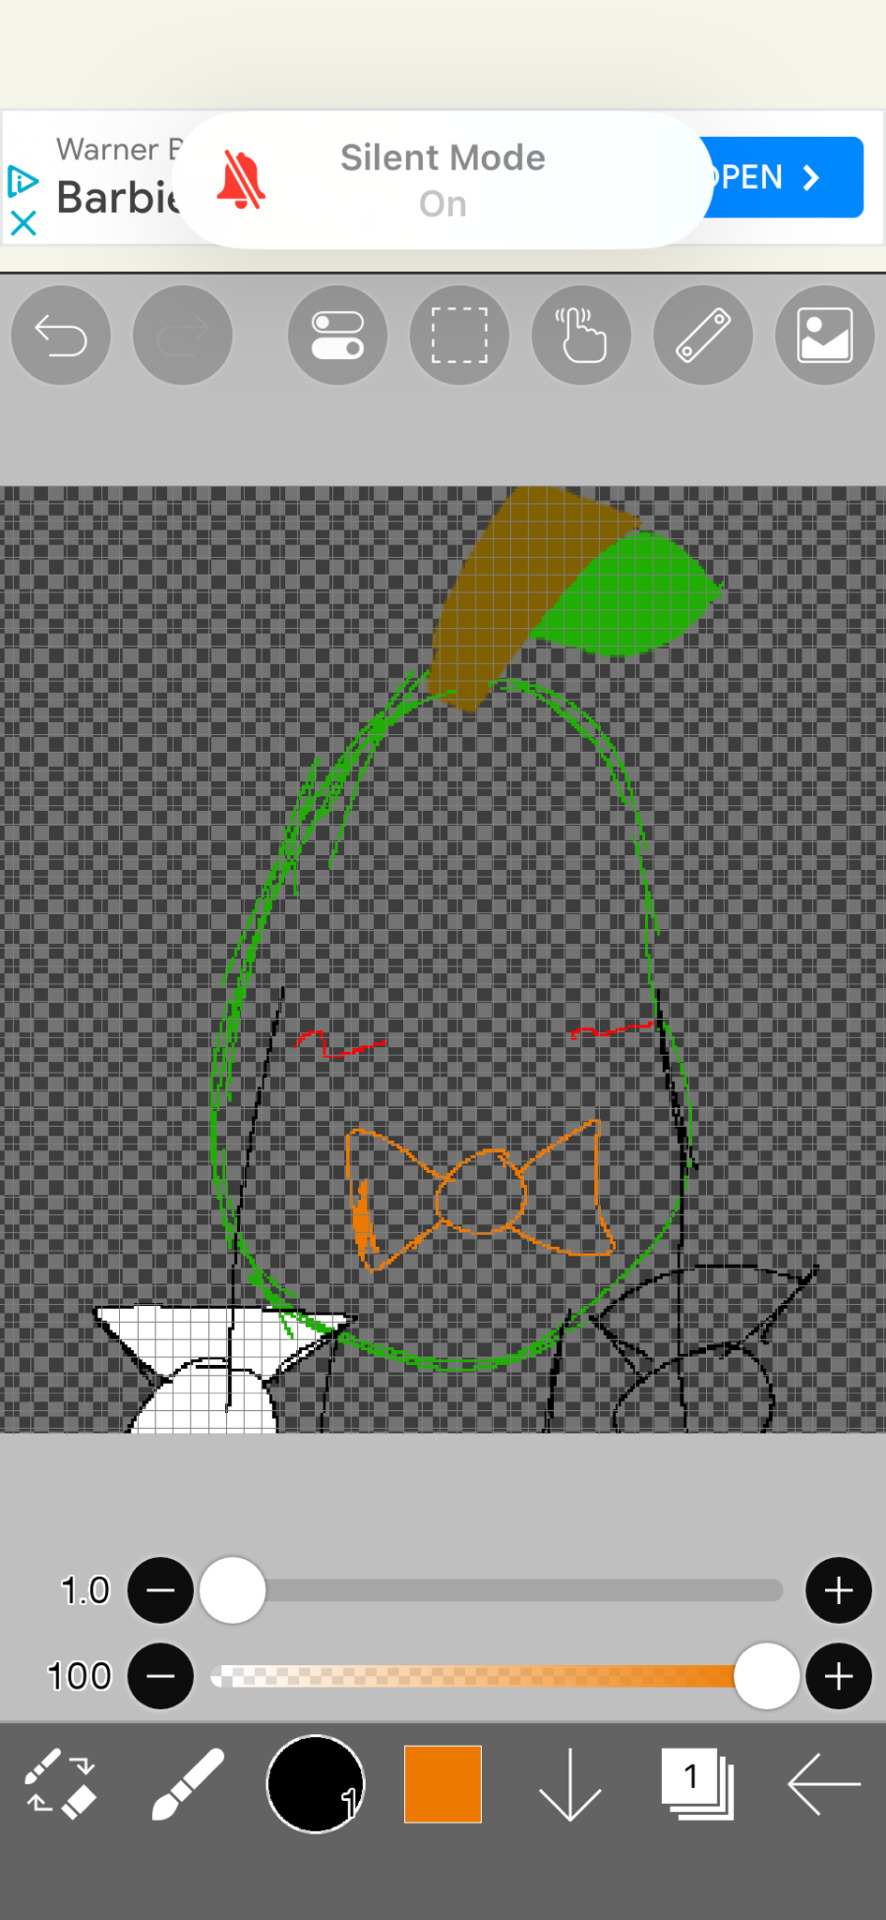
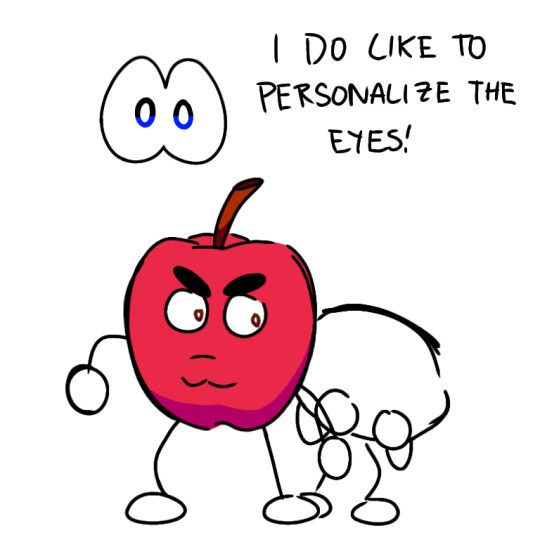
To be honest that was really it! Everything else just really depends on art style! But I can show you what the neutral expression I give him is!

That's all! Hope I helped even a little bit!!
Also!
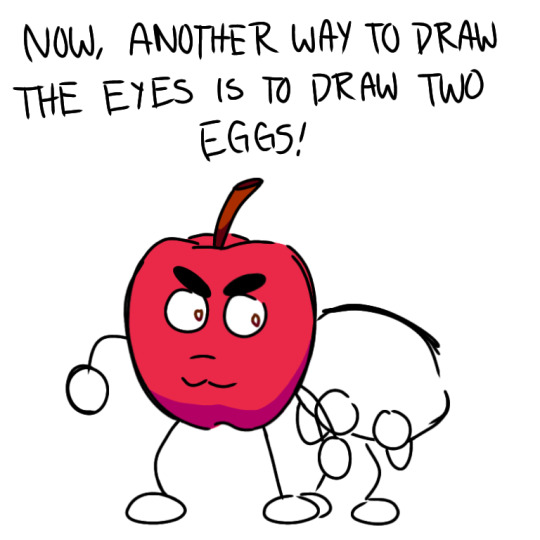
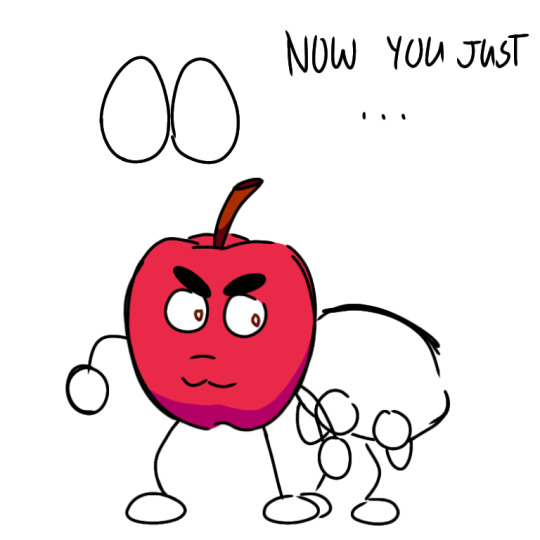
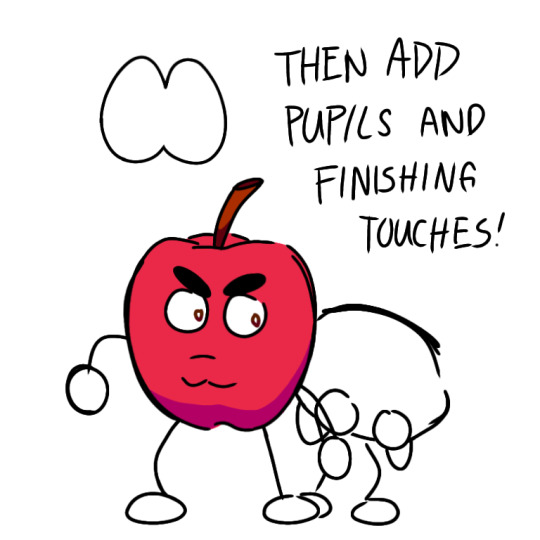
If you're still having trouble with the eyes ( since I didn't really focus on the eyes on the first tutorial ) Here's another way to draw them! ( Unless you don't need it then u can skip the bit below this :) )
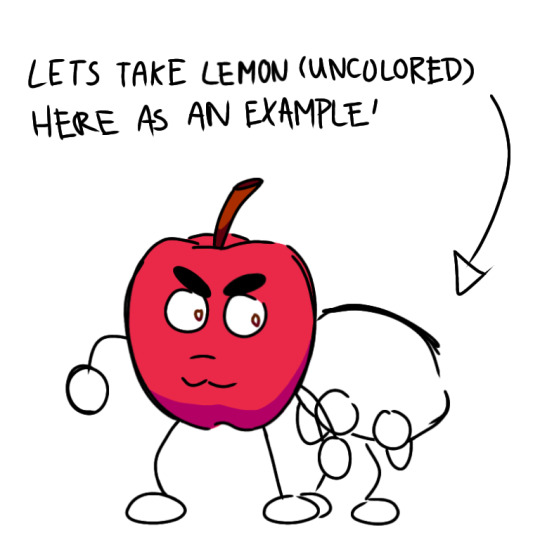
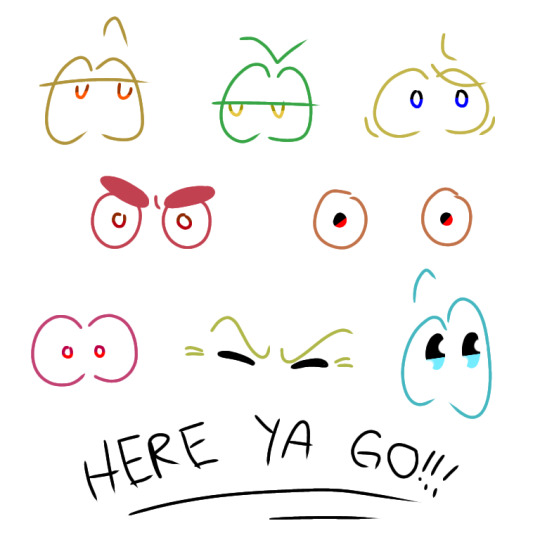
Dancing Banana - Pear - Lemon - Apple - Orange - Cherry - Cantaloupe - Boardy ( Left to right )
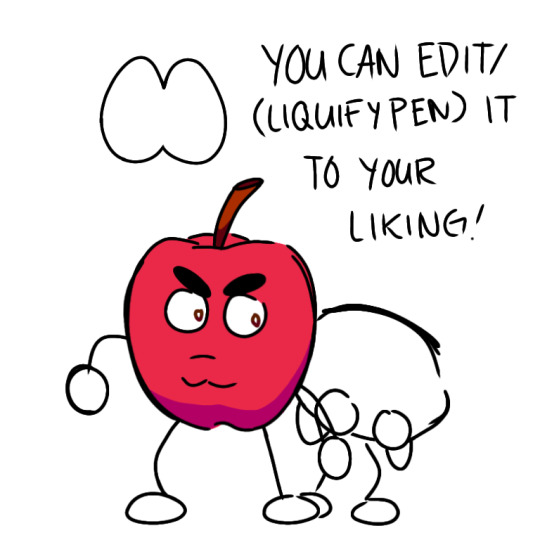
( You can use the liquify/special pen to change and stretch the shape of the egg eyes )

Sadly didn't included Broccoli since them eyes are hidden :(( Maybe next time Broccoli!
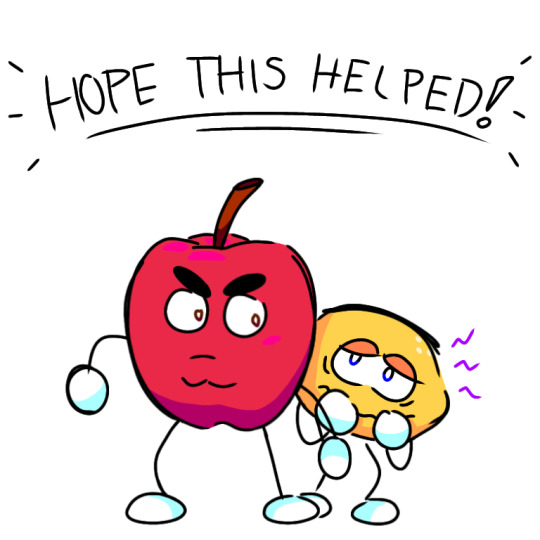
Anyways hoped you got to learn something here! Enjoy drawing the sbwg characters ( they're so fun to sketch! :DD )
#tutorial#swbg#swbg dancing banana#swbg banana#swbg pear#roblox#shovelware's brain game pear#shovelware#shovelware brain game#shovelware’s brain game#shovelware brain game host#shovelwares brain game lemon#shovelwares brain game art#shovelwares brain game pear#shovelwares brain game#shovelwares brain game apple#answered asks#ask#my art
6 notes
·
View notes
Text
How to Migrate WordPress to GCP Server Using WordOps and EasyEngine
Migrating a WordPress site to Google Cloud Platform (GCP) offers numerous benefits including improved performance, scalability, and reliability. In this comprehensive guide, I’ll walk you through on how to migrate WordPress to GCP using WordOps and EasyEngine, with special attention to sites created with the --wpredis flag. This guide works whether you’re migrating from a traditional hosting…
#cloud hosting#Database migration#EasyEngine#EasyEngine to WordOps#GCP#Google Cloud Platform#How to#rsync#Server migration#Server-to-server WordPress#site migration#Site migration guide#SSH key setup#SSL certificate setup#WordOps#WordOps configuration#WordPress database export#WordPress hosting#WordPress hosting migration#WordPress migration#WordPress Redis#WordPress server transfer#WordPress site transfer#WP migration tutorial#WP-CLI#wp-config
0 notes
Video
youtube
Terraform on Azure - Create Bastion Service and Host | Infrastructure as...
#youtube#Learn how to deploy secure Azure Bastion Host and Bastion Service using Terraform (Infrastructure as Code)! In this step-by-step tutorial we
0 notes