#smooth software transition
Explore tagged Tumblr posts
Visit Tumblr Blog
Explore Tumblr blogs with no restrictions, modern design and the best experience.
Last Seen Tumblr Blogs


Fun Fact
The average Tumblr user visits about 67 pages every month.
Text
Integrating New Software: Tips for a Smooth Transition
Introduction
In today’s fast-paced technological landscape, businesses often find themselves integrating new software to stay competitive and efficient. However, the process can be daunting, fraught with potential disruptions and challenges. At TechtoIO, we understand the importance of a smooth transition when implementing new software. This guide provides essential tips to help you integrate new software seamlessly, minimizing downtime and maximizing productivity. Read to Continue
#addressing software resistance#business software implementation#continuous software improvement#data migration tools#effective software rollout#ensuring data integrity#Integrating new software#minimizing downtime in software integration#new software adoption#performance metrics for software integration#post-implementation software review#selecting new business software#smooth software transition#software compatibility considerations#software implementation roadmap#software integration tips#software migration strategies#software vendor selection#successful software integration#training for software integration#software solutions
1 note
·
View note
Text

It is very warm outside rn
#he gets to cool off. he deserves it#mod snuuy#omori#daily basil#art#drawing#omori basil#digital#basil#basil omori#first time i edit an ms paint drawing with my normal drawing software... mostly for the blur#i literally just added blur and smoothed out the color transitions in the hair with an airbrush i am SO happy with how this looks
195 notes
·
View notes
Text

Sunrise to Sunset on the Martian Mimetolith
Scattered mesas, such as this one, are common in the Cydonia region, where the heavily cratered Southern highlands of Mars transition into the smooth Northern lowlands. Many midlatitude locations like this have also experienced glacial activity, which probably reduced the size of this mesa and created the stubby valleys around its highest level. Patches of smooth material (especially on its east- and north-facing sides) are likely to be remnants of dusty water ice.
This particular mesa acquired a certain notoriety when an image was captured by the Viking 1 orbiter on 25 July 1976. The shadows cast across the feature created a pareidolic perception of a human face. This feature became one of the most famous examples of a “mimetolith,” a pattern created by rocks that may come to mimic recognizable forms through the random processes of formation, weathering and erosion.
A stereo pair of this feature taken by HiRISE was turned into a digital terrain model. HiRISE DTMs are made from two images of the same area on the ground, taken from different angles, on different orbits. HiRISE DTMs provide valuable data, not only for researchers, but also for visualizing the terrain.
For example, with the DTM we can recreate the shadows on the day of the original 1976 Viking image. By modeling the sun angle as it would have appeared on 25 July 1976 throughout the day, the features of the mimetolith only take shape when the lighting is lowest just before sunset. This video and color perspective views were created by our team using the DTM data input into open source visualization software. Visualizations such as these provide an accurate view of what could be seen by a ground-based or aerial explorer.
ID: ESP_080970_2210 date: 4 November 2023 altitude: 299 km
NASA/JPL-Caltech/University of Arizona
58 notes
·
View notes
Text

My SAI 1 got all buggy and my tablet couldn't recognize the software and refused to work :') So after attempting to fix it and failed multiple times... I was forced to upgrade to SAI 2. I thought it would be a smooth transition but I was very wrong lol I tried to transfer my most used brushes but it didn't transfer properly. I ended up looking up a bunch of other brushes in hopes of finding one close enough to what I used. It's been a journey. For now this is as close as I could get to my coloring style. Honestly I'm not thrilled with the results but it's a step in a new direction! |Instagram| |Cara| |Blue Sky| |TikTok|
#my art#genshin impact#razor#genshin razor#i almost cried from the frustration#as silly as that may sound#it's hard to readjust#i sometimes hope that SAI 1 miraculously would start working normally again
12 notes
·
View notes
Note
hello! i've been watching sfth edits all day (including yours! big fan!), and i just wanted to ask what your editing process is like? what program do you use, how long do they usually take, how do you get all the footage, etc? i really want to try making edits, but it's all new to me and i don't really know where to start
Hello!! That’s definitely a great way to spend the day :D (and thank you <3)
I’ve only been editing for a year so I’m honestly still learning, too :)
I don’t really know how I do it, I generally only edit when ideas actually come to me otherwise I won’t be motivated enough to finish it. Most of the time it’s just hearing a song and going “that’s exactly like this character/ship/moment” and then I put them together. Making them can take anywhere from an hour or two to a week, depends on how motivated I am. (A week from beginning to end- not of actually doing it)
I’m making an edit now so I’m gonna basically just say what I’m doing :) this will be long and I’m sorry if I’m bad at explaining things 😅
Find song and get the audio


I save tiktoks with potentially good audios into a folder and used one of those today. I also just use songs I know or hear. I generally go to youtube and screen record it, then I can “upload audio from video” when editing.
2. Screen record clips and then upload them to the editing software of your choice.
I use inshot but have also used capcut, recommend inshot more. (Only used the free versions, which is the reason I don’t use capcut- the free version is very limited in my opinion and I’ve found inshot to be better in this aspect)
(I edit on my phone, this “tutorial” is in the context of using inshot on a phone :))


I choose moments that I find fit with the lyrics. Usually I kinda see the moments in my mind?? when I listen to the song and am thinking of how the edit will go, so I then find those moments in the video.
3. Add the audio and mute the clips
(I generally mute the actual clips, sometimes I play with having lines of the dialogue in the edit, but for starting to edit I’d say it’s simpler to mute the clip audio and focus on the music)


The “extract audio from video” will allow you to import to screen recording of the song.
you’ll probably want to also cut the audio, you do this with the “split” tool when you have the audio open (so click on the lil “audio” button) you can also fade in or out the audio with the “edit” tool (the pencil)

Dragging whatever you have open (like the image or the audio or the captions) will let you put that little white line on wherever you want to make a cut.
4. Cut the clips to fit the audio and adjust them where needed. You can also change the aspect ratio of the edit to be whatever, I like to make it 1:1 (square)

You can see here that I split the clip using the “split” tool, then deleted the part I didn’t want (marked with the star) by clicking on it and then pressing the “delete” button.


Above is how to make it cropped 1:1 or cropped to be whatever aspect ratio you want. You can also do this manually (which I did for AGES before realising this was possible and way easier.)
5. Add text, filters, overlays, text ect.


Have a play around and try to make it look good, is my honest advice. I don’t really have my rhyme or reason for what I do with filters/adjustments, just try and make it look harmonious.
You can use the “duplicate” tool for text to keep any changes you make to it (like colour and size) consistent.
6. Adding transitions
I don’t actually do this all the time because I kinda like how it looks without any transitions. I’m not going to do it for this edit, but if I were to do it, I’d probably use the “animation” tool. You can also click on the white square with the “\”symbol to add a transition, but that can mess up with the timing of your clips because it merges them.


7. Make it all clean and smooth
You’ll probably have to do this a lot, at least I do. Just pretty much watching it over and over looking out for any jumps or bits that don’t look right and then lining them up.
In inshot, you can drag the thing you’re working on to line up with another aspect and it should “snap” into place which is a very handy feature.
8. Export
I usually end up exporting an edit at least four times because I’ll watch the final product and go “oh that looks bad” so I just kinda keep going until I’m happy with it. Inshot allows you to remove the watermark by watching ads, which I do. I then export it in 4K (because who needs storage right?) and voilà :)
Hopefully this is a helpful guide for you, anon!
#I’m not the best at explaining things but hopefully this is good#Editing#editing tutorial#inshot#sfth edits#emu edits#thank you for the ask!#I tried to format the images to be neater but tumblr wasn’t having it
15 notes
·
View notes
Text
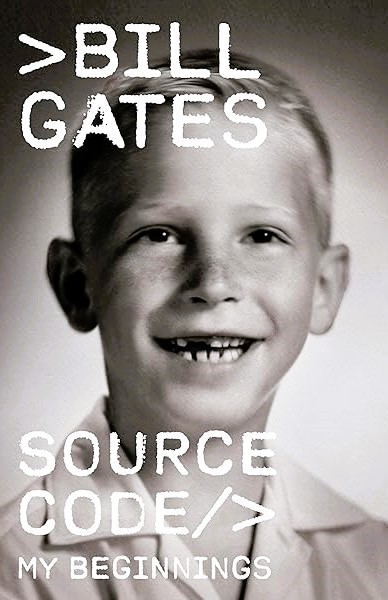
Source Code: My Beginnings by Bill Gates
In contrast to the current crop of swaggering tech bros, the Microsoft founder comes across as wry and self-deprecating in this memoir of starting out
Bill Gates is the John McEnroe of the tech world: once a snotty brat whom everyone loved to hate, now grown up into a beloved elder statesman. Former rivals, most notably Apple’s Steve Jobs, have since departed this dimension, while the Gates Foundation, focusing on unsexy but important technologies such as malaria nets, was doing “effective altruism” long before that became a fashionable term among philosophically minded tech bros. Time, then, to look back. In the first of what the author threatens will be a trilogy of memoirs, Gates recounts the first two decades of his life, from his birth in 1955 to the founding of Microsoft and its agreement to supply a version of the Basic programming language to Apple Computer in 1977.
He grows up in a pleasant suburb of Seattle with a lawyer father and a schoolteacher mother. His intellectual development is keyed to an origin scene in which he is fascinated by his grandmother’s skill at card games around the family dining table. The eight-year-old Gates realises that gin rummy and sevens are systems of dynamic data that the player can learn to manipulate.
As he tells it, Gates was a rather disruptive schoolchild, always playing the smart alec and not wanting to try too hard, until he first learned to use a computer terminal under the guidance of an influential maths teacher named Bill Dougall. (I wanted to learn more about this man than Gates supplies in a still extraordinary thumbnail sketch: “He had been a World War II Navy pilot and worked as an aeronautical engineer at Boeing. Somewhere along the way he earned a degree in French Literature from the Sorbonne in Paris on top of graduate degrees in engineering and education.”) Ah, the computer terminal. It is 1968, so the school terminal communicates with a mainframe elsewhere. Soon enough, the 13-year-old Gates has taught it to play noughts and crosses. He is hooked. He befriends another pupil, Paul Allen – who will later introduce him to alcohol and LSD – and together they pore over programming manuals deep into the night. Gates plans a vast simulation war game, but he and his friends get their first taste of writing actually useful software when they are asked to automate class scheduling after their school merges with another. Success with this leads the children, now calling themselves the Lakeside Programming Group, to write a payroll program for local businesses, and later to create software for traffic engineers.
There follows a smooth transition to Harvard, where in the ferment of anti-war campus protests our hero is more interested in the arrival, one day in 1969, of a PDP-10 computer. Gates takes classes in maths but also chemistry and the Greek classics. Realising he doesn’t have it in him to become a pure mathematician, he goes all-in on computers once a new home machine, the Altair, is announced. He and Paul Allen will write its Basic, having decided to call themselves “Micro-Soft”.
The early home computer scene, Gates notes, was a countercultural, hippy thing: cheap computers “represented a triumph of the masses against the monolithic corporations and establishment forces that controlled access to computing”, and so software was widely “shared”, or copied among people for free. It was Gates himself who, notoriously, pushed back against this culture when he found out most users of his Basic weren’t paying for it. By “stealing software”, he wrote in an open letter in 1976, “you prevent good software from being written. Who can afford to do professional work for nothing?” This rubbed a lot of people up the wrong way and still does, at least in the more militant parts of the “open-source” world. But he had a point. And that, readers, is why your Office 365 account just renewed for another year. Fans of Word and Excel, though, will have to wait for subsequent volumes of Gates’s recollections, as will those who want more about his later battles with Apple, though Steve Jobs does get an amusing walk-on part. (Micro-Soft’s general manager keeps a notebook of sales calls, on one page of which we read: “11.15 Steve Jobs calls. Was very rude.”). This volume, still, is more than just a geek’s inventory of early achievements. There is a genuine gratitude for influential mentors, and a wry mood of self-deprecation throughout. Gates gleefully records his first preschool report: “He seemed determined to impress us with his complete lack of concern for any phase of school life.” Later, he explains how he acquired a sudden interest in theatre classes. “Admittedly the main draw for me was the higher percentage of girls in drama. And since the main activity in the class was to read lines to each other, the odds were very good that I’d actually talk to one.” Strikingly, unlike most “self-made” billionaires, Gates emphasises the “unearned privilege” of his upbringing and the peculiar circumstances – “mostly out of my control” – that enabled his career. Adorably, he even admits to still having panic dreams about his university exams. The book’s most touching pages recount how one of his closest friends and colleagues in the programming group, Kent Evans, died in a mountaineering accident when he was 17. “Throughout my life, I have tended to deal with loss by avoiding it,” Gates writes. He says later that if he were growing up today, he would probably be identified as “on the autism spectrum”, and now regrets some of his early behaviour, though “I wouldn’t change the brain I was given for anything”. There is a sense of the writer, older and wiser, trying to redeem the past through understanding it better, a thing that no one has yet seen Elon Musk or Mark Zuckerberg attempt in public. That alone makes Bill Gates a more human tech titan than most of his rivals, past and present.
Daily inspiration. Discover more photos at Just for Books…?
7 notes
·
View notes
Note
How do you do your model capture for twitch?
I use a Logitech C930e webcam (not the most ideal option but it is a good affordable one) and VSeeFace (there's a lot of 3D Vtubing software out there that gives a loooot more options for Gimmicks n shit but honestly I don't feel like learning how they work sahfghafj) and a Leap Motion hand tracker for my hands (I tried using a Leap Motion 2, it was Actively Worse)
One little thing I wanna say while we're on the topic, regardless of your Vtuber software, if you feel your mouth tracking doesn't look right, try turning down mouth sync smoothing (or whatever similar name it has in the program in question.) Mouth sync smoothing means the mouth will take longer to transition between the sounds you make, meaning it can't keep up with normal talking speed and doesn't actually mimic your mouth properly.
29 notes
·
View notes
Text
Top Pro Audio Gear Every American DJ Needs This Summer
There’s something electric about summer—the festivals, rooftop parties, beachside gigs, and late-night warehouse sets. For DJs across the U.S., it’s not just the time to perform; it’s the time to shine. And let’s be honest, the right gear can make all the difference between a forgettable set and an unforgettable experience.
Whether you're spinning in a Miami club or throwing down in the desert, having the right pro audio gear is a must. But with so many options out there, it can get a little overwhelming. That’s why we’re breaking down what every DJ should consider adding to their setup this summer. Think of this as your seasonal checklist, designed to help you stay ahead, sound amazing, and look like a total pro.

Reliable Speakers That Can Handle the Heat
Summer DJing often means unpredictable environments—outdoors, hot venues, sudden rain. So, the first thing to lock down? Your speakers. Look for portable speakers with solid output and clarity across the lows, mids, and highs. More importantly, make sure they're built to withstand a little weather and movement. Portability and power should go hand in hand. You don’t want to compromise on sound just because your gig is under the sun or away from a wall outlet.
A Mixer That Offers More Than Just Volume Control
Let’s talk about mixers. They’re the command center of your performance. In summer gigs where crowd energy fluctuates fast, having a responsive mixer with smooth EQ controls, customizable filters, and dual mic inputs can save your set. Consider mixers that allow easy transitions, effects integration, and can sync effortlessly with your playback devices. You want something that feels intuitive under your fingers, especially in the heat of the moment.
DJ Controllers That Are Built for Versatility
If you’re performing at different types of venues—from backyards to big stages—you’ll need a DJ controller that adapts with you. Look for ones that are lightweight but not cheaply built, and ones that support both standalone use and software control. USB compatibility, onboard displays, touch-sensitive jog wheels, and customizable pads are a huge plus. In short, flexibility is key. A good controller helps you stay confident no matter the vibe of the venue.
High-Quality Headphones for Crisp Cueing
When you're cueing your next track, every detail matters. You need headphones that offer isolation, clarity, and comfort. Over-ear, closed-back headphones are ideal, especially in noisy summer environments. Durability is also critical—headphones get tossed into bags, wrapped in cords, and worn for hours on end. Prioritize models with swiveling earcups and adjustable bands so they fit your style of monitoring.

A Dependable Microphone for Crowd Engagement
Even if you’re not the talkative type, having a microphone on hand is always smart. Whether it’s for hyping up the crowd or making quick announcements, a clean, interference-free mic can add energy and professionalism to your set. Wireless models give you freedom to move, but make sure you test for signal reliability—especially outdoors, where interference can be tricky.
Lighting and Effects to Match Your Sound
This one’s a game-changer: lighting. Visuals are half the experience, and adding even a simple lighting setup can take your set from good to great. Consider compact LED lights, strobes, or fog machines that you can sync with your music. These can be especially impactful during sunset sets or late-night events, adding a professional edge to your vibe.
Sturdy Stands and Protective Cases
Summer gigs can be rough on your gear. That’s why investing in heavy-duty stands and padded cases is a no-brainer. Speaker stands should be height-adjustable and stable on uneven surfaces. DJ controller and mixer cases with foam interiors will keep your equipment safe from accidental drops or even just the occasional spilled drink. They may not be flashy, but they’re the unsung heroes of every setup.
Power Management Tools You Can Rely On
Nothing kills a party like a power outage. That’s why having proper surge protectors, power conditioners, and extension cords in your setup is essential. You might be playing on a beach, at a park, or in a venue with old wiring—plan ahead. Bring gear that distributes power safely and gives you peace of mind during those peak-hour drops.
Cables and Backups – Don’t Overlook the Basics
One of the most underrated parts of your gear is also the easiest to mess up: your cables. Always bring extras—power cables, RCA, XLR, USB, and whatever else your gear needs. Color-coding them can help you set up faster and troubleshoot on the fly. Summer humidity and outdoor dust can mess with connections, so having fresh spares is always smart.
Portable Recording Options for Your Set
Recording your set is a smart move. It’s not just about content creation it’s about improvement. A good portable recorder lets you capture your performance in high quality so you can review what worked, what didn’t, and build a portfolio of your sound. Many devices plug directly into your mixer or offer dual-channel recording for crowd and music capture.
Bonus Thought: Where You Buy Matters
While it's tempting to shop based on price alone, investing in gear from a professional audio shop offers peace of mind. You get access to knowledgeable staff, genuine warranties, proper testing, and the kind of customer support that’s worth every penny—especially when your next gig is just around the corner.
DJing in the summer is a unique experience. From packed festivals to impromptu block parties, every event is a chance to make your mark. And having the right gear—gear you trust—can make that happen. Take the time to build a setup that works for you, one piece at a time. Stay cool, stay prepared, and most importantly—keep the crowd dancing.
Because at the end of the day, it’s not just about playing music. It’s about creating moments. And the right pro audio setup is your ticket to doing just that.
#audio#audio gear#music#dj#professional audio#audio shop in brooklyn#brooklyn#dj gears#summer party#pro audio gears
2 notes
·
View notes
Text

In the early 1980s, personal computers were transitioning from text-based interfaces to more visually engaging environments. Sierra On-Line’s King’s Quest: Quest for the Crown, developed in 1984 for the IBM PCjr, was a landmark achievement in this evolution. It was not just another adventure game; it redefined the genre by leveraging the limited hardware capabilities of the time to create an immersive, interactive experience that felt years ahead of its contemporaries. Technical Innovations in King's Quest
1. The Birth of a 3D Adventure Game
At a time when most games were either text-based or limited to simple 2D visuals, King’s Quest introduced a pseudo-3D graphical environment. Players could guide the protagonist, Sir Graham, through a dynamic, scrolling landscape, where he could walk behind or in front of objects—an innovation known as "2.5D."
Pseudo-3D Effect: Achieved through creative use of layers, the AGI (Adventure Game Interpreter) engine divided the screen into foreground, background, and player layers. This gave the illusion of depth and interactivity.
Character Movement: The freedom to move in eight directions and interact with objects in a visually convincing space set a new standard for adventure games.
2. Adventure Game Interpreter (AGI) Engine
Sierra developed the AGI engine specifically for King’s Quest. This software framework was groundbreaking for its time, allowing:
Cross-Platform Compatibility: AGI was portable across different systems, from the IBM PCjr to later platforms like the Apple II and Tandy 1000.
Event-Driven Programming: AGI allowed designers to script events and interactions, decoupling game logic from graphical rendering—a novel approach in the early 80s.
3. Advanced Graphics for the IBM PCjr
The IBM PCjr was an ambitious but underpowered machine, featuring:
Intel 8088 Processor (4.77 MHz): A modest CPU that could struggle with heavy computations.
16-Color Graphics (CGA Palette): While most PCs supported only four colors in CGA mode, the PCjr's extended graphics capabilities allowed for richer visuals.
3-Voice Sound (TI SN76496 Chip): This was a significant improvement over the beeps of the PC speaker, enabling a more immersive auditory experience.
King’s Quest took full advantage of these features:
Rich Color Palette: By designing scenes with careful attention to the 16-color limit, Sierra created lush, vibrant environments that brought the fairytale world to life.
Smooth Animation: Despite hardware limitations, the game’s character animations and environment transitions were fluid and detailed.
4. Text Parser and Command System
While maintaining the classic adventure game tradition of text input, King’s Quest improved upon the interface:
Contextual Parsing: The text parser was more forgiving and sophisticated than previous games, interpreting a wider range of player inputs like "Take sword" or "Open door."
Visual Feedback: Unlike purely text-based games, the parser’s output was directly reflected in the graphical world, making the player’s actions feel meaningful and connected.
5. Disk Streaming and Memory Optimization
Given the IBM PCjr's limited 128 KB of RAM and floppy disk storage, Sierra engineers implemented innovative solutions to manage resources:
Dynamic Asset Loading: Only the necessary graphics, animations, and logic were loaded into memory at a time, minimizing RAM usage.
Compression Techniques: Graphics and animations were heavily compressed to fit on the game’s floppy disks, requiring clever algorithms to decompress assets on-the-fly.
The Impact of King’s Quest
The technical achievements of King’s Quest went beyond its hardware. It had a profound impact on the gaming industry and paved the way for future innovations.
Pushing Hardware to Its Limits: By making the most of the IBM PCjr’s unique capabilities, King’s Quest demonstrated what was possible with even modest computing power.
Setting a Standard for Interactive Storytelling: The game’s rich narrative, combined with its visuals and player agency, set the benchmark for future adventure games.
Expanding the Gaming Audience: The colorful, family-friendly design attracted a broader audience, including casual gamers and younger players.
Influencing Game Design: The AGI engine became the foundation for future Sierra titles, including Space Quest, Police Quest, and Leisure Suit Larry.
#IBM#IBM PCjr#PCjr#Sierra On-line#Sierra Online#On-line Systems#King's Quest#KQ 1#Impact#Pixel Crisis
4 notes
·
View notes
Text
Day 1
Kolkata
Expect The Unexpected 🙌🏻
The Story of My Six-Year Old Phone and An Unexpected iPhone ❤️🙌🏻 The Lesson of Letting Go…
The universe has a funny way of reminding you who’s really in charge. You think you’ve got things under control, that you can stretch your old clothes, devices, your habits, your ways of thinking just a little longer - until reality decides otherwise. That’s how I found myself standing in a blindingly bright Apple Store, gripping an iPhone box like it was some foreign artifact, all because my six-year-old Samsung finally tapped out.
My phone, the battle-scarred veteran of my digital life, decided it’s done right after my first ever Thailand solo trip…Not a dramatic explosion, not even a satisfying, smoke-filled death - just a slow, pitiful descent into unresponsiveness. You jab at the screen. Nothing. You restart it for the hundredth time. Black screen. You curse, shake it, hold it up to the light like some ancient artifact, but it doesn’t care. It’s gone…
For six years, my old Samsung held the line—scratched, bruised, stubborn, but loyal. It had survived accidental drops, countless software updates, and the occasional splash of coffee. It was slow, sure…It lagged at the worst moments. But it was mine 😭🥲
And then, like all things in life, it gave up - quietly, unceremoniously, in the middle of a mundane Tuesday. No dramatic shutdown, no fiery explosion, just a black screen that refused to flicker back to life.
I had expected this moment, but not really. The thought lingered in the background like an unpaid bill - something I knew I’d have to deal with, but not today.
And yet, here I was, standing in a phone store, staring at the glowing Apple logo on a device that felt more like a spaceship than a phone. The iPhone. The enemy. The thing I swore I’d never own because I had convinced myself that brand loyalty was a hill worth dying on. But my hill had crumbled, and now I was standing on unfamiliar ground, holding a sleek, impossibly smooth device that felt like the future itself…
It is so funny how we resist change until it’s shoved in our face. I had spent years defending my Samsung, rolling my eyes at the “blue bubble supremacy” of iMessage users, mocking the “cult” of Apple enthusiasts. But now, as I slid my fingers across the impossibly responsive screen, I felt something I had not expected - relief.
The setup was seamless. The transition, effortless. My contacts, photos, even my music playlists - everything flowed into this new world as if I had been meant to be here all along. It was not just an upgrade, it was a shift in perspective.
Expectation is a tricky thing. We assume we know how things will play out. We think we have control over the narrative. But then, a six-year-old phone refuses to wake up, and suddenly, the world tilts.
In that moment, I realized how much of my frustration had come from clinging to the past. Was it just the phone I was holding onto, or was it something bigger? A refusal to admit that time had moved forward, that maybe, just maybe, I had been standing still?
I had expected to feel resistance. I had expected frustration, regret, the nagging feeling of betrayal. But what I got instead was a strange, almost disorienting sense of liberation. The unexpected had arrived, and instead of fighting it, I let it in.
And as I walked out of the store, my old, lifeless Samsung in one hand and my new iPhone in the other, I had to laugh. Because sometimes, the biggest surprises are not the ones that come crashing into our lives with fireworks and fanfare…
…Sometimes, they are the quiet moments of acceptance - when we realize that maybe, just maybe, change is not the enemy we thought it was! ❤️❤️❤️

4 notes
·
View notes
Text
HLVRAI B-Side rapid fire, let’s go! Some of this is similar information to an older post and some of it is new.
Character Information
The Player (Wicker) and Barney Benrey
Benrey’s player is a Twitch Streamer named Johnwicklover1994, but he informally goes by “Wicker” by his chat and people that collaborate with him. Wicker found out about a special Collector’s Edition of Half-Life after another Twitch streamer played through the OG Half-Life through this special edition.
Playing this Collector’s Edition of Half-Life suddenly blew up as a popular trend after the original stream. While Wicker is not much of a trend follower, he DOES enjoy games with janky NPC behaviors, and the AI seemed to fit the bill just fine.
All the Player Characters in the Collection are AI like their companions, but their existences as such is part of a much larger series of glitches that resulted in the collection never being released. The PC’s personalities are partially molded by the actions of their Player…Benrey is seemingly okay with this because Wicker is a very friendly player.
Upon finding out he can say pretty much anything and completely influence the game, Wicker started making it his goal to become best friends with ALL of the AI, even if it means tricking the game into thinking that soldier he found was a former best friend.
Wicker has never actually SEEN the original HLVR streams, he just knew the names of the character and put those names in when he was setting up the game. He wanted to see if the game would let him change Barney’s name, and it did. He was able to justify this change in-universe to Benrey being a jokester that frequently changes his name to see if any of the high-ups will notice.
For all intents and purposes, Benrey and Wicker are the same person when Wicker is in-character.
Background information (Under the cut)
B-Side takes place in a universe where HALF-LIFE VR is part of a Collector’s Edition of the OG game and all its original expansions that started development after Valve’s contributions to VR technology in 2013. The VR was intended to be an optional feature so that even players that didn’t have it could still enjoy the original games.
The AI was an additional feature created to bring more life to all players since some players wouldn’t be playing on VR anyways. The scope of the AI was never supposed to go as far as it did, but somehow the developers implemented self-learning technology.
The AI implementation ended up creating issues that could not be solved due to how the AI was learning, and the code was eventually rendered unusable as the game would frequently crash due to the AI attempting to pull resources from other games in the same way that GMod does for Source games.
The Collector’s Edition was supposed to utilize a custom engine that bridged Goldsource and Source engine.
The files for the Collector’s Edition were backed up and eventually leaked by an unknown individual. This individual would also encourage for an unofficial release of the collection, but in closed conversations would provide the condition that they were allowed to oversee development as an uncredited person. While it took a while for a group to accept the project due to this controversial condition, it was eventually accepted. The individual’s singular contribution was a line of code that seemed to prevent any form of hardware or software crash while the game was running, even with exploits that crashed the original games.
One of the game’s features included with the AI was smooth level transitioning that prevented any of the pausing or freezes associated with loading a new map.
Each game in the collection comes with a set of customizable companion AI that the player can pick and choose to have accompanying them when one starts a new game.
For OG Half-Life, the possible starters include one of each of the basic scientists and a security guard, however the data for the AI also includes the G-Man and a “rival” in the form of a randomly assigned soldier; also included is a “custom companion” slot whose default is a random image of a dog.
One of the custom backgrounds for AI is “alien imposter” and it is an understandably popular choice after a certain multiplayer game released. This background was meant to be locked out from player use in the final release as it was a background made specifically for the G-Man’s AI, but the devs of the unofficial release thought it was too funny to NOT keep accessible.
You are not supposed to be able to have the Rival and the G-Man as companion AI. Wicker’s game being fucked up is the only reason he was able to do that, but a similar achievement can be done by modifying the code.
The reason Wicker’s game is so weird is because he did some shoddy coding in an attempt to get the HUD from Blue Shift into the OG Half Life. For some reason, it is not possible to modify the colors themselves, so the next best thing he was able to do was fuck around with the files and trick the game into running the OG game’s maps in Blue Shift, allowing him to play Half Life as Barney.
There are explicit warnings in the READ ME file to not run any of the campaigns outside their original game due to the AI companion listings not all being compatible. Some games have more slots for AI companions than others, and the devs wanted to get a patch in that would pull the companion AI slots from one BIG pool instead multiple smaller pools on a by-game basis since the result of, say, running Half-Life through Blue Shift while requesting Blue-Shift exclusive AI might result in incredibly buggy companions.
#hlvrai#hlvrai au#hlvrai b side#hlvrai another swap au#half life but the ai is self aware#half life vr but the ai is self aware#totally wicked gamer [wicker]#benrey
11 notes
·
View notes
Text
What are the features of an open source platform?
Open Source Development

An open-source platform is a type of software that makes its source code available to everyone. Anyone can view, use, change, and share the code freely. With the rise of Open Source Development, more businesses and developers choose open-source platforms because of their flexibility, transparency, and community support. Let’s look at the key features that make open-source platforms so popular.
Free and Open Access -
One of the most best and dominant features of an open-source platform is that it’s freely available. While the users can download, install, and use their software and portals without paying for a license or any additional resources. This is considered as a significant benefit for the startups and developers with limited budgets and lower cash surplus.
Customizable and Flexible -
Open Source Development allows and grants the users to modify and develop their code to fit their specific needs. Whether it’s changing the interface, adding new features, or fixing bugs, open-source platforms give complete control to the user.
Community-Driven Support -
Open-source platforms usually have large communities of developers and users. These communities and joint groups share knowledge, fix issues, and improve overall responses for the software over time. Forums, documentation, and online discussions make it an easy process to get help and stay updated as the users or partners dive in for assistance.
Frequent Updates and Improvements -
With open-source projects, improvements come fast. Developers from around the world contribute updates, security patches, and new features regularly. This keeps the software current and efficient, driven by the power of Open Source Development.
Transparency and Security -
Because the code is open, anyone can inspect it for flaws or vulnerabilities. This level of transparency helps identify and fix security issues faster than with closed-source software. Users also know exactly what the software is doing behind the scenes.
No Vendor Lock-In -
Open-source development platforms allow the users to host, change, or move their software as needed. You’re not tied to one company or limited by their policies—giving you more flexibility and independence.
Open-source platforms offer powerful features like cost-effectiveness, customization, and strong community support. Thanks to Open Source Development, they continue to grow and evolve, helping users build better, more innovative solutions. Open Source Development encourages innovation, customization, and collaboration, while closed-source development offers more control and official support as this results in a better approach towards open source platforms.
Businesses can rely on open-source system partners and developers with companies and experts like Suma Soft, IBM, and Cyntexa for a hassle-free operational journey. These industry and professional experts ensure a smooth transition with custom solutions and advanced security measures with ongoing support, allowing the companies to maximize the benefits of modern digital infrastructure with the help of Open Source Platform.
2 notes
·
View notes
Text
Cross-Platform iGaming: The Key to Winning in a Multi-Device World 🎮💡
The iGaming industry is evolving fast, and seamless cross-platform integration is no longer optional—it’s a game-changer! With players switching between mobile, desktop, and consoles, ensuring a frictionless experience across all devices is crucial for engagement and retention.
✅ Why It Matters: 🔹 Players demand smooth transitions between platforms without losing progress. 🔹 A unified experience boosts trust, engagement, and loyalty. 🔹 Operators benefit from increased user retention and higher lifetime value.
📈 The Winning Formula: 🔗 API-driven ecosystems for real-time data sync 📲 Responsive, mobile-first design for a flawless UX 🔄 Cloud-based infrastructure for seamless performance
Want to stay ahead in the iGaming race? Prioritize cross-platform compatibility, and watch your user base soar! 🚀
2 notes
·
View notes
Text
Something that I've been meditating on since I started getting more serious with digital art is pressure sensitivity, specifically calibrating with the tablet's global settings as a first step. It's a topic I don't see come up often for art tips. Probably because it's intuitive for some, or maybe it's something that's not given much thought. I never really had anyone sit me down and explain how hand pressure works beyond the various brush settings, while practicing varying your hand pressure to achieve line weight.
Those are certainly good principles to have as a digital artist, but what if you could make your transition from traditional to digital more intuitive, especially with traditional-like brushes that are supposed to simulate the real thing?
Personal experience/study under cut [7 min read ]:

Art doesn't have to be rocket science, but I believe you have to understand how your tools work if you want to be productive with your art, like how you need certain mediums to paint with oils on a primed canvas.
I had seen so many tips on how to use flow/opacity/jitter, or how to adjust settings for the perfect line weight for Photoshop, but it never worked right for me. Then there was PaintTool Sai, where its ink brush was perfect to customize to your own pressure while giving the right amount of smoothness in edge. But ever since the copy that I had broke on an old laptop, I began transitioning to Clip Studio Paint. I love using CSP, but ever since I started using it, I was on a hunt for the one brush I could naturally draw with and achieve the same effect.
I didn't ever want to fall into the trap of "What brush are you using?" because ain't nobody got time for that. I remember back then how only a few software like Sai and Corel Painter had the exact ink brush everyone was excited about using (2000s). But where I'm at with CSP today? I made 8 brushes so far, each one having a significant tweak from its predecessor, hoping to achieve a certain line aesthetic and weight. I'd get close each time, though I'd usually just settle by the end, feeling resigned that maybe that's how brushes are.
I've been using CSP for about 7 years now, and I know that I've improved on drawing in general during that time. Even so, I hadn't drawn as much as I'd like as I upgraded to an Intuos Pro large tablet, and I'm pretty certain it was because I never adjusted from having used to draw on a Bamboo small on Sai and FireAlpaca, which is 1000 levels of pressure as opposed to Intuos's at 8192! I've always drawn with a light touch, which is why I favored using mechanical pencils and erasers for my sketches before digitizing them. Transferring the pics using old tools was easier back then, but with my current tools? I'd ruminate why I couldn't ever seem to settle with any of the drawing brushes, whether default or by someone else's customizations. That ended up being a buzzkill for many of my drawing moods.
To clarify, I definitely found and customized my own brushes to my liking. It still didn't stop the feeling that I was under-utilizing the local brushes that CSP made with their own brush engine, which is supposed to be pretty good (something that could be compared to Corel Painter back then).
[*]
Here's my first brush study where I was getting a feel for how the Tapered, Rough, Mechanical, and Pencil brushes worked at their default. Tapered was especially difficult to work with because it felt like I had to apply more pressure to get the lines down. Rough and Mechanical were fine for the fine lines, but it didn't build up as nicely as the Pencil did.

When I mused about this on an art server a couple days ago, a fellow member had brought up that I could just adjust each individual brush to my natural pressure. Which they weren't wrong about, but Ismaire can attest to you that there are days when I've spent hours fussing over brush settings only to still be dissatisfied. I know this looked like an unnecessary fixation to others, but I was determined to have a brush that I didn't have to think twice about, like how one expects to pick up a mechanical pencil and draw on paper.
Part of my problem with accomplishing my drawings is that I deal with a lot of distractions in my workspace, like cats and ADHD. The last thing I wanted was to be distracted by my dissatisfaction of my brush settings. Like seriously, once you've tweaked a brush, it should be one and done, right? Even from trying other people's pencil/ink brushes, in spite of the benefits that somebody else figured it out for me, it still wasn't exactly what I was looking for as far as hand-feel goes.
I remembered in the past there was one art tip that showed up on my dash about how adjusting the pressure sensitivity on your tablet could help an artist not wear down their pen nibs as quickly. The feedback was generally positive, but it mostly came from people who had a harder hand pressure. This was something that I tried figuring on and off over the years, but couldn't figure out how it applied to my drawings until tonight.
[*]
Taking that old tip in mind, I went into the tablet settings and started playing with how much my tablet could detect my pressure:

1) I started experimenting with the pressure graph, where I pushed around the click threshold and max pressure, taking into account that I have a lighter touch. The test pad for the pressure sensitivity showed me what I thought I liked, but then my pencil sketches started coming out too light. I really had to start pressing harder to even get the darkness and line weight achieved.

2) I then resumed to the default to compare how much my pressure was being detected, which was back where I normally worked with. But when I tried one point over to the firm setting, the pencil brush turned out even lighter, and I had to apply more unnecessary pressure to get that scribble to be visible.

3) I tried putting the tablet at a softer tip once a long time ago, but it blew up my brushes like i was leaving blobs of color with hardly any pressure. Trying again today, though, I was more conscientious of how I applied my pressure from lightest to heaviest. It felt counterintuitive from what I was seeing in the graph and the tip feel, but then I started noticing the same CSP pencil brush was starting to act like a pencil. In the past I never understood how tilt could work, though everyone said it was supposed to simulate how you tilt a pencil to get broad strokes. I never was able to achieve that with this brush until now.
Victory at last!!

4) Now that I understood how the tilt function actually played with this brush, I reverted to default tablet settings to see what it would look like. At the default pressure setting, the fine line sketches were okay, but then I ended up having to apply a more significant amount of pressure when tilting the stylus. I don't think CSP would've wanted to give you a difficult pencil to work with because it should come out effortlessly.

5) Maybe I'm a slow bloomer, but I'm really stoked to finally understand how to use the pressure graph in conjunction with me using a soft pressure, which is no wonder why I jived with my blending brushes but couldn't ever be stay satisfied with my drawing brushes. Any art tutorials and tips that I've seen come my way don't seem to address how to first adjust your tablet pressure settings to your specifications. They just dive right into the mechanics of how to make a brush look a certain way, assuming that you'll figure out the rest if it still doesn't go your way.
[*]
Below is a sketch that started this whole essay. I started working on it after watching Love Hurts (highly recommend), but I was running into that same exasperation that kept me from finishing drawings, so I was determined to get my crap together. I'll be damned if I let one more sketchy WIP go gather dust because I couldn't get my workflow straightened out!

1) Rose and Marvin (gray sketches) were used with the same pencil brush at default settings for both Wacom tablet pressure and CSP brush. I'm estimating 40 minutes for both the characters, which isn't bad, but I knew the time spent was subconsciously not being happy with how the brush felt in my hand. 2) Raven (purple) was drawn much more comfortably once I adjusted to the softer tablet pressure, with the pencil finally feeling like an actual sharp pencil since I typically like sketching with a fine point. 3) Granted, Knuckles (red) was just a headshot, but if I had been working with the settings from before, I would've been angsting why I couldn't get past the sketch stage and then just straight up give up on the drawing because I mentally fatigued myself. I ended up adding more details (in green) on Marvin, all thanks to having a little extra energy left over :)
[*]
Everyone's hand pressure is different, but I'm finding it's sort of an underrated discussion. Again, maybe this is something that everyone else has figured out and don't need an explanation. At the same time, I feel like if we as artists were cognizant of how we use our tools, we wouldn't be constantly chasing after the latest brush pack thinking it would solve all our art woes, or worse be like me and suffer wondering why your drawings don't look the same when you switch between mediums.
You have to remember that the brush pack is customized by the creator, which may or may not match your own hand pressure. People who are aware of color monitors talk about calibrating their screens. We ought to make it a common practice to calibrate our tablet's pressure sensitivity as a global setting before changing all the brushes you plan to use. Perhaps this wouldn't apply to everyone, but I imagine if you're a tactile artist who's worked with various traditional medium, it probably wouldn't hurt to figure out how you apply pressure to your tablet beforehand and adjust accordingly.
2 notes
·
View notes
Text
Audio Podcast Editing
In the rapidly growing world of digital content, podcasts have emerged as a powerful medium for storytelling, education, and entertainment. While the content itself holds significant importance, the quality of audio can make or break a podcast. This is where audio podcast editing comes into play. Editing not only refines the sound quality but also enhances the overall listener experience. This article delves into the essentials of audio podcast editing, from basic techniques to advanced tips.
The Importance of Podcast Editing
Podcast editing is more than just cutting out mistakes or awkward pauses. Here is my profile about services of AUDIO PODCAST EDITING It's about creating a polished product that engages listeners. High-quality audio can establish credibility, maintain audience attention, and improve the accessibility of content. Poor audio quality, on the other hand, can be distracting and may cause listeners to abandon an episode prematurely.
Essential Tools for Podcast Editing
Before diving into the editing process, having the right tools is crucial. Here are some popular audio editing software options:
Audacity: A free, open-source software that's perfect for beginners. It offers basic editing features like cutting, trimming, and noise reduction.
Adobe Audition: A professional-grade software with advanced features for detailed editing, mixing, and mastering.
GarageBand: Ideal for Mac users, this intuitive tool is great for recording and basic editing.
Hindenburg Journalist: Designed specifically for podcasters, it offers automatic audio leveling and easy-to-use editing features.
Descript: A modern tool that allows you to edit audio as if you’re editing text, making it incredibly user-friendly.
Basic Editing Techniques
Trimming and Cutting: Remove unnecessary parts like long pauses, filler words (um, uh, like), and off-topic tangents to keep the content concise.
Noise Reduction: Eliminate background noise, hums, and hisses to ensure clarity.
Equalization (EQ): Adjust frequencies to balance the audio, making voices sound fuller and clearer.
Compression: Manage volume levels to ensure consistent sound throughout the episode.
Fading In and Out: Smooth transitions between segments with fade effects to avoid abrupt starts or stops.
Adding Music and Sound Effects: Incorporate intro/outro music and sound effects to enhance the listening experience.
Advanced Editing Techniques
For podcasters looking to elevate their production quality, consider these advanced techniques:
Multitrack Editing: Work with multiple audio tracks simultaneously to fine-tune interviews, discussions, or panel recordings.
De-essing: Reduce harsh "s" sounds that can be jarring to listeners.
Normalization: Adjust the overall volume to meet industry standards, ensuring consistency across episodes.
Dynamic Range Compression: Enhance the clarity of voices, especially in environments with varying loudness.
Audio Restoration: Fix distorted audio, remove clicks, pops, and other imperfections using specialized plugins.
The Editing Workflow
A structured workflow can make the editing process more efficient:
Import Audio: Bring your raw recordings into the editing software.
Organize Tracks: Label and arrange tracks for easy navigation.
Initial Cleanup: Remove obvious mistakes, silences, and background noises.
Detailed Editing: Focus on fine-tuning audio levels, applying EQ, and adding effects.
Review: Listen to the episode from start to finish to catch any missed errors.
Export: Save the final version in a suitable format (usually MP3 for podcasts) with appropriate settings for bitrate and file size.
Common Mistakes to Avoid
Over-editing: Removing too many natural pauses can make conversations sound robotic.
Ignoring Audio Levels: Inconsistent volume can frustrate listeners who constantly adjust their device's volume.
Skipping the Final Review: Always listen to the entire episode before publishing to catch unnoticed errors.
Using Excessive Effects: Overuse of reverb, echo, or background music can distract from the main content.
Tips for Efficient Podcast Editing
Use Keyboard Shortcuts: Learn shortcuts in your editing software to speed up the process.
Batch Process: Apply effects and adjustments to multiple files at once when possible.
Invest in Good Equipment: High-quality microphones and recording environments reduce the need for extensive editing.
Create a Template: Set up project templates with pre-configured tracks, effects, and settings to save time.
Stay Organized: Keep your files, audio clips, and project folders well-organized to avoid confusion.
Conclusion
Audio podcast editing is both an art and a science. It requires technical skills, a good ear, and attention to detail. Whether you're a beginner learning the basics or an experienced podcaster aiming for professional-quality sound, the key is continuous practice and experimentation. With the right tools, techniques, and a commitment to quality, you can create engaging, polished podcasts that captivate and grow your audience.
#podcast#podcasting#podcastersofinstagram#spotify#podcasts#podcaster#podcastlife#music#youtube#radio#hiphop#comedy#applepodcasts#love#podcastshow#fiverrgigs#upwork#graphicdesign#logo#freelancer#design#fiverrgig#art#graphicdesigner#logodesigner#fiverrfreelancer#fiverrbuyers#freelancing#fiverr
4 notes
·
View notes
Text
2D to 3D Drawing Conversion Services: Transforming Designs with Precision

2D to 3D Drawing Conversion Services: Transforming Designs with Precision
Introduction
In the modern design and engineering world, the transition from 2D to 3D drawings has become crucial for enhanced visualization, accuracy, and efficiency. At ADSBIM, we specialize in 2D to 3D drawing conversion, offering precision-driven solutions to transform flat drawings into comprehensive 3D models. Our expertise ensures seamless conversion, catering to industries like architecture, engineering, and manufacturing. We are recognized as the BEST 2D to 3D Drawing Conversion Services provider in Gurgaon, India, UK, Dubai, and USA.
The Process of Converting 2D Designs into 3D Models
The 2D to 3D drawing conversion process involves several meticulous steps to ensure accuracy and fidelity to the original design. Here’s how we do it:
Understanding Requirements: We analyze the 2D drawing, ensuring clarity in dimensions, annotations, and details.
Software Selection: Based on project needs, we choose the appropriate 2D to 3D drawing conversion software such as AutoCAD, SolidWorks, Revit, or CATIA.
Modeling the Geometry: Using advanced tools, we create a 3D representation of the 2D drawing while maintaining proportional accuracy.
Material and Texture Application: If required, materials, textures, and colors are applied to make the model more realistic.
Validation and Quality Check: The final 3D model is compared with the original 2D drawing to ensure precision and adherence to client requirements.
Final Delivery: The completed 2D drawing to 3D model is delivered in the required format, ready for use in design simulations, manufacturing, or visualization.
Challenges in 2D to 3D Drawing Conversion
While converting 2D drawings to 3D models, several challenges can arise:
Loss of Information: Some 2D drawings lack depth-related data, requiring intelligent interpretation.
Complex Geometries: Intricate designs may need additional modifications to ensure a smooth 3D transformation.
Scale and Accuracy: Ensuring precise measurements during conversion is crucial to avoid design flaws.
Software Compatibility: Different clients use varied software, requiring expertise in multiple platforms.
How ADSBIM Provides the Best Solutions
At ADSBIM, we tackle these challenges with expertise and cutting-edge technology:
Experienced Team: Our skilled professionals have extensive experience in 2D to 3D drawing conversion across multiple industries.
Advanced Software Tools: We use industry-leading 2D to 3D drawing conversion software, including:
AutoCAD
SolidWorks
Revit
CATIA
SketchUp
Custom Solutions: We tailor our approach to match specific project needs, ensuring maximum accuracy.
Quality Assurance: Rigorous quality checks ensure error-free 2D drawing to 3D model conversion.
Fast Turnaround: Our efficient process ensures timely delivery without compromising quality.
Why Choose ADSBIM for 2D to 3D Drawing Conversion?
BEST 2D to 3D Drawing Conversion Services COMPANY IN GURGAON and globally recognized in India, UK, Dubai, and USA.
Precision and Accuracy: Our models maintain the highest standards of accuracy.
Affordable Solutions: We provide competitive pricing while maintaining high quality.
Comprehensive Support: From consultation to post-conversion support, we ensure seamless collaboration.
Multi-Industry Expertise: We cater to architecture, engineering, manufacturing, and more.
FAQs for 2D to 3D Drawing Conversion Services
What is the benefit of converting 2D drawings to 3D models?Converting 2D to 3D drawing enhances visualization, accuracy, and efficiency, making designs easier to understand and modify.
Which industries require 2D to 3D drawing conversion services?Industries like architecture, engineering, manufacturing, automotive, and product design benefit from BEST 2D to 3D Drawing Conversion Services.
Which software is used for 2D to 3D drawing conversion?We use AutoCAD, SolidWorks, Revit, CATIA, and SketchUp for 2D to 3D drawing conversion software solutions.
How much time does it take to transform a 2D drawing into a 3D model?The time required depends on the complexity of the drawing and project specifications, but we ensure fast turnaround times.
Do you provide 2D to 3D drawing conversion services globally?Yes, ADSBIM offers BEST 2D to 3D Drawing Conversion Services in India, UK, Dubai, USA, and beyond.
Conclusion
The transition from 2D drawing to 3D is essential for better visualization, accuracy, and manufacturing efficiency. With ADSBIM’s 2D to 3D drawing conversion services, businesses can seamlessly transform their designs into high-quality 3D models. Whether for prototyping, construction, or product development, we provide precise, reliable, and cost-effective solutions tailored to your needs.
Looking for expert 2D to 3D drawing conversion services? Contact ADSBIM today and let us bring your designs to life!
#adsbim#2Dto3DConversion#2Dto3DServices#DrawingConversion#CADConversion#3DModeling#AutoCAD#SolidWorks#Revit#CATIA#SketchUp#ArchitectureDesign#EngineeringDesign#ManufacturingDesign#ProductDesign#2Dto3DModeling#DesignVisualization#ADSBIM#Gurgaon#India#UK#Dubai#USA#CADExperts#TechnicalDesign#3DRendering#EngineeringSolutions
3 notes
·
View notes