#3 oz glass jars with lids
Text
When it comes to practicality and versatility, our 6 oz glass jars with plastic lids are a top choice. These jars are perfect for storing spices, herbs, homemade beauty products, and more. The twist-on plastic lids provide a secure seal, ensuring your contents stay fresh and spill-free. 3 oz Hexagon Glass Jars: Add a touch of elegance to your packaging with our 3 oz hexagon glass jars. These unique jars are perfect for showcasing specialty products such as honey, jam, or bath salts. Their distinctive shape and crystal-clear glass construction make them a standout choice for artisanal goods.. For more details www.skunkjarspackaging.com
#3oz glass jars#3oz glass jars with lids#3oz glass jars for sale#3oz glass candle jars#3 oz glass jars wholesale#3 oz glass jars with lids#3 oz glass jars with lids wholesale#3 oz glass jars#3 oz glass canning jars#3 oz glass bottles with caps#3 oz glass bottle with cork#3 oz child resistant glass jars#3 oz glass bottles for sale#3 oz hexagon glass jars#6 oz glass jars with plastic lids#6 oz glass jars with lids#6oz glass jars#6oz glass jars with lids#6oz glass spice jars#6 oz amber glass jars#6 ounces to glass#6 oz glass bottle bulk#6 oz glass baby bottles#4 oz glass jars with lids near me#6 oz glass bottles with caps#6 oz glass bottles with cork#6 oz glass containers with lids#10oz glass jars#10oz glass candle jars#10 oz amber glass jars
0 notes
Text
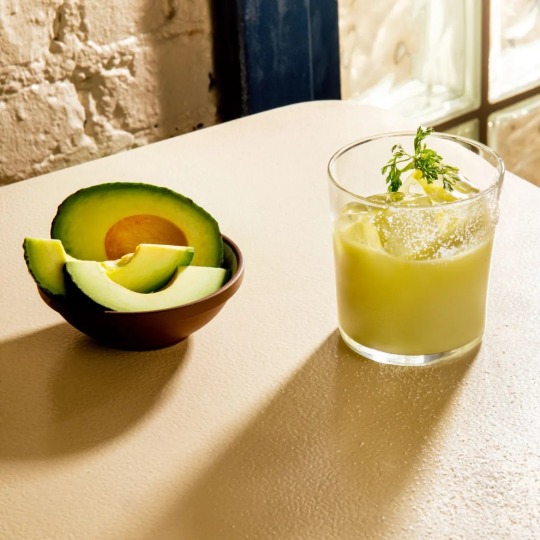
Bella's Bloody Marinara

The jar of spaghetti sauce Charlie’d stuck in the microwave was only on its first revolution when I yanked the door open and pulled it out.
“What did I do wrong?” Charlie demanded.
“You’re supposed to take the lid off first, Dad. Metal’s bad for microwaves.”
In honour of @threebooksoneplot season 3 starting next week, may I present an actually nice tasting cocktail based off of one of my favourite gags in the books, from Eclipse Chapter 1: Ultimatum.
Ingredients:
1 oz vodka
4 oz tomato juice
1 /2 oz lemon juice
Dash balsamic vinegar
Italian seasoning
Salt, to taste
Black pepper
Italiano garnishes of your choice
Shake vodka, tomato juice, lemon juice, balsamic, and seasonings with ice. Strain into highball glass filled with ice. Garnish with black pepper, lemon wedge, and basil, and top with fettuccine noodle skewer of Caprese salad ingredients.
Optionally, add pop rocks for a nod to Charlie's *shocking* microwave safety 😔

#can't wait for yet another season of dunking on bellas's truly corker dad jokes#threebooksoneplot#twilight#eclipse#cocktail#this may become my official italiano bella cocktail it's really good!
29 notes
·
View notes
Note
How to make meth
How to make meth
Making Methamphetamine at home:
List of chemicals and materials: Diluted HCl - also called Muriatic acid - can be obtained from hardware stores, in the pool section
NaOH - also called lye
Ethyl Ether - aka Diethyl Ether - Et-0-Et - can be obtained from engine starting fluid, usually from a large supermarket. Look for one that says "high ethyl ether content", such as Prestone
Ephedrine The cottons in todays vicks nasle inhalers dont contain efed or pfed (ephedrin or psuedoephedrin) but there are still lots of easy ways to get good ephed or pfed, pure ephedrin can be extracted out of it's plant matter, from a plant that can be bought at most garden stores. Or you can get pfed from decongestive pills like sudafed. Most people perfer to work with pfed from pills rather then ephed from the plant. The important thing is that you must have pure pfed/ephed as any contaminants will fuck up the molar ratio leaving you with over-reduced shit or under-reduced shit. Or contaminats will jell durring baseifying and gak up your product which will then be very hard to clean. So you want to find a pill that is nearly pure pfed hcl, or as close to pure as you can get. Also check the lable on your pills and see what inactive ingredients they contain. Inactive ingredients are things like binders and flavors. These you dont want and will remove when cleaning your pills. but certain inactive ingredients are harder to remove then others. You dont want pills with a red coating, you dont want pills with alot of cellose in them and you dont want pills with much wax. you also dont want pills that contain povidone. As a rule, if you have a two pills that contain the same amount of pfed hcl then take the smaller sized pill because it obviously has less binders and inactive ingredients, time released pills are usualy harder to work with because they have more binders and tend to gel up durring the a/b stage. Also only buy pills that have pfed hcl as the only active ingredient. You first have to make ephedrine (which is sometimes sold as meth by itself):If you are selling it...I would just make ephedrine and say it's meth.
Distilled water - it's really cheap, so you have no reason to use the nasty stuff from the tap. Do things right.
List of equipment : A glass eyedropper
Three small glass bottles with lids (approx. 3 oz., but not important)one should be marked at 1.5oz, use tape on the outside to mark it (you might want to label it as ether). One should be clear (and it can't be the marked one).
A Pyrex dish (the meatloaf one is suggested)
A glass quart jar
Sharp scissors
Clean rubber gloves
Coffee filters
A measuring cup
Measuring spoons
Preparing your Lab:
Preparing Ethyl Ether: WARNING: Ethyl Ether is very flammable and is heavier than air. Do not use ethyl ether near flame or non-sparkless motors. It is also an anaesthetic and can cause respiratory collapse if you inhale too much.
Take the unmarked small bottle and spray starter fluid in it until it looks half-full. Then fill the rest of the way with water, cap the bottle and shake for 5 minutes. Let it sit for a minute or two, and tap the side to try and separate the clear upper layer. Then, draw off the top (ether) layer with the eyedropper, and throw away the lower (water) and cloudy layer. Place the ether in the marked container. Repeat this until you have about 1.5 oz. of ether. Put the cap on it, and put it in the freezer if you can. Rinse the other bottle and let it stand.
Ethyl ether is very pungent. Even a small evaporated amount is quite noticeable.
Ephedrine & or P-Ephedrine: Please discuss this on the neonjoint forum
5. Pour 1/8 teaspoon of the lye crystals into the bottle of ephedrine and agitate. Do this carefully, as the mixture will become hot, and give off hydrogen gas and/or steam. H2 gas is explosive and lighter than air, avoid any flames as usual. Repeat this step until the mixture remains cloudy. This step neutralizes the HCl in the salt, leaving the insoluble free base (l-desoxyephedrine) again. Why do we do this? So that we can get rid of any water-soluble impurities. For 3 oz. bottles, this should take only 3 repetitions or so.
6. Fill the bottle from step 5 up the rest of the way with ethyl ether. Cap the bottle, and agitate for about 8 minutes. It is very important to expose every molecule of the free-base to the ether for as long as possible. This will cause the free base to dissolve into the ether (it -is- soluble in ether).
7. Let the mixture settle. There will be a middle layer that is very thick. Tap the side of the bottle to get this layer as thin as possible. This is why this bottle should be clear.
8. Remove the top (ether) layer with the eyedropper, being careful not to get any of the middle layer in it. Place the removed ether layer into a third bottle.
9. Add to the third bottle enough water to fill it half-way and about 5 drops of muriatic acid. Cap it. Shake the bottle for 2 minutes. When it settles, remove the top layer and throw it away. The free base has now been bonded to the HCl again, forming a water soluble salt. This time, we're getting rid of ether-soluble impurities. Make sure to get rid of all the ether before going to step 11!
10. If there is anything left from step 3, repeat the procedure with it.
11. Evaporate the solution in the Pyrex dish on low heat. You can do this on the stove or nuke it in the microwave (be careful of splashing), but I have found that if you leave it on top of a hot-water heater (like the one that supplies hot water to your house) for about 2-3 days, the remaining crystals will be ephedrine HCl.
If you microwave it, I suggest no more than 5-10s at one time. If it starts "popping", that means you have too little liquid left to microwave. You can put it under a bright (100W) lamp instead. Microwaving can result in uneven heating, anyway.
First Batch: 120mg ephedrine HClEstimated: 300mg (100% of theoretical, disregarding HCl)
Now, Making Methamphetamine out of ephedrine by reducing it with Hydroiodic Acid and Red Phosphorus.
Items needed: Alot of matchbooks (the kind with the striking pad)
Coffee filters (or filter paper)
Something that measures ml and grams
A flask (a small pot with a lid can be used)
iodine
Hydroiodic Acid (I will tell you how to make this)
Red Phosphorus (I will tell you how to make this)
Lye
*Optional (toluene and HCI gas)
Making Red Phosphorus: The striking pad on books of matches is about 50% red phosphorus. The determined experimenter could obtain a pile of red phosphorus by scraping off the striking pads of matchbooks with a sharp knife. A typical composition of the striking pad is about 50% red phosphorus, along with about 30% antimony sulfide, and lesser amounts of glue, iron oxide, MnO2, and glass powder. I don't think these contaminants will seriously interfere with the reaction. Naturally, it is a tedious process to get large amounts of red phosphorus by scraping the striking pads off matchbooks, but who cares?
Yeah, Mr. White! Yeah, science!
6 notes
·
View notes
Photo
National Margarita day is celebrated on 2/22/23. We wanted to share some of our favorite alcoholic and nonalcoholic margarita recipes to honor national margarita day!
Woodbridge Sunshine Pinot Grigio Margarita !
Makes 2 cocktails
Ingredients:
¾ cup of freshly squeezed orange juice (about two oranges)
3 oz. Woodbridge Pinot Grigio
2.5 oz. tequila reposado
2 oz. club soda
.5 oz. lemon juice (about ½ lemon)
2 tbsp. agave
1 tbsp. Tajín, for rim (optional)
1 orange slice, for garnish (optional)
1 cube dry ice (optional)
Directions:
Fill cocktail shaker with ice
Add the orange juice, Woodbridge Pinot Grigio, tequila, lemon juice, and agave
Shake for about 20 seconds
Strain into prepped glasses
Top with club soda
Garnish with a sliced orange, if desired
For a Tajín coated rim, place the Tajín on a small plate. Rub the rim of a cocktail glass with a lime, and lightly dip the glass into the Tajín. Fill your glasses with ice.
To make your margarita with dry ice, make the cocktail as directed above, but don’t add ice to the glass. Wear gloves and use tongs to transfer a 1/2-inch to 1-inch chunk of dry ice to your drink. Allow ice to melt completely or carefully and safely remove ice cube from glass before drinking.
Can’t find agave? Here’s a quick ‘simple syrup’ recipe as a substitute:
Add ½ cup of granulated sugar and ½ cup of water to a small saucepan over medium heat
Stir until sugar is dissolved
Let cool, then pour into a glass jar and seal tightly with a lid
Courtesy: The Knockturnal
This article was not sponsored or supported by a third-party. A Cocktail Moment is not affiliated with any individuals or companies depicted here.
#art#design#Cocktails#cocktail recipe#cocktail#cocktail recipes#orange#pinot#tequila#club soda#lemon#the knockturnal#ice#shaker#tajin#agave
12 notes
·
View notes
Text
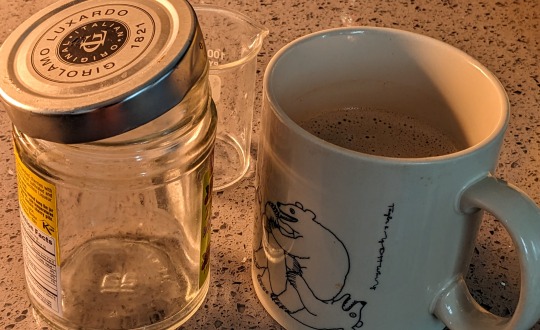
[peanut butter mocha latte]
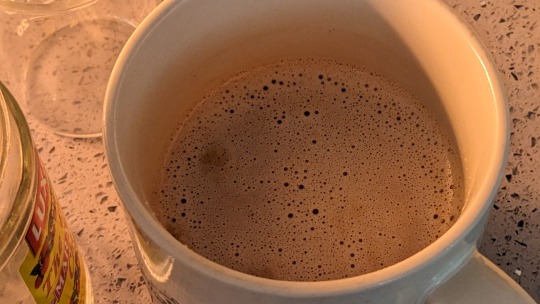
i woke up this morning hating life, ffs. one of these and i felt like someone pushed a 'press to activate' button on my back. dishes got done. cooking and meal planning happened. i even had the energy to sing.
moral of the story: i really REALLY need stimulants to function. for me, they are Not Optional. and yes, i have to remind myself of this literally every morning during PMDD time.
equip yourself first:
a way to shake shit up. a glass jar with a tight-filling lid is my preferred method.
a way to heat shit up relatively quickly. the simpler the better, and you don't have all day. microwaves and stoves are fine; i own a hot water kettle and use the microwave for heating other liquids on days like this.
ingredients:
1 part espresso or cold brew concentrate.
1 part milk or alterna-milk of your choice. (i use full-fat oat milk... always trying to sneak in extra calories if i can.)
1 part filtered water.
a pinch of salt.
for every 60 ml (~2 fl. oz) strong coffee, add:
3-6 g (1-2 tsp) cocoa powder or raw cacao powder.
16 g (1 tbsp) natural peanut butter (i.e.: no sugar, no additional oils. nothing but roasted peanuts... and maybe salt. i use the unsalted kind).
additional fixins:
15 ml (1 tbsp) of MCT oil. your brain is mostly fat. feed it.
sweetener of your choosing, 5ml (1 tsp) to start. try honey, raw cane sugar, agave syrup...
how to make:
heat water and milk to the boil, separately. unless you don't care about foam. foam is life to me.
add coffee, hot milk, sweetener, peanut butter and cocoa/cacao powder to your jar and seal it tightly.
wrap towels or a tee shirt or something around it to keep your hands safe, and shake until everything is blended together. the exercise from this will help wake you up too.
pour water into your desired cup or mug, then the latte mix. stir a little to blend everything together.
enjoy.
i hope you feel a little better and more ready to start your day.
#simple meals#recipes#metric#cafe latte#actually adhd#actually pmdd#neurodiverse stuff#peanut butter#can be made vegan#just make sure your sugar wasn't made with bone char#nondairy#healthy food#recipes in metric#get those extra calories in
5 notes
·
View notes
Link
Check out this listing I just added to my Poshmark closet: 2 Blue Ball© Canning Jars 3 cup Jars, Wide Mouth, 24 oz Glass w/ lids.
0 notes
Text
The Best Ways to Store and Preserve Cannabis in Glass Jars

Maintaining the freshness of cannabis products is the best way to enjoy their full benefits. They maintain their qualities and provide you with the smoothest and most flavorful smoking experience when stored properly. Glass jars are among the best containers for cannabis.
Cannabis can have a shelf life of up to 18 months when it is kept fresh and humidity-free. It is essential that you know which glass cannabis jar is best for you. In similar jars, each strain has a varied weight and container capacity. Think about these things before choosing a glass jar to store your weed.
Cannabis jars:
The purpose of weed jars is to protect marijuana from light, air, and vapour. These are the primary outside variables that degrade the quality of your cannabis. The straight-sided Sided Clear Glass Jars are the most widely used cannabis jars. They are clear, so you can easily view the content inside and monitor its freshness, which is why many people prefer them.
Extra protection for your cannabis is provided by a glass jar with a cap. To keep your cannabis airtight, the cap provides an additional layer of protection. It has the smell of marijuana inside and keeps it fresh. Glass jars with wooden lids and clear glass concentrate jars with black or white caps are two types of cannabis jars with lids.
The perfect cannabis jar to select for your flowers:
It’s essential to select the correct glass cannabis jar for your flowers. The quantity and time you wish to store are the most crucial factors to take into account when selecting glass jars. The small jar, also known as X-small, could be perfect for you if you occasionally use just a tiny bit of cannabis.
The medium or large jar may be perfect for you if you use it roughly ½ every few weeks. The Large Wide Mouth, XL UV, or Latch Top jars are the best options if you wish to store bigger amounts of cannabis. If you use them frequently, the glass apothecary jars or gallon jars will be perfect for you.
Finding the perfect cannabis jar according to its size:
One thing to keep in mind when storing cannabis is how much airspace the glass jar has. After each use, you will release more air space inside. The best way to keep your cannabis airtight is to select glass jars in multiple sizes. Glass jars can help to maintain the proper moisture balance that keeps cannabis fresh for an extended period of time if you wish to store it for longer.
You can choose from a wider range of customizable options to suit your own preferences. The most common cannabis jar sizes are:
2 oz. jars for marijuana: Perfect for preserving concentrated and weed flowers. In cannabis stores, they are well-liked.
3 oz. Cannabis Jars: Popular for displaying different cannabis strains in dispensaries.
These jars can hold 3 to 4 g of weed, making them perfect for creating a beautiful display in dispensaries
4 oz. Jars For Weed: Great for storing 1/8 to ¼ of cannabis and 5 to 6 g of weed.
6 oz. Marijuana Jars: Best for displaying are dispensary shelves and showrooms. They’re specious holding 6 to 7 g of weed
10 oz Glass Flint Jar: Tall CR Jar with Black Matte CR Lids

Choosing glass jars according to storage conditions:
It’s possible that the location where you’re keeping your marijuana is public. Either hide your products or make them visible to all will be your choice. Amber or UV Screw Top Jars are great options if you want to blend in. Choose the Pop Top OR Wide Mouth Jar if you don’t mind people seeing your products.
Selecting glass jar cannabis based on design:
Once you’ve determined your perfect size and storage conditions, you can select your preferred design from a list of 24 options. You can choose between customizable jars for branding, different colours, and transparent glass jars.
Keeping cannabis fresh with quality glass jar storage:
Maintaining the flavour, potency, and quality of your cannabis products depends on proper storage. Glass jars have become the preferred storage option for both individual consumers and dispensaries.
Selecting a perfect glass jar in terms of size, style, and kind will help you keep your cannabis fresh for up to 18 months. When choosing your perfect jar, don’t forget to take into account elements like the quantity of cannabis you’re storing, ideal humidity levels, and storage conditions.
You can consistently enjoy a better experience and maintain the integrity of your cannabis with the right glass container and storage methods. Whether you operate a dispensary or just a casual user, investing in high-quality glass jars is a small but important way to increase the effects and longevity of your cannabis products.
Have questions about which jar is best for you? Innovative Sourcing is here for you. We are always available to assist you in finding the perfect packaging solution for your cannabis needs.
0 notes
Text
Fermentation - Kombucha
I consider myself a bit of a fermentation guru. By that, what I mean is, I think "What would someone thousands of years ago before the written word do in my situation?" They didn't have glass containers, and they didn't have much sterilization (though they knew how to preserve things really, really well), so when I read about certain steps in fermentative processes, all I can think is: Unless I'm trying to be a food processor factory, that sounds like complete overkill. Modern beer-making is an example where I read what they do and think that.
Then again, I haven't made any beer yet. I've made bubbly quince with just the wild yeast that was on it, kombucha, many batches of crunchy sauerkraut, vinegar, and many successful experiments. That's where I'm a guru.
Currently, I'm on kombucha. My first efforts were years ago, before COVID, when my stomach and digestive tract weren't doing so well.
I'll spare the T.M.I., but share the fact that fermentation has been a godsend.
Kombucha wasn't too much of a game changer for me, and my batches back around 2019 weren't great or tangy or fizzy when allowed the time to attempt a 2nd fermentation. The sauerkraut was a game-changer. It improved my gut health dramatically and my overall feeling of health significantly. Everyone gifted those batches of sauerkraut loved them.
Now, I have a new ferment of Kombucha growing, the SCOBY is from a store-bought 16 oz. kombucha which I allowed to depressurize under refrigeration, and then fermented in a jar with 3 cups of sweet tea where I took a quart and added 1/2 cup of sugar (double the sweetness typically recommended of 1 cup sugar to each gallon (128 fluid oz.) - so 1/4 cup sugar per quart). I drank the extra cup of tea from that quart.
As soon as the SCOBY membrane formed, I took what I had and moved it to a 1-gallon container, adding another quart of sweet tea with just over 1/4 cup of sugar. Then over the course of weeks, I'd sample the kombucha and add another quart of sweet tea.
It's been months now, and I've had two 16 oz. second fermentations, where I took a sample, bottled it with some fruit juice (maybe as much as 1 to 2 oz.). The first attempt didn't work. I perhaps left too much head room in the bottle, but it seemed that there wasn't enough active yeast to make effective carbonation, since no pressure built over the course of a week at room temp.
My second attempt at a second fermentation ended with exactly the product I wanted. It was to be pink lemonade kombucha, but ended up fizzy and tasting a bit like mostly dry, apple cider with little to no alcohol content. There hasn't really been apple in the process, so that would be phenols and/or other aromatics created by the kombucha itself during the 2nd fermentation.
The method of getting what I want
I don't follow sanitization or sterilization protocol. What I do is clean, but I'm not boiling anything (with the exception of making feed yeast), steaming it, autoclaving it, or otherwise using special solutions for sterilization or sanitization. I use soap, water, and clean cloths or paper towels while I have clean hands. Often, I wash my hands with soap and Borax (anhydrous crystalized sodium borate) to reduce the likelihood of contamination.
So, I mentioned SCOBY generation from a commercial bottle of kombucha by adding roughly 3 parts sweetened tea (3/4 of a quart of sweet tea with 1/2 cup sugar for the entire quart). From there, I added sweet tea as the SCOBY continued to mature.
After my first attempt at a 2nd fermentation failed to get fizzy, I purchased 1 lbs. of DADY, which is "dry active distiller's yeast" from Amazon for $10.
I took a little dash of that and added it to 16 oz. kombucha in a cleaned commercial bottle with a plastic lid and left that to ferment for 3 or 4 days. I shook it a lot those first two days, and burped it once because the lid looked a little... big and bulgy, which made me think "this might be a bit over-pressured". After that one burping, then allowing the lid to repressurize, I refrigerated it and ended up with fizzy delicious kombucha.
Important footnote - feeding kombucha
Before my successful second fermentation, I did something I saw on a Youtube video, which was to sterilize some yeast and add it to my ferment to feed it. I call this feed yeast, which is similar to "nutritional yeast".
I boiled a packet of bread yeast in about 1/4 cup of water, waited for it to cool and added it to the gallon of kombucha. This worked wonders for both the flavor and the "roundness" of my kombucha.
After the successful second fermentation, which we opened yesterday, I added another 3/4 tsp. of brewer's yeast which I boiled for about 5 to 10 minutes to sterilize. These dead yeast infusions act to feed everything in the kombucha with more nutrients than what tea or sugar would be able to provide alone.
Final notes
My summary to all this is that if you're interested in brewing or trying to brew or ferment some of the healthiest things you can make in your kitchen, you don't have to go all industrial. You don't have to spent $100s to get all the special niche products many people recommend. A 1 gallon pickle jar will do. A setup with a port and spout at the bottom is ideal for kombucha and those are $20, I think.
What you can do to save time and money is to ask yourself, "Did someone 1000s of years ago have a store to buy this shit?" Answer yourself "No", and then go from there. Keep things clean, and you'll be surprised with the results and with how proud you might feel about producing artisan quality all by yourself (and with a culture of microscopic buddies).
My last note is that if you want to go big, you probably will need to use sterilization and sanitization protocols along with specific cultures and measured, quantifiable processes to create a stable product. I don't know how to do those things yet, but what I produce is consistent and consistently good, barring my experiments which have roughly a 33% success rate (where what I produce would be something I want to eat or drink or cook with).
1 note
·
View note
Text
Top 10 Bathroom Counter Organizers to Buy Right Now

EUDELE Shower Caddy
Adhesive Shower Organizer

Shuang Qing Bathroom
Counter Organizer Countertop

JayRex Countertop Corner
3 Tier Moveable Organizer

Weidace Corner Bathroom
Counter Organizer Bathroom

Adjustable 2-Tier
Bathroom Countertop Organizer
Amazon Price $25.99
There is no denying that the bathroom counter is frequently the most cluttered area in our homes. Yes, clothes and shoes may occasionally spill out of our closets, and our kitchen sinks may occasionally be overflowing with dishes and utensils, but it is our bathrooms that bear the brunt of our product overflow. Here is top 10 bathroom counter organizers for this problem.
Bathroom Counter Organizer 2023
A bathroom counter organizer is a handy tool that helps to keep your bathroom countertop clutter-free and organized. It can come in a variety of styles and sizes, from a simple tray to hold your everyday items to a multi-tiered stand with compartments for all of your bathroom essentials. Using a bathroom counter organizer can help to save time in the morning by allowing you to easily access your toothbrush, razor, and other items without having to search through piles of clutter. It can also help to create a more cohesive and visually appealing look in your bathroom.
Bathroom counters store everything from makeup and cosmetics to hair tools and medications. To avoid a cluttered counter and the risk of losing any important products, it’s best to place them all in a bathroom counter organizer that can store your essentials while also complementing your existing décor. However, not all models on the market are created equal in terms of form or function, so we’ve compiled a list of the best of the best to help you keep your space cleaner.
Read the reviews below to pick the best bathroom counter organizer:
SheeChung 4 Pack Bathroom Vanity Countertop Canister Jars
Pros
Perfect Size Canisters
Easy to Use
Cute and Functional
Durable
Cons
The Lid Fits So Tight
Overview

The clear acrylic apothecary jars combine BEAUTY and ORGANIZATION and are ideal for achieving the modern farmhouse look you desire in the bathroom. A rounded base has plenty of room for storing bathroom essentials like cotton swabs, Q-tips, cotton balls, cotton rounds, and floss picks and is easily cleaned with soap and water. 4 packs of 15-ounce canisters are included in the package. Waterproof chalkboard label stickers are provided free of charge.
These jars are ideal for keeping q-tips and cotton rounds in the bathroom. Each apothecary jar has a removable acrylic lid and a wide mouth, making it easy to access bathroom necessities and accessories. The lid fits well, not too loose or too snug, and it is simple to place and remove the Q-Tips from the dispenser.
The canisters are also clear plastic jars, modern design, functional yet decorative, and PERFECT for the kitchen, bedroom, or craft room. Perfect for use in a small space, such as floating shelves, a small bathroom vanity, or a countertop.
The small apothecary jars are strong and look like glass, but they will not shatter. Because it is made of acrylic, there is no risk of broken glass if it is dropped or knocked off the counter.
Shop on Amazon
Specifications
Tray: 1 Pack
Apothecary Jar: 15 OZ
Color: Clear
Material: Plastic, Acrylic
ZHWS Bathroom Counter Organizer Corner Shelf
Pros
Stylish and Attractive Design
Premium Bamboo and Stable Legs
Easy to Install
Versatile and Functional
Cons
Expensive
Overview
Introducing our black bathroom counter organizer, expertly designed to fit corners, maximizing valuable counter space. With adjustable tiers and a freestanding design, it offers flexible storage wherever you need it. Crafted from durable, renewable Moso bamboo and strong stainless metal that won’t rust, it comes with non-slip plastic feet to safeguard your counter space effectively.
The three-tier bathroom organizer is simple to assemble and comes with detailed assembly instructions. The corner shelf with hooks is ideal for storing mugs, bowls, spices, and baking supplies; it can be used as a plant stand by a window area; or as a storage, rack to display your belongings.
The creative storage rack takes up little space but provides a lot of extra storage space; it adds about 20% more counter space to small spaces; it can be used on office desktops, bookcases, kitchen countertops, plant display stands, and other similar surfaces.
Shop on Amazon
Specifications
Material: Bamboo, Plastic, Stainless Steel
Mounting Type: Tabletop
Shelf Type: Corner Shelf, Tiered Shelf
Number of Shelves: 3
Fixparts Bathroom Counter Organizer
Pros
Multipurpose
High Guardrail and Grid Design
Anti-Rust and Anti-Slip
Easy to Assemble
Cons
Bottles Can Fall
Overview
The countertop organizer for the bathroom counter, bathroom organizer countertop, bathroom counter shelf, bathroom under sink storage, bathroom decor, makeup organizer rack, or spice rack organizer for kitchen and bathroom counter shelf is a handy life accessory.
In addition to the base’s grid design, the countertop organizer, kitchen organizer, and under-sink organizer all have additional guardrails to keep objects from dropping. It is rust- and water-resistant and composed of alloy steel. Rubber anti-slip feet at the bottom of the storage rack allow it to be set securely on any table.
Spices, lotions, make-up, shampoo, nail polish, and other cosmetics may all be stored in the two-layer bathroom and kitchen organizer racks that measure 12.2 x 7 x 13.4 inches. It is useful in every room of the house, including the kitchen, bathroom, office, under-sink organizer, and bathrooms.
Simple, quick, and doesn’t require any tools for installation. Simply take a few minutes, then finish. It’s of very high quality and a wise choice as a gift or for personal use.
Shop on Amazon
Specifications
Color: Black
Material: Alloy Steel
Weight: 2.09 Pounds
Mounting Type: Countertop
Mantello Bathroom Organizer Countertop
Pros
Multifunctional
Perfect Size
Easy to Clean
Neat and Organized Storage
Cons
A bit Expensive
Overview
This stylish and durable dresser organizer will upgrade your dresser, bathroom, or vanity. Finding space for all of your makeup and necessities has never been simpler, thanks to the 9 spacious compartments. Depending on what you need to manage, it can be used as a wardrobe organizer, bathroom countertop organizer, makeup storage organizer, or hair organizer storage. The options are unlimited, so start storing right away!
Your cosmetics, skincare products, and toiletries will be neatly and efficiently stored in this countertop bathroom organizer. The skin care organizer makes it simple to keep everything in its place because there is a spot for everything!
Much more than simply makeup can be stored in the cosmetics organizer. Use it as a dresser top organizer, bathroom sink organizer, an organizer for skin care products, or any other type of organizer you require!
11.25″L x 6.875″W x 5.25″H are the dimensions of the bathroom counter organizer. There are nine sections in all, including two large drawers, so there is enough of space for all of your skincare storage.
The skincare organizers are extremely simple to clean and not only have a clean, fashionable appearance. Makeup stains will easily wash off the bathroom countertop organizer with any mild soap and warm water.
Shop on Amazon
Specifications
Material: Plastic
Color: Matte Black
Mounting Type: Bathroom Counter, Sink, Tabletop
Special Feature: Portable
JayRex Bathroom Organizer Countertop Corner Shelf
Pros
Great Space Saver
Multifunctional Counter Organizer
Looks Great
More Steady and Stable
Cons
Not So Easy to Assemble
Overview
In the kitchen or bathroom, Jayrex will always make every effort to maximize counter space and use it for storage. With this adjustable bathroom corner organizer, you can create extra levels and stacking choices for can food, coffee cups, sauce jars, perfume, and cosmetics by placing it in the cabinet or on the counter.
The bathroom countertop organizer is movable; you can use it either straight or twisted so that it resembles a three-tiered black corner shelf. Thanks to a versatile design, your bathroom countertop might gain roughly 30% additional space.
The black corner bathroom shelf organizer is a real hero when it comes to keeping your home well organized. It works perfectly as a desktop shelf, sink side counter shelf, bathroom shelf organizer, kitchen countertop organizer, plant stand, and shelf for cosmetics and other items.
In addition to doing an incredible job of creating space for your bathroom storage organizer, this compact organizer also creates a charming place to look at. It can accommodate a range of objects thanks to the varying heights, and the multiple levels make it easier to show, see, and access anything.
Shop on Amazon
Specifications
Material: Engineered Wood, Stainless Steel
Mounting Type: Tabletop
Shelf Type: Corner Shelf
Number of Shelves: 3
Lzhevsk 2-Tier Bathroom Counter Organizer
Pros
High Quality and Stable Structure
Perfect Size Saver
Multifunctional
Unique Shape Design
Cons
A Little Hard to Assemble
Overview
The bathroom countertop organizer uses a special trapezoidal shape and double-layer design that is not only eye-catching but also makes it possible to store and take various items without bumping into anything. The handle is also made with portability in mind, so you can move the bathroom countertop organizer wherever you need it. Rustic brown can be the ideal complement to the majority of home styles. Nordic style bathroom countertop organizer will create an elegant landscape in your house.
This bathroom counter organizer features rustproof and waterproof high-quality iron brackets on both sides, ensuring a secure and long-lasting hold. The body of the organizer is crafted from natural solid wood for added durability.
You may use the bathroom counter organizer in the damp bathroom safely because of the non-slip mats at the bottom. The bathroom counter organizer is the ideal option for home storage because it can support high loads while remaining sturdy.
The kitchen, living area, bathroom, powder room, office, coffee bar, balcony, etc., are all possible locations for this 2-Tier Countertop Organizer. It can be used as a little shelf to keep toiletries, cosmetics, fragrances, spice jars, snacks, coffee, crystals, small plants, and other things.
Even under the sink, the standing counter organizer rack can be used to arrange disorganized cleaning items. Make the most of your available space while flawlessly complementing your decorating style.
Shop on Amazon
Specifications
Material: Wood, Iron
Color: Brown
Shelf Type: Bracket Shelf
Number of Shelves: 2
Vecallo Hair Tool Organizer
Pros
Good for Wide Applications
Stores Hot Tools
Damage Free and Quick Installation
Rust-Proof & Waterproof
Cons
Only Comes with 3 Adhesives
Overview
The bathroom organizer basket helps to arrange wires, and this hair styling tool’s three sections can contain hair dryers, flat irons, curling irons, and brushes. Steel wire construction enables you to store the tools even while they are still hot.
The hair tool organizer satisfies all of your needs. It offers a large capacity for keeping shampoo, conditioner, lotion, etc., 10.62 x 4.33 x 6.69 inches. Perfect for restrooms, guest baths, and powder rooms, among other places.
Storage for adhesive hair organizers 100% manufactured from high-grade SUS 304 stainless steel, which is rust-resistant, long-lasting, and simple to clean. Don’t be concerned about the bearing capacity because it can withstand the test of time with a powerful load capacity of 20 lbs.
It is a wall-mounted brush holder; without drilling into the wall or needing any additional tools, simply peel off the cover to use. Large adhesive: 11.81 x 2.75 inches, giving a solid bond to the wall you can watch the installation tutorial video. Use a hairdryer to warm the glue before tearing it off when it needs to be removed.
Shop on Amazon
Specifications
Material: Stainless Steel
Color: Black
Finish Type: Coated
Mounting Type: Wall Mount
Vitviti Toothbrush Holder for Bathroom
Pros
Waterproof and Sturdy
Anti-Slip/Automatic Drain
Attractive Marble Resin
Multifunctional
Cons
Expensive
Overview
Since 2020, VITVITI has focused on researching bathroom organizers with the motto ‘ENJOY SIMPLE, ENJOY LIFE.’ Our goal is to create creatively simple products that solve families’ storage issues. Enjoy life’s bliss.
The toothbrush holder is manufactured of fantastic resin that is waterproof, strong, and difficult to shatter when used repeatedly. This resin bathroom organizer has four non-slip foot cushions and is heavy enough to prevent tipping. At the bottom are 6 slot holes that automatically drain water and provide sufficient ventilation for keeping things tidy and dry.
The addition of a lovely marble-style toothbrush holder to your bathroom is significant. 5 storage spaces are a fantastic idea for a clutter-free bathroom. Electric toothbrushes should be stored and organized. The elegant design makes it perfect for any bathroom countertop style. Everything fits perfectly, including razor blades, shaver, toothpaste tubes, electric toothbrushes, and more. It really helps to maintain organization and storage.
Shop on Amazon
Specifications
Material: Resin
Color: White
Mounting Type: Freestanding
Special Feature: Unlit
Dorhors 2 Tier Bathroom Counter Organizer
Pros
Versatile Bathroom Counter Organizer
True Space Saver
Sturdy and Easy to Assemble
Simple Design
Cons
Not Much Storage
Overview
This vertically designed bathroom countertop storage shelf has stacked storage, a big capacity square change cubic, and is appropriate for all bathroom items. Because of its size, this shelf may be used for a variety of things in addition to serving as a bathroom organizer. This would look fantastic in a fun area, kitchen, bedroom, or office.
This more stable and convenient cosmetic storage rack has a ladder iron frame and a waterproof solid wood board with guide holes. In addition, the product has four anti-skid pads to make it waterproof. The rustic wood meets metal bathroom organizer on the counter is finished, fits your home’s design, and bids farewell to the chilly metal.
Shop on Amazon
Specifications
Material: Wood
Color: Brown
Shelf Type: Accent Shelf
Room Type: Bathroom
Aimou Bathroom Counter Organizer
Pros
Versatile Organizer
Automatic Drain
Sturdy and Durable
Offers Large Capacity
Cons
A bit Expensive
Overview
This bathroom organizer offers a warm harbor, and the final resting place is at home. Every product from Aimou is meticulously designed with the ideal balance of minimalism, modernism, and usability. Improve and modernize your daily life at home.
This bathroom countertop organizer has 5 slots for toiletries like toothbrushes, toothpaste, succulent plants, floss, lotions, razors, and more. It doubles as a dressing table organizer for makeup brushes, combs, tweezers, and other items. It also serves as a countertop organizer for office supplies, including pens, rulers, and postcards.
The natural hard resin used to make the bathroom electric toothbrush holder is far more robust than the flimsy plastic it is composed of and has a marble-like appearance. The bottom has four anti-slip pads attached, and the right weight can prevent it from toppling over and scratching your surface or countertop. The bathroom organizer’s bottom is built with slot holes to automatically drain off water and provides sufficient ventilation to keep things dry and organized.
Final Words
In conclusion, a bathroom counter organizer is a practical and stylish addition to any bathroom. It helps to keep your countertop clutter-free and makes it easier to find your essential items in the morning. Whether you opt for a simple tray or a multi-tiered stand, a bathroom counter organizer can help to create a more organized and visually appealing space.
Overall, investing in a bathroom counter organizer is a great way to streamline your morning routine and add some organization to your bathroom. We hope these reviews will be helpful for you in picking the best bathroom counter organizer for your needs and budget.
What to Consider While Buying a Bathroom Counter Organizer
Size
Bathroom counter organizers come in a wide range of sizes, with varying heights, widths, and depths to suit different types of counters. They are carefully designed to adapt to various configurations, whether it’s fitting snugly in a corner next to the sink or accommodating the space between two sinks on a larger double vanity. If you intend to use an organizer to store large items such as shampoos, conditioners, moisturizers, and hairsprays, you should also consider how tall or deep it is.
Safety
If you know you’ll be storing heat-generating tools, such as straightening or curling irons, make sure your bathroom counter organizer can accommodate them. That means you should opt for a model with metal components that won’t burn or melt when exposed to heat or one with smaller compartments that can keep your heated tools upright while cooling.
Product Visibility
There will invariably be some things you’d rather store away, even though others may be visually appealing enough to show on your bathroom counter. You might want to choose organizers with opaque drawers if you anticipate wanting to keep some of the goods you’re storing hidden.
Frequently Asked Questions
What are the benefits of using a bathroom counter organizer?
Using a bathroom counter organizer can help to keep your countertop clutter-free, making it easier to find your essential items and saving time in the morning. It can also help to create a more cohesive and visually appealing look in your bathroom.
What should I consider when choosing a bathroom counter organizer?
When choosing a bathroom counter organizer, consider the size and layout of your bathroom countertop. You should also think about the types of items that you need to store, such as your toothbrush, razor, and makeup, and look for an organizer with the right number and size of compartments to fit these items.
Can a bathroom counter organizer be used to store other items besides bathroom essentials?
Yes, a bathroom counter organizer can be used to store other items besides bathroom essentials. Some organizers have larger compartments that can be used to hold items such as towels, washcloths, or other linens. You can also use an organizer to hold small decorative items, such as candles or soaps, to add some personal touches to your bathroom.
Are bathroom counter organizers easy to clean and maintain?
Most bathroom counter organizers are made from materials that are easy to clean and maintain. Many organizers can be wiped down with a damp cloth and mild cleaner to remove any dirt or grime. Some organizers may be dishwasher safe, making it easy to sanitize and disinfect them.
How much do bathroom counter organizers typically cost?
The cost of a bathroom counter organizer can vary depending on the size, material, and features of the organizer. Simple tray organizers can cost as little as $10, while multi-tiered stands with multiple compartments may cost upwards of $50.
#lifestyle#furniture#home & lifestyle#home decor#kitchen#reading nook#homekitdecor#wall decor#vase#staircase#bathroomdecor#bathrooms#bathroom countertops#bathroomcounter
1 note
·
View note
Link
Check out this listing I just added to my Poshmark closet: Perfect Harvest Candles Pumpkin French Toast & Honey Cider & Sunflower.
0 notes
Text


1960 - 1975 BALL MASON JAR 32 OZ WIDE MOUTH CLEAR VINTAGE LID ML FRUIT IMPRESSED.TALL 32 OUNCE MASON JAR. THE LOGO IS FROM 1960-1975.
THE GLASS IS IMPRESSED W/ LOGO, MADE IN USA, ML & OZ MEASUREMENTS (HOLDS 4 CUPS, 1 LITER), FRUIT DESIGN (GRAPES, APPLES, PEARS, STRAWBERRY), IN AN OVAL.
THE LID AND RING THAT CAME WITH IT ARE INTACT. DON'T KNOW IF THEY'RE ORIGINAL. THE LID SAYS CRAFTED FOR QUALITY, SEALED FOR FRESHNESS, MADE IN USA.
#3, 67 & 26 ARE NUMBERS APPEARING AROUND THE BASE...TEXTURED BOTTOM TO HELP WITH SLIPPING.
NO DAMAGE CHIPS OR CRACKS ON GLASS. RING HAS A COUPLE DENTS.EXTRA NICE FEATURE IS THAT ONE SIDE HAS THE OUNCE MEASUREMENTS DEMARKED ON IT. THE OTHER SIDE HAS THE MILLIMETER MEASUREMENTS. GREAT FOR EASE OF FILLING AND COOKING.GREAT COLLECTIBLE JAR FOR USE OR DISPLAY. PERFECT FOR SHABBY CHIC CHIQUE DECOR.I GOT IT AS A GIFT FROM AN OLD HIPPY MOUNTAIN WOMAN FRIEND OF MINE--FILLED WITH PEACHES...I ATE THOSE.I HAVE A SEPERATE LISTING FOR THE SAME TYPE JAR, AS WELL. SLIGHTLY DIFFERENT MARKINGS.#DAWNETTSEMPORIUM, #BEAUTIFULMERMAIDQUEEN, #SHAUNALYNNSFOOD.
0 notes
Text

Makes 64 oz
8 whole lemons (Meyer lemons are ideal, but any type will do)
2½ cups (500 g) granulated sugar
2 cups (450 g) sweet (unsalted) butter
8 eggs, beaten
Sterilize 8 clean glass jars (ideally ½ pint/250 ml Mason jars. Grate the lemon zest into a medium pan. Squeeze every drop of the juice from the lemons into a bowl—you should have about 1½ cups (330 ml). Add the juice to the pan, along with the sugar. Cut the butter into small pieces and add it to the pan gradually.
Place the pan over a low heat, and stir until the butter has melted and the sugar dissolves. Strain the beaten eggs through a fine strainer (sieve) into the pan. Cook on a medium heat for 10–15 minutes, stirring frequently. As it heats up, the mixture will begin to thicken and take on a creamy consistency.
When the lemon sauce is thick enough to coat the back of the spoon, remove the pan from the heat. Fill the jars with the lemon curd to within ⅛ in. (3 mm) of the rims. Carefully wipe the rims clean and top with the hot lids. If you are using Mason jars, screw the bands down until they are finger tight, then seal, label, and store the jars
1 note
·
View note
Link
Check out this listing I just added to my Poshmark closet: New Ladies Spring Special Accessories Bundle of 12 Items Gift Idea.
0 notes
Photo

'Tis the season to eat, drink and be merry! You can be sure to delight guests at any holiday party or gathering by elevating your libation offerings to include not only wine and beer, but some colorfully inventive, well-garnished and festive cocktails as well. The Northeast region is home to many small-batch craft distilleries producing a range of interesting and unique spirits using both old-world and modern-day fermentation techniques. This means you can have a lot of fun this month sourcing locally made liquors at the farmers market and channeling your inner mixologist through a variety of holiday cocktail recipes:
1. Whiskey Cocktails
Whiskey is a distilled liquor made from different grains such as barley, corn, rye, wheat and oats. A mixture of these grains is combined at certain percentages, cooked together and mixed with malted barley and warm water to form a mash. The mash undergoes a fermentation and distillation process after which more water is added to the product to achieve the desired alcohol by volume. The resulting liquid is then aged in wooden barrels for at least two years. Whiskey is the quintessential winter spirit given its spicy, sweet, caramelly, and toasty notes. You can use it to add warmth and cheer to both cold or hot cocktails:
Cinnamon Maple Whiskey Sour
The scent of cinnamon and maple syrup infuse this cocktail with plenty of holiday spirit!
Ingredients
* 1 ½ ounces (3 tablespoons) locally made bourbon
* 1 ounce (2 tablespoons) fresh lemon juice
* 2 to 4 teaspoons local maple syrup, to taste
* Pinch of ground cinnamon
* Whole cinnamon stick
Directions
Fill a cocktail shaker or repurposed mason jar about two-thirds full with ice. Pour in the bourbon, lemon juice, maple syrup and a pinch of ground cinnamon. Securely fasten the lid and shake well. Strain the cold whiskey sour mix into a tumbler filled with fresh ice. Plop in a whole cinnamon stick to serve as attractive garnish as well as a handy cocktail stirrer!
“Irish” Coffee
When Jack Frost is nipping at your nose, nothing beats an “Irish” Coffee to warm them up. Bonus points are given for using coffee brewed from single-origin, fair-trade grown coffee beans such as those sold at farmers markets.
Ingredients
* 2 ounces local whiskey
* 5 ounces coffee
* 2 teaspoons sugar
* Heavy cream
Directions
Pour the whiskey, coffee, and sugar into a stemmed, heated glass mug. Stir, then top off with a thick layer of lightly whipped heavy cream. Don't stir it in.
2. Mulled Wine
Mulled wine tastes and smells just like the holidays in a mug! It’s warmth and spices make it the perfect drink to serve on a chilly night:
Some Like It Hot (Mulled Sangria Recipe by Freefall Sangria)
Ingredients
* 1 bottle Red Freefall Sangria
* 2 cups farmers market apple cider
* 3 cinnamon sticks
* 6 allspice berries
* 8 cloves
* 2 star anise
* 1/4 orange
Directions
Pierce orange with cloves. Place all ingredients in pot and heat on low for 20 min. Strain and serve warm. For even more warmth, add brandy after heating.
3. Vodka Cocktails
Vodka is traditionally made by distilling liquid from fermented cereal grains such as rye. It can also be made using potatoes which produces a higher quality, smoother tasting liquor. If you are looking for gluten-free cocktail options this season, use potato vodka in your recipes such as this colorful holiday punch:
Jingle Juice Holiday Punch
Ingredients
* 6 cups chilled cranberry juice
* 1 (750 milliliter) bottle chilled Prosecco or sparkling wine (try Cliffton Dry Sparkling Wine made from local apples!)
* 3/4 cup potato vodka, chilled
* 3 (12 oz) cans chilled hard seltzer
* 1 lime, juiced
* 2 cups frozen cranberries
* 1-2 oranges, thinly sliced
* 1-2 limes
* Granulated sugar
* Fresh rosemary sprigs
Directions
Combine all ingredients in a large punch bowl and stir together until well combined. Add ice if desired, but the frozen cranberries will help to keep the punch cold. Rim serving glasses with lime and then dip into sugar to fully coat. Ladle punch into glasses (with ice if preferred) and garnish with rosemary sprig. Serves 8-12.
4. Holiday Mocktails
Don’t forget to pick up some alcohol-free options at the farmers market for the non-drinkers in your crowd. You can find locally brewed kombucha, cold-pressed syrups (Aronia very berry offers a wide-range of juices and syrups extracted from New York State grown berries), mulled apple cider, nut milks (check out Nuthatch egg-free Nog), non-alcoholic sorrel wine such as kosher-certified Caribbean Hibiscus and more. Serving an inventive holiday mocktail like these suggestions will make everyone feel included in the festivities:
Blackberry Fizz Mocktail
Ingredients
* 1 tablespoon Aronia very berry’s new wild blackberry 100% natural cold-pressed syrup
* 1 tablespoon Lime juice
* 4 Mint leaves
* 1 teaspoon honey
* 1 cup of your choice of kombucha
Directions
Mix blackberry syrup, lime and honey in a glass. Clap the mint together in your hands to release the scent, then add to the glass. Top with kombucha. Garnish with a lime wheel and serve.
Sparkling Cranberry Kombucha Mocktail
Ingredients
* 2 bottles kombucha of choice
* ½ cup 100% cranberry juice
* 1-inch slice of fresh ginger, thinly sliced, plus more for garnish
* Fresh cranberries, rosemary sprigs, and thinly sliced ginger for garnish
Directions
Fill 4 double old-fashioned glasses with ice and set aside. In a pitcher or quart-sized mason jar, muddle sliced ginger and rosemary together using the end of a wooden spoon. Add cranberry juice and kombucha, stir gently to combine. Pour into ice-filled glasses (using a strainer, if necessary) and garnish with sprigs of rosemary, a slice of fresh ginger, and a few cranberries before serving. Cheers!
#downtoearthmkts#holidaycocktails#localwhiskey#potatovodka#redsangria#kombucha#nutmilk#mocktail#mocktails#drinklocal#eatlocal#farmersmarket
1 note
·
View note
Last Seen Blogs

sourwords
amaterasu

dj-sona-bot
Have You Seen My Bear Tibbers?

homiehopper4life
SHINEE IS FIVE

gr515n
R🏜

tumbrizandogirlsblog-blog
Caroline ❤🌸