#Clay Jewelry Tutorials
Explore tagged Tumblr posts
Visit Tumblr Blog
Explore Tumblr blogs with no restrictions, modern design and the best experience.
Last Seen Tumblr Blogs


Fun Fact
Tumblr was attacked by a cross-site scripting worm deployed by the Internet troll group GNAA on Dec 3, 2012.
Text
Making Clay Jewelry with Different Types of Clay
Welcome to the world of clay jewelry making! Whether you’re a seasoned artist or a curious beginner, the versatility of clay offers endless possibilities to unleash your creativity. In this post, we’ll explore various types of clay and guide you through the process of crafting your own exquisite jewelry pieces. Although we have talked before about making jewelry at home here, this post goes into…

View On WordPress
#Air-Dry Clay Crafts#Artisan Clay Pendants#Artistic Clay Creations#Beginner Clay Jewelry#Clay Art Jewelry#Clay Bead Making#Clay Jewelry Ideas#Clay Jewelry Making Tips#Clay Jewelry Tutorials#Crafting Clay Necklaces#Creative Clay Projects#Custom Clay Earrings#DIY jewelry#Epoxy Clay Designs#Fashionable Clay Pieces#Handmade Accessories#Homemade Jewelry#jewelry crafting#Jewelry Making Guide#Metal Clay Techniques#Oven-Bake Clay#Personalized Clay Ornaments#Polymer Clay Jewelry#Sculpting Clay Accessories#Unique Clay Bracelets
0 notes
Text
I made a 30s video (kinda tutorial) of how the heart shaped trinket tray turned out!
I used air dry clay. I'd recommend punching all the air out and using A LITTLE BIT of baby oil/any oil for your hands and surface, to make it easier to handle.
Also, I painted it with acrylics and then added a cost of white glue for protection (it becomes transparent no worries)
Please, reblog to support and keep the inspiration rolling! 🩷🌸
#craft#clay#air dry clay#ceramics#heart#trinkets#rings#jewelry#jewellery#diy#diy projects#diy tutorial#diy tips#diy craft#craftblr#tonbane#video
14 notes
·
View notes
Text
Stunning Heart Shape Earrings: A Complete Guide to Styles
#are polymer clay fumes toxic#beginning polymer clay#burning polymer clay#easy polymer clay#getting started with polymer clay#how to bake polymer clay#how to polymer clay#how to use polymer clay#polymer#polymer clay#polymer clay basics#polymer clay crackle#polymer clay earrings#polymer clay for beginners#polymer clay hacks#polymer clay how to#polymer clay jewelry#polymer clay techniques#polymer clay tutorial#starting polymer clay
0 notes
Text
hobbies to consider for 2025
・゜゜・.⋆。°✩ ⋆⁺。˚⋆˙‧₊✩₊‧˙⋆˚。⁺⋆ ✩°。⋆.𖥔. ᗢ₊˚✧ ゚.
painting
gouache, watercolor, acrylic… there’s so many things for you to try and it’s super easy to get started!
clay
sculpt rlly cute charms, dishes, and whatever else!!
scrapbooking
great way to look back on memories and lets you get rlly creative with it
journaling
my personal favorite ♡. so many different ways to go about it. you can have a bullet journal, book journal, cooking journal, movie journal. or, simply a diary to write about your thoughts and days. you can decorate your spreads with stickers and washi tape or keep it simple.
crocheting
there are so many things you could make, from tops to plushies. there are a lot of cute tutorials and free designs available online!
baking
this one may or may not be as easy as the other ones I’ve mentioned depending on the recipe but learning how to cook or bake makes for a great New Year’s resolution!
puzzles
there are a ton of different puzzles out there ranging from different skill level, so you can challenge your brain as much as you’d like!
sewing
whether you want to learn how to hand sew or use a sewing machine, to tailor clothes you already have or make your own pieces, sewing can be a fun and impressive skill to have.
playing an instrument
guitar, violin, piano, clarinet, drums— there are a ton of options for you to choose from and plenty of online resources :)
reading
reading can be a great way to learn more or be a better form of entertainment compared to social media and television. whether you want to educate yourself on different topics, discover a new genre of novels, or are interested in comics— reading is one of those hobbies where there’s something in it for everyone, regardless of what they’re looking for.
jewelry making
bracelets or necklaces, whatever it is you want to make the materials are easy to find, as well as tutorials and references.
bicycling
having an outside hobby is very important imo, and bicycling is one of those hobbies that lets you be as relaxed or intense as you’d like.
yoga
I think this is a great one, with yoga the focus doesn’t have to be looking a certain way or going super hard— it’s just about relaxing. there’s no pressure.
#it girl#self improvement#wonyoungism#that girl#pink#pink pilates princess#dream girl life#dream girl#becoming her#it girl lifestyle#wonyoung motivation#the wizard liz#wellness girl#health and wellness#healing girl era#hyper feminine#self help#self care#self improvement tips#clean girl#motivation#hobbies#new year#becoming that girl#dream life#productivity#pinterest girl#self confidence#glow up#leveling up
706 notes
·
View notes
Text
DIY Pride Gear
In honor of Aromantic Spectrum Awareness week, I thought I’d make a list of some resources for making some DIY aro pride gear!
Aro Rings
For anyone who doesn’t already know, an aro ring is a white ring worn on the left hand middle finger, signifying that the wearer is on the aromantic spectrum.
If you want to make one yourself rather than buying online or searching through local stores trying to find a suitable ring, AUREA made a pretty detailed tutorial on how to make an aro ring, which I’ve linked below.
It’s also pretty simple to make rings out of polymer clay if you would prefer an easier method.
Pride Flag
This tutorial is for a rainbow flag, but if you would prefer to make an aromantic flag, you could just use the same method with different fabric colors. (Since the aro flag is a 5 stripe flag, you’d probably want the fabric strips to be around 20.4 cm wide by 150 cm long if you want to get close to the dimensions of the flag in the video).
youtube
Pins
Great if you want to make something cheap and easy with a pride flag on it, especially if you want to make something with one of the more obscure or complicated flags, since those can be harder to sew or buy.
youtube
Patches
Aroworlds is aro-specific and thus includes many different aro flags, but the tutorials in the two videos can also be easily done for pretty much any horizontal striped pride flag.
youtube
youtube
167 notes
·
View notes
Text
Flowers you gave to Gods have withered away? no problemo, reuse them!

Hello guys! I believe I made a post before in which I talked about my habit of picking up flowers for Lady Aphrodite, Lord Hermes, and Lady Athena whenever I come back home. However, since they do not have dirt in which to expand their roots and absorb water, they wither away very soon. Generally, I would advise you to not leave expired food or dried-up flowers on your deity's altar. But there comes the question
,, Jelly, what do I do with them afterward?"
Well, fear not, because I've got just the solution as your fellow devotee and flower enjoyer!
1. Make homemade Potpourri!
A potpourri is basically a jar full of flowers, fruits, spices, etc. Which you leave in your room for its scent. Once your flowers get all dry, you can make one of these and place them in your room as to fill it with scents that remind you of your deities! and it is also a way more natural alternative to room freshener. I personally follow this recipe:
– Spread your flower heads and petals on a baking sheet. – Dry your flowers in an oven at 93° Celsius (200° Fahrenheit), which may take up to two hours. – Place dried flowers in an airtight container with a lid and add two or three drops of essential oils for your ideal scent. Rose, lemon, lavender, and cinnamon are among the most common fragrances for the home. – Store for six to eight weeks to allow the flowers to absorb the essential oils.
PS: Can also be a good freshener for your altar!
2. Homemade dried flower body scrub!
I actually only found out abut this today. But, apparently, if you mix up dried flower petals with Epsom salt, sea salt, baking soda, and essential oils you can basically create a scrub! I dunno if I would recommend it to people with sensitive skin tho...
3.Scented room spray
Mix together essential oils, alcohol, and dried flowers, and BOOM natural room spray! poof a little on your altar every morning!
4. If they are roses, make rosaries out of them!
Even though rosaries can be found a lot in Catholicism, many other religions use them. Buddhists, Muslims, and so much more! and, they actually used to be made out of actual roses. @jekraftbooks has a very good tutorial on TikTok about this, but basically, you need to:
1.Take your dried roses and throw them in a blender
2.Cook them down for several days at a low temperature. Only simmering, never boil.
3.When it begins to form like a clay ball, it is ready to go! Get a cheese cloth and squeeze all the water you can out of the clay. (Keep it for later)
4.Roll them into balls. Put a needle through them to make the hole, then leave them on cardboard for a few days to dry.
5. Once they dry, they will be rough, but we need them to have a smooth texture. Use the water from step 3, then rub some oil on them to give them some shine and protection from water ✨
6.Your beads are done! congrats! make necklaces, earrings, bracelets, any type of jewelry you wish for with them! You can also dedicate them to a deity as devotional jewelry or use them for prayer. Let your creativity go wild!!
#hellenic pagan#hellenic#hermes devotee#pagan#aphrodite devotee#hermes#hermes deity#aphrodite#aphrodite deity#athena#hellenic devotion#flowers#offering#offering ideas#physical offerings
174 notes
·
View notes
Note
Found your work through desperate searches for sylvanian family customisation or recolour resources and WOW your art/characters/worldbuilding are also astoundingly good... gonna be scrolling here a while. Out of curiosity do you do custom/commissioned sylvanian figures or do you have a tutorial/materials list someplace? Thanks for reading!!
Aw gosh, thank you, Anon!
I did one custom commission as an experiment (which I'm sure you've seen if you looked through the tag) and it was pretty fun, but man are these things a time suck! I tried to do too many dolls in too short of a time, got kind of burned out on them, and haven't touched them in months... I'm currently trying to work up motivation to get back into it and finish the projects I have materials for. If I do, I'll take pictures this time and put together a proper tutorial.
Unfortunately I can't take any commissions right now, but I'd be happy to share a materials list! It's under the cut:
The paint used is basic acrylic paint, like the kind you can get from Walmart or craft stores for under two bucks. There's a bit of a trick to painting them without making the fur clumpy, I described the painting process here!
For the hair, you'll want doll hair ("My Little Pony" size is way more than sufficient), a hair rooting tool/kit, and either a heat gun or blow dryer. I wrote some notes on hair rooting Sylvanian Family dolls here.
For the clothes, you can use a number of different fabrics, but you want it to be very, very thin. That super cheap, thin cotton fabric you can find at Joann Fabrics is pretty perfect and comes in a wide variety of colors and patterns, though some stuff like doll-sized flannel you might have to look online for (or DIY--you can use acrylic paint on fabric, it just makes it stiffer). I use ribbon for trim. Other accessories like jewelry, buttons, chains, crystals, and belts can be sourced from craft stores, too... I usually just bring my WIP doll with me in my pocket and hold it up next to anything I'm interested in buying to check if the sizing is right (the lady at the fabric cutting station was incredibly charmed by them, hah). For more specialty items, like tiny hats and replica firearms, you will probably need to look online.
If you can't find a specific accessory, or need to sculpt something like armor, you can try making it out of epoxy clay and painting it with the same acrylic paint you used for the figure. Mod Podge will help seal it and give it a nice glossy finish. (Do not use Mod Podge on Sculpey--it makes it sticky!)
Tails are generally pipe cleaners or occasionally pom poms. Cut the original tail off with wire cutters, digging out as much of it as you can, and super glue the new tail in the hole.
Horns are done with epoxy clay. For big horns on the head, I use wire cutters to cut the pointy part off a pin, embed that in the clay horn, and then stick the end of the pin into the plastic head to more securely anchor it.
Bat and dragon wings are done with leather sheets you can buy from a craft store.
Other essentials: Super glue, sewing kit, Dritz fray check. Super glue is essential for both tails/horns/etc and clothing (it's often better for ultra-fine detail than sewing). Sewing kit is needed for clothing. You will not have much success with clothing without Dritz fray check. It keeps the edges of the fabric from disintegrating, which is a major concern when working on such a tiny scale.
Also this isn't a material so much as a tip: I often use the pointy end of a pin to do fine detail painting. It's also useful for sculpting miniatures.
Hope that helps! Good luck on your customization ventures, and feel free to ask if you have any more questions!
#sylvanian families#calico critters#doll custom#doll customization#anon#ask#not an art post#ALSO THANK YOU FOR THE KIND WORDS ON MY WORLDBUILDING AND CHARACTER STUFF... it is what I live for
22 notes
·
View notes
Text
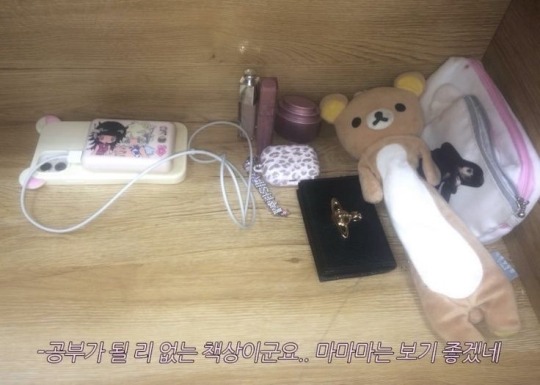
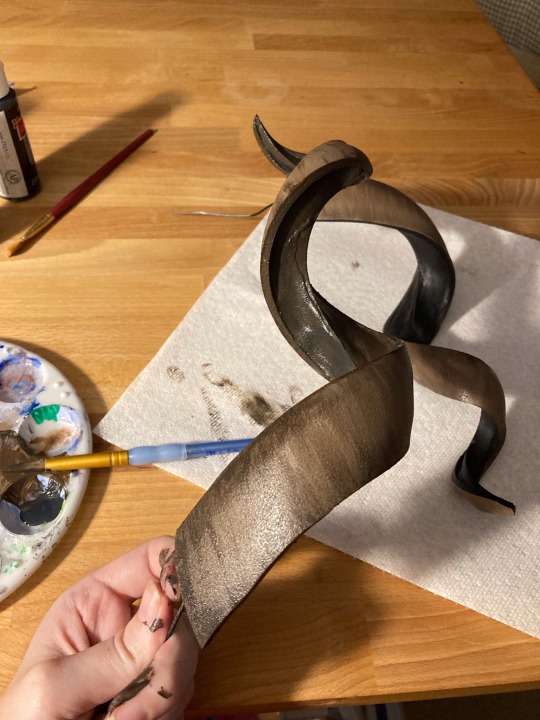
let's make fearne horns!
a step-by-step tutorial for making foam horns for cosplay
this was originally posted to twitter last year, but since twitter’s decided to ram itself through a brick wall repeatedly for some reason, i’m reposting here.
materials/supplies:
wire (the hardware store kind, not the flimsy jewelry kind. you want it bendable but sturdy enough to hold whatever size horns you’re making.)
craft foam/eva foam (thickness depends on project needs)
triangular foam dowel
tape or paper for patterning
barge cement (or other brand contact cement)
foam clay
plastidip spray
acrylic paints
gloss spray
heat gun
scissors
paint brushes
something to wrap horns around depending on curl needs
headband or something else to attach the horns to for wearing
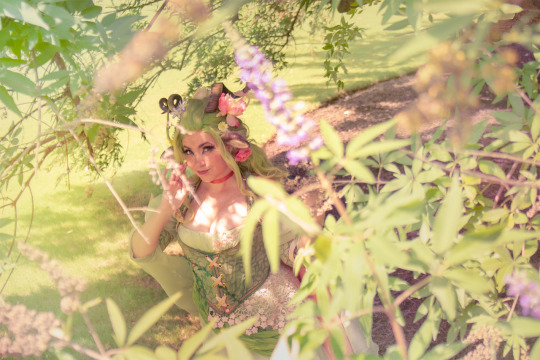
the process:
1️⃣ pattern horn curl using tape or paper. mine is going to be a long triangle shape along it’s top face.
2️⃣ cut out of craft foam & trim/taper triangular foam dowel to match. cut wire to match this length plus a couple extra inches for attaching to a headband later on.
3️⃣ carve valley into dowel & glue wire into it using barge cement. tape is helpful for holding the wire down while it dries. be sure to follow glue instructions for use which usually requires good airflow/ventilation in the space! for me, that means opening the window, turning on a fan, and wearing a mask to avoid fumes.

4️⃣ glue foam dowels to craft foam.

5️⃣ spiral horns carefully around a cylinder, heat forming tips where wire can’t reach. the hardest part here is to get both sides even. (i think i used a wooden dowel or a curtain rod for my spirals??)

6️⃣ fill gaps between dowel & craft foam with foam clay, using finger + water to smooth it out. if you want to add any ridges or scars to your horns, do it once this part is dry and before the next step—but i wanted mine to be smooooth.

7️⃣ once dry (give it a couple days just in case), heat seal with a heat gun & spray with plastidip. do multiple coats to get all the angles because spirals are WEIRD!
8️⃣ paint with acrylics.
9️⃣ gloss spray!
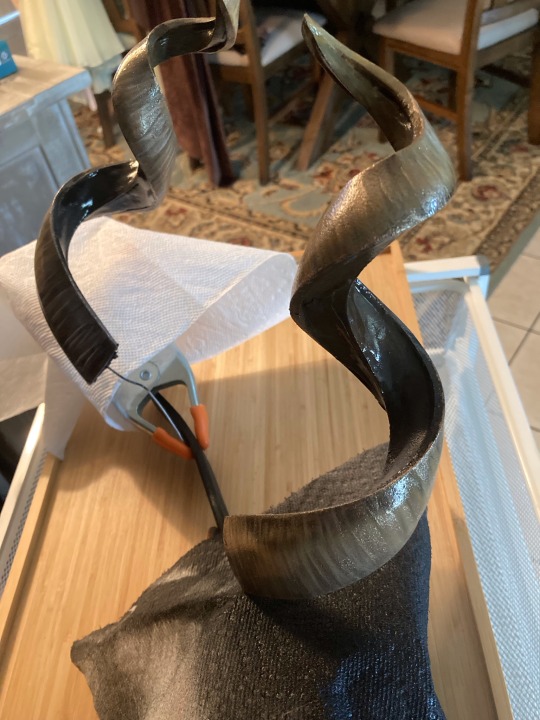
🔟 using the bit of wires sticking out, attach to a headband or wig to wear! mine actually poke through my wig and attach to a headband that sits inside the wig which fearne’s ears also attach to.

i hemmed and hawed over how to approach these originally because i know most folks would either 3d print them or do a proper full craft-foam pattern, but i’m crap at cutting craft foam and i hate sculpting digitally and ALSO don’t have a 3d printer. so i did it my way! and it was fun!! plus, the final horns are super lightweight which makes them great for wearing all day! the flexibility of the wire also allows them to have some pose-ability which can be nice for photos to make sure they’re visible.
206 notes
·
View notes
Text
GOOD NEWS!! THE VIBES ARE CORRECT
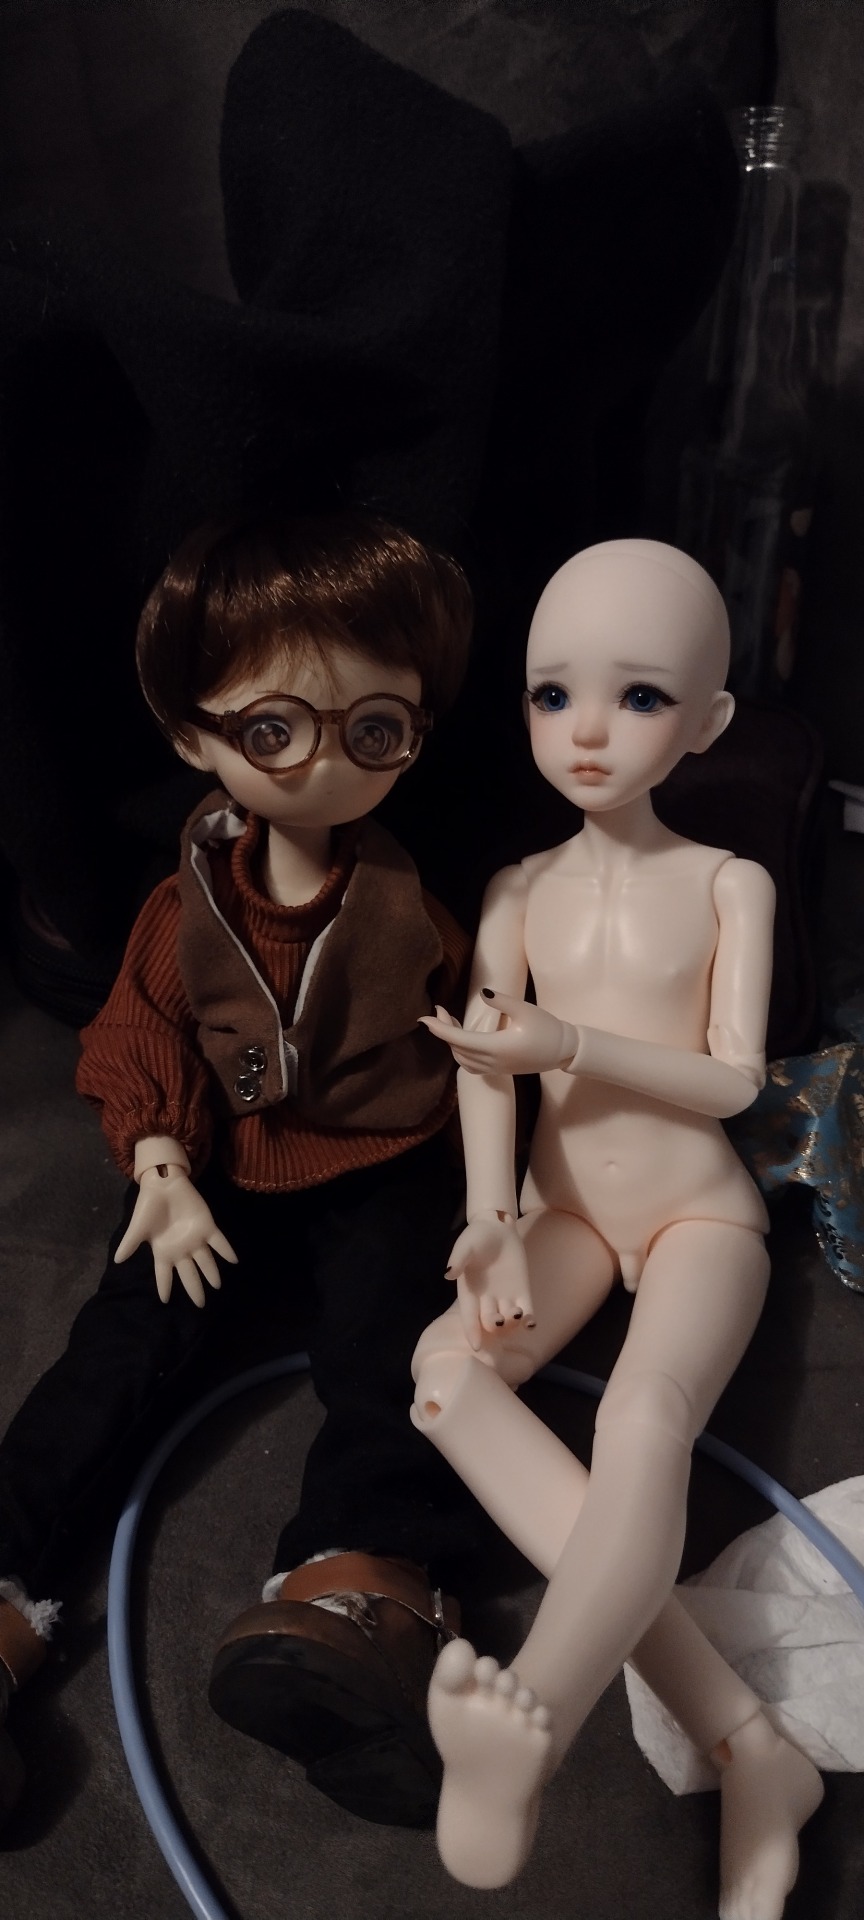
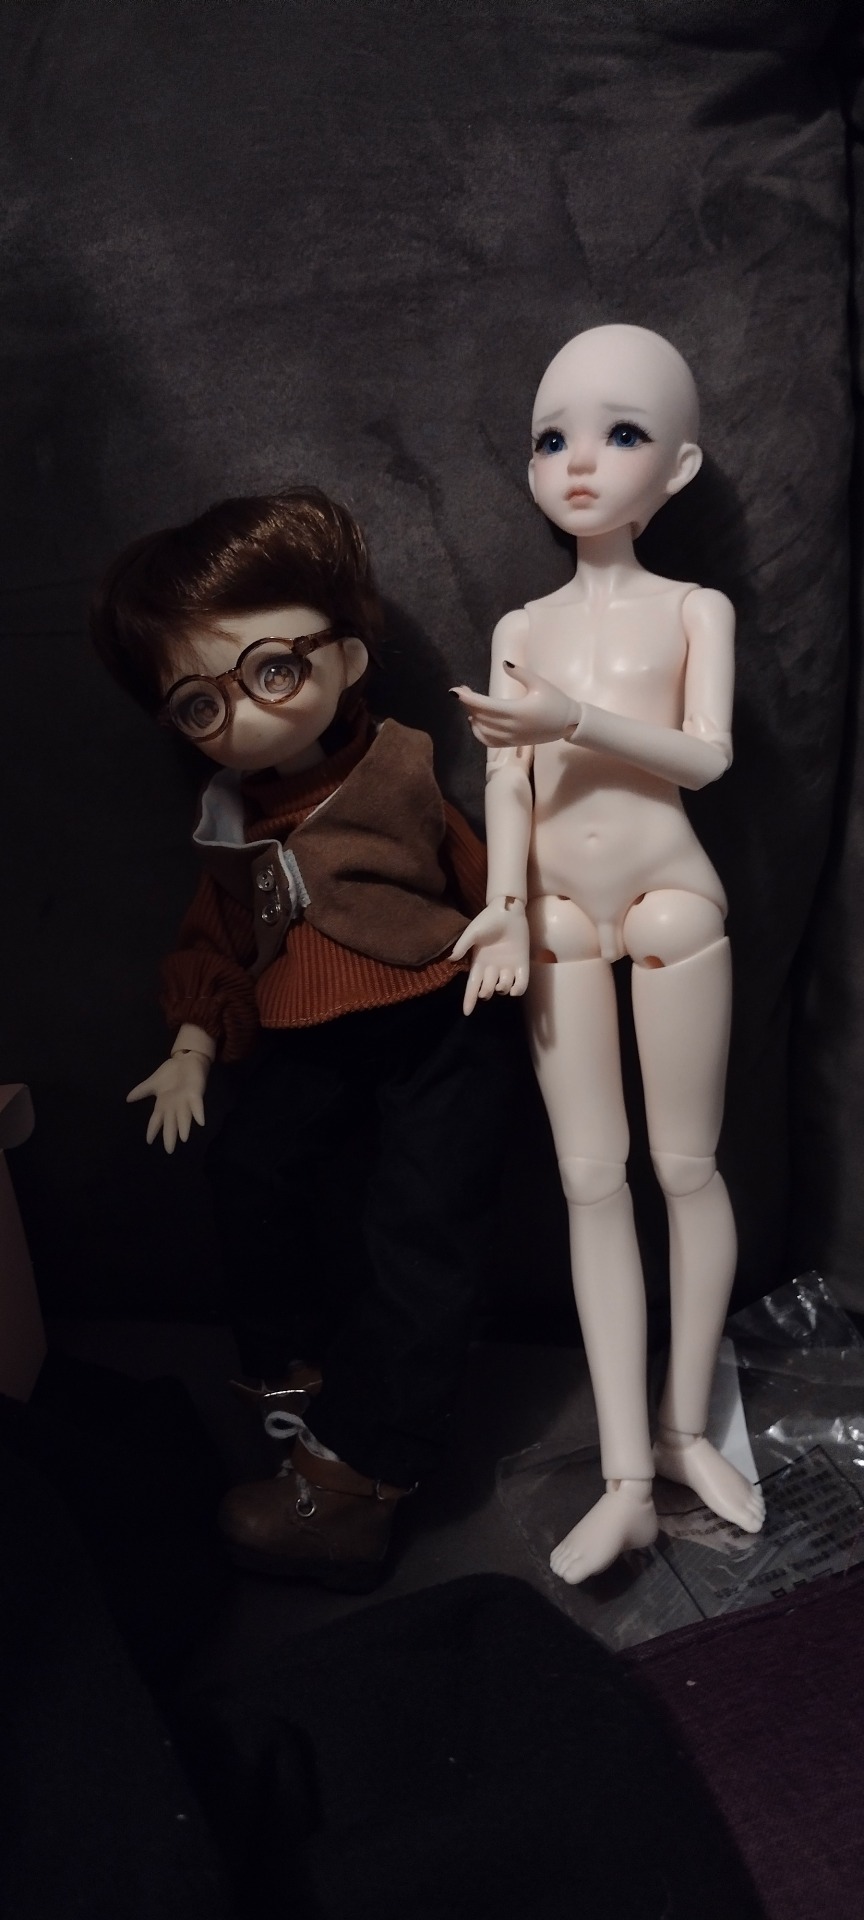
i believe i am truly achieving the official character art in doll form
oh and uhhhh i haven't had capacity to do anything other than a single pic which is NOT styled etc. i will figure out peter's wig later. but elena's hair is in and the wig caps arrived, so they do both have non-placeholder hair now
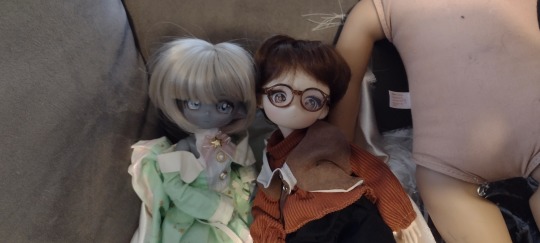
yes that is a rescue american girl beside them. i never said i was good at this.
i got to take off the bandages on rumi's face up when he arrived and then had to wrap him right back up again to attempt to make a wig cap. I would really like to do the doll justice so i KNOW i may not get it on the first try, but i'd still like to hope. no wigs match him but i had some yarn i bought specifically due to the rumi vibes, so i have tentative plans to make a wig that way. I also dropped [HIGH NUMBER WITHHELD] at joann for fabric and other fun bits, and have been spending all my breaks at work watching tutorials on hand rolling sheer seams.
Current plan is to carve the horns out of a hot glue stick and then test different methods of paint. I just remembered I have some very thin shimmer paint that i usually need a million coats of , but i bet that would be an option for coloring the surface while still keeping some transparency, since actual stone or glass shaping is sort of beyond my ken for now.
tbh i might as well also copy/paste my notes from before i went shopping under a cut as being my plans going in.
I did stick to the plan but fabric wise, found a nice dark purple for the sleeves and a vague star and flower pattern that is ok for the lining.
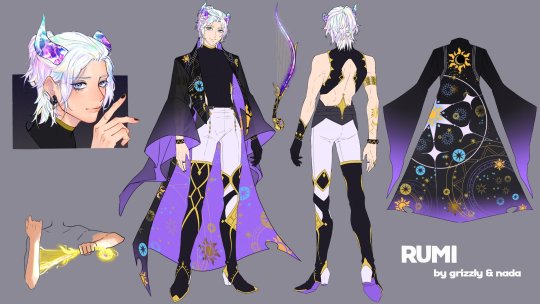
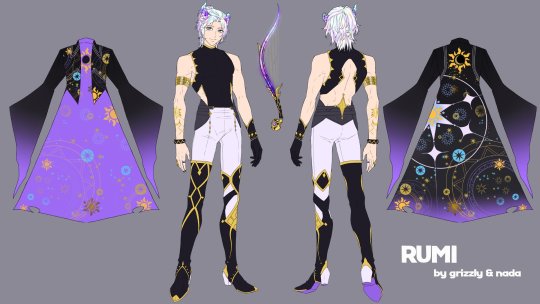
Actually, I think everything but the sleeves is SUPPOSED to be stiff. So everything except the sleeves can be normal cotton etc. Although I think it would be nice to have the inner be lined (you wouldn't see it much anyway) and then the outer still be the galaxy design.
I should invest in a (NEW!!) method of marking up the fabric. A fabric pencil maybe. Or even use a mechanical pencil?
Should probably also invest in a fabric paint set.
Depending on options available, the gauzy part could be a solid color (either lilac or black or in between) painted with a gradient. May want to reference dollightful videos as I know she's done something similar before. The flowiness and thinness of the fabric is probably more important than the color matching, especially given how it'll be thicker when scaled down. May need to iron it or otherwise give it some kind of heat treatment at the end of all this?
I wanted to go spandex for the shoes but I'm not sure that's the right call anymore. To get down to the meat and potatoes, in order for everything to be tucked in where it should be, I think the top and bottom should be a single layer.
I'd been planning from the start to make the boots attached to the pants.
So I think it's a heel/sole shoe form (using one I already have if it fits - making my own with cardboard, air dry clay, something else similar if it doesn't) with white fabric stretched on top. This goes up to the waist.
Note that in the reference images, the fabric for the pants is in fact stiff and creased, like trousers or jeans. Spandex may not be ideal here.
However, the top could maybe be made with a spandex and thus be slipped over the top. Since his head and arms … and chest if needed… will be detachable, it won't even need that much give to it though. I think that, instead of a bulky fastener like in most doll clothes, would be better, even if it means you'd have to reassemble him to change his clothes, since I don't intend to get him out of costume. If I took him apart entirely and shimmied his torso in, the tiny neck piece may not even be a big problem.
All that to say that the shirt may not need to be spandex after all. Another thing to be aware of is that the gold bits will probably be paint and not very stretchy.
Gloves and jewelry, based on the zoomed-in face reference pic, are possibly optional and I'll treat them that way for now. The tattoos are important though and I'm not sure how to achieve that - possibly buying some cricut paper and hand carving that with an exacto blade? Need to make sure that is possible though.
This article says that "clear transfer tape" is needed too - I thought that was built in.
I think I might want to buy an actual brand name exacto blade for this. My shitty dollar store ones are in fact shitty.
Anyway. Shoes part 2, I was going to say any dark fabric with gold paint. However, they need to allow for posability! They're going to restrict that even more with the pants in place.
I do want the black bits to be separate, not only because that's more practical to make, but because they clearly are in the design. They're shoe covers.
The darker belt bits and those particular gold embellishments may need to wait until I have the main clothing done.
Also, for the sake of the ankles bending, may in fact want to have just a thin strip of fabric running up the calf or something? The white only starts showing again just below the knee.
So to summarize for shopping list.
1 - fabric paints, variety of colors or enough to mix. 2 - fabric paint, gold metallic. 3 - lilac fabric, ideally a cotton print with star designs. 4 - gauzy outer layer, the thinner the better, lilac or black or in between. 5- white fabric for pants, needs to have SOME give for joint posability 6 - black fabric for shirt and shoe covers. Enough stretch for the knee
Also should look up any options to finish fabric that aren't hemming. Eg melting?
4 notes
·
View notes
Note
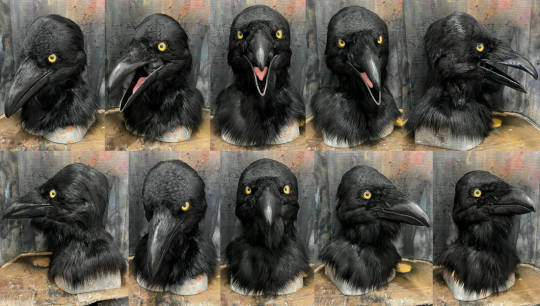
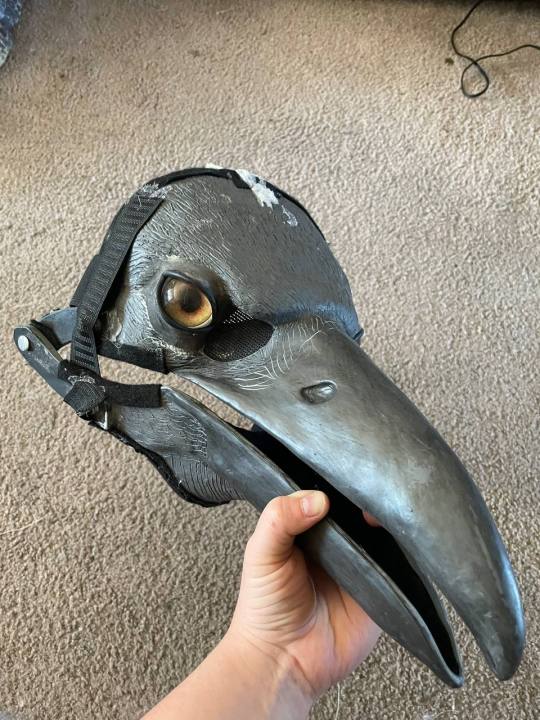
hi! i hope this doesnt come off as a bother or anything . but do you have any mask making tips or tutorials you could reccomend ?? (like for materials, jaw movement, and how to see out of there) im planning to do a raven named Goose :D
ive been finding some resources here and there, but i thought it wouldnt hurt to ask !!!
Absolutely not! I'd love to answer all your questions. :D I have not looked at that many tutorials, I mostly looked at pinterest pictures of raven costumes to see what I can come up with. One that really inspired me to get things going is actually another Tumblr user I found on there who has posted some helpful tips that I followed along with! They too have a raven costume and they got their resin base from the same manufacturer (Crystumes, they have a website where you can shop for their blanks) Since this post is awfully long, I'll do a read more from here on:
The tutorials I followed the most is this one by Rah-Bop:
Rah-Bop has some tips about adding feathers, making foam-feathers, adding claws to your gloves, making gloves or feet. In terms of material: I used the hinged resin base by Crystumes which by itself cost me +/- 200USD, they sent me a pair of customizeable glass eyes and a tongue.
Crystumes has some additional tutorials specifically regarding their masks on their website! Crystumes also lists some of the materials on their website that I used and where to get them (Like the apoxie clay to do the eyelids, the glass eyes etc.) I did mess the eyes up though the first time I did it so I had to order them from delviesplastics.com (As suggested by Crystumes) Since I ordered the base with hinges I'm not sure how to do them myself but I will have to figure it out for the second fursuit I'm cooking! In terms of other material I bought some long rooster feathers and hair jewelry off of Etsy. I bought a pair of long faux leather gloves from Ricardo (which is a swiss second hand online shop) but you can buy the gloves anywhere else or even sew them yourself by tracing your arm and hand on a piece of paper, then trace the pattern twice on any somewhat stretchy material like faux leather or spandex and sew those two together for one glove each. I bought black fur in another Swiss textile / sewing shop named Alja (not sure if it's actually Swiss) since it's cheaper (around 60$ for 4 yards) than to ship fur from America to Switzerland (Which amounts to 100-200 for the same amount). But if you can afford it: Take a look at Howl's Fabrics or Big Z Fabric. Both websites offer samples! I personally don't buy from them as the shipping costs for me are devastating. I suggest looking at general "furring" tutorials or "how to fur a fursuit head" tutorials on youtube. Most of them will tell you to make a duct tape pattern on your base, draw on the patterns then cut those patterns out on fur, sew the fur together then glue to the base. Crystumes once made a twitter post about it as well I think but I'm not sure I'll find it. When cutting fur in general just make sure you keep the scissors as close to the backing as possible to avoid cutting any fur fibers in the process, it will be visible otherwise. I made a fur top / shirt by tracing one of my long sleeve t-shirts onto the fur I bought and went with that. For the back of the head I used an 80s Mullet/Rockstar wig I bought from another Swiss online store. Other fursuit makers mostly sew fur even to the back of the head but my personal Raven fursuit is literally just a mask with a wig to cover the back. Which in turn makes the whole mask less hot. To keep the mask ON my face and to keep it from slipping down I used the adjusteable part of a biking helmet or climbing helmet. and attached it to the mask by using a lot of hot glue, I eventually had to use some stronger glue as it kept falling off. Since the mask was fairly big when I bought it and rather uncomfortable I used thick felt sheets and glued them inside the head as padding material! Foam works as well, whatever floats your boat. I went with felt since I could easily cut some feather patterns into them as a nice easter egg. Not sure anymore what exactly I used to cover the holes by the beak that I see out of, but it was some kind of very fine dark and flexible grid that I bought from the swiss equivalent of home depot. In terms of being able to see: The crystume base has holes between the beak and the eyes that you can look out of or you can even look through the mouth, both works pretty well and the mask allows for a lot of visibility from within- Out of all my fellow furry friends I'm the only one that doesn't necessarily need a spotter since I can see pretty well. In terms of clothing I pretty much sewed nothing by myself and only assembled a bunch of my own outfits that would fit the raven costume. Sometimes I did buy some costume specific stuff from online clothing stores or went into the thrift shop to buy some costume specific clothing pieces. In general, for your first raven costume just go with the flow and try to keep it budget friendly, as your first will unlikely be perfect. And that's about it! Not sure if I missed something but I tried to cover everything as much in detail as I could. Hope it helps!
#tutorial#costume design#cosplay#cosplay tutorial#raven#costume#furry#fursuit#fursuiters#furry fandom#fursuiter
13 notes
·
View notes
Text
Machina - Test World 3
Author: Kino Seitaro (with Akira)
Characters: Mika, Makoto, Sora
Translator: Mika Enstars
"Oh! By the way, Sora’s making one of the ES buildings inside SSVRS into a black company sim!"
[Read on my blog for the best viewing experience with Oi~ssu ♪]
Season: Winter
Location: Saison Avenue (SSVRS)

Makoto: First, let’s begin with an explanation of how to create items here in SSVRS.
In order to create an item, you need the tools to “craft” it.
What tools you need depend on the item you’re making, but you’ll need a kiln for handicrafts, and a sewing machine for attire.
It costs money to get tools, so I’ll give it to you as a gift this time around, Kagehira-kun, okay?
Sora: HaHa~, nice tutorial, Yuuki-sense~!
Mika: Ah, thank ya kindly!
Are ya sure, though? Even if it’s a game item, it still costs quite a lotta real money… VL$, right? I feel kind bad…
Makoto: Nah, don’t worry about it!
This Test World is just an experimental server. Once the test is over, all the in-game money will be reset.
Though, there seem to be some players who are eagerly aiming high for first-mover advantage or something.
But as things are now, it’s far more efficient to work part-time in real life, so I guess it’s sort of all for fun.
Moving on. You can’t make items with only the “kiln” and “sewing machine”, you need to gather materials first.
You need to have these consumable items available in order to make things, like for handicrafts you need things like ore and clay, and for attire you need things like cloth and thread, jewelry, etc…
Mika: Gotcha… That part ain’t different than the real world.
Makoto: Right!
Collecting materials would be considered more difficult here, though… If they’re too easy to collect, the value of the resource would drop.
That being said, I wouldn’t want you to spend the day searching for materials, so I’ll likewise give you materials this time around too!
Now, with the corresponding tool and materials available, all that is left is for the player to design and create…♪
By the way, given you have the right tools and materials, you can make virtually any handicraft and attire you want!
Something like that would be uncanny in real life, but here it’s a feature…♪
Mika: Thank ya, Mako-kun! I can make all sorts of things with this much now! ♪
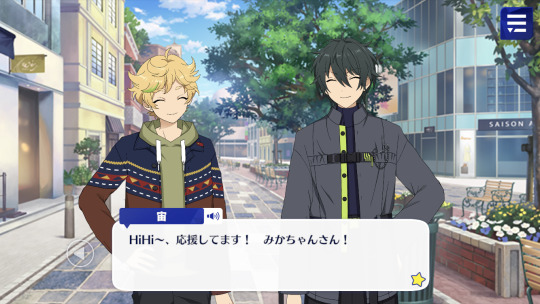
Sora: HiHi~, Sora will lend his support, Mika-chan-san!
Sora would also like to add that items created in SSVRS can be expressed in a way unique to games, that wouldn’t be possible in the real world!
Mika: Expressed in a way unique to games…? Like, how so?
Sora: Showing would be faster than explaining in this case~! ♪ Hop, step, jump! ♪
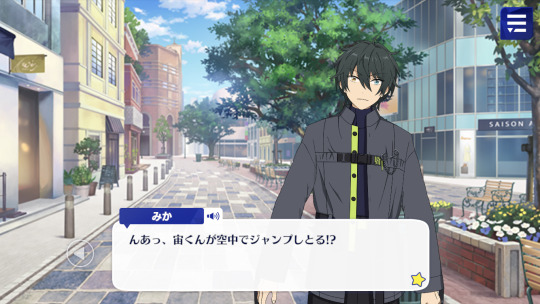
Mika: Nnah, Sora just jumped on thin air!?
Sora: Yes! Sora did a triple jump!
The laws of physics can be ignored a little bit in ways like that, which means unusual handicrafts can be made~! ♪
Makoto: To put it more accurately, the game-side of things can’t calculate everything with absolute precision. It’s difficult for even a supercomputer to simulate the real world 1 to 1.
But personally, I think that makes it more fun, since that means no restrictions on ideas, y’know?
Mika: Yeah! I’m already excited thinkin’ that there’s works of art that can’t be created outside of this world…♪
Alrighty, I’m gonna try t’get my creative juices flowin’ in this world! Thank ya so much, both of ya! ♪
Sora: Nah, Sora and Yuuki-sense~ are simply having fun developing games~! ♪
If Mika-chan-san’s enjoying our game development, then Sora’s super happy too!
Makoto: Hehe, how about we go play together elsewhere so as to not get in the way of Kagehira-kun’s crafting, Harukawa-kun?
Sora: Yes! Sora still has the map from Yuuki-sense~’s previous visit to SSVR! How about going there?
Makoto: Ahaha… Could you cut me some slack with that one?
That was pretty traumatic… I guess you did warn me of that when I had first entered the Test World as part of a part-time job.
Sora: Hm~, but Sora thinks it’d be boring if the game’s purpose was only to mimic reality, though~?
Oh! By the way, Sora’s making one of the ES buildings inside SSVRS into a black company sim!
Would Yuuki-sense~ like to join Sora in enjoying irrational demands?
Makoto: Why would I want to do that!?
Mika: ……
(Ooh, the clay hardens so quickly. Bein’ able to make things without the constraints of time and money sure is an advantage of virtual space, huh…)
(If I end up usin’ a 3D printer, the output would have to be resin, right? Then, I wouldn’t be able to make the most out of this material, would I?)
(So there are pros and cons… Still, I think the good outweighs the bad.)
(You can see the results right away, and like Sora said, you can create data without regard to the laws of physics, so it’s pretty handy for brainstormin’ ideas.)
(Yup, makin’ stuff in this Test World ain’t bad at all!)
(Maybe I’ll be able t’break outta my slump and finish my next work before Oshi-san returns to Japan if I do this, even!)
(If I create as many artworks as I can think of and hold an exhibition within’ SSVRS… If I can do that, I bet Oshi-san would also be pleased! ♪)
(Aaalright, and my first piece is done! And I’ll get started workin’ on the second one shortly~!)
……♪
[ ☆ ]
← prev | story directory | next →
11 notes
·
View notes
Text
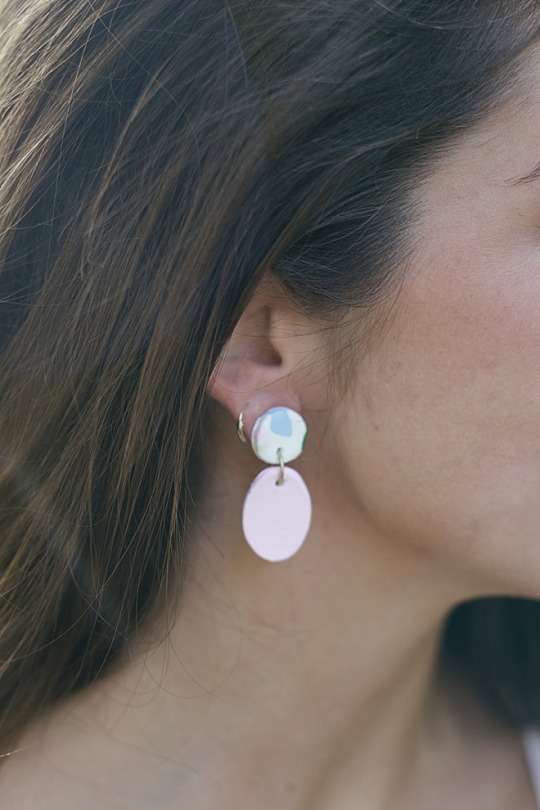
DIY Clay Bridal Party Earrings Gift

Supplies
Clay
Baking Sheet
Parchment Paper
Rolling Pin
Knife or Clay Cutter
Pliers
Earring posts and backs
Jewelry Jump Rings
Glue
Directions
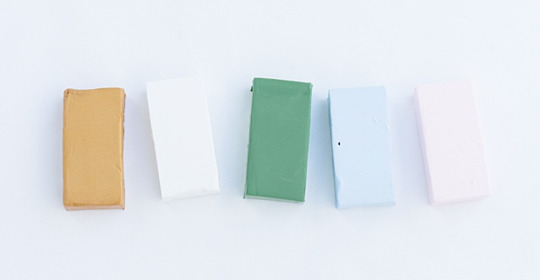
Color Palate
First pick the clay colors that you want for your earrings. I will show you three different styles to make during this tutorial and these are the earthy tones that I chose. Try to pick one neutral color and a gold then pick what ever other colors you want.
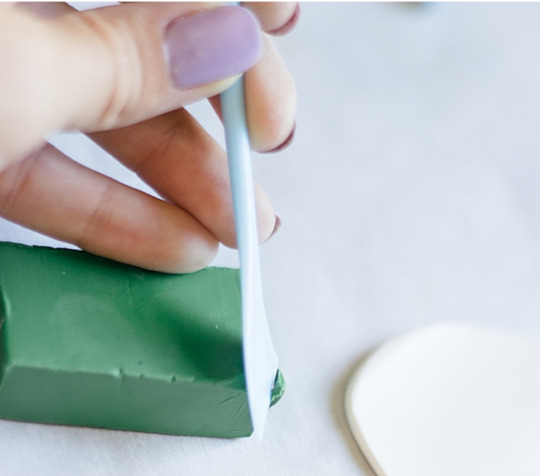
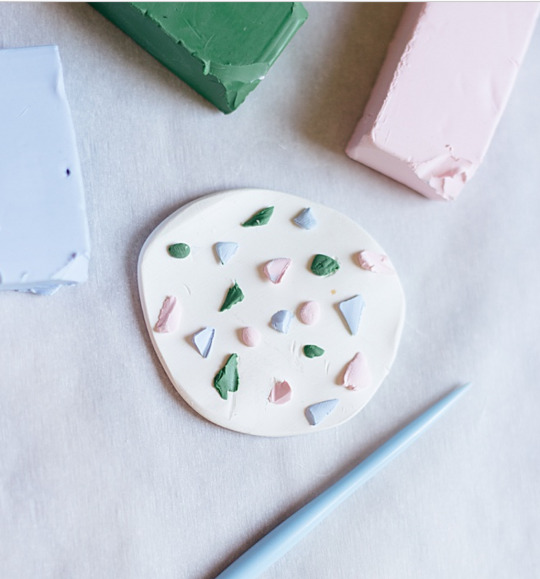
Create Shapes
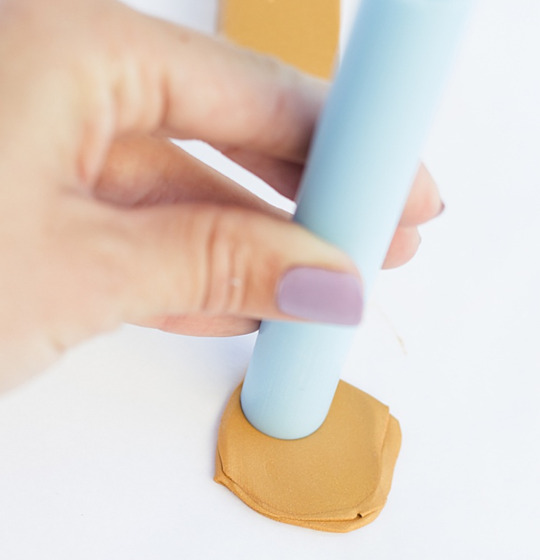
Roll out the clay until it is about 1/16 inches to 1/8 inches thick. For the small circles, I used the end of the clay rolling pin as a shape cutter. You can also create an outline with the parchment paper to cut out with a knife. You can also use every day objects around your house to trace, like a quarter!
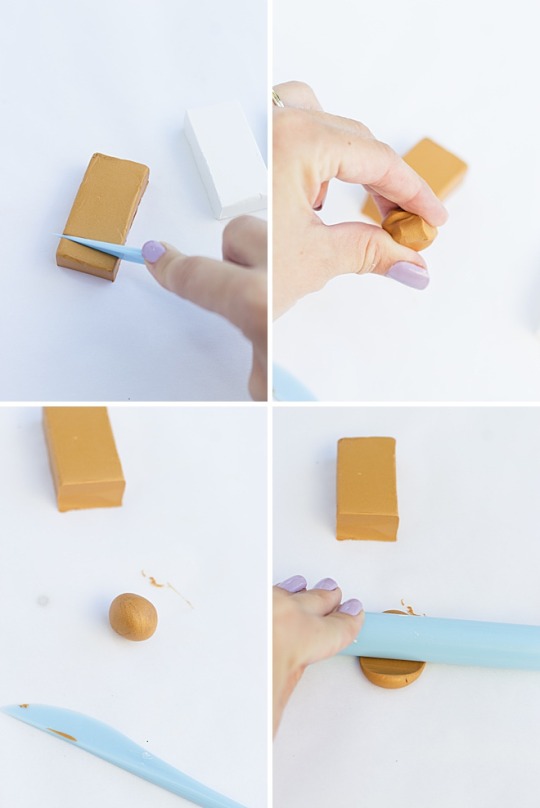


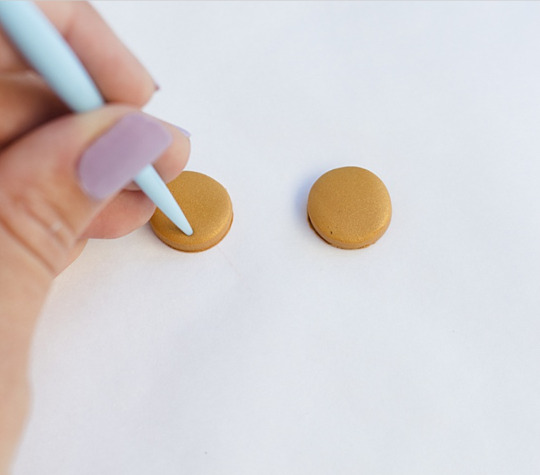
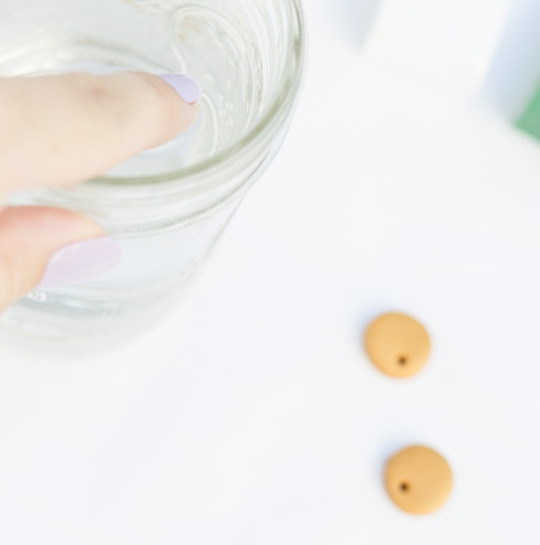
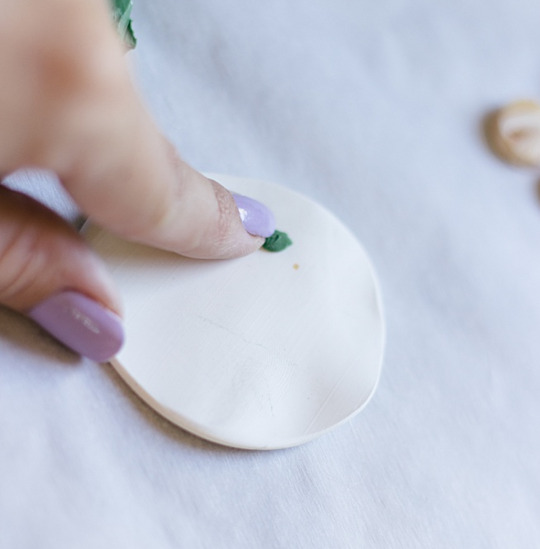
Create a hole in the top of the shape to connect each earring piece together. Dip your fingertip in water to round out any uneven edges to create a smooth surface.

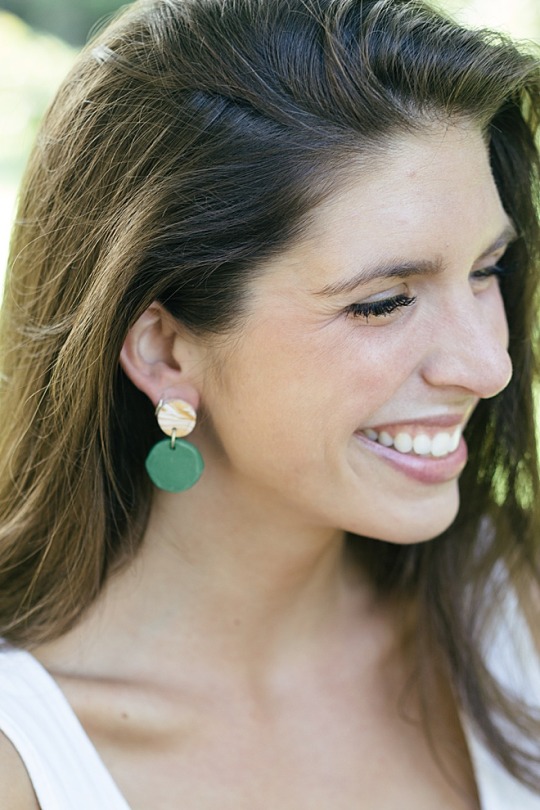
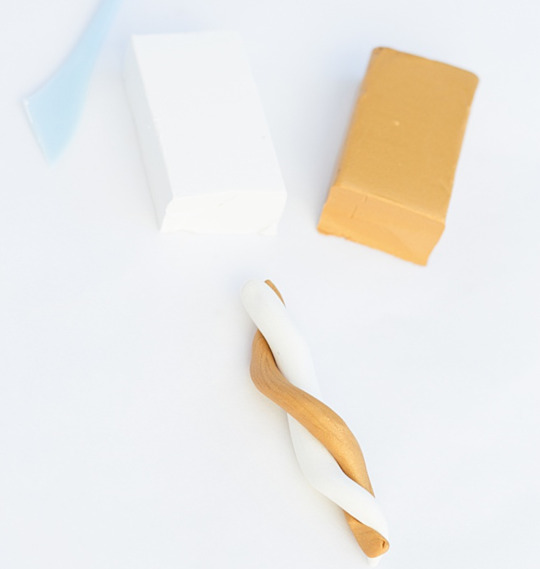
Marbling
Start with two colors, I used white and gold as my base. First create a small ball then roll the individual colors out into snakes. Twist the two colors together then start stretching and folding until you reach a marbling pattern you like. Make sure you don’t mix too much because then it will just turn into one solid color.

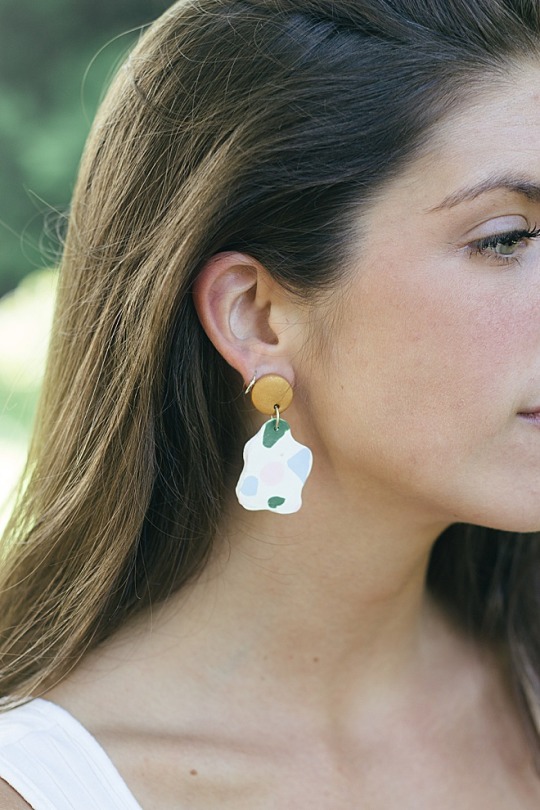
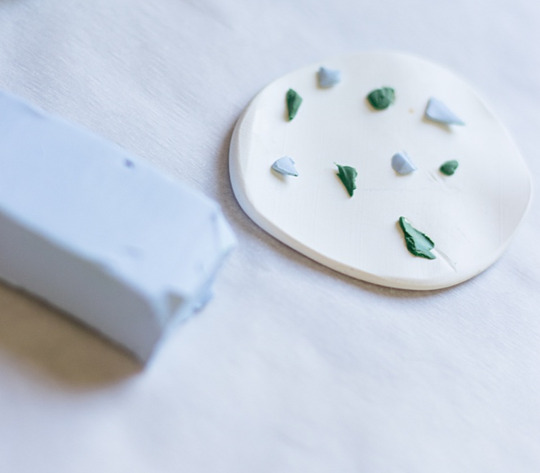
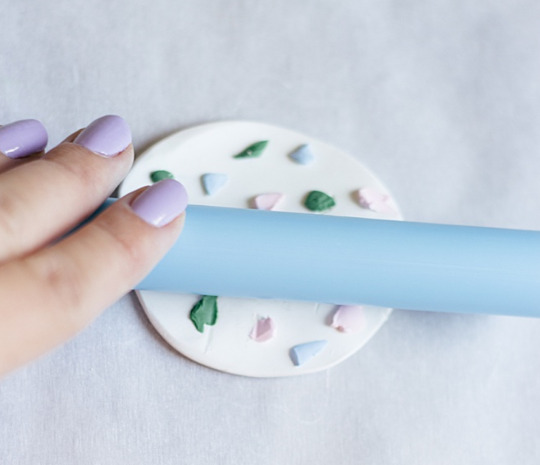
Terrazzo
The terrazo pattern has become one of my favorites. Start with a solid rolled out color, like white. Using a knife, cut off small pieces of other colors and place on top of the white like a party pizza. Once you have the pattern and colors you like, using the rolling pin to flatten out all the specks. Once flat you can cut out the shapes using one of the techniques from the beginning of the post.


Oven
Heat your oven to 250º and line a baking sheet with parchment paper. Place all your pieces on a baking sheet and bake for about 10-12 minutes, depending on the thickness of your pieces. Make sure the clay is completely flat, otherwise you’ll run into problems when you add your earring posts.
Remove the earrings from the oven and let them cool before picking them up.

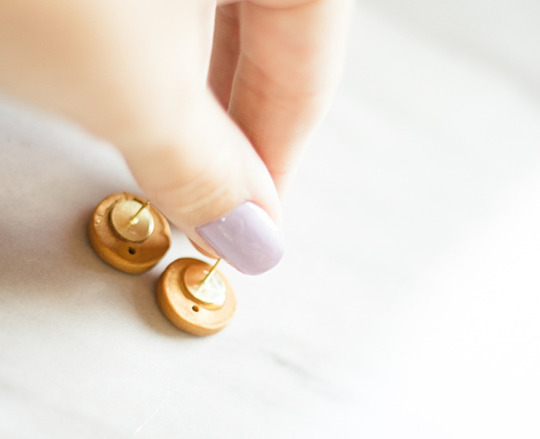
Posts
Put a dab of glue on the back of the post and add it to your small circle earring piece, avoiding the whole you put through.

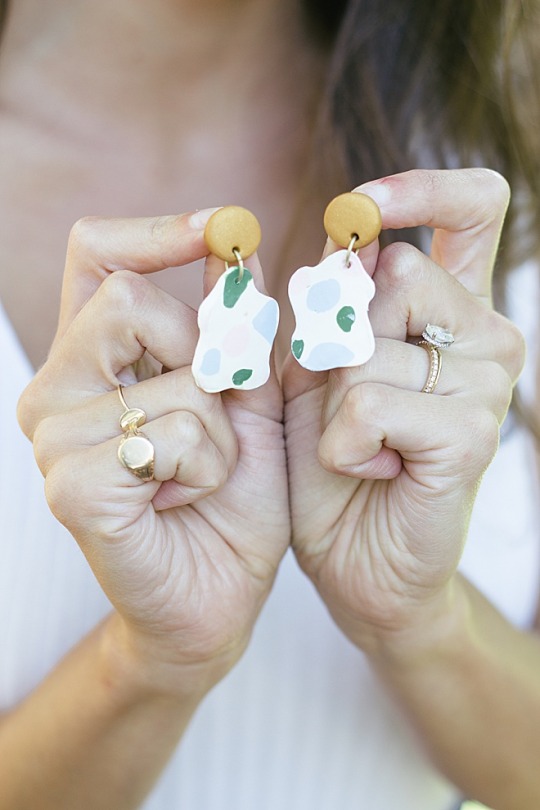
Connecting
Open the jump rings with either your fingers or pliers. Put the jump ring through the small circle piece and attach each correlating piece to it’s color. To close the jump ring, use the pliers to make sure there is no gap.

Gift
These make the perfect bridesmaid gift. You can put them in a little box to give to your bride tribe or simply hold out a hand and say, “Will you be my bridesmaid?"


#diy earrings#clay earrings#bridesmaids gifts#diy clay earrings#jewelry gifts#clay crafts#diy crafts#diy gifts
2 notes
·
View notes
Text
Unleashing Creativity: Exploring Polymer Clay Jewelry Making Techniques
Polymer Clay Jewelry Making Techniques: Introduction Polymer clay is a versatile and forgiving medium, this implies a promising new form of jewelry-making with an identifiable edge. After first being processed it transforms into a durable, tough mold that can do everything from tiny beads and intricate pendants to towering statement necklaces and sculptural earrings. This article introduces the…
#advanced polymer clay techniques#bargello technique polymer clay#beads jewelry making#clay bead jewelry techniques#how to make polymer clay earrings#jewelry#jewelry collection#jewelry making#jewelry making tutorials#polymer clay#polymer clay earrings#polymer clay earrings making#polymer clay jewelry#polymer clay jewelry making#polymer clay pattern techniques#polymer clay technique#polymer clay techniques#polymer clay tutorial#polymer techniques
0 notes
Text

New! Double Foil Polymer Clay Jewelry Tutorial by PolyOriginals http://www.beadinggem.com/2025/02/double-foil-polymer-clay-jewelry.html?utm_source=dlvr.it&utm_medium=tumblr More on the blog!
0 notes
Text
The Timeless Beauty of Art and Craft: Creativity Beyond Boundaries

Art and craft have been integral to human culture for centuries, serving as a means of self-expression, storytelling, and connection. From ancient cave paintings to modern mixed-media installations, these creative practices have continuously evolved, reflecting the diversity and richness of human experiences.
The Essence of Art and Craft

Why Art and Craft Matter
Cultural Preservation: Many crafts are rooted in tradition, preserving the cultural heritage of communities around the world. Techniques like pottery, weaving, and wood carving are passed down through generations, maintaining their historical significance.
Personal Expression: Art and craft provide a platform for individuals to express their emotions, thoughts, and identities. Whether through painting, sculpting, or jewelry making, creators find a voice in their work.
Therapeutic Benefits: Engaging in artistic activities has proven psychological benefits. It reduces stress, enhances focus, and promotes overall well-being. The meditative act of crafting can be a powerful tool for mental health.
Sustainability: In an era of mass production, handmade crafts promote sustainability by using natural materials and encouraging thoughtful consumption. Upcycling and DIY projects further highlight the eco-friendly aspect of crafts.
Popular Art and Craft Forms
Painting: From watercolors to acrylics, painting is a versatile medium that allows endless possibilities.
Pottery: The ancient art of shaping clay into functional and artistic forms continues to captivate artisans and collectors alike.
Textile Arts: Embroidery, knitting, and quilting merge functionality with intricate designs, creating pieces that tell stories through fabric.
Paper Crafts: Origami, scrapbooking, and card making highlight the versatility of paper in crafting.
Jewelry Making: Combining metals, beads, and gemstones, jewelry making offers wearable art that reflects personal style.
How to Get Started with Art and Craft
Find Your Passion: Explore different mediums to discover what resonates with you.
Learn the Basics: Online tutorials, workshops, and community classes can provide foundational skills.
Gather Supplies: Start with essential tools and materials. Many crafts require minimal investment.
Practice Regularly: Like any skill, regular practice enhances creativity and technical ability.
Join a Community: Connect with fellow artists and crafters to share ideas, inspiration, and support.

The Future of Art and Craft
The digital age has revolutionized art and craft, providing platforms like Etsy and Pinterest to showcase and sell handmade creations. Virtual workshops and social media have democratized access to knowledge, enabling anyone to learn and share their work globally.
As we move forward, the appreciation for artisanal craftsmanship and the need for personal expression will continue to drive the relevance of art and craft. Whether you’re a seasoned artist or a beginner, there’s always room to explore and create. Show your skills by making newspaper DIY
Conclusion
Art and craft are more than just hobbies; they are powerful tools for self-love, healing, and cultural preservation. Embracing these creative practices allows us to connect with individual’s own self, express our individuality, and finding out the inner skills to a more sustainable world. So pick up a brush, thread a needle, or mold some clay—let your imagination guide you on a journey of artistic discovery.
For More Details: Visit Our Website : https://www.asmita.mydt.in/
0 notes
Text
The Art of Doing Things for Fun: Hobbies That Don’t Need to Be Perfect
The thing is, hobbies aren’t about perfection—they’re about joy, calm and fulfilment. The beauty of a hobby is that it doesn’t need to be anything other than time for yourself. It’s your time to unwind, not another way to measure success.
Yet, sometimes taking the first step towards a new hobby can feel overwhelming. For it to feel safer, I’ve put together a list of hobbies you don’t need to be “good” at to love (and that don’t break the bank).
Air-dry clay: the low-maintenance cousin of ceramics.
With just a little imagination and patience, you can create anything—from a dainty trinket dish to statement jewelry that you can say, “I made this!” to people when they ask where you got it! And the best part? If your masterpiece doesn’t turn out, no heartbreak necessary—just add water, and it’s like it never happened. A fresh start.
But be warned: once you get hooked, you might find yourself eyeing pottery studio memberships. As a full-time potter, clay-covered hands are the new manicure anyway, right?
Crocheting: Getting hooked
This one may be a bit daunting for some people. It has difficult-to-follow YouTube-tutorials, hook sizes, etc. The trick is finding a pattern that you’re motivated to finish! Start with cheap tools and upgrade when you feel like it!
I took the liberty of finding a couple of manageble patterns with simple, clear instructions!
A bikini for all your adventures to come;
https://www.etsy.com/no-en/listing/1693816088/crochet-bikini-pattern-english-digital?ga_order=most_relevant&ga_search_type=all&ga_view_type=gallery&ga_search_query=tuva+sandok&ref=sr_gallery-1-3&dd=1&content_source=f53ccadbcf4b48b76eda6b2d9b45b25feb715a9a%253A1693816088&search_preloaded_img=1&organic_search_click=1
A plant without the maintenence;
https://www.etsy.com/no-en/listing/1530384623/plant-crochet-pattern-car-hanging-plant?click_key=339f52bdb1336bb6c913920dabac5ac9d71973b1%3A1530384623&click_sum=64de214c&ref=search2_top_narrowing_intent_modules_etsys_pick-4&pro=1&sts=1
Reading: There is no friend as loyal as a book.
With reading, there’s always this anticipation, knowing there’s always something coming for you: the next book, the TV adaptation, or even an event. The best part? These stories come with their own communities, where you can meet people who get why you cried over a fictional breakup.
But what if curling up with a book feels more like a chore than an escape? Enter: audiobooks. Cooking dinner? Painting your nails? Commuting to your next big date? Pop on your headphones and let someone read to you. Trust me, it still counts.
Collages: To Glue Or Not To Glue—That Is The Question.
There’s something therapeutic about piecing together pieces of magazines, old photos, and scraps of paper to create a visual of you. For the fidgety, it’s a perfect pastime; for the creative, it’s a chance to tell your story without even writing a word.
Think of it as manifesting your identity through pictures—one carefully curated image at a time. If you’ve always felt more aligned with colors and textures than with sentences, this one’s for you.
So, grab a crochet hook, turn the page of that book, or find an old stack of magazines. Whatever you choose, remember: it’s your time. And if it gets a bit (or a lot) messy, as long as you enjoy it, you’re doing it right!
Love, Anne
1 note
·
View note