#Pathing Tool Tutorial
Explore tagged Tumblr posts
Visit Tumblr Blog
Explore Tumblr blogs with no restrictions, modern design and the best experience.
Last Seen Tumblr Blogs


Fun Fact
Mobile Tumblr US users spend an average of 4.04 minutes per session on the app.
Text
youtube
Quick Tip- Mastering Motion with the Pathing Tool in Green Screen by DoInk
Welcome to our quick tip tutorial on mastering motion with the Pathing Tool in Green Screen by DoInk! In this blog post and accompanying video tutorial, we'll explore how this powerful feature allows you to create dynamic animations with ease. Whether you're a teacher looking to engage your students or a content creator aiming to add movement to your visuals, mastering the Pathing Tool will take your projects to the next level.
What you will learn:
Introduction to the Pathing Tool in Green Screen by DoInk
Quick tip guide on utilizing the Pathing Tool for motion animations
Tips and techniques for creating smooth and fluid movements
Real-world examples showcasing the versatility of the Pathing Tool
Elevating your projects with captivating animations
With the Pathing Tool in Green Screen by DoInk, creating dynamic animations has never been easier. Whether you're animating characters, photos, objects, or text, mastering this tool is essential for crafting captivating visuals that leave a lasting impression.
#Green Screen by DoInk#Pathing Tool Tutorial#Animation Techniques with Green Screen#Quick Tip Tutorial#DoInk Tutorial for Educators and Content Creators#Creating Motion Animations#Smooth and Fluid Movements#Captivating Animations with Green Screen#How to use DoInk#DoInk#Do Ink#How to path in DoInk#How to use pathing in doink#How to use the pathing tool#Youtube
0 notes
Text
Big Awful Texture Locator

Download the latest version here
Find any texture in The Sims 2 that is too big, or is 'awful' (suboptimal texture format)
Features:
Find textures in any folder you choose
Filter by width, height, memory size, texture format, or number of mipmap levels
Preview and show details of textures the tool found
Remember 'known good' textures, which are optionally excluded from being shown in the list
Look up the path of the package, and the group and instance of the resource
Copy texture/resource details (right click)
Open the package in the default package editor (double click)
Dark mode/light mode and UI scale adjustable
Native on both Windows and Linux
Why?
The Sims 2 has had a long-standing problem known as 'pink flashing' or 'pink soup' when using too much custom content. The Sims 2 is a 32-bit program, which means that it normally has a maximum memory limit of 2GiB (2048MiB) and by using a so-called '4GB patch' you can raise this limit to -you guessed it- 4GiB, this limit might seem pretty large, but due to how the game works you might hit this limit sooner than expected!
Let's say you have 1024x2048 textures (which is the default for Sims 4 textures, and thus also often for 4to2 cc) in RGBA format, these textures will EACH take up 8MiB of texture memory! This means you could possibly only have only a MAXIMUM of 512 textures loaded in memory before you run out of memory completely. In practice, this limit will probably be lower due to other factors.
This tool will help you find textures that take up too much texture memory, and thus (hopefully) help alleviate some amount of pink flashing.
Tutorial
First, download the program from the link above and follow the instructions to open the program.
Now let's get the program looking the way you want: click on the sun/moon button on the top left of the program to switch light/dark mode and click the "UI Scale" number next to it and enter a new number to change the size of the interface.
Set the folder we want to search: at the top bar, search for the 'Downloads:' bar, then at the end click the button with the folder icon and select your folder. Once you've selected a folder the program will instantly start scanning, if you want to restart this scan then at any time you can click the text in the Downloads bar and press enter.
Currently this list will show all textures in the scan folder, which is probably not very interesting. To find some more interesting textures we can add some filters to the texture list. On the top bar, click on the 'Filter' button: this will open the filter list and it will be empty if you haven't added any filters previously.

These filters filter the texture list one by one, each filter removing more textures from the displayed list of textures. To add a filter, click the plus button, and to remove it click on the trashcan button at the start of the line.
To edit a filter, click on the first box to choose the filter type, click on the second box to choose the type of comparison, and select the number in the last box to set the number to compare with.
The comparison type can be < (smaller than), <= (smaller or equal), > (greater than), >= (greater or equal), == (equal), or != (not equal).
The Format filter is different: make a format filter, then click on the 'choose' button and choose the texture formats that you want to show in the texture list.

Let's edit some textures!
In the texture list, find a texture that you think is too big, and either double click on it to open it in the default package editor or right click on it to show a menu to copy the details of the package.
Finally, once you have the package opened in your favorite package manager, edit the texture to be smaller and/or a better texture format, save and ta-da! your game will now use less texture memory.
430 notes
·
View notes
Text
THE GALA - A Clone Dating Sim
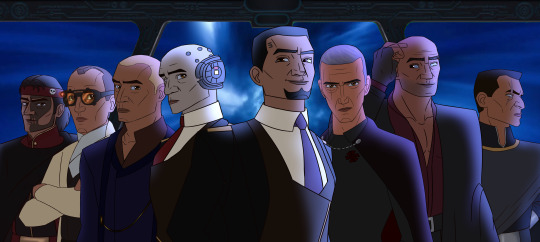
You are a Jedi General. The Council has assigned you a very important mission: the infiltration of a Separatist gala on Raxus. But you will not be going alone--you are allowed to bring a date on this adventure. In the heart of enemy territory, who will you count on to watch your back?
PLAY HERE: THE GALA
Ideal play experience is on desktop! (I think you can play on mobile it just looks a lil yuccy)
Clone bbs x Fem!Jedi player FEATURED CLONES: Sergeant Hunter, Tech, Crosshair, Wrecker, Captain Rex, Commander Wolffe, and ARC Twins Fives & Echo
RATING: 18+ MINORS DNI - The paths can be SFW or NSFW depending on your choices (2nd option is always the NSFW one!) - general warning for smut if you make those choices, more specifics below the cut!
Additional (less relevant) info beneath the cut!
HAPPY MAY 4TH! ENJOY MY LOVES~~

COMPREHENSIVE WARNINGS LIST: In general, lots of flirting, innuendo, pet names. Established relationship for all
Hunter: LOTS of flirting (he is a whore), p in v sex
Tech: Oral (f receiving)
Crosshair: Fingering
Wrecker: Not much for him honestly, implied canoodling (p in v), oblivious boy ♥
Captain Rex: dirty talk, praise, oral (m! Receiving)
Commander Wolffe: rough! p in v
Fives & Echo: Multiple clones (no clonec*st), lots of flirting, Echo is self conscious!
-ART ASSETS I drew all of the Clone art! I found the most nakedest screencap I could of any of them (SURPRISINGLY DIFFICULT) and then traced the base, then looked for Star Wars Male Fashion (WAY FUCKING HARDER) to draw on them and dress them up! I think for Hunter and Fives/Echo I just went crazy but for all the rest lmk if u can spot who I stole the outfits from, i deadass dont remember at this point For Background art I found them all on google images - from what I recall, it's mostly concept art and screenshots from games! -ENGINE I made this in Twine, an incredible tool for making text-based games! I highly recommend looking into it. It's really easy to use and there are a ton of tutorials online!

AN: Thank you so much for playing! Please let me know what you think, I had so much fun making this✨✨ it is so phenomenally cringe but I hope you all enjoy ♥ (also if you spot any bugs or typos, please feel free to let me know and I will fix!!)
TELL ME YOUR FAVORITE PATH I like Rex Crosshair Wrecker the best I think
"""taglist""" - @shinyshayminflower @starrylothcat @pb-jellybeans @jediknightjana
#tbb x reader#the bad batch x reader#star wars x reader#w6fic#wrecker x reader#hunter x reader#tech x reader#crosshair x reader#captain rex x reader#rex x reader#wolffe x reader#echo x reader#fives x reader#clone dating sim#fem!reader#i hope u enjoy playin as much as i enjoyed making :)#idk what else to tag this fr#the bad batch#captain rex
2K notes
·
View notes
Text
For everyone who asked: a dialogue parser for BG3 alongside with the parsed dialogue for the newest patch. The parser is not mine, but its creator a) is amazing, b) wished to stay anonymous, and c) uploaded the parser to github - any future versions will be uploaded there first!
UPD: The parser was updated!! Now all the lines are parsed, AND there are new features like audio and dialogue tree visualisation. See below!
Patch 7 dialogue is uploaded!
If you don't want to touch the parser and just want the dialogues, make sure to download the whole "BG3 ... (1.6)" folder and keep the "styles" folder within: it is needed for the html files functionality (hide/show certain types of information as per the menu at the top, jumps when you click on [jump], color for better readability, etc). See the image below for what it should look like. The formatting was borrowed from TORcommunity with their blessing.

If you want to run the parser yourself instead of downloading my parsed files, it's easy:
run bg3dialogreader.exe, OPEN any .pak file inside of your game's '\steamapps\common\Baldurs Gate 3\Data' folder,
select your language
press ‘LOAD’, it'll create a database file with all the tags, flags, etc.
Once that is done, press ‘EXPORT all dialogs to html’, and give it a minute or two to finish.
Find the parser dialogue in ‘Dialogs’ folder. If you move the folder elsewhere, move the ‘styles’ folder as well! It contains the styles you need for the color coding and functionality to keep working!
New features:
Once you've created the database (after step three above), you can also preview the dialogue trees inside of the parser and extract only what you need:

You can also listen to the correspinding audio files by clicking the line in the right window. But to do that, as the parser tells you, you need to download and put the filed from vgmstream-win64.zip inside of the parser's main folder (restart the parser after).
You can CONVERT the bg3 dialogue to the format that the Divinity Original Sin 2's Editor understands. That way, you can view the dialogues as trees! Unlike the html files, the trees don't show ALL the relevant information, but it's much easier to orient yourself in.


To get that, you DO need to have bought and installed Larian's previous game, Divinity Original Sin 2. It comes with a tool called 'The Divinity Engine 2'. Here you can read about how to unstall and lauch it. Once you have it, you need to load/create a project. We're trying to get to the point where the tool allows you to open the Dialog Editor. Then you can Open any bg3 dialogue file you want. And in case you want it, here's an in-depth Dialog Editor tutorial. But if you simply want to know how to open the Editor, here's the gist:
Update: In order to see the names of the speakers (up to ten), you can put the _merged.lsf file inside of the "\Divinity Original Sin 2\DefEd\Data\Public\[your project's name here]\RootTemplates\_merged.lsf" file path.
Feel free to ask if you have any questions! Please let me know if you modify the parser, I'd be curious to know what you added, and will possibly add it to the google drive.
2K notes
·
View notes
Text

Someone asked me how I created the fade transition in this gifset which I’ll try to explain in the most comprehensive way that I can. If you've never done something like this before, I suggest reading through the full tutorial before attempting it so you know what you'll need to plan for.
To follow, you should have:
basic knowledge of how to make gifs in photoshop
some familiarity with the concept of how keyframes work
patience
Difficulty level: Moderate/advanced
Prep + overview
First and foremost, make the two gifs you'll be using. Both will need to have about the same amount of frames.
For ref the gif in my example is 540x540.
I recommend around 60-70 frames max total for a big gif, which can be pushing it if both are in color, then I would aim for 50-60. My gif has a total of 74 frames which I finessed using lossy and this will be explained in Part 4.
⚠️ IMPORTANT: when overlaying two or more gifs and when using key frames, you MUST set your frame delay to 0.03 fps for each gif, which can be changed to 0.05 fps or anything else that you want after converting the combined canvas back into frames. But both gifs have to be set to 0.03 before you convert them to timeline to avoid duplicated frames that don't match up, resulting in an unpleasantly choppy finish.
Part 1: Getting Started
Drag one of your gifs onto the other so they're both on the same canvas.
The gif that your canvas is fading FROM (Gif 1) should be on top of the gif it is fading INTO (Gif 2).

And here's a visual of the order in which your layers should appear by the end of this tutorial, so you know what you're working toward achieving:

Part 2: Creating the grid
Go to: View > Guides > New guide layout
I chose 5 columns and 5 rows to get the result of 25 squares.

The more rows and columns you choose, the more work you'll have to do, and the faster your squares will have to fade out so keep that in mind. I wouldn't recommend any more than 25 squares for this type of transition.

To save time, duplicate the line you've created 3 more times, or as many times as needed (key shortcut: CMD +J) and move each one to align with the guides both horizontally and vertically. You won't need to recreate the lines on the edges of the canvas, only the ones that will show.
After you complete this step, you will no longer need the guides so you can go back in and clear them.

Follow the same duplicating process for the squares with the rectangle tool using the lines you've created.
Align the squares inside the grid lines. The squares should not overlap the lines but fit precisely inside them.
This might take a few tries for each because although to the eye, the squares look all exactly the same size, you'll notice that if you try to use the same duplicated square for every single one without alterations, many of them will be a few pixels off and you'll have to transform the paths to fit.
To do this go to edit > transform path and hold down the command key with the control key as you move one edge to fill the space.
Once you're done, put all the squares in their separate group, which needs to be sandwiched between Gif 1 and Gif 2.

Right click Gif 1 and choose "create clipping mask" from the drop down to mask it to the squares group. This step is super important.
After this point, I also took the opacity of the line groups down to about 40% so the lines wouldn't be so bold. Doing this revealed some squares that needed fixing so even if you aren't going dim the lines, I recommend clicking off the visibility of the lines for a moment to make sure everything is covered properly.

Part 3A: Prep For Key framing
I wanted my squares to fade out in a random-like fashion and if you want the same effect, you will have to decide which squares you want to fade out first, or reversely, which parts of Gif 2 you want to be revealed first.
In order to see what's going on underneath, I made Gif 1 invisible and turned down the opacity of the squares group.

If you want text underneath to be revealed when the squares fade away, I would add that now, and place the text group above Gif 2, but under the squares group.

Make a mental note that where your text is placed and the order in which it will be revealed is also something you will have to plan for.
With the move tool, click on the first square you want to fade out. Every time you click on a square, it will reveal itself in your layers.
I chose A3 to be the first square to fade and I'm gonna move this one to the very top of all the other square layers.
So if I click on D2 next, that layer would need to be moved under the A3 layer and so on. You'll go back and forth between doing this and adding key frames to each one. As you go along, it's crucial that you put them in order from top to bottom and highly suggested that you rename the layers (numerically for example) which will make it easier to see where you've left off as your dragging the layers into place.

Part 3B: Adding the Keyframes
This is where we enter the gates of hell things become tedious.
Open up the squares group in the timeline panel so you can see all the clips.
Here is my example of the general pattern that's followed and its corresponding layers of what you want to achieve when you're finished:

So let’s try it!
Expand the control time magnification all the way to the right so you can see every frame per second.

As shown in Part 3A, select your first chosen square.
Where you place the time-indicator on the panel will indicate the placement of the keyframe. Click on the clock next to opacity to place your first keyframe.

Move the time-indicator over 3 frames and place the next key frame.

Things to consider before moving forward:
Where you place your very first keyframe will be detrimental. If you're using a lot of squares like I did, you may have to start the transition sooner than preferred.
If you're doing 25 squares, the key frames will have to be more condensed which means more overlapping because more frames are required to finish the transition, verses if you're only using a 9-squared grid. See Part 4 for more detailed examples of this.
The opacity will remain at 100% for every initial key frame, and the second one will be at 0%.

Instead of creating two keyframes like this and changing the opacities for every single clip, you can copy the keyframes and paste them onto the other clips by click-dragging your mouse over both of them and they'll both turn yellow. Then right click one of the keyframes and hit copy.
Now drop down to your next clip, move your time-indicator if necessary to the spot where the first keyframe will start and click the clock to create one. Then right click it and hit "paste".


Tip: When you have both keyframes selected, you can also move them side to side by click-dragging one of them while both are highlighted.
Your full repetitive process in steps will go as follows:
click on square of choice on the canvas
drag that square layer to the top under the last renamed
in timeline panel: drop down to next clip, move time-indicator tick to your chosen spot for the next keyframe
create new keyframe
right click new keyframe & paste copied keyframes
repeat until you've done this with every square in the group
Now you can change the opacity of your squares layer group back to 100% and turn on the visibility of Gif 1. Then hit play to see the magic happen.
PART 4: Finished examples
Example 1

the transition starts too soon Cause: initial keyframe was placed at frame 0
the squares fade away too quickly Cause: overlapping keyframes, seen below. (this may be the ideal way to go with more squares, but for only 9, it's too fast)

Example 2

more frame time for first gif
transition wraps up at a good point Cause: in this instance, the first keyframe was placed 9 frames in, and the keyframes are not overlapping. The sequential pair starts where the last pair ended, creating a slower fade of each square.


Part 5: Final Tips and Saving
You can dl my save action here which will convert everything back into frames, change the frame rate to 0.05 and open the export window so you can see the size of the gif immediately.
If it's over 10gb, one way to finesse this is by use of lossy. By definition, lossy “compresses by removing background data” and therefore quality can be lost when pushed too far. But for most gifs, I have not noticed a deterioration in quality at all when saving with lossy until you start getting into 15-20 or higher, then it will start eating away at your gif so keep it minimal.

If you've done this and your gif is losing a noticeable amount of quality and you still haven’t gotten it below 10mb, you will have no choice but to start deleting frames.
When it comes to transitions like this one, sometimes you can't spare a single frame and if this is the case, you will have to return to the timeline state in your history and condense the key frames to fade out quicker so you can shorten the gif. You should always save a history point before converting so you have a bookmark to go back to in case this happens.
That's pretty much it, free to shoot me an ask on here or on @jugheadjones with any questions.
#gif tutorial#photoshop tutorial#transition tutorial#grid tutorial#usergif#ps help#tutorials#tutorials*#resources*#requested
445 notes
·
View notes
Text
Resources for Creating: My Go-To things.
Update: I’ll be updating the list on this page from now on, since Tumblr can’t handle so many hyper-links in one post, on Dreamwidth - right here, so I won't have to update it multiple times. Please note: I keep updating this list, and updates aren't showing up on reblogs. Please check the original post for the most up to date list.
Sooo this is going to be a long comprehensive list. I got back to this game after a long time and with a different computer, with a dedicated graphics card, hurray! It made me want to return to making things, so while gathering back all the necessary stuff, I've complied this list. It might be is updated as I go along, but these are the main things I use. Maby one day i'll even finish something. So here are my go-to resources & tutorials; I'm posting it here for safekeeping, and hopefully others will find it helpful. Everything that's listed is here free. So many wonderful things for free under the cut.
Programs – General:
Creating: Blender. Blender Addons: 3D Print Toolbox – comes with blender, enable it from within the program. Originally for 3d printing. Good for fixing flipped normals, and some quick general repairs. Source Tools And source tools wiki – for exporting as SMD!!!! (SimPe: to enable bump maps for the mesh on import). GMDC Addon for Blender 4.0+ by Nopke.
GIMP. GIMP Addons: G'MIC-Qt. Resynthesizer. Nvidia dds?. Doesn’t it come with Gimp?
Other: Nvidia Texture Tools Exporter (iirc it works with all graphic cards that are compatible, doesn’t require Nvidia). For making Normal / Bump / Cube Maps. For high quality compression.
NormalMaps - Online, For making all types of maps, has good setting menus. A very cool tool.
Converting: Umodel, for Unreal Engine (Static meshes: export as gtlf.2. Animated meshes: export as psk. Requires Add-on). AssetStudio, for Unity. AC Viewer, self implied (+ USD Addon for blender). QuickBMS* and support forum, for basically everything else. (don't forget the required scrips, down the same page). *I haven’t tested it fully yet, but it was recommended here. A tutorial for it is listed further down. Works like a charm.
UV Mapping: UV Mapper, Classic (free) and the most recent Demo (for visualization).
Programs – Sims:
Never Mind the Bollox, Here's Osab and MAGIkarp to the rescue!
Latest version of SimPe, works with a non-default installation path. Chris Hatch's updates.
Home Crafter installation, Post by Huge Lunatic at Sims2Artists.
Repository Wizard, by Pick'N'Mix Mods. A game changer.
DBPF Compare, by Pick'N'Mix Mods.
Object Relocator, also by Pick'N'Mix Mods.
SMD Tools, by Lazy Duchess.
The Compressorizer, by JFade – Lazy Duchess's edit.
Bulk Rename Utility, to change file names in well, bulk. As explained by io here.
Lot Adjustor, by Mootilda at MTS.
Tutorials:
Override the game's graphic settings via Nvidia, as explained by iCad. The settings to Nvidia Profile Inspector she linked to at MTS have been deleted for some reason, here they are via WebArchive.
Meshing in Blender:
Mesh Optimization Info (and links), by Crisps&Kerosene.
Additional - Reducing Polycount:
Tutorial, by Flaming-Chickens (another username on other sites perhaps?)
Edge – Un-subdivide, a quick one by CG Link.
Transfer high poly details to low poly object in Blender, by 3Dnot2D.
Shrinkwrap Modifier - Blender Tutorial for Beginners - Basics, by in2vert.
Placeholder for this Addon that I want to try but haven't found, something for AR that was on facebook's defunct AR.
Scaling tips, by Blender Secrets.
How to fix inverted/ flipped normals, by ipaintsmallthings.
Converting: How to Extract 3D Models, Textures, Music from Unreal Engine Games, by iwanMods.
Extract 2D/3D/SFX Unity Assets fast & easy from your Unity Game, by iwanMods as well.
How to use QuickBMS, by darkhorse.
Guide to Converting 3t2 and 4t2 Part 01 and Part 02, by Chiaroscuro/tenlittlepandas.
Converting TS4 Windows and Doors, by Crisps&Kerosene.
Using Different Material Maps as Shading/Details for Base Texture, in Gimp or Blender, by Pineapple Forest & Crisps&Kerosene: https://www.tumblr.com/crispsandkerosene/764893644571525120/great-info-thats-the-reason-some-conversions?source=share
Texture Editing in GIMP:
Using Gimp Add-ons: G'MicQT. Resynthesizer. Both by Davies Media Design. This guy's channel for Gimp in general – here's a good one to begin with. And another one about layer masks.
Making a texture Tile Seamless: 1. My favorite - How to Make Seamless Textures for Cinema 4D - 3 Levels of Photoshop Wizardry using iPhone Photos, by School of Motion.
2. Simple Trick for More Realistic Texture Patterns in GIMP, by Davies Media Design – Quick and simple, using the Resynthesizer plugin. Good for patterns.
Making walls in SimPe out of a square texture, with minimal quality loss. To be written.
SimPe: Cloneable Objects: A List of Good Objects for Cloning, by IgnorantBliss at MTS.
Huge Lunatic's Tutorials, Her website.
Object Creation for Absolute Beginners, by Moune.
Sims 2 start to finish Object Creation Tutorial, by JWoods, Numenor, Lethe_s & IgnorantBliss.
The Material Definition (TXMT) Guide, by PixelHate – very comprehensive. Part 5 is about Bump/ Normal maps.
Null (Texture-less) Groups, by Skell. For bodyshop, for Objects see an elaboration by Midge the Tree below.
Crisps&Kerosene discovered how to add specular maps to objects! It's incredible there are still new things to discover in this ancient game.
More on Specular Maps, by Pineapple Forest.
Making new flooring & walls with SimPE, by Charisa. Includes adding Bump/Normal maps. She added a file to clone from in the comments below. It works for normal maps as well. Here's cool discovery in the game files.
Expanding footprint: a mini tutorial, by Deedee.
How to add correct drop shadows to objects, by Yuxi, via Wayback Machine.
Making Objects Viewable in Neighborhood View, by iCad.
Making Objects Visible In Build/Buy Mode, Invisible In Live Mode, by Midge the Tree.
Making Seasons-Friendly Trees, by Echo.
Io/ Serabiet's resources list, mainly for Bodyshop but not just.
Pineapple Forest's Tutorials, useful tips for efficiency and optimization.
MTS modding forum in General.
The Sims 2 Tutorials, on Tumblr. A database, is more updated.
Sims2Artists tutorials section.
LeeFish modding forum.
Garden of Shadows, Tree of Knowledge section.
Troubleshooting: What to do if you get a System.OutOfMemoryException Error, SimPe Forum, via WayBack Machine. Thank you @fanseelamb for the find.
How to read object error logs: I just want to know what causes it!!, by Episims.
Common TS2 errors, by Midge the Tree.
General game fuckery: How to Stop Sims 2 Crashing (Memory Allocation Fix and 4GB Patch Repair), by Jessa.
Graphics card problems, LeeFish forum.
Graphics help - DIY, by Kiri. How to fix faulty Texture Memory allocation, and the problems that stem from it. Tumblr can't handle anymore hyper links so here it is: https://celebkiriedhel.tumblr.com/post/189431721483/graphics-help-diy
General: Switching between save folders without renaming them, by Nopke.
Resources:
3D Models Online*: Various furniture designers' websites: Porada, Zanotta, Muuto, Hay, Poltrona Frau, many luxury furniture designer basically.
3D Warehouse, belongs to Sketchfab (get the Collada files).
Scan the World.
Wikimedia Commons. And more.
*(NOT OPTIMIZED).
Textures: Architextures.
Fabrics & Wallpapers: Natural Stones: Wall Plasters:
iCad's Woods. Shastakiss's Cluedo Metals, Yeti Metals, Pirate Woods. Goat's Woods.
Textures from other games: Dishonored, Thieve and much more, by Saricoya at GoS. Dreamfell by io.
Resource sharing threads at Garden of Shadows.
SimPe - General: CEP Extras list, HugeLunatic at Sims2Artists.
TXMT settings for different materials, by Hafiseazale.
Extended SimStandardMaterial Shader for the Sims 2 + Optionally Brighter Sims, by Crisps&Kerosene.
Custom CubeMaps, by Crisps&Kerosene.
Shiny TXMT Settings & Cube Maps Packs, by Pineapple Forest.
Build/ Buy: Templates for Recoloring Maxis items; MTS Templates sction, Hafiseazale (+cc), ZeroDark.
Template for Seasonal Trees, Gwenke at Sims2Artists.
Making Roof Recolors, Tutorial & template by Numenor, great template by iCad.
Pack for making food clutter usable, by DeeDee.
CAS: Default Makeup Packages - BYO Packages, by Huge Lunatic.
Body shape, Io/Serabiet on Tumblr.
Skin template, Io/Serabiet on Tumblr.
Hair texture, iCad.
Color Actions, Pooklet on Tumblr.
That's it for now.
Edit: forgot about CEP extras. Added more links. Edit 02: Added Troubleshooting section under tutorials.
#ts2#ts2 resources#ts2 creation resources#ts2 resources for creators#the sims 2#sims 2#resources#ts2 cc#sims 2 cc#the sims 2 cc#well its cc related#sims 2 resources#the sims 2 resources
67 notes
·
View notes
Text
SEA'S COMMUNITY COMPENDIUM UPDATE
We have a massive one today! Huge thanks to a close friend of mine who sent me every single bookmark of xiv resources she had. 💖
Additionally, a good handful of these resources were sourced from a list originally created by @rinhkitty, which you can find here. I have tried to include the more recent/active of the lot, so it's not a one-for-one. Thank them for a lot of the large scale resources you'll find below! ✨
As of 04/12, I have added the following resources (in no particular order) to Sea's Community Compendium for FFXIV Creatives:
LARGE SCALE
GARLAND TOOLS — Contains XIV resources such as Garland Data, everything database, crafting lists and equipment calculators; Garland Bell, gathering timers, collectable resources and hunt windows; and FFXIV Fisher, daily fishing windows, bait paths and catch checklist. Maintained by Clorifex Ezalor of Zalera.
TEAMCRAFT — Create crafting lists and collaborate with others, set gathering alarms, simulate crafting rotations, and more!
CAT BECAME HUNGRY - FFXIV ANGLER — Contains everything and anything to know about fishing including specific fish guides, location, baits, aquarium fish and more!
FFXIV - CRAFTING AS A SERVICE — Crafting information and planning for FFXIV!
FFXIV GARDENING — The FFXIV Gardening Database is a collection of everything related to gardening in Final Fantasy XIV: A Realm Reborn. It was created to organize and visualize the results obtained from crossbreeding.
SIGHTSEEING LOG HELPER — This tool will help those trying to complete their pesky Sightseeing Log by letting them know upcoming weather patterns for each zone!
EUREKA TRACKER — For everything and anything to do with Eureka mobs, tracking and weather patterns.
FFLOGOS — for tracking of items/actions related to Eureka.
FFXIVSQUADRON — A comprehensive tool that helps you assess the success rate of various squadron missions.
FFXIV CHOCOBO COLOUR CALCULATOR — Will calculate what chocobo feed you will need to get from your current colour to your desired colour. *rng not included.
FFXIV HOUSING — A site specialising in the documentation of all housing items available in game.
HOUSING SNAP — A compilation of player-made housing designs. Can be used for inspiration or places to visit!
MISC
NPC CHAT BUBBLES — Would you like more NPC chat bubbles for edits? Say no more! Created by @alexoisxiv.
OLD TUMBLR LAYOUT BY PIXIEL — While not XIV specific I know a lot of people aren't fans of the new Tumblr layout, so this is a fix that will revert it to an as close as possible approximation of the new one. I won't tag the creator as I don't think they're in the xiv community, but it's run by @/pixiel!
HOW TO CURSE LIKE AN ISHGARDIAN — Do you want to make the church blush? Do you want to incur the wrath of Halone? @stars-and-clouds has compiled a list of appropriate curses/swear words for you!
FINAL FANTASY XIV SIDEQUEST GUIDE - HEAVENSWARD EDITION — maintained by @chatty-moogle, this guide explores interesting sidequests in Heavensward that will give you more information about the lore, titbits about locals and other interesting information!
TRUST BANNERS FOR XIV — If you have ever wondered how people mimic the Trust banners used in XIV, look no further! @locke-rinannis has a template for you.
MAKING USE OF RECOMMENDATIONS — created by @autumnslance, this guide will help you make your recommendations tab useful rather than annoying.
BOTANICA EORZEA — A guide to the flora of Eitherys and her reflections, including fungi and seedkin. For reference in writing and roleplaying. Maintained by @tinolqa.
GPOSE TIPS — A tutorial on how to achieve clarity and detail in your XIV screenshots! Created by @aryalaenkha.
UI MACRO MENUS — A guide on how to use macros to create small UI menus for XIV. Written by @diskwrite-ffxiv.
TYPHON GATE RESEARCH — Created by @mcstronghuge, these are the statistically best places for your character to stand for the Typhon Gate!
CHANGELOG
HYDAELYN HEALTH HAVEN has been removed at the request of the owner.
Moved THE BALANCE higher on the list to reflect alphabetical sorting, excluding names that start with The.
Misc formatting as needed.
Added some additional clarification around large-scale discords/spaces; in particular: Large-scale community discords such as the XIV Reddit Discord, Hunts, GPOSE promotions and broad-space roleplay servers that harbour a large number of people and are publicly available to all. These may not have an RP focus but will assist in other aspects of the game. Also includes well-known tools/resources that are utilised by large groups of people and assist in gameplay elements.
Added a quick-jump menu to the bottom of each of the table of contents menus to assist in navigation.
Want to submit? You can either fill out the google form here, send me an ask with the relevant information contained on the Compendium, or join my Discord at SEAFLOOR (21+ only)!
I am sure there's probably a couple of things I have missed or links/formatting that might be broken. Please don't hesitate to let me know if anything is out of place. I'm going to take a break now. I'm pretty sure that's the biggest edit that's ever going to occur on this document!
#final fantasy xiv#ffxiv#crystal rp#crystal roleplay#。・゚゚・ — sea's community compendium#。・゚゚・ — sea speaks
162 notes
·
View notes
Text
Downtimes, module editor, water temple
Happy summer! There's smoke in Portland but it's not too bad. Bless firefighters. Work on Lancer Tactics continues apace.
This month has been mostly focused on the largest heretofore-untouched section of the game: downtimes and the module editor for designing the sequences between combats. We're not planning on doing anything particularly innovative or new in its design — if you've played Banner Saga, Fire Emblem (gameboy versions), or Rogue Squadron you'll recognize what's going on here.

Repair, level up, have visual-novel-style conversations with companions, do some light choose-your-own-adventuring, and pick & launch the next combat. All pretty standard downtime fare — games have pretty thoroughly explored these patterns as vehicles for narrative at this point.

The unique thing that Lancer Tactics is offering on this front is an editor to make your own entire campaigns. Classic games like Warcraft or Age of Empires had incredible scenario editors, but making anything more than a one-mission map was solely the domain of modders. Over the last few weeks, we've gotten a full basically-visual-novel-editor working ingame where you can orchestrate NPC story arcs, clocks ticking, branching paths, and triggered events for all the stuff that happens between combats.


All of the campaigns we ship with the game are going to be made with these same editors, which'll force us to really make sure that they're solid tools. I think it'd be very funny to someday see someone like completely ignore all the mech stuff and just make a visual novel in this engine.
There's no new preview game build this month because adding this big section of the game means too many things are under construction. I'm happy with how fast we've been able to get this going, but making ingame editors is a lot of unglamorous UI piping and data refactoring work. Fingers crossed that it'll come together enough that we'll be able to get the first version of this editor in your hands in time for the next update
Other Changelogs
Carpenter has started re-making the tutorial level from the demo in this new engine, which is pushing us to add a bunch of stuff to the combat editor. I added triggers for playing arbitrary effects on the map, moving the camera, storing arbitrary data to the battle/module states, enabling/disabling/triggering other triggers, AND/OR conditions, and putting execution limits on triggers.

Triggers can highlight UI or actions (so it can be like "use the boost to get through!" and the boost button becomes all shiny)

New "camera start" zone type
Added a "hotspot" zone type that has a little floating title, and plastered the names of other zones on the map (visual style stolen from some Foundry VTT modules)

Added water, whose level can be set via the editor or triggers.


Added unmounted pilots who can mount up into Shut Down mechs. We continue to plan to not have pilot combat be a part of the core game, but it'll be useful for scenario or scripted sequences.

Added activation pips and template icons to the mini healthbar on units.

A bunch more portrait editor assets from Martina, including facial hair. Here's a check Carpenter did where he tried to recreate some official Lancer art ingame. ✨

Schedule update
Taking a look at our original date for the "bones" of the game ("finishing the battle engine, basic character creation, 2 mechs per manufacturer, and an a 'instant action' mode"), we estimated being able to get it done by the end of November. The emotional milestone for me on this front is getting the game to a complete enough state that I feel OK about swapping it in on the itch.io page.
I've been saying that the 3D cataclysm has pushed us back back about 3 months, and I think that's still holding true. Carpenter and I haven't officially made the call yet, but I think it's likely we'll need that time to port more mech content; here's a graph they made that shows about where we're sitting on the PC and NPC mechs for the "bones" target in terms of mechanics and action icon/sprite.

(This data is pulled from a big table they made that includes ALL talents/gear/traits where we've been marking things off as we've implemented them. Very handy for tracking where we are.)

That's all for now. Tata!
81 notes
·
View notes
Text

Mon. 30th Sept. 2024
Programming is often viewed as a practice bound by rules and conventions, but I believe it can be so much more than that – it can be about exploration and creativity.
Many forget that programming is meant to be fun, a field where discovery and pushing boundaries are encouraged and celebrated.
While there are established "right" ways to use tools and endless documentation to guide us, I find joy in exploring things on my own terms. Experimenting, making mistakes, and learning through trial and error give a sense of achievement that can't be found in a tutorial. It’s a bit like how the web started out simply as a way to share text and information and has evolved to a place where you can play a 3D SpongeBob game right in your browser. Programming is a limitless playground, constantly evolving, and every day we learn how much higher the bar has been set.
So, whether I'm using an old technology or a new one, following conventions or breaking them, the excitement I get from exploration and discovery makes it worthwhile.
Advice and guidance are important, of course, but finding your own path, stumbling upon new ideas, and innovating in your own way – that's what truly makes programming come alive.
#xc: note to myself#coding#codeblr#programming#progblr#studyblr#studying#tech#comp sci#computer science
84 notes
·
View notes
Text

THE SIMS 3 TUTORIAL
HOW TO CREATE CUSTOM FOOD DEFAULT REPLACEMENT MOD USING CUSTOM MESH & WORKING GEOSTATES (FULL, HALF, EMPTY)
This is default replacement replacing existing food in Base Game or Expansion Packs using EA's recipe and custom mesh & texture. If you are not satisfied with EA's existing mesh and texture, sure you can replace them with this easy-to-follow tutorial with pictures explained one by one. No custom recipe, no CCLoader, no scripting.
This is how I created Authentic Chinese Spring Rolls Replacement Mod using custom mesh and texture.

----------------------------------------------------
This tutorial is for intermediate, which means already know the basic principle of doing default replacement mod.
If you are beginner, haven't tried default replacement mod mesh & texture before, recommended to try the Default Replacement Tutorial for Simple Object first. TSRW Workshop, Milkshape, etc. Tools to prepare on that tutorial as well.
----------------------------------------------------
I created this tutorial because there is no tutorial about default replacement food mod using custom mesh and explaining about how to do the GeoStates properly. I did trial-and-error and accidentally found the method how to replace EA mesh with edited mesh, and the GeoStates are fully working.
The challenge of doing food default replacement is that food mesh cannot be cloned simply on s3oc. There's no OBJD for "EggRolls" "Stir-Fry" etc. other food. The only OBJD available for clone on s3oc is Burger.
Sims 3 Object Export cannot replace s3asc because it keeps throwing error and cannot make 3 working GeoStates (Full, Half, Empty).
-----------------------------------
Note: You need World Adventures Expansion Pack to use my example, Egg Rolls. You can replace food from Base Game or any Expansion Pack.
✳️ Step 1: Find all Egg Rolls file strings: Cook, Eat Serve files on S3PE
Instead of cloning from s3oc, we have to find the file from game file package on s3pe.
Why? Because the food cannot be cloned simply from OBJD. You cannot find file "Egg Rolls" no matter how careful you inspect every file filtered "WA" (World Adventures Expansion Pack) on s3oc catalogue.
The only food you can clone its OBJD on s30c is Burger. You will clone that Burger OBJD later. Right now you have to find every file with word "Egg Rolls" on game package.
⚠️I suggest you make duplicate of game package for modding purpose instead of using package that is readable by game when the game is running. It is to avoid corruption because you accidentally replaced the files. If corrupt happens you have to re-install the game. ⚠️
Make duplicate of game package you find on your game installation path.
Base game:
The Sims 3> GameData > Shared > Packages > FullBuildep1.package
Expansion Pack:
The Sims 3> GameData > Shared > DeltaPackages>p02 > DeltaBuild_p02.package (Depending the release of Expansion Pack & Stuff Pack)
My duplicate of game package folder looks like this.

Open s3pe. Open FullBuildep1.package.
Type Name "EggRolls" on box.
Tick besides Name and Filter Active, then click "Set" button. It will give your result "EggRolls" filtered by its own.
Select all files until they are in blue selected, Right Click > Copy.
File > New. Right Click > Paste...
Then your files are all pasted into new S3PE document. You can delete ticks on Egg Rolls filter, as the package is no longer filtered.

File > Save .package. Give the name of the package such as "[Your username]_AmericanEggRollsEA". For my own example, "TBW_AmericanEggRollsEA."
We will use this package as a base to be replaced with new resource codes later. Put this package on Folder such as "Original EA American Egg Rolls" to make you easier to find the file which is original, which is edited.
✳️Step 2: Export Egg Rolls .s3asc and texture files from S3PE & copy the original resource codes.
Export foodEatEggRolls, foodCookEggRolls, foodServeEggRolls to s3asc.
If you are asking why this MODL should be export to s3asc, it is because we cannot clone OBJD of original EA Egg Rolls from S3oc and imported as .wso format from The Sims Workshop (TSRW). The only mesh of EA Egg Rolls we can get is from .s3asc file we can get from s3pe.
Save the s3asc file: "Cook","Eat", "Serve" on separate organized folder, name it "Original s3asc EA Egg Rolls"

⚠️Warning! The strings too long can cause error when export it.
Sometimes you tried to export the .s3asc but then disappeared and you cannot find where you save it. It is because the S3PE application crashed when you exported it because the strings are too long.
In this case, the original .s3asc you want to export is S3_01661233_08000001_0000000008780D94_foodEatEggRolls%%+MODL_filebase.s3asc
You can delete the long string then leave the "FoodEatEggRolls_filebase.s3asc" for example. Yes, you must add _filebase so it can be saved as .s3asc format.
Save, then the .s3asc will add additional files such as:
foodEatEggRolls_group00.s3ascg foodEatEggRolls_group01.s3ascg

Export the original EA .dds textures "All" and "Used" .
Copy all resource codes of each file to Notepad. Right-Click>Details...
Click Copy TGI to easily copy the codes (Type, Group, Instance) to Notepad.
Click GRID > Resources (3 Dots) > TGI Block List Editor You will see the list consists of 8 lines of_IMG, copy all TGI (Type, Group, Instance) codes to Notepad for easy copy paste later.

✳️Step 3: Copy original GeoStates codes (0, 1, 2, 3)
Click "FoodEatEggRolls" MODL. See the 4 GeoStates on the right side.

GeometryStates[0]: 0x95A36FFE
GeometryStates[1]: 0xD8918A76
GeometryStates[2]: 0x4DB2D3D2
GeometryStates[3]: 0x35B26CCB
Copy all these GeometryStates to Notepad for easy copy paste later.
GeoStates are in three forms.... Full, Half, Empty? But why are 4 GeoStates now?
You will find out later by cloning the base food OBJD in the next Step.
✳️ Step 4: Clone Burger mesh using s3oc & Open the Burger Mesh on TSR Workshop
More steps click spoiler tag “Read More / Keep Reading” below
Search "food" on s3oc.
You will get results like this. Food that can be cloned are Hamburger, Hotdog, Fries (Seasons EP). I choose Hamburger because it's Base Game and it's resembling custom food we want to create.

"Clone or Fix..."> Don't tick Renumber > Start.
Save the package. Open the package on TSR Workshop.
Open TSR Workshop > Create New Project > New Import> Next > Browse EA Burger .package > Next > Next > OK.
You will get Burger mesh preview. Take a look at Mesh tab.
Then see the Group 0 and Group 1. Both have GeoStates.
What is Group 0? What is Group 1?
If you check the the burger's .s3asc exported from s3pe or .wso exported from TSRW
You will see Group 0 is the food mesh as main mesh and Group 1 is the plate.

Go back to TSR preview. You see there are 4 GeoStates under Mesh from Group 0 tab.
By default, the Burger meshes (Full, Half, Empty) are combined into one.
Click each GeoState, from top to bottom.
0x95A36FFE is Full state
0x8A6C4E39 is Half state
0x4DB2D3D2 is Empty State
0x35B26CCB is Full state

✳️ Step 5: Create your edited mesh
Import MODL file (with format .s3asc) of Egg Rolls you exported from s3pe from Step 2 into Milkshape 3D via Sims 3 Object Import by Wesley Howe. From Milkshape, export .obj file to your favourite 3D software to make .obj file as base mesh for your edited mesh.

Create 3 States: Full, Half, Empty.
Export uvmap to editing image software to create the texture.
After you are done and satisfied with your mesh, export your custom mesh only without plate, Full, Half, Empty states in .obj format. Hide EA plate and EA's base mesh before exporting.
✳️ Step 6: Create texture
Import uvmap from your 3D software. Create texture, save in .dds format with the same name as original name of .dds exported from s3pe.

✳️ Step 7: Bone Assignment, Make Group & Export to .wso
Open Milkshape 3D. Import .s3asc of original EA Egg Roll "foodEatEggRolls_filebase.s3asc" from Step 2. Click Joints Tab, tick box "Draw vertices with bone colors" to enable bone colours.
The food shows Purple colour, the plate shows Yellow colour.
*Note that this .s3asc was imported from year 2023, the original colours are like these. If in this recent year 2025 shows different colour such as the plate is Purple, please follow this example, assign the plate Yellow colour, because my method using this Yellow bone colour has been working successfully.
Then import .obj of your edited mesh from 3D software. Delete materials of custom mesh, select custom mesh, regroup, rename to group00.

Your main task is copy Bone Assignment from original EA mesh to your edited mesh.
Check the codes on Joints tab, there are 3. Click each code then click "Assign" to see what is the Bone colour to determine rig for functionality of the object in the game.
0xFEAE6981 --> Yellow 0xCD68F001 --> Purple 0xD0DECA8E --> Light Blue
We will assign the custom mesh with Purple colour, therefore, select the custom mesh, select 0xCD68F001, assign. The custom mesh colour will turn Purple.

After you are finished with the Bone Assignment (Main Mesh is purple, plate is yellow), make sure the groups are correct. Group 00 ---> main mesh. Group 01---> plate. Export them in .wso format.
✳️ Step 8: Import the edited mesh on TSR Workshop
Open Burger .wrk on TSR workshop, import your custom mesh in .wso format. Click folder with green arrow to import .wso.

After importing, you will see your custom mesh and Geostate reset to 0 for all states.
✳️ Step 9: Create Geostates on TSR Workshop, Export to Package
If you click Geostate row, the custom mesh disappears. Because the face is 0. Click on ... dots on the right side of Geostate to open Face Selector. Face Selector is to create Geostates working, Full, Half, Empty. The mesh suddenly appears with grey colour.

Left click to give colour to the face. Colouring faces based on Geostate. Be careful because the mesh is all joined into one. When give colour to Full state, do not give colour to Half state.
0x95A36FFE for the Full State
⚠️Warning! This is the trickiest part of creating Geostates: Texturing the Geostate. Cannot undo. If you wrongly click and want to undo, you have to restart from zero again. If you feel the texture is alright, then save it. You can start from checkpoint from last save if you wrongly clicked. Cancel then load the save to restart. ⚠️
Click 'n pick to click the colour one by one. Basic Square: Drag cursor to give colour in big area. Shift + Left Click: Delete 1 face. Click "Clear" to delete all the colour in one click.

Rotate the camera to make sure all part of expected geostates are textured.
Give colour to other GeoStates.
0x8A6C4E39 for the Half State (half eaten)
0x4DB2D3D2 for the Empty State (crumbs)
After you are done with the texturing GeoStates, export to package. Edit > Project contents, Export> To .package

✳️Step 10: Export MODL filefrom Package saved from TSR Workshop
Save the package with name "SpringRolls_TSRW"
Open s3pe, import package that you saved from TSR Workshop. "SpringRolls_TSRW"
Export MODL, save.


✳️Step 11. Finalizing in s3pe & Replacing the Original MODL with Edited MODL & Correcting the TGI (Type, Group, Instance) Code As Same As Default Code
Open original package you cloned on s3pe "Your Username]_AmericanEggRollsEA"
I saved the package with different name to"[Your username]_SpringRollsDefaultReplacement." to make it modified package, while leaving AmericanEggRollsEA package as backup original base, just in case I need original file.
Replace "FoodEatEggRolls" MODL that you saved from Step 10: from SpringRolls_TSRW
Check if all resource code (Type, Group, Instance) are the same as the original. Check the resource codes inside TGI Block List Editor, are they as same as inside TGI Block List Editor in original package.
You can see the resource codes are different from original FoodEatEggRolls MODL codes you copy pasted to notepad. Delete MLOD, change the codes (Type, Group, Instance) with the original FoodEatEggRolls MODL codes on Notepad. Use "Add" to add one row, Delete to erase one row. After you are done, Save and Commit.
Replace textures with your custom texture in .dds format.

Save package.
Test the package in game.
Wait until your Sims finish all their GeoStates, are the GeoStates working properly.
The geostates are working properly except at the Half Eaten state.
All states are combined into one and the plate colour are having spring rolls texture... 😱

Don't panic. Your bone assignment is alright. Copying same codes on Data Resorce and TGI Block List Editor are working properly too.
What causing the Half Eaten state is not working is:
The "Half Eaten" geostate code you are cloning from Burger mesh is not the same as code from geostate of FoodEatEggRolls.
Burger= 0x8A6C4E39
FoodEatEggRolls= 0xD8918A76

✳️Step 12. Correcting one GeoState that doesn't work because using EA's Burger mesh
Your main task here is using Default EA's Half Eaten state code to override your custom mesh Half Eaten state code.
Data Grid > ChunkEntries> [1] ChunkEntries > RCOL Block > Meshes > (on Tab [0] Mesh) > GeometryStates (then click ... Dots on the right side) > [1] GeometryStates

Second row is [1] GeometryStates, indicates it is "Half Eaten" state.
[1] GeometryStates > Name

Delete the code 0x8A6C4E39, replaced the code of the Burger with 0xD8918A76 from FoodEatEggRolls.
Click Done. You will go back to Tab [0] [1] Mesh and Geometry States
Don't forget to correcting the code for Plate as well. Plate is in the Tab [1] Mesh. Click [...] Dots on Geometry States once again, it will bring you to Geometry States for Plate.

Repeat the step as you did for the Food State: On Row [1] GeometryStates > Name, Delete the code 0x8A6C4E39, replaced the code of the Burger with 0xD8918A76 from FoodEatEggRolls.
After you are done, click OK > OK > OK > Commit > Save the .package.
Test your package in your game again.
Half Eaten state should be working by now.
✳️Step 13. Replacing the Original "Cook & Serve" MODL with Edited "Cook & Serve" MODL & Correcting the TGI (Type, Group, Instance) Code
Create custom mesh & texture for Cook & Serve, export to TSRW, then export to MODL like Eat state before.
⚠️ Pay attention because this step is very important, otherwise the Custom Food will turn black/disappear, doesn't work in the game.
Repeat Step 11: Replace the MODL for Cook & Serve state.
If you see default TGI code you copied from "foodCookEggRolls" there are only 3 lines.
_IMG 0x00B2D882 0x08000000 0x6F93B613E7C91FD0 _IMG 0x00B2D882 0x08000000 0x6F93B613E7C91FD0 _IMG 0x00B2D882 0x00000000 0xA4D80FB45AE9066B
If you want the Cook state working in the game, you should use default TGI code of Serve you copied from "foodServeEggRolls"
_IMG 0x00B2D882 0x08000000 0x6F93B613E7C91FD0 _IMG 0x00B2D882 0x08000000 0x6F93B613E7C91FD0 _IMG 0x00B2D882 0x08000000 0x0E3D40D33CC70324 _IMG 0x00B2D882 0x08000000 0x6F93B613E7C91FD0 _IMG 0x00B2D882 0x08000000 0x6F93B613E7C91FD0 _IMG 0x00B2D882 0x00000000 0xA4D80FB45AE9066B _IMG 0x00B2D882 0x08000000 0x6F93B613E7C91FD0
instead of foodCookEggRolls, otherwise the Cooked food will turn to Black colour in the game.
Repeat Step 11: Copy all the TGI codes you copied from "foodServeEggRolls" for Cook and Serve.

Commit, Save.
✳️Step 15. Check the Geostates for Cook & Serve
Check the Geostates for Cook & Serve.
Cook & Serve Geostates are working using Burger Geostates.
0x95A36FFE 0x8A6C4E39 0x4DB2D3D2 0x35B26CCB

Leave the Geometry states, no need to change to default EA Egg Rolls (otherwise your mesh will disappear or black).
After you are done, click OK, commit, save the .package as usual.
✳️Step 16. Test the CC in the game.
If your Custom Food works well in the game: Full, Half, Empty Geostates are working without showing weird texture or black or disappear, then congratulations! Enjoy and have fun with your custom food default replacement mod👍

#the sims 3#ts3 tutorial#thebleedingwoodland#ts3 mod tutorial#ts3 default replacement tutorial#ts3 functional food tutorial#tutorial#modding#s3pe#s3oc#TSR Workshop#geostates#ts3 food
24 notes
·
View notes
Note
hellooooooooo i love all of your renders and posts you're so talented oml. may i ask for a tut on how you did the smoke in this post? tysm ily :D
Hey, thank you so much ahhh!!! That means so much to me!! ILY! 😘
In truth, my method for smoke is not sophisticated at all... It's actually laughable how simple/easy my process is for this, I'll admit 😅
There is a way to do it right in blender, but for this particular trick I don't use blender (mostly because I've never been able to get it to work right, user error I'm sure haha). But if that's what you're looking for, there's an (untested) tutorial here!
I personally use photoshop for my smoke, and, I admit, brushes!
This tutorial assumes you have a basic knowledge of photoshop, but if you don't or if any of this is confusing feel free to send me an ask and I'll be glad to help!
A while back I scoured the internet for free cigarette smoke brushes and amassed a small collection of them. Unfortunately none of mine are marked with a name or anything so I can't link to specific ones, but here are a few I've found for this tut:
Click with caution! I use ad blockers and these sites are fine for me but as always be careful!
Brusheezy free smoke brushes 15
Brusheezy free smoke brushes 12
Resource boy 200+ free smoke brushes
If you're using photoshop, make sure the brushes are in .abr format!
Once downloaded (& unzipped), if you double click the .abr file it should automatically install and open your photoshop if it's not open already.
I've pulled one of my renders of Ariss (pre-smoke) into photoshop, so let's make some smoke.

Step 1: Create a new Layer!
Make sure you are working on a new, empty layer! This will be important in later steps!

Step 2: Add smoke using your smoke brushes
On the new layer, select the smoke brush you want to use, and make sure your color is set to white/off white/grey.
Hover over your image and select where you want your smoke to be. I was unable to take a screenshot of this process, but I put my smoke here:

Step 3: Adjust opacity/shading

You should have a layer for your smoke now. Double click it and the layer style window should pop up.

In this step... honestly go ham. If you follow exactly what I'm doing, it won't look the same because of differences in our base image (color, brightness, saturation, etc). But I usually adjust:
Blend mode
Opacity
Color overlay
Outer glow
If your smoke isn't on a separate layer, any adjustment you make here will be on the main layer, which we don't want!
I've adjusted mine, & ended up with this:


Step 4: Move & adjust your smoke
Because your smoke is on a separate layer, now you can move and adjust it.

This is all up to your preference! I typically just move, adjust, and edit the layer style until I get something I want.
Sometimes I'll also blur the smoke, which you can do by selecting filter -> blur -> gaussian blur, just make sure you're on your smoke layer!

You'll know you did it right when you get this window showing the transparency instead of your image, & if the smoke blurs when you adjust the radius!

& that's it!
There's a way to also use the standard brush tool and "path blur", which I've used before but don't usually like the result of it.
But if you'd prefer to try that, here's a tutorial for it!
#thank you so much for the ask and the love!#ts4 tutorial#ts4 edit tutorial#sims 4 tutorial#sims 4 edit tutorial#sims tutorial#sims edit tutorial#ts4#sims 4#sims#ts4 editing tips#sims 4 editing tips#sims editing tips#salemsims tutorials#I hope this helps#if not lmk!#& I'll try to clarify
26 notes
·
View notes
Text
youtube
Mastering Motion: Quick Tip Tutorial for Animating with the Pathing Tool in Green Screen by DoInk
Dive into the world of dynamic storytelling with our latest tutorial! In this blog post, we'll unveil the secrets of animating with the Pathing Tool in Green Screen by DoInk. Whether you're a teacher bringing lessons to life or a content creator adding a touch of magic to your videos, this quick tip tutorial will empower you to master motion effortlessly.
What you will learn:
Introduction to the Pathing Tool in Green Screen by DoInk
Quick tip tutorial for animating with the Pathing Tool
Exploring the versatility of motion paths in visual storytelling
Tips for seamless integration and customization of animations
Real-world examples for inspiration and application
Elevating your projects with captivating and fluid animations
Animation becomes a breeze with the Pathing Tool in Green Screen by DoInk. Whether you're a beginner or a seasoned creator, this quick tip tutorial will equip you with the skills to infuse life into your projects.
Master the art of animation with the Pathing Tool in Green Screen by DoInk. Share your animated creations with us, and bring stories to life through captivating motion!
#Green Screen by DoInk#Pathing Tool Animation Tutorial#Quick Tip for Dynamic Storytelling#Fluid Motion Paths in Video Editing#DoInk Tutorial for Educators and Content Creators#Elevate Your Projects with Animated Elements#Creative Applications of Motion Paths#Customization Options for Personalized Animations#Memorable Experiences with the Pathing Tool#Mastering Motion in Green Screen by DoInk#DoInk#Do Ink#How to animate in DoInk#How to use DoInk#Best App for Students#Youtube
1 note
·
View note
Text
Explain the basic: Everything to know before you start!
Surprise! surprise! Before I actualy start my new 'Explain The', I will like to make sure you know how to protect yourself and that you are doing the right thing that makes you comfortable in this new world and in your future way of practicing.
Desclaimer: Everything I will talk about is information that I got from books and sites online and even videos on YouTube. In my years of practice, I learned as much as I could out of curiosity and what works best for me. I suggest you do the same by learning as much as you can on your own (I will be here making posts teaching this kind of stuff) from multiple sources.

What is witchcraft based on?
Witchcraft is a broad and complex practice with a rich history that spans many cultures and traditions. It's important to note that witchcraft can mean different things to different people, and its beliefs and practices can vary widely. However, I can provide an overview of some of the key elements that witchcraft is based on:
Nature and the Elements: Many forms of witchcraft are deeply rooted in nature and the natural world. Practitioners often believe in the interconnectedness of all living things and the power of the elements, such as earth, air, fire, and water.
Magic and Ritual: Witchcraft often involves the use of magic and rituals. These rituals can vary widely, but they are typically used to harness and direct energy for a specific purpose, such as healing, divination, or protection.
Ancestral and Folk Traditions: Witchcraft frequently draws on ancestral and folk traditions, incorporating practices and beliefs passed down through generations. These traditions can vary by culture and region.
Belief in the Supernatural: Witchcraft often involves a belief in the supernatural, including spirits, deities, and otherworldly forces. These may be part of a practitioner's personal belief system or tied to specific traditions, like Wicca, where various gods and goddesses are honored.
Herbalism and Folk Medicine: Many witches incorporate herbalism and folk medicine into their practice. They believe that certain plants and natural substances have healing or magical properties.
Divination: Divination is the practice of seeking to gain insight or knowledge about the future or the unknown. Tarot cards, runes, pendulums, and other tools are often used for divinatory purposes within witchcraft.
Personal Empowerment: Witchcraft is often seen as a means of personal empowerment and self-discovery. Practitioners may use it to develop their intuition, self-awareness, and a sense of inner strength.
Ethics: Many witches follow ethical guidelines, such as the Wiccan Rede, which encourages actions that harm none. However, ethical codes can vary among different traditions and individuals.
Covens and Solitary Practice: Some witches practice as part of a coven, a group of individuals who gather for rituals and support. Others prefer solitary practice, working alone and following their own path.
It's important to remember that witchcraft is not a single, standardized religion or practice. It encompasses a diverse range of beliefs and traditions, and individuals may interpret and practice it in their own unique ways. As a result, there is no single set of beliefs that universally define witchcraft.
What will I talk about in my new "Explain the"?
In the new "Explain the," I will be guiding you in your journey by teaching the important basics when you start this particular journey, such as how to banish, heal, and protect, how to use the various tools, and what their meanings are. I'm going to talk about the astros and how we can use that energy, and the many types of magic that are out there. For the first few mouths, this particular "Explain the" will be "Explain the basics," because that's what I'm going to talk about. I'm not going to throw a spell tutorial without making sure you are safe while doing it.
Sometimes ago, I already talked about color magik. If you are interested, it is a good and fun way to start. We use colors every day after all.
As always, I will be more than happy to answer every question you have in mind. I'm proud of you! Have a wonderful day or night!
#journal#manifestation#manifestation method#manifesting#shifting methods#manifesation#loa methods#spiritual development#explain the method#explained#spirituality#spiritual awakening#spiritual journey#spiritual healing#spiritual disciplines#spiritualgrowth#chakras#witchcraft#witches#witch#witchery#spells#spellcraft#spellcasting#color magic#color photography#music#reality shift#shiftblr#witchblr
179 notes
·
View notes
Text
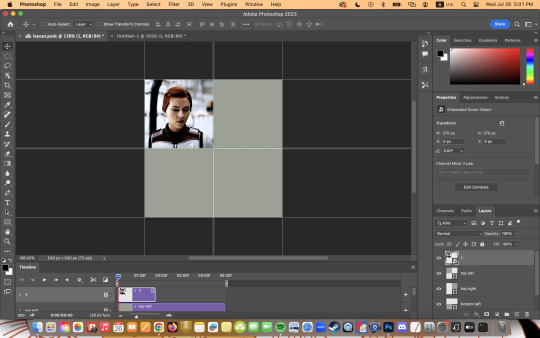
here's my quick tutorial for making layouts in photoshop! i'll be going over how to make this 4-panel square one! ↳ requires basic knowledge of photoshop
「 step 1: making your file 」 make a new file, 540 x whatever height you want (just make sure it fits within tumblr’s image size guidelines), and make sure the background is set to transparent. for this specific layout, i want the overall shape to be square, so my dimensions are 540x540!

「 step 2: mapping out 」 the best way to make sure your layouts are even and spaced equally is using guides! go to view > guides > new guide layout. the color of your guides doesn’t matter at all (i just like green so mine are green lol), and you can have as many columns and rows as you want. since this is going to be a 2x2 layout, i’ll have 2 columns and 2 rows. the general rule of thumb for gutter is 4px.

once your guides pop up, select the rectangle tool by pressing U on your keyboard. make sure shape is selected from the drop-down menu at the top (right by the home button in the top left), and make sure that you have snapping on (view > snap).
using the rectangle tool, trace out your layout panels! as long as you have snapping on, your path should naturally snap to the guidelines, making it a LOT easier to do this! when you’re done making your rectangles, you can turn off guides by going to view > guides > clear guides (i usually keep them on until i’m done adding in my gifs but this is up to you). i always name each shape layer after where it is in the grid to not get confused.


「 step 3: adding gifs 」 some quick things before i go over actually adding in your gifs: 1. make each of your gifs in their own individual files. you’ll be adding them into the main one later. 2. your gifs have to be the same length — you can cut them down to length in their own individual files or later in the main one. either way is fine, totally up to you!
now you have your layout set up, you can make and add your gifs! in order to make sure that they fit into the panels, check the dimensions of each shape you’ve created by selecting the layer and looking in the properties tab. my panels are each 268x268.

i’ll actually be making each of my gifs 270x270, just to make sure that i don’t have any weird gaps or anything (i’ll talk about how i’ll be getting rid of the 2 extra pixels on each side later).
once you have your gifs done, you can duplicate them into the main one. convert your gif and anything else (coloring etc) into a smart object (right click > convert to smart object), and then right click it and select “duplicate layer”. make sure the document you’re duplicating to is the one with your layout in it.
layers automatically duplicate aligned into the top left corner. since this is where my first panel is, i can just leave my gif there, but for the other ones, drag your gifs into place using transform and your mouse (once again making sure that snapping is on).
now to get rid of those extra pixels. this step also makes sure your gif is perfectly in line with the shape you’ve outlined the layout with. make sure your gif is right above the shape layer in the layers tab, and then right click and select “create clipping mask”. this makes sure your gif doesn’t go outside the limits of your guidelines. this is what it should look like in the layers tab:
「 step 4: exporting 」 exporting a layout gif is pretty much like exporting any other gif, but you do need to check your matte settings before saving. the wrong ones can make what should be the transparent dividers solid, which can throw off the look of your gifs. make sure matte is set to “none”, and then save as normal!

here's my finished gif:
happy giffing! feel free to send me an ask/message me w any questions!
#gif tutorial#gif tutorials#allresources#completeresources#userchibi#userpjo#uservivaldi#userraffa#userbess#usermorgan#tuserheidi#userrobin#userkosmos#usershreyu#userzaynab#userisaiah#thingschanged#rogerhealey#*mine
274 notes
·
View notes
Text
A Very Basic How to Edit a Screenshot Tutorial
I had a request by PeachPlumbobs on Bluesky about how I edit my moodlets and use them on my Sims 4 screenshots. I used this as an opportunity to brush up a little on my Photopea skills to offer a free solution to anyone editing their sims screenshots. This is a quick and dirty tutorial. There are SO MANY MORE THINGS you can do with Photopea. Its basically a free to use, browser based, Photoshop. If you've ever worked with Photoshop, you will be comfortable here.
To follow along with this tutorial you need:
A screenshot of a moodlet and a screenshot you want to put it on top of.
Open Photopea in your browser
** I play and edit on a PC. Any keyboard shortcuts I mention are for PC.

First, we're going to open Photopea. It really is browser based. You don't need to download a thing to your computer. For this basic edit tutorial, I dragged and dropped a screenshot with a moodlet and a screenshot I wanted it overlayed on.

Notice how Photopea will open each image as its own tab. That's good. The question I was asked was how I edit and add moodlets. Personally, I use exactly what the game gives me. I'm going to show you how to cut them out with rounded corners here.
*To make your life easier, feel free to use the magnifier glass tool on the left to make the area you are working on bigger. If you need to move the whole image around, use the hand selection tool on the left side.
On the left side with the tools, you will find a button for shapes, click the rectangle one. On the top bar, just below the "Edit" button, you will see a drop down box that lets you change this from a shape to a path. Make it a path. On that same bar you will see an option to edit the corner radius. I changed it to 5px.
Use this path drawing tool to draw a rectangle over the part of the moodlet you want to see. I cut out the time remaining on the moodlet when I do this. I also cut out the icon - that's optional of course!

Once you have your path drawn, look to the right side of the screen. Over there, you want to switch it from layer view to Paths. After that, on the bottom of the right side is a button that lets you make that path into a selection. Switch the view on the right side back form Paths to Layers. Use the Arrow tool on the left side and click the center of your selection to make sure it is active.

On PC, you can use the keyboard short cut "Ctrl C" to copy the selection. Or, you can go to the top and click "Edit - Copy"
Switch tabs to the image you want to place the moodlet on. The PC keyboard shortcut is "Ctrl V" to place your copied selection on a new layer of this file. Or, you can click, "Edit - Paste"
Again, this is how I edit my moodlets and you don't have to do the same thing if you don't want to! Once my moodlet is placed as a new layer, I use the square selection tool on the left side to create a box around the moodlet icon. I then use the arrow tool to move the icon on top of the moodlet box with the text. Once completed, go to the top and press "Select - Deselect"

How to add that nifty translucent outline around the moodlet. Make sure you are on the layer your moodlet is on! Go to the bottom right and click the button labeled, "eff." Go up the pop-up list until you get to "Stroke." Click on that and a layer style box will pop up. For this example, I set the width to 10px, the opacity to 40%, and the color to white. There you go, you've given that moodlet a little pop!

This is a quick tutorial, but I'd be remiss if I didn't follow through with the rest of the image editing process here. I know I plan to make this image a square when I save it, so I moved my moodlet over where the square would be. Using the rectangle select tool, you can press "Shift" while dragging the rectangle out and you will get a perfect square. Once you are happy with your selection, go to the top bar, and click "Image - Crop"

Now that I know the size of my image that I plan to post, I can adjust the size of the moodlet. Again, make sure you are on the layer with the moodlet when you try to do this! Go to the top bar and click, "Edit - Free Transform"
Free Transform is a lot of fun. You can make the moodlet larger, smaller, or rotate it! If you hold down the "Alt" button while resizing, the moodlet will keep it original aspect ratio as well. Once you are happy with the size and rotation of the moodlet, click the arrow tool on the left to exit Free Transform mode.

This screenshot was taken at night and is very dark. There is a very easy and quick way to make it a little brighter. Click the layer with your screenshot. By doing this first, the following edits to brightness will not affect the Moodlet layer. From the screenshot layer, go to the bottom right and click the half and half circle button. From the drop down list, click "Levels"
Levels brings up a bar graph looking screen. On the left is darks, on the right is lights, in the middle is midtones. Pull the slider button just below the bar graph around until you find a happy level of darks and lights. In this case, I played more with the midtones. This is a quick and dirty adjustment method! there are so many other ways to do this! But, if I'm in a hurry, I go straight to levels to adjust my screenshots.

Finally, save your final product! In my case, I'm going to file and exporting it as a .jpg or a .png. If you save it as a .PSD, you can open it and work on it again in the future if that's something you want to do. When I export the save as a PNG or JPG - it automatically saved it to my downloads folder.

There you go! One quick Photopea to edit your sims screenshots tutorial!
Have fun.
#ts4#sims 4#ts4 screenshot editing#photopea#photopea screenshot editing#photpea screenshot editing tutorial
32 notes
·
View notes
Text
About an hour ago, I was in Walmart looking for my conditioner because today is wash day for my hair. As I’m looking for my product, this older white lady approaches me and she says, “Excuse me, miss. Please don’t be offended by this.” And usually when white people tell me not to be offended, 9 times out of 10, whatever they are about to say is going to be offensive af.
Anyway, she follows it up with, “My husband and I just recently won our custody battle with our foster daughter and she means the world to us. She’s a beautiful African American girl and her hair looks a lot like yours. But I’m afraid because I don’t know what to do with her hair. It’s a lot different from mines and our other children and we are at a total loss. I’ve tried looking up the YouTube videos and my husband went to the braiding shops so they can teach him how to properly braid her hair, but he’s still pretty new and it will be a while before he gets used to it. Do you have any tips you can give me? If you don’t have the time, it’s okay, really! I just needed a little advice because I want her to look beautiful.”
Y’all. swear I almost started crying on aisle 6. So for the last 30 minutes, I spent my time talking to her and what products to use and how to properly detangle and comb her hair with the proper tools and what not to do with natural hair. And I showed her a bunch of easier to follow natural hair tutorials on YouTube and saved them for her. (I also had to create a YouTube account for her so she could save it for later.) but omfg, she was so sweet, and I could tell that she listened to every single thing I had to say and she took little notes on her little notepad.
And what really filled my heart was the fact that her husband actually taking classes from African braiding shops. And she showed me a picture of him wearing a little sweater vest and loafers in a little shop surrounded by beautiful black women showing him how to braid black hair and even the lady he’s braiding on is guiding his hands. And omfg. Bless these old white people and their black daughter who I know have new loving parents because they are willing to step out of their comfort zone just to make her feel and look beautiful.
I really hope our paths cross again one day, Mrs Cicilia.
❤️
13 notes
·
View notes