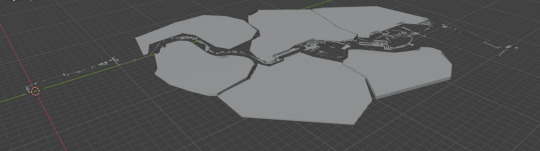
#however the map has the basic outline done!
Explore tagged Tumblr posts
Visit Tumblr Blog
Explore Tumblr blogs with no restrictions, modern design and the best experience.
Last Seen Tumblr Blogs


Fun Fact
Average visit duration of Tumblr.com is 10 mins and 25 secs.
Text
Moon 13
Aircricket trotted into camp with glee, having caught a desert hare right at the edge of the Duneclan border. It was on Crystalclan's side, so who cared. The gleeful she-cat took her kill to the nursery, Where Quailglare and Ripplenoise were tending to Doestar's newest kit, Longkit, while Deerscreech was resting. He had fought off a pack of rats trying to steal from the fresh kill pile a few sunrises ago, and was recovering from his injuries. When Aircricket dropped the hare in front of Deerscreech, she gave a smug grin, "Check out this juicy hare I caught," Aircricket purred, "Well go on! Take a bite! How that Thrushpaw is an apprentice, you can finally take a break from Doestar's kits."
"Longkit is here," Deerscreech shook his head, grateful that Ripplenoise was taking over his duties while he recovered. "You're eating with me, right?"
"Of course! You would get a belly ache if you ate that hare by yourself!" Aircricket snickered before sitting beside her brother. As the two ate, Aircricket decided some gossip was in order. "You know, if I were Doestar, I would have chased Egret out of the territory, not invite her into the clan! What was he thinking?!"
"Egret was being followed by her ex-mate," Deerscreech hummed, "If she was scared of him enough to leave her kit here, imagine the danger she would have been in if she hadn't."
"Then she should have joined WITH her kit," Aircricket huffed, "And now she's pretending to be a mother again. If you ask me, she lost that right."
Deerscreech only sighed in reply to Aircricket's anger, but part of him began to wonder if his sister was right. Then he thought about their own mother, Swiftleaf. She gave up he and Aircricket to keep her kits safe from Duneclan, but remained in Duneclan. "Are you upset at Swiftleaf?" Deerscreech asked.
"What?! No!" Aircricket hissed as her fur bristled, "Of course not! Mom was deputy, she had no choice but to stay." Deerscreech frowned, seeing how Aircricket was, once again, defending their mother's actions. "Egret has no place here," Aircricket concluded, "If it were up to me, I would exile her."
----------
Thrushkit -> Thrushpaw
Egert -> Joined the Clan
Longkit -> A white and brown tabby tom.
#clangen#crystalclan#lifegen#mc 1 deer#Due to pain in my joints I have focused art elsewhere#now I can't even draw without pain :\#however the map has the basic outline done!
2 notes
·
View notes
Text
Mr. Qi Friendship and Romance Mod: 4/19 Progress Update
It's a working title, I'm trying to come up with something less wordy that still will pop up in Nexus searches.
I wanted to be able to track my progress, mainly for myself, but if you're curious, this is the state of the mod right now:
Writing:
Heart Events - the 2 heart event is fully written (with blocking directions), and the 6, 8, and 10 heart events are outlined. The 4 heart cutscene currently has me a bit stumped; I have ideas, but nothing concrete yet. I definitely now understand why Sam's 4 heart cutscene is him dropping an egg. 14 hearts is on the back-burner as a little treat to myself once I get further into things.
Generic Daily Dialogues - about 1/3 done, probably the highest priority for writing. I'm leaving his vanilla casino dialogue as the two heart dialogue, and the vanilla Walnut Room dialogue as his four heart dialogue, with a few small changes. And, since it's me, I have more marriage dialogue written than anything else...
Day-Specific Dialogues - very few written, lower priority. Hoping to have a lot of these made eventually, and I have plenty of ideas, but they aren't necessary for the core of the mod so they're on the back-burner for now.
Gift Dialogues - all 5 generic gift response dialogues are written, with an additional 22 dialogue lines for specific items/groups of items. I'm also up to around item 530 in figuring out what item corresponds to which dialogue/whether or not he likes it. Certain item groups, like cooked food, still need more lines, however. This is definitely something that should be low priority, but also something I'm really enjoying working on. Some personal favorites so far are-
[if given a fish (hated)]: "Eugh, it's all slimy..."
[if given a legendary fish (disliked)]: "If you must give me one of the rarest fish in the valley, can you at least wrap it so I don't have to touch it with my bare hands?"
And I think that's pretty funny.
Art
Portraits - 3 new portraits finished: "deep frown" "glint" and "glasses-less". I'll probably be messing with "glasses-less" for a looong while; it's first shown at a dramatic moment so it needs to look good. Blushing portraits are next on the docket.
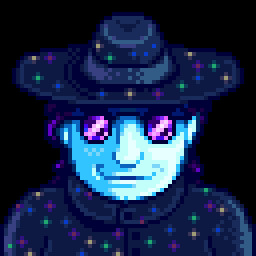
Here's "glint" btw, with a background thrown on so I can have a custom icon. You know I gotta make him do the anime glasses thing a few times.
Sprites - no progress yet. Walk cycle is up next after I finish the blushing portraits. Did you know he doesn't have a walk cycle at all? [1.6 spoilers] in the cheated Summit cutscene where he attacks(?) you, he literally just slides at you very fast. Anyways, I may also change his map sprite a bit as well, since it was drawn to match his old portrait and doesn't actually have the same color scheme as his sprites. Note to self: is it possible to make the sparkles on his outfit prismatic?
Maps - no progress yet. The 6 heart and 10 heart cutscenes both require custom maps, with the 6 heart one being a fully custom asset. 10 heart recycles some existing assets but will still need some custom stuff done as well.
Misc Sprites - in my head, there's a dream version of the 8 heart cutscene that has so, so many unique sprites. Like an incredible amount of stuff. I think it'll kick ass, but also that sequence could be done with a few lines of text. So, for now, it's low priority. But maybe in a few months I'll put out a request for help.
Implementation
Not totally sure how to split this into sections yet, as I'm very much still in the preliminary stages so far. To say that I'm feeling overwhelmed is an understatement; documentation on the wiki swings wildly between "an asset is a file in a video game" and "this is an advanced tutorial. Read these 4 other pages first before continuing."
I've started using Ms. Coriel's NPC Creator which has been good for setting up the basic file structure, but ultimately doesn't cover some of the more complex stuff I want to do. EDIT: Turns out it's completely outdated for 1.6! Had to throw out a bit of work, but I still learned from it so it's fiiine.
I think setting up his "schedule" will be a challenge, in that I don't actually want him to have a real schedule like most NPCs. Not to pull back the curtain too much here, but I want him to "exist" in both the Casino and the Walnut Room simultaneously, which is to say, he does not exist in two places at once in the narrative, just in the code. This will change after marriage, however.
My next goal is to set up placeholder cutscenes for each of the heart events, and then to implement the generic daily dialogues once those are finished.
Final Notes
God, this will be a work in progress for a while, but I'm enjoying it! Definitely enjoying the writing more than anything else, but hey, that's how it be. I've got around 70 lines of dialogue written, a bit of art done, and I've started learning how to actually get stuff in game. I've always been more of a designer than a coder, but it's getting there!
ADDITIONALLY I've decided that if I abandon this project for more than 8 months, anyone is welcome to request my work so far and use it for their own mod. If this blog hasn't posted in a long while, feel free to send me an ask or message! I may say no, however.
Ultimately, I want this mod to exist in some fashion. While there is an existing one, I have a pretty different take on the character and I want to share it with you all! Every line of dialogue, every heart event, every little detail needs to share something interesting about a character and their world. Yet, Mr. Qi is a mysterious guy, and I think some things should be left up to player interpretation. And I think it's crucial to be able to match his tone and voice to the vanilla game, while also expanding on his characterization. It's a fun challenge to write, and I hope the finished product, uh, well I hope it gets finished mostly, but I think it'll be pretty good.
Thanks for reading all this. This is largely just a stream of consciousness for myself, but I hope it's...interesting, or something?
105 notes
·
View notes
Text
Wednesday - Week 9 - The Last Working Day.
Modelling.
For my last working day, I needed to get my map finished and ported in the game by the end of the day, otherwise my project will not a perfected as it could be. To get started, I began working on finishing the path that I had stared on yesterday.

This wasn't to much of a challenge, only because it was me just copying and pasting the bits of the path that I had already made. I did have to alter them each time I copied one but it didn't take me that long to do. After I had done this, I immediately noticed that this environment was missing details like planets and bushes so that’s what I worked on next.

The grass what a great place to started it added a lot detail while only being a few pixels big. I did end up getting the inspiration from Minecraft, with how they designed there grass. The only thing I really need help with the most was how they blended the colors together with there grass blocks and grass, I did also look into how there flowers worked with the grass.
Now onto the harder part, the bushes. I didn’t know if I wanted to make them be designed more similar to leaf piles than anything else or making them look more like a miniature tree. I did also look into what I could have around the bushes, and most tree's or bushes normally have a lot of vegetation/nutrients around them so it makes sense for there to be grass within the tree.
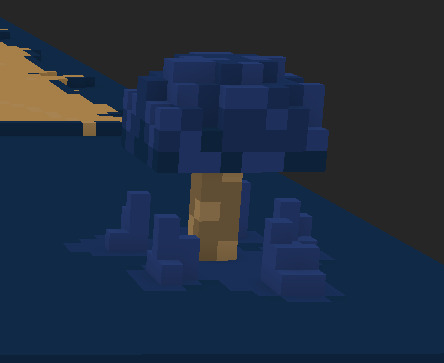
This is how I ended up making it. I did have help from a friend to decided what type of design that I should go for and he preferred the look of the mushroom top with it having a brown stalk. taking the color from the path. I do like the design as it makes the environment look extra-terrestrial, I mean it looks like blue funguses. And feels like if someone where to come here they would be surprised by the shape and color of the plants.


For what to do now, I needed to get all of these models inside of unreal engine so then I can finally remove the place holder base and path. This has been something that I have been waiting to do for a long time now, and it feels so good finally have something art wise to show.
UI Changes
This all that inside the project, I can finally start working on the finishing touches for the game and get around to the finally testing in the project. The first thing that I noticed that needed slightly changing was the UI, the Ui needed the font that I got earlier while making the main menu and I felt like that there should be a timer in the top left of the screen under the money.

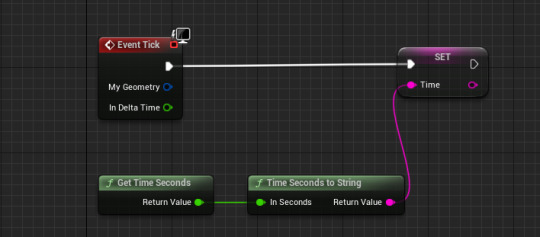
The font fits in better than I thought it would. I originally was going to get a new one however it works. Something else I changed was the colours of the buttons at the bottom, there used to be an grey outline that really annoyed me so I got rid of it. As you can see now as well, I added a timer. This timer works exactly the same way as the previous one that I had made in my last project, it continuously gets the time from the game and set it as the text. It is really basic but it is all I need in this game.
Unit Changes
The last thing I changed today was some of the prices of the units that I have, most of them here have been changed around how strong there are in action. I do plan on continuously changing the prices of the towers until I figure out how easy/balanced it is.
Gilbert's
Changed Gilberts Level 1 Price to 1000
Change Gilberts Upgrade Price to 1800
Changed Gilberts Level 2 Price to 1600
Mildred's
Changed Mildred's Level 1 Price to 1200
Changed Mildred's Upgrade Price to 2400
Changed Mildred's Level 2 Price to 2000
R.0.D.R.1.G.0's
Changed Base Price to 400
Changed Upgrade Price to 550
Level 2 Price is 700
5.P.I.N.9.L.E.Y
Changed Fire Base Price to 400 (I think that its the same)
Changed Upgraded Price to 770
Changed Level 2 Price to 800
Plan
I do also plan on changing some damage numbers next, instead of just changing the prices. Other than that, my weeks goal has been completed, I finished the map, all of the units have been implemented and work.
I do plan on releasing the state of the game I usually do next week, this is main because there as still a couple of bugs that I wish to fix and I would also like to add some final research posts here on my blog.
I think I did everything that I wanted to do this week, unfortunately while making the map there were more bugs that just appeared after fixing there ones that were already there. Other than that I think I did everything that I wanted to do this week.
0 notes
Text
Basic of Summarizing
What is summarizing?
•Summarizing is often used to determine the essential ideas in a book, article, book chapter, an article or parts of an article. These essential ideas include the gist or main idea, useful information, or key words or phrases that help you meet your reading purpose. Summarizing is generally done after reading. However, it can be done as well reading a text.
Summarizing is an important skill because it helps you:
- Deepen your understanding of the text;
- Learn to identify relevant information or key ideas;
- Combine details or examples that support the main idea/s;
- Concentrate on the gist or main idea and key words presented in the text; and
- Capture the key ideas in the text and put them together clearly concisely.
What is NOT Summarizing?
You are NOT summarizing when you:
- Write down everything;
- Write down ideas from the text word-for-word.
- Write down incoherent and irrelevant ideas.
- Write down ideas that are not stated in the text.
- Write down a summary that has the same length or is longer than the original text.
Guidelines in Summarizing:
1.Clarify your purpose before you read.
2.Read the text and understand the meaning. Do not stop reading until you understand the message conveyed by the author. Locate the gist or main idea of the text, which can usually be found either at the beginning, in the middle, or in the end.
3.Select and underline or circle the key ideas and phrases while reading; another strategy is to annotate the text.
4.Write all the key ideas and phrases you identified on the margins or on your notebook in a bullet or outline form.
5.Without looking at the text, identify the connection of these key ideas and phrases using a concept map.
6.List your ideas in sentence form in a concept map.
7.Combine the sentences into a paragraph. Use appropriate transitional devices to improve cohesion.
8.Ensure that you do not copy a single sentence from the original text.
9.Restrain from adding comments about the text.
10.Edit the draft by eliminating redundant ideas.
11.Compare your output with the original text to ensure accuracy.
12.Record the details of the original source (author's name, date of publication, title, publisher, place of publishing, and URL (if online)). It is not necessary to indicate the page number/s of the original text in citing sources in summaries.
13.) Format your summary properly when you combine your summaries in a paragraph. Use different formats to show variety in writing.
Formats in Summarizing:
Three (3) formats in writing summaries are:
Idea Heading Format
-In this format, the summarized idea comes before the citation.
Author Heading Format
-In this format, the summarized idea comes after the citation. The author's name is/are connected by an appropriate reporting verb.
Date Heading Format
-In this format, the summarized idea comes after the date when the material was published.
0 notes
Text
Top Down Shooters
For this piece of research, I am going to pick 5 games from this video and explore their features and style.
youtube
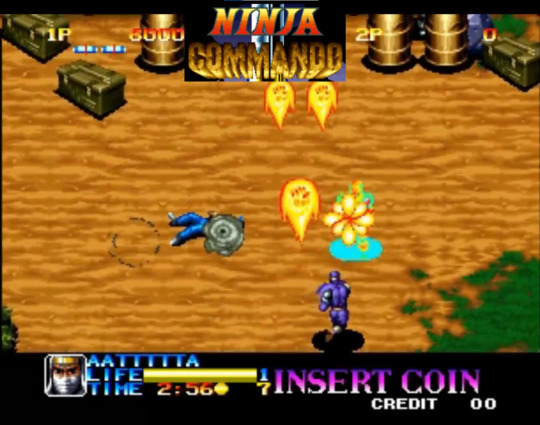
Ninja Commando:
Ninja Commando's graphics are pretty realistic given the year it came out (1992). The game gives the player the option of 3 characters each with different abilities allowing the game to both appeal to a larger audience and give players variety after playing the game for a while. Ninja Commando is a vertical scroller, meaning that, instead of going from left to right when progressing through the level, the player has to go up from the bottom. I personally prefer the horizontal scrollers to the vertical ones as I struggle with the depth, especially on older games with flatter graphics. I do, however, really like the use of multiple characters with differing moves.

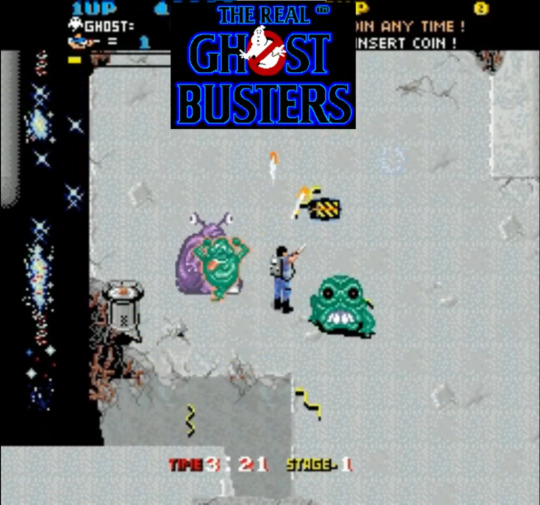
The Real Ghost Busters:
The Real Ghost Busters graphics are very simple, using basic outlines and shading with very few shades per sprite. The scene is especially simplistic, consisting of a white stone backdrop with a black background and small pathways between floors. I personally dislike this simplicity as, in terms of repetitive play, can get boring to look at very quickly. The game uses a mix of horizontal and vertical scrolling, having the player able to move freely around the map. I really like the sense of freedom this gives the player as they can chose where they think is best to be on the map.

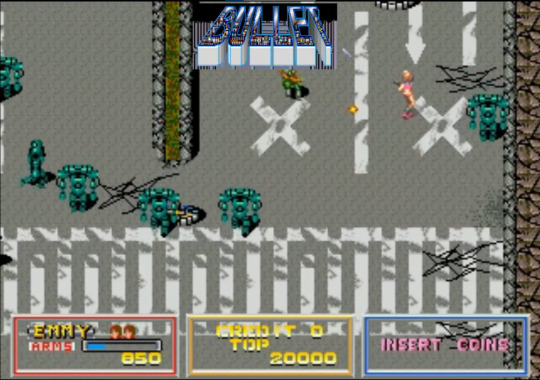
BULLET:
Bullet's graphics are semi-realistic, having shading and realistic proportions while still being simplified and stylised. I really like this style as it mixes both realism and simplicity really well. This game also uses free movement but to a lot less of an extreme, focusing on vertical movement with only a little bit of horizontal. This is well implemented as it helps to give the player more space while still giving them a specific correct way to follow.

Out Zone:
Out Zone's graphics are very well done, with the extreme top down perspective still being clear to the player. The scenery is also nice with details going into the tracks on the floor and certain parts of the terrain that are inaccessible being shown to the player by obvious but still natural looking rock formations.


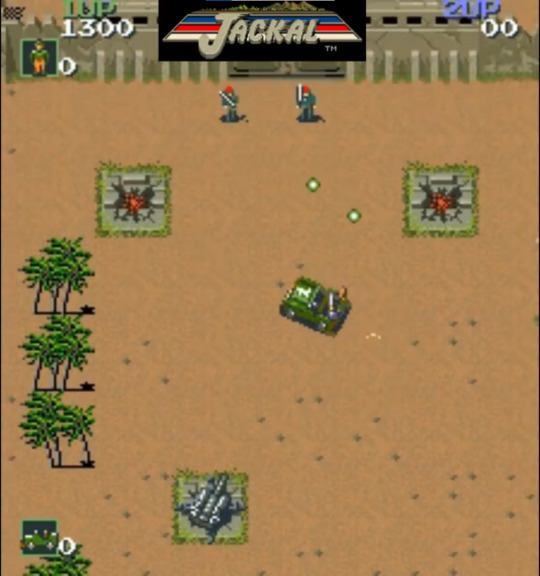
Jackal:
Jackal's graphics are very simplistic, however, unlike Ghost Busters, I like this form of simplicity. This is because of how zoomed out Jackal is compared to Ghost Busters. Because Jackal has the player controlling a car, the game is played in a much further out perspective, meaning that less detail should be put into sprites as they don't have many pixels to work with. This makes it feel more real while Ghost Busters just felt empty. The use of the car is also another unique aspect as most top down shooters have the player playing a character rather than controlling a vehicle. I like this change of pace, especially since the car still controls very well.

0 notes
Text
User Experience/User Interface Design (UX/UI) – A side by side comparison
In a business-technology driven world, consumers are aware of what products and schemes they are getting themselves into. Products play a rather great deal in this cycle. A product’s popularity is based on the way, a customer feels about it. More particularly, how it solves the problem for its customer without having to go through a routine or do something out of the ordinary in order to get the job done. Here is where User Experience and User Interface Design comes into play, where the developer puts themselves in the shoes of their customer to get a better insight. A product can have all possible features yet can be unpopular just because it has a complex design. Thus eventually, a product’s design contributes a significant deal to its success as well. Hence, to improve its User’s experiences the UI/UX designers were hired. Often people confuse UX designs with UI designs. By the end of this read you will have a basic outline of how each varies.

What is UX?
UX Design is the study and understanding of a user’s behavior & motivations with a goal of providing better digital experience. Before starting a design, every designer has to keep in mind that the product or service they design should answer the most basic questions — WHAT, WHY and HOW?
Why User Experience Design? Most problems are actually problems of perception.
User experience design (UXD) allows you to create products that makes the user feel that he/she had been a priority or that the product’s design had been tailored to fit them. The entire design process relies on acquiring details and integrating those details into the product. Now a days, people are more familiar with the technologies available than they have ever in the past decade hence they have higher expectations. User Centered Experience Design, has been a proven factor behind these successful designs.
User-Centered Design
One of the most effective design methodologies is the user-centred Design. The main theme of this user-centred design is that it is built purely on the needs & requirements of the end-user. To build an uncompromisable and flawless design, a UX designer should do his/her fair share of user research, buyer persona, design frames and prototypes. Once you have mapped an outline it is essential to include testing into it too. This doesn’t mark the end of the routine; the designer should identify & include relative issues as well.
Role of the UX Designer
UX Design is the study and understanding of a user’s behavior & motivations with a goal of providing better digital experience. Before starting a design, every designer has to keep in mind that the product or service they design should answer the most basic questions — WHAT, WHY and HOW?
What is UI?
First things first to those debating, UX and UI designs are two different elements of user experience with a product. However UI in other words can be said is a part of UX. As User experience arises from interaction with the User Interface. UX refers to the user experience, that focuses on how something works & how people interact with it. User Interface, focuses on how the layout design can appeal to the user. To help you understand better, consider a car, UX will refer to the car’s gear, steering etc., and UI will refer to the model, color of the car. Together they provide a pleasant experience to the user. An UX designer makes sure that the user can understand and follow the logical flow of the product, whereas the UI designer ensures that the user enjoys the looks and feels of the product.
What includes as the UID?
Designers strive to create designs, which pleases its users yet provide a level of ease to use. UI designers design graphical user interfaces (GUI) but nowadays UI is not limited to just graphics. Voice-controlled interfaces, oral-auditory and gesture-based interfaces as well fall under UID. This is because of the psychology that the less the user goes through the motions of control the more immense their experience will be and more likely they are to return to your product or service.
What is a perfect UID/UXD?
Let me give you an example. In case a company figures out an ideal product and designs based on a human-centered design process which has everything from feels and looks, perfect modules & interface and the expected user experience. Then everybody has one or wants one.
How to perfect a UID/UXD?
Take your time, dedicate to research, constant improvement, polishing the details and editing will make a big difference. In the long run, companies who did not take their time will slowly become obsolete, and people will forget they ever existed.
Take a step back from the pressure of having to deliver a perfect product to your competitors and customers. Start by defining what is important to you and how your product can deliver that. You have to make sure that your product is relevant and effective.
A major business giant, who runs a successful company for more than two decades, advices startups to focus on three questions,
“What do customers want?”
“How their needs can be satisfied?”
“What can we do to enhance our customer service and value?”
Be Consistent
To contribute to the betterment of the design, ask these questions. How do your customers feel about your product? What do they use it for? Have you experienced its environment yourself? What issues do your customers have on a daily basis that might hinder their experience? The answer to these questions can’t be found in the comments and review section. Best products come from listening to the voices of the users. To summarize, when coming up with an idea or developing a product put yourself into your user’s shoes. Stick to simple rather than an attractive complex layout. Work in small groups. Contrary to the popular belief, small groups with strong decision makers are more successful. Analyze and reiterate. Take your time to perfect the modules.
0 notes
Text
Another month has flown past, and we're still going. This update and onwards are going to be a little different, being split into sections based on my current projects, and starting with this general section. A few small 'general' things; I've started trying to plan out what I'm doing for sets of two weeks, and these updates will be made around the last sprint for that month (so they should be ~every 4 weeks/1 month still, just more specific). I also got a 1tb HDD, so I've got a bit more storage on my pc :D Now, for the main updates:
Chaos/Tale. Got a little bit of work done on the Profile Sheets done, and expanded on an Art Bible more, which mostly involved listing and gathering references for AU Characters that will appear, and for some environments inside of a general Undertale Universe. The main progress from this month was in beginning to build the Undertale Environment/Map in Blender, which will likely be used often, as well as models that are being used to build it, and can be used to build other environments for the story. I managed to complete an outline for the entire Undertale path, and mark out how the greater Underground area will look, and started building up the Ruins, getting the walls of the first few rooms done.

In Shadows We Live. This was a 'small', mainly outline of a game that I made for a game jam, and after taking a break from it for this month, I have decided I am, at least to some extent, going to continue working on it. To what extent? We'll see. For now I only intend to continue fleshing it out, figuring out what would happen in it, locations, etc.
Minecraft Survival Series. I've tried to do a few series, but kept getting sick of recording (? I think that explains it well enough), due to only letting myself play if I can record, which previously was harder to do with limited storage space, however with the HDD this shouldn't be an issue. This series is both because I want to have a Minecraft series, but also for some basic editing practice (especially with Davinci Resolve which I'm trying out now), and to try and keep an upload schedule.
Anyways, hopefully everyone has been doing well, and hopefully it continues to go well (or get better)!~
0 notes
Text
Why I decided to start drawing.
I'm a programmer by profession. I spent the last 6 years learning about computers, programming languages and such. I never considered myself a creative person, which is why any attempt at art I made before was either botched, I didn't like it, or has most of the process already done for me (as in, papercraft, where I just need to assemble the model and that's it).
Things changed a bit on April 2023, when I decided it would be fun to try and host a DnD campaing for my friends. I got to think for a while, and decided that ripping off the story line for Golden Sun, a relatively obscure game that none of my friends had played by then, could make for a good plot. It went great overall. Some more people joined with time, others left, but we're doing fine.
Last month the party finally reached Venus Lighthouse, and I was designing some encounters for the dungeon, drawing some maps and planning some puzzles. You know, the usual stuff.
I wanted to use one of the, in my opinion, most iconic monsters of the dungeon, which is the Stone Soldier (pic below). However, no such thing exists in official DnD material, which is why I resorted to homebrew something similar.

It wasn't the first time I did a homebrew monster, and it will certainly not be the last. I have the process outlined by now: conceptualize the idea of the monster (what it does, its abilities etc); translate that to a DnD statblock borrowing from other monsters with similar abilities, and then find an image to use as a token for the monster in the VTT.
It was the last part that got me. I couldn't just place the sprite from the games in the token, it would look awful having a 29x36 pixels image along my high resolution maps. It would suck. So the next step is to find a similar image, but how to do so when the god damn monster is a spiky ball with some long ass legs and a pair of angry eyes?
Google didn't help. Perhaps I couldn't find the proper terms to place in the search bar, but the results weren't to my liking. I then spent a while trying to use AI to generate a creature (which, I know it's bad, but then again, it's free and quick, I didn't want to bother), but the results were bad, the models didn't understand my petitions, and it felt soulless tbh.
Not having the time nor the willingness to commission someone for a silly drawing of a rock with feet, I gave up and decided that if internet couldn't draw the rock as good as I wanted, I would do it myself then.
I went and ordered a cheap tablet (Huion Inspiroy, for anyone interested), downloaded a drawing software and started playing around with tutorials to get myself used to it. When the tablet arrived, I got to follow some basics tutorials, drew some sketches and got comfortable with it.
After trying a while doing different stuff, I realized that if I wanted to learn to draw, I needed a more structured process than following 10 random "LEARN TO DRAW GOOD FAST NOW NOW NOW" youtube tutorials, and that's when I stumbled on the Drawabox online course.
I'm only really starting the course, I haven't even finished all of Lesson 0 yet, but the metodology of it and the fact that it encourages practice and play alongside actual homework and lessons sounded cool to me (that's what they call the 50% method). Also, the promise to be tasked with doing stuff that would feel way above my skill level sounded cool, which is why I decided to give it a try. Worst that can happen is I get bored and give up on it by week 2.
But who knows?
1 note
·
View note
Text
NANOWRIMO: the conclusion + learning from failure
Hello friends!
Long time, no see! ᕱ__ᕱ These past two weeks I have been giving myself a little break from this blog. I have been swamped with final projects in all of my classes and have been trying to balance getting all of them done with middling success. I’m not thriving, but I am surviving.
However, to make up for my absence, I will be giving y’all some extra content within the next two weeks. In those posts I won’t be boring you with my rambles as I usually do and instead will simply be giving you some content that I have created for my novel! In this post, though, I will be updating you on my novel’s progress and giving you my thoughts on NANOWRIMO.
For those of you who have been here for a bit, you will know that I attempted to participate in National Novel Writing Month for the first time this November. (As always, here is a link with more info about NANOWRIMO for your perusal.) My personal goal as a full time student with a part time job, was to write a 25,000 word manuscript instead of the full 50,000 words. November has ended and I am happy to report that I failed. I failed to reach even my cut down goal. However, I am surprisingly really happy with my progress this month. I learned a lot about myself as a writer and about my process and while I didn’t manage to write even a 10,000 word manuscript, I feel much more prepared to tackle writing this novel.
~*~*~
So, here are the things that I learned:
Character design and building is VERY important to me
This, I already knew. One of the main things that bother me about book to movie translations or “hot takes” about books on social media or even some fanfictions is that characters, their personalities and development and relationships, are often either misunderstood or sacrificed for the plot or the sake of another character's development. It’s so annoying. I personally belief that every character in a work of fiction should be able to stand on their own, especially if they are a main or secondary character. Characters should be their own individuals with their own motivations and backstories and for goodness sake they should be consistent! (Crappy character development is a thing that bothers me about published novels too. The wasted potential of Severus Snape, Albus Dumbledore, and Draco Malfoy, among countless other characters, in the Harry Potter novels bugs me so, so much!!)
So, one of the things that happened everytime I sat down to write this NANOWRIMO was that I would find myself getting “stuck” on this character’s backstory or that character’s personality. I have 13 characters that exist for this story in my head. 2 are the main main characters. The 11 others are also going to have their own plot lines and spin offs. Before NANOWRIMO, I knew that this would make my novel complex. After NANOWRIMO, I realized that I was going to have to organize and map and structure and detail my characters (along with several other things) to the metaphorical gods before I even try to manuscript anything or else I am going to be stuck forever and I will never get this book out of my head.
Worldbuilding is also VERY important to me
This was a bit of a surprise. I am definitely no Tolkien and before I started this blog, and my creative writing journey, at the beginning of this fall, these original characters simply just floated around in my head in a vague fantasy realm with no discernible structure or detail. I expected to be able to just continue with this vague fantasy world and as I started writing let the structure fall into place. Yeah… that’s not what happened.
As I began to outline character backstories and a basic plot to start writing, I would find myself drawing up short when I needed to insert a detail about the world in which my story is taking place. This month made me realize that I need to also worldbuild to the metaphorical gods before I try to manuscript anything, and in some cases before I try to go deeper into outlining my character’s backstories and such as well. I’m such a detail oriented person that I have no idea why this didn’t occur to me before, especially because I am including a magic system in my book. I hate fantasy books (that are meant to be serious and not just cozy reads) in which the magic systems rely on the “because it’s magic” excuse and the author doesn’t make any attempt at giving at least some sort of structure or rules. So yeah. I really need to worldbuild, which I am going to hate because it is going to take FOREVER (detail oriented person).
I work better on lists and schedules
This I did know, but I didn’t realize it applied to my writing. A lot of the reason why I failed to write anything of substance for the plot of my book is that I thought I could just throw myself in and make it up as I go. Incorrect. As November passed, and I kept getting stuck on details, I realized that I would need to incorporate my penchant for planning and list making if I was ever going to complete a task this large.
Also, side note, but I keep referring to this story that I’m writing as a novel. It will most certainly not be a novel. It will be a whole dang book series. (13 characters!! Who will each get their own POV at some point!! “A novel” my a**.)
I can throw myself head first into school essays and short writing assignments no problem, but with a story this big, all coming straight from the mess I call my brain, I need to do a lot of planning beforehand. That, above all, is what this failed NANOWRIMO taught me.
~*~*~
So! Now that I have torn my failure to shreds and dissected all the little pieces and given yall a short (yes that was short for me - I’m starting to think you guys don’t know me at all ᕱ__ᕱ) summary of who, what, when, where, and why my failure occurred, what’s next. Well, I plan. I outline to the metaphorical gods (as I seem to be fond of saying in this post), and next year, when November rolls around, hopefully I have done enough planning and outlining and detail work that writing a 50000 word manuscript should be a breeze!
That’s all for now folks! If any of y’all are curious as to some of what I did manage to get done on my novel/series over NANOWRIMO then stay tuned for the first of your special content posts which should be up within a few minutes of me posting this. Also, if any of y’all have suggestions about how to store/order worldbuilding content in an easily searchable way that would be fantastic!! Please do let me know. Thanks for bearing with me! ᕱ__ᕱ
And remember, dot your j’s and cross your t’s!
~Clementine J. Quincey 🪷
#amature#author#amature writer#creative writing#writers on tumblr#writer things#writerscommunity#nanowrimo 2023#nano 2023#nanowrimo#conclusion#original story#original novel#story writing#failure#learning from failure#series#rambles#ramblings#frog#thanks for sticking around#love yall#kisses#ᕱ__ᕱ
1 note
·
View note
Text
Emerging Technologies Shaping the Actuator Systems Market
An actuator system market is a component of a machine that is responsible for moving and controlling a mechanism or system, which is operated electrically, manually or by various fluids such as air, hydraulics, and others. An actuator requires a control signal and a source of energy. The control signal is relatively low energy and may be electric voltage or current, pneumatic or hydraulic pressure, or even human power. Two basic motions of actuators are linear and rotary. The global actuator systems market is estimated to grow at a CAGR of 8.8% during forecast. At this CAGR, the global actuator systems market size is estimated to reach from $48.3 billion in 2019 to $87.2 billion by 2026.
Increase in production, rise in use of electrical actuators due to their efficient operation, less maintenance and others, and surge in demand from automation industry are expected to drive the growth of the global actuator systems market. However, strong competition among manufacturers, stringent government regulations on the use of actuators for safety purpose, and reduced energy consumption are expected to restrain the global actuator systems market growth. Further, factors such as increase in investment in automation industry, rise in demand in energy sector for the actuator use, and research on improvement in actuator systems are expected to be the opportunities in the growth of the global actuator systems market.
Key segmentation can be done on the basis of product, application, motion, end use, and region. Based on the product, the market is segmented into hydraulic, mechanical, pneumatic, electrical, thermal, and others. On the basis of application, the market is classified into automotive, healthcare, electronics, chemical processing and others. By segmentation type motion, it is categorized into linear and rotary. Based on end use, the market is divided into chemical, power, oil & gas, automobile, hydraulics, metals, and others. Based on region, the global actuator systems market is studied across North America, Europe, Asia-Pacific, and LAMEA.
Key players in the global actuator systems market are ABB, Rockwell Automation, Inc., Emerson Electric Co., Altra Industrial Motion, Flowserve Corporation, SAMSON CONTROLS, SMC Corporation, Aero Space Controls Corporation, GE Aviation, Honeywell International Inc., and MISUMI Corporation.
Key Benefits for Stakeholders:
The global actuator systems market share has been analyzed across four major regions.
Porter’s five force analysis helps to analyze the potential of buyers & suppliers and the competitive scenario of actuator systems for strategy building.
The report outlines the current market trends and future scenario of the market size to understand the prevailing opportunities and potential investment pockets. The market is forecasted.
Major countries in each region have been mapped according to their individual revenue contribution to the regional market.
The key drivers, restraints, opportunities & actuator systems market trends along with their detailed impact analysis are elucidated in the study.
The global actuator systems market analysis covers in-depth information of the major industry participants.
Questions Answered in the Actuator Systems Market Research Report:
What is the growth rate of the actuator systems market during the forecast period?
What will be the global actuator systems market size ?
Who are the leading manufacturing companies in the actuator systems market?
How the major current trends will shape the market in the future?
What are the driving factors and opportunities in the market?
Which will be the niches at which players profiling with thorough plans, financials, and also recent advancements should set a presence?
Why are some of the segments flourishing at the highest growth rate while others experience a steady growth?
What are the conclusions of the actuator systems market?
0 notes
Note
Right, so: around the time Everything Almost Died, Siberia exploded. Not violently, mind you. It was more of an enthusiastic oozing than a bomb going off, but it did do a lot of lava and (presumably) greenhouse gases. The map below shows the area affected, outlined in black:

So...yeah. That's a lot! And for the longest time, scientists thought that the greenhouse gases emitted by the formation of the Siberian Traps caused the acute global warming which in turn caused the Great Dying. However...recently...that has come into question.
Basically, it wouldn't have done enough to raise global temperatures by that amount. Not even close.
Enter the plucky little bacterium with the greatest genus-level K/D ratio to ever exist: Methanosarcina
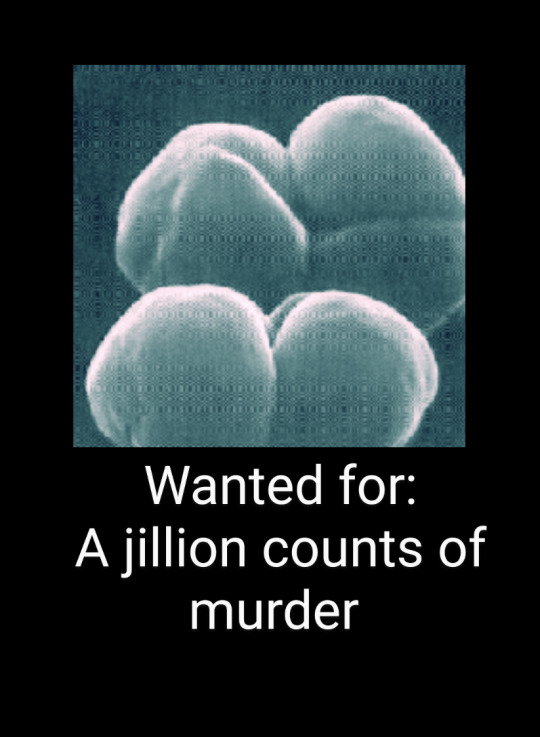
See, right around the time Siberia blew its top, Methanosarcina evolved a nifty little trait: how to digest acetate using nickel as a catalyst. The end-product of this metabolic marvel? Methane. As long as there's dead stuff in the environment, Methanosarcina has a source of acetate, so the limiting factor to its fitness was the availability of nickel. Guess what the Siberian Traps blasted into the environment.
I think you can see where this is going.
When the mass influx of bioavailable nickel into the world's oceans, Methanosarcina populations exploded, and with them? Global methane emissions. What resulted was a horrid positive feedback loop: more Methanosarcina making more methane increasing global temps killing more sea life providing more food for more Methanosarcina to make more methane.
It's plausible that the only thing that kept this cycle from perpetuating indefinitely was the fact that Methanosarcina populations were so high, and thus dying off in such tremendous numbers, that the nickel they were consuming simply couldn't be recycled back into the food web fast enough to sustain their growth. Eventually, Siberia calmed down, and Methanosarcina populations crashed back to pre-Triassic levels. But by that point, they'd already left their mark.
If the Methanosarcina hypothesis holds true, then it means that they are probably the most important single genus to ever exist since the time oxygen nearly sterilized the planet. (But that's another story entirely).
So yeah, moral of the story? Be careful when you explode a whole continent: some bacteria might fart your biosphere to death.
Thoughts on the idea that Lystrosaurus caused the Permian extinction by being so dang numerous and dominant, making them one of three organisms that were so overly well-adapted that they broke the ecosystem and led to a colossal mass extinction (the other two being early photosynthesizers and humans)?
I pay so much more attention to invertebrates, I actually knew nothing about this idiot fool here?!?!
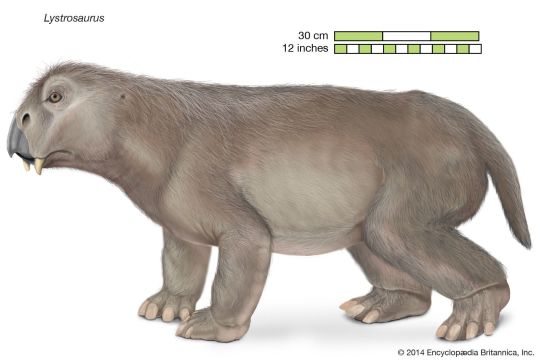
I did not know that this big mole rat walrus sloth looking ass survived the permian so fucking well that at one point it constituted possibly 95% of the terrestrial vertebrates on Earth. What the fuck. What happened. And we have a fucking MUMMIFIED SKIN fossil of one?!?! A little baby one!?!?

augg they flattenated him I can't believe it :( I can't believe they'd pancaker a little guy like that
3K notes
·
View notes
Text
New and Improved Writeblr Intro
I didn't really know what I was doing the first time and my WIP priorities have changed, so here we go again.
Call me Moshke Palmoni (they/them). I spend as much time as I can writing, but that is not as much as it might be because there's also a lot of life going on right now. I also like to read, knit, collect vintage ephemera, and play with my cat. Most of my time currently is taken up with fixing up the 100-year-old house I just bought. It's lovely but it was not cared for in the last couple decades and the previous owners made some interesting decisions. I also visit libraries and museums as much as possible.
Active WIPs
(respond to this post to be added to or taken off any taglists!)
General taglist: @blind-the-winds
To Die Among the Stars
First draft about half done at ~50k words.
In the future, 20 people are sent into space on a second test of an FTL drive, aiming for a habitable planet. The first test was a disaster, so this time they’re more careful—the volunteers are only needed for data on how humans fare at faster than light speeds, so they are selected from prisons and “mental wellness centers” and areas where people would agree to a suicide mission for the promise of feeding their families. No one expects them to live, just to provide enough data to improve the next test. Told from 4 POVs: Pixel, a semiverbal black market modder; Ri, who has so many illicit mods embedded in his body he can no longer experience the world the way most people do; Zippy, a young disabled woman desperate to support her family; and Peppermint, a genetic experiment combining human and cat DNA raised in a lab with only a sentient android for company. Despite all expectations, the group bands together for survival.
Taglist: @hd-literature
A Blade of Ice
In the outlining stage.
Working title. Part of the Legends of Halara series, which follows 1,000 years of fantasy kingdom history. About 300 years into that history, Princen Aryel is born. Aryel is never good at going along with expectations but has a certain duty eso must follow to take care of eson kingdom. Aryel is one of three royal children and not expected to rule, but after eson youngest sibling dies relatively young Aryel has to take on the responsibilities of both leading the army in a generation-long war and leading the kingdom through a time of shortages and despair. Aryel often clashes with the noble advisors in ways eson sibling never did, and the balance between who Aryel is at war and who eso is at court is not an easy one. It certainly doesn't help that in a world of politically arranged marriages, Aryel always seems to be in love with the wrong person.
Worldbuilding Links for Halara: cultural genders are explained here (with pictures of clothing styles here) and non-human gender systems here. This is a basic post about their pantheon of deities and this is a post containing maps of all the local kingdoms.
Cold Iron
In the outlining stage.
Shakatra is 107 years old. They are also 33. They are a rare case of a Fae changeling surviving to adulthood without being killed or dying from iron exposure or the weak constitution common among Fae children chosen to be left. They survived long enough to gain magical strength not only beyond any human but beyond many of the more minor Fae. They used to use this to exert power over Wild Fae, to protect humanity, to exact revenge, or just for fun. Now, however, they are widowed and retired with two kids to take care of. Their brother Kris, also their best (only?) friend is equally happy to be done with that world. Neither of them are prepared for it to find them again. When there is a Fae threat against the entire world, Shakatra may be the only one with the power to stop it and enough love of humanity to bother. But things are not what they seem and questions of betrayal, priorities, and what they are willing to do to protect the life they've built are harder to fight than a direct battle, insidious like the creeping poison of iron.
Links: Character posts here and here.
Backburner WIPs
Time to Kill
Working title. Esther Dahan is part of one of the first teams ever sanctioned to use time travel technology. Against all historical odds, they aren’t cops or soldiers—they’re anthropologists. Her team specializes in Jewish history specifically, and as tough as it is to leave her young daughter behind for long stretches the team is like her family as they get to truly experience what life was once like, always careful not to change anything (the butterfly effect having been disproven, they must still not share too much information or come in contact with major figures). And yet, something is off. In more and more time periods, they find suspicious activity. But they can never quite get enough proof to convince anyone why this matters—why they should believe that these scientists found the first known rogue travelers. It’s not until trying to solve the mystery on their own leads to Esther’s life being torn apart that they’re taken seriously, and even then her team might be the only ones capable of finding out the truth and stopping something even worse.
A Tangled Knot of Gold
Also in the Legends of Halara series, about 200 years into the kingdom's history. Tlapil is the cousin of the heir to the throne, Soter, who is also the only person who treats eso like a person because eso is semi-verbal with unusual body language and interests. Tlapil's main useful skill seems to be mapmaking, but when the kingdom needs unusual solutions Tlapil's ready to help—along with eson only other friend, who happens to be a slime. Having proven esonself, eso holds a respectable position as advisor to eson cousin, but when tragedy threatens to tear apart the entire kingdom it might be up to Tlapil to find a way to hold it together.
Falling Petals
A story of imperfect love and family and undiagnosed disability across generations (they're all autistic before they would have been called that). Ira Katz was born in 1913, the only child of Russian Jewish immigrants. He was clever and charming, but there was always something off-putting about him. He didn't understand why blunt observations and mean jokes went unappreciated. He would give long and detailed lectures on his interests, which included photography, without regard to anyone else's level of interest. He spent his adult life working in the drugstore he inherited from his father and had 4 children with his wife, though he never knew how to connect, loving them from a distance.
Ira's second child, Daniel (born 1939), was also odd and isolated. He was gentle and generous but mocked for being sensitive, for his silly attempts at being serious and adult too soon. So he learned to channel his pain from tears to rage and disappear into comic books to forget about the world. He learned to script friendly conversations so no one could see his confusion or pain. He studied architecture because it was more manly than becoming a librarian, married a teacher, and had twin daughters. He refused to become his father--he never mocked his kids and he spent some time with them--but the pain and overwhelm and frustration would burst out of him in rages that terrified them.
One of Daniel's daughters, Shoshana (born 1961) was also odd. She was bright but seemed young for her age, clinging to toys her sister had long discarded. She had a bad habit of freezing when confused or scared, so she would stare blankly and just not answer people. She cried easily. She read constantly but failed out of college and ended up back with her parents and no chance of marrying or living alone. She convinced herself she was stupid.
And then Shoshana's sister had a daughter, Naomi (born 1987). Naomi was odd in a way Shoshana recognized, and she was determined not to project her own pain onto her niece but to use this chance to break the cycle of pain and give a child a chance to grow up loving herself and her differences.
#moshke writes#writeblr#writeblr intro#yes it's only been a couple months and some of this is the same#but I have learned some things since then
36 notes
·
View notes
Text
Ao3 Tips and Tricks
So I thought I would make a post about some cool stuff you can do with Ao3 and userscripts, and some tips I’ve learned from setting them up for myself! I promise it's not hard, though this is a lot of info. I'm happy to help if I can.
What You’ll Need:
First, you will need the Tampermonkey extension for your browser (depending on what browser you use, Greasemonkey is the equivalent). On Android, you can even run Chrome extensions on mobile with Kiwi Browser! It is easiest to configure the scripts on your desktop and then sync to mobile with Tampermonkey’s cloud sync feature or by exporting the configured scripts and importing in your mobile browser (I will explain how to do this later in the post). If you use any of the tweaks I outline below, be sure to backup your scripts in case your settings are lost.
Once you have Tampermonkey installed, you can get scripts from GreasyFork. The inimitable @flamebyrd also has some great scripts and bookmarklets and has been incredibly helpful while I figured all this out.
Find a script that looks interesting, click on it, and then click “install this script.” Pretty straightforward. Once you have it installed, you can go to Tampermonkey to configure it (only necessary for some scripts) by clicking on the Tampermonkey extension icon in your browser (under the three dot menu in Kiwi) and clicking “dashboard”, then clicking the edit icon next to the script you want to configure. When you’re done, click File->Save.
Scripts and instructions under the cut
Some of my favorites:
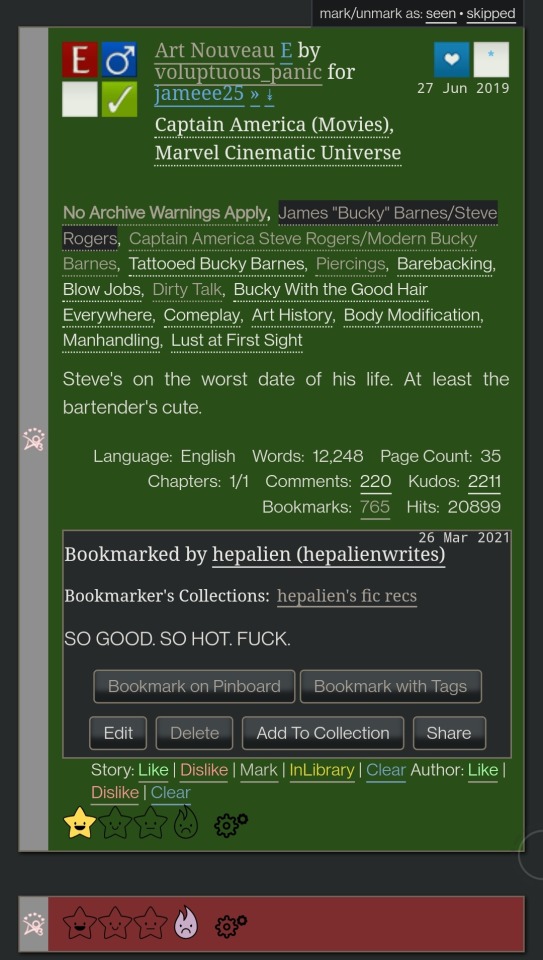
Flamebyrd’s Incomplete Works script - fades out WIPs on works listings, and displays the work stats (wordcount, chapters, etc) in red on single works to make it more obvious that they’re WIPs as you’re browsing:

Flamebyrd’s Ao3 to Pinboard bookmarklet/script - if you click the bookmarklet while on a work’s page, it opens the Pinboard save screen and prefills the title, tags, description, word count, etc, and adds ?view_full_work=true&view_adult=true to the URL so Pinboard’s archiver will archive the complete work and not the adult content warning screen (note that Pinboard still cannot correctly archive works locked to Ao3 users, so you may want to download them as a backup. I’ve asked him about fixing that.), based on your selections when configuring the bookmarklet on the linked page. If you use the userscript, it adds a button to the works listings page so you don’t even have to open the work to save it:
I tweaked this script so that it only grabs the first pairing tag, since I don’t typically care about secondary pairings and they were clogging up my Pinboard tags. It’s a simple fix (though I know nothing about coding so I had to do some googling and inspect-sourcing; kinda proud of myself tbh):
Just change this part of the script
if ( options.relationship_include ) {
- $(".relationships a.tag", $work).each(function () {
To this
if ( options.relationship_include ) {
- $(".relationships a.tag:first", $work).each(function () {
I also found this cool mobile-optimized Pinboard bookmarklet called Pincushion and combined it with Flamebyrd’s script. Everything works except the auto-tagging, but I’ve reached out on GitHub to see if he can help (according to Flamebyrd, there’s no tag field ID attribute to map to). However, this bookmarklet has tagging autocomplete features that make it easy to tag manually. For example, if you type “steve 21st” it will suggest “steverogersvsthe21stcentury” rather than having to type out “steverogersvs…” in order for it to autocomplete like it does on the regular Pinboard bookmarklet. I actually have two buttons set up (which you can see in the next screenshot) - Flamebyrd's to quickly grab the tags and close without me having to do anything, and then the Pincushion one to quickly edit the tags. If anyone's interested, I can explain how to do that.
To combine Pincushion with Flamebyrd’s script (so it works from the Ao3 works listings page as mentioned above), simply change this part of Flamebyrd’s script:
t = t.split(" ").join( options.space_replacement );
var pb_url = "https://pinboard.in/add?url=" + encodeURIComponent(q) + "&description=" + encodeURIComponent(d) + "&title=" + encodeURIComponent(p) + "&tags=" + encodeURIComponent(t);
void(open(pb_url, "Pinboard", "toolbar=no,width=700,height=350"));
To this
t = t.split(" ").join( options.space_replacement );
var pb_url = "https://rossshannon.github.io/pincushion/?user=YOURUSERNAME&token=YOURAPITOKEN&url=" + encodeURIComponent(q) + "&description=" + encodeURIComponent(d) + "&title=" + encodeURIComponent(p) + "&tags=" + encodeURIComponent(t);
void(open(pb_url, "Pinboard", "toolbar=yes,width=600,height=700,left=50,top=50"));
You’ll need to get your API Token from your Pinboard account and plug it in where it says YOURUSERNAME and YOURAPITOKEN (number part only) above.
FanFictionNavigator - mark fics as Like/Dislike/Mark/InLibrary, highlight with colors based on which option you select, hide/show based on category, like/dislike author and highlight with color. Only you will see how you've marked things.
You can tweak the colors for the highlighting by configuring the script (I find the default colors make the text hard to read because I use the Reversi skin on Ao3 for white-ish text on a gray background). I also changed it so that when I click “hide likes” it only hides liked fics and not liked authors (i.e. hides fics I’ve read, but not unread fics by authors I like), changed the color of the like/dislike/etc links to match the highlighting color and to show up better, and changed the way it highlights authors (I think the default is bold/strikethrough which doesn't really catch my eye. I changed it to highlight the author name in red/green):

Here are my configured scripts if you’d like to use them instead of tweaking yourself (you need to install both):
FanFictionNavigator
FanFictionNavigator - Colors
Note: Your settings for this script will sync via Tampermonkey but not your data (i.e. fics you’ve liked/marked/etc). If you ever switch between browsers, you’ll need to go to your Ao3 Dashboard and click FFNOptions, export your data, then go through the same process to import it into the new browser.
AO3: Kudosed and seen history - highlight or hide works you kudosed/bookmarked/marked as seen. If you want to use this with FanFictionNavigator, you’ll need to turn off “highlight bookmarks” from the settings under the “Seen Works” dropdown that gets added to your Ao3 navbar or FFN’s colors won’t show. Again, data doesn’t sync between browsers but you can copy it from the dropdown settings. However, it pulls your kudosed and bookmarked fics from Ao3 itself, so that will always show. It's just seen/skipped that doesn't sync:
Ao3 download buttons - adds a download button to the works listings page so you don’t have to open the fic to download it. However, it also doesn’t play nicely with FFN’s colors, so I’m using AO3 Review + Last Chapter Shortcut + Kudos-sortable Bookmarks script which also has a download button that works with FFN (a small down arrow next to the author name). The download button doesn’t work as-is from that link, so here’s my tweaked version based off of this comment. You can configure what format you want it to download by default in the script. There’s also a tweak in the comments to fix kudos-sorting, but it overloads Ao3 and you get a “retry later” error for a few minutes when you try to open Ao3, so I don’t recommend it. I don’t know if any of the other functionalities of the script work because I don’t use them, but it looks like there are tweak suggestions in other comments you can try:

I was using Ao3 Replace Words to replace words in fics that bug me but I realized it wasn’t working on mobile, so I’m using zensurf instead which is not Ao3-specific but works basically the same way. If you want to limit it to just Ao3 (so it doesn’t change words on non-fic sites), just add this
// @include http://archiveofourown.org/*
// @include https://archiveofourown.org/*
Above this line
// ==/UserScript==
(function() {
You can // @include other fic sites like ffnet that way too.
AO3: Links to Last Chapter and Entire Works does what it says on the tin, but the creator was kind enough to give me a code snippet to add that makes the “E” (for Entire Work) appear next to all works and add ?view_full_work=true&view_adult=true to the work URL so that I can easily right-click and share to Instapaper and have it be saved correctly (not just the first chapter but the whole work + not the content warning screen for NR/M/E works). Here is the script with this tweak applied:

I think those are the only ones that I’ve done special tweaks for. Here are some others that I find useful that either don’t require any configuration, or should be pretty straightforward to configure and are explained on the script page.
AO3 author+tags quick-search - doesn’t require configuration
Generates quick links from AO3 fics to more by the same author in the same fandom (or character/pairing/any other tag):
Remove leading spaces in AO3 - doesn’t require config
Removes the leading indents for paragraphs in AO3 works.
Ao3 Only Show Primary Pairing - you have to enter the pairings you want in the script, and you can change how early in the sequence they must appear before the work is hidden. Also works with character tags.
Hides works where specified pairing isn't the first listed. Hidden works show a placeholder that you can click to unhide:

AO3: highlight tags - have to enter the tags you want highlighted, as well as the color you want. It matches case so you may have to enter both “Dog” and “dog”, for example.
Configure tags to be highlighted with different colors. This makes a tag more obvious to your eye when browsing. I use it to highlight things I’m wary of in red so I don’t miss them and start reading a fic I might not want.
AO3: Tag Hider - configure how many tags you want to see before it hides them
Hide tags automatically when there are too many tags. Add hide/show tags button to browsing page and reading page.
AO3 Remove Double-Spacing - no config
Removes awkward double spaces between paragraphs on AO3. Doesn’t smush together paragraphs that have a single line break - it leaves those alone.
ao3 series collapser - no config
Collapse works that are later than part 1 of a series. Leaves a placeholder so you can uncollapse if you want to see it.
AO3 Blocker - no config, but you enter what you want to block from the added navbar dropdown in Ao3
Fork of ao3 savior; blocks works based on certain conditions. I find this simpler to use than Ao3 savior.
FYI there are also style scripts for Pinboard on greasyfork and userstyles.org (this site is slow af for some reason, so be patient while it loads). I use show unread bookmarks more clearly and Modern Pinboard Style (basically a dark mode). Neither require config unless you just want to tweak the settings to your liking. To install to Tampermonkey from userstyles, scroll down to “Install style as userscript”.
I also use these extensions in Kiwi:
Ao3rdr - Adds a star rating system (pictured in some of the screenshots above) to Ao3 works that only you can see. This one will sync your data between devices if you use the cloud sync option, which I recommend so you don’t lose your data if something happens to your device or browser.
Dark Reader - not really necessary for Ao3 if you use Reversi skin, but does make all browser pages dark mode if you want it on sites other than Ao3.
Speaking of Ao3 skins, I have another one set up in conjunction with Reversi that shows all the fandoms on a user’s profile, rather than having to click “expand”:
Unfortunately, I can’t remember where I found this. To set it up yourself, go to your Ao3 -> Dashboard -> Skins -> Create Site Skin, fill in the Title (has to be unique), and paste the code below in the CSS box:
#user-fandoms ol.index {
padding-bottom: 0;
text-align: center;
}
#user-fandoms ol.index li {
display: inline;
margin-right: .5em;
line-height: 2.15em;
}
#user-fandoms ol#fandom_full_list {
padding-top: 0;
padding-bottom: 1.5em;
display: block !important;
}
#user-fandoms p.actions {
display: none;
}
Then hit Submit -> Use. There are ways to hide or highlight various elements (ships, characters, blurbs, work stats, etc) on a works listing page using skins on Ao3. This is getting long so I’m not going to go into that, but I’m happy to help if you want to try it. It’s very easy.
Once you have everything configured on Tampermonkey on your desktop, you can migrate it to your mobile device in one of two ways:
Option 1: Go to Tampermonkey settings and change Config Mode to Advanced
Go down to Script Sync and select your preferred cloud service and save
It will ask you to log in to said cloud service
Install Tampermonkey in Kiwi and do the same thing
Wait for it to sync (this can be slow)
It should sync any changes you make moving forward, but again, it’s slow
Option 2: go to Utilities and check all 3 checkboxes under general (include script storage, include Tampermonkey settings, include external script resources)
Either export to your preferred cloud service or
Export as a zip file, move it to your mobile device, go to this same screen and import
I would recommend exporting as a zip for a backup even if you don’t use it to migrate your scripts
You can unzip and upload individual script files (.js) on this page if you ever need to reinstall a single script with your settings instead of all of them
Let me know if you run into any issues and I can try to help! The script writers are also super nice and helpful if you reach out to them. Yay fandom!
#ao3#archive of our own#fanfiction#ao3 resources#fandom#fanfic#tech#Tampermonkey#userscripts#ao3 tips#musette22#I hope you don't mind that I used you for the 'liked author' example ^_^#ditto voluptuous_panic#y'all should read art nouveau it's so good
482 notes
·
View notes
Text
Update! Further research e.g. putting the Hyakuri together in full has suggested it's a more a different in proportions than scale. This isn't a surprise since, the Shiden aside, the HG Teiwaz mobile suits are all a bit clunky and loosey-goosey. That and I think there's a considerable amount of flexing going on between what the Teiwaz frame is 'supposed' to look like and how the various 'suits actually function.
I'm going to go ahead and use the Shiden kit as my base, since it's the most complete version of the frame modelled, but I will likely be playing with the proportions as I go and generally doing some fudging of my own to get the best-looking result.
I'm about 90% done sketching a basic outline of the HG version (the remaining 10% is shins and neck).

I'll then scale this up to full size and start the proper model.
The shins are the biggest place where it's unclear how the Teiwaz frame maps between the different 'suits, since Shidens have a prominent lower-leg structure that looks doubled in size from the Hyakuri, so that'll be interesting. However, I'll start on the torso first.
Good news! I have started modelling the Teiwaz/Io frame.
Bad news! Turns out the Hyakuri and Shiden high-grade kits are not quite the same scale, at least if we go by the inner frame components.
Isn't that fun?
11 notes
·
View notes
Text
Guide to Drafting
Patreon || Ko-Fi || Masterlist || Work In Progress
–
Planning v. Discovery
The first thing you must decide when you embark on the journey of drafting a story is how you’re going to get it done. Typically, there are two groups you can fit into, though most writers are somewhere in between. There are writers who plan meticulously before they begin writing to create a very clean first draft, or there are discovery writers (otherwise known as “pantsers”) who find more success in choosing a premise and then using a zero draft to explore the idea before gluing down any details. You are most likely someone who falls between those two methods. Some initial planning to feel familiar with your idea before you do some of the planning through the writing itself. Having some semblance of a method will help you narrow down your own process, which is immensely important if you want to get any substantial project near completion.
Consistency
Drafting is a difficult process because it’s either the revisitation of ideas you’ve already had, or the generations of ideas in quick succession. If you want to have a draft in a reasonable amount of time, you must develop a consistency in your writing. I won’t say that it must be a strict routine because time management can be a luxury, but you must make the consistent effort to write, and keep it in the forefront of your mind. Even if you don’t write every day, it should be something you try to make time for every day.
Know What You’re Trying to Accomplish
To get a draft done, you need to set expectations for yourself and they must be realistic. That doesn’t mean they have to be easy, or an amount of work you’ve been able to accomplish in the past. Considering how much time you dedicate to writing and your skillset, it should be a goal within reality. In addition, you must accept that you cannot create a masterpiece in one draft. For each version of your story that you write, you must have a focused goal, such as maintaining consistent characterization, making the plot concise and engaging, or making the prose more fluid and efficient. If you have a specific and attainable goal that you can accomplish in a reasonable amount of time with a fair amount of precision, each draft will be better than the last.
Designate Work to Phases
As mentioned in the last section, it maximizes your time and effort to have specific and attainable goals for each draft. This doesn’t mean that you rewrite the draft each time (though that is very common amongst writers), but that you designate tasks to draft versions. I find it very helpful in clearing my mind and soothing my perfectionist anxiety to make a “schedule”, outlining what I’ll accomplish in each version following the zero draft. For example, my draft schedules usually end up something like this:
Zero Draft: Main plot line, basic characterization, key world building
First Draft: Finalize Timeline, research for world building, structure
Second Draft: (Rewrite) Plot Development Fine Tuning
Subplot development
Foreshadowing
Build up to climaxes
Tone & Pace
Third Draft: (Intermittent Rewrites) Character Development Fine Tuning
Backstory
Subtextual Development
Making sure motivations are clear
Relationships between characters
Reinforcing character arcs
Checking dialogue
Fourth Draft: (Give to Beta Readers) World Building & Prose
Descriptions & Flow
Finalize settings
Checking grammar & punctuation
Reader Immersion
Fifth Draft: Incorporate Beta Reader Feedback
Write for Yourself First
In what some call the “zero-draft”, there are no rules. This draft is purely for your eyes. It’s you telling yourself the story for the first time. So, you don’t have to write in chronological order, or know the right word you’re looking for, or take a break every time you run into a problem. The purpose of the zero draft is to get a rough idea of as much of the story as you can and avoid getting snagged on minor details. This part is important. A lot of writers like to outline meticulously before they begin drafting and if that works for you, that’s great, but the majority of writers who attempt that get stuck in the planning phase, or burnt out on their story before a word of it exists. The easiest way to avoid those two situations is to do a zero draft, which can be as long or short as you want if it provides a skeleton for you to add meat to later.
Common Struggles
~ How do you estimate the number of words/chapters?... That depends on the genre, mostly. However, that’s usually something you decide in the second draft and beyond, and it can vary because of factors you haven’t got locked down until the plot and character arcs are firm or final. This is also something you’ll probably do a lot of tinkering with, and receive feedback on, especially from beta-readers, who can advise you on where natural breaks could occur from their perspective.
~ Why, after planning everything out, do I always struggle to write the draft?... 99% of the time, it’s because you’ve either burned yourself out, or accumulated too much pressure. When you put that much effort and time into a story, you can either slip into a headspace where you feel little excitement about it because you’ve already done all of the problem solving and had all of the revelations. It’s usually beneficial at this stage to take a step back (even if you’re not burnt out) and give your story some space, so that once you come back to it, you’re enthusiastic enough to fully realize your vision. If instead you’re struggling to write because you feel a lot of pressure to do justice for a story you’ve put so much love into already, take a step back, remember that the first draft is just for you, and work on letting go of the idea that the zero draft is meant to serve any purpose beside simply existing.
~ How do I come up with the necessary scenes to move the story forward between major plot points?... Most writing problems can be solved by asking yourself the right questions. When you’re trying to figure out what your reader needs to see next in order to effectively set up the next major event, ask yourself “What would happen between event A and event B that would add context or make event B more impactful?”. Treat it like a real situation and try to map out all of the tiny, notable moments that would take place between the major plot points, and then assess those moments on the basis of how impactful they would be to the coming scenes, and whether they can add context, set the tone, or aide in the rising action.
~ How do I balance sticking to the draft and following my own creative instinct in the moment?... This is a judgement call. Sometimes you’ll realize that maybe you should have just stuck to the outline, but remember that you can always go back, rewrite, test things out, etc. Always save every version of every scene, just in case, and go wild. Don’t be afraid to take detours just to explore. The writing process is anything but linear.
~ How do I maintain momentum in my writing progress when I constantly have distractions or other responsibilities that take priority?... Work at it. There’s no magic trick or piece of advice I could say that gets rid of your personal responsibilities. Write when you can, don’t make excuses on top of the reasons you have no control over, and remember that you create your own deadlines and expectations. Be kind to yourself, do what you can, and don’t spend potential writing time punishing yourself because there isn’t as much as you’d like.
~ How should I designate space (words/pages) to specific scenes/description/conversations, etc?... Trust your instinct and remember you can always cut/add later. In the earlier drafts, I’d advise you try to create as much material as possible to work with, and in the later drafts, be ruthless when determining what is necessary and adds value, and what doesn’t.
~ How do I finish a draft if I regularly lose motivation or interest in my projects?... Accept the fact that motivation is fickle, and that no writer in history has ever maintained “inspiration” for any project from the beginning to the end. There are going to be days where you’re like “ugh this is not what I want to do right now”, probably more than there are days where you’re stoked to work on your project, but that’s reality. If your goal is to finish a draft, you must recognize that writing is work, and nobody wants to work all the time. Try to supplement the lack of motivation by setting a positive and enjoyable routine so that, even when you’re not particularly motivated, you still know that your writing time will be peaceful and comfortable.
–
Masterlist | WIP Blog
If you enjoy my blog and wish for it to continue being updated frequently and for me to continue putting my energy toward answering your questions, please consider Buying Me A Coffee, or pledging your support on Patreon, where I offer early access and exclusive benefits for only $5/month.
Shoutout to my $15+ patrons, Jade Ashley and Douglas S.!
#writing#writeblr#writing advice#writing tips#writing resources#resources for writers#writing reference#writing help#writespo#writing inspiration#writing motivation#inspiration#motivation#drafting
545 notes
·
View notes
Photo

Requested by @tennant!
For this tutorial you will need:
Some basic gif-making knowledge (see my last tutorial!)
I’ll be using CC 2017 to do this, but as long as you have the timeline option, this will work for you! 🥰
So, in a sort of part two to my other gif tutorial, (https://luke-patterson.tumblr.com/post/636980573506813952/) this is a slightly more advanced part of gif-making. But I promise it’s easy when you know how!
Assuming you followed the last one, you’ll already know how to make your gifs into a smart object, so we’ll start there!
PART ONE: BLENDING
Drag both of your gifs into the same file. For this to work, your gifs have to be the same number of frames, or at least cropped to the same length in the timeline window, otherwise one will loop before the other, and it will mess up the loop of the gif. (For when we get to the multiple gif part, I recommend having between 60-80 frames, so it stays under tumblr’s 10 MB limit.) As this tutorial uses smart layers, they can both be sharpened as well.
(I made this gif 540 px by 268 px, because I’m going to add more to it later. But we’ll cover that further down in part two!)
Honestly, I find it so much easier to put my colouring on top of both/all the gifs, and then clip individual layers down onto a specific gif, if that one needs more of its own colouring. That way, the extra layers don’t interfere with the other gif(s). It’s so much less confusing visually for me than having lots of groups with their own colourings, and it makes moving the gifs around simpler.

Position them side by side, one on top of the other. Obviously, you can play around with the positioning: this may be easier to do once they are blended, especially as some gifs may be smaller and you need to try them in different places. For example, this is a screenshot of a Lyra/Will set I made in the past, with three blended gifs of different sizes:

Add a layer mask to both of your gifs. You might not need to edit both, but I usually do, as I like to balance how much one gif blends into another! Using the brush tool (set to black, when you’ve clicked on the layer mask), we want the brush to be very big, and very soft.
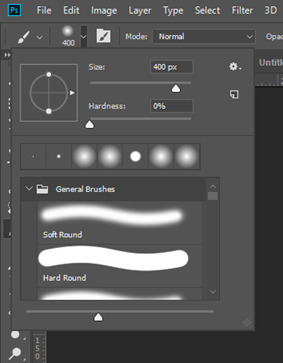
The bigger the brush, the more seamless the blending will be! By painting parts of the top gif away, the other gif will start to appear underneath. It’s not always necessary, but I usually like to set my top gif to ‘screen’ as well. This helps the gifs merge into one another even more, especially if you have one gif which is darker than the other!
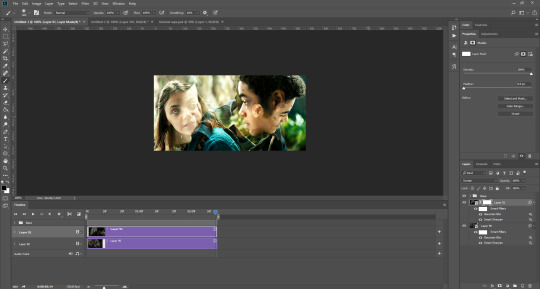
As you can see, by setting it to screen, the top gif has already started to look blended. Then, you can start to paint. As the brush is so big, you might end up painting away too much of the gifs, like so:
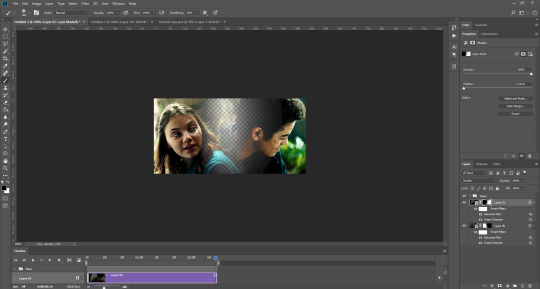
I usually go back and forth, switching between black to remove parts of the gif, and white to add it back (always painting on the layer masks). Sometimes, you might need to make the brush slightly smaller, just to fill in tiny gaps.
Another thing you can do is to add a solid black colour underneath all your gifs, just to fill in any spaces. (Sometimes, I do this on top of gifs too, to create spaces where I want blended gifs to go, like in my current header!):


Anyway, back to the original gif. My blended gif is now pretty much how I want it to be, except Lyra is quite far to the left, and Will is taking up a lot of the screen:
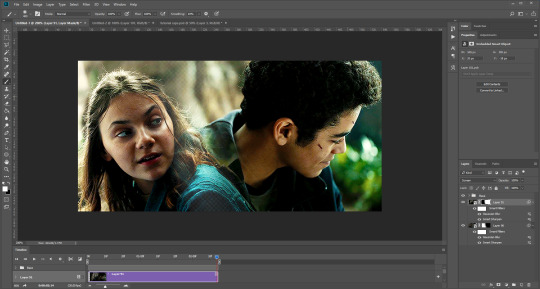
So I’m going to see how they look at the start of the gif, to determine how far right I need to move them both to get them mostly in the middle:
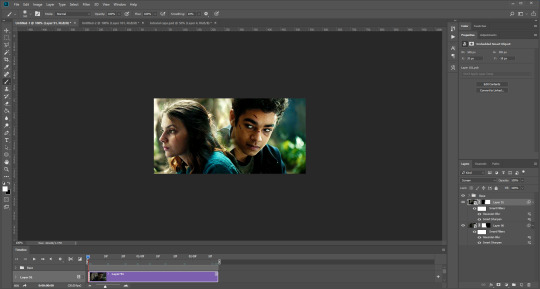

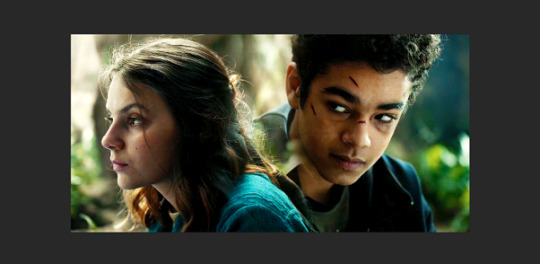
And that’s it! Now you can export them [file > export > save for web (legacy)] and you’ll have to change the timing back to 0.05, or use the action I introduced to do this in my last tutorial.
PART TWO: MULTIPLE GIFS
To put more gifs underneath this one I’ve made, I expanded my canvas. Go to image > canvas size. Make sure you click the little ball to the top in the anchor section, so the canvas expands underneath your gif. If you leave it in the centre, it will simply expand from the middle, or the left, right, etc.
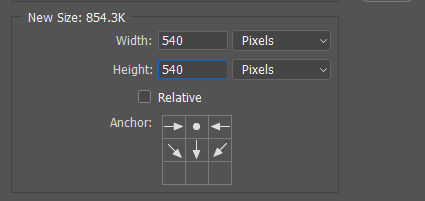
Next, we need to remove the black line at the bottom of the gif.
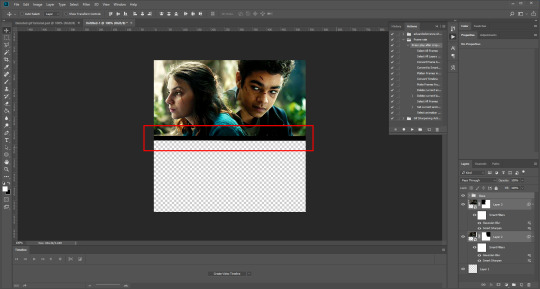
You want to select the space for cropping using the rectangular marquee tool, so in this case, 540 px by 268 px. The tumblr spacing is 4px between each gif in a set, so however many gifs you want, you have to account for 4px less pixels inside your one gif, to give the illusion there are multiple (unless you want them to touch).
For example, (there’s a little maths here: forgive me!) two gifs of equal size, placed side by side, must be 268px in width or length, because (268 x 2) + 4 = 540. (There is one 4px gap in between). For four gifs, it would be (132 x 4) + 12 = 540. (For the three, 4px gaps). For three gifs of equal size, it’s a bit different. These must be 177px, 178px, and 177px, to ensure there is 8px of space left over (two gaps).

Then, make sure the colour white is the primary colour selected on the paint pad (this is vital) and (in this case), the layer mask from before when we blended, is selected. Press ctrl (command on mac), shift, and i to invert your highlighted area (or select > inverse) and then simply delete the excess line, (either using the delete button on windows, or fn + delete on mac, I think!) Then, do this again for the other gif.
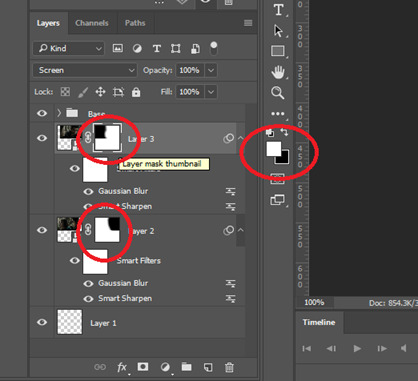
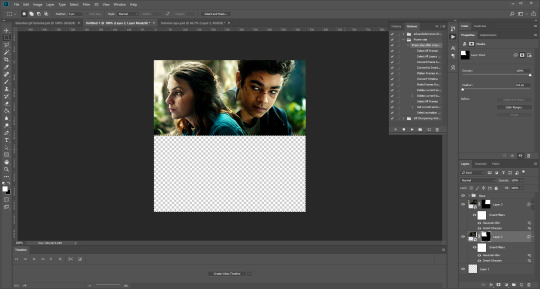
And voilà! It’s gone. You can also paint it out (using the black colour as the primary colour to erase), but I would still recommend highlighting the outline of the area you want to erase, using the marquee tool, so that you can paint it out in a straight line, and don’t paint into your gif and erase parts of that by accident.

Now to add in the other gifs! To do this, I use guides, but you can also use lines at a size of 4px, to map out the spaces in between gifs. If you go with lines, just make sure you delete the shapes after. With guides, they are not actually ‘in’ your gif, so you don’t have to remove them before you save. However, guides only work for straight lines, so gifs with other shapes will need to be made using lines, (but I will touch on that at the end!)
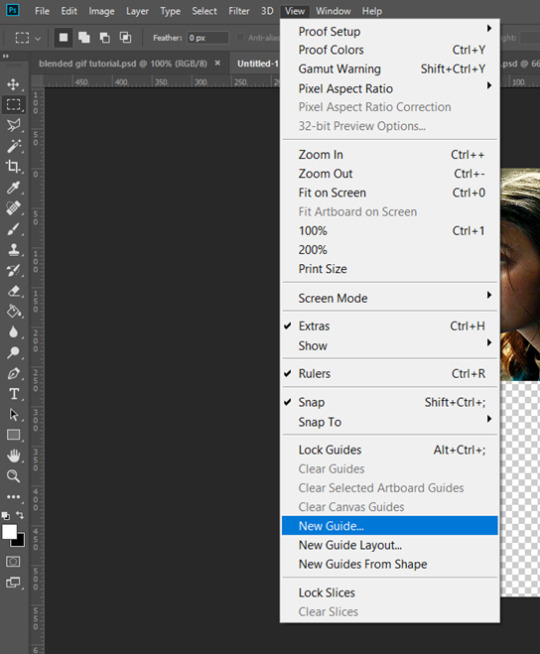
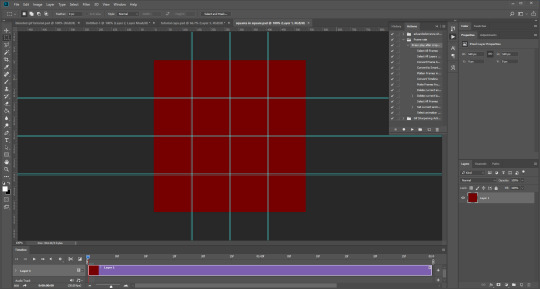
I actually have a few psds saved with guides already on, so that I don’t have to draw them out every time. If I was making a set with three gifs in a row, this would be different, but I usually stick to two or four (or three with one big square/rectangle, and two little squares), so this is my most used psd. The guides are set at: 132 px & 136 px, 268 px & 272 px, and 404 px & 408 px, both horizontally and vertically!
I have a red colour underneath just because I find it easier to see the lines between gifs this way - if you do the same, just remember to turn it off before you save your gif, otherwise it will have the colour red instead of mimicking the transparency between gifs.
Now, make a second gif! I decided to have a square in the middle as you can see in the title, and then two rectangles either side.
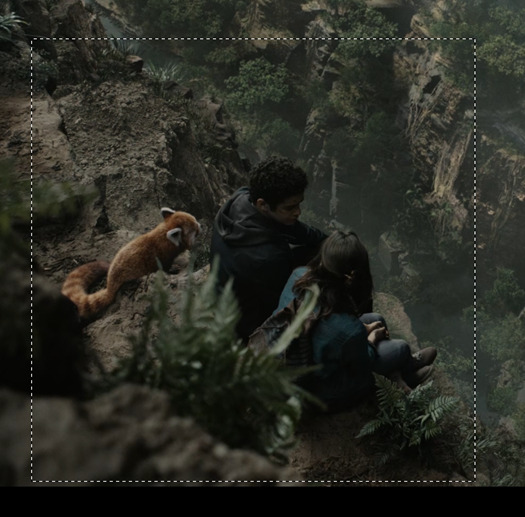
Then you want to resize it, in this case to 268 px by 268 px, and drag it across into your main file, or go to layer > duplicate layer, and move it that way. Don’t worry, when you move it, it will show the whole gif as if you haven’t cropped it. The reason I crop and resize it beforehand, is so that I can ensure it will be the correct size when I remove the excess parts of the gifs I don’t want, (rather than making it 268px including the black line for example, which would be wrong.)
Then, as before, position the gif where you want it to go, and highlight the area you want to be in the gif. Whilst this is selected, (again ensure white is the primary colour on your paint pad), click the layer mask:
Then the excess around the gif should be gone! (Making a gif of a gif tutorial... meta, lmao.) This way, if you decide you want to change the shape of the gif, or move it slightly, you can just paint parts in and out, or delete the layer mask, move the gif, and reapply it!
You can then sharpen and adjust your colouring to the gif as needed! Next, go ahead and repeat this process for your other gifs. Selecting the area, adding a mask, and sharpening. By the end, you should have something that looks like this:
PART THREE: OTHER SHAPES
If you want to use other shapes (which I haven’t tried myself until now, but I can talk you through some thoughts!) You can use the line tool. So, for example you could make a layer with the lines at 4px, merge it, and then at the end delete it from your gif to leave the gaps transparent:
To make a gif any shape you want, choose a shape (either use the shape tool, or get a png of it), and using a clipping mask. Make sure your gif is above the shape layer, then right-click the gif layer, and select create clipping mask to clip it down:
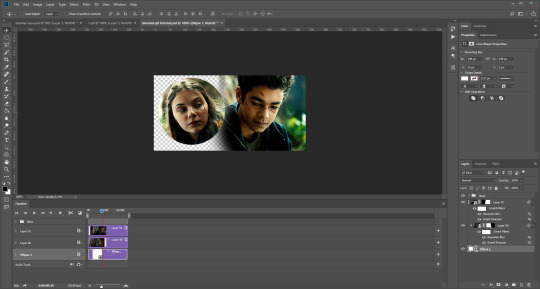
OR you could use a circle, and then delete the circle to make it look transparent:
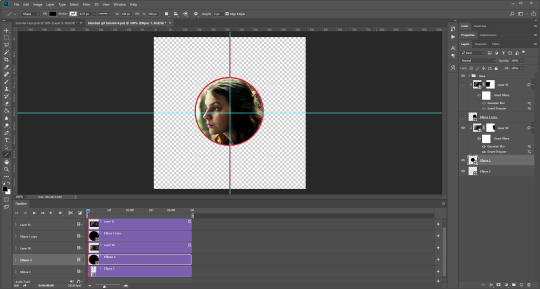
The best way to select items which are not rectangular, (so you can’t use the marquee tool), is to use the pen tool. Click around your gif so that it’s got a border of what you want selected. Once you have outlined your gif, right-click and choose make selection:
Then set the feather radius to 0, and then the area you want should be highlighted in the same way as with the marquee tool above, so you can add a layer mask, etc. However, as the pen tool is not always that accurate, there is a little white gap here where it’s not a perfect circle.
A way to overcome this could be to make all the gifs you want, and then simply add one on top with a white 4px border, so it gives the illusion of being transparent! (As I have done above, but save it as white rather than red!)
If I find a better way to do this in the future, I will update this tutorial. I hope this is helpful, and thank you for reading 🥰💖
#gif tutorial#tutorial*#completeresources#yeahps#chaoticresources#allresources#mikesmom#usertom#usersmile#heavensentnetwork#if there's any mistakes pls let me know#i am so tired rn fjghfjhgfjgh
718 notes
·
View notes