#i make multiple gifs per post so i have options
Text


gif dump💜
gifs i liked that didn’t make the posts
2 notes
·
View notes
Text
The Weaver's Song

Disclaimer: well I thought I had time to edit this properly and tidy it up, but joke's on me, apparently the entirety of HOFAS has leaked in Portuguese over night. That'll teach me (haha, never) to leave something in my drafts for months. So this may or may not be correct, and YOU might know that, but I'm not going to read the whole thing until I have the original version.
If someone has already posted this theory, I'm sorry!
Spoilers: this contains information from ACOTAR, TOG and CC series books 1 and 2. Please do not discuss spoilers in the comments until after HOFAS has officially been published, or in the reblogs without warning (and ideally a read more option)!
This may be fanciful, but I think I may know what The Weaver was singing about in ACOMAF... it was a metaphor for Prythian history and Void travel.
“There were two sisters, they went playing, To see their father’s ships come sailing … And when they came unto the sea-brim The elder did push the younger in.”
Theia's two daughters, as @silverlinedeyes has posted before, she thinks the second daughter brought Truth-Teller back to Prythian through a rift - though was there a third, unknown sibling, as @wingedblooms and I have theorised?
Playing - playing music? Music as the universal magic/language? Urd’s music?
Whether or not they're also Fionn's daughters, if literal, the ships could be people travelling through the Void/Rift to Midgard… the Feyre, the Nesta, the Elain come to mind, except maybe the Selene, the Eos and the Helios?
The Haldren Sea sounds like it could have a rift/portal in it (similar imagery to the Court of Nightmares/Hewn City). Port/portal?
Did Helena push her younger sister into the rift, to make her return through the Void and save Prythian from the Asteri, per @silverlinedeyes?
If this was then case then Helena knowingly sacrificed herself.
“Sometimes she sank, and sometimes she swam, ’Til her corpse came to the miller’s dam.”
Did she travel through multiple worlds until she reached Prythian, similar to Aelin as the red star? Or was this after returning to Prythian and living her life she then travelled again across the murky realm?
Miller's dam - dam could be their mother? The Mother? Silba?
A dam is also a body of water. The Cauldron?
Miller is one of the oldest human professions - milling grains for bread.
Miller is also a type of moth - moth wings at the HOW library, with their Cauldron/bowl-type statues at the entrance?
What if the Void/Cauldron is the Miller, and Chaos/Cauldron's water is the Dam?
“But what did he do with her breastbone? He made him a viol to play on. What’d he do with her fingers so small? He made pegs to his viol withall.”
What if the Void/Cauldron is the earth, Chaos/Cauldron's water is the dam, and the Miller is the hypothetical third sibling?
How do the underground waterways and/or the pool of Starlight in the Spring Court fit in?
The viol is an instrument; is the language of the universe a song? This would support my idea that Singing is a language of the gods, and Sight/messages from the gods could be a form of Singing.
Breastbone, spells and bonds are threads, viol strings? Pegs tighten/tune the strings. Witchy and sorcery spell vibes, but also hello PUPPET VIBES. Who is/will the Cauldron using as a puppet?
“And what did he do with her nose-ridge? Unto his viol he made a bridge. What did he do with her veins so blue? He made strings to his viol thereto.”
Nose - smells, Azriel can smell the Elucien bond… because it's discordant (theory on the way)? Amren could smell Feysand’s bond, how?
Bridge - I saw the painting in my mind: the lovely fawn, blooming spring vibrant behind her. Standing before Death, shadows and terrors lurking over his shoulder. Light and dark, the space between their bodies a blend of the two. The only bridge of connection … that knife. Paint that when we get home. - ACOWAR, chapter 69. Truth-Teller connecting with the Starsword.
"A violin bridge is a maple piece that sits atop the violin and lifts the strings above the fingerboard in a way that allows you to play both single notes and double stops. It transmits the string vibrations to the soundbox (body of the violin)." It's a conduit. Could Carranam be relevant here?
Blue - Azriel's siphons, the veins in Elain's eyes in the tent scene when she Looked for the Suriel. Can she see the threads?
Viols have six strings - three brothers and three sisters?
“What did he do with her eyes so bright? On his viol he set at first light. What did he do with her tongue so rough? ’Twas the new till and it spoke enough.”
Eyes bright - like Elain's when she's in pain? Pain is a link to the divine, do her eyes go bright when she's using her magic?
Eyes at first light - Sight/Singing at dawn? Eos?
First light - firstlight?
To set at something, to go after it… with an instrument playing him through the Void? Someone is after the firstlight and will go after it. The Asteri and Bryce. Mystics? Elain?
Till - as in the soil/gardening? More likely a boat's till/tiller; did Theia's second daughter’s tongue become the rudder that allowed “the Miller” to steer his way through the water/Void/space between… Lightsingers? Mystics? And there were three ships named after Feyre, Nesta and Elain Archeron.
Mor speaks the truth, Elain speaks what she Sees.
“Then bespake the treble string, ‘O yonder is my father the king.’”
“Then bespake the second string, ‘O yonder sits my mother the queen.’”
“Then bespake the strings all three, ‘Yonder is my sister that drowned me.’”
The father/king and mother/queen have been separated, and are in different locations.
Different worlds?
Fionn/the father/king is in Prythian.
Theia/the mother/queen "sits" somewhere else… a hell/Hel realm? Sits on a throne?
The sister/Helena is in Midgard.
I really think that the Weaver was singing to nobody/Feyre about Prythian's ancient history, along with the crossover - and potential instructions on how to navigate the Void - all the way back in ACOMAF! When she just happened to be collecting a six pointed star sapphire ring (six strings?) for Rhys?
Will each sister become a magical, Singing tiller for the bat boys' wings (as rudders), guiding them through the Void? It gives a whole new depth of meaning to Papa Archeron's fleet going down in a storm!
This also fits for Vassien, with Lucien being the magical tiller and Vassa as the firebird. And even possibly More and Emerie, if her wings get healed, or she gets her own Pegasus! Could it parallel the way they had to fly through holes in the Wall back in the OT, before Hybern destroyed it with the Cauldron (which just happens to contain Void)?
Will they be the light in the dark?

SJM you wicked bloody genius, this cannot be a coincidence. 🙏🏻
PLEASE BE VERY CAREFUL NOT TO SPOIL HOFAS FOR OTHERS WITH DISCUSSIONS ABOUT THE LEAKS!
#hosab spoilers#crescent city spoilers#maasverse#acotar cc tog crossover theory#hosab#crescent city theory#elain archeron#feyre archeron#nesta archeron#acotar#the weaver#the weaver's song#maasverse theory#pre hofas#acomaf
70 notes
·
View notes
Note
hellooooo @talks-with-the-void here! :) I reeaaaally want to commission art from you (not entirely sure if I can afford it soon tho, but I plan to!!) but I have a hard time to estimate how the different size options would look?? like, could you maybe add some example pictures for each size to your commission page or post them or something?? cause I have no clue what for example 90x90 pixels Look Like :') that would be really helpful!! :3
you're right, i'm working on adding more to my portfolio and i'll label them too
TLDR, the smaller the canvas size, the bigger the pixels will seem. this also means there's less room for detail

this icon of Cinnamon is (SMALL) 48x48. this is a good size for portraits and objects or items

this strawberry and paw button icon is (SMALL) 32x32. this size is best for items, obejcts, and simplified portraits.
i choose the specifics of the canvas size based on what i'm tasked with making. if you choose "small" and pick character art, i will make it on a 48x48 canvas by default and you dont need to choose that. it's just a guide to tell you how small/big the pixels will look in the end
this posed art of @subjectseventeen is (MEDIUM) 96x80. this size is better for character art and anything else you can think of.
just like the small sized canvas, i choose the specific canvas size based on what i'm making
this gif of dolli dimples & sally sashay is 280x220. i dont offer this size right now but it's to give you a better idea of what differently sized pixel art means - as you can see, much more detail can be fit into larger canvases. the big canvas is best for all things, especially things that require a lot of detail.
i dont currently offer this size because my commissions are already on the expensive end and the amount of time/detail that goes into these big canvases is just... Too Much !
(link to my commissions page if anyone wants to see)
(also, here's a sliiightly-outdated portfolio of my work on games)
more about pixel art/artistic process below if anyone's curious
pixel art is basically so small because the devices and games which use it have very small memories. this is why i start with as small of a canvas as possible and keep the canvas small (17's canvas is horizontal.) it also saves space if the art is transferred onto anything, such as turned into a sticker or badge, there's basically no border so it wont need to be cropped. the canvas sizes used are all multiples of 16 because that's traditionally how pixel art has been made - makes moving sprites much easier for computers to understand for the game i work on. it's also a good size to make repeating patterns with for tiles in games - and it's the sizing reference my background canvas uses so it's sort of like a ruler for spacing certain things

each grey square is 16 pixels, meaning 4 squares is 32 pixels and so on
this isnt why pixel art is called "8bit/16bit/32bit" though, THOSE numbers refer to how many colours were used in the game's entire palette to, again, reduce the memory it takes up as much as possible. modern pixel artists generally dont use these words because we dont usually work in hyper-limited palettes. we do still use limited palettes (for me, usually 1 base 2 shade 1 highlight per colour) and again it's to reduce memory size of the file and it helps with keeping your art consistent :0)
it kinda sucks how much visual math goes into making pixel art because im actually so. SO. bad at math .
#undescribed#my art#asks#not tagging this as not dog because i would .love to draw .... someones ..kintype...kinsona......whatever..
13 notes
·
View notes
Text
Homebrew Class design For Dummies: Part 2: Getting Started
Hi there~! Welcome to the second edition of homebrew class design for dummies, in case you haven't seen the first part of this. Welcome! This is a series of blogs where I go over how to make-what else, a homebrew class for Dungeons and Dragons Fifth-Edition. The previous post discussed the "planning" phase, going over the classes role in and out-of combat, their area and other minutia. This entry will cover the level 1-3 foundation, along with some other design concepts to help your class get off the grounds into becoming something amazing.
But First!
Before we get into making our class, there are a few key ideas you should keep in mind when designing a character option for 5e, some of this ties back into advice given in part 1, but bear repeating here.
Very basics
These things don't require much of an explanation, but just things to well...Keep in mind
Strong and weak saves: Each class has a strong (Constitution, Dexterity and Wisdom) and weak saving throw (Charisma, Intelligence and Strength) make sure to give one of each to your class.
Ribbon features: Ribbon features are like seasoning, while not adding much to the fully course, they enhance the classes flavor, a bad example of a ribbon feature is "Druidic" simply put unless your DM actively gives you a use for it, it is a completely useless feature. So make sure you're ribbon features actually come into affect when roleplaying the class.
Amount of features: Typically classes gain 2 features at these early levels, the only exception in official 5e is paladin at 2nd level, where you're given a fighting style, spellcasting and your divine smite, which all play form core pillars of how the paladin, use with caution.
Dead levels: Dead levels are those levels where you get nothing, nada, bupkis. Spellcasters have the most dead levels due to them getting cantrip enhancements + higher level spells as they level up, use them where appropriate. These are typically seen at later levels of a classes progression.
Bounded Accuracy:
In laments terms, bounded accuracy is meant to keep DC's around a bounds the designer intends for (In 5e's case 0-30) this is why, not including magical items or feature such as the barbarians capstone, this applies to whether you're attempting to break down a door or stabbing a vampire. Bounded accuracy is also accompanied by 5e's horizontal progression system, meaning that rather than your numbers going up, you gain more features to make you better at certain tasks (Damage, healing, etc) rather than bonuses to hit, to damage, etc and such, there are some exceptions (Advantage, Bless) but
Keep an eye on these
Weather you're designing a spell, subclass or a new class in our case, there are a few things in game that you should keep in mind
Barbarian Rage
Bards Magical Secrets
Druids Wild Shape
Fighters Action Surge
Monks Stunning Strike
Paladins Divine Smite + Auras
Rogues Sneak attack
Sorccerers Metamagic (Quicken + Twinned spell)
Warlocks Eldritch Blast and Pact Magic
Wizards Spell Mastery
All of these features not only serve as foundations for their respective classes, but also grant the class a huge deal of power. And in a game where 5e's multiclassing system is a thing, keeping these features in mind is helpful, for an example, say your class allows you to easily get off weapon attacks as a reaction, which, while possibly mediocre on its lonesome can get out of hand when paired with a rouge multiclass, due to how sneak attack can trigger multiple times if using a reaction attack (Since it triggers once per turn, rather than once per round) it's fine if you want to have interesting synergies between classes, just make sure you don't break anything in doing so.
While not class features, some other character options also grant players with them a great deal of power by virtue of their existence.
Feats: Sharpshooter and Great Weapon Master
Spells: Aid, Booming/Green Flame Blade, Counterspell, Conjure animals/Woodland Beings, Pass without trace, Wish.
Laying the foundation
With all of that jargon out of the way, lets begin laying out the first three levels of a homebrew class.
Level 1:
Level 1 is effectively the rookie stage of your classes career, whether they trained at a mystical academy or bonded with sewer rats, the first level of your given class should lay the framework for your class going forward, to give some examples, barbarians at 1st-level are given rage as their core feature, alongside a complementary feature in unarmored movement, rogues get sneak attack and expertise, fleshing out their role as a sneaky skill-monkey archetype. spellcasters (Besides the paladin and ranger) also get their spellcasting at this level.
Level 2:
Level 2 is where your character is starting to get a grasp of their abilities, similar to level 1 many classes get some of their most defining features here at this level, such as Druids Wildshape, Rogues Cunning Action, Clerics Channel Divinity, the list goes on.
Level 3:
Level 3 is where your character has gotten the grasp of their abilities and now can truly be one of their own, this is where the fullcasters get their second levels spells and where the martials get their subclass of choice, speaking of subclasses:
Where do I put the subclass?
A likely question you'll have have when making your subclass is "Where do I put it" or "What level should they get it, while non of what i'll state is definitive, some general guidelines for 1-3rd level goes as follows:
A subclass at 1st-level is generally done because it is absolutely crucial to the classes fantasy, say for instance your class is about you harnessing the power of a curse (Ex: Ross leisers accursed) getting your subclass at first level would make the most sense, to use base game classes as an example sorccerers, warlocks and clerics get their subclass at 1st-level because said subclass defines the source of their magic. Warlocks for instance derive their magic from a pact, which grants them their magic, hence a subclass at first level.
A subclass at 2nd-level is (offically) only use for both druids and wizards, both representing you coming into your own, such as training in a specialized school of magic. But also on a mechanic level, its done because 3rd-level grants a massive power spike for full casters by granting them second level spells.
A subclass at 3rd-level is typical of many martial and half casters, narratively it has a similar beat to a subclass at 2nd-level, being your character coming into their own as that respective class. Though I assume martials get their subclass at third is to balance the power between martials and casters, due to the previously mentioned power spike.
Subclass Progression
Last thing in relation to subclass, while you can simply use the wizard, fighter or paladin subclass structure for your subclass, feel free to go out of the box (Within reason) with it, want your class to gain its final subclass feature at 20th level? Go ahead! Just keep in mind that subclasses only give you 4-5 features maximum. Though more can be done if you want to put more emphasis on the subclass as a part of their identity.
The Avatar
Now for the moment you've (Maybe) been waiting for, using the knowledge bestowed within this article I shall showcase the first three levels of the Avatar class.
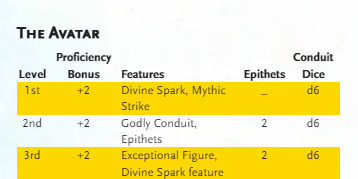
Divine Spark is your avatars subclass, determining the source of your divinity, similar to a cleric divine domain. While I haven't written down any features of their subclasses quite yet, I have four planned for the class so far (With more likely on the horizon) You also gain the Legendary strike ability, which not only increases your weapons damage dice by one, you also give temp hp to your allies when you score a critical hit.
Godly Conduit acts similarly to ki on the monk, you gain a number of conduit dice equal to half of your avatar level + your charisma modifier, which you can use to either leap a number of feet equal to 5 times the number rolled, or gain an expanded hit range with your weapons for a number of rounds equal to the number rolled. My favorite feature so far is the epithets, which are described bellow:
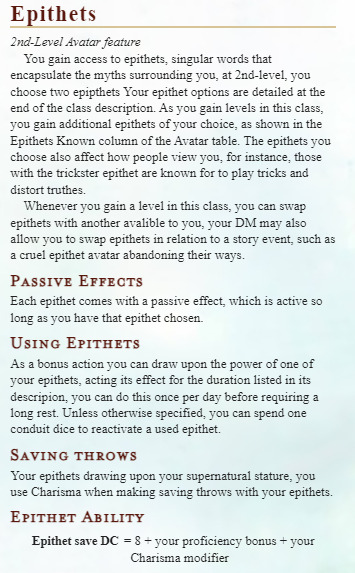
I cannot wait to show off the epithets sometime in the future. I am super proud of how they're turning out as of now. My hope is that they not only allow for a customizable avatar, but also help redefine how you utilize weapons.
at 3rd-level you gain a ribbon feature, exceptional figure, which makes it so that you cannot suffer disadvantage on any strength-based ability checks you make. Alongside that, feasting now counts as light activity for you and your allies while resting, meant to emulate the giant appetite many heroes of myth have, and I love the idea of an avatar and their allies after a long fought battle just pigging out to their hearts content.

You also gain another subclass feature at 3rd-level to for one last power spike in the starting levels.
Summary
To summarize everything covered within this entry, when laying the 1-3rd level foundation for your subclass, you should
Keep the basic rules of design in mind.
Create features that lay out what you want your class to be doing.
Give them a cool roleplay feature to help with your classes theme.
Determine where your classes subclass should go.
Get to Writing.
That's about all I got for this entry, next time we will go over features after 3rd level, going from 5th to 20th level, make sure to follow me if you're interested in that but until then. Thank you for reading, stay cool and go make some homebrew
Homebrew Class design For Dummies: Part 1:
Indestructoboys Homebrew Design Masterclass
Where to put my subclass by Indestructoboy
Two videos on Bounded Accuracy: 1 2
#dnd homebrew#dnd5e#5e homebrew#dnd#homebrew 5e#5e#dnd 5e homebrew#dungeons and dragons#dungeons and dragons homebrew#writing#writting tips
32 notes
·
View notes
Text
RING OF FIRE RULES
Hello, and welcome to Ring Of Fire! This is an American Horror Story Discord Group, and we've been running going on five years now from roleplayer.me, and want to recruit on Tumblr as well. We have recently decided to make this a more discord oriented group, which would just require you play a character without a page, in the safety of your own discord! Just fill out the form and choose the season you're associated with in self roles.
1. We are Page Optional. If You do want a page, that is great! You must post the 𝑅𝑃-𝑃𝐴𝐺𝐸-𝐿𝐼𝑁𝐾𝑆 channel! There's no activity requirement for roleplayer.me site or tumblr. You can muse in those as well, if you want! You don't need to know what roleplayer.me is if you don't know
2. The main activity requirement that is an ABSOLUTE MUST is GROUP SLS. We break them apart per season. OC's must join the group SLs that their character is correlated with, even if it's a couple. If you feel your OC isn't apart of that timeline in the plot, please don't worry, just talk to an admin. Everyone has two weeks to reply whenever it is their turn. If you do not do the group sl, your role will be re-opened.
3. OC must make sense. They could be apart of multiple seasons, however it must with the timeline. We don't allow OC's to replace any character. Yes, we do take Celebrity AUs, and if you have seen Coven, Stevie Nicks is a good example. But they must fit into the AHS timeline. Make sure you have a Face Claim and a story in place, whether you have a page or not. It is important to have everything ready so everybody else knows who your character is! Must have these things ready before getting into the group!
4. WE DO MONTHLY DRABBLES, however, you can opt out of them if you don't have time that month. We also require you at least do 3 or more 1x1 storylines with your main connections, if you are a cannon character, especially if you're a main character. OC's have more freedom in that realm.
5. If your interested role is closed, and you have no other role you want, you're welcome to leave the server before joining! It is okay. 6. EVERYONE DESERVES A CHANCE. Nobody has to write with everyone, but in reality, we all do. 1x1 maybe lax, but please give an OC a chance too. We all need each other to help our muse grow, and OCs need Cannons as well!
7. YOU ARE ALLOWED TO CLAIM UP TO 2 CHARACTERS UP FRONT. However, be wary on what you choose, because each character has to write in a group SL. Meaning if you have Nan and Queenie, they both have to be in the Coven/Apocalypse Sl. If you have Kit, and March, then they have to be in the Asylum SL and then the Hotel SL. Once I see activity after 30 days, you will have room to pick up 2 more characters.
8. And Lastly, NO DRAMA or BULLYING. That means NO harassing another member for replies, or a SL they might not want. ANY OUTSIDE DRAMA between you and another member must be taken care of outside of the group. ADMINS HAVE THE RIGHT TO DENY A POTENTIAL MEMBER. We Will not take Past members unless there is a conversation had first. (Depends on why you got kicked or left the first time.)
#ahs murder house#ahs asylum#ahs coven#ahs freakshow#ahs hotel#ahs roanoke#ahs cult#ahs apocalypse#ahs 1984#ahs red tide#ahs nyc#ahs stories#ahs fandom#ahs#american horror story#tate ahs#taissa farmiga#rules ahs#rpg#ahsrpg#discordrpg#ahsdiscord#violet ahs#coven ahs#ahs rp#ahs writer#violet harmon#constance langdon#cordelia foxx
3 notes
·
View notes
Text
Been thinking and..
It'd be fun to do book commissions right? Where instead of just one shots we could make a story together that basically YOU make up and I just write. You can whatever you want however you want it if you pay.
Considering I'll need the money for when I rehabilitate further I love dough but even when I do eventually heal I'll still do commissions. Usually I fold to do requests just to get more attention but I'm gonna stand my ground this time.
So if interested in working with me for multiple periods of time just to get the story done then come and chat with me.
Prices would be based off my commission sheet already but to give a few examples of how I see this going lets say you want a 10 chapter story with 500 words each chapter. By the end of the book (chapter ten) that'll be 5,000 words which in total for what it is the whole book would cost $50.
Example 2:
10 chapter story with 5,000 words each would be $550.
Basically I'm doing my current prices by ten for these examples so you all should do that too when picking word count AND chapters. I'll allow up to 30 chapters though depending on circumstances and such this could be a monthly between me and you, the buyer.
More Examples:
5,000 words per chapter for a 20 chapter book would equal $1,100 by the end of the book.
5,000 words per chapter for a 30 chapter book would equal $1,650
Now I'm only going to say this once! If you don't have the money either wait till you do or find someone who will help accommodate you. I wish you luck on that.
You can set the timing!!
Granted at minimum these can be done by a month but be prepared for bigger orders to take just a bit more time than the smaller ones. With that said bigger stories could take longer than just a month but it all depends of course on how I'm feeling, the story we're making, characters, etc etc. Honestly you can keep up with me at any point and time and check in on the progress of things whenever you want.
~
I only take cash up front and before I start new chapters so you'll pay for the first, I'll show it to you when I'm done with it and if you want to continue you'll go ahead and pay for the next chapter and we can repeat that process. For people big banking though you could pay it all up front and I'll do everything without waiting on anything.
You can also post your story on your OWN account as long as you mention me (@ me) so people can find my account. Either you'll post it or I will and I'll mention you in the story as the one who paid for it. Either way is fine.
A lot of this stuff will take communication and adjusting, especially since this is my first time taking a step like this but if you all are willing to be patient with me I promise I'll make your story as perfect to you as I can.
Anyway,
I think I explained what I needed to BUT if confused anyone and everyone is always allowed to hit up my ask box or dm me personally.
Options available:
10 chapter story
20 chapter story
30 chapter story
Prices WILL change and WILL vary based on original pricing time word count of the chapters.
Available:
Canon x Readers
Canon x ocs
OCS x OCS
Canon x canon (depending on if I also like the ship or not.)
For more information look at my commission sheet HERE and if you have any questions PLEASE ask them. Considering commissions like these will make us partners for a while I want to make sure we both know exactly what we're doing and hoping into because I DO NOT allow refunds.
Let's have fun guys considering that's all fanfic is about! I also do art commissions but currently I'm more focused on the writing though if you want art you can always commission that as well.
If you've made it this far thank you for reading! Reblog, like and share if you can't give me money but still want me to grow my platform.
Everyone PLEASE have a lovely day!
~

#digital art#my art#artwork#artists on tumblr#art commisions#please commission me#writing commissions#i will write almost anythin#writers on tumblr#writerscommunity#fandom#fanfic#x reader#writers of tumblr#booklr#bookblr#book commissions#hazbin hotel#castlevania#jujutsu kaisen#the arcane game#fnaf security breach#ocs are welcomed#oc artwork#oc x canon#canon x reader#canon x canon#ocs#oc#original story
1 note
·
View note
Text
Don't mind me just compiling a bunch of unfinished vent drafts into a finalized product ready for purchase~
It's crazy how for the first half, even maybe like 2/3rds of 2023 I felt amazing overall, the novelty of being out of horrible, multiple years-long situation and into a, realistically just kinda average situation, felt so great that it completely carried me emotionally for nearly a year. But ever since around August/September I've kinda slowly been receding back into that same depressive state I was before, my life has stagnated once again, I've traded one set of issues for a completely different, less familiar set, and I don't have any real clear solution for any of those problems that are within reach. Don't get me wrong I'm at the very least not trying to drown myself once per week yet, but I don't think that should really be the baseline of an acceptable quality of life.
I have a job I've very quickly come to hate that's also kind of consumed my life up until very recently, where I've had enough time off to realize that I've made virtually no progress in the last year outside of merely having a job. I've lost a sizable number of friends, in part due to my coming out as trans, and partly due to just a longterm buildup of disillusionment with those around me that just finally reached a breaking point, and some of the few still left in my life I don't particularly want to keep in my life much longer either, and after going several years socially isolating myself, I don't remember how to make new friends, even though I have several avenues to very easily do so if I actually put forth the effort. I likely won't be able to make any progress transitioning for quite a long time, despite deciding now would be the best time to come out for some reason, I still live with my father, and while I've spent months searching for a place to move out to, the renting market is abysmal and most of my prior options for roommates are either no longer an option, or I'm not particularly comfortable living with them now, and despite having a job that provides pretty good insurance, I am still undiagnosed for a million different potential mental illnesses that I should really probably be medicated for because I'm both too stupid and too lazy to figure out how to switch off my parents' insurance onto my job's, and I'm too afraid of hospitals after going probably close to 10 years without going to any doctor, outside of 1 visit to the optometrist 2 years ago after my old glasses finally broke. And I don't even really have much of a reason to change insurance plans right now when with each passing week I'm more heavily considering just quitting my current job, even though I realistically don't have any better options in my area.
So yea anyways life blows I miss my old terrorist friends (dear Tumblr mods; they were not real terrorists, they were merely g*y people on the internet, please do not nuke me thank you). In good news tho someone posted a map of informed consent clinics throughout the US so now I know there's one like 2 hours away from me, and while I'm still probably too afraid to actually go inside one, and also doubt I'd be able to literally just walk in and say "1 girl medicine plz :3" with any success at all, still good to know. I am so on the verge of wasting all of my savings on HRT without the assistance of insurance all for the bit >:). Also started doing 3D modelling again so like that's fun, didn't do that for a long time but now I have both the time and motivation and now I'm gonna make 5 million Veemon models and nothing else I hope Blender Guru dies fuck that guy.

Why is it so fucking big???
#big vent#super mario dat hoe super mario dat hoe hit the yoshi on em#gamers i think i still have depression; big surprise getting a job didn't solve it big sadge#going back to mmos is like the clearest sign of a problem imaginable; i'm mere weeks away from playing Digimon Masters Online again#Digimon Masters Online#I'm gonna start putting the DMO tag on all of my vent posts; it's relevant because it's the origin point of all problems in life#ok wtf the most recent update increased mercenary slots by 1 (party size) this is huge I have to check this out#family ride home from the hu tao rap#i can't keep doing this i told myself i wouldn't put 500 unrelated tags on this one but they're so fun to do#le sigh gunvolt rhythm game dlc pack 1 doesn't have a zip to the moon life still sucks
0 notes
Text
PROJECT 02
ok damn I did more work for this than i realised!
so following on from my last posts- I focused a lot on varuna while making her character ref sheet. However, I didn't forget about Yama. I decided that I wanted to make a small outcome of her as well, one that didn't require me to spend as much time on a full ref sheet.
so, I opted to make a small animated sticker of her instead.
To begin with, I decided I wanted for her to have somthing to do with her multiple eyes. this narrowed my options down to either having her wink, or blink judgingly. i drafted out the wink first on procreate, keeping it very rough and simple.

I thought it was a cute draft, but I realised that it wasn't really in character for her- she wasn't really the type of person who would make an expression like that. so, I instead decided to try something a bit different- to make a mini animatic of a small comic interaction I had drawn of her and Varuna.
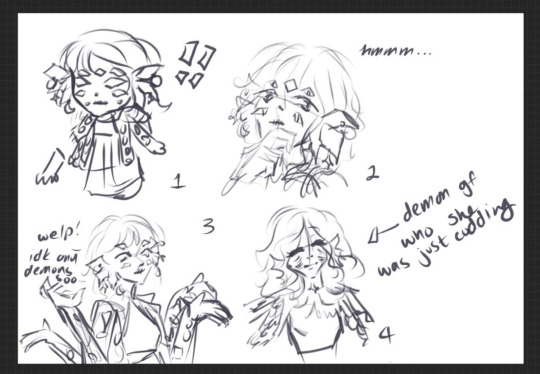
I had drawn this as part of project 01, but i thought it was a really cute storyboard. However, when it came to actually making an animatic of it, I realised this was quite troublesome due to the amount of different design features I had to take into account per frame. This led to a very rough animatic, with very low quality frames, ultimately making it so i wasn't satisfied with it at all.

It followed (very roughly) the narrative of Yama's arm falling off, but without the added context of Varuna being the cause of it. As such, I ended up using the simplified smaller design of Yama that I had made in the initial mini comic/storyboard to make a sticker of her simply blinking with a judgy expression.
0 notes
Text
Basic Giffing Tutorial
How I make gifs for a simple scene + coloring + captions under the cut:

I’ll show you how to make this ^^^ gif (including the sharpening, coloring and captioning process).
Okay let’s start with what you need to do this: A version of photoshop with timeline (I use photoshop 2020 but probably any version will work, the program layout might just look a bit different), HD videos to gif from (preferably 1080p, especially for making big gifs, but 720p is also okay if you can’t get anything better, I just recommend making smaller gifs with it), some kind of video player that lets you trim clips in it (I use Quicktime Player because it’s the default for Macs)
1. Start with a video clip of the scene you want to gif. I usually download full episodes and clip scenes from the episode. My computer is a MacBook Pro and the default video player is Quicktime so I just trim my clips directly in that. In Quicktime you can just press CMD+T and it’ll give you trimming options. Most people use the screencapping method to make gifs, but it requires extra software and that’s not how I learned, so I’m going to tell you how to gif straight from video clips. I have no idea if there’s a difference in quality or ease between the two methods, but if you find that my way is too difficult then there are plenty of tutorials on how to do it via screencapping too like this one.
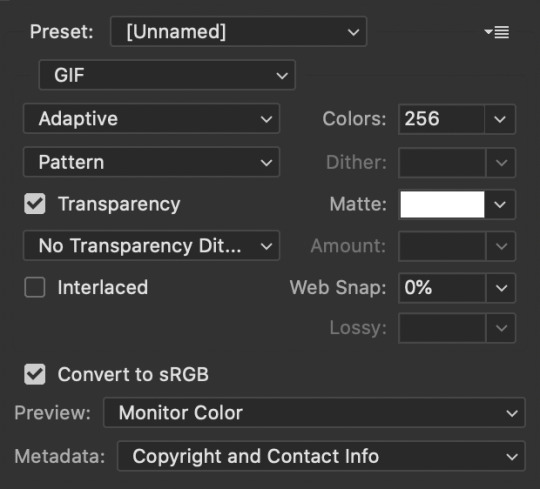
2. Open the clip in Photoshop. Just hit CMD+O and then select the video you want to gif from (or go to File > Open). Then, in the Timeline window at the bottom, scrub through the video and trim it (with the little scissor icon to the left) at the first frame of the scene/shot you want to gif and the last frame. Delete the excess clips. Before the next part, I usually crop off the black borders that some videos have if their original aspect ratio isn’t 16:9 (which most aren’t). For TV shows from Netflix, for example, the aspect ratio is usually 2:1 (or 540:270) so if you set the crop ratio to this you can get rid of exactly the black, no more and no less. I have several preset crop ratios (540:270 for TV shows, 540:225 for most movies, etc.). You can do further cropping after you have made and colored the gif, but getting rid of borders before converting the video to frames makes this easier. If your video does not have these black borders to begin with, ignore this part.
3. Convert video to frames. In the upper right hand corner of the Timeline window there is an icon that is four small lines stacked on each other (time line menu). When you click on it, a drop down menu will appear. In this menu select “Convert Frames > Flatten Frames into Clips.” Then click the button in the lower left hand corner (three small rectangles next to each other; frame animation button) that says “Convert to frame animation” when you hover over it.

After, it should look like either of these. Sometimes, if you crop the video before you start the process, it gives you two frames like in the image on the right above. If this happens, delete the frame with the shorter time stamp on it (as indicated by the number at the bottom). Next, click the dropdown menu in the timeline window again and select “Make Frames From Layers.” It will then turn into multiple frames, as shown below:

Delete the first frame (it will have a number under it, while the rest of the frames say “0 sec”), then use “select all frames” from the dropdown menu so that they are all highlighted and click “0 sec > other” and set the frame delay to “.06 seconds.” Scroll down to the bottom of the layers channel window and click and delete “Video Group 1″ then scroll back to the to top of the window and select all the layers by holding Shift and clicking on the top layer. Click the icon in the lower left hand corner that says “Convert to Video Timeline (video timeline button) and the frames should convert to long purple bars stacked vertically on top of each other. Then, under the “Filters” drop down menu at the top of the screen, select “Convert for Smart Filters.” This converts the layers to a smart object, turning the stack of bars a single purple bar and a single layer in the layers channel. When you press play in the timeline window, the image should move and play through like a video. If it doesn’t, you missed a step. It should now look like this (the left is the timeline window; the right is the layers window):
This seems like a lengthy process, but I have compiled most of these steps into a few Actions. With the actions (starting at step 3 of this tutorial) you use “Part1″, delete the frame with the shorter time stamp on it (if needed), “make frames from layers,” delete the first frame and Video Group 1, select all frames in Timeline and change frame delay to .06 seconds, select all layers in the Layers window, then use "Part2″. I assign my actions to function keys so all I have to do is use a few keyboard shortcuts ( i.e. Part1 is F1, Part2 is F2, etc.). This makes the whole process much quicker. Here is a link to download the actions I created for this process. Once you get the hang of using the actions, it all goes pretty fast. Also, when using the actions you might get messages like this:
Just click stop and keep going with the instructions.
4. Duplicate the frame in the layers window and set the top layer to screen using the drop down menu in the window (it’s the second from the top and should say “Normal” to begin with. That changes the scene from this:

to this:

5. Make coloring adjustments. Everyone colors gifs in their own ways, so you absolutely don’t have to follow what I do. This is just the basics of how I color:
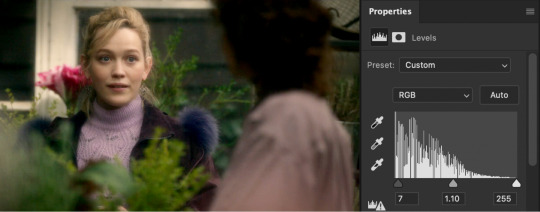
I always start with Levels (some people use curves, some people use both, I never learned how to use curves though). Under the levels adjustment menu, I start by using the black point dropper and select the darkest part of the image. Sometimes it takes a bit of clicking around with the dropper to find what works. Depending on the scene (colors, lighting, etc.) I also move the sliders if needed. There’s no real formula to it, I just do everything by sight, changing things until it looks good to me. For this gif, I selected a dark part of Jamie’s hair with the black point dropper. Then I did some minor adjustments with the sliders on the graph. If you’re coloring a darker scene, the sliders are very useful for brightening the scene, but this is a fairly well lit scene so not much is needed. This is the scene with Levels added:
Next, I usually use color balance to fix the color changes that Levels made. This looks too yellow to me now, so I use the yellow-blue slider to add in blue. You’ll have to play around with what looks best for whatever scene you’re giffing, but I’ve found that most scenes I add blue and sometime add red or cyan, but rarely use the magenta-green slider. With color balance added:

Next I use a series of selective color layer. Make a new layer for every different color adjustment you make, it makes it easier to edit if you make a mistake or want to make changes later. I always start with Black, usually just adding a little to Cyan, Magenta, and Yellow so that it increases the contrast of the whole scene.

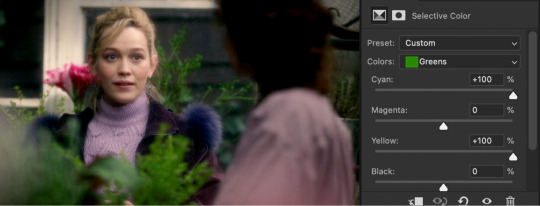
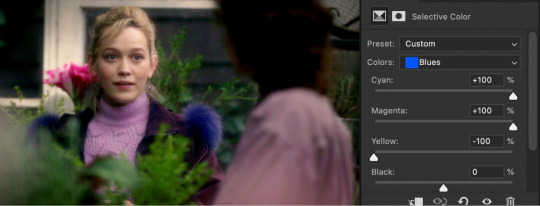
From there, you have to pick out what colors you want to accent or correct. You get better at this the more you do it. In this scene, I want to accent the green of the plants and the purple of their clothes. Normally I would do Red next to adjust skin tone, but because I want to increase the green in the picture, I’m going to start with Yellow. This will make skin tones look too yellow-green, but you can correct this with a Red Selective Color layer. The Yellow layer made the plants greener, but the Red returned the proper color to Dani’s skin.


I keep adding more selective color layers to bring out more color in the scene.

To make it even more vibrant, I use several Hue/Saturation layers to increase the saturation of certain colors.


Sometimes I also add a Vibrance layer, but for this scene it wasn’t needed. Lastly, I usually add a Brightness/Contrast layer. I prefer to get contrast out of deepening the blacks in the scene rather than use the contrast setting in this adjustment layer, but sometimes I do use it. Most of the time I just increase the brightness a little, depending on the lighting in the scene.

Really, coloring is all about just messing with different settings until things look right to you. I’m still learning new things every time I make a new gif. There are tons of other adjustments available that I haven’t even tried out, so feel free to mess around with them. Note: The more adjustment layers you add, the more the quality might decrease. I do try to do minimal adjustments normally, but I wanted to make this coloring fairly vibrant so it has a lot more layers.
If you are making multiple gifs from the same scene, repeat the process of Steps 1-4 and then copy the adjustment layers from the first gif to each subsequent gif. I normally group all the adjustment layers together (select the layers and press CMD+G) which makes it easier to copy the layers to another PSD.
6. Crop and resize the gif. You can crop your gifs any way you want. I’m in the habit of making rather large gifs (which is thankfully now possible due to the 10mb size limit) and most of my gifs are cropped at ratios of 3:2, 4:3, or 1:1. For longer scenes I usually use 16:9. Crop your gif at whatever ratio you want and then resize it. For Tumblr, there are specific dimensions that gifs have to be for them to format properly in posts. For “large” gifs (one per row), they must be 540px wide. Height does not matter. For smaller gifs they have to be either 268px (two per row) or 177px (three per row). Resize the gif by either using CMD+OPTION+I or going to the “Image” dropdown menu at the top of the screen and clicking on “Image Size” If you already cropped at your desired ratio, just change the width to 540, 268, or 177, according to the size gifs you want.
7. Sharpen the gif. After you have cropped and resized the gif as desired, you need to sharpen it. Because of the method I used in the beginning (duplicating the layers and setting the top to screen), you will have to add a Sharpening filter and a Gaussian Blur filter. Select the top layer of the gif (not the top coloring layer) and click on the “Filter” dropdown menu at the top then select “Sharpen > Smart Sharpen” These are my sharpening settings (if you’ve ever giffed before, or looked at other tutorials, you’ll notice this is sharper than most people would use. That’s because you also have to slightly blur the layer below it, which dilutes it to a proper sharpness):
Next, select the lower layer of the gif and go back the the “Filter” menu and select “Blur > Gaussian Blur” and set the radius to “1.0 pixels.”
These sharpening and blur settings are also actions I’ve created. If you download the action I listed before, assign them to function keys and you will just have to select the appropriate layer and use the function key to do the work. Additionally, learning the keyboard shortcuts speeds along the process.
8. Export/save the gif. Go to “File > Export > Save for Web (Legacy)” or CMD+OPTION+SHIFT+S. These are my save settings (I actually have no idea what any of these things mean... I’ve never changed any of them).
The important thing really is that you make sure that under looping options near the bottom (not shown in this screenshot) it says “Forever,” not “Once.” And also check how big the file is in the bottom left corner:
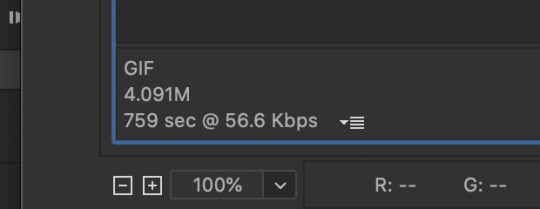
As long as the number under GIF is less than 10M, you’re good to go. Then save the file and name it.
9. Caption the gif (if needed). You can either do this in the PSD you already had open to create the gif or you can open the gif you just saved and caption it there. I find it easier to add captions directly in the current PSD. When it comes to captions, it’s really based on your own preferences. I’ve seen people use all different fonts, sizes, colors, and placements for captions. Some fonts I can recommend are: Myriad Pro, Calibri, Arial Rounded MT Bold, and Keep Calm.

There are plenty of others too. The main thing is that they normally look best when they are bolded and italicized. I have been using Keep Calm for my captions lately. I also add Stroke and Drop Shadow to the text (my text settings are also included in my Actions):

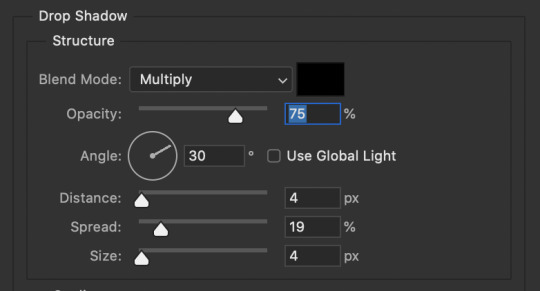
Just make sure the text is centered and has a good margin from the bottom.

This is what it looks like with those effects ( font: Keep Calm; size: 13; tracking: -25).
Anyway, that’s my basic process for gifmaking and coloring. I hope this gives you some kind of foundation to work off of. Just keep experimenting with different techniques and you’ll keep getting better. Read other people’s tutorials and tips and try them out to see what you like and works for you.
#if you're seeing this now i dont make gifs like this anymore#if you ask i'll make an updated tutorial#riah.txt
223 notes
·
View notes
Text
an obligatory analysis of sylvie’s character (aka: who betrayed who?)
in case you can’t tell, i like sylvie. but here’s a big fuckin post where i share my thoughts on her role in the finale in a sort of disjointed kind of way.
NOTE: this isn’t about sylki. i don’t ship it personally, but that isn’t really relevant to this at all. this also doesn’t go into the criticisms i have of the show because this isn’t really the place for that. maybe i can do that later, whatever.
also, this is gonna be a long post. i have a lot of thoughts.
sylvie’s introduction and motivations

one of the first things we learn about sylvie is her opposition to the tva. (okay, it’s literally the first thing, whatever.) in episode 3, we get to see her entire plan - overthrow whoever’s running the tva, and... that’s it. loki questions her about the power vacuum that would leave, to which she shows that she’s not interested in running the tva. (this is also stated in ep 2.) her goals are clear. she wants rid of the entire organisation, and doesn’t care about or want the sort of power that would come with pulling the strings.
her reasoning for this seems pretty simple. she doesn’t want the power ruling the tva would entail because she knows what it’s like to be on the other end of that deal. she had everything taken from her as a child, and doesn’t want that to happen to anybody else. she believes that that kind of power belongs to nobody, not even herself.
this easily establishes her as a character who, despite having an ego, has principles that trump everything else. she’s very dedicated to her cause; the ‘never at the expense of the mission’ line in ep 3 just states it out loud. her entire life has been dedicated to this cause. this is a good time to segue into the next section...
sylvie’s personality, character and flaws
she’s fuckin stabby.
despite only really being present for 4 out of the 6 episodes of the show, we manage to get a pretty good idea of sylvie’s personality right from the start thanks to episode 3 being largely a character study with both her and loki. she’s shown as a very competent and strong character - however, contrary to marvel’s guidebook on writing female characters, those aren’t personality traits. what we actually see of her is that she’s very confident, and has a tendency to be rude or dismissive of other people. episode 3 has a bunch of examples of this, but the easiest one to point to is the fireworks scene. after loki does something nice to cheer her up, something which visibly works, her response is to waive it away as ‘not bad’.
her coldness in this scene even after bonding with loki is likely due to her upbringing. sylvie spent the majority of her life, including her childhood, on the run, unable to form relationships with people who weren’t moments away from dying. it feels a bit redundant for me to point this out, but this is, as they say in the medical field, mega fucking traumatic. not only did sylvie not have the opportunity to form these kinds of connections, she couldn’t even develop the ability to form them. loki is a bandaid to cover a bullet hole in this regard, one she needs years to heal from. while she does bond with him to an extent, she is physically unable to trust him to the point where they can be considered close.
another thing we learn about sylvie is that she’s very violent - and that she enjoys it. being a character that grew up running from an organisation that wanted her dead, it makes sense for her first instinct to be confrontational. however, despite having to fight to survive, she visibly takes pleasure from fighting. this was brought up in an interview with sophia (that i am not going to link here, because tumblr is kind of a hellsite and i’m not in the mood for that today). here’s a nice extract instead.
“She's not trained like Loki is,” Di Martino continues. “She can't do some of the flourishes that he would, but she's figured out how to brawl. She's a street fighter and she loves it. That was a really great key to unlocking part of Sylvie for me, was how much she just loves a fight. She knows that she's either going to win, or if she isn't going to win, she'll survive. She's that damaged character who's dangerous because she knows she can survive.”
her tendency towards violence is actually a key part of sylvie’s character. this works as both a strength and a flaw. on the one hand, she’s able to survive scrapes most other characters wouldn’t, and she knows that. she’s not one to freeze in most (note: most) scenarios, because she knows what to expect. on the other hand, violence isn’t always the answer, and she’s very unlikely to consider any other option than a fight.
her enchantment abilities tie into this - they’re another weapon for her to use, and one she’s not afraid to call on. however, her eagerness to enchant people without hesitation puts her in a pretty bad place morally. her enchantment clearly leaves hunter c-20 traumatised, and yet she’s more than willing to enchant people for the sake of the mission. she’s also relatively dismissive of human sentient lives. an early example of this is in episode 2, where loki asks her if the person she had enchanted was dead, to which she responds with a casual ‘they usually survive’. additionally, she’s more than willing to fight the guards on the train in episode 3, despite them seeing her as a threat for completely understandable reasons.
in the case of the guards, her reasoning for placing such little value on their lives is likely that they’re about to die anyways. everyone on lamentis is doomed, so from her point of view, whether they die at her hands or at the hands of the moon from majora’s mask isn’t really important. however, c-20 is a different story. sylvie places next to no value on the lives of the tva’s workers, content to slaughter them en masse for the sake of her goal. this is despite her knowing that every one of the tva workers is a variant plucked from the sacred timeline. this sets up a weird sort of transactional nature in how sylvie views other people - to her, they’re less important than the mission, and she doesn’t hesitate to eliminate threats.
was this a long section? this was a long section. i would like to call back to the fact that this is not a sylki post for this next part. and also to praise anyone that got this far, because fucking hell, is this excessively long or what? who would have the time to write this out?
sylvie’s bond with loki

i want to go back to that whole thing about her relationship with loki. he’s the first person she’s really spoken to since she was a child who isn’t about to face imminent death. furthermore, despite their differences, they have quite a lot in common - enough to hit it off surprising well for two people who kind of want to kill each other. they’re able to relate on common ground like frigga, and even though they clash due to loki’s initial carelessness, they’re overall able to get along well enough aside from occasional bickering. the blanket scene from episode 5 is probably the best example of this. sylvie allows herself, albeit briefly, to be vulnerable around loki.
except, not really. one of the first things she does is tries to ensure he won’t betray her. i’ve seen somebody cite this before as proof that her fondness towards him isn’t real, and that she was planning on betraying him from the start, hence why it was on her mind. that’s definitely possible, but i think it’s far more likely that it’s just her difficulties connecting to people stopping her from feeling safe around him even as they share a nice moment. she really does seem to care about loki - an easy example of this is her asking how he is during episode 4 without being prompted. she’s just unable to properly process these kinds of feelings due to an incomprehensible amount of trauma. as loki puts it, she can’t trust.
and loki can’t be trusted. she knows - or at least, thinks she knows - his nature as a trickster and a villain. loki embodies a part of sylvie that she considers herself completely separate from; the tva-approved liar whose purpose is to bring out the best in others. while she does show him more decency than to treat him like that, at the end of the day, he represents something that makes her deeply uncomfortable, hence her rejection of the loki name. despite what they have in common, loki is an incredibly difficult person to trust, especially for somebody who has deep-rooted trust issues. so, this brings us onto...
who betrayed who?

so, sylvie and loki make it to kang’s castle. after all this time, she’s finally about to reach her life’s goal. she’s clearly nervous - this is out of her comfort zone, unlike most fights. loki reassures her, and they head in. they meet kang, learn the true nature of the tva, have the opportunity to kill him...
and loki stops her.
loki’s motivations are left ambiguous. the uncharitable interpretation is that he wants to rule the tva for himself, as per kang’s offer. he’s expressed such an interest to sylvie before. for the loki we know in avengers 1, this seems perfectly in character.
however, for the loki we’ve seen in the show, there’s a different option. he believes kang’s threat that there are multiple of him, and that killing him won’t solve anything. to him, he isn’t willing to risk unknown horrors for the sake of taking his revenge out on kang. this is the loki who offered diplomacy and guile to counteract sylvie’s brute force.
but sylvie, who can’t trust, assumes the worst.
to her, loki was the one who betrayed her. they had a plan - find whoever pulls the strings, and destroy them. to her, loki’s hesitation isn’t caution, but treachery. taking kang’s offer to rule the tva is exactly what she thinks she should’ve expected from the guy who hurts everybody who loves him. her fight or flight responses kick in, and she chooses the one she always chooses. loki’s attempts to reassure her fall on deaf ears, not just because she doesn’t want to trust him, but because she’s physically incapable of it. she makes the short-sighted decision of brute force, just like she did back on lamentis, because it’s all she’s ever known, and the cause she’s dedicated her life to.
from the outside, it looks like sylvie was the one who betrayed loki, but things look pretty different from where she’s standing.
this is why i take issue with people calling sylvie a ‘villain’ or questioning whether this was her plan for the start. in my opinion, her motivations line up pretty clearly as a creature of habit, one who panics at the first hint of smoke and pushes away the first person she’s been able to bond with for the sake of self-preservation. did she make the wrong decision? unquestionably - the effects of her actions will no doubt plague the multiverse (and the mcu, for us) for as long as they go unchecked. but she made the only decision she was capable of making, and that’s not villainous, just tragic.
conclusion

well, this is a kind of depressing way to finish this post. for what it’s worth, though, i don’t think sylvie is a doomed character. regardless of how brief it was, she did show a real connection with loki. just because something requires a lot of healing doesn’t make it impossible. this is why i like sylvie as a character so much; she’s deeply flawed and complex, but that complexity makes her interesting, and relatable. marvel has a long history of sexy lamps and supposed ‘tortured backstories’, but sylvie is the first time they paid attention to this with their character writing without having to give somebody a wholeass prequel movie. with loki confirmed to appear in multiverse of madness, i’m hoping we see more of sylvie - not as a villain, but as a hero who can overcome her past experiences and rise to better things.
or maybe another kang shows up and kills her immediately. who knows.
#sylvie#sylvie laufeydottir#loki#loki theory#loki analysis#loki series#long post#like really fucking long#i’m so sorry for this#not a gif
46 notes
·
View notes
Text
#13: Doctor Strange [Marvel]

By the Eternal Vishanti, I welcome you back!
Today we're making the Sorcerer Supreme of the Marvel Universe-616, Doctor Strange. This spell-slinging master of the mystic arts has been my favourite superhero for quite some time now, and I'm always excited whenever we get something related to him. Now, just a quick note – this build is going to be based on the comic book version of Strange, not the MCU one. We're having real spells and incantations, not some thinly-veiled Clarke's Third Law. #LetMagicBeMagic.
Next Time: The Gods call for us again. The Dragon King blesses us with his presence.
Now then, let's examine what we need to become the mightiest mystic of the Multiverse:
Arcane Artillery: Doctor Strange holds enough mystic knowledge to give Mind Flayers an indigestion. What he doesn't know, he can look up in his Sanctum Sanctorum's library. We need to be prepared to have a spell for almost any situation.
Mystic Fists of Fury: Before opening his Third Eye fully, Strange spent some time in Kamar-Taj under the tutelage of the Ancient One, practising his combat skills in case he was ever in a situation where magic would fail him.
The Old Favourites: Whatever incarnation of the character we encounter, Doctor Strange is almost always certain to have the following items on him: the Eye of Agamotto, the Cloak of Levitation, and occasionally the Book of the Vishanti. After the Last Days of Magic event, Strange found a likeness for weapons like shortswords, staffs, and axes.
---
Stephen Strange was an ordinary human, but due to the years of exposure to otherworldly mystic forces, his biology changed to not accept regular human food anymore. This sounds like a good excuse to make him Variant Human. We get a +1 to two abilities of our choice (Intelligence and Constitution), we know how to speak Common and one other language of our choice, we get to pick one skill to be proficient in (Investigation), and we get to pick a feat. The Medic feat gives us a +1 to Wisdom, proficiency with the Medicine skill, and the ability to tend to our party members' wounds on short rests (Medicine check [DC 15], if successful - the player can use the maximum value of their Hit Dice to regain Hit Points).
Although he started as a simple physician, the turning point of Strange's life was his training in Kamar-Taj. He gained skills and knowledge, vast enough to call himself a Sage. From this background, we gain proficiency in Arcana and History, we learn two more languages, and we gain the Researcher feature; when we're to recall a piece of lore, and we don't know it, we usually can figure out where to find the information (be it a library, a temple, or somebody's private collection).
ABILITY SCORES
Intelligence is our primary stat, serving as our casting ability and our pride. Next is Constitution, all casters need to keep it high. We follow that up with Wisdom, lessons of the Ancient One granted us both humility and broadened our horizons.
Dexterity is a little low, but we'll take care of that later. Charisma is next, even after his training was complete Stephen can be a bit of a jerk and refusing to hear anyone but himself. Finally, we'll dump Strength.
CLASS
Assigning a D&D class to Doctor Strange was a very (and I mean very) difficult task. Starting off, I had to disregard his Sorcerer Supreme title, because in D&D sorcerers are born with the ability to wield magic. Strange had to study and practice to get his powers, so that makes him a Wizard. Kamar-Taj is also dedicated to studying the teachings of the Vishanti, a trinity of god-like beings who give the Sorcerer Supreme their powers, so that would make Strange a Cleric. Finally, he also draws powers from deals he made with otherworldly entities (such as Cyttorak, the Faltine, Munnopor, Watoomb, sometimes even Dormammu himself), which screams 'Warlock', except there's no way to incorporate multiple patrons without homebrewing. It wasn't easy, but I am satisfied with what I've created. Hopefully, you'll be, too.
Level 1 - Monk: We start just as Strange started, by honing our body first. Monks get the d8 Hit Dice, [8 + Constitution modifier] initial Hit Points, proficiencies with simple weapons and shortswords, and proficiency in one set of artisan's tools or a musical instrument (I'd go with alchemist's supplies). Our saving throws are Strength and Dexterity, and we get to pick two class skills (Insight and Religion).
Monks start with Unarmoured Defence. When we're not wearing armour, or holding a shield, our AC equals [10 + our Dexterity modifier + our Wisdom modifier]. We also get Martial Arts, which gives our unarmed strikes some more power. We can now use Dexterity instead of Strength for our unarmed strikes attack and damage rolls, we replace our Strength modifier with a d4 for damage of our unarmed strikes, and if we use the unarmed strike (or a monk weapon) on our turn as an Attack, we can use a bonus action to make an extra unarmed strike.
Level 2 - Monk: We get more mobile with Unarmoured Movement. Our ground speed increases by 10 feet if we're not wearing armour or holding a shield.
We also get access to the Monk's signature feature, the Ki energy. We start with 2 Ki Points, which we can spend on the following abilities:
Flurry of Blows: Spending 1 Ki Point after making an attack, lets us make two unarmed strikes as a bonus action;
Patient Defence: Spending 1 Ki Point lets us take a Dodge action as a bonus action on our turn;
Step of the Wind: Spending 1 Ki Point doubles our jump distance for the turn, and we can take the Dash or Disengage actions as a bonus action.
Level 3 - Wizard: We finally begin our study of spells and arcane arts.
Unfortunately, multiclassing into Wizard does not give us any additional benefits. We do, however, get Arcane Recovery. Once per day, during a short rest, we can choose a number of expended spell slots and refill them. The number must be equal to half of our Wizard level (rounded up), and the recovered spell slots cannot be 6th-level or higher.
Wizards also start with Spellcasting at their 1st level, and they know both cantrips and ritual spells. Our spellcasting ability is Intelligence, but unlike many other casting classes we do not get a full access to our spell list. Instead, we start with six spells in our spellbook and get two more each time we level up. Then, we can only prepare and use [Our Intelligence modifier + our Wizard level] spells at once. Describing all of those spells we pick would make this post over a mile long, and I've made that mistake with Sypha. To not make this a chore for you guys, I decided that from now on whenever I make a Wizard (or, a build where Wizard is a majority), I will simply list the spells we pick without descriptions. Let's be honest, if not here, you'll certainly find those in a different build. Alright, let's begin! First, we get to pick three cantrips:
Fire Bolt
Mage Hand
Minor Illusion
When it comes to our starting spells, let's take these six. Remember, we can only prepare a certain number, and we start with only two 1st-level spell slots.
Alarm
Detect Magic
Fog Cloud (to represent the Mists of Munnopor from the comics)
Shield (of the Seraphim)
Magic Missile (as a stand-in for the Daggers of Daveroth)
Sleep
Level 4 - Wizard: We get to pick our subclass, our Arcane Tradition. For Strange, who can be any combination of Wizard, Cleric, and Warlock, the best choice is to pick Theurgy from 2017 Unearthed Arcana. Theurgists are religious magic-users, who focus more on the arcane research rather than prayer and worship.
With Divine Inspiration, we get to select a Cleric Domain and a deity we wish to follow. Ask your DM if it's possible for you to worship three gods as a collective, a magical triumvirate. For your own Vishanti I suggest Mystra, Mother of All Magic, Azuth, the Lord of Spells, and Savras, the All-Seeing. For a Wizard, I'd say there's no better choice than Knowledge Domain.
We also get Arcane Initiate, which lets us replace spells we learn as we level up with the cleric spells of our chosen domain. What's cool about that feature is, other wizards cannot copy those spells from our spellbook. If we get all of our chosen domain's spells, we can keep replacing spells we learn with spells from the Cleric spell list.
Finally, we gain the Cleric's unique skill - Channel Divinity - except in our case it becomes Channel Arcana. We start with two effects: Divine Arcana and the effect granted by the chosen domain. Unlike Clerics, we can use the Channel Arcana once per short or long rest.
Divine Arcana lets us use a bonus action to control the flow of magic in the area. The next spell we cast gets a +2 to its attack roll or saving throw DC.
Knowledge of the Ages grants us quick insight into a skill we're not familiar with. For the next 10 minutes, we're proficient with one tool set of our choice or proficient in one skill we choose.
We gain one more 1st-level spell slot, and for this level's two spells let's get Feather Fall, and Command from the domain list.
Level 5 - Wizard: At this level we unlock 2nd-level spell slots, and we can access 2nd-level spells. Let's get Hold Person (for Strange's famous Crimson Bands of Cyttorak) and Icingdeath's Frost from 2021 Unearthed Arcana: Draconic Options (for the Icy Tendrils of Ikthalon).
Level 6 - Wizard: Time for our first Ability Score Improvement! As is the rule of thumb with all Wizards, boosting our Intelligence is a priority. That's what we shall put the 2 points into.
For this level's spells, we get another cantrip (Light), and let's take Locate Object and Mirror Image (to represent the Images of Ikonn).
Level 7 - Wizard: We unlock 3rd-level spell slots. Let's get Dispel Magic, and we can get Fly to finally get a representation for our Cloak of Levitation.
Level 8 - Wizard: We get our first subclass upgrade. Arcane Acolyte grants us the 1st-level benefits of our chosen domain. For Knowledge domain, it's Blessings of Knowledge; we learn two languages of our choice and get proficiency in two skills... which we pretty much are proficient in already. To not waste a feature, ask your DM if you can double your proficiency bonus for those two skills instead. If you get a 'yes', pick Arcana and Insight.
For this level's spells, let's get Counterspell and Magic Circle.
Level 9 - Wizard: From here, we get access to 4th-level spell slots. Banishment and Dimension Door seems like exactly what we need to keep enemies at bay and have fun with portals.
Level 10 - Wizard: Halfway through the build, and we get an ASI. Let's cap our Intelligence at 20, with those two points.
For this level's spells, let's grab Arcane Eye and turn back a little and get Speak with Dead from our domain list, as it is one of few spells not available to Wizards.
Level 11 - Wizard: We get access to 5th-level spells. With Contact Other Plane and Legend Lore, we become an even bigger magical know-it-all to aid our party.
Level 12 - Wizard: For our subclass upgrade, we get Arcane Priest, which grants us the Knowledge Domain's 6th-level benefit - Channel Divinity: Read Thoughts. One creature within 60 feet of us must make a Wisdom saving throw, or grant us access to its surface thoughts (emotions and active thoughts, no deep secrets or hidden motives) for 1 minute. During that time, we can also use our action to cast the Suggestion spell on the target; they fail their saving throw automatically.

We also get our final cantrip for this build (Sword Burst), and we get two more 5th-level spells: Planar Binding and Wall of Force.
Level 13 - Wizard: We unlock 6th-level spells. With Globe of Invulnerability and True Seeing, we upgrade our Shield of the Seraphim and give our Eye of Agamotto even more mystic abilities (as it should have had!)
Level 14 - Wizard: Time for another ASI! Let's put one point into Constitution for better HP chance, and one into Dexterity.
Arcane Gate finally gives us a proper yellow sparkly portal thingy, and let's get Chain Lightning for some much needed offensive capabilities.
Level 15 - Wizard: We're getting into 7th-level spells at this level. Mordenkainen's Magnificent Mansion allows us to recreate our very own Sanctum Sanctorum, and with Project Image we can get Strange's Astral Projection.
Level 16 - Wizard: At this level, we get our final subclass upgrade (and we cross the 100 HP mark, yay!). Arcane High Priest grants us the Knowledge Domain's 17th-level benefits. Visions of the Past lets us spend at least 1 minute of meditation to receive information about a specific object we're holding, or our immediate surroundings:
Object Reading - we learn of the object's previous owner. We know how the person came into contact with the object, how they lost it, and a significant even in their life tied to the object.
Area Reading - we see the events that transpired in the specific location (up to 50-foot cube), going back a number of days equal to our Wisdom modifier.
For this level's spells, let's get Plane Shift and Teleport to double-down on Strange's interdimensional travels.
Level 17 - Wizard: Time for 8th-level spells.
Illusory Dragon is a nice nod to the great "Doctor Strange and the Sorcerers Supreme" series (go check it out, it's awesome!), and Maze is another good banishment-type spell to have. Just don't use it on minotaurs.
Level 18 - Wizard: For our final ASI, let's put two points into Dexterity, leaving us unfortunately with an odd number (hopefully, you'll manage to find some ability-increasing item or benefit in your adventure).
For this level's spells, let's grab Power Word: Stun and Demiplane is a good combo to immobilize a foe and send it to the Shadow Realm Mirror Dimension.
Level 19 - Wizard: We unlock the pinnacle of D&D arcane, the 9th-level spells... that is, unless your DM introduces High Magic, which is... whew, a league of its own.
Time Stop and Foresight give us those Time Stone abilities (for all you MCU degenerates. Yes, I know what I said, but Strange was given the Time Stone in his new run, so I did not lie!)

Level 20 - Wizard: Our capstone is Wizard 18, which gives us the Spell Mastery feature. We get to choose one 1st-level spell and one 2nd-level spell from our spellbook and make them our signature moves; we can now cast them at will, without expending a spell slot. Shield and Hold Person seems like a good choice here.
For our final spells of this build, we cannot go without Astral Projection, and let's get Imprisonment a chance.
---
And there we go! Doctor Strange, Master of the Mystic Arts. Let's see what we've created:
First of all, we're the epitome of Wizard, we're a great utility caster and a pretty good support, with Internet-like capability of finding information. We're don't have a lot of damage-dealing abilities, like Sypha did, but remember - Wizards also get spell by finding them in the world and copying them in their spellbook. This here is only what we get automatically. Go and roam the world in search for that Fireball!
We have AC of 14, but with Shield (and later making it pretty much permanent) it can get up to 19, and we have 130 Hit Points on average. Our speed is also a little better, with 40 feet of movement (plus flying thanks to the Fly spell).
Unfortunately, our Charisma and Wisdom are not great, so those saving throws might be difficult. Our Strength is also not the greatest, so we're pretty much forced to fight with magic.
---
And that is it! Next time, we return to SMITE for a few builds, as I absorbs information about Fire Emblem: Three Heroes. Also, the game devs just released a teaser for Morgana le Fay, and my first reaction was 'Hexblade Warlock'. Do you agree?
Anyway, hope you enjoyed it and your day is going great. I'll see you next time!
- Nerdy out!
#dnd#d&d 5e#dungeons and dragons#character building#marvel#mcu#doctor strange#stephen strange#sorcerer supreme#wizard#theurgy
33 notes
·
View notes
Text
How To Choose a POV?
One of my writer friends asked me to write something about POV. She didn’t have a specific question, but basically asked if I might cover the different types of POVs and which ones work better in certain circumstances.
Well, like I told her, this is going to be a VERY biased post. I am incredibly partial to third limited. I choose third limited almost every story I write.
Let me start by explaining the different POVs.
First Person: Uses the pronoun I
“I went to the store.”
Second Person: Uses the pronoun You
“First you need to go to the store, get some eggs and vanilla extract.”
Second person is rare in fiction. It is most often used in non-fiction books that include instructions, or recipes, or other how-to guides.
Every once in awhile, a writer will be really artsy-fartsy and use second person in fiction.
Second person in fiction would look like this:
“You go to the store. You see a long line of people. You sigh and shuffle down the aisle.”
One notable example of second person in non-artsy-fartsy fiction would be the choose your own adventure books.
Third Person: Uses third-person pronouns such as “She/He/They/Ze/etc
“Ze went to the store.”
But within third-person you have two options:
Third Limited or Third Omniscient
With third limited, readers are privy to the thoughts and feelings of only one character per chapter or scene. A story can still have multiple POVs, but within a scene or chapter, the POV remains only with one character.
In my novel ‘Desire and Destruction’, I alternate POVs every other chapter. So it goes one chapter in Cole’s POV and one chapter in Ingrid’s POV. When we’re in a Cole chapter, we can see what Ingrid does, but not what she thinks or feels. We can not see into her head. And the reverse is true when we’re in an Ingrid chapter.
With third omniscient, there is a god-like narrator who is looking into the minds of ALL the characters. This narrator is often somewhat detached and may look down on certain characters and praise other characters. Basically, it isn’t that deep-third that we get with third-limited. The narrator often has their own personality and way of viewing the characters. Within any scene, the narrator can relate the thoughts, feelings, or backstory of any character.
I do not recommend third omniscient. As I covered in my last post, very few people have the skill to know when to use it AND how to pull it off effectively. Most stories are not enhanced by third omniscient. I’m not saying you should never use it, but don’t jump in and give it a whirl just because a lot of the old classics use this style.
Remember the time period that was hard AF for third-limited also experimented with narrative style to the point that Frankenstein is told via letters by someone who has nothing to do with the story and just happened to meet Dr. Frankenstein out in the wilderness. It’s a summary of a summary. Wuthering Heights is told exclusively in conversations between the housekeeper and a tenant, neither of whom are main characters. Look.....the classics of the Romantic and Victorian era were....on some real other shit. Writing like the classics isn’t always a solid plan.
So that’s my extreme cautioning against third omniscient. I just don’t think it adds anything to most stories and is far too likely to jar or confuse readers and come across as head-hopping.
But third-limited on the other hand....

I ADORE third-limited. Let me explain why I like it.
You get all the perks of first person AND all the perks of third-person. You can be somewhat detached, but you still get a front row seat to the thoughts and feelings of one character at a time. When you really pull off a nice deep-third, you’re fully immersed in the character’s inner world, but there’s still a bit of a buffer. You still aren’t writing AS the character.
Here is a section of my book ‘Combustion’ in third-limited where I was going for deep-third.
~The flame birthed itself at the end of the match. It danced, red and orange, against the backdrop of the still night. Rachel opened her mouth as wide as she could, until the corners of her lips were stretched as far as they would go. She made sure that her mouth was a wide, round circle. Just like the man on fire. Probably just like Mary Reeser had done. She was going to spontaneously combust. She would do it now.
And she could stop waiting for it to happen. She was never going to have to be afraid of it happening again. It was all about to be over. Rachel watched the flame slide down lower, burning away at the wood of the match. It was going to reach her hand soon, so she had to do this fast. Spontaneous Human Combustion started inside the body.
Rachel understood why the man on fire had his mouth wide open.
There wasn't any time left.
Rachel took the match and placed it into her open mouth.~
It’s in third-person, but it’s still written in a way where we can feel her fear, her confusion, her dissociation. We can see her reasoning. Of course, her reasoning is flawed. She should not be trying to make herself spontaneously combust JUST so that she can stop being afraid of it happening.
So how do you know if you should choose third-limited or first? (because third omniscient and second person should rarely be used). Well, I’m biased, and I believe third-limited works well for most stories.
That being said, I have chosen first person for two of my stories. One is my now shelved manuscript ‘Femcel’ which I will eventually be rewriting and it will be retitled ‘Pick Me.’ The other is my collab story with Emily Hurricane ‘When The Darkness Takes Us.’
For ‘When The Darkness Takes Us’ I had a very specific reason for choosing first person. This character is a self-insert. It’s a fictionalized account of something very difficult I went through semi-recently.
So I suppose I’d say, when it’s a really emotional story with strong voice, first person may be a better choice. When it’s a very personal story, first person may be a better choice. When you’re writing a character who rants and raves and switches gears mid-thought-stream so quickly that a third-person narrator wouldn’t do it justice-it would only slow the stream-of-consiousness down.
I also chose first person for my book ‘Femcel’ which is not currently online, because I need to make some changes to it.
Here is an excerpt from ‘Femcel.’
~If every single day was a day off from work with Sailor Moon dvds and an entire pickle pizza all to myself, well, then I think life would be a-okay. Today has been great. I cleaned my room and then I pulled out my trusty Sailor Moon box set. Auntie and Mom-mom are both at work, so nobody to bug me about what I'm eating. I ordered a large pizza and I got the owner on the phone when the new guy didn't understand that they can put pickles on a pizza. It isn't on the menu, but they do it for me all the time.
I told him, "You charge me for a pepperoni pizza and tell the guy cooking it to put on pickles. Ask Jim. He always does it." But the guy still thought I was full of it.
Eventually they sorted it out though. And yeah, I know it's bad to eat an entire large pizza myself. Don't go thinking I'm a total pig. I only eat like this when I watch anime.
Usually I don't eat enough. Mom-mom says I'm too thin and she isn't wrong. If I lay on my stomach too long at night, my ribs start to hurt. I'm the only woman in my family with a stick body. Everybody else has nice curves. I barely have boobs and my butt is flat. I tried doing squats for awhile, but when nothing much happened, I figured it was probably all nonsense. You know? A placebo.
It's only four in the afternoon, but already it's getting dark. I hate winter. Especially once Christmas is over. I feel so upset and anxious every day in that long dead span of winter, January through March, when there's nothing to look forward to and it feels like the world just dead ass stopped. Sludge in every parking lot. Everything is cold and wet. Kek. And it's the middle of January. Top kek. (I mean that sarcastically. Obviously).~

I chose first for Ana’s story, because I imagined her as this very voicey character with this sweet and sarcastic personality. She’s also incredibly immature (which does make sense since she’s in her very early 20s) and I felt that youth and naiveté would across more strongly in first person.
So....what’s the hard and fast rule for deciding between third-limited and first?
I....uh....
I wish I could tell you lol

Like my last post about balancing dialogue with other storytelling elements, I have to say, I just play it by ear.
I will say, I think every writer should figure out early on which POV they prefer to write in. Try them all out. Try writing the same scenes in first and third and see which one you like better.
I did this while I was getting my B.A in Creative Writing and after several rounds of playing with third-limited and first, I discovered I’m incredibly partial to third-limited.
That doesn’t mean there isn’t any room for first. Like I said, I realized first was the better choice for two of my WIPs. But knowing that third-limited is my default style, I always have a starting point. I start most stories in third-limited and it’s only when third-limited starts to feel....well...limiting that I give first a whirl.
In the end, it’s about what YOU as the writer are most comfortable with. Some people say it depends on the story you want to tell, and I agree to an extent, but at the same time, if you hate writing in first person and you try to force it, the story may suffer for it. For years, I wrote exclusively in third-limited before I was comfortable enough to test out first person.
Third-limited and first both accomplish different things. First person has more voice and immediacy, while third-person allows a writer to be more poetic and detached.
Which POV do you like best? When you experiment with both POVs, which allows your story to come to life more?
There’s no real rule of thumb.
Like everything with writing, it’s all a matter of intuition; following your gut and looking at every story as a unique experience.
I know that was wishy-washy, but it’s the best I can do while still being honest!
There just aren’t any true absolutes with writing.
Good luck fellow writers <3
#writingadvice#writing#pov#second person pov#first person pov#thirdperson#thirdlimited#omniscient reader's viewpoint#self-insert#femcels
14 notes
·
View notes
Note
omg I need a full tutorial on how you do your edits on powerpoint because sis my edits trying to have even a little hint of *amazingness*
Hi! First of all your edits are beautiful and I am queuing them up 💛 and again, I'll never be as adept as the Photoshop gods, but since both you and @achalk asked, Powerpoint is surprisingly easy to use after some practice and is adequate to make edits, especially if you’re a beginner like me. I’m also still learning about color and fonts and other aesthetics.
A lot of it is trial and error, which is why I never look at my older edits cause they were definitely more on the error side, but I can break down some of my newer edits so you know what went on in there.
What usually takes a long time in edit making (especially graphics) is finding the right movie frames/pictures. The pictures I use are frames from movie files that are larger than 3gb. A truly marvellous place to find those files are in this post by @in-a-cave-with
Figuring out how to arrange things is a balance between what picture you want to make and what the edit is about. for my last edit all the circular shapes was supposed to be like the arc reactor’s circle but that point might have been missed.
Anyway, I have no idea about your skills but under the cut we start with the very rudimentary basics and then I’ll dissect some of my edits for you. please excuse the messiness of my Powerpoints windows
The Basics
First of all, it depends on what version of Powerpoint you have. My university gives us free access to the Office 365, so that’s the version I’m working with.
I’m pretty sure a lot of the features I use most often (shapes, arranging, and animations) are available on all versions, though.
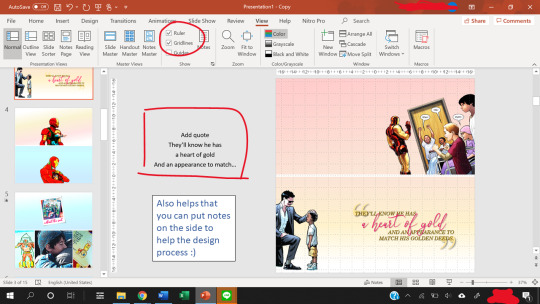
The gridlines are really helpful with positioning, and you can use the space beside the slides to add notes.
Also, to change the slide size, go to the Design -> Slide Size -> Custom Slide Size.
Usually, I use a width of 33.867 cm, which is the default for my Powerpoints and that translates nicely to 1280 pixels when you save as a PNG file.
The 1280 pixels is a multiple of 540 pixels, which is the width that tumblr rescales your images to, so it balances the quality of the image with tumblr’s determination to ruin that quality.
What I usually modify is the height of the slide, and that’s a balancing act. You want enough space to fit what you want, but not too much to crowd the dash. Nobody knows anymore what the maximum height limit is for tumblr but I try to keep the height below 60 cm for proportionality.
Note: each Powerpoint file can only have one slide size. So if you want to make one graphic but using two different slide sizes, you need two Powerpoint files.
Usually, I stick to one slide size per graphic so that it doesn’t confuse people.
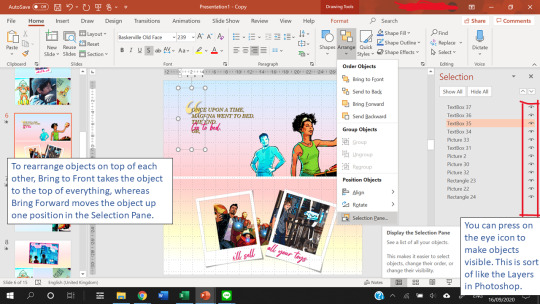
Finally, Arranging things is really useful. This allows you to have multiple “Layers” in your slide.
Creating Templates
Shapes in powerpoint are a beautiful thing. And the most useful thing is that you can fill a shape with a picture or with a gradient.
After you fill a shape with a picture, you can go to Format -> Crop. Then, you can resize that picture.
If you have the Draw tab in your Powerpoint, that’s also great for you to draw your own lines and shapes to give things a more authentic feel. You can find the Draw tab here if you have the right version of Powerpoint.
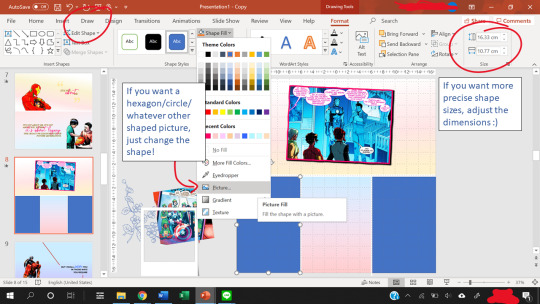
The Corrections option (see picture below, it’s the one with the sun icon) under the Format tab is great for quick adjustments to the brightness and contrast of a picture, and for saturation or grayscale adjustments you go to Color right next to it.
Artistic effects are useful to blur a picture, and if you want to adjust even further, you can go to Options at the very bottom of the pop-up which brings up a side panel for you to fine tune everything.
Notice that on the left of Corrections there is Remove Background. This is very useful as long as your picture has a clear background and foreground.

Shapes can also create a “template” for when you have more than ten images (which is the tumblr limit). You can put two images into one slide easily using the shape as a template so that the images are of the same size.
Gradients are nice to add some vibrance to your edits, and Powerpoint lets you adjust the angle of the gradients for variation.
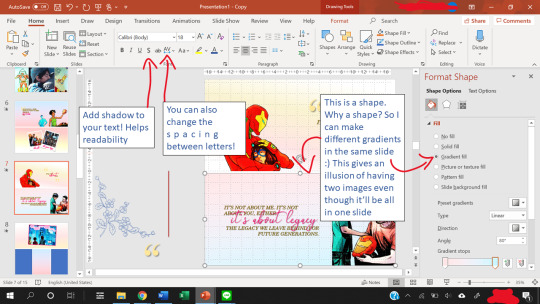
Other useful features include the text shadow effect and the spacing of letters.
To see how you can use shapes as templates, let’s look at some of my edits.
Anatomy of a Slide I
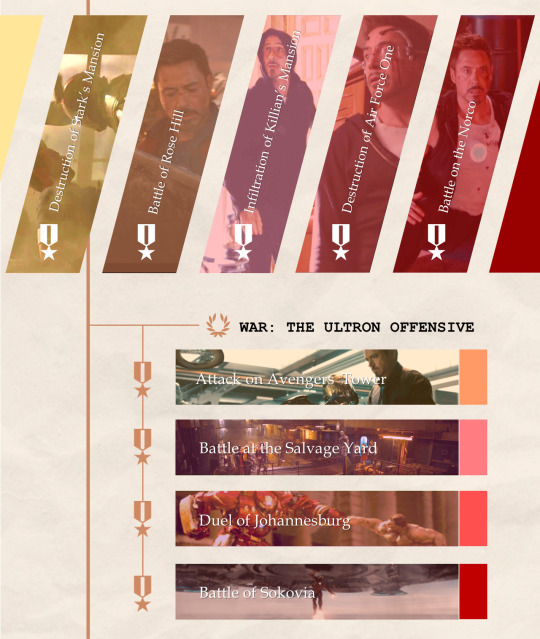
Let’s break this graphic edit down from my Tony Stark + Combat History edit. It has 12 parallelograms, 12 rectangles, 10 icons, 10 textboxes, 3 lines, and a texture background.
This is what the slide looks like as I put the first picture in.
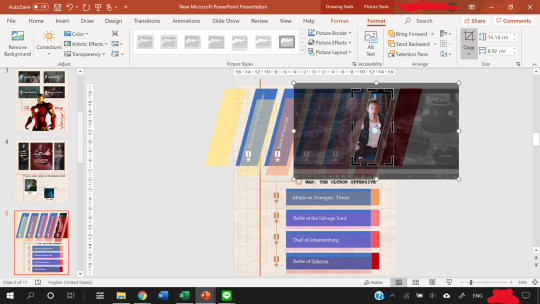
In the end result, the slide consists of:
5 parallelograms filled with a picture.
2 parallelograms at the sides are just filled with color.
5 more parallelograms are arranged on top of the 5 earlier parallelograms, and filled with a color. The transparency of the shape is adjusted so that it creates a sort of color filter for the pictures.
4 of the rectangles are filled with a picture.
4 rectangles are put on top of them, filled with color, transparency adjusted to again create a color filter.
Then, the 4 smaller rectangles at the end of the large rectangles are just filled with color. They are there simply for aesthetics :)
The 10 icons are the medals and the wreath. To find icons in Powerpoint, you can go to Insert -> Icons. Icons is right next to Shapes for me. You can change the color and transparency of Icons too!
The three lines are just to make everything look a tiny bit more cohesive and linked.
The texture background is a paper texture. To find texture backgrounds, there’s this really amazing resource post!
After the slide is done, you can save your slide as a PNG image (save as PNG and not as JPEG because JPEG is lossy and tumblr destroys it) by going to Save As -> PNG. You can choose to save one slide only or all the slides.
That’s it. You’re done making a graphic edit :)
Notice that one of the save options is save as a GIF. That does not work unless you have the newest version of Powerpoint. I don’t have it, so in order to create GIFs, we need to find a workaround, which I explain next.
Anatomy of a Slide II

This GIF from my Tony + Ethics edit has 8 components/objects in it.
A black and white picture (a screenshot of Tony, cropped in Powerpoint and also turned black and white by adjusting the Color and Saturation in Powerpoint)
The color cutout of Tony.
Two lines (called Straight Connectors in the animation pane)
Four textboxes.
In order to make them appear one by one, animations are used. Here, all of them are animated using the Fade animation.
When you animate, make sure that the first object on the animation pane starts With Previous.
In the picture above, you can see that beside the first object in my Animation pane (the object called Content Placeholder) there’s a number 0. That means the animation starts With Previous.
Never set an animation to start On Click because then the animation won’t show up when you convert the Powerpoint to a video.
You can start an animation After Previous as long as the first animation is starts With Previous. Just never use On Click
To figure out what I mean by On Click, With Previous, and After Previous, you can check this link.
The objects with animations are the color cutout, the two lines, and three textboxes.
The color cutout is actually part of the original screenshot of Tony. I copied the screenshot, changed the saturation and brightness of it, and then removed the background using the Background Removal tool in Powerpoint.
For how to use the Background Removal tool, check this link.
Then, the color cutout is arranged to be in front of the black and white picture, and a Fade animation is put in place so that it looks as if only Tony is coming into color.
Similar animations are used for the textboxes and the straight lines. In order to animate by letter, follow this tutorial.
P.S. you can use emphasis animations to animate the color of a text.
Adjust the animation pane for the timing of the appearances, and present the slide to see if you’re satisfied with the final result.
The next step is how to convert the animated slide into an actual gif.
First, go again to Save As, but this time choose MPEG-4 Video (*.mp4).
Then, you extract each frame of the resulting video and then use photoshop to turn the frames into a GIF.
For a tutorial on how to make gifs in photoshop, check out this really amazing and blessed tutorial by @robertdowneys
Anatomy of a Slide III
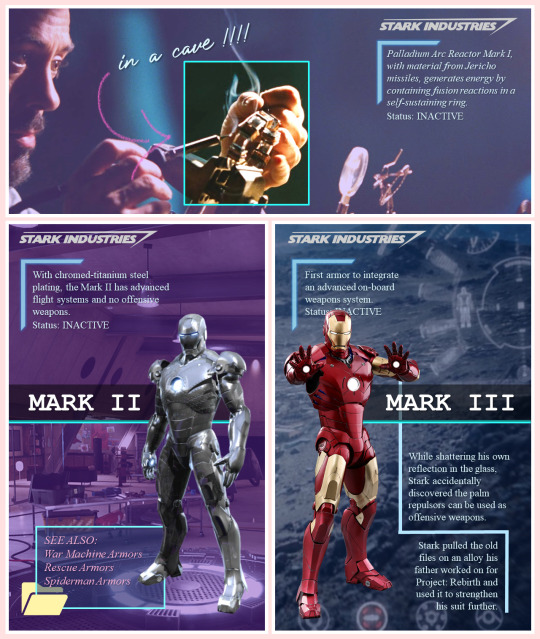
The top part of this slide has 8 components/objects to it:
3 rectangles
1 hooked shape
2 textboxes
The Stark Industries logo
The arrow
The hooked shape has a small glow effect added to the shape. Here’s a tutorial on shape effects. On that note, you can also make transparent text using various shape functions, and a tutorial for that is here.
The logo is a transparent logo downloaded from the internet, and the arrow is hand-drawn by me using the Draw tool in Powerpoint.
2 of the rectangles are filled in with the same picture and stacked on top of each other.
Then, the top rectangle is cropped to only Tony’s hand, and a border is added.
After that, another rectangle is arranged between the top and bottom rectangles. This third rectangle is filled in with a purplish color and transparency adjusted.
That creates a “highlight” effect for the part of the picture where Tony is working on the arc reactor. This same trick is what I used to make several parts of my ethics edits, like this GIF which I like.
Except, this time I make a circle shape first, fill that circle with the same image as the background, and adjust the size of the image to be the same as the background using the Crop tool on the circle.
Then, I make the background darker and the circle brighter using the Corrections tool. This increases the contrast between the two to create a highlighting effect.
Add a border to the circle, and add a Fade in animation.
Save the Powerpoint as a video, and turn video into GIF in photoshop.
Anatomy of a Slide IV - Inserting GIFs
Finally, you can put gifs into a slide! This GIF is from my Tony + his heart of gold edit. Make the GIF in photoshop, then just copy and paste the GIF into the slide like any other picture.
You can rotate, crop and adjust the size of a GIF in powerpoint.
You can’t make any other adjustments (e.g. you cannot change the brightness of a GIFor the color. If you try to do that, the GIF will freeze and become a still image.)
The GIF will not play unless you present the slide.
Don’t steal GIFs :) Again go back to that blessed tutorial on how to make your own GIFs, or ask permission from GIF creators.
As you can see from the selection pane, this slide has 12 components.
The quotation mark is in a textbox of its own
3 textboxes with pink text (animated using a Fade in animation by letter), and 1 with the all caps text
2 polaroid frames arranged on top of a comic book panel (with background removed) and a GIF of Harley.
Plus, a comic book panel of Riri with background removed
Then there are two rectangles filled with a gradient color to serve as the “background” of the slide.
I made the bottom background rectangle a gradient that fades into white to make a more seamless transition to the next image.
You can see the GIF of Harley does not move in this view. However, when you present the slide, it will move. To check if you accidentally froze the GIF while editing, present the slide.
When you are satisfied with how the slide looks, again save it as an MPEG-4 Video (*.mp4). Then, you extract each frame of the resulting video and then use photoshop to turn the frames into a GIF.
That’s it!
Powerpoint has all those tools, and you shouldn’t be afraid to experiment :)
My foray into making edits was literally me, bored in class, with a presentation about data when I went... hey... that’d be nice if I put Tony’s face in it because isn’t everything better with Tony in it?
There’re even more useful features in Powerpoint but this tutorial’s gotten really long already, so I’ll leave it at that. Hope it helped!
You can send me another ask or message me if you’re confused :)
#asks#vormirjumper#resources#tutorials#i know you make beaufitul gifs but i included the gif tutorials in case achalk needs them!#this got WAY longer than expected#but i hope it's useful#forgive my ramblings#and i hope to see more of your edits because all that coloring!#and those captions of yours?? iconic
30 notes
·
View notes
Photo


Red, White, and Maple
[ UNLIMITED MULTI-SALE W/ SET PACKAGES ]
A labour of love, Red, White, and Maple was a July 2020 Skinathon skin - Canadian themed to honour the start date of July 1st, which was shared with Canada Day! That said, the accent color and icon can be changed easily. This skin is “self-contained” within the frame, as seen, and even the post rows have a maximum height on them. The templates have been designed to fit in with this and sit at the maximum height for the post content space (save the comms template, which is a little shorter). This skin will have unlimited sales, making it cheaper, however, there are four different package options available at different price points. Pricing details are below the cut!
Features:
All HTML templates designed exclusively for the skin
Static user bar, navigation controls, etc
Three posting templates: general posting, tabs, and communications
Styled checkboxes (the maple leaves for topics, and a box that matches the function buttons - like edit, delete, etc - for posts)
Avatar hover which will scroll for multiple/any height mini profile fields
Colors, font families, body font sizes, and icon set in variables for easier changes
Tabbed profile available
Filtering member list available
Vertical forums; will not wrap to a new line, but widths will adjust depending on how many exist in the row
Category descriptions!! Also set in variables for easier editing
Installed and auto-updated to the latest version FontAwesome 5 Pro icon set (Yes, I installed my kit with all icons on this. Yes, this is reflected in the price.)
If you want to purchase this skin, please contact me through Discord only. My Tumblr messages do not get pushed to my phone and I’m not on desktop Tumblr often enough to notice them there. My Discord handle is lux#5069. If this will not work for you, then you may reach out on Tumblr for my email - but expect a delay. I apologize for any inconvenience this may cause, but Android has decided that I don’t deserve Tumblr notifications at all, so I have to work within that.
Package A: $35 USD
Basic package
Includes the non-tabbed profile and non-filtered member list HTML
Includes the CSS for the above implementations and most script
Can include the final script for +$5 USD
Good if you want to save, don’t need a lot, and/or are comfortable enough with code to analyze mine and add those features yourself
Instructions on how to use the different profile fields in the main profile and in the post row / mini profile
Instructions on how to change / add category descriptions
Total Sales Made: 0
Package B: $45 USD
Tabbed profile package
Includes the base package, but with the tabbed profile HTML instead of the basic profile HTML
Can include the missing filtered members list for +$5 USD
Good for profile application based sites
Instructions for how to add / subtract / change tabs
Total Sales Made: 0
Package C: $50 USD
Filtered members package
Includes the base package, but with the filtered member list HTML instead of the basic member list HTML as well as the script which is missing from the base package
Good for sites which want a quick and easy peek at plotting
Instructions for how to add / change filter groups and filter labels
Total Sales Made: 0
Package D: $55 USD
Full package
Includes the base package and both features unique to packages B and C - that is, it includes everything
Good for sites that want profile applications, a quick and easy peek at plotting with their member list, and are not comfortable figuring out how to add those features themselves
Total Sales Made: 1
Available Add-ons:
Additional posting templates [ +$10 - $30 USD for set ]
Webpage template(s) [ +$15 - 30 USD per template ]
Group color changing profiles [ +$5 USD for 5 groups, +$1 USD per additional group ]
Group color changing skin [ +$10 USD for 5 groups, +$2 USD per additional group ]
Modal box additions [ +$10 - 20 USD per box ]
Skin installation [ +$15 ]
30 notes
·
View notes
Photo

A Long Rant and Mediocre Analysis of the Future of My Beloved Jinteki Faction, by scd.
I have been thinking about Jinteki and the impending rotation of a lot of Jinteki cards...
As many have, I eagerly anticipate the upcoming System Update and System Gateway releases from NISEI. I’ve not been the hugest fan of Ashes, to put it mildly, especially their ID design. As someone on the Green Level Clearance Discord said the other day (I forget who, sorry), it’s almost as if they made every Runner a different kind of Shaper. And the Corps are, by and large, uncompetitive and overly fiddly for my tastes — oh, how I wish Hyoubu Institute was any good! I’m dipping my toes back into Standard after a few years away, and have lately been trying to get my head around what’s coming around the corner, especially since beyond Engram Flush and LaCosta Grid, I don’t see a ton to be excited about in recent Jinteki cards.
Then it dawned on me, with the upcoming replacement of SC2019, Honor & Profit, and the SanSan Cycle, we are actually losing a lot of Jinteki cards. This hit me most the most at the level of identities. On the potential chopping block are: Jinteki: Personal Evolution, Jinteki: Replication Perfection, Harmony Medtech, Nisei Division, Tennin Institute, Jinteki Biotech, and Chronos Protocol. Add in that Mti Mwekundu and Jinteki: Potential Unleashed are currently banned, this leaves the competitive pool as of System Gateway/System Update: one of the above identities (if the rumors that System Update will have only one Corp ID per faction are true), the new Jinteki ID in System Gateway, then Pālanā Foods, AgInfusion, and Saraswati. No other legal Jinteki IDs. I understand that the first two are solid glacier choices, and I actually quite like Saraswati, but I want more and more variety.
So it’s a bit of a bummer for my favorite faction, which has had goofy FA Tennin decks, Punitive Medtech techs, Complete Image Chronos Protocol kill decks, lots and lots of different PE decks. Will we see the death of the Jinteki I loved? Or will it rise again from the proverbial coffin of rotation? (Yes, this was all an elaborate justification for using the old GIF above that I think Eric Caoili made many years ago).
I’m basically just sick of Jinteki glacier. It’s never been fun for me, nor does it feel like what the faction should be primarily “about.” Jinteki’s current state as a glacier faction primarily has as much to do with what’s been banned as much as what’s been printed (LaCosta, for instance). If there are enough net damage cards in the pool, someone will make yet another new version of the caustic “Potatoes” deck and then NISEI will ban a bunch of the most troublesome cards again. Ignoring currents, there are five Jinteki cards on the current banlist, which is tied with Weyland for the most — followed by four NBN cards, two HB cards, and four neutrals.
If System Update has only one Corp ID per faction, as the recent rumor has stated, then I’ll be bummed out. If it’s true, I fully expect that Personal Evolution will be the one to stick around. It’s always been at least marginally playable, it does something different (a net damage tax), and it’s intelligible for new players. But what other cards stick around? What else should stick around? I thought I’d look and see what cards are actually going to rotate and which ones I was most upset about. What I found was actually a little surprising to me — while I claim I love this faction, I’m, uh, not going to miss many of these! I’ve gone through below and identified from SC2019, Honor & Profit, and the SanSan Cycle all of the cards that I suspect just can’t go and/or I’d be real sad if they did.
From the pool of SC2019 Cards, here’s what I’d hold onto:
Jinteki: Personal Evolution
Nisei Mk II
Fetal AI
Philotic Entanglement
Project Junebug
Ronin
Snare!
Neural EMP
All of these are such key cards to me, I just can’t see Jinteki without nearly all of them. Fetal AI, Philotic and Ronin are possibly marginal, but I think NISEI really made the right call bringing Fetal back (t’s a beautiful card on a number of levels); Philotic being limited to 1-per-deck has always made it a fun surprise and/or a welcome 3/2 in the faction; and without Ronin or a suitable combo-kill replacement, I don’t see the faction moving beyond just glacier decks. Can you imagine Netrunner without Snare!? Or NISEI getting rid of Nisei Mk II? Personal Evolution, Neural EMP, Junebug — these have always been faction-defining cards to me, and I don’t see NISEI being foolish enough to mess with that.
So, what would I lose from SC2019?
Jinteki: Replicating Perfection
Sundew
Hokusai Grid
Celebrity Gift
Trick of Light
Himitsu-Bako
Wall of Thorns
Lotus Field
Yagura
Neural Katana
Swordsman
Tsurugi
A lot of great cards here, but push come to shove, I could lose any of them. I’ll miss all of these if they all go, and I won’t be sad if any are kept (other than maybe RP, as I think there are better options, if NISEI has more than one core Jinteki ID in System Update; see below).
Onward and on to the Honor & Profit Cards:
Psychic Field
Mushin No Shin
Komainu
This genuinely surprised me! I had expected that there would be many, many more Honor & Profit cards I’d want to keep. As a Jinteki lover, I’ve played with all of the cards in this box (with the possible exception of NeoTokyo Grid), but only Psychic Field, Mushin, and Komainu seemed obvious keepers to me. Now, now, I’m sure there’s some group of people out there who think Mushin is "bad” and I understand that, but without Mushin there needs to be something I want there to be something that has a similar effect — Saraswati is kinda it, but it’s also the ID itself and Mushin as an ID is not the same. I think Mushin needs to be kept to help facilitate the shell game Jinteki that has been a staple since Hinkes’ Cambridge PE. In the online play world of Jinteki.net, many people would love to see mind games and traps leave the game entirely, but I don’t think NISEI does (given that they kept Cerebral Overwriter in Uprising). Psychic Field, I’d keep, partially to facilitate this but also as a necessary, hard 419 counter — a counter on a mechanical vector that is not just about money and math. Komainu is a beautiful piece of ice, and one I’d love to see stay in the game.
So, what are we losing if I ruled NISEI?
Harmony Medtech
Nisei Division
Tennin Institute
House of Knives
Medical Breakthrough
The Future Perfect
Chairman Hiro
Mental Health Clinic
Shi.Kyū
Tenma Line
Cerebral Cast
Medical Research Fundraiser
Inazuma
Pup
Shiro
Susanoo-no-Mikoto
NeoTokyo Grid
Tori Hanzō
Ouch. There are a lot of almost-keepers here. House of Knives, TFP, Tennin, Pup, and Susanoo, are all cards I’d love to see stick around but frankly, I don’t think they really need to. TFP is a great defensive agenda but we already have some fantastic defensive agendas in the faction (and I’d love to see what NISEI cooks up for other defensive Jinteki 5/3s). House of Knives is a great card and maybe it should stick around, I dunno, but perhaps there’s more interesting space to explore in net-damaging 3/1s (plus, we just got Sting! somewhat recently). These remaining ice don’t get a lot of play, even if they once did (like Pup); I’d be happy to see any of them stick around, but I’d also like to see new ideas. So, they can all go.
What about the SanSan Cycle? I’d keep:
Jinteki Biotech: Life Imagined
Crick
Cortex Lock
Marcus Batty
An Offer You Can’t Refuse
Okay, whoa, there’s actually an ID in here! Yeah, I love Biotech, even if I haven’t played it in a long time. I feel like Biotech needed just another couple of cards to make the other non-Brewery flip sides workable. I’d love to see NISEI attempt to fix an ID rather than just rotate it. Crick and Cortex Lock seem like such solid, interesting ice that I wouldn’t want to lose either — Cortex Lock is of course a wonderful facechecking ice, good early game ice that was only really ever a problem during the Mti meta. I’ve always loved the positional ice of that cycle, and Crick is lovely. Batty is too fun to ignore and is versatile for multiple decks, and is not stifling like other defensive upgrades. And An Offer You Can’t Refuse — clearly the weirdest, least-played card of this entire post — I just want to keep it around, for the novelty of forcing a run on the Corp’s turn and its related rules confusions. And for the memes.
What would we lose?
Genetic Resequencing
Ancestral Imager
Allele Repression
Genetics Pavilion
Lockdown
It’s a Trap!
Clairvoyant Monitor
Chronos Protocol: Selective Mind-Mapping
Recruiting Trip
Valley Grid
Not a lot here that I really care about, I guess? Genetics Pavilion is probably the one I’d miss the most, not that it’s had much play since Wyldside rotated. And Chronos Protocol — I’m glad it got a brief moment to shine in the sun of Complete Image, but I’m not going to miss it otherwise. Maybe Allele Repression, but frankly, Genotyping, Preemptive Action, etc. have shown that Operation-based card recycling is the best way to go post-Jackson. The rest of these cards were, I think, pretty mediocre design; I’m surprised at how little wheat to chaff there was in SanSan for Jinteki, as my memory is quite different!
And, of course, with the release of System Update, we’ll presumably get some other old cards resurfacing that we haven’t seen in a while. I certainly hope NISEI gets aggressive and interesting with these choices, as I think they did a pretty good job with SC2019 (even if I found Core Experience to be a slog of a format). I’m excited at the options of what from the original core, Genesis, Spin, and Lunar might resurface. If it were up to me, here are the four cards that I would bring back:
Hostile Infrastructure
Shock!
Edge of World
Industrial Genomics
Okay, okay, Hostile Infrastructure won’t be popular, but I love it. It’s expensive to rez and with SanSan gone there won’t be the old Breaker Bay Grid cheese to get it rezzed for free. It’s been back in the meta with Salvaged Memories for a bit now and doesn’t appear to be the scourge of the meta, so why not just keep it? More importantly, I’d love to see Shock! come back — it felt infinitely more fair than Breached Dome with a similar (albeit costlier to trash) effect. Edge of World was a jank-enabler that I would love to see again (perhaps because I’m currently playing Retrunner with these old cards again), and then there’s ... Industrial Genomics.
Okay, okay, okay, I hear you, “IG bad.” It’s a mean, mean, Bad People Play It™ identity that made you cry real bad that one time. It did the same to me once, too! I get that perspective, but if we are going to choose a Jinteki ID that is very functionally different than Personal Evolution to complement it in System Update, I’d like one that facilitates the kinds of play IG does. Biotech fits that bill, but frankly, Biotech unless it gets the card support will just be another Brewery kill ID, and I’m not sure NISEI are thinking that’s worth keeping. I’m being hopelessly optimistic that we’ll be getting three Jinteki IDs when System Gateway and Update drop rather than just two, and if I had to choose between Biotech and IG, I’m going IG every time.
Now, with Kakurenbo in the cardpool, a return of IG just can’t happen; so... ban Kakurenbo! It is a ridiculous card that was, seemingly, mainly designed for IG to play in Eternal. I can’t see any other good use for it, at least. Bring back the old IG from before Bio-Ethics prison. Bring back Shock! Hell, even go ahead and ban Bio-Ethics — gasp, I can’t believe I’m typing such blashemy — and give us something that can open up new kinds of play with this interesting, classic, and overly-maligned ID. Industrial Genomics was a weird thing of beauty, and it deserves another run. Laugh at me all you want, you know I’m right.
One more thing — what about Caprice Nisei? Shouldn’t she be discussed? Nah, she gets no love from me, simply because of the playstyle she empowers. Caprice is of course a great and meta-defining card — for glacier! But haven’t we had enough of glacier by now? Like, two years of mainly glacier Jinteki? And I’m the lord of my own barely-read blog fiefdom; I decree that if you really want a psi game to protect your agenda, you should just go play Hyoubu Precog Manifold.
Anyway, just some thoughts by someone who doesn’t play any Standard but wants to do more. I started writing this thinking it was about the dire state of Jinteki, but I’m now left thinking there’s actually a much smaller set of must-keep Jinteki cards than I initially thought. Granted, most of them are non-ice cards, and that’s a problem here — only a handful of ice here seem really necessary to keep. And maybe that’s what this is about; encouraging more deckbuilding that has little to do with building remotes.
I’m most concerned about IDs. Keeping PE and either Biotech or IG would make me personally happy, and Tennin would be an acceptable “sure, why not.” There’s a lot of potential for Jinteki to move into more forms of play that aren’t so glacier-heavy, and I’m hopeful about that. I do think what they do in System Gateway and System Update will need to address the loss of Jinteki cards, but perhaps not as seriously as I had feared when I started writing this.
Anyway, I’d love to hear any reactions to this. Long Live Chairman Hiro!
2 notes
·
View notes
Text
Hello! I got asked a few days ago if I would make a git tutorial and I had the time so I thought I’d give it a try. If you are left with any confusion or have any questions please feel free to send them to my inbox and i’ll try to help!
This is everything you will need for this tutorial:
Photoshop (i’ll be using CS5 and you can try and find a download here)
KMPlayer (x)
4K Video Downloader (x)
So, first things first, you're gonna need to download the video you want to gif and that’s what 4K Video Downloader is for. Open the app

Where it says “paste video link”, that is where you paste the link from the video you want and when you click on that green button it will read the link and find the video for you.

After that, this window will pop up and this is where you choose the quality (make sure you save it as the highest quality possible and never save any clip as a quality with 60p after it like 1080p60 because photoshop freaks out and those gifs will come out laggy and weird). Also make sure that you are saving it where you want to, which is where that last bar next to the ‘browse’ button comes in handy.
After that, we will open KMPlayer. This is where we will get the frames for the gif. There are a lot of ways to get frames for a gif so if this doesn't work for you or you would like to have some options here is a tutorial that uses another way inside photoshop.
Okay so back to KMPlayer, after you open you can right-click and press the ‘Open File’ option

Then track down the video you want to gif. Once you open that file you can hit the key command Ctrl + G. That will bring up the ‘Frame Extraction’ window.

These are my settings and make sure you know where the frames are going and that it’s KMPlayer/Capture. Once everything is ready, you can click Start and it will start capturing the frames to the scene you want to gif, so go to that scene in particular and be ready to click start.

Now once you’ve gathered your frames, go to wherever you saved them in your computer and just clean up the frames, for example:
I don’t need the shots of the crowd cheering, so I’ll select those one delete them now, it saves time later so it’s a nice habit to get into.
Now we finally get into Photoshop. Once you open it you go to File, Scripts, Load Multiple DICOM Files.

This opens a window where you select the same place the frames you captured are stored.

Once you hit OK, this should bring up the frames you pulled from the video.

Now we need to start getting the files into the right format. As you can see, there is a timeline at the bottom of photoshop where, on the left, is one frame. On the right at the top of the timeline is a down arrow and 4 little lines next to it, click on that and select Make Frames Into Layers.
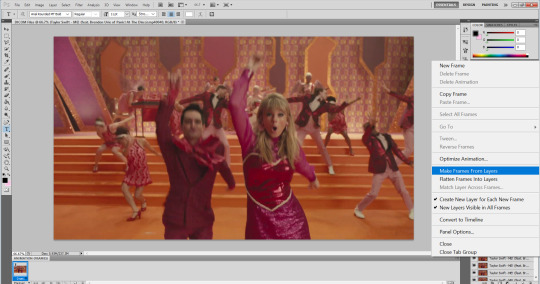
This should get all of your frames separated and into layers, now we need to go to the same place and now select Flatten Frames Into Layers.

This will now add the frames to the section on the left and will have frames labeled ‘Frame 1’ ‘Frame 2’ ‘Frame 3’ etc.

Now we need to time out the layers, go to that same window with the downward facing arrow and 4 little lines, select Select All Layers.
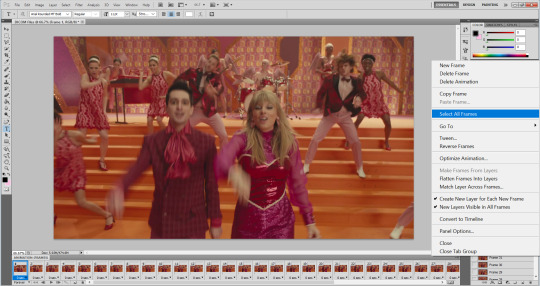
Click on any of the highlighted layers black arrows next to the 0 sec on the bottom of the frame.

You will always change this to 0.05, ALWAYS. some people try to do things differently and it always looks bad. It either goes too fast, too slow or some people time it on every other gif? which makes no sense to me and the gif just looks laggy and rough instead of smooth.

Now we are going to size these gifs. Tumblr has set some size guidelines that must be followed in order to maintain the quality of the gifs. The Wifth option is where these guidelines come in. For example, the gif i’m making for this tutorial is one that goes fully across the post, the largest gif possible on this site and the width must be 540px, if you’re doing gifs that are smaller and are half that (like a set where there are two gifs per row instead of one) then the size would be 268px, and a gif with 3 per row is 177px. The place where you can pick and choose is the Height of the gif, i want this gif to be large so i’m making it 295px, but you do whatever you want with what you are making, this part is a preference.
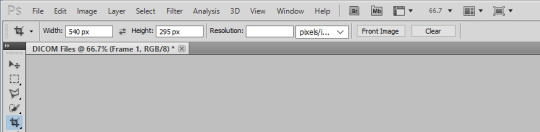
Let’s go back to the side timeline for one moment and do some garbage collecting. if you scroll down past all the Layer 1, Layer 2, Layer 3 etc. you will see there is left over layers that are unnecessary and that are just named the title of the download. Delete all of these layers that do not say Layer and then a #.
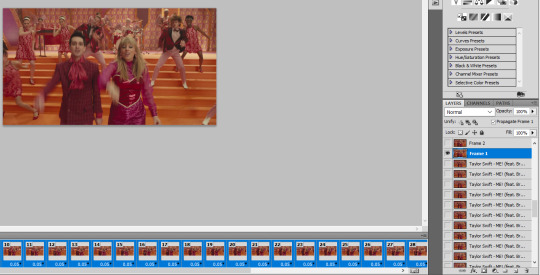
It’s now time to start sharpening your frames. The sharpening action I use got taken down because the account got deactivated and I cannot find it anywhere in my computer so sorry about that, but i can offer the sharpening action @nicole-kidman uses here.
Once you download that got to the actions button (which is a small play button on the right) scroll down to where you see the action, and before you press the play button on the bottom of the window, make sure you have all the layers selected and the first layer highlighted and well as the first frame (see pic below if confused)
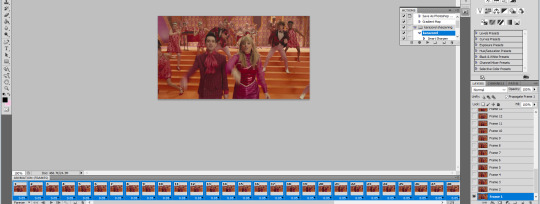
Once all that is done you press that play button and it should start sharpening, it will go through each frame (depending on the action you use, you can run out of action before you sharpen all of the layers, my action goes up to 130 frames so make sure to stay under that just in case) and once it is done you will get this window:

Just click Stop.
Now we are moving on to coloring, this is all about preference and what type of look you are going for on any given project, but i tend to stick to pretty natural and basic coloring. I’ve been using this amazing psd and just adjusting it with every gif i make.
I’ll go over how i changed it for this specific coloring of this gif. I got rid of a few layers I didnt deem necessary and was left with these:

I lowered the curves to what you see above that this is what we got:

now we move on to brightness, i changed it to these settings and this is what we are left with:


Now we adjust levels:


With the gradient map, i didnt change anything and it’s exactly the same from what’s originally on the psd and we are left with this:

Next is exposure:


Now selective color:


And finally Photo Filter:
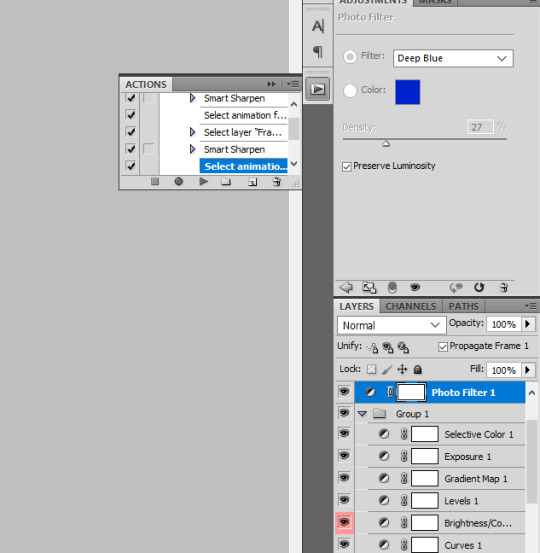

Now I am ready to save out the gif. Go to File and Save As to save the working File in case you need to come back and change something. Now go to File and then Save for Web & Devices.
When this window comes up there are a few things you need to double check. Make sure, under Present on the top right corner, you are saving it as a GIF and on the bottom left corner, above the 100%, the GIF size is under 3M (that’s tumblrs limit and if you upload a gif over 3M it will not move).
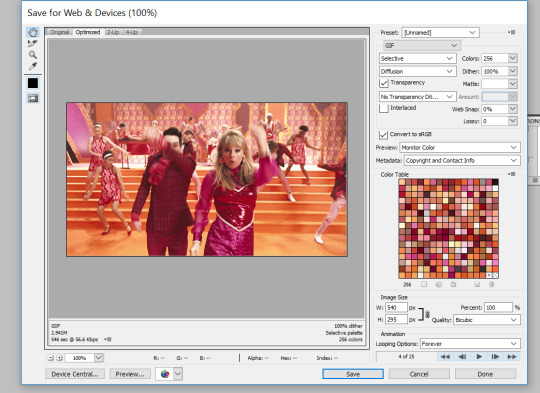
Once you’ve done that be sure to save it. Then go onto tumblr and hit Photo (this goes for gifs, edits, graphics, etc. as well)

Click Upload Photo

Then find where you saved the gif and there you go!

Also, here is a tutorial on how to make gradient text just in case anyone wanted to know!
And please be sure to tag me in all your gifs! I track #usersar. Like I said at the beginning of this tutorial, feel free to ask me any questions you have left! Happy Creating!
164 notes
·
View notes
Last Seen Blogs

rummagingthroughlife
Life.

reveluving
“ my precious love ,,

ronnielddge
she is an entire ocean

spypanties14
Amo las culonas
lynxindisguise
just a humble forest cat