#learn CSS
Explore tagged Tumblr posts
Visit Tumblr Blog
Explore Tumblr blogs with no restrictions, modern design and the best experience.
Last Seen Tumblr Blogs


Fun Fact
Tumblr is used by 21% of adults online aged 18-29 years.
Text
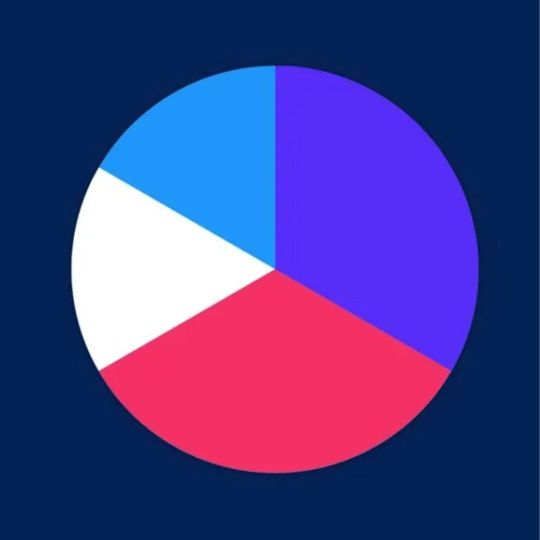
HTML CSS Pie Chart
#html css pie chart#css pie chart#html css#codenewbies#frontenddevelopment#html5 css3#css#css tricks#css snippets#learn css#webdesign#learn to code
4 notes
·
View notes
Text
CSS Focus Blur Text on Hover
#css text blur#text focus blur#css blur#css tricks#css effects#html css#codingflicks#learn to code#code#frontend#webdesign#html#css#frontenddevelopment#css3#html5 css3#learn css
8 notes
·
View notes
Text
CSS Tutorials, CSS Introductions - WebTutor
🚀 Elevate Your Web Development Skills! 🚀
🌐 Dive into the world of CSS with our latest tutorial on https://webtutor.dev/css/css-introduction. 💻✨
#WebDevelopment #CSSMagic #CodingJourney #TechSkills #LearnCoding
👉 Share if you're ready to embrace the world of CSS! 🌐💙
CSS Tutorials, CSS Introductions - WebTutor✨
2 notes
·
View notes
Text
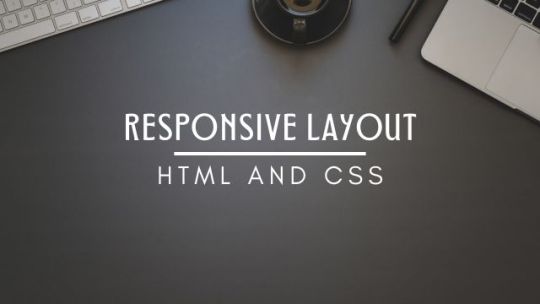
CSS Responsive Web Layout Join Telegram
#simple responsive web design#learn to code#html css#webdesign#frontenddevelopment#css#css3#html#code#responsive web design#responsive website#learn css#css tricks#responsive layout#divinectorweb
3 notes
·
View notes
Text
PLAY/PAUSE BUTTON

I'M SOOOOOOO PROUD OF THIS LMAO!! I DID IT YESTERDAY(2023.10.26 ) AND I'M GONNA ADD ALL THE DETAILS NEXT!!
the animal crossing video is from whimsisadie
Right now, i'm working on the volume button and hope I'm gonna post the result soon :3!! sooooo stay soon~

2 notes
·
View notes
Text
CSS Tutorial for Beginners: Build Stylish Web Pages

In the digital world, design is everything. A clean, stylish website can make a powerful first impression, keeping users engaged and encouraging them to return. While HTML is responsible for the structure of a web page, it is CSS (Cascading Style Sheets) that gives it life, color, and personality. If you're looking to create beautiful, modern websites, this CSS tutorial for beginners is the perfect place to start.
Whether you're new to web development or just want to improve your front-end skills, this tutorial will help you build stylish web pages using CSS. We'll walk through the fundamentals of CSS, explore how it works with HTML, and give you real examples to apply immediately.
What Is CSS?
CSS (Cascading Style Sheets) is the language used to describe the presentation of a document written in HTML. It defines how elements like text, images, and layouts should appear on a webpage—everything from font sizes and colors to spacing and positioning.
Without CSS, all websites would look plain and unstyled. CSS separates content (HTML) from design, making web pages easier to manage and more visually appealing.
Why Learn CSS?
Learning CSS offers several benefits, especially for beginners:
Design freedom: Customize any website with colors, fonts, layouts, and animations.
Responsive design: Make your web pages look great on all screen sizes and devices.
Better user experience: Improve readability, navigation, and visual appeal.
Easy maintenance: Update styles quickly without altering the content.
Career advantage: Front-end developers, designers, and content creators all use CSS.
How CSS Works with HTML
CSS works hand-in-hand with HTML by selecting specific HTML elements and applying styles to them. There are three main ways to use CSS in an HTML document:
Inline CSS – inside HTML elements
Internal CSS – inside a <style> tag in the head section
External CSS – in a separate .css file linked to your HTML
Here’s a simple example of internal CSS:<!DOCTYPE html> <html> <head> <style> h1 { color: blue; text-align: center; } p { font-size: 16px; color: gray; } </style> </head> <body> <h1>Welcome to My Website</h1> <p>This is a styled paragraph using CSS.</p> </body> </html>
CSS Syntax Explained
CSS consists of selectors and declarations. Here's the basic structure:selector { property: value; }
Example:p { color: green; font-size: 18px; }
p is the selector (targets <p> tags)
color and font-size are properties
green and 18px are values
You can apply multiple styles to one element by including multiple property-value pairs inside the braces.
Key CSS Concepts Every Beginner Should Know
1. Selectors
Selectors define which HTML elements you want to style. Common types include:
* – universal selector
p, h1, div – element selectors
.className – class selector
#idName – ID selector
Example:#main { background-color: #f0f0f0; }
2. Colors and Fonts
CSS allows full control over colors and typography.body { background-color: white; color: #333; font-family: Arial, sans-serif; }
3. Box Model
Every HTML element is a rectangular box, made up of:
Content
Padding
Border
Margin
Understanding the box model is key to layout and spacing.div { padding: 10px; border: 1px solid #ccc; margin: 20px; }
4. Positioning and Layout
Use CSS properties like position, display, flex, and grid to control layout..container { display: flex; justify-content: space-between; }
5. Responsive Design
Make your site mobile-friendly using media queries.@media (max-width: 600px) { body { font-size: 14px; } }
Build a Simple Styled Web Page
Let’s build a simple web page using HTML and CSS:
HTML (index.html)<!DOCTYPE html> <html> <head> <link rel="stylesheet" href="style.css"> <title>My Stylish Page</title> </head> <body> <header> <h1>My Stylish Web Page</h1> </header> <main> <p>This is a simple paragraph styled with CSS.</p> </main> </body> </html>
CSS (style.css)body { background-color: #f9f9f9; color: #333; font-family: 'Segoe UI', sans-serif; } header { background-color: #007BFF; color: white; padding: 20px; text-align: center; } main { padding: 20px; }
Save both files in the same folder, open index.html in a browser, and admire your styled page!
Tools to Help You Learn CSS
CodePen – Try CSS code snippets online.
MDN Web Docs – Comprehensive documentation for CSS.
Visual Studio Code – A great editor with live preview extensions.
CSS Zen Garden – Explore examples of what’s possible with CSS.
Final Thoughts
This CSS Tutorial for Beginners is your gateway to designing elegant, responsive, and professional-looking web pages. By learning CSS, you gain control over how content appears and interacts with users. Start small, practice consistently, and experiment with real-world projects.
Once you master the basics, explore advanced topics like animations, transitions, flexbox, grid, and preprocessors like SASS.
0 notes
Text
youtube
0 notes
Text
How To Use CSS To Create Menus And Navigation Bar
CSS stands for Cascading Style Sheets, and it is a language that can be used to style and customize HTML elements on a web page. CSS can create custom menus and navigation bars by using properties such as display, position, flexbox, grid, hover, etc.
To create a CSS menu, you need to define two things: the menu items and the menu style. The menu items are the links or buttons that you want to display on your menu. The menu style is the way you want to arrange and decorate your menu items.
For example, if you want to create a simple horizontal menu with four items, you can use the following code:<!-- Define the menu items --> <ul class="menu"> <li><a href="#">Home</a></li> <li><a href="#">About</a></li> <li><a href="#">Services</a></li> <li><a href="#">Contact</a></li> </ul> /* Define the menu style */ .menu { list-style: none; /* Remove the bullet points */ display: flex; /* Use flexbox to arrange the items horizontally */ justify-content: space-around; /* Distribute the items evenly */ align-items: center; /* Align the items vertically */ } .menu li { padding: 10px; /* Add some space around the items */ } .menu a { text-decoration: none; /* Remove the underline */ color: black; /* Set the text color */ } .menu a:hover { color: white; /* Change the text color on hover */ background-color: blue; /* Add a background color on hover */ }
This will result in the following output:
![menu]
As you can see, the menu items are displayed horizontally, with some spacing and styling. You can also use different properties or values for different items to create more complex and creative menus.
To create a CSS navigation bar, you need to define two things: the nav element and the nav style. The nav element is a semantic HTML element that represents a section of a page that links to other pages or sections. The nav style is the way you want to position and decorate your nav element.
For example, if you want to create a simple fixed navigation bar with four items, you can use the following code:<!-- Define the nav element --> <nav class="navbar"> <ul class="menu"> <li><a href="#">Home</a></li> <li><a href="#">About</a></li> <li><a href="#">Services</a></li> <li><a href="#">Contact</a></li> </ul> </nav> /* Define the nav style */ .navbar { position: fixed; /* Fix the position of the nav element */ top: 0; /* Set the top position to zero */ left: 0; /* Set the left position to zero */ width: 100%; /* Set the width to 100% of the viewport */ height: 50px; /* Set the height to 50 pixels */ background-color: blue; /* Set the background color */ } .menu { list-style: none; /* Remove the bullet points */ display: flex; /* Use flexbox to arrange the items horizontally */ justify-content: space-around; /* Distribute the items evenly */ align-items: center; /* Align the items vertically */ } .menu li { padding: 10px; /* Add some space around the items */ } .menu a { text-decoration: none; /* Remove the underline */ color: white; /* Set the text color */ } .menu a:hover { color: black; /* Change the text color on hover */ }
This will result in the following output:
![navbar]
As you can see, the nav element is fixed at the top of the page, with a blue background and white text. You can also use different properties or values for different elements to create more complex and creative navigation bars.
CSS menus and navigation bars can make your web pages more user-friendly and attractive. You can use them to create different types of menus and navigation bars, such as vertical, dropdown, responsive, etc. You can also combine them with other CSS properties and selectors to create more unique and customized menus and navigation bars.
If you want to learn CSS from scratch must checkout e-Tuitions to learn CSS online, They can teach you CSS and other coding language also they have some of the best teachers for there students and most important thing you can also Book Free Demo for any class just goo and get your free demo.
1 note
·
View note
Text
Finished a website y’all boys enjoy
#html#webdev#adobe animate#web design#spotify#animation#web developers#html5#learn css#javascript#programming#my animation#artists on tumblr#digital illustration
1 note
·
View note
Text
#CSS#phyton#C Language#HTML#C++ Language#Learn CSS#Coding Classes#Java Script#Learn HTML#java language#Programming Language#HTML Language#CSS Language#coding for beginners#online coding courses
0 notes
Text
Introduction To HTML
[Note: You need a text editor to do this. You can use Notepad or Text Edit. But it's so much better to download VS Code / Visual Studio Code. Save it with an extension of .html]
HTML stands for Hyper Text Markup Language
It is used to create webpages/websites.
It has a bunch of tags within angular brackets <....>
There are opening and closing tags for every element.
Opening tags look like this <......>
Closing tags look like this
The HTML code is within HTML tags. ( // code)
Here's the basic HTML code:
<!DOCTYPE html> <html> <head> <title> My First Webpage </title> </head> <body> <h1> Hello World </h1> <p> Sometimes even I have no idea <br> what in the world I am doing </p> </body> </html>
Line By Line Explanation :
<!DOCTYPE html> : Tells the browser it's an HTML document.
<html> </html> : All code resides inside these brackets.
<head> </head> : The tags within these don't appear on the webpage. It provides the information about the webpage.
<title> </title> : The title of webpage (It's not seen on the webpage. It will be seen on the address bar)
<body> </body> : Everything that appears on the webpage lies within these tags.
<h1> </h1> : It's basically a heading tag. It's the biggest heading.
Heading Tags are from <h1> to <h6>. H1 are the biggest. H6 are the smallest.
<p> </p> : This is the paragraph tag and everything that you want to write goes between this.
<br> : This is used for line breaks. There is no closing tag for this.
-------
Now, we'll cover some <Meta> tags.
Meta tags = Notes to the browser and search engines.
They don’t appear on the page.
They reside within the head tag
<head> <meta charset="UTF-8"> <meta name="viewport" content="width=device-width, initial-scale=1.0"> <meta name="description" content="Website Description"> <meta name="Author" content="Your Name"> <meta name="keywords" content="Websites Keywords"> </head>
Line By Line Explanation:
<meta charset="UTF-8"> : Makes sure all letters, symbols, and emojis show correctly.
<meta name="viewport" content="width=device-width, initial-scale=1.0"> : Makes your site look good on phones and tablets.
<meta name="description" content="Website Description"> : Describes your page to Google and helps people find it.
<meta name="author" content="Your Name"> : Says who created the page.
<meta name="keywords" content="Website's Keywords"> : Adds a few words to help search engines understand your topic.
_____
This is my first post in this topic. I'll be focusing on the practical side more than the actual theory, really. You will just have some short bullet points for most of these posts. The first 10 posts would be fully HTML. I'll continue with CSS later. And by 20th post, we'll build the first website. So, I hope it will be helpful :)
If I keep a coding post spree for like 2 weeks, would anyone be interested? o-o
#code#codeblr#css#html#javascript#python#studyblr#progblr#programming#comp sci#web design#web developers#web development#website design#webdev#website#tech#html css#learn to code#school#study motivation#study aesthetic#study blog#student#high school#studying#study tips#studyspo#website development#coding
154 notes
·
View notes
Text

CSS Glowing Gradient Loader
#css gradient loader#gradient loader#loader html css#html css#css animation examples#frontenddevelopment#code#css#pure css animation#html5 css3#css animation tutorial#codenewbies#learn css animation#learn css
2 notes
·
View notes
Text
Animated Search bar CSS
#animated search box#animated search bar#css animation snippets#css animation#codingflicks#html css#learn to code#frontend#css#html#css3#frontenddevelopment#learn css#learn css animation#search bar css animation#search bar
2 notes
·
View notes
Text
Essentials You Need to Become a Web Developer
HTML, CSS, and JavaScript Mastery
Text Editor/Integrated Development Environment (IDE): Popular choices include Visual Studio Code, Sublime Text.
Version Control/Git: Platforms like GitHub, GitLab, and Bitbucket allow you to track changes, collaborate with others, and contribute to open-source projects.
Responsive Web Design Skills: Learn CSS frameworks like Bootstrap or Flexbox and master media queries
Understanding of Web Browsers: Familiarize yourself with browser developer tools for debugging and testing your code.
Front-End Frameworks: for example : React, Angular, or Vue.js are powerful tools for building dynamic and interactive web applications.
Back-End Development Skills: Understanding server-side programming languages (e.g., Node.js, Python, Ruby , php) and databases (e.g., MySQL, MongoDB)
Web Hosting and Deployment Knowledge: Platforms like Heroku, Vercel , Netlify, or AWS can help simplify this process.
Basic DevOps and CI/CD Understanding
Soft Skills and Problem-Solving: Effective communication, teamwork, and problem-solving skills
Confidence in Yourself: Confidence is a powerful asset. Believe in your abilities, and don't be afraid to take on challenging projects. The more you trust yourself, the more you'll be able to tackle complex coding tasks and overcome obstacles with determination.
#code#codeblr#css#html#javascript#java development company#python#studyblr#progblr#programming#comp sci#web design#web developers#web development#website design#webdev#website#tech#html css#learn to code
2K notes
·
View notes
Text
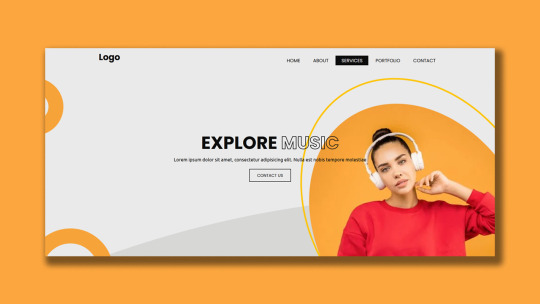
CSS Responsive Website Layout Join Telegram
#divinector#html css#create a website#build a website#make a website#how to create a website#responsive website design#code#learn to code#frontenddevelopment#css#webdesign#css3#html#learn css
3 notes
·
View notes
Text
FIRST WEBSITE :3!!
I still need to learn how to make it possible for me to post there :(((!! If anyone know how to do it please help me!! I also need to make the follow button works :3!! I'm slowly learning (´▽`ʃ♡ƪ)
All what i need to do ↴
Make the post button work
make it possible to follow someone there
need to finish the whole website >w<!!

6 notes
·
View notes