#s4cc: tutorial
Explore tagged Tumblr posts
Visit Tumblr Blog
Explore Tumblr blogs with no restrictions, modern design and the best experience.
Last Seen Tumblr Blogs


Fun Fact
US Tumblr user growth rate is estimated to slow down to 4.1%.
Text

IF YOU CAN'T ENABLE CC 🌸
Sul sul ^^
After today updates, I wasn't able to enable CC again. It doesn't matter how many times I closed and launched the game.
So I remembered that this had already happened to me before.
If you're going through the same problem, this is how you can fix it:
🌸🌸🌸🌸🌸🌸🌸🌸
HOW TO ENABLE CC AGAIN:
1- On the game home page, in the bottom right corner of the screen, you can see what the current game version is. After today's update, mine was: 1.108.318.1020. Launch the game and check the number that appears for you.
2- In your game folder (Documents>Electronic Arts> The Sims 4) you'll find a file called "GameVersion". There will be a number.
The number in that file has to match the current game version number.
When I opened mine, it was "1.107.151.1020". So I just updated it to "1.108.318.1020" and saved. Then when I launched the game I could enable CC again.
Note 1: There's a "space" before the number in "GameVersion" (as if it were a paragraph). Keep that space. Change the numbers exactly where they are.
Note 2: If you prefer, before changing the number, make a backup copy of "GameVersion" just in case. It won't harm your game, but it's better, just to prevent and make it safer.
💎 If you want a tutorial video, I made one about it some time ago. You can watch it here :)
🌸🌸🌸🌸🌸🌸🌸🌸
ALSO IMPORTANT AFTER UPDATES:
Remember to delete "localthumbcache". You can find the tutorial here.
🌸🌸🌸🌸🌸🌸🌸🌸
I'm currently checking my CC to see if they're still working.
If anything, I'll let you know :)
I hope it helps you if you're having any problems :)
Happy Simming ^^
3K notes
·
View notes
Text

Create Your Own Main Menu for The Sims 4 - Tutorial
Hey folks!
This tutorial will walk you through creating your own main menu override for The Sims 4 based on my custom repository.
_________
What is required:
JPEXS Free Flash Decompiler
Sims 4 Studio
Raster graphics editor (e.g. Photoshop, Gimp, Photopea)
Your Own Main Menu repository
_________
Step 1: Download and unzip the Your Own Main Menu repository
It's available on my Patreon page for free.
_________
Step 2: Prepare your custom images
There are two images that you need to customize:
SimMattically_YourOwnMainMenu_MainBG.pngThis is the main background image, where you want to put the desired graphic.Size: 1440px x 1200px
SimMattically_YourOwnMainMenu_BarBG.pngThis is the second background for the navigation bar on the right.Size: 480px x 1200px
Prepare your own images based on these templates. Do not change the size of the images.
Tips: If you're using a more complex background, such as a screenshot from your game, I recommend blurring the Bar_BG with a Gaussian Blur (~60px). Additionally, I suggest adding a white overlay with ~50% opacity and a 5-pixel wide white bar on the left edge with ~10% opacity. This helps improve the readability of the navigation bar buttons and adds an extra layer of detail to your menu design.

The repository also contains the optional file "SimMattically_RefreshedMainMenu_ScenarioButton.package" from my other mod, which replaces the Scenario button icon with a semi-transparent white version. It's up to you whether you want to use it.
_________
Step 3: Import the images to the .GFX file
Firstly, open JPEXS Free Flash Decompiler and then open my SimMattically_YourOwnMainMenu_Template.gfx with it.


Select "No to all" when prompted.

On the left, choose "images" and scroll to the bottom where you will see the images you just edited in their original form. Right-click on each and select "Replace." Select the custom images you prepared in step 2.


Save the file.
_________
Step 4: Import the .GFX file into the .package file.
Open Sims 4 Studio, then click on "My Projects" and open SimMattically_YourOwnMainMenu.package. Select "Scale Form GFX" (the one with the "gameentrylauncher" description) and click on "Import." Select the modified .GFX file and import it. On Windows OS, you need to switch from .binary to all file types to see the file.


Save the .package file via File -> Save As... Give it a custom name and place it in The Sims 4/Mods folder.
That's it! Enjoy!
_________
IMPORTANT INFORMATION/TERMS OF USE:
Main menu overrides can become outdated with some game updates, causing them to break the game. You will have to remake your custom main menu with a new, updated template in this case. Always make sure you are using the latest available template and that it's not outdated.
Since these mods can break the game, I do not advise sharing your custom main menus with other players. You are free to do so, but be aware that since you're relying on this repository to create your own version, you most likely won't be able to update the mod and resolve issues for other players on your own, so you take responsibility for breaking their game.
If you decide to share your version with other players, please credit my repository and link to my Patreon post.
Do not put your custom main menu based on this repository behind any paywall or early access. I made this repository and tutorial free for everyone, so keep it fair.
I do not take responsibility for people misusing this repository or breaking your game with incorrectly modified files. I do not provide support for custom main menu overrides created by other creators using this repository.
_________
#sims#thesims#thesims4#sims4#sims 4 mods#sims 4 custom content#simblr#s4cc#ts4#main menu override#sims tutorial
314 notes
·
View notes
Text
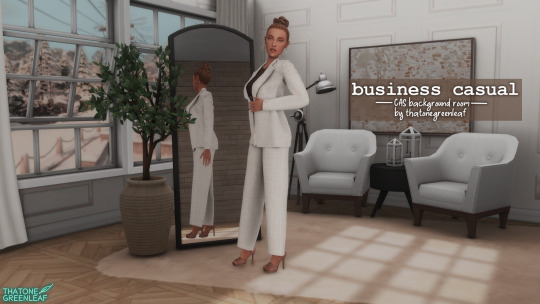
~business casual CAS background room~ (with mirror!) + tutorial!

-
A bunch of you have asked, so here it is! You can watch my tutorial on how to make your very own CAS background room with a mirror right here!
(and you can also download the room I made while filming this tutorial below!)
♥ Download the package file and put it right in your Mods folder! (up to 5 folders deep)
♥ You can only have one CAS background/room in your game at once, remove any other before putting this one in!
♥ Reflections need to be set to low, medium, or high but not OFF in your game's graphics settings for the mirror to be functional.
♥ Base Game Compatible!
♥ DX11 and DX9 compatible!
-
Follow me on twitch!
Support me on patreon!
DOWNLOAD "BUSINESS CASUAL" CAS BACKROUND ROOM ON SIM FILE SHARE!
WATCH THE TUTORIAL ON HOW TO MAKE YOUR OWN HERE!
-
TOU: do not redistribute, reupload, or claim my cc/CAS rooms/presets as your own! recolour/convert/otherwise alter for personal use OR upload with credit. (no paywalls)
♥ built using littledica's original CAS room files ♥
stuff I'm using here: reshade | cas lighting | (send an wcif if you want anything on the sim!)
#sims 4#ts4#sims4#thesims4#maxis match#maxis mix#s4cc#sims 4 cc#sims 4 custom content#cas background#sims 4 cas#cas room#ts4 cas background#sims 4 cc tutorial#cas background tutorial#cas background with mirror
373 notes
·
View notes
Text

CAS UNDERWEAR OVERRIDE TUTORIAL!

faq/before you begin: This is a tutorial for personal use ONLY. If you use this tutorial DO NOT reupload your overrides unless it the original creator gives you permission to do so. reuploading a creator's custom content IS theft. I do not condone stealing cc from hard working creators, so please only use this as a tutorial for yourself! to get started, you will need: ꣑ৎ sims 4 studio ꣑ৎ the underwear you want to make your default ꣑ৎ and patience ( ,,◕ ̫ ◕,, ) this tutorial is aimed towards people who have never used ts4 studio before! so if it seems too hand holdy im sorry, i just want to make sure everyone can understand! If you don't understand something, please don't feel shy about reaching out! either through a dm or an ask! i'll be happy to help!
start by downloading TS4 studio. The process is fairly simple, but if you get stuck here's a great tutorial you can follow!
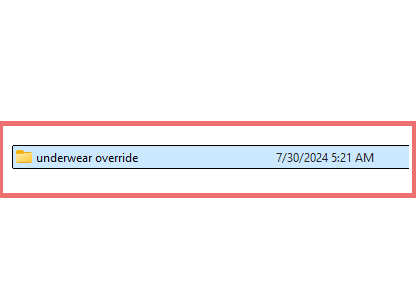
once you have it all installed, you'll want to make a folder on your desktop. This is just for organization purposes, to make digging for the files easier later on:
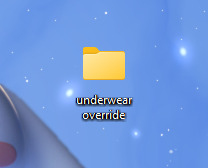
here's an example of what i named my folder! for simplicity's sake though, i'll be referring to the desktop folder as the "underwear override" folder, but you can name yours whatever you want! Just make sure its on your desktop~ ( ˶ˆᗜˆ˵ )
────୨ৎ────────୨ৎ────────୨ৎ────────୨ৎ────
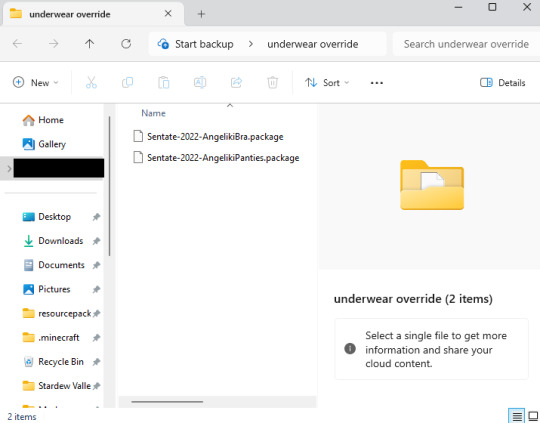
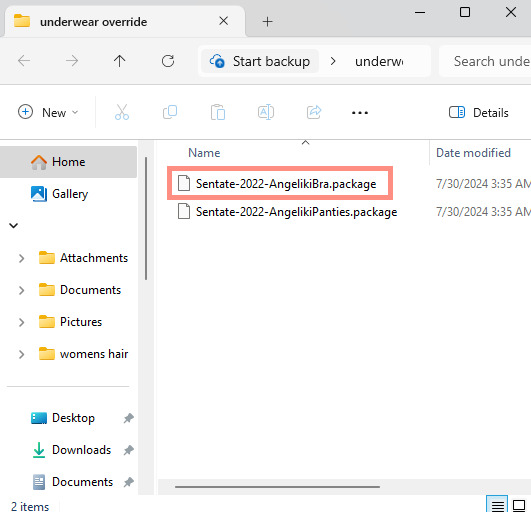
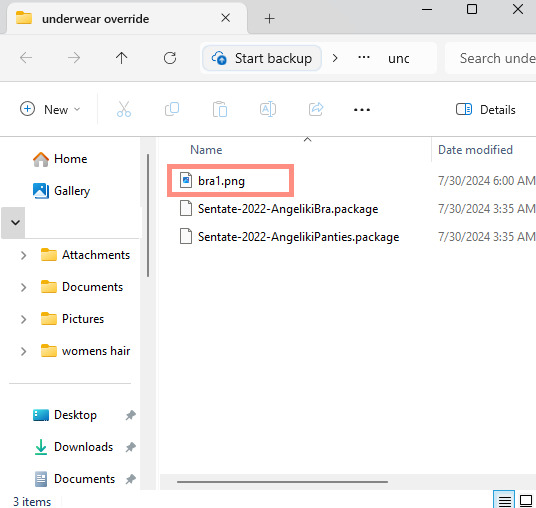
next you'll want to find the underwear you'd like to make a default replacement. I'm using the Sentate's Angeliki set (bra and panties) from their midnight collection found HERE. (Also a gentle reminder, this is for PERSONAL USE only. Sorry i keep repeating this, i'd just hate for people to use this tutorial for bad 。°(°.◜ᯅ◝°)°。 )
any underwear SHOULD work, unless the underwear you pick has 3D pieces. I wish i could explain why, but i honestly have no clue. Im a noob at this haha. Just make sure your mesh isn't 3D!
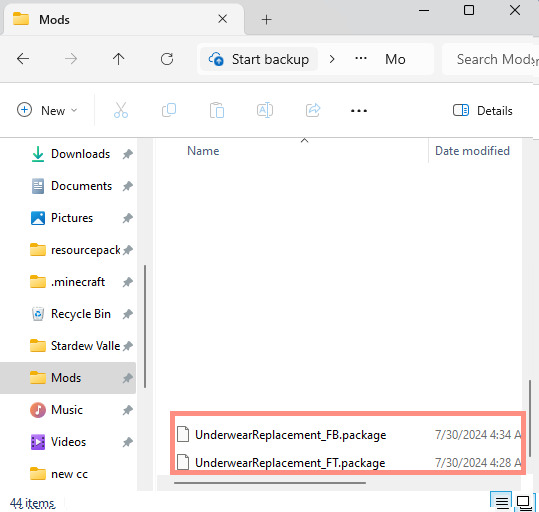
once you have the undies of your choice secured, go ahead and place both into the "underwear override" folder on your desktop! (photo below)
────୨ৎ────────୨ৎ────────୨ৎ────────୨ৎ────
now it's time for the fun part! You'll go ahead and open sims 4 studio, once in there, you'll want to click where it says "my projects" (photo below)
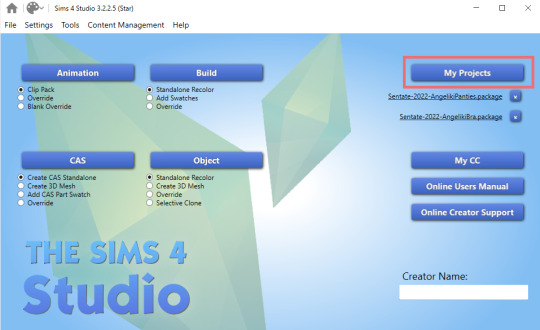
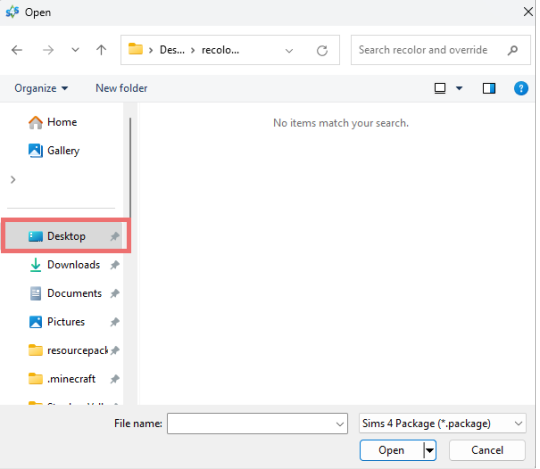
Once you do that, your files should all pop up. It doesn't matter where it takes you, you'll just want to find the "desktop" section of your file menu! Then, you'll find the "underwear override" folder and open that~ Now you'll just go ahead and open the package that you want. I'm going to start with the bra, but the process for the underwear is exactly the same! so it doesn't matter which one you choose to do first ദ്ദി ˉ͈̀꒳ˉ͈́ )✧ (photo below)
────୨ৎ────────୨ৎ────────୨ৎ────────୨ৎ────
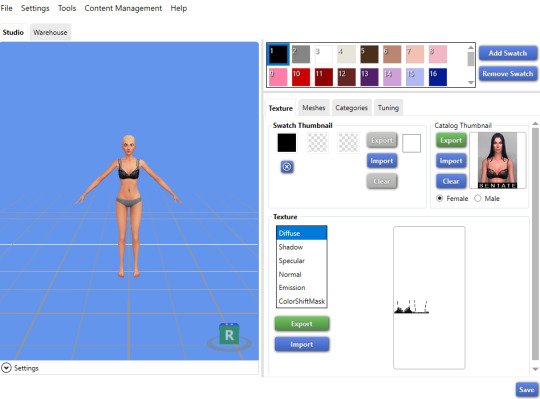
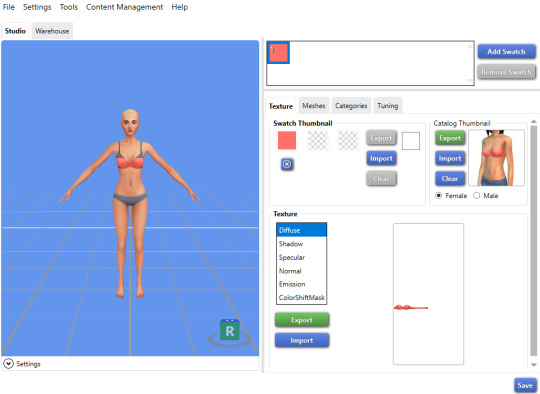
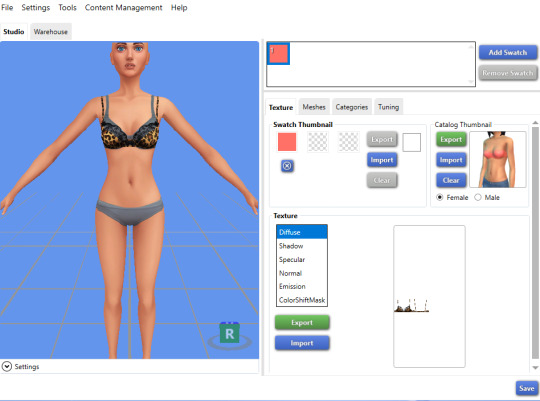
if you did it right, your screen should look similar to mine! ¡¡¡( •̀ ᴗ •́ )و!!! (photo below)
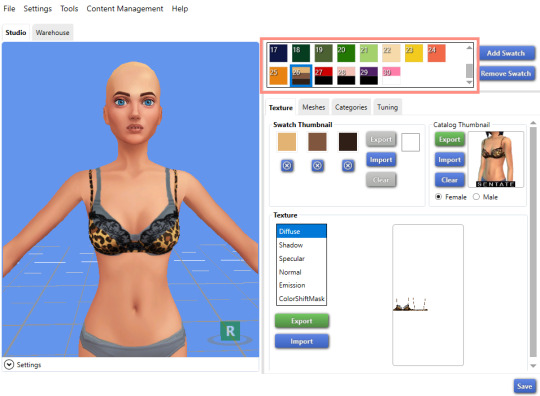
now, you'll just want to select the swatch you'd like at the top! (if you've never used the sims 4 studio before, you can use your mouse wheel and the right mouse button to control the camera in the blue area with the weird bald sim lol- that way you can see the swatch you're picking a bit better! (photo below)
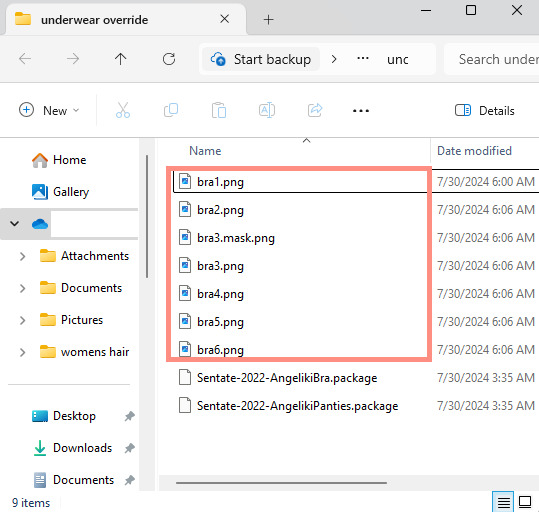
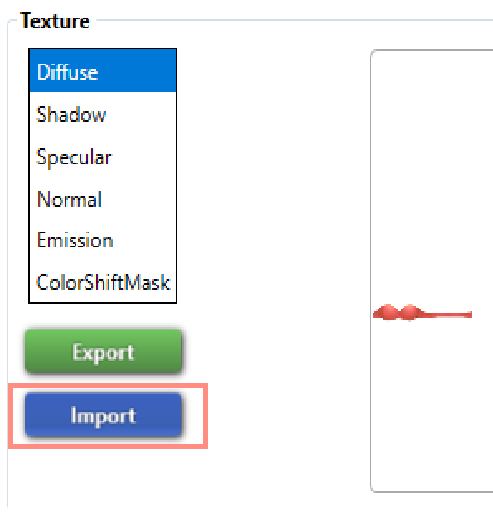
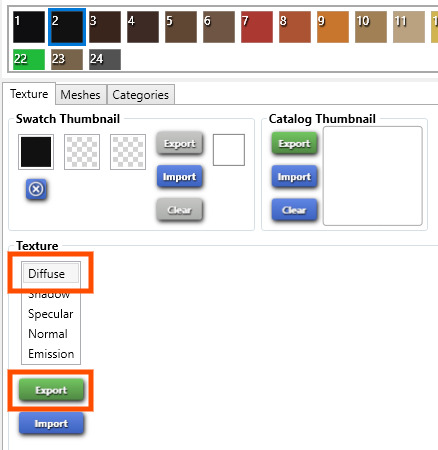
now that you have the swatch you like, in the texture setting, diffuse should already be selected. You'll want to go ahead and click "Export", then name the file "bra1". If you did it correctly, it should save as a PNG! (photo below)

then, you'll want to go down the line of textures (shadow, specural, normal, emission, colorshiftmask) and continue to number them (EX: shadow is bra2, specural is bra3, ect ect) til your folder is full with each texture! It should look like this if you've done it right! (photo below)
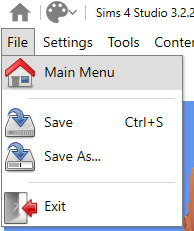
after you're done with that. You'll go ahead and click "File" and "main menu" in your sims 4 studio! (no need to save!) from here, you'll go ahead and select "Override" under the CAS section on the main menu then click the CAS button at the very top. (photo below)

the menu here might look confusing if you've never used sims 4 studio before, but just copy the way mine looks to make the process a bit easier! At the top drop down menus, you'll want to select "Gender: female, Age: Adult, Part Type: Clothing Top, Game Pack: base game" This should narrow down the menu a bit! (photo below)

then, you'll scroll til you find THIS exact bra. This is the bra the sims 4 uses as their default, and we're overriding this, so please be sure to select the exact one! (photo below)

once you select it, click "next", and it should take you to your files once more. You'll want to name THIS file something unique, that way there's no conflicts! I suggest something like: "Underwear_Override_Bra" just so you know which one you're working on, and you also know that this is an override (๑˃́ꇴ˂̀๑)
once you've named your package at the bottom, go ahead and click enter, and the studio should open back up~ (photo below)

now, you'll want to repeat the same export process from before, but use import instead! Then, you'll import the pngs the same way you saved them. (EX: diffuse is bra1, shadow is bra2, ect). Once you've done that, you should immediately see the textures change (photo below)
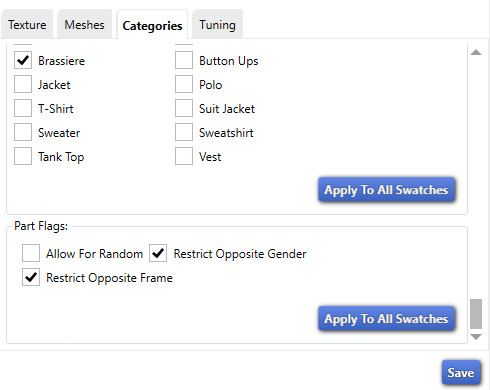
now that your textures are changed, you'll want to make sure to catagorize it properly, just to prevent your male sims from getting a bra when you take their shirt off as well. If you for some reason want your male sims to have an unremoveable bra, feel free to skip this step! if not, then you'll want to click the "catagories" tab right beside "meshes"
once there, you'll scroll all the way to the bottom til you hit "Part Flags", then you'll check "restrict opposite gender" and "restrict opposite frame" (i'm not sure if these mean the same thing, but i just checked both to be extra sure!) (photo below)

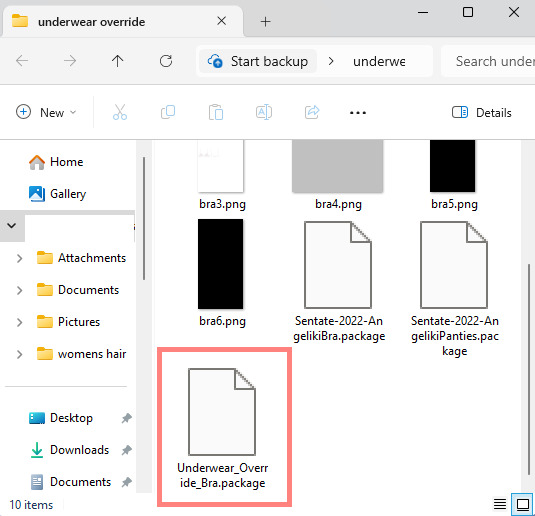
once you've finished replacing all the textures and catagorizing the override, you'll go ahead and click the save button at the bottom right hand corner, then open your "Underwear Override" folder. You should have your "Underwear_Override_bra" package now saved! yay! All that's left to do is repeat these steps with the panties of your choice, then drag both package files into your mods folder just like you would any other cc! (photo below)
(mine are named differently because i already made my own recolors + default replacements ( 〃..).. i'll try and upload a recolor tutorial later today for anyone curious!)
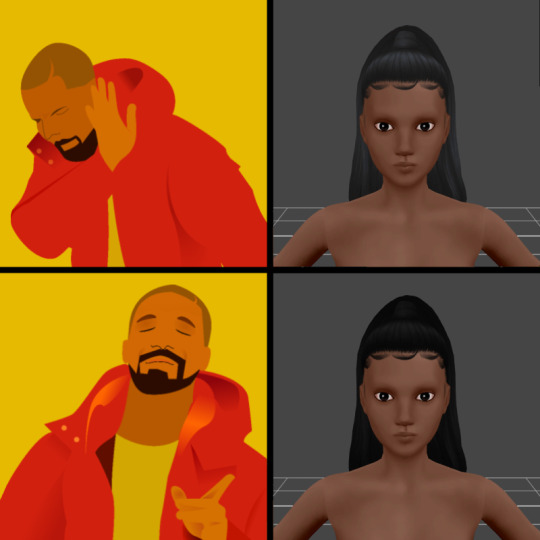
but now, you're done! all that's left to do is open your game and see your overrides in cas! If you did everything correctly, the undies should just appear when you take your sim's clothes off (⁄ ⁄•⁄-⁄•⁄ ⁄)
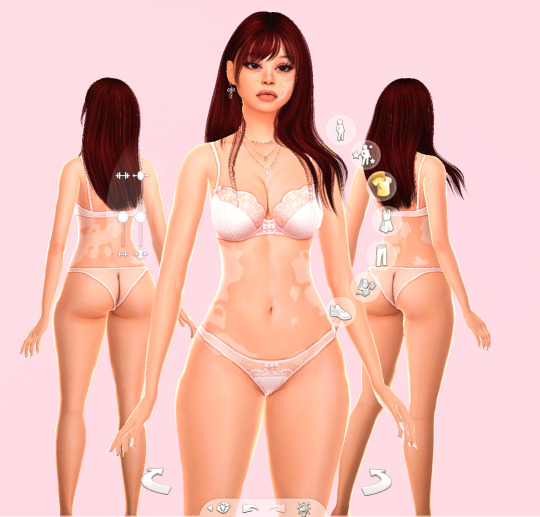
heres how mine turned out! (˵ •̀ ᴗ •́ ˵ ) ✧ im super proud of them!
it took me a few hours to get this tutorial together, so im a bit loopy signing off. If this is completely incomprehensible and confusing im so sorry, again if anyone has questions please do send an ask or message me! i'll do my best to answer any questions :) and also please remember; DO NOT REUPLOAD ANYONE ELSES CUSTOM CONTENT! this is for PERSONAL USE!
thank you for reading! (。•̀ᴗ-)✧
#the sims 4#ts4#sims4#maxis match#maxis mix#s4cc#sims 4 cc#ts4 cc#sims 4 custom content#cc tutorial#cc rec#cc cas#sims 4 cas#sims tutorial
91 notes
·
View notes
Text

Straightening Labels for Recolors: A Tutorial
I made a tutorial with plenty of pictures to show how I get perfectly straight labels to apply to my retextures. PDF file; French version coming soon! Link under the cut.
Here!
#sims 4 custom content#sims 4 cc#ts4 cc#s4cc#ts4cc#sims custom content#custom content#sims 4 horses#mycc#ts4 horses#sims 4 resources#ts4 resources#sims 4 tutorial#ts4 tutorial#sims 4 tutorials
21 notes
·
View notes
Text
does anyone have/know of a good tutorial for making cc clothes?? there’s so many pieces that’s i’ve seen on pinterest and from my personal style that i’d love to see as cc but i have no idea how to make it happen
#sims4#sims 4#ts4#the sims 4#maxis match#sims4cc#ts4cc#ccfinds#simblr#ts4 cc#sims 4 cc#sims 4 mm cc#the sims 4 cc#cc help#tutorial#s4cc#sims 4 clothes
21 notes
·
View notes
Text
youtube
Speed Mesh #10 - Mya Hair:
Haven't uploaded a speed mesh in years, but when I saw a lot of interest in them I decided to give it another go! This hair is not currently available for download, it's part of a collection coming in September. Hope you find the speed mesh helpful - I included timestamps in the description so you can see what I'm doing in each part!
#r#youtube#ts4#s4#ts4cc#ts4mm#s4cc#s4mm#ts4 youtube#s4 youtube#ts4 speedmesh#ts4 mesh#ts4 tutorial#sims tutorial#maxismatch#sims4#thesims#Youtube
106 notes
·
View notes
Text
#sims#sims awesomeness#the sims#sims 4#sims 4 cc#sims cc#the sims 4#ts4 cc#the sims 4 cc#s4cc#ts4 tutorial
8 notes
·
View notes
Text
The sims 4 custom content and mods install tutorial
I made this tutorial 5 years ago, but I thought it could still help you all now! I will make a new one soon! also ignore my yucky voice XD
youtube
2 notes
·
View notes
Text
Have you ever thought that the black hair colour just wasn't black enough?
If so, I've got an easy solution for you!
DISCLAIMER! I don't mean to be hateful or rude towards anyone. Everyone is free to do as they please with their own content (as long as it complies with EA:s TOS). The original black colour just doesn't fit my taste, that's all. I made this tutorial because I thought that there might be others who share my opinion but who might not know how to change the colour. With that said, I'd like to apologise in advance if this hurts or offends anyone.
Art by Alex Espino.
The hair shown above was made by Kiara Zurk.

Let's begin!
You'll need:
- Sims 4 Studio
- A photo editing program (e.g. Photoshop, Photopea, Gimp)
1) Open the hair you want to edit in Sims 4 Studio (double click on the package file).
2) Export the blue-black texture as a PNG and save it somewhere that's easy to access.
3) Open the PNG you just saved in your editing program of choice. I'll be using Photopea for this tutorial.
4) Add a 'Black & White' adjustment layer.
5) Add a 'Brightness/Contrast' adjustment layer and bring it all the way down to -150 or whatever you prefer.

6) Optional! You can flatten the image into one layer by right-clicking on any of the layers and then click on 'Flatten Image'. I personally don't bother though.
7) Save as a PNG and import it back into Sims 4 Studio. Save the package file.
That's it! Now you've got yourself a true black hair colour.
Important! If you use a Reshade preset, you need to take into account the way that preset changes colours, lighting etc. in the game. If you use a preset that darkens the colours, the hair colour might look odd if you adjusted the brightness exactly the way I did in this tutorial.
Now I'll leave you to it. Happy Simming!
#s4 cc tutorial#s4 tutorial#ts4 cc tutorial#ts4 tutorial#sims 4 tutorial#sims 4 cc tutorial#the sims 4 cc tutorial#the sims 4 tutorial#s4cc tutorial#ts4cc tutorial
24 notes
·
View notes
Text
~business casual CAS background room~ (with mirror!) + tutorial!
-
A bunch of you have asked, so here it is! You can watch my tutorial on how to make your very own CAS background room with a mirror right here!
(and you can also download the room I made while filming this tutorial below!)
♥ Download the package file and put it right in your Mods folder! (up to 5 folders deep)
♥ You can only have one CAS background/room in your game at once, remove any other before putting this one in!
♥ Reflections need to be set to low, medium, or high but not OFF in your game's graphics settings for the mirror to be functional.
♥ Base Game Compatible!
♥ DX11 and DX9 compatible!
-
Follow me on twitch!
Support me on patreon!
DOWNLOAD "BUSINESS CASUAL" CAS BACKROUND ROOM ON SIM FILE SHARE!
WATCH THE TUTORIAL ON HOW TO MAKE YOUR OWN HERE!
-
TOU: do not redistribute, reupload, or claim my cc/CAS rooms/presets as your own! recolour/convert/otherwise alter for personal use OR upload with credit. (no paywalls)
♥ built using littledica's original CAS room files ♥
stuff I'm using here: reshade | cas lighting | (send an wcif if you want anything on the sim!)
#sims 4#ts4#sims4#thesims4#maxis match#maxis mix#s4cc#sims 4 cc#sims 4 custom content#my cc#cas background#sims 4 cas#cas room#ts4 cas background#sims 4 cc tutorial#cas background tutorial#cas background with mirror
243 notes
·
View notes
Text
Tutorial Video of STP Deluxe uploaded.

Hope it bring some help ^ ^
STP Deluxe Lighting Tool Arrives ^ ^


Get STP Deluxe here (click the attachment at the end of that post)
STP is a set of lighting tools that bring various light and shadow effect ingame, mainly used for indoor photography. Posters and GIFs above show the ingame effect of STP.
For STP beginners, it may take time to get used to STP. I highly recommend to read the introduction in the file folder. Welcome to view the 'STP Tutorial' collection or search the 'tutorial' tag on Patreon.
I don't think Deluxe brings huge improvement compared to Standard, but there are some differences. For STP users (get used to STP Standard already), please pay attention:
1. There are White version and Cyan version files, which cannot be placed in mod folder at the same time. The only difference is that the default white light is replaced by cyan light in Cyan version files. Please choose only one version to use.
2. There are XS1 and XS2 lighting tool. 'XS' refers to its size (smaller than S size). '1' and '2' refer to the height (position) of light source. '2' is half unit higher than '1'. Now you can arrange the lighting tool more flexibly.
And so sorry that there are some errors of LMC in the latest version of game. I'm afraid it won't arrive this week. I'll try to squeeze some time to fix it next month. But if I don't have time. maybe I'll just share this unsatisfying version of LMC...
Anyway, welcome to share your experience of using STP ^ ^
#sims4 cc#ts4 cc#ts4 lighting#sims 4 cc#the sims 4#sims 4 furniture#ts4 furniture#sims 4 lighting#s4cc#stp#achino#tutorial#ts4cc
333 notes
·
View notes
Photo
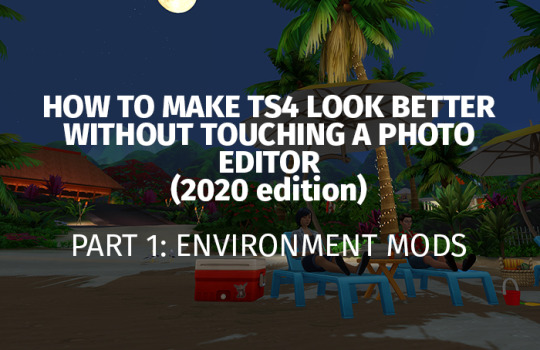
I saw this old tutorial of mine making the rounds on the Simblrs(tm) and thought this is the perfect time to update that tutorial to make sense for 2020 as some of the items I used in that tutorial broke during patches.
This series will be divided into three parts:
Part 1: Environment Mods (this one!)
Part 2: ReShade Installation
Part 3: Making your first gameplay ReShade preset
Click “Keep Reading” to get started.
Part 1: Environment Mods
World Lighting Mods: These are mods that edit each TS4 world’s outdoor lighting.
Note that these replace all the .world files in your game installation and will thus require to be re-installed after every patch install.
As of march 9, 2020, @softerhaze has been updating the following lighting mods for every patch update:
their very own twinkle toes lighting mod (which is what I personally use since the lighting for each world is unique unlike the three other mods)
astral lights by @brntwaffles
no blu by @brntwaffles
no blu (that’s not orange) by me
Previews and instructions to install one of these mods can be found through nova’s Github page here.
Indoor Lighting Mods: These are lighting mods that modify TS4′s indoor lighting.
The first type of indoor lighting mod in existence are those that edit out the ugly blue lighting you get indoors. For this kind of lighting mod, you have a couple of choices:
@luumia‘s NoBlu: This is for those who prefer a more realistic lighting setup. If you played TS2, this would be similar to the Radiance Lighting Mod.
@lotharihoe‘s Out of the Dark: If you prefer brighter indoor lighting, this is for you. For players who come from TS2, I would say this is similar to the vanilla TS2 lighting or maxis-adjacent mods like my Maxis Match Lighting Mod
The second type of mod are those that fix the blue “overexposed” effect on Sims. The same two creators have their companion mods for the ones given above
@luumia‘s NoGlo
@lotharihoe‘s Into the Light
CAS Lighting Mods: These mods modify the lighting setup when you go into CAS.
There’s only one mod that deals with CAS lighting and that’s by Luumia. Make sure to pick one package for both Create-a-Sim and Create-a-Pet.
World Terrain Mods: These are mods that replace everything you see in TS4 worlds like grass, rocks, roads, etc.
There is one mod by @k-hippie that does just that, but it may be a little bit on the alpha side for those who are maxis-match at heart.
All these mods shouldn’t have too much an effect on your game’s performance since all they do is replace game resources, and in the case of the terrain mod, retain the same size as vanilla.
Next up, we’ll tackle ReShade installation 101 and do some prep work needed to create your first gameplay-oriented preset.
820 notes
·
View notes
Photo


cute cas animations!
when i make tiktoks i prefer animation to poses but i get tired of reusing the EA trait animations, so i made some of my own! (if you want it to be a different trait, follow this tutorial but skip the blender parts - instead export my animation and import it onto another trait)
replaces the active trait
4 animations total, all in one
download: simfileshare
in-game version (download + preview)
@ts4-poses
#cas pose#cas animation#create a sim#ts4#s4cc#ts4cc#animation#pose#sims 4#boyfrogsims#my cc#added the tutorial bc i think active pretty commonly has cas poses on it? but i dont have any so this works for me lol#my cas animations#my animation
574 notes
·
View notes
Text
This is incredibly out of date and no longer functional
Does anyone know how to adjust comfort and tune scores on objects?
New Tutorial: Change an Object's Attributes and Catalog Entry
The team has posted a new tutorial that shows how to alter an object’s attributes and change the catalog entry to match. This will allow you to do things like make a recolored bed have the attributes of a different one. The example item increases the comfort, energy, and stress scores of a bed that has mediocre ones.
Currently, this requires the use of the Warehouse tab where nothing is automated so it’s a bit of a PIA. Eventually that will change of course ;)
The tutorial is here: Change Comfort & Other Scores of a Bed - Tuning & Catalog
20 notes
·
View notes
Text
youtube
[Outdated video]
Sims 4 Studio Tutorial: How to Mod the Phone Icons + Wallpapers
This tutorial for the Sims 4 Studio will teach you how to mod the Social Bunny Phone Wallpapers in The Sims 4!
-------
[Resources:]
1) Sims 4 Studio: https://sims4studio.com/thread/29786/sims-studio-windows-star-open
2) GIMP Image Software: https://www.gimp.org/downloads/
3) Serra's Icons Mod/Resource: https://www.patreon.com/posts/phone-ui-77783967?
4) Channel4Sims-cc BTS Wallpapers Mod (used as reference): https://channel4sims-cc.tumblr.com/post/702990640005496832/ts4-bts-phone-wallpapers-override-sul-sul-its
5) Wallpapers Template: https://www.patreon.com/posts/sims-4-studio-82276712
-------
Want the finalized cc made in this video? It's available on CurseForge! https://legacy.curseforge.com/sims4/mods/grid-phone-wallpaper
-------
Special thanks to these two wonderful creators for sharing their resources! @channel4sims-cc @xosdr
60 notes
·
View notes