#and devoured
Explore tagged Tumblr posts
Visit Tumblr Blog
Explore Tumblr blogs with no restrictions, modern design and the best experience.
Last Seen Tumblr Blogs


Fun Fact
Tumblr was named as a finalist in Lead411’s New York City Hot 125 in Aug 2010.
Text

this is what I come home to

13 notes
·
View notes
Text
god now i’m horny and whiny and have no one to help me take care of it
2 notes
·
View notes
Text
hey... don't cry.... tesla recall for most cybertrucks, okay? >46,000 vehicles affected <3
#i watch the stock price like a dog watching a squirrel#my jaws ache with the sheer and unholy desire to devour#<3 it's sitting around 235 last i checked <3 it was over 400 in december#<3 peace and love on planet earth#we should really all start a community bet on when we can get that number <140.#i think april 23.#<3 with ur help all things are possible :)
68K notes
·
View notes
Text

No mangoes left behind
#tim drake#cassandra cain#damian wayne#batman#dc comics#dc fanart#my art#batfamily#I drew this after devouring a mango
14K notes
·
View notes
Text


TRAMELL TILLMAN Interview Magazine (2025)
#tramell tillman#severance#lgbt#gay#lgbtq#severance cast#severanceedit#severancecastedit#tramelltillmanedit#ttillmanedit#gayedit#flawlessgentlemen#dailymenedit#appletvdaily#usermichi#*#edit#constance#DEVOURED AND LEFT NO CRUMBS
6K notes
·
View notes
Text


vampire au caitvi bcs it's my birthday (yay) and i love them
#look at Vi bro she's about to be absolutely devoured by a vampire but she's so in awe#do NOT try to save her she's exactly where she wants to be#also peep the nails hehe#vampire au#vampire caitlyn#vamp!cait#vampire cait#caitvi#violyn#piltover's finest#caitlyn x vi#vi x caitlyn#caitvi fanart#violyn fanart#caitlyn kiramman#caitlyn kiramman fanart#caitlyn arcane#caitlyn arcane fanart#vi arcane#vi arcane fanart#vi league of legends#caitlyn league of legends#arcane fanart#arcane#arcane series#pluto☆art gallery
4K notes
·
View notes
Text


Maid dress Poseidon (using @neal-illustrator ‘s design bc why not) 🌱
#epic the maid dress saga#epic poseidon#epic the musical fanart#epic the musical#epic: the musical#neal illustrator#Athena stays being a hater#Hermes is just happy to be here#he loves the chaos#yes he’s holding a tray of me I’m the snack that wishes to be devoured#no you didn’t read that correctly
7K notes
·
View notes
Text


Snake snacks for lunar new year.
5K notes
·
View notes
Text
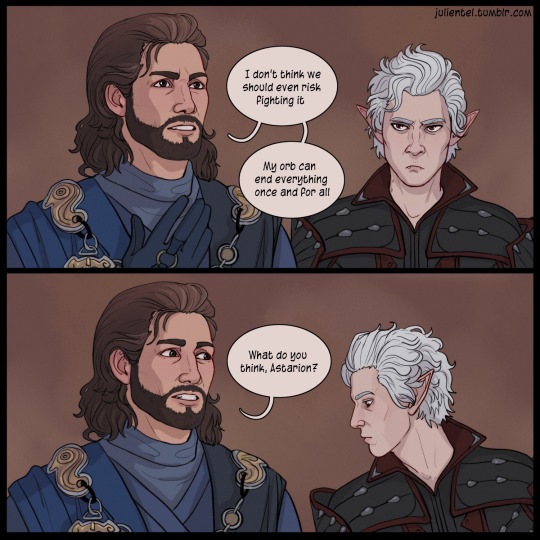
use your brain, Gale 🧠
(not a ship)
11K notes
·
View notes
Text
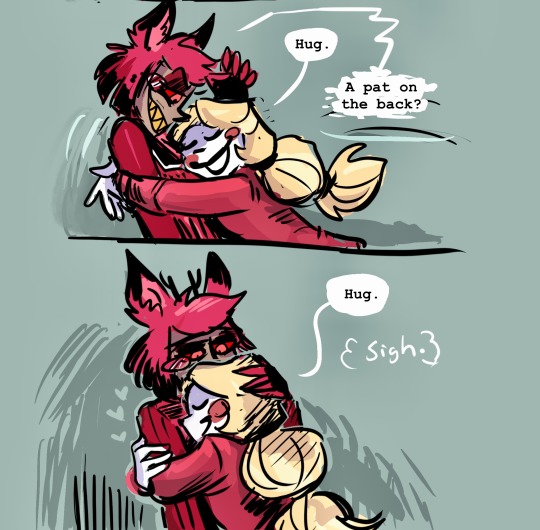
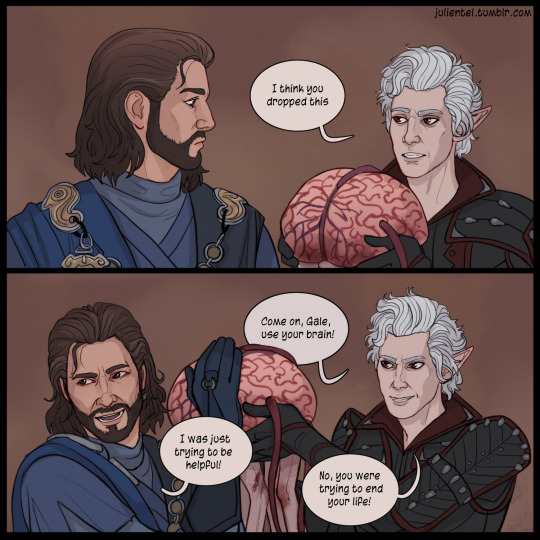
I was rereading Skulduggery Pleasant and realised it was a goldmine for cute Alastor & Charlie moments.👌
I’m gonna project genuine friendship onto these fuckers and you can’t stop me!
#grey art#hazbin hotel#hazbin hotel comic#charlie morningstar#alastor#skulduggery pleasant#for the dialog#guys go read those books they are like half my personality#even though Ive not been keeping up since Bedlam 😅#DEREK KEEPS WRITING THEM I DONT KNOW WHATS HAPPENING#anywho….#Charlie and alastor being friends or something is something I’ll always devour
9K notes
·
View notes
Text
Have we considered what it means that Laois is so good at killing monsters, the one thing he loves, and so bad at fighting humans, the thing he feels most distance from. And inverse Kabru is terrible at killing monsters, the one thing he wants to destroy, but so good at killing humans he would have killed Falin 6 different times when he tried to kill her if her anatomy had been more human, despite his love for and drive to protect humanity? Have we considered what it means to be able to kill that which you love but not that you hate? Has anyone fucking considered the imposter syndrome that has to come from only being good at killing that which you love most??? The fear of not being able to protect yourself from the thing you most think is a threat simply because you cannot find a way to understand it enough to take it's life?
11K notes
·
View notes
Text


They could've won if they used a sebek scream avalanche to cross the ravine and get the tiny guys stuck in the snow on their way....
(I kinda expected this to happen tbh, sadly it didn't)
#Twisted wonderland#twst harveston#twst shitpost#jade leech#idia shroud#sebek zigvolt#epel felmier#twst grim#and another surprise guest :)#Grim devourer of worlds just having a light snack#zhej finally home w/ mu usual setting I will finally be able to draw more eeeeee
3K notes
·
View notes
Text

Caramel Cheesecake 🍰
#caramel#cheesecake#sweets#sweet treats#sweet tooth#snacks#dessert#baking#cooking#eating good#toya's tales#style#toyastales#toyas tales#summer#september#munchies#snacktime#devour#foodporn#foodpics#food photography#foodie#food#food cravings#food culture#food pics#food porn#food glorious food#kitchen
4K notes
·
View notes
Text


Bonus:

Because when these freaks are gentle their emotional floodgates open
#these two want to eat each other up#nothing short of devouring each other satiates them#but they do know how to be gentle from time to time#deadpool and wolverine#deadpool 3#wade wilson#james logan howlett#poolverine#deadclaws#peanutbub#old man yaoi#imagine your otp#otp prompts#writing promt#marvel memes#mcu avengers edits#ryan reynolds#hugh jackman#deadpool x wolverine#mischievous thunder
3K notes
·
View notes
Text
Needle Felt Siffrin Build Log: (oct 6 - nov 20, 2024)


Credits goes wholely to @insertdisc5 for creating ISAT and siffrin's design! I am just here to attempt to make cool fanart (and get more people to play isat.. my devious plans are going great so far :3) As always, this isn't a tutorial- it is just a log about how i go about approaching a sculpture and I hope this collection of resources can help others make their own sifs!!
PSA: this has some spoilers for endgame CGs/sprites on my references image board ( also might see it in the backgrounds of my process pics). And bc this is needle felting, you will see some sharp needles! beware!
my inspiration was the intro cutscene where Sif eats the star, so my main goal was to adhere to the style of ISAT as closely as possible while transfering it to 3D space. And I knew i also wanted to try making the cloak for stopmotion purposes, so my process was tailored towards having control over the fabric with wire inlaid within the cloak (more on that later).
I ended up not sticking eyebrows on top of siffrin's bangs lol but anyways, first order of business is Gather Reference! v important. pureref is free and an awesome program. I also do some sketches to visualize the pose and important details i wanted to include in the sculpt.
behold the isat wiki gallery page! tawnysoup wrote an awesome ISAT style guide that absolutely rings true in 3d space too!! adrienne made a sif hair guide here!! (sorry i couldnt find the original link, but it's on the wiki). It says ref komaeda hair so that's what i looked at, along with other adjacent hairstyles! I also like doing drawovers on in progress photos to previs shapes n stuff to get a better idea of the end result.
Also if you're like me and struggle with translating stuff into 3D space, take a look at how people make 3d models and figurines! sketchfab is also a great resource! I looked at the link botw model by Christoph Schoch here for hair ref. (I used Maya, but there's a blender version too ! you can pose characters too if your model has been rigged!)


Face:
Started off blocking out the main shapes of eyelids and iris, and then filling in the colour details in the iris and the star highlights before moving onto adding thin black outlines and eyelashes. I didn't take many in-progress photos cause i kept ripping stuff out to redo them many many times, sorry!! This eye took about 3 hrs bc i just wasn't happy with it!! Sometimes it do be the vibe to give up, go to bed and see how it looks in the morning (more often than naught, it looks fine and it was the "dont trust yourself after 9pm" speaking)

The Mouth:
Couldn't decide if i even wanted to add a mouth as per usual with all my humanoid sculptures.. but i did some drawover tests first to see what expression i liked and to try to visualize it from multiple angles. (I was also testing the placement of stars on the hat brim here)

And then I redid the mouth like 3 times cause the angle just wasn't right (this went on for about the course of a week yay!)
Hair: woe baldfrin be upon ye


I made the hair strands individually first, and then since Sif has some of the hair at the back dyed black, i covered some of the tips with black wool (manually) (I think it would go much faster if i just took a marker to it, but hahaha i love pain and detailing!! )
And then the rest of it was positioning strands with sewing pins layer by layer, always looking at it from different multiple angles- sometimes tailoring the angle or swoop of individual hair flippies. At one point I thought the back looked too cluttered, but the hat covers a lot of it anyways!! yay for hiding mistakes! (imo this is a similar process to how cosplayers style wigs, but on a smaller scale and the same level of time consuming)
As always, look to your reference for guides, and I always do a whole bunch of drawovers over in progress photos to ascertain what was working and what wasn't.
Hat:
A trick to get a super pointy tip, make another tip seperately while keeping the connection point unfelted, and then combine the two to make super pointy hat!! (this also helps if you made the hat too short and need it to be taller. ask me how i know)

The embroidery on the hat brim was done in a hoop and then invisible stitched to the felted top portion. Technically you don't need a hoop but it helps keep the fabric tension, so you avoid puckers in your embroidery. You can also use iron-on stabilizer if your fabric is loose weave or particularly thin. this is the tutorial i used for the stars embroidery! particularly the fly stitch one, french knots, and the criss-cross stitches. highly recommend needlenthread for embroidery stitches and techniques! i learned all my embroidery from this single site alone.

For fabric, I think I used a polycotton i had in my stash,, unsure of the actual fiber content bc i bought it a long time ago. I used DMC Satin floss which was nice and subtle shiny but frayed a lot so it was kind of a pain to stitch with... but keep a short thread length and perservere through it!! After the embroidery was done, I folded up the raw edges and invisible sewed it to the top portion of the hat.
General shape:
Ok general structure of the body is this: wire armature body covered with black wool -> cloak lining & wire cage -> edge of lining is invisibly sewn to the main cloak at the hem -> head

Don't be afraid to mess around with the pattern, it's essentially a pizza with a slice taken out of it to form a steep cone shape!! Use draft paper before cutting into felt to save material! (i think i made like 3 cloaks before i was happy with the shape lol).
You can also hide the seam of the cloak and collars by gently messing up the fibers of the felt with your fingers or a felting needle btw! you can also sandpaper the seams according to Sarah Spaceman in this vid (highly recommend them for their in depth cosplay/crafting builds holy smokes), though since sif cloak is at such a smol scale, I just blended the seam with my felting needle.
For the lining wire cage section, I sewed in wire around the cloak, so the main rotation point is at the top neck area under the collar. These paddles are used to keep whatever pose I need the cloak to be in for stopmotion purposes. Then after the wire is done, I invisibly sewed the lining to the cloak at the hem (same technique as the hat brim to the lining there).
In hindsight, I should've used a thinner fabric for the lining, but i only had sheer white in my stash so had to go with double felt, thus resulting in a really bulky lining but oh well!

Heels:
started with the general boot shape, then tacking on the diamond shape heel stack and also diamond shape sole bc we're committed to the bit here. I skewer the boot onto the armature which also conveniently hides the connection point into the base to keep the whole thing upright and also I can rotate the boot to tweak the angle if needed.

Pins:
I kinda just trial and error'd jewellery wire with pliers into the pin shapes. They're itty bitty!! had a whole bunch of fails before i got two nice ones. A hot tip is to use needle nose pliers and wrap the wire around the tip to get a smooth circle shape!

Base:
I smoothed out the edge of a circular wood base with a dremel, and then used wood stainer to get the black colour. It ended up kinda looking like I took a sharpie to it, but whatever.... now i have a whole ass can of black wood stainer........ I then made a rough mountain of black wool and stuck the feet armature in. And now he's standing!!

Normally at this point when I'm done felting everything, to get a smooth finish, I'd take a small pair of scissors and carefully snip away any flyaway fibers, but this time, I just left them fluffy cause i think that's what sif would do :3c
Photoshoot:
Normally I do shoots using daylight but it was winter so the sun was nonexistent. So I broke out the home lighting setup aka dollarstore posterboard for a nice smooth background, and then hit it with the overhead Fill, side Fill 2, and Rim light, and use white paper/posterboard for bounce light if one side feels too dark. But if things are overexposed, you can move the light sources away until the harshness dims down. I'm using a Olympus mirrorless camera (handed down to me by my sibling so i dont remember the model exactly), which can connect to my phone as a remote so I can avoid shaking the camera when i take photos. Pretty nifty for stopmotion purposes! (yes my camera stand is a stack of notebooks, a tissuebox and some eva foam under the lens, don't judge me)


Stopmotion animation:
I'm still figuring stopmo out on my part, but my process was straight ahead animation ... move the cloak a cm, take a pic.... move another cm, click.... and repeat until i get a version I was happy with. My ref was the cloak animation from Gris (beautiful game btw). The 2d star animation was also done straight ahead using procreate, exported in png with a transparent background, and finally stitched together with the stopmotion footage in photoshop.

My turnarounds are also stopmotion! also secret hack, the turntable is a fidget spinner sticky tacked to a cake platter.
And i think that's all! i mainly wanted to share how I go about thinking about taking a 2d concept and moving it to 3D. I also didn't go in depth into how to actually do the needle felting bc I don't think I''d be very helpful I'm a very good teacher by telling yall to just keep stabbing until it looks right (i'm self taught for this hobby),,, if anyone wants it though, i can share a bunch of tutorials and other felters' process that helped me learn more needle felting!
Hopefully this was helpful to someone! Feel free to send asks if ya got any questions or if anything needs clarification! Or show me your works! I love seeing other people's crafts :3
here have a cookie for making it this far 🥐
#in stars and time#siffrin#isat#isat siffrin#isat fanart#needle felt#soft sculpture#know that i am devouring all the nice words yall leave in the tags/comments of my posts :holding back tears:#I hesitate to call this a tutorial bc this is just how i fumble my way through crafting anything lmao#the only reason I know how long I worked on a project are timestamps on wip photos and however long the day's video essay or letsplay is#sorry time is immaterial when i get into crafting mode#reason why this log is so late is bc after i finish a project i'm perpetually hit with the ray of 'i dont ever want to look at this again'#hence why photos never get edited#AND THIS POST SAT IN MY DRAFTS FOR 2 MONTHS DUE TO BLOODBORNE BRAINROT SORRY#done is better than perfect!!!#sorry i dont control the braincell#sorry for using a million exclaimation points! i am not good at this.. conveying my anxiety in written form!!! my toxic trait
1K notes
·
View notes