#i essentially had to learn very basic html to make it
Explore tagged Tumblr posts
Visit Tumblr Blog
Explore Tumblr blogs with no restrictions, modern design and the best experience.
Last Seen Tumblr Blogs


Fun Fact
Tumblr posted its first advertisements in May 2012 and subsequently earned $13M in revenue.
Text
I'm doing it, I did it! I officially have a place to never shut the fuck up about fic the way it deserves let's gooooooooooo!!!!!
This blog is under construction!
I am working really hard to bring you all my favorite fics, including plenty that I haven't had the time/space to add onto my previous rec lists over on my personal blog. That being said, I am a bit of a perfectionist, and there's no way to batch move everything, which means the process is a bit tedious.
At the moment, I have ensured that there's a working theme and functional tagging system, although I'm not entirely pleased/finished with the latter. I want to focus on getting more fics up now that there's a structure though, so expect changes to the tagging and navigation system in the next month or so.
While I'm working on posting all the fics I currently have backlogged, my AO3 Bookmark Collection is up to date, and will continue to be the place where I catalogue every fic I plan to share. I always pull from my bookmarks, so everything I post will live there first.
I also have submissions open, so if you have a fic you want to share (whether you have written it, or simply enjoy it as a reader), please feel free to send it in! Asks are open as well, so if you need help finding a specific fic, want to request a general vibe/topic/ect., I'd be more than happy to help! If you submit a fic and I don't post it, it's likely it's already pending in my bookmarks, and I will add it myself soon. I'll always post author submissions though, because I want y'all to be proud of your work!!
Suggestions for how to improve the structure of the blog and tags are also welcome, and you are can message those to me separately.
Lastly, I want this to be a place to celebrate all Trigun fics and authors! That means that, while the fics I read and post have a large lean towards Vashwood (due to the insane brainrot they have over me), that is by no means the only thing allowed. Please don't hesitate to submit or ask for fics with other topics, including ones that don't involve Vash or Wolfwood at all. I just wanted it to be clear that the primary focus would be Vashwood, based on what I read. All I ask is that you include the appropriate cw/tw to your submissions.
#vashwood#trigun#vashwood fic#trigun fic#this is for tea and the people who commented on the one post i made where i mentioned this as a possibility#i spent literally all day setting this up yesterday#like at least 8 hrs probably????#maybe more#i was up very late cause i couldn't find a theme i liked lol#and then making the tag page was a fucking nightmare#do you know tumblr doesn't support javascript on pages you add to your blog????????#like what the fuck WHY#who the hell made that decision i just want to TALK I PROMISE#i can't fucking code but ppl who do code use javascript cause why the hell WOULDN'T YOU#and not being able to use javascript meant i couldn't use like any page themes that other people coded#so that's why the tag page does not look very nice#i essentially had to learn very basic html to make it#anyway this looks infinitely better on desktop than mobile but i'm working on it#the point is it functions and i'm gonna focus on the fic part now#so come send me stuff!!!!!!!!!!!!!
14 notes
·
View notes
Note
I know you mentioned you had web development experience. Do you have any HTML/CSS courses you would recommend or people to follow or YouTube channels or anything? How did you learn it? I work in SEO and would like to get a better grasp on the web and coding side of things. Also good with your job search bestie!
thank you! i was self-taught and think that's the best/easiest way to learn. check out the code of a site you like, try to recreate it/mess with it on your own, make tumblr themes (for css)! i learned the essentials by making my own goofy websites on neocities. but i don't keep up with my education now, i have a good idea of the fundamentals. plus, unless you want to be a front-end developer, it's unlikely you'd need to know anything beyond basic html/css - most organizations probably use a cms like wordpress that allows you to implement templates and update things very easily without touching code. but understanding the basics can be helpful, it's definitely a plus.
but i have heard good things about university of michigan's course: https://online.umich.edu/series/web-design-for-everybody/ i believe it's free on coursera!
9 notes
·
View notes
Text
neocities heracles trials: from a chaotic newbie
okay so i want to actually start posting here and i finally got it through my thick skull that this is LITERALLY A BLOG. i'm supposed to blog. so here's a blog post.
anyways, for context, i've been working on my neocities for a while now, recently started over to make things more original and more me. another thing to note is that i'm using VScode.
the issue here is that i have zero well not exactly zero but i lack any professional/academic background experience with making websites. the html isn't the issue (thankfully) but holy shit dude...css+javascript implementation . basic styling with css is no biggie, right? absolutely, however...may i introduce: smooth transitions + the absolutely tragic fact that the <marquee> tag is deprecated an accessibility issue.
so, my first goal day one was to recreate a marquee animation through css. so i tried to simply implement this incredibly useful bit of code into my site (in which if you're interested i totally think my failure to get it working was user error so please check it out it works great if you're not me) but, lo and behold, despite me getting it to work in my V1 project, i could not, for the life of me, get it to work. so i, not too familiar with css animation and completely lost when it comes to javascript, started grasping at straws. i ended up finding this tutorial and, with some improvisation since the tutorial is for webflow and i'm manually writing everything, managed to make my own css recreation of a marquee effect essentially from scratch, and even learned about the animation-play-state css attribute so i could pause the effect when the marquee is hovered over! victory, basically.

then, i looked around the many cool and absolutely awesome sites on neocities to get inspiration, and then i was like "hey what if i made a custom button background image" and with some trial and error, made myself a pretty decent base (for now) with aseprite, and learned more about the program in the meantime which is always a plus.
then i decided that i wanted to do more with the buttons. i wanted to make it animate on hover. not too hard right? you'll...you'll see why i struggled...in a moment...
anyways, i settled on a simple shrink animation. which THIS i could do with ease, messed around a bit, got the keyframes, assigned that to the button:hover and all of that and all was good!...until i realized that once i stopped hovering over it, it snapped back to its original scale instead of transitioning smoothly again. THIS is where the "fun" began.
see, although i can wrap my head around things easily when it comes to css, i have to constantly look up what the proper syntax for everything is because otherwise i'll mess everything up. and through my research i had conducted (aka surfing through multiple blogs and reddit posts alongside other things on random forum websites) i had discovered the very neat transition attribute.
but we'll have to return to this because i have adhd, and i ended up getting distracted during this process. see, originally i had decided that the button would change it's visual to appear like it was pressed when the user's mouse hovered over it. then i was like "i don't think this makes sense" so i changed it so that the button wouldn't change its background image unless the user actually clicked on it. so i did that. then i had to make sure that the button wouldn't magically scale up again so i had to transform the styling and blah blah blah those details aren't really that important ANYWAYS the actual important bit about this is that if you use the transition attribute and there's a change in background images that change will also be transitioned unless you set the transition to only apply to a specific change. and i didn't know that originally. so every time i tried to fix things up with a transition so the button wouldn't snap back to it's original size out of nowhere the background would slooowly change as well and i actually got so frustrated with this that i wanted to burn something down because that's a totally normal reaction i guess. anyways, then i started frantically searching for answers on the topic and EVERY. SINGLE. THING. THAT I FOUND. INCLUDED JAVASCRIPT.
i do not know javascript. i have not learned anything about it unlike css and html. it SCARES me and it is FRUSTRATING. but i thought i'd try it anyways. news flash that shit didn't work at all and i almost thought about scrapping the animation entirely especially when it randomly stopped working when i made certain changes, but i ended up eventually figuring out what i mentioned earlier (CSS transitions and the fact that you can assign them to only affect a specific change instead of everything) so with some dabbling here and there i eventually managed to finally figure out how to make everything smooth through pure css and although it still snaps if the element hasn't finished animating i'm happy with it.

moving on to another thing, i wanted to then make a sound effect play when you click the button. yes, we are still talking about buttons. THIS i could not do with css, like, at all. javascript admittedly is for interactivity and i had already been bending the rules quite a bit with the animations since those teechnically should've been done with javascript as well but this? this was impossible without javascript. so i found a free mp3, and searched up a nice little tutorial on the very basics of javascript.
little did I know that apparently, this would be my own personal little hell.
see, no matter how many times i tried a different script, the sound just would not work like at all. i'd do everything in what i assumed to be the correct way, and no matter what, it would not play. knowing that i'd just have to revisit this, i decided it was best to just sort of put it on the back burner.
and this is where i wish i could say this is the end of my absolutely gobstopping rant. however, i cannot.
see, one thing that i really like that i've seen in a lot of other people's sites is draggable windows. i think they're sick. but this ALSO requires javascript, but i didn't think this could POSSIBLY be that bad since so many people did it.
...right?.......right? guys. right?
MOTHERFUCKER I WAS SO WRONG.
see, it turns out that a lot of people do this sort of thing with jQuery, specifically for user interfaces. but vscode doesn't have a "user friendly" way to get jquery to work with it. and because i don't want to mess with program files, i decided that logically speaking jquery just makes writing things in js scripts less complicated and doesn't introduce things that are impossible in vanilla javascript so i decided i could suffer a little bit and try and do things without jquery.
this led me to looking at many sites with draggable windows to look at their own scripts, in which every single time i tried replicating things i FAILED.
i eventually stumbled upon a nice code that worked. but the issue with it - in which unfortunately i can't find it, else i'd link it - is that it works with not only element classes but also a specific ID. see, this would be fine if i only wanted ONE draggable element. but i want multiple. and i thought that maybe if i just duplicated the script and dedicated it to a different ID and changed function names it would work but nooo life cannot be this easy apparently. so after setting up my webmaster status window, getting that to work, i tried doing the aforementioned method for what will eventually be a guestbook of sorts. it failed.
so i decided, "hey i'll revisit this later!!" and i went on to finding a way to implement a status widget into my site. this honestly was really easy as i ended up stumbling upon status.cafe . so i registered, eventually got my account activated, and i got it working in my live port of vscode just fine!! all is good in the world.
well that's what i thought until i found out that since i had created my neocities account in march of 2024, and i'm unemployed since i'm still in high school hence i have a free account, that i could not. use the widget. in neocities. so i tried finding a work around, found this handy guide (which is genuinely useful by the way) and set up things through a RSS feed instead which is essentially just a work around that complies with the security restrictions of neocities that i'm bound by. anyways, this works great but i literally just can't customize it to how i want so this is another fail. then i find imood.com which, although is NICE, doesn't suit what i want on its own. so i'm at a loss here too.
so, again, another thing to put to the side i suppose.

so i started working on getting my guestbook, browsed through people's homepages again, and found chattable . and you probably think i have another paragraph complaining about this but honestly i can't write about something when i can't figure out how to even create a chat to implement onto my site in the first place so...y'know.
plus, i honestly have no clue if it'll work on my site either due to security restrictions so this is fun!!
anyways, after dealing with all of this, i finally decided it was about time i ported what i had so far over onto my neocities account. which isn't actually that hard i just had to wipe all of my files, overwrite the content in my index.html file there and paste in what i have now, and then upload my new files. but for some god awful reason after i went through all of this chrome just. kept depending on my old stylesheet??? so i had to clear some of my browsing data and eventually everything was loading properly for me.
and THIS is finally the end of my ridiculous documentation concering my neocities adventure so far.
i have no doubts i'll end up ranting here AGAIN about all of this but for now this is all i have on my plate...besides finally caving and learning javascript for real and continuing to learn more about html and css. hopefully one day i'll stop having such frequent issues but now is not the time and i doubt that'll be anytime soon either.
moral of the story, if you want to start something new and pick up a new hobby, please for the love of all that is of substance in this world don't go in completely blind like i've done if you're going to be making a project of some sorts. it will only lead to many misfortunes.
anyways you can see what i currently have done in my neocities here, make suggestions or give advice in the notes and whatnot i don't know.
#neocities#rant post#rant#coding#web development#geocities#html#html css#htmlcoding#css#javascript#losing my mind#holy shit#send help
6 notes
·
View notes
Text
Nortubel is finished (Hopefully)
9 new leves.
6 cutscenes (3 are put together).
Music in every level and cutscene possible.
Maybe some other tweaks I forgot (Someone check the GitHub page for me).
Note how the HTML version is no longer present on Itch.
I had to delete unused content and replace almost every WAV sound file with either an MP3 or OGG version.
On Newgrounds, you can play on browser, do I should at some point see if there's anything weird.
Besides some other tweaks I could do for a “post release” update, I want to declare the game finished in the sense that there won’t be more levels or substantial content.
There was barely any hype or marketing, I just wanted it to be done even if only a very small fraction of the population knows about this game.
The music I made is terrible for lots of reasons: I got into LMMS very late, probably didn’t get enough from tutorials, tried looking for VST plug ins/soundfonts/samples/etc and even the few I used still sounded a bit weird, the program itself had some bugs, wanted to keep myself with a deadline etc.
(And admittedly, procrastinated a bit by watching WKUK skits).
Also expect plagiarism but that’s essential to videogames as a medium and a lot of characters and settings take stuff from somewhere else.
There’s a lot about this game that could’ve been better that I once thought whether or not it could be remade in the future.
Because at the same time, I want to make enough games using ideas from this game, as if I was rather “remastering” each idea one by one while doing something new.
At the very least, this game is the starting point for something bigger.
So, what’s next?
On one hand, I thought of another “practice/hobby” project and it’d be around Godot 4.
It could be a platformer with no companion focus and with a more basic but less ugly pixel art style, while also focusing on the Hirdrih characters.
At the same time, I thought of focusing more on some IRL stuff.
(And this is something I could elaborate in a more personal post).
Might as well do a recap of 2024 for me:
The game is finished, now you can play it and also, if you don’t mind, spread the word and tell others about it.
Did some Doom mapping: That MetaDoom map of mine was finally made playable thanks to Kinsie making the PK3 file work and I also did a map for /Vertex Relocation/ and RAMP 2024.
When Dark Ages comes out, there’s a chance that mod will update to have some things from that game.
Not sure if that could affect compatibility with the map.
Maybe I could do more Doom mapping or even try Quake mapping in the future.
Did a first gif on Krita, which is the one with the dancing characters.
Did a gallery of “art inspirations and references” which is kinda like a moodboard for future projects and also reveals where I got some ideas.
Did 2 trailers, one with a song by Horbror and another with a song by me.
Did an animation for /v/3 which is technically a slideshow but there’s a joke or two in there.
Did another game on another account, for some game jam… you can figure that out.
Could do another update to a certain text of mine.
Also, I may actually get a Twitter and Bluesky, if I want to reach people that could help me with stuff.
I’ll still try to maintain those potential accounts focused on either my projects or other people’s.
And maybe anything cool in general, like those accounts that post cool concept art or something like that.
I also want to play a bit more of other people’s games.
Anyway, if the link works, this is related to the Hirdrih game:
Also, here’s that art “ref” gallery https://mega.nz/folder/jARmRT5A#5DGmQnlbnwPVTyUcJWbHcw
And if you find my YT channel, you could find my “music” playlist, to get an idea of some basic (And not subtle) influences.
Either way, I hope something new starts.
I'd like to thank anyone that helped even if very little.
Not sure what else to add other than some "you can do it" sort of message.
Let's look into the future.
#gamedev#indiedev#indie dev#godot#godot engine#indie games#blog#game development#game dev#gaming#godot game engine#progress#update#video games#videogames#important#announcement#release#game release
0 notes
Text
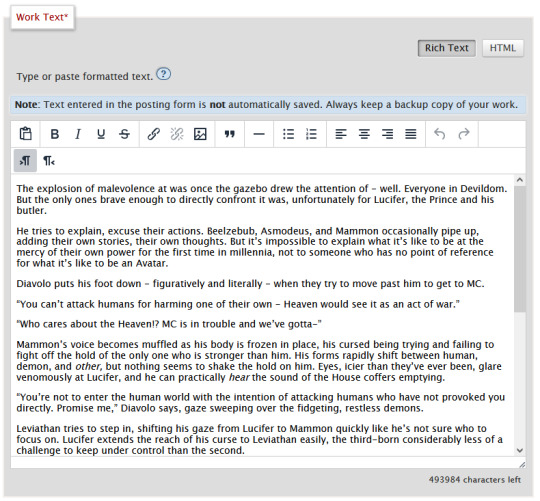
A not-so-quick how-to for Ao3 work skins
Ao3 has some pretty powerful customization tools at your disposal - if you know how to use them. Did you know this entire time you could change your text colors, size, background colors, outlines, underlines, overlines, and even fonts of your works? It's fairly easy to do - you only need a little knowledge about markup languages to get started. The way this is done is through classes and the clever application of some simple CSS. Though I've written this guide around using my Obey Me coloring and work skin, the principles are applicable across anything you may want to do with your Ao3 styling.
I've done all the heavy lifting this time around, and have actually created a very, very simple skin that you may want for the purposes of your Obey Me fic including:
Unique colors for each character (sticking to WCAG 1:3 minimum contrast ratio for accessibility)
Heading font and size styling (separate from character colors)
Styled 'pullquotes' for written letters/passages/quotes (at 75% size)
Make sure to keep checking back for updates - I'll put word out here on my tumblr whenever I update, but I've also created a codepen (work skin CSS found in the CSS tab) with the latest version of the skin that you can use to play around in.
Just a heads up before you start: there is a bit of a learning curve, but I have tried to make the explanation as simple as possible, and hopefully provide enough tools and knowledge that you can run with what I've given you and start creating your own styles.
1. Markup: The Basics
I'm sorry - no matter how simple I try to make this work skin, you're going to need at least a little understanding of what markup languages are and how they work. But don't fret: I've had a few years experience now teaching this to absolute beginners so hopefully by the end of this tutorial you'll be feeling like a real Hackerman.
So what is Markup? A tl;dr
Markup is a set of instructions used to tell a program (in this case your internet browser) how something should behave. HTML stands for Hypertext Markup Language and is likely the markup language you'll encounter most often. Ordinary text like you would type in a word document is meaningless to a computer browser - it doesn't know how to read. You need to talk to it in a language it understands so that it can translate your wonderful words into something that appears in your browser. This is done through the use of 'elements'.
Like how you know "words captured in these quotation marks" are quotes (or text written in parentheses is related to but non-essential to the main body), elements are essentially markers that indicate how a thing should be read. In HTML, these elements are denoted through angular brackets <> containing the necessary info that your browser understands. These often consist of an opening tag <[element type]>with content within, followed by a closing tag</[element type> denoted through the use of the "/" slash. Every element that has been opened must always be closed. Common tags include:
<p></p> for paragraphs
<em></em> for emphasis (typically displayed as italic)
<strong></strong> for strong (typically displayed as bold)
<h1></h1> for your highest headline (and subsequent-level headings use 2-6)
<div></div> for generic sections or blocks
<span></span> for specific selections of text.
<a></a> for anchors (links)
<img> containing images <- this one doesn't have closing tags because it's special
and more!
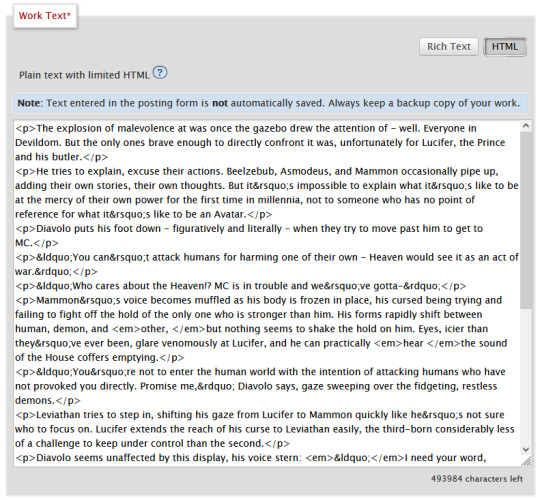
Everything you see on the internet rests within tags like these. You don't see them because they're only for your browser's eyes. Even your fics are formatted with this - though Ao3 does it automatically. You can freely switch between Markup (HTML) and Rich Text Formatting up in the top right corner.
Attributes
Attributes are additional information you can add to an element. Some attributes are essential, like a href (hyperlink reference) for anchor elements. Some are additional information used to differentiate between different identical elements like a class or id. It's this latter, non-essential attribute we're going to be utilizing for our work skins.
Once you have your fic in Ao3, make sure to switch over to the html editor. From there, you are going to find the element that you want to change the look of, and we're going to add a class.
We do this by finding the open tag of an element. That will probably be a <p>. Inside those angular brackets, after the name of the element, we are going to type class=""
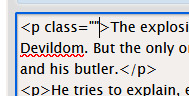
What we've done there is create a field for the class, but we haven't actually given the element a class yet.
It's always a good idea to name classes that describe the content, not what you want it to look like. You could change your mind down the line, but then you're stuck with a class called red that's really changing the color to blue. So rather than calling a class "gold", you might instead give it the name "Mammon" as it indicates when Mammon is speaking. This is known as Semantic markup.
Here's a few things you need to know about classes:
Class names cannot contain spaces. We use spaces to delineate new classes in the same element (like commas to separate tags on tumblr).
You can use as many classes as you want, as many times as you want.
They are case-sensitive.
You can add classes to all most html elements. That means that you don't have to just make entire paragraphs a particular style.
I have already specified several classes in my existing work skin. These are [Luci Mammon Levi Satan Asmo Beel Belphie Dia Barb Luke Sol Sim Heading pullQuote] - remember that these are case-sensitive. Feel free to use any one of these, or use your own! Put your chosen class name between those quotation marks I had you make earlier like so!

These don't actually do anything just yet. For that, we need to now head on over into our work skin.
2. Introducing the work skin: CSS
Now that we hopefully have our heads wrapped around the basics of elements and classes, we can start using that to make things look interesting. CSS stands for Cascading Style Sheet. HTML gives the browser structure, CSS gives the browser style.
But first, we have to create a new work skin.
Go to your Ao3 Dashboard and up in the top left underneath "Profile" and "Preferences" you should see an option for Skins. It'll land land you in "site skins" by default, so make sure to click on My Work Skins. From here you can click on Create Work Skin in the top right corner.
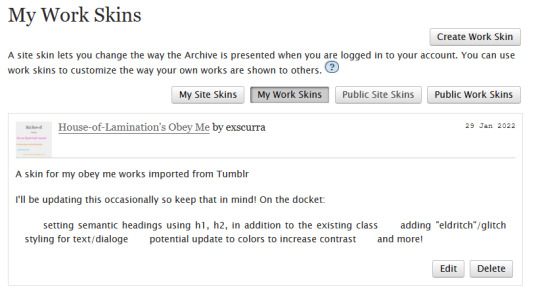
In the "About" section, make sure Work Skin is selected, and give your new skin a title!
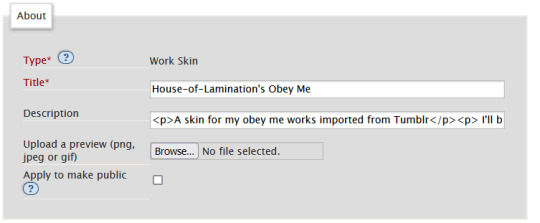
Feel free to also include a description for your own sake. Now. Onto the fun part!
Below the "About" section, you should see a box labelled CSS. In that box, feel free to copy+paste the styles below into that box:
#workskin .Luci { color: #0071ed;}
#workskin .Mammon { color: #e5a71c;}
#workskin .Levi { color: #e26600;}
#workskin .Satan { color: #00c117;}
#workskin .Asmo { color: #ff00bd;}
#workskin .Beel { color: #e80b00;}
#workskin .Belphie { color: #4f08b5;}
#workskin .Luke { color: #00c0ed;}
#workskin .Dia { color: #9b0000;}
#workskin .Barb { color: #007215;}
#workskin .Sim { color: #c1ac44;}
#workskin .Sol { color: #757575;}
#workskin .Heading { font-size: 1.25em;}
#workskin .pullQuote { text-align: center; font-size: 0.75em; display: block;}
This can also be found in the CSS section in this codepen. (disclaimer: tumblr may or may not mess with the line spacing when you copy things over. After you've copied, save your work skin and then reopen it in "edit" - Ao3 will automatically format your work so that it's nice and clean).
So what's actually happening here?
Let's read from left-to-right, top-to-bottom - because that's precisely what CSS does. Feel free to skip this part if you're not interested in creating your own styles and you're happy to just copy and paste existing work skins :)
#workskin .Luci { color: #0071ed; }
This first part here is what is called a "selector". Here, we're specifying what exactly we want to target in order to change its looks. Every character, including the spaces, symbols, and capitals matter.
#workskin .Luci { color: #0071ed; }
#workskin is specifying a unique ID within the HTML - one that encapsulates everything that you want to apply the work skin to - so basically your entire work. This is absolutely necessary in order for the work skin to actually function. We didn't create this ID in our HTML because Ao3 (will) create it for us automatically down the line.
#workskin .Luci { color: #0071ed; }
Following the work skin id, we have a space, a period, and then - hey! That's a class name! The space between the ID selector and the next part indicates we're looking for things inside this particular ID. Periods are used to indicate classes. When targeting a class, you use the period, followed by the class name. So if you're targeting your Levi class, you would write #workskin .Levi . If you were targeting a class that you created in your html, you would write #workskin .[classname] (removing the square brackets, of course).
#workskin .Luci { color: #0071ed; }
Now it's time for the fun stuff - the rules. Once we've targeted what we want to style with our selector, we use curly brackets to contain all the "rules" that we're using to make the browser appear a certain way.
#workskin .Luci { color: #0071ed; }
We start with our property - or what we want to change. In this case it's the text colour, denoted through 'color'. Yes. It's American spelling. I have no control over this. Find a simple list of css properties here! There's loads, but the ones that are probably of most use to you at this point are color, font-size, font-weight, text-align, text-decoration, and display. Make sure to put a colon after the property - that links us into the next step.
#workskin .Luci { color: #0071ed; }
Finally, we have our value - or what we're asking the property to do. In this case, we're changing the color, so the value is a hex color value. Color can also be denoted through rgb [written as rgb(0,0,0)]. Different properties will have different values. For example, text-align can have a value of left, right, or center (note the Americanized spelling again). If you click on the property in this list, it will tell you what values you can use!
You can have as many rules as you want in your selectors, as long as you end each of them with a semicolon. I cannot stress the semicolon enough. If your CSS isn't working - it's probably a missing semicolon. An example of multiple rules being used within one selector is in the pullquote styling:
#workskin .pullQuote { text-align: center; font-size: 0.75em; display: block; }
You can even write rules that override each other, though we try and avoid doing that. When this happens, your CSS will read from top-to-bottom, prioritizing the latest thing it has read (typically your bottom-most). There are exceptions to this, but that's not necessary for this guide.
So by this point you should have copied over the CSS I've written into your work skin, or perhaps tried your hand at making your own. This would be a good point to save.
3. With our Powers Combined
Right! So we have our work skin. We have our work formatted properly, resplendent with classes. Here's how we get these things talking to each other:
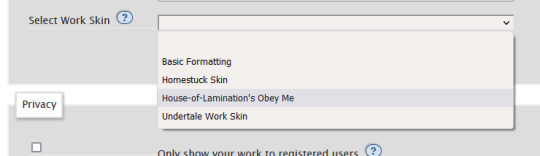
Once you've saved and closed your new work skin, open up or post the work you would like to apply the styling to. Down the bottom of the Associations section, there is an option to Select Work Skin. Ao3 already provides some work skins by default - Homestuck and Undertale - but you should be able to select your new work skin from this dropdown.
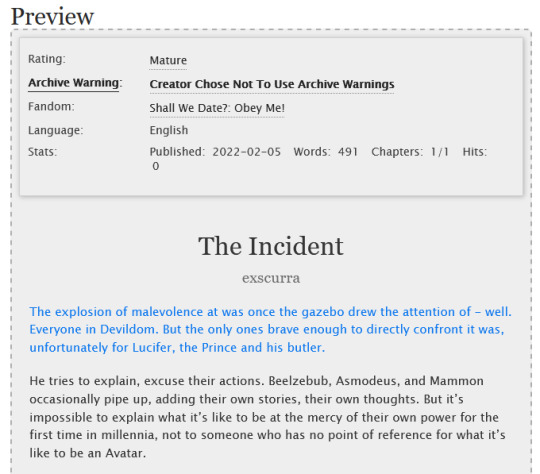
Now here's the magic. Time to check if this worked. Go through and make sure you've applied your classes to each of the elements you want to change the look of. These can be <p> elements, <em> elements, <strong> elements, or you can even make new, unique sections using <span>. Save your work as a draft and preview it - if you've done everything right, you should see the sections of text you've added classes to have changed in appearance!
A reminder that you can add multiple classes to one element: say for example you want to create section headings unique to each 'character', you can name both classes in the class field, separated by a space. See the example below:
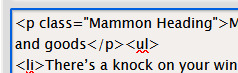

And that's about it! You can use the same work skin for multiple works - just remember that you should be using the same class names if that's the case. If you create a new class in your html, make sure to go back to your work skin and make some rules for that class!
I've created this codepen that you can play in that is using all the same classes - it also has the work skin in the CSS which you're also very welcome to mess around with.
Ao3 itself has a great guide to using work skins, explaining things just like I did here. The Modzilla Developer Network is a great resource for learning more in-depth about html and css if you want to do weirder and wonderful-er things!
I hope this has been informative and useful! Best of luck using skins in your own fics! 💛
#obey me#ao3#tutorial#omswd#writing reference#long post#cs people dont come @ me about my oversimplifications. this is for beginners! i am not here for definitional semantics!!!!#literally only one person asked for this and YET. i really enjoy writing tutorials
237 notes
·
View notes
Note
How would you say fandom culture has changed over the years? What are some differences you notice between older and younger fandom folks?
I’ve been thinking for a while about how to answer this, and I’m not sure I have a really good answer, but I’m going to try.
I’ve been in fandom since approximately 1995. Maybe 1994. At that point, the world wide web was a relatively new part of the internet, and the fandoms I was in had most of their activity on privately-hosted mailing lists (predating eGroups/OneList/Yahoo Groups) and on Usenet newsgroups, with fiction beginning to be available on websites as part of either fandom-specific or pairing-specific archives as well as authors’ individual pages. Fanfiction.net did not yet exist. LiveJournal did not exist. AO3 definitely did not exist. If you wanted real-time chat, there was IRC. I was coming in basically at the tail end of zine fandom; zines were no longer the only way of distributing fanfiction, as fandom started to move online. So I have a selection of zines from 90s-era Western media fandoms but even by then zines weren’t where I was doing most of my reading.
I think in terms of generally “what it was like to be in fandom,” the big-picture stuff hasn’t changed. Fandom still produces creative fanwork and likes to, y’know, get together and talk about fandom. Also, almost every fight or complaint that fandom has about something is a thing that has been going on for actual years. People complain that, say, the kudos button is ruining comment culture because back in the LJ days the only way you could comment on a story was, well, by leaving an actual comment, or sending an email on a mailing list, and this might mean that people who would have otherwise commented have left a kudos instead. But back in the LJ and mailing list days, people were complaining that commenting was going downhill since the days of zines, when in order to comment on a story you had to write a real paper letter and mail it and because you had to do that, the quality of feedback was so much better than you got nowadays because people could just dash off a quick email or comment. You get the idea. Top/bottom wars are not new either. Pairing wars are not new. If you’ve been in fandom a while, you will pretty much have seen all the fights already. I think one thing that is new, though, is the fandom awareness of things like privilege and intersectionality and various -isms, as well as things like “providing warnings might be nice” (do you know how much unwarned deathfic I have read? a lot!) and I sure won’t say we’re perfect at any of this now, but I think fandom is trying way way more about all that stuff than it used to.
There are some fights we actually don’t have anymore, as far as I can tell. I feel like it’s been years since I’ve seen the “real person fiction is wrong” battle, but also I don’t hang out in a whole lot of RPF fandoms, so it’s possible that’s still going and I just don’t see it.
There also used to be a recurring debate about whether gay relationships that were canonical were slash or not. When slash started, obviously this wasn’t a question because there weren’t canonical gay relationships in fandoms, period. But as gay characters began to appear in media, people started to wonder “does slash mean all same-sex relationships, or does slash mean only non-canonical same-sex relationships?” Now, you may be reading this and think that sounds like an incredibly weird thing to get hung up on, but that’s because what appears to have happened is that the term “ship” (originally from X-Files Mulder/Scully fandom) has, as far as I can tell, come up and eaten most of the rest of the terminology. Now people will just say, “oh, I ship that.” For any pairing, gay or not, canonical or not. Fandom seems to have decided that for the most part it no longer actually needs a term specific to same-sex relationships as a genre.
Similarly, there are a few genres of fic that we used to have also pretty much don’t exist anymore. There are also plenty of genres that are well-entrenched now that are also extremely recent -- A/B/O comes to mind. But there are some kinds of fic we don’t write a lot of now. Like, I haven’t seen smarm in years! I also haven’t seen We’re Not Gay We Just Love Each Other in a while. There was also a particular style of slash writing where you’d basically have to explain, in detail, what made you think that these particular characters could be anything other than straight. You’d have to motivate this decision. You’d have to look at their canonical heterosexual relationships and come up with a way to explain why all those had happened in order to reconcile how this one guy could have romantic feelings for another guy. When had he figured out he wasn’t straight? Who might he have been with before? How does he interact with people in ways that make you think he’s not straight? That kind of thing. You had to, essentially, show your work. And these days a lot of fanfic is just like, “Okay, Captain America is bisexual, let’s go!” It’s... different.
Fandom also used to skew older, is my sense. A lot older. I don’t know, actually, if it really was older, but I get the sense now that there are some younger people who are surprised that adults are still in fandom. I have seen people saying these days that they think they’re too old for fanfiction because they are not in middle school anymore. And I think a lot of this has to do with the fact that the barriers to access fandom are a lot lower than they used to be. You used to basically have to be an adult with disposable income (or know an adult with disposable income who was willing to help you out; but even then if you were reading explicit fiction you also had to swear you were 18+, usually by sending in an age statement to whoever you were buying the zine from or to the mods of the list you wanted to join, so a lot of fandom was very much age-gated). Internet access was not widely available. Even if you had internet access, you maybe didn’t have your own email address, so you couldn’t sign up for mailing lists; free email providers didn’t exist. If you wanted to buy zines, you had to have money to buy them. If you wanted to go to cons, you had to be able to afford the cost of the con, travel to the con, et cetera. If you wanted to have a website you had to know HTML. Social media did not exist. You want to draw art? Guess what, you’re probably drawing it on paper! You might be able to upload a picture to your website if you have a digital camera or a scanner, but both of those things are expensive, and also a lot of people don’t have the capability or the money to download pictures from the internet (some people have data caps with overage charges, and some people have text-only connections!), so they won’t get to see it. Maybe you can sell your piece at a con! You want to make a fanvid? We called them songvids, but, anyway, you know how you’re doing that? You’re going to hook two VCRs together and smash the play and record buttons very fast! If you want anyone else to watch them, you are either making them a tape personally and mailing it to them or bringing your vids to a convention. Maybe you can digitize them and upload them, but it’s going to take people hours to download them!
(Every three hours my ISP would kick me off the internet and I’d have to dial in again. If it was a busy time of day, it might take me 20 or 30 minutes to get a connection again. And that was assuming no one else in the house needed to use the phone line. Imagine if your modem went out every three hours now.)
And now, for the cost of my internet connection, I can read pretty much whatever fanfiction I want, whenever I want it. I can see all the fanart I want! I can watch vids! Podfic exists now! Fanmixes exist! Gifsets and moodboards exist! If I want to write fic I can write it with programs that are completely free, and as soon as I post it everyone in the entire world can read it. If I want to draw or make vids that may require some additional investment, but I may also be able to do it with things I already have. Do you have any idea how good we all have it?
There are a couple of kinds of fan activity that don’t seem to exist anymore, though, and I miss them. I know that roleplaying still goes on, but I feel like these days most people who do real-time text roleplay have switched to things like Discord. I know that in the LJ days, RP communities were popular. But I really miss MU*s (MUDs, MUSHes, MOOs, MUXes..), which were servers for real-time text-based RP with a bunch of... hmm... features to aid RP. There were virtual rooms with text descriptions, and objects in virtual rooms with descriptions, and your character had a description, and they could interact with the objects as well as with other characters, and you could program things to change descriptions or emit various kinds of text or take you to different rooms, and so on. Just to, y’know, enhance the atmosphere. It was fun and it was where I learned to RP and I’m sad they’re pretty much gone now.
I also don’t think I see a lot of fanfiction awards in fandoms. Wonder where they went.
Going back to the previous point, the barriers to actually consuming the canon you are fannish about are way, way, way lower now. You can pretty much take it for granted that if right now someone tells you about a shiny new fandom, there will be a way to read that book or watch that show or movie right now. Possibly for free! Of course you can watch it! Why wouldn’t you be able to?
This was absolutely, absolutely not the case before. I’m currently in Marvel Comics fandom. If there is a comic I want to read, I can read it right now on the internet. I have subscribed to Marvel Unlimited and I can read pretty much every comic that is older than three months old; the newer ones cost extra money. But I can do it all from the comfort of my own home right now. I was also, actually, in Marvel Comics fandom in the nineties. If I wanted to read a comic, I had to go to a comic book store and hope they had it in stock; if they didn’t, I had to try another store. Not a lot of comics were available in trade paperback and they definitely weren’t readable on the internet. I used to read a lot of Gambit h/c fic set after Uncanny X-Men #350. I never found a copy of UXM #350. I still haven’t! But I did eventually read it on Unlimited.
Being in TV show fandoms also had similar challenges. Was the show you were watching still on the air? No? Then you’d better hope you could find it in reruns, or know someone who had tapes of it that they could copy for you, otherwise you weren’t watching that show. It was, I think, pretty common for people to be in fandoms for shows they hadn’t seen, because they had no way to see the show, but they loved all the fanfic. The Sentinel had a whole lot of fans like that, both because I think it took a while for it to end up in reruns and because overseas distribution was probably poor. So you’d get people who read the fic and wrote fic based on the other fic they’d read, which meant that you got massive, massive amounts of fanon appearing that people just assumed was in the show because it was a weirdly specific detail that appeared in someone’s fic once. Like “Jim and Blair’s apartment has a small water heater” (not actually canonical) or “Blair is a vegetarian” (there’s an episode where his mother visits and IIRC cooks him one of his favorite meals, which is beef tongue).
Like, I was in The Professionals fandom for years. I read all the fic. I hadn’t seen the show. As far as I know, it never aired in the US, and it certainly never had any kind of US VHS or DVD release. I’d seen a couple songvids. I eventually saw a couple episodes in maybe 2003, and that was because my dad special-ordered a commercial VHS tape from the UK and paid someone to convert it from PAL to NTSC. I didn’t get to see the whole show until several years later when I got a region-free DVD player someone in fandom sent me burned copies of the UK DVD releases and then I special-ordered the commercial release of the DVDs from the UK myself. But if I were a new fan and wanted to watch Pros right now? It is on YouTube! For free!
I think also one of the things about fandom that’s not immediately evident to new fans is the way in which it is permanent and/or impermanent. There are probably people whose first fannish experience is on Tumblr or who only read fanfic on FFN and who have no idea what they would do if either site, say, just shut down. But if you’ve been in fandom a while, you’ve been through, say, Discord, Tumblr, Twitter, Pillowfort, Imzy, DW, JournalFen, LJ, GeoCities, IRC, mailing lists. And sure, if Tumblr closed, it would be inconvenient. But fandom would pack up and move somewhere else. You would find it again. It would, eventually, be okay. Similarly, if you’ve been in a lot of fandoms, if you’ve made a lot of friends, drifting through fandoms is like that. You’ll make a friend in 1998 because you were in the same fandom, and then you might go your own ways, and ten years later you might be in another fandom with them again! It happens.
But the flip side of that is that I think a lot of older fans have learned not to trust in the permanence of any particular site. If you like a story, you save it as soon as you read it. If you like a piece of art, you save it. If you like a vid, you save it. Because you don’t know when the site it’s on will be gone for good. I have, like, twenty years of lovingly-curated fanfic. And I feel like people who have only been in fandom since AO3 existed might not understand how much AO3 is a game-changer compared to what we had before. It’s a site where you can put your fic up and you don’t have to worry that the webhost is going out of business, or that the site might delete your work because they don’t allow gay fiction or explicit fiction or fiction written in second person or fiction for fandoms where the creator doesn’t like fanfiction, or whatever. Because all of those things have absolutely happened. But, I mean, I still save pretty much everything I like, even on AO3, just in case.
So, basically, yeah, fandom is a whole lot more accessible than it used to be. I think fandom is pretty much still fandom, but it’s a lot easier to get into, and that has made it way more open to people who wouldn’t have been able to be in fandom before. There is so, so much more now than there ever was before, and I think that’s great.
2K notes
·
View notes
Text
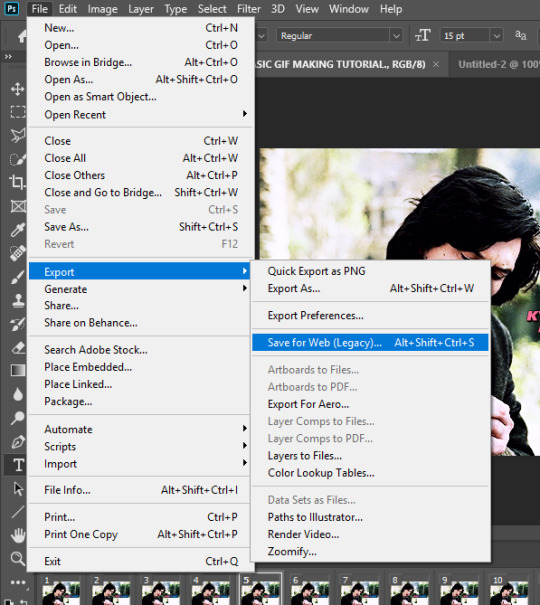
KYLOSOLO’S/KRYLORENS’ STEP BY STEP BASIC GIFFING TUTORIAL, inc. ALL RESOURCES:
this is part one out of two not don’t worry, part two is just me filming the process, i just had to put it onto a separate tumblr post since i can’t place it in this one. PART TWO HERE: [x]
i’ve been giffing for about over six years and it’s only very recently that i feel i’ve got a grasp on a pretty good method, for me at least. if you’re reading this you probably have prior knowledge already but this tutorial is also going to go over the basics as if you know nothing. → this is just how i do everything and my ordering process, there are way better gif-makers out there but i know how finicky the process can be so i wanted to give out all my tricks! it might seem like a lot but it becomes second nature easily. (let me know of any broken links and or questions.) just to note i use windows not mac.
SORRY FOR SPELLING AND GRAMMAR ISSUES, i really pushed myself and i struggle with articulation.
things you will need/learn: (it’s all free!) →the ones in bold are essential. —adobe photoshop; i use cc2020 which you can get here: [x] —mpv; (a frame captures, i’ve used pretty much every type over the years, even ps’ inbuilt one but this is my favourite & this tutorial on how to use/dl it is the best) [x] —***at least 1080p footage; if you don’t have any you can still use this frames folder to follow along with me :) [x]*** —4k video downloader [x] —a megasync account [x]
actions: —@kylos tumblr sharpening; (these are just my favourites you can use any you find/make really but this makes your gifs look even more hq) [x] —@kylos twitter sharpening: [x] —@rory-amy tumblr/twitter save; (i just use the save action out of this pack and it’s a LIFESAVER) [x] —if you’re not sure how to put these into your ps i’ll show you how later on in this tutorial.
how to learn colouring + how to add subtitles correctly + how to make hq twitter gifs: —all later on in this tutorial with links to my own resources and might have my twitter watermark by mistake.
*what this tutorial isn’t including: —how to t*rrent. —how to upscale footage. —how to make multiple gifs/gifset are crop them the same way/move frames over to a new document; (i’m just focusing on how to make one simple gif) —how to use gradient/html text for captions but here’s a great tutorial on it. [x]
i just want to give a big shout out to @kylos because all her tips are just amazing and top-tier!!!
‧͙⁺˚*・༓☾ ☽༓・*˚⁺‧͙ ok now onto the good stuff! ‧͙⁺˚*・༓☾ ☽༓・*˚⁺‧͙
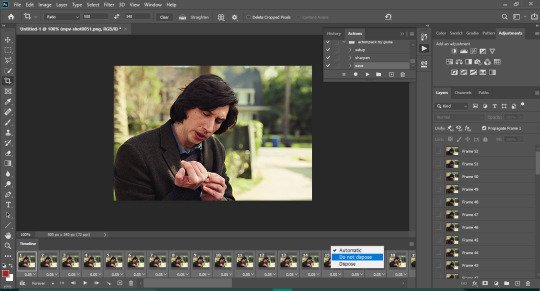
★ how to load in and sort out your layers: [1/2] ★ —once you’ve dl the frames or gotten your own you’ll need to load them into ps like this;
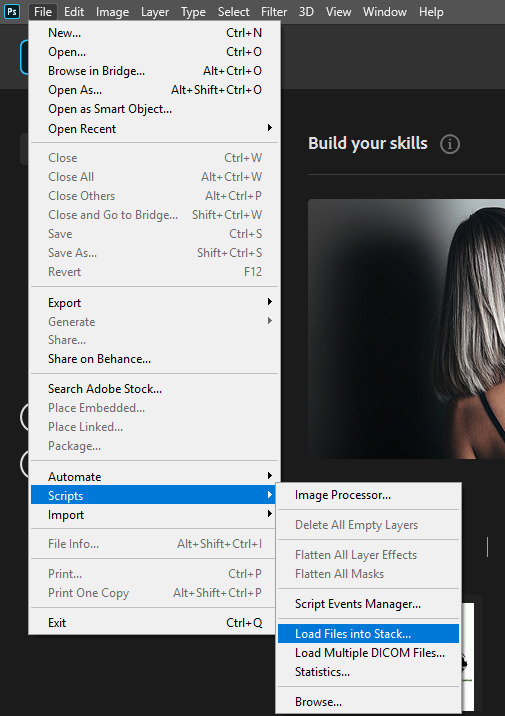
when load layers pops up, you can select individual files (for a more complicated set this is good) but i prefer to just use the folder option. now select your captures folder from wherever you saved it. depending on how many frames/how hq they are will effect how long the loading time is. it can really vary. —ONE THING YOU SHOULD NEVER DO: is take EVERY OTHER FRAME when making your gifs this destroys the flow of them and is an older method to gifs that isn’t needed.

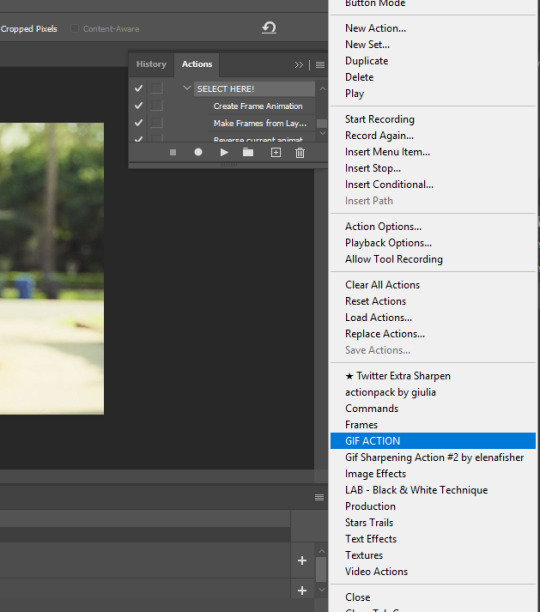
—if your ps is brand new you’re going to have to add some stuff, which i’ll show you how to do. — first go to window and select TIMELINE and ACTIONS. then move your ADJUSTMENTS bar up and close the tab it came from since you won’t need those. (if you ever do, just click workspace and then RESET ESSENTIALS) and next you’re going to click on your timeline bar, then CREATE FRAME ANIMATION. — *your screen should now look like this:*

—then on your timeline bar at the right top corner there’s three little lines, click that. then select MAKE FRAMES FROM LAYERS and after SELECT ALL FRAMES and next REVERSE ALL FRAMES. (depending on the ps you use your frames might be like mine and need to be reversed, just click the play icon on your timeline to make sure). —i always play through the gif before doing anything and i noticed the gif frames are a bit long for my taste so i’m going to press my shift key and then select up to frame ten by right clicking (they should now be highlighted) and click the trashcan icon on the TIMELINE bar to delete them. you can trim your gifs at the end doing this if the mb is too high and your gif doesn’t load when uploading. currently tumblr is up to 10mb and twitter is around past 15mb. —after deleting your frames you then need to SELECT ALL FRAMES again and then CONVERT TO TIMELINE.
★ how to crop your gifs: ★ ***here is when i like to do it: (4th icon on the bar on your left)*** —however, you can do this before or after, just as long as it isn’t after making it a SMART OBJECT or sharpening. —there should now be a new a bar on top of your gif and next to RATIO is where you should put your dimensions in (as in width:height)

—there are tumblr dimensions but i find you can be more lax with them, i like to change it up a lot but for now i make square gifs around 450px x 450px and rectangular ones around 500px x 340px but it’s up to you. if you’re really struggling and see a set with a size you want to use yourself you can study the size of it by inspecting its elements on desktop, and rounding up. but i would recommending doing it yourself. making your own style is the fun of it!!! —for twitter the best size is 600px x 600px. this is a square, sometimes frames can’t just fit neatly into this shape/sizing so find what’s best or copy my tumblr dimensions if you’re struggling.
***note: when cropping your gif you can get weird transparent lines around it. → to get rid of those when cropping your gif, you have to: crop inwards a bit, (or as much as you want) and move the cropping square/shape a bit into the middle.
now, make sure you go to IMAGE on top bar select and put in your gif dimensions.***
‧͙⁺˚*・༓☾ ☽༓・*˚⁺‧͙
★ back to your layers: [2/2] ★ —now go to your LAYERS bar and select every frame with an eye icon next to it, right click and select on top of them and select CONVERT TO SMART OBJECT. this should leave all the frames you have deleted earlier and those have no eye icon, you can select those akin to how you did it on your TIMELINE bar, just use the trashcan icon on your LAYERS bar or just select DELETE LAYERS when right clicking.
★ how to insert and use actions: ★ —to do this you need to locate your actions folder. so, go to your adobe photoshop file, right click on the ps icon and then click ‘FILE LOCATION’ then search in it for ACTIONS. next if your action(s) are downloaded go open another file explorer tab:
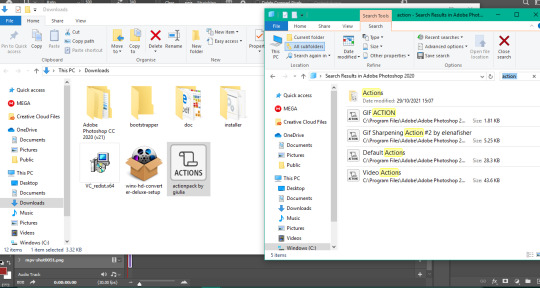
then drag and drop it like this: —if it says administer permission is needed click yes.

—once you’ve done this head back into ps to use the ACTIONS, first to sharpen, then to save: —you’re going to click the arrow icon on the sidebar on the left side to your LAYERS and then the three lines as shown here:
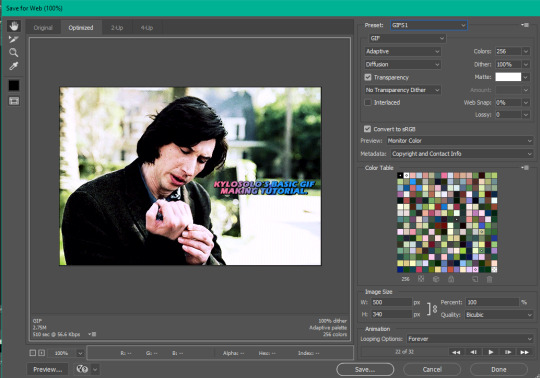
—you’ll see where it says SELECT HERE, do that and then click the arrow icon below it and just click continue if you get the make layers error, this won’t affect anything. (sometimes gifs can glitch at this stage but just undo or you may need to restart your gif.) —ok now your gif is sharpened! if you think it’s too much you can add gaussian blur from the FILTERS bar at the top but i just prefer to lower the opacity by double clicking the bars next to the word SMART SHARPENED which has now appeared x2. —for me gif colouring at this stage is hard because playing the gif in this mode blurs it and i like having the individual layers so this is where the action pack (save) comes in handy! *it also saves you from having to open your gif at the end and adjusting to 0.07 sec bug to 0.05 gif speed the action auto does it to 0.05 for you (which i’ll explain next.) just select the action the exact way you did sharpening. just scroll down to where it says save. —now your ps should look like this (this is a good point to save, but i’m the worst and do it after i colour usually.)
adjust the gif speed by double clicking the numbers if you want to change it from 0.05 speed but even if your gif is short making it anything more slower or even faster can mess up your flow. the best range imo is around 0.04-0.06, although i usually never stray from 0.05. i also like to put do not dispose on all the frames (which you again can do by shift clicking or the three lines on your timeline to get select them all and then any frame right clicking to do that should work for both things.)
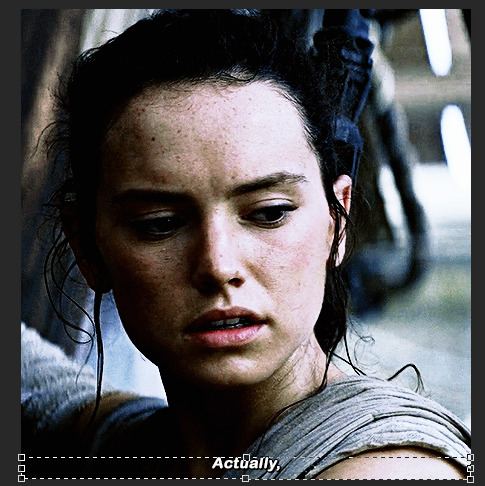
★ how to colour (basic not colourful): ★ —now this is the best part for me, however it’s the most tricky and vague in a way. one psd (your saved photoshop document that contains your colouring and usually the gif too) might not work for the next gif even if it’s the same film or ‘footage’ and getting your own style can take a long, long time. you can use other peoples psds but i find making your own is the most rewarding. but! i have studied those psds given out and incorporated them into my own style over time. —*so, what i have decided to do is just that. i have made a base psd for this gif for you to study. but i really recommend looking at other tutorials to teach you how to do that. i’m just gonna get you started, which i hope no one minds. i did try and make it less my very blue-toned grunge style and more ‘normal’. [x] —note 1: select all of the adjustment layers on the side and then to put them into a multi-set just select DUPLICATE LAYERS and put them onto your document/next gif. be smarter than me and don’t name randomly or keyboard smash your psds, sorting out your psds makes life so much easier trust me and you can reuse them!!! (i keep ALL of mine in folders in my documents and then they are sub-dived). —note 2: i like to go more extreme and lessen the vibrancy/saturation and then constantly edit and mess with the opacity rather than being subtle, there’s so many ways to do this. so again, it’s just messing around. however, even if you all your frames selected sometimes this can bug out and mess up one of the frames. so, keep watch on that and either undo or just duplicate the new version of your adjustment layer and delete the bugged one.
*if you do want me to make a how to on my colouring that goes more in-depth/colourful please let me know.
★ how to add perfectly in the middle subtitles: ★ —here i’m going to give you my subtitles with its settings preset, but edit it to your own liking! [x] —if you’re loading it in, different sizes/factors effect your subtitle placement and your text can looks random like this:
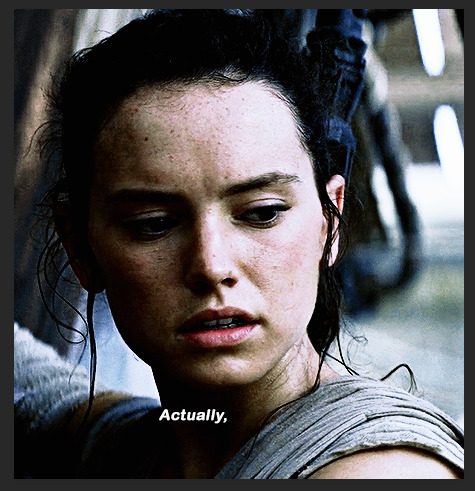
so what you’re going to do this: drag it into the place you want and then make sure your text bar looks like this:
—since this is also an adjustment layer you can get the same bug of it being fixed on one frame only and then the rest are how it used to be. so, just duplicate it into a new file like this:
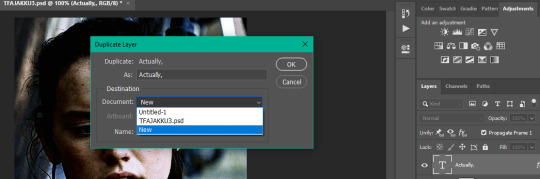
—and after duplicating it back onto your main gif and get rid of the old one.it should be good. (again, this is just my own learned solution) —this is also applicable to twitter watermarking which i’ll mention later on.
now that you’ve done all of that and hopefully saved your gif it’s time to export it!
the save settings i use:
★ how to make hq twitter gifs: ★ —read this tutorial, already linked above but: [x] —if you’ve read everything above then making a hq twitter gif won’t be a hard adjustment, you just need to change and add a few things. —first: make sure it’s 600px x 600px (you can change this but to get the best result) —second: use the twitter sharpening action!!! you can adjust this, but twitter can really repress the quality if you use just the tumblr one, or your preferred method. although some footage needs you to lower the sharpening or else it can look like a lot, but don’t be afraid it’s an easy fix! —if you’re adding subtitles make them a bigger than you would for tumblr just make sure it doesn’t go through the bottom left side of your gif. —before posting, make sure you have watermarked it! which you can only do on the top left/right corner and bottom right or else it’ll get covered up! you can also place in somewhere else if you’d like it’s up to you. —the video of me making a gif will be one for twitter so if you’re unsure about anything from this or the entire tutorial hopefully it clears that up. :)
it should look something like this, just in your style!:

✨✨✨ now that should be everything!!! if you have made it this far, thank you for bareing with me and let me know if there’s anything confusing!!! this took a very long time of planning and making so if it helped, interact with this post? <3 ✨✨✨
#big shout out to everyones resources mentioned!!!#gif tutorial#mine#mine: tutorial#mine: gifs in txt#ft. charlie barber
125 notes
·
View notes
Text
Tutorial: Simple Carousel without using <input>
Hello everyone!
I always wanted to create a Carousel-based theme, upon researching, I found yeoli-thm‘s tutorial (link is at the demo) but I had a difficulty in understanding it as I am not a huge fan of <input>. Luckily, I managed to create a simpler version of the carousel without using <input>.
Here's the result:
Preview
By having this result, you can create your very own pages and all-in-one themes! The base code will be provided in the demo but if you want to learn how to create this from scratch, please do read this till the end!
IMPORTANT!:
Please like and/or reblog this post if you like this tutorial. If you intend of using this code as a based code, you are required to mention me in your theme post.
This tutorial consists of four aspects:
General styling
Basic Container
Navigation
Carousel
The concept of creating a carousel derives from my smooth scrolling tutorial. If you haven’t check that out, I highly recommend for you check it out.
General Styling
1. Firstly, you need to add the basic code for your carousel. You can retrieve it from this site.
2. Add the universal selector at the style/CSS area:
/*GENERAL STYLING*/ *{ margin:0; box-sizing: border-box; scroll-behavior: smooth; }
It is pertinent to add scroll-behavior:smooth. This is to create a smooth scrolling effect.
3. Once you're done with it, you can create a basic styling for the body, fonts, etc at the style/css area. In my demo, I made a basic styling of the body, paragraph, title, and scrollbar. Example can be seen as follow:
/*BODY AND FONTS*/ body{ background: rgb(248,248,255); background-image: linear-gradient(180deg, rgba(248,248,255,1) 0%, rgba(223,223,255,1) 50%); font-family:geo sans light; text-align:justify; line-height:150%; } @font-face { font-family: geo sans light; src: url(https://static.tumblr.com/v6akjgz/MQbqf9ocl/geosanslight.ttf); } p{ margin-bottom:2rem; } h1{ font-family:vintage fair; text-align:center; color:#1f1b1b; text-shadow:-1px 0 black; font-weight:300; margin-bottom:1rem; line-height:1.15; } @font-face { font-family:vintage fair; src: url(https://static.tumblr.com/v6akjgz/SNhqfaujo/vintage_fair.ttf); } /*SCROLLBAR*/ ::-webkit-scrollbar { width: 18px; height: 18px; } ::-webkit-scrollbar-track { border: 8px solid #fff; background-color: rgba(0,0,0,.05); } ::-webkit-scrollbar-thumb { background-color: #acacff; border: 8px solid #fff; }
NOTE!: There's no need for you to copy and paste the above code. You can always edit it or create other designs that you like to add.
Basic Container
A basic container is a place where you'll be adding the carousel. You can design it however you want in the style/CSS area but at the most basic, you can style it this way:
/*BASIC CONTAINER*/ .content{ /*Basic*/ width: 50%; height: 60%; /*Position*/ position: fixed; top: 50%; left: 50%; transform: translate(-50%, -50%); /*Important*/ overflow: hidden; /*Design*/ background-color:lightblue; border-radius: 5px; border: 1px solid rgb(58, 2, 58); }
Please do take note that this is one of the many ways of creating the basic container. If you know your ways in CSS, you can style it however you want!
IMPORTANT: It is very important for you to add overflow:hidden;. Without this, it will cause the scrollbar to appear and make it less pleasing to see.
For the HTML area, add the following code:
<!--CONTENT--> <div class="content"> <!---THIS IS WHERE THE CODE FOR CAROUSEL WOULD BE SITUATED AT--> </div>
By now, if you click [Update Preview] and [Save], you will now see the container on your page.
Navigation
Navigation is the place where all the links to the section will be wrapped in.
1. Add the code below /body.
<!--NAVIGATION--> <div class="contentlink"> <ul> <li><a href="#partone">First</a> <li><a href="#parttwo">Second</a></li> <li><a href="#partthree">Third</a></li> <li><a href="#partfour">Fourth</a></li> </ul> </div>
2. After that, you are required to style it at the CSS/style are (preferably below the content). The most basic ways to do it is by doing it this way:
/*NAVIGATION*/ .contentlink{ width:5rem; height:10rem; position:fixed; top:30%; right:10%; } .contentlink ul{ list-style-type: none; padding:0; } .contentlink li{ background-color:ghostwhite; border:1px solid lightblue; border-radius: 5px; display: block; margin-bottom: 1rem; padding:1rem; text-align: center; } .contentlink li a{ text-decoration: none; color:rgb(24, 91, 136); transition: 0.25s ease-in; } .contentlink li a:hover{ color: midnightblue; font-weight: 600; transition: 0.25s ease-out; }
So let me explain one-by-one what's the function of each selector:
.contentlink: This is the wrapper for all the navigation links for the carousel.
.contentlink ul: This is the wrapper for the list. Since we don't want any bullets nor padding/indents, it is essential for us to set the list-style-type and padding to none and 0 respectively.
.contentlink li a & .contentlink li a:hover: These are essential to customize the link.
Take Note!
If you are the kind of person who focuses on accessibility, this type of code may not suit your needs. So, you may need to modify both the HTML and CSS code.
Again, this is one of the many ways of styling the navigation section. If you know your ways in CSS and HTML, you can always modify it however you like.
The number of navigation sections does not necessarily be four. It can be two or even six if you like! So, add/remove the link that suits your need.
If you intend to create an effect where whenever you click the section, it will show an indication to it, I would say that it may not be possible to do so as it requires input.
By now, you will see that everything is starting to come up to life. But if you click the button, you'll see that it won't move to another section. This is because we have yet to create the content section.
Carousel
This is where the content of each section lies. Firstly, you need to add the code inside the the div class="content" :
<!--CAROUSEL--> <div class="default" id="partone"> <!-- YOUR CONTENT--> </div> <div class="default" id="parttwo"> <!-- YOUR CONTENT--> </div> <div class="default" id="partthree"> <!-- YOUR CONTENT--> </div> <div class="default" id="partfour"> <!-- YOUR CONTENT--> </div>
Take note!:
class="default" is where you uniformize all the settings to be the same instead of rewriting the same setting in each id
partone,parttwo, etc represents the 'section for the link'. If you refer back tp the navigation above, you'll see that the link/href name is the same as this section. You may change the name to whatever you want to. However, you need to ensure that you also do the same with the link in the navigation area.
Now that you done with this, you can customize default and/or the sections at the css/style area. This is what I did for it:
.default{ width: 100%; height: 100%; overflow: auto; padding:2rem; } .default a{ color:rgb(58, 2, 58); text-decoration:none; font-weight:bold; } .default a:hover{ text-decoration:underline; font-weight:normal; } .default img{ width:100%; margin-bottom:1rem; margin-top:0.5rem; } #partone{ background: rgb(248,248,255); background: linear-gradient(180deg, rgba(248,248,255,1) 0%, rgba(223,223,255,1) 50%); } #parttwo{ background: rgb(223,223,255); background: linear-gradient(180deg, rgba(223,223,255,1) 0%, rgba(197,197,255,1) 50%); } #partthree{ background: rgb(197,197,255); background: linear-gradient(180deg, rgba(197,197,255,1) 0%, rgba(172,172,255,1) 50%); } #partfour{ background: rgb(172,172,255); background: linear-gradient(180deg, rgba(172,172,255,1) 0%, rgba(134,134,254,1) 50%); }
Take note!
If you want to uniformize everything (ie not wanting each section to have a different background-color/image), you can simply remove #partone all down to #partfour.
It is important to set the width and height to 100%. This is to ensure that your section will have its own section.
Set the overflow to auto. This is to allow the carousel to scroll in case if the contents overflow.
With that, you’re done! Please take note that what I’m sharing with you is just an idea of how to create a carousel effect using CSS and HTML. There are myriads of ways of creating this design as long as you follow the said concept:
Set your scroll behavior to smooth.
For the basic container, make sure that overflow is set to hidden.
For the navigation, make sure that the link is set to #THE NAME OF THE SELECTOR.
For the carousel, make sure that height and width are set to 100% + overflow is set to auto.
For each carousel, make sure its id is the same as the navigation.
All the best!
18 notes
·
View notes
Text
Random Thoughts - Computers
About time I live up to this blog's title.
Today, I'll be talking about computers. We all use them, they are everywhere. From the desktop PC, to the chip inside your car, computers define our current lives, but I'd like to take a minute to just look at some of the absolutely crazy things about them.
- The scale of microchips today. The transistor, a simple electrical component invented in the mid 20th century, essentially began the computer age. Before this, you could have a light switch or something, but you didn't have any processing ability. The first transistors were the size of lightbulbs, and computers for basic math took whole rooms. Today, transistors are so small that there are growing concerns that they will become smaller than atoms, which is not possible or feasible with the transistor-based computer. The fact that trillions of things that were the size of a lightbulb less than a century ago fit into a tiny chip is absolutely crazy. Also Moore's Law, the fact that this number of transistors doubles every 18-24 months. Even in my lifetime, that means transistors have gotten 500-1000 times smaller, roughly speaking.
- The fact that they even work at all. It takes a bit of learning to understand how logic gates work. The small groups of processors that do operations such as OR, AND, or NOR. How these turn into Minecraft is a question that is very difficult to answer. At its core, a computer is always making small logic operations, and it is somehow able to turn our input into those logic operations and then back into something we can understand well almost instantly.
- Everything about computers was created by someone. The modern computer system builds on decades of work by millions of individuals, and somehow all of this works together in one machine. Off the top of my head, I cannot think of another single object that represents so much collective human effort to work. Someone had to start there and put logic gates together. Someone else had to come up with ways to program in binary. Someone else had to invent memory storage techniques. Someone else had to create Javascript. On and on it goes. Computers are completely artificial. Everything about them is human-designed, and that is something really interesting to think about.
- It is also pretty crazy that someone managed to create systems for using computers that require almost no technical knowledge. Creating such a system requires someone to create an OS that has basically no potential for error, and if there is an error, it had better have built in checks to fix it, and at the very least tell the user exactly what is wrong and how to fix it. Plain code just spits out errors all the time, but Windows 10 does not get this luxury. I may not like Windows all that much, but I do appreciate just how much work it does to hide all the technical details from most people who don't want to be dealing with them.
- Video games. Video games as a medium are basically unlike anything else. Most media forms around today have a long history. Music, art, books, plays, board games, even videos and podcasts could have once just been seen in live form. Video games are unique in that they allow the player to interact with the game. You could write in a book, or ponder what its author means, but you do not get the option of rewriting its stories and forging your own path. Video games can imitate the real world in the ways that other media cannot, bringing everyone a bit closer in their own ways.
- The people who did some of the early work on computers, creating Unix, Unicode, C, html, etc., have probably had their work reach more people than anyone else ever. Sure, lots of people have heard of the Mona Lisa, or seen the Eiffel Tower, or listened to Beethoven's 5th, but it seems quite likely to mean, that more of them have used a computer. Computers are so universal, that the things at their roots are used by almost everybody.
- Computers are amazingly good at some things, and amazingly horrible at others. If you want to know 12390812908 / 1290834, a computer will beat you every time, regardless of the speed of your long division, but if you are trying to log into your roblox account, you'll be able to flip the animal the right side up far better than the computer will. We worry about the uprising of AI, but we're talking about something that can't always tell which of these pictures is a train. Computers, much like humans but in their own way, are incredibly smart and also incredibly dumb. For this reason, I believe that computers, at least in their current form, will probably stick to specific places in society. I don't expect to see a computer playing jazz improv better than the greats any time soon.
This is all the things that come to mind, but computers are amazing, so I will likely be back to another round at some point.
#I just wrote for 20 minutes and didn't proof read it so it probably makes no sense#longform infodumping#technology#random#underworld-secretary
2 notes
·
View notes
Text
Anonymous:
Do you have any advice on how to start an rp blog? I feel like there's so much to do and so many specific things, it looks intimidating, but I really want to get into it (and your blog seems like a safe space to ask as a baby in the matter)


Hi! Thanks you for asking and for trusting. I do admit that rping on tumblr can look daunting and there is a series of things that are considered “etiquette” that might not be obvious for newcomers. And the only way to learn is to ask, right? As I’m not sure if you would like something more specific or a step-by-step, I’m going to go through the whole process.
note: this is a repost from an ask in a more reblog-friendly format
1. Setting up the blog
You might want to make a new e-mail account for each blog you want. I recommend making a gmail/google account, so you may be able to use other services and associate them with your blog. I’ll go into more details in a minute.
Some people would rather have a personal blog and then making the RP blog as a side-blog. Or a “hub” blog and many side-blogs so they have everything centralized. The downside is that you can’t follow people with side-blogs, only the main – and some rpers are a little suspicious of personal blogs, so if you intend to go this route it might be a good idea to state somewhere in your blog that you have a RP blog.
Tip : It isn’t said too often, but I recommend saving your blog’s e-mail and password somewhere, maybe a flashdrive or even google drive. This way, if something happens you will be able to retrieve your account.
When picking the URL, for a very long time tumblr had problems tagging URLs with a hyphen ( - ). I’m not sure if it has been fixed or if there are still some issues, so I recommend only using letters and maybe numbers. Other than that, pick anything that sounds nice to you!
Themes are nice, but not entirely necessary. Not everybody has photoshop skills and all that. Some people do have commissioned themes, but if you want to try your hand at it my first stop is usually @theme-hunter or @sheathemes . They reblog many themes from many creators, so there are always many options that might suit your needs. Some creators offer very newcomer-friendly themes that you can configure a lot of things without much hassle but some might require basic HTML knowledge – a few creators have guides on how to properly set up their themes and are willing to and answer questions, so don’t be afraid to contact them! You can also send me an ask, I’m not a specialist but I can certainly help walk you through the basics.
Tip: @glenthemes have very good themes and a basic installation guide here.
When fiddling with the options, try to pick colors that have nice contrast and are easy to read. If you are bad at picking colors or have problems in finding the code for them, I recommend trying this link. There is also this one that auto-generate palettes.
Tip : If you mess with your theme, remember there is the Theme Recovery.
Tip: If you use Chrome or Firefox you can set up different profiles and associate each with a different blog, so you don’t need to log out from any of your accounts.
There are two pages that I recommend having: one is an about your muse. If they are an OC, it is always a good idea to have at least some information out there to make things easier. If they are from a canon source, not everybody is familiar with the material so it might be a good idea to state. For example, if you are going to roleplay as Altria/Arturia, it is a good idea to have a “RP blog for Saber (Altria Pendragon) from FGO/FSN “ somewhere visible. The other page that is a good idea having is a rules/guidelines page. This one can be a little intimidating, but it is usually a way to communicate important things. For example: are you comfortable writing violence? Do you have any personal triggers? There is something you absolutely won’t write? There are things you may figure out along the way and it is absolutely ok to fine-tune this session every now and then. Some people also credit source for their icons and graphics in general in their rule/guideline page.
If you are using the tumblr default themes, when you create a new page you can turn on the option to show a link to the page. If you are using a custom theme, most of the time you will have to link it manually.

Oh, and if you are planning to do a multimuse, it might be a good idea to list which muses you have. The same goes for a hub blog; list the muses and link to the pages.
Icons aren’t necessary but are considered commonplace. You can find some icons I’ve done here but there are plenty of other sources. If you want to do your own icons, keep in mind to don’t make them too big, as a courtesy to your mutuals.
Tip: Anything larger than 300 pixels will be stretched to fit the post. As of today ( 4/29/2021 ) the posts are currently 540 pixels wide. This can be useful as making banners for your blog.
Tumblr allow users to “pin” posts. This mean that they will always visible if you access your blog, even on dash/mobile. You can use this to set up a post with basic links for mobile users or something else. For example, if you are out on vacations and won’t be able to do replies, you can pin a hiatus notice and then remove the pin once you are back.
2. Introducing yourself
Time to officially join the fun! (insert a “Hi, Zuko here” joke) Don’t worry if you don’t have a fancy promo graphic or anything, most people make their initial introduction with a simple post.
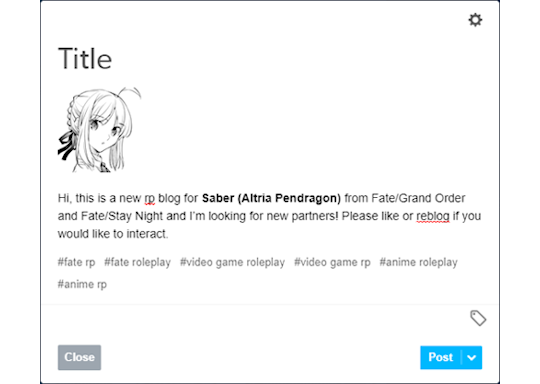
(as you can see, I’m not very good at saying ‘hi’)
Try to introduce yourself in a few lines, but make sure to state which muse you RP as. Some people also like adding their pen name/alias and establishing a brand. Follow as many people as you want that reblogged or liked your post, and tumblr is going to start recommending other blogs that are related to the tags you use normally or have any relation to the people you follow. You can put as many tags as you want, but tumblr will disregard more than 6 tags in their system. Try tags like “<fandom> rp” and “<fandom> roleplay” along with the media, such as “movie” “video game”, “anime” and so on.
It might also be a good idea to follow a few RP memes blogs. They often have options to break the ice, like one-liners that your mutual can send you.
Tip: Don’t forget to turn on the asks and the anon
3. Practical advice
Alright, now that you have a few mutuals, it is time to get to some general tips:
Tumblr can be a little “iffy”, and a great quality of life extension for RPers and navigation in general is installing the New Xkit extension. They offer a number of options to enhance your tumblr experience, but the ones I consider essential are the “editable reblogs”, “quick tags” and “blacklist”. Get it for Chrome or Firefox.
As a rule of thumb I recommend writing your RPs using Google Docs before posting or replying. By doing this you can do some spell check and if your browser crashes for any reason you can easily recover your work. You can also use Word, Open Office, or any text editor you feel like.
Because I’m a bit of a perfectionist, I also have Grammarly ( Chrome / Firefox ) installed for an extra layer of spell/grammar check. There is a subscription option, but the free one works perfectly fine.
To make things easier to locate, always tag the URL of your RP partner when doing a reply. There are other useful things you can tag, such as open starters, memes, and such.
Risking being obvious here, but when you are not interacting as your character it might be a good idea to tag as “ooc” or “out of character”.
Some people like making google docs with basic info and other useful stuff for easier access on mobile. It is a recent trend, it might be easier to edit as opposed to going through tumblr page editor and dealing with the HTML. You can find some templates here and here.
Tumblr’s activity can be unreliable, so don’t be afraid of contacting your partner to see if they have gotten your reply after a few weeks. However, some people also enjoy using the RP Thread Tracker in order to be on top of things. It might be a good idea to check it out.
Because of Tumblr shadowbanning and shenanigans, it isn’t unusual for people to have NSFW sideblogs (sometimes referred as ‘sin blogs’). If you want to write smut, it might be a good idea to consider making one.
Some people don’t like replying to asks, as Tumblr won’t let you remove the initial ask. It has become common to see people making new posts to reply to asks. This is a simple example:
As you can see, I used the mention to have the RP partner notified then I copied and pasted their question on my post and used the quote to indicate it. You can also have fancy graphics, like a line to separate the contents, just do whatever you feel like with the formatting or keep it simple.
To make sure your partner got the answer, I recommend copying the link to the post and pasting on the ask and then replying it privately. An example sent to my rp blog:
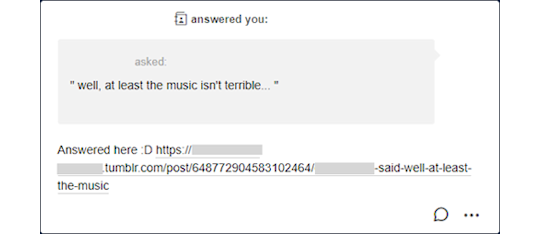
4. Basic Etiquette
Ok, this is a little subjective most of the time but here are a few things that are considered universal courtesy.
Never reblog someone else’s headcanons. If you enjoy it, maybe it should politely contact the author and ask if it is ok to write something based on their original idea but you should never downright copy or lift something from another creator. It is considered rude, or even theft in some cases.
Don’t reblog threads you are not involved with. It is ok to leave a like, but never reblog. This is because Tumblr can mess up the notifications and disrupt the flow of the RP.
Don’t copy other people’s graphics. It is very rude and sometimes they commission (aka: paid) for it.
Trim your posts. What does that mean? Every time you reblog with a reply, the post tends to get longer and longer, and it can cluster your and your mutuals’ dashes. This is why the New X-Kit’s “editable reblogs” is an almost must-have tool. If for some reason you can’t install X-Kit (if you are on mobile for example), then remove the previous post or ask your partner to trim for you.
Never take control of your RP partner’s muse. This is called “godmodding” and it is heavily frowned upon. It is ok to control your muse and the possible NPCs that you inserted, but never seize someone else’s character. Likewise, it can also be very upsetting if you use what people call “meta-gaming”, applying knowledge that your muse shouldn’t know about the other. For example, let’s say your RP partner’s muse is a vampire, but they have never disclosed that information to your muse, who also doesn’t have an excuse to know that (for example, being a vampire hunter) so it can be quite jarring sometimes. When in doubt, contact your partner.
This should go without saying, but RPing sexual themes with users under the age of 18 are illegal. It doesn’t matter if the age of consent in your location is lower, once you join Tumblr you are abiding by their user guidelines and the law of the state they are located in. If you are an adult, don’t engage minors with these topics, maybe a fade to black would be a better option. If you are a minor, don’t insist or you might cause a lot of legal problems for others.
Try to tag anything triggering. Violence, gore, NSFW. Both Tumblr and the New Xkit have options to block keywords.
When picking PSDs or graphics for your blog, you should avoid templates that change the color of the skin of POCs muses and try to pick the right race/ethnicity of the muse you are going to RP as. I won’t go through a lot of details, as it is a rather lengthy subject in an already lengthy conversation but keep this in the back of your mind.
Some RPers don’t like when you reblog memes from them without sending anything. Try to always reblog from a source or to interact with the person you are reblogging from, it can be rather disheartening to be seen as a meme source rather than a RP blog. This isn’t a rule and some people don’t mind, but it is always a good idea to try to do this.
This might be more of a pet peeve of mine than proper etiquette, but it is ok to use small font. What is not ok is use small font + underscript. Some people have disabilities that might make it harder for them to read it, so it might be a good idea to refrain from using it. Maybe if you feel like doing something fancier every now and then, but I wouldn’t recommend making this a habit.
Mun and Muse are different entities. Remember that it isn’t because a muse does something (especially a villain one) that the mun condones something. Never assume anything about the mun, when in doubt talk to them.
Be mindful of your partners and treat them the way you would like to be treated.
As a rule of thumb, always talk to your RP partner. It is only fun as long both of you are enjoying it.
5. Closing Words
This got longer than I expected.
Despite all of that, don’t be too worried about not being very good at first. I assure you that you will get better with time, so don’t be afraid of experimenting as long you feel comfortable. And don’t be afraid of saying “no” if something bothers you.
My inbox is always open to questions and ideas, so feel free to contact me anytime!
I would also ask my followers: there is advice I missed/overlooked? Anything you would like someone have told you when you first started? Add your thoughts so I can update this.
Happy RPing!
17 notes
·
View notes
Link
LETTERS FROM AN AMERICAN
June 28, 2021
Heather Cox Richardson
This evening, President Joe Biden published an op-ed in Yahoo News about the infrastructure bill now moving forward on its way to Congress. He called the measure “a once-in-a-generation investment to modernize our infrastructure” and claimed it would “create millions of good-paying jobs and position America to compete with the world and win the 21st century.”
The measure will provide money to repair roads and bridges, replace the lead pipes that still provide water to as many as 10 million households and 400,000 schools and daycares, modernize our electric grid, replace gas-powered buses with electric ones, and cap wells leaking methane that have been abandoned by their owners in the private sector to be cleaned up by the government. It will invest in railroads, airports, and other public transportation; protect coastlines and forests from extreme weather events; and deliver high-speed internet to rural communities.
“This deal is the largest long-term investment in our infrastructure in nearly a century,” Biden wrote. “It is a signal to ourselves, and to the world, that American democracy can work and deliver for the people.”
Biden is making a big pitch for this infrastructure project in part because we need it, of course, and because it is popular, but also because it signals a return to the sort of government both Democrats and Republicans embraced between 1945 and 1980. In that period after World War II, most Americans believed that the government had a role to play in regulating business, providing a basic social safety net, investing in infrastructure, and promoting civil rights. This shared understanding was known as the “liberal consensus.”
With the election of Ronald Reagan to the presidency in 1980, the Republican Party rejected that vision of the government, arguing that, as Reagan said, “government is not the solution to our problem; government is the problem.” But while Reagan limited that statement with the words “in this present crisis,” Republican leaders since the 1980s have worked to destroy the liberal consensus and take us back to the world of the 1920s, a world in which business leaders also ran the government.
For the very reason that Biden is determined to put through this massive investment in infrastructure, Senate Minority Leader Mitch McConnell (R-KY) would like to kill it. Until recently, he has presided over the Senate with the declared plan to kill Democratic bills. He opposes the liberal consensus, wanting to get rid of taxes and stop the government from intervening in the economy. But today’s Republican lawmakers are in an awkward place: by large margins, Americans like the idea of investing in infrastructure.
So the Republicans have engaged in a careful dance over this new measure. Biden wants to demonstrate to the country both that democracy can deliver for its people and that the two parties in Congress do not have to be adversarial. He wanted bipartisan support for this infrastructure plan.
A group of Democrats and Republicans negotiated the measure that is now being prepared to move forward. Last week, five Republican negotiators backed the outline for the measure. They, of course, would like to be able to tell their constituents that they voted for what is a very popular measure, rather than try to claim credit for it after voting no, as they did with the American Rescue Plan.
Negotiators were always clear that the Democrats would plan to pass a much larger bill under what is known as a “budget reconciliation” bill in addition to the infrastructure plan. Financial measures under reconciliation cannot be killed by filibuster in the Senate, meaning that if the Democrats can stand together, they can pass whatever they wish financially under reconciliation. Democrats planned to put into a second bill the infrastructure measures Republicans disliked: funding to combat climate change, for example, and to promote clean energy, and to invest in human infrastructure: childcare and paid leave, free pre-kindergarten and community college, and tax cuts for working families with children.
Crucially, that bigger measure, known as the American Families Plan, will also start to dismantle the 2017 Republican tax cuts, which cut the corporate tax rate from 35% to 21%. Biden wants to return the corporate tax rate to 28%, still lower than it was before 2017, but higher than it is now.
To keep more progressive Democrats on board with the bipartisan infrastructure bill, Democrats need to move it forward in tandem with the larger, more comprehensive American Families Plan. This has been clear from the start. After announcing the bipartisan deal, Biden reiterated that he would not sign one without the other.
And yet, although he himself acknowledged the Democratic tandem plan on June 15, McConnell pretended outrage over the linkage of the two bills. McConnell and some of his colleagues complained to reporters that Biden was threatening to veto the bipartisan bill unless Congress passed the American Families Plan too.
It appears McConnell had hoped that the bipartisan plan would peel centrist Democrats off from the larger American Families Plan, thus stopping the Democrats’ resurrection of the larger idea of the liberal consensus and keeping corporate taxes low. Killing that larger plan might well keep progressive Democrats from voting for the bipartisan bill, too, thus destroying both of Biden’s key measures. If he can drive a wedge through the Democrats, he can make sure that none of their legislation passes.
Over the weekend, Biden issued a statement saying that he was not threatening to veto a bill he had just worked for weeks to put together, but was supporting the bipartisan bill while also intending to pass the American Families Plan.
McConnell then issued a statement essentially claiming victory and demanding control over the Democrats’ handling of the measures, saying “The President has appropriately delinked a potential bipartisan infrastructure bill from the massive, unrelated tax-and-spend plans that Democrats want to pursue on a partisan basis.” He went on to demand that House Speaker Nancy Pelosi (D-CA) and Senate Majority Leader Chuck Schumer (D-NY) agree to send the smaller, bipartisan bill forward without linking it to “trillions of dollars for unrelated tax hikes, wasteful spending, and Green New Deal socialism.”
McConnell is trying to turn the tide against these measures by calling the process unfair, which might give Republicans an excuse to vote no even on a bill as popular as the bipartisan bill is. Complaining about process is, of course, how he prevented the Senate from convicting former president Trump of inciting the January 6 insurrection, and how he stopped the establishment of a bipartisan, independent committee to investigate that insurrection.
But McConnell no longer controls Congress. House Speaker Pelosi says she will not schedule the bipartisan bill until the American Families Plan passes.
Pelosi also announced today that the House is preparing legislation to establish a select committee to investigate the January 6 attack on the Capitol. She had to do so, she noted, because “Senate Republicans did Mitch McConnell a ‘personal favor’ rather than their patriotic duty and voted against the bipartisan commission negotiated by Democrats and Republicans. But Democrats are determined to find the truth.”
The draft of the bill provides for the committee to have 13 members. House Minority Leader Kevin McCarthy (R-CA), himself likely to be called as a witness before the committee, will be able to “consult” with the Speaker on five of the members, but the final makeup of the committee will be up to the Speaker. This language echoes that of the select committee that investigated the Benghazi attack, and should prevent McCarthy from sabotaging the committee with far-right lawmakers eager to disrupt the proceedings rather than learn what happened. Instead, we can expect to see on the committee Republicans who voted to establish the independent, bipartisan commission that McConnell and Republican senators killed.
Biden’s op-ed made it clear that he intends to rebuild the country: “I have always believed that there is nothing our nation can’t do when we decide to do it together,” he wrote. “Last week, we began to write a new chapter in that story.”
—-
Notes:
https://news.yahoo.com/biden-americans-can-be-proud-of-the-infrastructure-deal-214533346.html
https://talkingpointsmemo.com/news/reconciliation-republicans-mcconnell-biden-infrastructure-bipartisan
https://www.whitehouse.gov/briefing-room/statements-releases/2021/06/26/statement-by-president-joe-biden-on-the-bipartisan-infrastructure-framework/
https://www.axios.com/mcconnell-approach-infrastructure-biden-democrats-440f11de-2661-4f7c-951c-d3b304374325.html
Sahil Kapur @sahilkapurThe Jan. 6 select committee will have 13 members. Kevin McCarthy gets "consultation" on five of them but Nancy Pelosi has the last word. From the text: 666 Retweets3,137 Likes
June 28th 2021
https://www.congress.gov/bill/113th-congress/house-resolution/567/text
LETTERS FROM AN AMERICAN
HEATHER COX RICHARDSON
#infrastructure#Heather Cox Richardson#Letters From an American#Biden Administration#goverment#effective government#political#corrupt GOP#criminal GOP
1 note
·
View note
Note
hi! im an aspiring webcomic maker and i was wondering if you had any tips? (one thing i gotta ask is abt making your own website: did you code it yourself or is that a template?). thanks in advance! devils territory rocks btw, i love ur character design
thank you!! 💚 it really means a lot to hear that people like the stuff we’re making
i’ve been really lucky to get to work with my girlfriend making this because she had years of experience drawing + writing the webcomic bad bad things before we started, so a lot of this stuff i learned from her
heres the big tips that i’ve got (mostly relevant to narrative comics cuz that’s the vast majority of what i make):
1. don’t feel like you have to plan absolutely everything out before you start. have a solid roadmap so you don’t get lost in the weeds and have a clear plan of your major plot points/character arcs/ending, but a big part of the fun of publishing a comic serially is being able to keep things spontaneous and interesting, especially for yourself. you have the freedom to take things in new directions whenever you want to, so you should embrace that and go with the flow!
2. once you’ve started publishing your comic, read it! i know a lot of authors/artists/filmmakers like to just put art out there and never revisit it, but i think it’s essential to get the audience’s perspective of your work so you can get a better idea of your best approach moving forward. art is one thing in your head and a whole other thing when you’ve actually made it, so it’s possible that characters, relationships, environments, plot points, etc may not be on the page what you imagine them as in your head. it’s a great way to see what you’re doing right and what you may need to improve on next time
3. don’t worry about making it perfect. webcomics are a time sensitive thing if you want to actually get through them to the end in your lifetime, so you’re going to have to let go of extreme perfectionism and learn to love the little flaws and errors inherent to the process. there’s a lot of earnest charm and emotional honesty that you can lose by overworking art and turning it into a flat pruned product with all the bumps smoothed out, and honestly you just don’t have time for too much polish. you’re better off in every way by learning to say “yknow what? good enough”
4. dive in and start making comics right now! there’s no amount of research and theorizing and analyzing other comics that can give you the skill that actually making comics teaches you. even if your big webcomic idea isn’t quite developed enough for you to start it, try making other smaller comics first so you can learn the ropes. you gotta get a feel for the visual storytelling and word/image dynamics essential to comics, and you can only do that through practise
in terms of websites, i’ve been all across the board with that one. originally the comic was on a smackjeeves website before they decided to no longer allow people to create custom comic pages, so we moved to our own wordpress website which i struggled with somewhat because the comic plugins available were not very user friendly. we’ve since moved to using a customized template on comic fury and i really have to recommend their platform, its got basically every tool i’ve needed or wanted so far and it’s clearly a labour of love for the people running it who are also super nice and friendly if you ever have any questions or issues. they’ve got basic templates that are easy to edit, but you can also fuck with the html as much as you want.
that’s all i’ve got for now, i hope any of this was helpful! i am by no means an expert but I’ve learned so much making devils territory and i’m very happy to share it. feel free to ignore any of this if it doesn’t vibe with you for whatever reason, because this is just what’s worked for me. good luck with your comic, and also make sure to send me a link when you start publishing it!
18 notes
·
View notes
Text
creative industries
Advertising and marketing
Architecture
Crafts
Design: product, graphic and fashion design
Film, TV, video, radio and photography
IT, software and computer services
Publishing
Museums, galleries and libraries
Music, performing and visual arts
qualifications and skills you need to become a graphic designer.
“All graphic designers need to be proficient in Adobe's Photoshop, InDesign and Illustrator software. Most graphic designers need an understanding of HTML and other web design applications. You can further solidify your credibility as a graphic designer if you have evidence showing your expertise in print design, photography and organizational branding.”
“If you want to work for a large company and earn a bigger pay check, a bachelor’s degree in graphic design is the ticket. When you pursue a college degree, you learn about colour and design fundamentals, motion graphics, traditional typography, digital illustration, webpage scripting, business graphic design and webpage design. Many programs offer internships to help ground your learning in practical application. Building a portfolio of your work is essential. In college, you can do this by using class assignments to represent your skills. If you don’t go to college, generate examples or volunteer with local organizations to build samples of your work.”
“Experience is everything in this profession. As you interview for graphic communications jobs or vie for an independent contract, a portfolio that represents your work is critical. The breadth of your work will be represented in the portfolio and by clients that hire you. Consider building a website that displays your work and skills in the graphic communications field.”
the salary roughly can vary from 30k to 40k + which is extremely good pay if you wanna work in the graphic design as it something that some people aspire to do. Graphic design was the focus point of this topic, I'm not sure if i want to pursue a graphic design pathway into the creative industries. I'm more leaning towards being a free lance artist. Though the skills i have learnt this term in photoshop would help me become a graphic designer if i so chose to be one even though we have only learnt the basics if i were to continue i would most likely be well equipped to get a degree in university and go onto becoming a graphic designer.
Freelance artist
“A freelance artist is a contractor for hire in the field of art. He or she may work in any medium, but most freelancers work in graphic fields such as illustration, design, or photography. Freelance artists are not in the employ of a single company or organization, but hire their talents out to various clients. Many are self-employed, though some work with agencies or with a small group of regular clients. The field of freelance art can be both more challenging and more fulfilling than standard salaried jobs.”
“A freelance artist must be a highly self-motivated person, as he or she must effectively run a business as well as handle artistic tasks. Like all artists, freelancers must have innate talent backed by knowledge of popular artistic trends and styles. The freelance artist should have a highly flexible style that can be applied to a variety of assignments. Patience and people skills are also assets, as some clients may not know exactly what they want or may not be able to express their desires clearly.”
“The most important tool of the freelance artist is the portfolio. This is a collection of the artist’s best and most representative work, assembled in a professional package for potential clients to view. Traditionally, a portfolio was just that: a large case containing a variety of sample prints. In the 21st century, artists can use websites to display their portfolios and woo clients. They should keep traditional portfolios as well, however, as some clients will see this as a mark of true professionalism.”
i would want to be able to be a freelance artist as i feel i am very self motivated especially when it comes to project's i really enjoy that involve paintings coloured pencil work, graphic work and printmaking. A lot of these skills have been developed in class and outside of class in my spare time especially print making as i have learnt and enjoyed doing that as previously i couldn't do print making of any kind at home. I also love trying and learning new things which is what we did on this project it was out of my comfort zone and i felt i had to really to adapt and learn a new set of skills to which i hadn't previously used.
sources
https://www.wisegeek.com/what-does-a-freelance-artist-do.htm
https://work.chron.com/average-salary-video-game-3d-animator-18753.htm
2 notes
·
View notes
Text
Back in college, let the challenge commence; Web Authoring Blog 4:
I sit in the office as everyone else has gone home. Early finish on a Friday, for some. I’ve stayed back to catch up on some college work. Was I tempted to join the rest, go home and put the feet up? Absolutely. But look, to be honest I would probably just be sitting at home aimlessly scrolling on my phone, this is good for me. Also I really hope the whole finish at 3 thing doesn’t come across as me playing the sympathy card. I’m also hoping that this blog doesn’t slowly turn more and more into my own personal self therapy and less about Web Authoring. Lets keep this on track Conor.
Right, so once again, I do feel that I am playing a bit of catch up with the class. And I’m not going to sit here and pretend it’s not through any fault but my own. I mean I have been attending most lectures and trying to keep not on top of things, but more afloat let’s say. I try stay back in the office most days after work to do the relevant college work, but for lack of a better saying, my brain can be pure mush after work. But I do try, most days (The self therapy has kicked in once again). So anyway, I read the blog on Wordpress, and it was actually interesting. I suppose my expectations were pretty low just judging off ‘wordpress’, the word doesn’t shout out exciting. It was probably so interesting because it’s so relevant to what I’m learning in class which instantly makes it more engaging. But it’s also obviously just relevant to society as a whole these days. Considering how much we engage with websites, blogs, social media and the list goes on. But it was also a very well structured and engaging article. It can be more difficult to engage people when there’s no huge narrative or story to tell. This was just explaining something, but I thought it was very well done anyway. I gave a more detailed breakdown on my thoughts on it all on the forum post.
I continued to do more of codecamp this week as well as bit of reading on HTML and CSS in general. Let’s discuss codecamp first. The practical approach which I am doing with code camp is definitely helping. It’s a really well designed website. It’s both practical and just great for simplifying and breaking down each task. I can see why so many were recommending it. Also, when you pass each test it gives you a little dopamine hit. Sort of like a methadone to the time I’m not wasting on social media and actually using to be productive. I also did a bit of the prescribed reading. Something I should have been keeping more on top of the last few weeks but mostly due to bad time management, have let slip. I started by just reading the basic tags, it was a very quick read as I already had a grasp of most of these but never bad to be constantly looking over so it sticks with you. I then went on to read the article on Web standards which was brief enough but very informative and sort of essential knowledge to have when working in the area. Gemma did mention it in her lectures but the article was also very good at explaining the matter. What stood out when reading this was the importance of validating your code. Which will obviously be very important when doing the assignment. It was also great because it gave a list of different tools to help validate your code. I will definitely be using some of them when carrying out the assignment. It also went into describing semantics of code and the importance of it as well as giving some examples which was also interesting. I still struggled a bit with grasping the details of semantics with code so I read the article listed on Gemmas Moodle called ‘Lets talk about semantics’.
As mentioned above, when doing some reading in relation to HTML, the importance of semantics of code seemed to appear quite a bit. I used to hear the word semantics back in the day when I would be watching an online Youtube show where people debate about movies. It sort of makes sense in that context. It’s all about how humans interpret different words and I suppose it’s actually no different to computers when it comes to coding. It’s actually something I never really thought about until I started reading up on the matter, but it’s pretty interesting. And if you get into the grander ideas of it, there’s definitely some great material for an interesting sci-fi/AI take over the world movie on the whole topic. Anyway, lets not get into that. Like any language, HTML is nuanced and complex and therefore can easily be misinterpreted, a matter that always fascinated me when it came to human psychology, and really isn’t any less interesting when it comes to the machine understanding side of it. It then went on to discuss an article called ‘Our pointless pursuit of semantic value by Divya Manning, an article which went under a huge amount of scrutiny in that scene. From what was discussed, it seemed to be actually extremely relatable, so I went on to read the article in full. It was an interesting read, and also very reassuring to know that everyone went through the struggles I’m currently facing with HTML, even those with great knowledge on it, and a lot overcame it. The author struggled, just like myself, but went on to justify the struggle, something I find myself doing every day when I’m overthinking how much I’m struggling, not only with Web Authoring, but with the course as a whole. And due to the circumstances we’re in which doesn’t really give us the opportunity to share the struggle with our fellow classmates, being able to read about it is a pretty good compromise. There wasn’t a huge amount of room for me to critique her article due to my lack of knowledge but it was still a good read all the same. Anyway back to the ‘Lets talk about semantics’ article. Towards the end it lost me a bit, partly due to my tiredness and partly due to the information in it and the lack of information in my brain about the subject. But it was still a good read, and definitely helped develop my ever growing knowledge on the subject.
I did a very brief bit of reading on CSS, not near as much as I should have considering my struggle with the topic in Saturdays class. I do aim to do more next week though. Once again, the class great, but unfortunately I’ve always struggled with classroom learning. Something I tried to work on in later years but really let it slip again. Even with some of my favourite teachers and lecturers back in school and college, I always struggled. There was a lot of mention of fonts and colours and it seems to be about making your code and website as engaging as possible for the user. As stated, I will do more reading on it in the coming week and hopefully get some practice in too. I just wanted to get a bit more of a grasp on HTML before that.
Anyway this blog was a whole lot longer than I ever intended. As I stated above, I need to continue to work on my time management if I want to do well with this course.Anyway, let’s end this weeks blog as I started it, a good old fashioned bit of Self Therapy. I’ve probably said it at least 20 times in these blogs, but I’m struggling, and I’m worrying. there is backstory as to why I’m in this course but that’s another tale for another time. I’m putting a lot into this course and would hate to come out with nothing. If I don’t up my game, I worry I won’t make it through. I actually watched a video today explaining the importance of struggle in life. Not to sound too cliched, but it can make you a better person in the process. I do believe that. I’m going to embrace this struggle. I aim to start the assignment ext week as I feel it might be the best way for me to learn, it will help give me a bit more structure that I feel I need. Am I at the level of knowledge to start the assignment, some would say no. But I feel it’s the best way for me to approach things and make best use of my time while learning as much as i can in the time I have. Sometimes if you have a hunch you just have to go with it. Time will give a good idea if I was right or wrong. I haven;t checked the word count on this blog, so if it’s 750000000000 words I do apologize to the reader, if you’re still reading at this point that is. Anyway, until next time!
1 note
·
View note
Text
Dental Marketing Tips and Ideas for Dentists

Imagine that: Your dental clinic has gotten so popular you are asked to create the rounds the day talkshows at which you reach reveal actors to whiten their teeth with strawberries, baking soda, and a charcoal briquette. Pretty awesome?
Okay... you may not desire to be considered a star dentist however I'm sure getting leads and much more patients will be probably pretty at the top of you list to cultivate your own dental small enterprise enterprise.
Dentistry is just a field, irrespective of what condition you are in. Cities such as Los Angeles have over 10,000 listings of dental practitioners on Yelp. There exists a office on every single block and also at every strip mall at most city. There is a great deal of competition and you are likely to wind up getting their bits, when you are not designed with the advertising tools.
I understand you've probably tried to employ a marketing business or SEO firm to help improve your clinic plus you were guaranteed yields by them but couldn't send. They had no clue exactly what these actually do to you and left it all seem really confusing that you find yourself ostensibly cutting them a test.
The insanity will stop the following.
You want to create yourself knowledgeable about which online advertising strategies ACTUALLY operate to help improve your clinic. Once you realize these advertising approaches you'll be able to request your SEO company how they're doing these activities and also make them demonstrate testimonials on the way they accomplished those aims. It's probably time for you to kick them and search for somebody In case they can not.
Here's What your SEO Company SHOULD Do for youpersonally:
Optimizing Your Website for SEO
Tracking your AdWords Daily and Making Good Adjustments
Assessing and Managing Your Local Listings and Review Sites
Fixing Your Dental Office's Yelp and Actively Helping You Push to Get Good Reviews
Creating New and Engaging Content About Dentistry in Your Website
Promoting Your New Unique Content Though Article Share Sites and Social Media
Assembling Strong Backlinks with Reputable Sites to Your Website
Auditing Your Dental Office Manager and Making Sure They Truly Are On Task
Helping You Build a Good a Good Sales Funnel So Your Leads Turn Into Patients
Offer You Easy to Understand Reporting and Statistics
Building Strong Backlinks
For the web site to rank well on Google you need to create a reputation . How would you do so? You want to obtain confidence with Google by building traffic from other dental sites. If Google sees a respectable dental-related site or site links to a website, it basically says to itself,"Hey, this trustworthy site thinks that this dental website is worth mentioning. Let's bump it up a few ranks." Using enough, backlinks, along with the years that your internet site will probably proceed upto front page for.
Managing Your Yelp and Review Sites
You might hate Yelp however, the simple truth is that it's actually the very first thing folks might find about your clinic. You can not hide from Yelp as it is the users that induce your list when you did not make one. A excellent online advertising company assisting you to develop strategies about the best way best to have patients that are joyful to render reviews and will probably always push one to find reviews. There are also review websites such as Google My Business, Yellowpages, Superpages, Manta, and more they ought to be managing foryou.
Whenever you do receive yourself a poor review (it's inevitable, almost always there is a individual who renders you ) your dental advertising team should inform you about it and also coach you about how best to write a valuable reaction. Often times a client will raise their score of you personally or will be seen by additional sponsors if they don't
Optimizing Your Website for SEO
Your web site has to be optimized for SEO so as to rank well on Google. There are numerous things Google actively seeks this as portable responsiveness, metatags and descriptions, page loading times, proper HTML and CSS, etc.. Each one these problems will need to be addressed as a way to construct a base for the online advertising. Your web site should work to be able to make the most of your financial commitment decision and convert.
Claiming and Managing Your Local Listings
If you would like to draw patients away from out your city or only from the competitors, you need to begin somewhere. Your online advertising firm extend from there and should make certain you control the city. A significant portion of that is making certain most your Local Listings and Review web sites are maintained and well examined. The presence you have the higher you may appear on maps and Google searches. Your site will begin standing for cities of course, when your SEO team does their occupation you're going to be pulling patients from all around the nation.
Creating New and Engaging Dental Content
Google loves engaging articles, and fresh. Genuine and the interesting your material is more, the more Google values your own site. Many advertising businesses assert to compose unique cut and paste articles. Ensure that your SEO company providing and is researching share-worthy articles which engages any own customers. Just take a while to learn this material that your SEO company was writing to you personally. When it's crap to you Google also believes it's crap and wont value doing it.
Promoting Your Unique Dental Articles
Creating articles fails . An outdated obsolete SEO plan was to produce a lot of useless articles and materials since much dental relevant key words as potential (e.g. Dental Implants, Cheap Dental Implants, Low Cost Dental Implants, etc.. ) in a post assured Google's robots pick this up and position well. That really is black-hat practice that is awful. Google would like to find people talking it, linking it, viewing it, and speaking about the essay. A dental SEO company allocate funds in to boosting the articles they've written to you and instead will focus significantly on creating quantity of articles.
Managing Your Dental AdWords
Lots of you have probably tried AdWords for the clinic and also have not seen a fantastic yield. It is just as if you are simply throwing money. AdWords is space since you are always competing with tens of thousands of companies and dentists with budgets which may just dismiss yours off. Some businesses spend between $10,000 - $60,000+ monthly on AdWords. If you should be managing your AdWords it yourself is improbable you have the individual hours to use its own features for the maximum. With key words costing between $2.50 - $8.00 per click on you have to be somewhat careful and accommodate new strategies fast. The concerns go with your site designer or IT profession that are not pros at AdWords managing it.
Here's are a few fundamental questions to ask your own AdWords supervisor:
What's the Auction Insights reports?
Answer: A report which shows how your campaign will be acting vs. the competition.
What Ad Extensions Have you been currently really using?
Sitelink - Additional connections on your advertisement
Call-out - Additional descriptive text below your advertisement
Structured Snippits - Extensions which emphasize aspects of your solutions
Telephone - Shows your telephone number
Location - Shows a map with your advertisement
Inspection - Highlights third party testimonials in your advertisement
Up are our advertisements turning what internet web sites for the Remarketing effort?
What key words that are are you currently really using?
Answer: Your supervisor ought to be searching through your research phrases and exluding key words You Don't want to appear to (e.g. Gold Teeth, Free Dental Implants, Dental Schools)
There are some issues if a SEO firm oversees your AdWords. As a SEO company has many customers, your accounts has hauled to a AdWords manager who has experience that can result in you losing money. They focus with extend and volume inexpensive rates but produce outcomes that are good.
Auditing Your Office Manager and Tracking Their Performance
It's rather simple to develop with plans that are tailored to aid your business generate leads and convert them but it's just another thing to employ them to the daily routine of office. Therefore everybody is executing A dental advertising and advertising business will work closely to be certain that they're managing your staff.
There are particular matters your workplace manager has on top of such as ensuring that the staff is earnestly requesting happy patients to get reviews, calling direct leads to a timely fashion, or ensuring to record essential data just such as the position and conversion speeds of your leads accordingly that your advertising and advertising and advertising campaigns might be corrected to find the maximum return on these. Your advertising company ensuring all activities have been done and ought to really be auditing your office manager.
Building a Good Sales Funnel
It's possible to spend tens of thousands on SEO and AdWords and receive tens of thousands of leads but in the event that you do not possess a sales funnel, then you will find yourself losing them. A dental online advertising business will produce an activity to help convert those leads. That is carried out using a CRM (Customer Relationship Management) applications that handles and analyze customer connections throughout the sales funnel.
In plain English this means if somebody gets out a questionnaire on your landing page requesting about a dental implant, then you have an activity which raises the likelihood they convert out of a lead to some patient if they cancel appointments, so do not answer your telephone, or ask to get called a day or two after because they'll undoubtedly likely probably soon be out of the town. Good earnings will frighten one induce and also team them develop in to paying patients and to be consistent so that that they really close. Every interaction has been monitored where the flow on your connection is therefore that you may understand.
Creating Easy to Understand Reports and Statistics
Most SEO businesses provide their dental customers complicated mechanically generated reports to demonstrate how"good" their numbers really are many of the metrics just do not matter.
Statistics Important For Your Dental Marketing Campaign
Internet Site Unique Visitors - The Quantity of New Visitors into Your Site
AdWords Clicks - The quantity of clicks that your AdWords campaign is currently becoming
CTR (Click Through Rate) - How likely an outcome will click on your AdWords advertisement after seeing it.
Total Phone Calls - How many telephone calls have been created through landing pages and your Web Site
Entire Leads - How many prospects that your Dental Internet Marketing firm is currently creating through SEO and AdWords
Result in Appointments - The percent of prospects which become appointments
Appointments to Shows - The percent of appointments that appear
No Shows - The percent of prospects Which Make appointments but not appear
Physicians - The amount of prospects which become paying patients
Cost Per Patient - The quantity of marketing dollars which will need to be spent to have a guide and convert them.
With numbers and useful and accurate reporting you as well as your online advertising team may create alterations that are educated to your promotional initiatives that will assist you to spend money.
Whether your objectives are in the event that you want to raise your income to eventually become profitable or to develop into a world dentist to the stars, you have to put money into internet dental advertising. When you have found the correct organization to work well with you ought to be knowledgeable about what SEO and AdWords methods will be effective therefore they can be audited by that you and be certain that you're getting your money's worth. Whenever you and your advertising team are employed in full harmony, you can start to finetune your efforts and finally enlarge the range of your company and ideally open more techniques. Please do yourself a favor and make sure to check out these great resources that will be sure to assist you in creating a successful online marketing strategy: ‘’click here’’
Area Based Marketing (Local SEO)
So as to prevail over close by contenders for new patients searching for a dental specialist in the zone, your dental work on promoting must incorporate advancement for neighborhood look. To get the best outcomes, ensure you have a precise posting over numerous online indexes, utilize nearby watchwords in your SEO system, and urge current patients to leave positive audits on locales, for example, Google, Yelp, and Facebook.
Enhance for Mobile
In 2016, portable web perusing overwhelmed work areas just because. Today, versatile utilization keeps on rising, which implies that notwithstanding area-based promoting, you'll have to ensure you enhance your site for the portable client. Here are the manners by which portable plan and SEO contrast from work area:
Versatile clients have less screen space, so you'll need to restrict boxes of long content.
Structure your site with effectively available symbols or catches that make it simple for site guests to call or solicitation an arrangement right away.
Versatile clients react well to video, so your site and web-based media pages ought to have important and drawing in video substance to build sees.
Improving for versatile is one of the most significant parts of an effective advanced promoting technique for dental specialists.
Remain Engaged with Social Media
Online Media is an incredible method to give your training an individual voice. It permits you to furnish devotees with modern, applicable data, for example, tips, intriguing measurements on oral wellbeing, and pictures of your training and representative culture so they feel as though they know you. The key is to fabricate a relationship with likely patients by offering correlative data. This assembles brand mindfulness, sets up the trust, and improves the probability that your training will be at the bleeding edge of their brains when they're prepared to plan an arrangement.
Notoriety Management
Most of the imminent patients base their choice to plan an arrangement on positive online notoriety. Your online notoriety is most generally spoken to by surveys on Yelp, Google, and web-based media stages. Despite the fact that you can't satisfy everybody 100% of the time, checking your audits routinely and immediately reacting to both positive and negative ones shows the worth your training places on understanding fulfillment.
Email Marketing Campaign
Conveying content right to your patients' inboxes permits you to give them complimentary instructive articles on keeping up dental wellbeing, admittance to neighborhood wellbeing assets, occasional advancements, and in any event, charging data. You can likewise make it a stride further and fragment your rundowns by socioeconomics so as to offer more customized content. Email showcasing is one of the structure squares of a dependable connection between your patients and your dental practice.
Remain Human
In conclusion, one of the most significant parts of any advanced showcasing effort for dental specialists, computerized, or something else, is the capacity to stay human and compassionate. In the event that you need a bigger crowd to consider your business, you have to show you're put resources into the network. Individuals need to give their business to organizations with a soul. Attempt to partake in-network occasions and offer free or ease administrations to the individuals who are oppressed or underinsured. It's advantageous to make a move and feature your responsibility to everyone's benefit. Potential patients will react well.
1 note
·
View note
Text
What I learned while self-publishing.

@milkyteefs asked:
I'm unsure about the entire self-publishing world! Do you have a basic outline of the process? Some key highlights/headings of how you started and what connections you needed to make? Thanks again! <3
I went through the process of self-publishing Our Bloody Pearl this summer. Even with all the guides in the world it turned out to be a very grueling experience. I’ll be doing it again with Quasi Stellar soon, but I also hope to traditionally publish The Warlord Contracts trilogy.
First, let’s get this out of the way: Self published books are often very bad.
But they don’t have to be.
Self publishing requires you, the writer, to either wear the hat of everyone else at a publishing house, or be your own investor and pay for professionals to do the jobs you can’t. If you’re willing to put in that effort and money then you can come out with a more professional book than you might have had you published traditionally. If you’re not, then self publishing might not be the right road for you.
Now then, how do you self publish in a way that produces a professional book?
Fifteen Basic Steps to Self-Publishing:
1. Write and edit the book.
This is, understandably, the step that a lot of people get stuck at. Writing a novel is hard. Don’t worry about how or when you’ll publish it until it’s finished.
Just write it.
During this time you should also be marketing yourself as a writer. Learn more about that via my marketing tips tag.
2. Beta readers and critique partners.
Getting feedback from handpicked peers is essential for any book no matter which publishing route you choose. If these terms are new to you, learn more about beta readers here and critique partners here.
During your first book (or two) I recommend starting with critique partners and then moving to beta readers afterward, because critique partners will shred your novel down to the bare bones, which you usually really need the first few books you write. Critique partners will also generally pick at your grammar and typos though, which can be very useful at the end of the editing stage so that your manuscript looks cleaner to an editor (or agent, if you traditionally publish.)
3. Write your blurbs and summary.
While your story is in the hands of your final group of readers, you should already be working on blurbs and summaries. By the end of the publishing process you will need:
A back of the book blurb.
A one-two sentence logline style blurb.
A one page summary of the story.
Don’t put these off! They won’t get any easier if you wait. You can find tips on writing blurbs in this article.
4. Determine that you’re done making changes to the manuscript.
A writer who’s growing and learning will forever feel as though there’s something they can change in their manuscript, but at some point you have to decide that what’s done is done. You will always have another awesome book which will be even better than this one.
If you have trouble determining when this point should be, check out this explanation!
5. Make a publishing timetable.
Give yourself more time on your timetable than you think you need! Traditional publishing takes about two years for a reason. A lot of the steps below this point seem relatively simple compared to writing and editing a book, but they require you to learn new skills and spend a lot of time waiting for other people with busy schedules.
Five and a half: Start book two.
You might have already done this during the beta reading stage, but if not, start another book! Writers should never stop writing and editing (outside of planned vacations, emergencies, and mental health breaks, of course), so pick that pen back up and start pounding out another book.
6. Find a content editor.
If you ran a beta reading stage with 10-20 critical and knowledgeable beta readers in your target audience then congratulations, they served the purpose of a content editor already!
6. Find a copy editor.
A copy editor is the person who checks your grammar, sentence structure, flow, and word usage. I found my editor though the editorial freelance association directory. The main things to look for when choosing an editor:
Experience. This should include testimonies, information about any publishing companies they worked with, and the works they edited in the past. If you can’t easily access and double check these things, then keep looking.
Sample edits. Any editor worth your time will offer you a free sample edit. (For copy editing this is generally 750-1k words of your novel. I’m not sure about other types of editing.) Take advantage of this! Send the same sample to the top four or five editors who fit your price range and see who returns feedback that you jive with and feel comfortable paying.
What if I can’t afford a copy editor?
In general, you can probably get away without hiring a professional copy editor if you (a) find 3-4 solid critique partners who are willing to do a very detailed line edit and proofread of your final draft (do not take advantage of your fellow writers!! Offer them the same in return!!), (b) get free sample edits from a handful of freelance authors to see if they catch any major formatting issues you do regularly, and (c) learn what a style guide is and make at least a simple one for yourself while you do another round of proofreading.
Remember though, traditionally publishing exists specifically so that you, the writer, can get a professional edit without having to pay for it. If you want a professional book without putting in the investment, then querying an agent might be the better option for you.
7. Prepare to offer ARCs to reviewers and friends.
Getting reviews for your book is the most important marketing activity you can do. The sooner you contact reviewers about this, the more reviews you’ll have when the release date comes. Note that the large majority of book reviewers you contact will never respond. If you email 20 reviewers, expect to get one or two reviews out of it, most likely in 4-6 months. (Which is why you should email all your friends and past beta readers too.)
How do we maximize the number reviewers who will read our books?
You know those neat little lists of book blogs who will review indie books? Don’t use them. Anything that with nicely compiled and easy to get reviewer lists is going to be overcrowded with blogs who have two year wait-lists and 97% of them will never even email you back.
Instead, try searching for reviewers you already follow on twitter and tumblr. Look for semi-popular goodreads reviewers who put positive reviews on books similar to your own and check if they have a link to a blog, or an email for review inquiries. Find less well known booktubers that youtube links to off your favorite popular booktubers.
8. Format the book.
You can pay someone to format your novel, but its rather expensive for something that’s relatively easy to learn to do yourself using guides off the internet. Paperback and ebook formatting must be done separately, and your first time I would set aside a full Saturday to tackle each of them, just to be safe. If you have a program like scrivener, with a little tweaking you should be able to get a nice looking ebook with none of the hassle of learning html. There are many other options though. Do a little research to find the one which works for you!
(Note: If you’re printing a paperback you cannot get a paperback cover until you’ve formatted the book and know final page count for your print size!)
9. Hire a cover artist.
The book cover is the most important part of your book, so far as sales and success are concerned.
There’s a huge trend in self published books to skip this stage and work with photoshop or cavna instead. I would not recommend this. Cover artists for professional books do what they do full time. They know the market. They know what sells. So do some writers, but the truth is, many of the writers who think they can design covers, turn out the sorts of designs that are easily pegged as self-published books.
If you want a professional looking book that pops in the amazon charts, hire a professional.
There are a multitude of ways you can go about this. Some large cover art sites like damonza offer bundles which can get pricey, but let you back out with no charge if you don’t like their first drafts and include unlimited changes if you commit. There are also many freelancers who specialize in book covers, for a wide range of prices.
What if I don’t have the money to hire a cover artist?
If there is anything you don’t want to go cheep on, it’s your cover art. But let’s say you absolutely have to get a cover for cheap or free. There are people who do cover designs for $5 on Fiverr, and I think some of them actually turn out half decent covers for very specific genres, but its a gamble. A couple writeblrs do cover design as part of their day job and might be willing to do something cheep or for a trade. You could also learn how to design covers yourself, but if you want to compete with books whose designers went to school just to do what they now do full time, you’ll either have to put in a lot of time or be lucky enough to have a very good, easily executed idea for your particular novel, and hopefully not one with requires any stock photos unless you want to purchase rights to them.
Now, there are some exceptions. Some writers have a natural design brain, and some writers are in fact designers themselves. Sometimes you write a book where the perfect cover design is very simple and easy to produce yourself. But that won’t be most people, with most books.
So far I have seen exactly two of the hundreds of self publisher made covers I’ve seen have actually made me want to buy the story. I’m not trying to be mean. It’s just the truth.
10. Offer ARCs to more reviewers.
Now you have a nicely formatted book and everything! Who can resist that?
11. Do a cover reveal, and during the cover reveal, offer everyone there an ARC.
Cover reveals come in many different forms. Some writers just post the cover on their blog, some do livestreams on facebook, some do question and answer sessions leading up to the reveal, some even go all out and have other writers come talk about their books on their site for a full day prior to the cover reveal.
Do whatever works best for your schedule. The goal is to attract attention for the book, so make sure you link to anything you’ve already set up from #12, so people can easily find your book when you release it!
And, as always, give out ARCs.
12. Get your book and author profile set up on everything.
Prior to your book’s release you should have a goodreads author page, an amazon author page, and a bookbub author page, all with your book attached. You should also have a website and a mailing list (linked to via your ebook), prepared release announcements for every social media site you work off of, and be ready with attractive and easily noticeable links to the book’s sale page off your tumblr blog and website.
Keep in mind that some of these things will take a decent chunk of time to set up, and a few of them require a live human being to confirm you are who you say you are. Start them as early as possible!
13. Release the book!
Time to actually put the book out there for all to buy. You can do a similar hype release as you do with a cover reveal, if you so desire. Make sure you remember to post all your announcements and put up all your links.
Try not to check on the book’s sales until the following day! It does not help their growth or your mental health to constantly be haunting your sales charts. When you do check them, keep in mind that a book which sells two thousand copies in its entire life time has done well, all things considered.
The fantastic thing about self publishing is that you never have to stop selling your book. If you sell fifty copies your first month and then twenty the second and then five the third, you can always dive back into marketing, run a discount, apply for a bookbub ad, focus on marketing yourself as an author and gaining followers. You chose whether your book is done selling.
To offer pre-orders or not?
This is a toss up. In my experience, pre-orders aren’t a good idea for your debut self-published novel, even if you think you have a large audience who will buy them, because they take away from the sales you could have your release week, and the boost those sale give you on the amazon charts. If you do wish to offer pre-orders though, try going through ingramspark instead of amazon advantage, to save yourself tears and heartache.
To go amazon exclusive or not?
Many authors claim that you have to try both to know what’s right for any particular book. Do your own research and decide what you think is best for you.
Thirteen and a half: Start book three.
At this point you should already have finished at least the rough draft of second novel, so don’t forget to start your third book at some point!
14. Offer people read for review copies.
Especially if your debut novel is aimed toward broke teenagers and younger adults, there will be a lot of people who are interested in the book but aren’t motivated enough to actually buy it on faith alone. By offering free ebooks on a read for review basis, you...
Grow your reviews.
Create fans out of people who may have never read the book otherwise.
Have higher paperback sales, because readers who loved the ebook you gave them may decide to buy themselves a paperback.
15, unto infinity: Keep promoting your book into the sunset, while writing new books!
The time to stop promoting you book is whenever you feel you’ve had enough sales and reached enough readers. Until you reach a point where you’ve published so many books that you can’t handle marketing them all, you should still be trying to expand your readership!
And don’t forget to have a little bit of fun along the way. You worked hard for this. Celebrate it.
But what if I just want to get a book out there?
If your goal is not to publish a professional looking book with will expand your fanbase and set you on a path to full time authorship, but rather to have a piece of your writing available in a book format your friends and family can buy, then there’s no reason not to publish exactly how you wish to.
Are all these steps really necessarily?
I believe they are, at least for a debut novel. In fact, there are probably more steps which I missed entirely. But, if you can find multiple self-published authors who went through a less rigorous publishing process and still received hundreds or goodreads reviews, then by all mean, follow that process instead (and let me know about it!)
So which book did you self publish?
This one here! You can support me and my ability to keep giving writing advice by purchasing a copy today =D
#writeblr#writing resources#writers on writing#writers on tumblr#self publishing#authors on tumblr#writing tag: publishing
2K notes
·
View notes