#for the last few weeks
Text
look, soul (2020) aint one of my favorite movies but. BUT. "maybe sky-watching can be my spark"????? exactly what I needed to be reminded of today.
#soul 2020#Feeling useless#And aimless#It's OK if all I managed to do today#Ir#For the last few weeks#Is look up at the sky in wonder#I don't need to have a greater purpose
11 notes
·
View notes
Text
i wish clovis bray a very greatful death
#ooc#i have been in the glassway for 2 hours and it's all his fault.#on the plus side i do not have to worry abt doing it again for gilding LMAOI#IVE BEEN FUCKING GOING ON ABT IT#being not as bad as i remembered#for the last few weeks#it was as bad as i remembered.#oh man oh boy them there wyverns#it was fun tho#im so happy they lowered the requirements to get into gms#bc it means i have new people to farm ascendant shards with LMAO
5 notes
·
View notes
Text
why do parents think they can scare their children out of being mentally ill
#also it does not occur to them that having trouble cleaning whatever is maybe a symptom of mental illness#my mom told me off for leaving ONE pan unwashed for 4 days#while i've been cleaning after EVERYONE#for the last few weeks#like how the FUCK do you think you have the right to point to oh you missed a spot#fuck you#I haven't been cleaning as meticulously since monday.. maybe there's a fucking reason for it???#i literally cleaned as i was baking on sunday#which i usually never do#like literally. NOTHING i do is EVER good enough huh#no point to even try
2 notes
·
View notes
Text
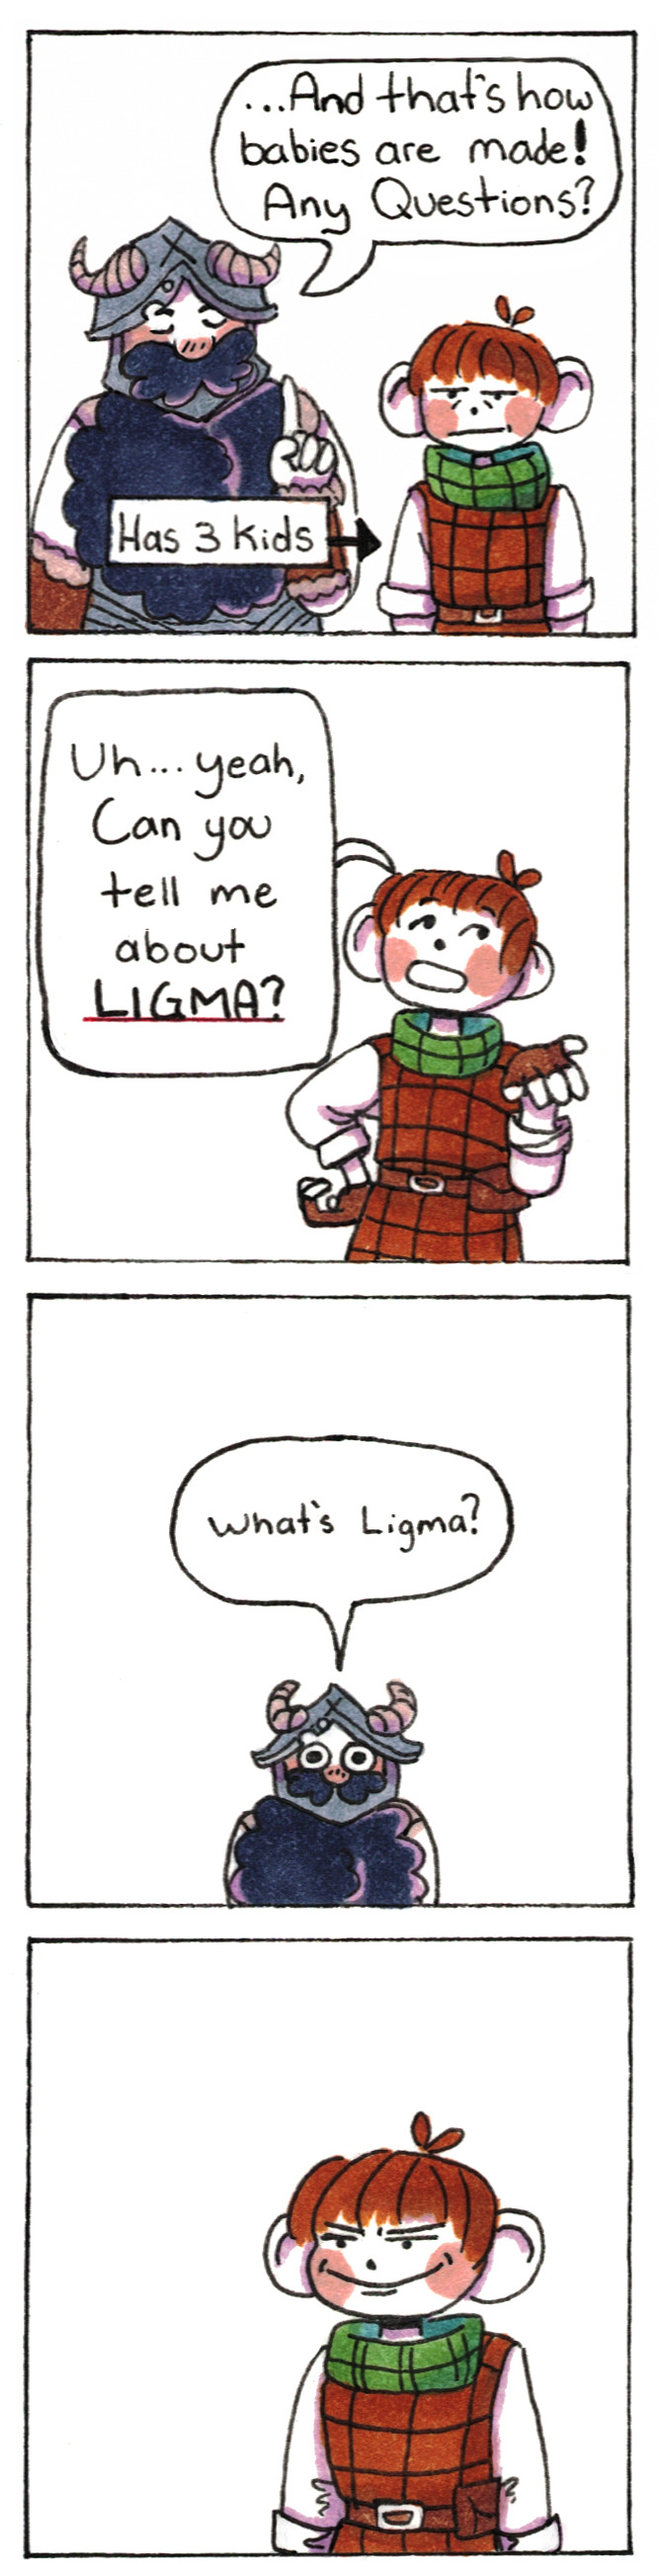
Knowledge Revenge.
#dungeon meshi#chilchuk tims#senshi#Somewhat of an unofficial sequel to the Dragon Comic. I promise I have more versatility in my jokes. I just had to take this opportunity.#Senshi is pretty much a recluse. I think he would know a few of these 'gottems' but not all.#Chilchuck would know gottems that are nearly lost to time. The deep cuts. The ones that you fall for because they are that obscure.#I would also like to take a moment to confess that after the last comic in which I posed a gottem -#I fell victim to a Mind Goblin Attack. I was thoroughly got. I will be on higher alert this time.#So NOBODY be funny in the tags. I am gullible and I like to share things with my friends. Who are *ruthless*.#I have a mild resistance to Vicious Mockery at this point but I can only take so much.#Happy Thistle Thursday Everyone! See you next week!
70K notes
·
View notes
Text

just some designs mainly created because I wanted to draw hakama and then it spiral out from there
bald zuko under the cute
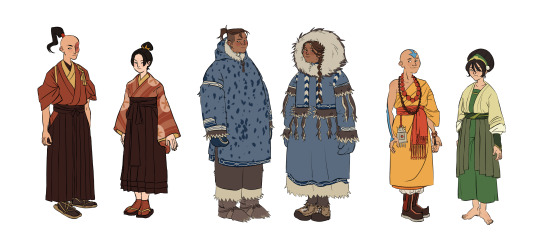
#avatar the last airbender#atla redesigns#atla#atla fanart#atla zuko#atla azula#atla sokka#atla katara#atla aang#avatar aang#toph beifong#my art#I also have some wip designs for summer clothes for most of them and before anyone says anything for the fire nation theyre thai inspired#doing research for this spiraled into reading 3 fairly big books in the span of 2 weeks just cause#i ALSO have adult designs cooking#this was really inspired by all the girls on campus in their hakama a few weeks ago...wahhh so pretty
8K notes
·
View notes
Text

The Batfam (not everyone obviously) is number one and was requested by anon! ofc I started with the one with the most characters, ooppss. But Dick Grayson deserves all the hugs!!
#someone has also been reblogging all my superbat content in the last few weeks?? and I see you 👀#dick grayson#jason todd#tim drake#damain wayne#bruce wayne#batman#batfam#zombie Kasier draws for christmas#see there is a tag#off to the next one!
5K notes
·
View notes
Text

find another role, carry on the show
#EDIT IT DIDNT SAVE MY TAGS. hey so this post got a thousand notes huh. interesting. surely nothing will change#i'll leave all the old tags. for my thought process. and its kinda funny#take a bow stupid idiot (throws a tomato at them)#in stars and time#isat#siffrin#siffrin no middle names no last name ദ്ദി ˉ͈̀꒳ˉ͈́ )✧#... or is it. Smiles#i'd like to draw mira for her birthday but um (hasnt open artfight website in a few days) im scared.#also i have NICE ASKS TO ANSWER.... But im scared. give me a minute#Uawaaaaagh i drew this bc i was trying to animate a little bit but it just . Didnt look good. im not good ag 2d animation#tch. ill keep trying cause there ar e way too many songs that and now about isat because i have brain worms. i need amvs.#IM SCARED TO POST THINGS THAT ARE SPOILERY BECAUSE I WANT MY FRIENDS TO PLAY ISAT. BUT.#isat spoilers#in stars and time spoilers#sasasap#sasasa:p#WHAT IS THE PROLOGUES TAG.#tshirt that says 'i <3 killing the image in the mirror and taking its place' on the fromt#and a list of megan thee stallions tour dates on the back. お金稼ぐ俺らはスター#Im kind of tempted to edit this to be the versiom with the eyes. or maybe twt can have that. or. well#all of my friends are on twt (trombone slide sfx) so maybe thats where i should worry about spoilers.#ill see if i want to slap an eyepatch on them in the morning#Im one of those people who was like idgaf about twohats (lets it simmer for a week) Oh my god. Oh my god. Ohmy god#EDIT. i swapped it out for the Eyes version it should be fine as long as its tagged formspoilers right...#ill post eyepatch vers on twt partly bc spoilers but also ppl over there can be .. annoying ..... ....#i fear i would get 800 You Forgot The Eyepatch replies. PLEASE JUST SEE MY VISION.#[BANGING MY HANDS ON THE GLASS] HIS HAND. LIKE IN THE PROLOGUE. WHEN THEYE. HANDS. HELD[EXPLOSION
1K notes
·
View notes
Text
Drake Siblings
Have I read this prompt somewhere or was this a fever dream from my bored mind.
What if, now hear me out.
What if we bring up Dana Winters-Drake (whose confirmed to at least be alive in the DC verse but no one knows where she actually is)
What if instead of when she had a mental breakdown and getting committed to an Bludhaven clinc she wandered away before anyone noticed and by the time Tim or anyone did notice a lot of stuff started happening at once in both Gotham and Bludhaven (Steph dying, The Bludhaven crisis, etc etc)
Tim still tries to find her though but even with best resources it was like she just disappeared into the wilderness and the stress of trying to handle more and more problems get worse.
So when out of the blue, a couple of years later, he gets a call from an unknown number. On his private, only for friends and family, phone and when he answers he meet with a young girls voice on the other end.
A very young, maybe six or seven, girl who informs him about his apparently half-brother Danny Drake-Fenton. And how she loves Danny so, so, so much but knows her home is dangerous for him to be in.
Tim is stunned and before he could question her, she says Danny is Dana and Jack's baby and that her parents had adopted him years ago and put Dana's stuff that the hospital had away for him to look at when he was older but she just had to fight off their lunch from eating her brother and she knows he needs a better place to live and so she snooped around and found Dana's diary and that she had to unscramble the nonsense Dana wrote and found Tim's number with the words 'tell him about his brother Danny' hidden in it. And-
But before she could keep rambling she hears Danny screaming "JAZZY THE MILK WENT BAD AGAIN AND HISSED AT ME!"
Tim is left with silence after hearing Jazz yell to Danny to lock the fridge and step out of the kitchen as she gets the bat.
#danny phantom#danny fenton#crossover#dp x dc#blue rambles#danny phantom dc#writing ideas#random idea#dpxdc#jazz fenton#tim drake#danny and tim are half brothers#dana Winters-Drake was pregnant when she disappeared#she was out of her mind until she found out and tried her best to regain control but it was hard#she had in and out episodes#she wanted to contact Tim but knew he was still in Gotham and she just coulnt due to episodes of her mental health failing#she was found months later in labor and rushed to a hospital and Danny somehow came out healthy#small but healthy#Dana however lasted a few more hours before passing away from the birth#weeks laters Danny is adopted or fostered out#Dana wrote in diary but scramble and scribbled during her episodes#Jazz finds it and being the smarty she is starts figuring it out#it also set her on her path to understand the human mind#Tim gets to be a big brother#not just for Danny though#hes gonna take Jazz in too after he finds out about how bad the home life is#will Danny still become Phantom though?#maybe#maybe Tim gets there and Jack and Maddie finished the portal way earlier than canon and Danny being curious goes to see#and comes down the stairs to see his baby brother die and then come back
2K notes
·
View notes
Text
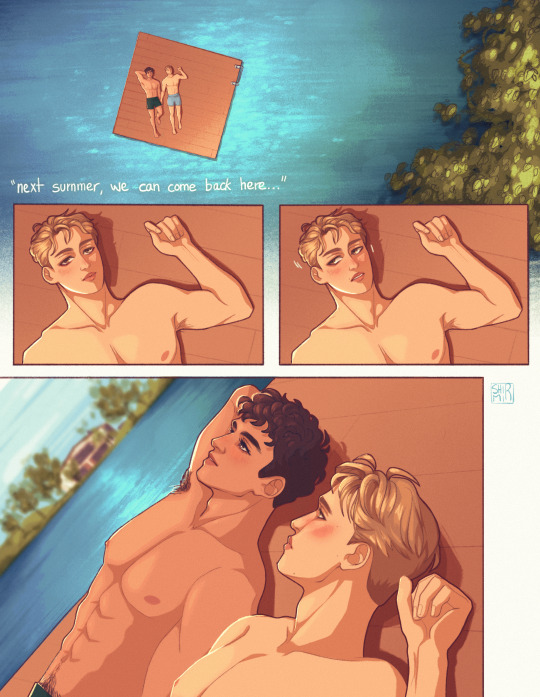
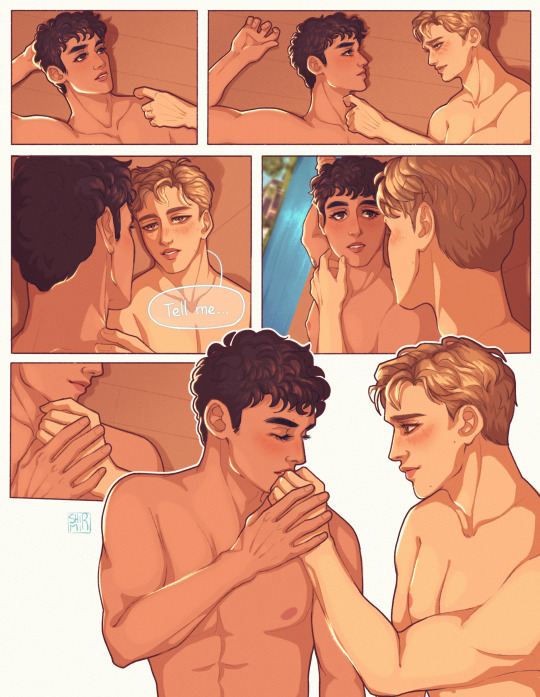

making new memories... ✨
#firstprince#red white and royal blue#rwrb#rwrb movie#rwrb fanart#alex and henry#alex x henry#alex claremont diaz#henry fox#prince henry#henry hannover stuart fox#henry fox mountchristen windsor#fanart#art#comic#my art#artists on tumblr#I worked on this a little every day for a few weeks#and I feel like you can feel the difference and even my progress with each page lol#the last one is my fav I really like how it came out#anyway
3K notes
·
View notes
Text


all I do is draw blindfaith art heeeellllppppp
#GAY GAY GAY#hm drew most of these a few weeks ago. and was like huh I feel like I draw this last one before#*drew#I have. and in the same post no less. embarrassing#malevolent#malevolent fanart#malevolent podcast#arthur lester#oscar malevolent#blind faith#blindfaith
961 notes
·
View notes
Note
Any tips on learning to make buttonholes? I've been putting it off for.... *checks notes* like three years.... but better late than never and all that. I don't have any fancy machines so I gotta do it by hand but that seems right up your alley.
Thanks!
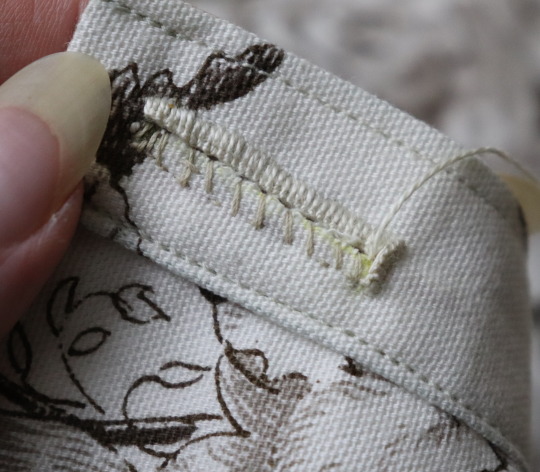
It IS up my alley, yes, I do most of my buttonholes by hand!
I'm actually part way through filming an 18th century buttonhole tutorial, but I expect it'll be a few more weeks before I finish that and put it on the youtubes, so in the meantime here's the very very short version. (The long version is looking like it'll probably be about 40 minutes maybe, judging by how much script I've written compared to my last video?)
Mark your line, a bit longer than your button is wide. I usually use a graphite mechanical pencil on light fabrics, and a light coloured pencil crayon on dark ones. (I have fabric pencils too, but they're much softer and leave a thicker line.)
You may want to baste the layers together around all the marked buttonholes if you're working on something big and the layers are shifty and slippery. I'm not basting here because this is just a pants placket.

Do a little running stitch (or perhaps a running backstitch) in fine thread around the line at the width you want the finished buttonhole to be. This holds the layers of fabric together and acts as a nice little guide for when you do the buttonhole stitches.

Cut along the marked line using a buttonhole cutter, or a woodworking chisel. Glossy magazines are the best surface to put underneath your work as you push down, and you can give it a little tap with a rubber mallet if it's not going through all the way.

I'm aware that there are some people who cut their buttonholes open using seam rippers, and if any of them are reading this please know that that is abhorrent behaviour and I need you to stop it immediately. Stop it.
Go get a buttonhole cutter for 10 bucks and your life will be better for it. Or go to the nearest hardware store and get a little woodworking chisel. This includes machine buttonholes, use the buttonhole cutter on them too. If you continue to cut open buttonholes with a seam ripper after reading this you are personally responsible for at least 3 of the grey hairs on my head.
Do a whipstitch around the cut edges, to help prevent fraying while you work and to keep all those threads out of the way. (For my everyday shirts I usually do a machine buttonhole instead of this step, and then just hand stitch over it, because it's a bit faster and a lot sturdier on the thin fabrics.)

I like to mark out my button locations at this point, because I can mark them through the holes without the buttonhole stitches getting in the way.
For the actual buttonhole stitches it's really nice if you have silk buttonhole twist, but I usually use those little balls of DMC cotton pearl/perle because it's cheap and a good weight. NOT stranded embroidery floss, no separate strands! It's got to be one smooth twisted thing!
Here's a comparison pic between silk buttonhole twist (left) and cotton pearl (right). Both can make nice looking buttonholes, but the silk is a bit nicer to work with and the knots line up more smoothly.

I've actually only used the silk for one garment ever, but am going to try to do it more often on my nicer things. I find the cotton holds up well enough to daily wear though, despite being not ideal. The buttonholes are never the first part of my garments to wear out.
I cut a piece of about one arm's length more or less, depending on the size of buttonhole. For any hole longer than about 4cm I use 2 threads, one to do each side, because the end gets very frayed and scruffy by the time you've put it through the fabric that many times.
I wax about 2cm of the tip (Not the entire thread. I wax the outlining/overcasting thread but not the buttonhole thread itself.) to make it stick in the fabric better when I start off the thread.
I don't tend to tie it, I just do a couple of stabstitches or backstitches and it holds well. (I'm generally very thorough with tying off my threads when it comes to hand sewing, but a buttonhole is basically a long row of knots, so it's pretty sturdy.)

Put the needle through underneath, with the tip coming up right along that little outline you sewed earlier. And I personally like to take the ends that are already in my hand and wrap them around the tip of the needle like so, but a lot of people loop the other end up around the other way, so here's a link to a buttonhole video with that method. Try both and see which one you prefer, the resulting knot is the same either way.


Sometimes I can pull the thread from the end near the needle and have the stitch look nice, but often I grab it closer to the base and give it a little wiggle to nestle it into place. This is more necessary with the cotton than it is with the silk.
The knot should be on top of the cut edge of the fabric, not in front of it.

You can put your stitches further apart than I do if you want, they'll still work if they've got little gaps in between them.
Keep going up that edge and when you get to the end you can either flip immediately to the other side and start back down again, or you can do a bar tack. (You can also fan out the stitches around the end if you want, but I don't like to anymore because I think the rectangular ends look nicer.)
Here's a bar tack vs. no bar tack sample. They just make it look more sharp, and they reinforce the ends.

For a bar tack do a few long stitches across the entire end.

And then do buttonhole stitches on top of those long stitches. I also like to snag a tiny bit of the fabric underneath.

Then stick the needle down into the fabric right where you ended that last stitch on the corner of the bar tack, so you don't pull that corner out of shape, and then just go back to making buttonhole stitches down the other side.
Then do the second bar tack once you get back to the end.

To finish off my thread I make it sticky with a bit more beeswax, waxing it as close to the fabric as I can get, and then bring it through to the back and pull it underneath the stitches down one side and trim it off.


In my experience it stays put perfectly well this way without tying it off.
Voila! An beautiful buttonholes!


If you want keyhole ones you can clip or punch a little rounded bit at one end of the cut and fan your stitches out around that and only do the bar tack at one end, like I did on my 1830's dressing gown.

(I won't do that style in my video though, because they're not 18th century.)
Do samples before doing them on a garment! Do as many practice ones as you need to, it takes a while for them to get good! Mine did not look this nice 10 years ago.
Your first one will probably look pretty bad, but your hundredth will be much better!
Edit: Video finished!
youtube
And here's the blog post, which is mostly a slightly longer version of this post.
#ask#buttonholes#sewing#hand sewing#sewing tutorial#I've been procrastinating on the video this week#I want it done! I don't want to work on it I want new projects! I want to cut out more gloves!#currently forcing myself to do the last few buttonholes on these pants and then maybe I can cut out new gloves? as a treat?#but I hope I get some filming done tomorrow too
4K notes
·
View notes
Text
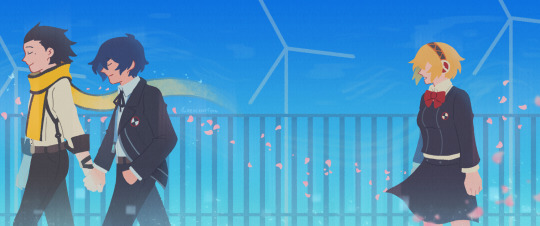
reunion 🌸
#persona 3#persona 3 spoilers#minato arisato#makoto yuki#ryoji mochizuki#aigis#ryomina#lizzy does art#HELLO EVERYONE!!! march 5th is upon us again so i bring... my contribution for this year. my third year drawing for it!#i made the thumbnail for this a few weeks after last year's graduation day#i thought it would be fun to lean into the ryominaigis angle of graduation day (you could read this as minato/aigis if you like-#but i feel like most people would read it as ryoji/minato)#IN ANY CASE working on this made me very emotional over this game :') (specifically minato)#i really enjoy how p3 ends it's such a nice way of wrapping up the narrative's messages and themes#working on this. minato's kindness was at the forefront of my mind throughout the piece#and i really wanted to capture how. ultimately it was his decision to sacrifice himself- to do the great seal#while to an outsider's perspective it is. sad that minato passes. i think becoming the seal is something that minato-#actively welcomes. in the same way that death (ryoji) is a comfort to him because death was housed in him for Ten YearsTM#AND I ALSO GOT REALLY SAD OVER AIGIS TOO. i still get fucked up over how in fes's animated cutscene for 3/5 they portray-#her as human and not drawing the robot parts so i wanted to do something smilar here...#but also i am very sad on aigis's behalf because she discovers her humanity through minato and realizes what she-#wants to do and then. well. minato is like. he's ready to pass on (even if he's scared) and im like. OH MY GOD THIS TRIO GETS ME MESSED UP#this was more coherent in my head LOL BUT ough i like drawing p3 and working through my feelings about it...#anyway! happy (in quotations) march 5th. i love this game to bits. it's so fun to draw for this day every year and see how i've improved#if you've read all this thank you :) lizzy appreciates you all very much. mwah! <3
2K notes
·
View notes
Text

Merry Christmas, don’t forget to kiss your ship’s unicorn for good luck
#i didn’t have any energy the last few days to draw anything proper for christmas so you’re unfortunately getting this thing I doodled#then scrapped for being too meh last week. sorry#our flag means death#izzy hands#stede bonnet#frenchie#lucius spriggs#fang#roach#jim jimenez#archie#wee john#black pete#my art#my art crap#cliopadra blabbers on#Christmas
3K notes
·
View notes
Text

It's just guys night talk! Don't worry about it!
(Read Tiger Tiger and shake this man awake so he can finish that thought!)
#tiger tiger#remy bonnaire#jamis arlesi#Comics I meant to post a week ago but I have been...extraordinarily sleepy.#Remy is the ultimate yearner and he is about to explode...these last few updates have had the Tigers discord in a vice grip.#We all knew he was going to say something that would devestate Remy.#But this??? This near confession? “I wish you would look at me like that?”#If I was Remy...well yeah I probably would also just lay in bed. Awake. Pondering and internally exploding.#But ough...the agony...his heart had settled on loving this man from afar and now...now he wonders. If it doesn't have to be so.#The boys are fighting (internally and with themselves).#If you haven't red Tigers yet but are reading this: What else must I do to convince you? Draw more men's tits?#God! If I must [I shake my head at an empty audience] I can't believe I'm being forced to do this!
5K notes
·
View notes
Text

who am i
#feeling a bit bad mentally for the last few weeks so im so happy to finish some art damn😔#art#my art#tw gore#tw blood#cw gore#cw blood#dorohedoro#dorohedoro fanart#drhdr art#drhdr fanart#drhdr#caiman#caiman dorohedoro#kai dorohedoro#caiman fanart#aikawa dorohedoro#ai dorohedoro
679 notes
·
View notes
Text

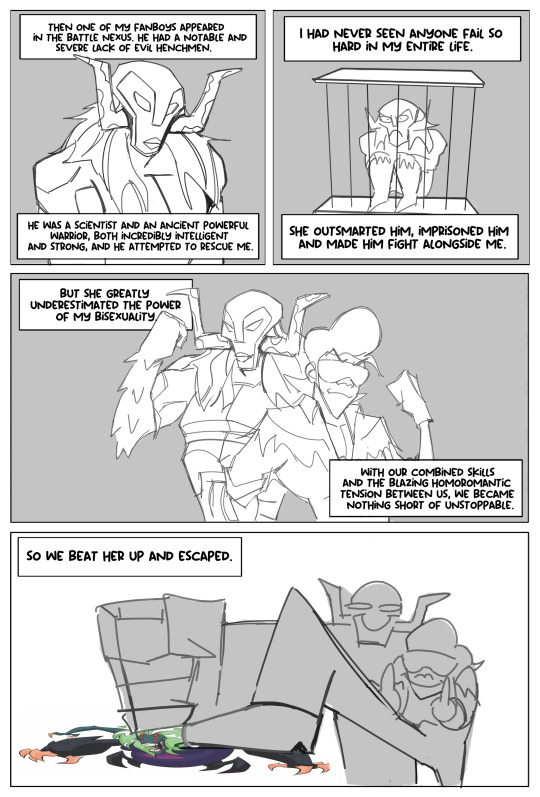

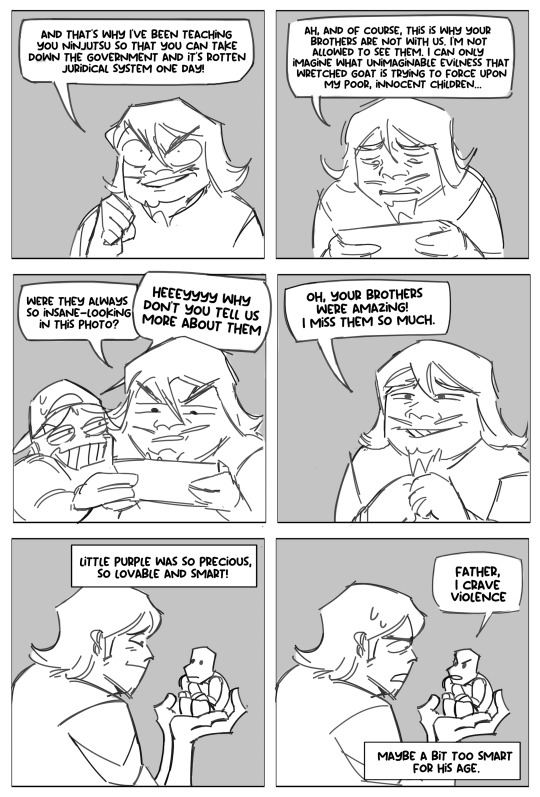

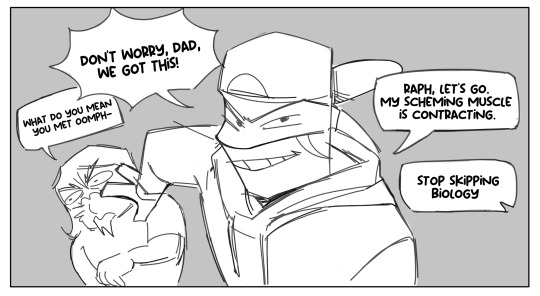
First | Previous | Next
#rise of the teenage mutant ninja turtles#rottmnt#rottmnt leo#rottmnt raph#rottmnt splinter#separated au#villain au#TECHNICALLY i kept my promise#coz a week is a 7 days period#sorry if its scuffed last few days were super rough for me#non-stop freaking out#the writers block has been blocking#the jokes have not been joking#the speech bubbles have been trying to murder me again#but i think im doing a lil better now#april soup in the next one??#villain pb&j duo
5K notes
·
View notes
Last Seen Blogs

keobongdalive
Kèo Bóng Đá - Keo Bong Live

mroffif-blog
Untitled

eatin-good
Eatin-good

wainstein-blog1
Transformational Life Coach

jenotation
resonance.