#free animation software for Windows
Explore tagged Tumblr posts
Visit Tumblr Blog
Explore Tumblr blogs with no restrictions, modern design and the best experience.
Last Seen Tumblr Blogs


Fun Fact
Tumblr was created by web developers David Karp and Marco Arment.
Text
#animation software free#free animation software for Windows#free animation software for mac#free animation software for Android
3 notes
·
View notes
Text
youtube
FOSS IS LOVE
FOSS IS LIFE
#da vinci resolve#toon boom animation#reaper audio#free open source software#foss = free open source software now and forever#Adobe and Microsoft suck#Linux#linux mint#james lee#James Lee animation#nox animation#YouTube animation#how i broke up with adobe#adobe premiere pro#microsoft windows#Youtube
4 notes
·
View notes
Text
#Video editing software#free video editing software#Video editing software for mac#Video editing software for windows#Video editing software for beginners#Video Animation Software
0 notes
Text
Come to Linux! We have...
Mascot: official Version
Mascot: Unofficial Transgender Furry Fox Version
More Desktop options than you can imagine
More Distribution options than you can Imagine.
More people willing to fight God for Half a Bagel over their preferred combination of Distribution and Desktop you can imagine.
The most uwu transfemmes and femboys you can imagine, all of them wearing Thigh Highs.
Mad Computer Scientists who could be dangerous if given access to a traffic light.
Everyone's favourite Fennoswedish Dad.
The Homeless guy who insists on using ONLY free software and defending Jeffery Epstein, and he's just done compiling the latest builds.
Pewdiepie for some fucking reason.
Arch Users.
Arch Users who insist on telling newbies to use Arch as their first Distro.
Sane people telling said newbies not to do that and just try Linux Mint first.
Men who look like the comic book guy.
People in developing countries doing absolutely great things with low spec tech.
People who skin their desktops to look like the OS they used when they were a child.
Tiling Window Manager users with anime wallpapers who post of /r/unixporn
Fans of Federated Social Media.
People who insist on using the Terminal for everything.
Ubuntu users who insist it's "still good".
Debian users will defend the release schedule with their dying breath.
People think the Cosmic Desktop is the Second Coming.
KDE Plasma Users.
Gnome Users.
People who think the government is watching them.
People who know the government is watching them.
The Majority of Webservers.
Literal Hackers.
People who really love conferences.
759 notes
·
View notes
Text

Relics of the Sanguine Rose - A vampire-gothic themed cursor Windows, made with pixel art.
I wanted to make my own cursor with a vampire or goth theme in mind. So here we go, these cursors are finally made. It's a complete set (except for the uncustomizable stuff like zoom and grabbing hands), includes that fully animated moving "busy" hourglass and left-handed versions for those who are using left hand.
I made them specifically for windows but feel free to convert the cursors that work for MacOS or Linux.
About the size:
Windows automatically make cursors become 32x32 in size (thats the default size), and if you try to resize the cursor in the Windows 11/10 mouse settings (in "Settings" not from the control panel). It would revert to one of Windows' default cursor look if you try using the resizing sliders. The cursors are originally made 128x128 (like large size cursor), but Windows automatically put it to 32x32 (or other sizes if you adjust the scale from setting)

Yep... that's moving hourglass alright, good to look at while your program waits.
Softwares used:
Clip Studio Paint (drawing them)
GIMP 3.0 (making the png's become .cur files)
RealWorld Cursor Editor (adjustments and such)
Download links (its free, like free beer... or blood for vampires):
Google Drive |
#hydrangea shelter cursors#web resources#resources#webcore#custom cursor#pixel art#pixel graphics#vampire aesthetic#gothic#free to use#f2u#f2u graphics#cursor#cursors#web graphics#cursor pack
195 notes
·
View notes
Text

COLORING + SHARPENING TUTORIAL
someone asked for a coloring tutorial and my sharpening settings, so here it is! there are also a few tips to achieve more HQ gifs. :)
tutorial under the cut!
FOR HIGH-QUALITY GIFS
FILE SIZES
it doesn’t matter what your sharpening settings are if the file you’re using to gif is too low quality, so i tend to look for the best that i can get when downloading stuff.
usually, movies (+2h) look better if they’re 5GB or more, while an episode (40 min/1h) can look good with even 1GB. the minimum definition i try to find is 1080p, but i gif with 2160p (4k) when available. unfortunately, not every computer can handle 4k, but don’t worry, you can gif with 1080p files just fine if they are big enough. contrary to popular belief, size does matter! which means sometimes a bigger 1080p file is better than a smaller 2160p one, for example.
SCREENCAPPING METHOD
this can too influence the quality of your gifs. as a gifmaker, i’ve tried it all: video frames to layers, directly opening video clips, loading files into stack, and i’ve finally settled down with opening screencaps as an image sequence. with bigger files, it doesn’t matter much what technique you use, but i’ve noticed with smaller files you can do wonders if you screencap (either by loading files into stack or opening as an image sequence) instead of using video clips. for example, this gif’s original video file was only 4GB (so smaller than i’ve usually go for), if you can believe it!

here’s a tutorial for setting up and screencapping with MPV, the media player i use to screencap. again, you can keep using video clips for bigger files, but you’ll find this useful when dealing with dire causes. i don't file loads into stack, though, like the video does. i open as an image sequence (open > screencap folder > select any image > click the image sequence button). just select OK for the speed. this will open your screencaps as a video clip (blue bar) in timeline mode (i'm a timeline gifmaker, i don't know about you). you will need this action pack to convert the clip into frames if you're a frames gifmaker. i suggest you convert them into frames even if you're a timeline gifmaker, just convert them into a timeline again at the end. that way you can delete the screencaps right away, otherwise you will delete the screencaps and get a static image as a "gif".

ATTENTION if you’re a Mac Sonoma user, MPV won’t be an option for you unless you downgrade your system. that is, if you have an Intel chip. if you have M1 Max chip (or even a better one), here’s a fix for MPV you can try while keeping that MacOS, because nowadays MPV is skipping frames in its latest build. or you can use MPlayer instead for less hassle. here are two tutorials for setting and using MPlayer. Windows users are fine, you can use MPV without trouble.
FOR EVEN MORE QUALITY
ADD NOISE
here’s a tutorial for adding noise as a way to achieve more HQ gifs if your original material is too low quality.
REDUCE NOISE WITH CAMERA RAW
instead of adding noise, you can reduce it, especially if your gif is very noisy as it is.
the path is filter > camera raw > detail > nose reduction. i do this before sharpening, but only my video file isn't great to begin with. because it’s a smart filter, you can reduce or increase its opacity by clicking the bars next to its name in the layers panel.
TOPAZ AI
i use Topaz Photo AI to increase the quality of my screencaps when i need to. it’s paid software, but there are… ways to find it for free, usually on t0rrent websites. if someone’s interested, i can make a tutorial solely about it in the future.
SHARPENING SETTINGS
here are my sharpening settings (filter > sharpen > smart sharpen). i sharpen things twice: 500% 0.4px + 10% 10px. here's an action for it, for more convenience. here's a tutorial on how to use Photoshop actions. for animated stuff, i use this action pack.

COLORING
here’s the gif i'm gonna use as a base. it’s already sharpened like the way i always do it.

LIGHTNING THE SHOTS
half of the secret of a good coloring is good lightning. i always useCurves (layers > new adjustment layer > curves) and Brightness & Contrast (layers > new adjustment layer > brightness & contrast). the settings depend on the scene you’re giffing, but i always try make my gifs bright and with high contrast to make the colors pop.
CURVES
besides lighting your scene, the Curves adjustment layer has four automatic options that will color-correct it for you. it’s not always perfect and it doesn’t mean you won’t need to do further coloring, but it’s a great start. it’s a lifesaver for most ridiculously yellow scenes. look at the difference! this gif uses the 3rd automatic option (the screenshot below isn't mine btw so that's why the fourth option is the chosen one), from top to bottom. what automatic option you need to choose depends on the gif.


sometimes i like to tweak my Curves layer. not everybody does that, it’s not that necessary and if you’re not careful, it can screw your gif up. to modify your layer by hand, you will need to click and drag points of that straight line in the position you desire. this is the concept behind it:

basically, the lower part of the line handles the shadows, while the upper part handles the highlights of the image. if you pull a highlight point up, the image’s highlights will be brighter. if you pull it down, it will make them darker. same thing for the shadow points. you should play with it to get a grasp of it, that’s what i did when i first started giffing.
BRIGHTNESS & CONTRAST
then i added a bit of brightness and contrast.

CHANNEL MIXER
the scene looked a bit too yellow, so i used the Channel Mixer (layer > new adjustment layer > channel mixer) adjustment layer. here’s a tutorial of how it works. not every scene needs the Channel Mixer layer though, i mostly use it to remove heavy overall tints. in this particular case, the Curves layer got rid of most of the yellow, but i wanted the gif to be just a bit more blue so the Channel Mixer tweaks are very minimal.

SELECTIVE COLOR
now, this adjustment layer i always use: Selective Color (layer > new adjustment layer > selective color). this is THE adjustment layer to me, alongside the Curves one. this is how it works:

ie, you can separately edit a color this way, giving it tints. for this gif, i wanted to make the colors more vibrant. to achieve that, i edited the selected colors this way:

for the reds, i added even more red in them by moving the first slider to the right, making the color more vibrant. for his hat to have a more warm tint, i added yellow to the reds (third slider, moving it to the right). finally, to make the reds stronger, i moved the last slider to the right (more black).
for the yellows, i made them brighter by adding white to them, thus making the tile wall and Paddington more bright as well.
for the cyans and the blues, i just added the maximum (+100) of black that i could.
i wanted for Paddington's nose to be brighter, so i added more white to the whites.
lastly, i added depth to the blacks by increasing their own blackness.
you should always play with the Selective Colors sliders for a bit, before deciding what you want or need. with time, you will automatically know what to change to correct the color grading. it all takes practice!
HUE/SATURATION
i don’t know if you noticed, but there are some green spots on the blue wall behind Paddington. to correct that, i added a Hue/Saturation adjustment layer (layer > new adjustment layer > hue/saturation) and made the saturation of the greens 0%, making that unwanted green disappear from the background.

while the green spots on the wall are specific for this gif, i use hue/saturation a lot to tweak, well, hue and saturation. sometimes someone’s skin is too yellow, i made it redder by tweaking the reds and the yellows, or vice-versa. the hue bar follows the rainbow bar, so the maximum settings (+100 and -100) give the selected color to change its hue to something more red or pink (the rainbow extremities). changing hue can give pretty whacky results, like turning someone’s skin tone to green, so you will need to play with it to get the hang of it. you can also tweak the opacity of your hue/saturation layer to further improve your gif’s coloring. i didn’t do it in this case, the opacity is still 100%. the reds and the blues had their saturation increased to make them pop just a bit more, without affecting the other colors.
COLOR BALANCE
the highlights of the gif still had a green tint to it due to the automatic correction of the Curves layer, so i used Color Balance. this is how it works: instead of giving specific colors some tints, you can give them to the shadows, highlights, and mid-tones. if your shadows are too blue, you counterbalance them with the opposite color, yellow. same thing with the cyan-red and magenta-green pairings. in my case, i added a bit of magenta.


B&W GRADIENT MAP
now, if this gif was a dish, it’s time for the salt and pepper. i always add a Gradient Map (layer > new adjustment layer > gradient map) (black to white gradient) with the Soft Light blending mode, thus giving my shadows more depth without messing with the mid-tones and highlights. it also doesn’t “deep fry” (you know those memes?) the gif too much by adding even more contrast. usually, the opacity of the layer is between 30% to 70%, it all depends on the gif. it always does wonders, though!

COLOR FILTER
finally, i like to add Color Filters (layer > new adjustment layer > color filter) to my gifs. it’s very handy when giving different scenes for the same minimalistic set because it makes them kind of match despite having completely different colors. in this gif’s case, i added a “deep blue” filter, opacity 50% density 25. you can change the density and the opacity of the layer for further editing, again, it all depends on the gif.

VIBRANCE
if i feel like it, i add a vibrance layer (layer > new adjustment layer > vibrance) to make the colors pop. this can ruin your coloring sometimes, especially when regarding skin color, so be careful. i didn't do it in this gif because i felt i didn't need it.
TA-DA! 🥳
AN OTHER EXAMPLE
the color grading of the original scene it’s pretty good as it is, to be honest. let’s see a worse scenario, a VERY yellow one:


no channel mixer this time because the automatic curves option dealt with the yellowness, but you can see it made the gif too green. i needed to correct that with the following adjustment layers:
curves (automatic option) (gif 2) >> same curves layer (tweaks) (gif 3) >> brightness & contrast (gif 4) >> hue/saturation (tweaked cyan+blue+green) >> selective color >> color balance (gif 5) >> b&w gradient map >> (sepia) filter >> vibrance (gif 6)
i added a hue/saturation layer to remove the blues & greens before my selective color layer because i thought that was more urgent than tweaking the tint of all colors. color balance (gif 4) was the real hero here, though, by removing the green tint. the selective color layer was meant to make the red pop more than anything else, because the rest looked pretty good, especially her skin tone (despite the green tint). you can notice that tweaking the curves layer (small gif 3) also helped A LOT with the green problem.
tl;dr 😵💫😵💫😵💫
here's a list of my go-to's while coloring and lightning gifs. it's not a rule, just a guide. there are gifs in which i don't use all these adjustment layers, or use them in a different order. it all depends!
1. curves (automatic option + tweaks) 2. brightness & contrast 3. channel mixer 4. selective color 5. hue/saturation 6. color balance 7. b&w gradient map 8. color filter 9. vibrance
i'll suggest that you study each adjustment layer listed for more info, either with other Tumblr tutorials or YouTube ones. the YouTube ones focus on images, but you can translate what they teach to gif making very easily. you can ask me to further explain any adjustment layer, too! i was brief to keep this short (which i kinda failed lol).
feel free to ask me for clarification or something else about gifmaking wise, i always like to help. ❤️
#*#*tutorials#gifmaker tag#resources#resource: tutorials#ps help#uservivaldi#tuserjen#userrin#userelio#useralien#userzaynab#userchibi#userbuckleys#usertj#userbess#tuserlucie#useraljoscha#userdavid#usershreyu#usernolan#userhallie#userisaiah#tusergio#tusergeo#userjesslynn
794 notes
·
View notes
Text
speedpaints were literally the backbone of the warrior cats fandom from 2008-2016ish. like pre-accessability of free/lower cost animation software it was mspaint (or photoshop if ur parents were able to buy it/u got it through school) and windows moviemaker against the world
104 notes
·
View notes
Text
okay sooo i made some sketches for a few of the sprites i'll be using, some of which i'm gonna show here, as well as thinking about the code edits i'll need to do for this project. i don't want to just redraw a shimeji to look like SQQ, i want him to act and move in character, so i have a whole bunch of edits to do

some of my notes:
i'm not yet sure how many sprites some animations will require so i'm not putting in a final number, or numbering which sprites will be used for what animation, but i'm going to throw out an estimate that the final sprite count will be about sixty-ish.
i mostly have all my animations already planned out. i know what i want them to look like and know how to do it, but there's a few i still need to think about, like one of the multiplying animations. i considered just getting rid of the one i have no ideas for, but i'll think on it some more. i'm open to suggestions too
i'm considering if i should code and draw in interactions with other shimejis already. it's a bit of a far off idea but i might make a Binghe or maybe even Liu Qingge or Shang Qinghua? who knows. anyway it'd be fun to make some interactions between them. i could even add a tutorial for adding more "romantic" interactions since i want to leave this area open for shippers. if i make it that is
"pet" - yes you can pat Shizun on the head. it makes him embarrased but he likes it.
i'd like to make this an incredibly intricate shimeji with a lot of animations but i'm worried about the performance. they may not be Chrome level RAM eaters, but they're not the lightest and i don't want to create something which people won't get to enjoy
i'm still considering where to host the files. thought about maybe hosting them on a patreon account (for free. the Shizun Distribution System does not demand payment for what it does) but i'm, again, open to suggestions
i'm making this for the Shimeji-ee DESKTOP SOFTWARE FOR WINDOWS. i've never used things like the shimeji chrome extension nor do i own any apple devices. i don't know how to work with these. HOWEVER, if there's someone who DOES know how to work on those, feel free to make versions compatibile with apple or with browsers, BUT only if those versions ARE DISTRIBUTED FOR FREE AND CREDIT ME AS THE CREATOR. i want as many people as possible to enjoy my shimejis
two long idles, one of which i'm showing the sketch for. in the notes i wrote down "looping" and "sound" - while it may be a project that i do not realize in the end, i thought it would be cute to make an animation where Shizun plays the guqin and add sound to it. there would have to be the option to toggle animation sounds, and another to loop that animation, but i thought it would be absolutely adorable to make a sort of music player out of that animation, allowing the user to add a downloaded copy of their playlist into the files. imagine - you're sitting at your computer, studying, working or filing your taxes or whatever, and Shizun's on your screen, doing his thing, providing background music for whatever it is you're doing. cute, no? but this feels like the sort of thing that might get annoying or make your computer turn into a jet engine from overworking. so, for now this is staying a concept. the animation will be present, that much i guarantee but all that other stuff might not show up
OKAY, SO. as you might have noticed i have three designs. i sorta changed them since i made the first post about this, because as it turns out my computer screen doesn't actually display bright colours all that well. might have to fiddle with the settings on it more. anyway this time i coloured looking at my tablet screen so they should be more accurate to what i wanted. i decided that my previous design didn't look like mint chocolate chip ice cream enough <3
so, i'd like you guys to tell me which design is your favourite! i have mixed feelings about design no. 3 because, while pretty, it's kinda too detailed. i just know i'd get sick of redrawing it so i might simplify it further for the finished product
here's the designs!

*slight correction: the eye colour is not final! i left the sketch in on those parts and forgot to actually draw the finished design for the eyes. i don't have the time to correct that at the moment, however. sorry! for a closer look at how the eyes might look like, see previous design
#svsss#scum villains self saving system#scum villain#shen qingqiu#shen yuan#chibi art#shimeji#my art#shizun shimeji#< new tag for sorting posts about this project
26 notes
·
View notes
Note
1) Will Peter get to meet villains like the joker or harley/ will the Batfam get to meet some of Peter’s arch enemies like the goblin?
2) what type of software/ app do you prefer to use when drawing, if you use any at all?
3) I drew a little pic of Peter for u :3 ❤️❤️

I plan on using a very wide cast of villains in all my aus, so even if LoF doesn't have a villain, another au might end up having them :)
I use Krita!! It's an awesome, FREE application for your computer (can also be on laptop). I've been using it for going on 9 years now. It has so many different uses/windows- animation, comics, painting, etc. In my experience, Krita can be a little difficult to learn (especially with shortcuts) but there are some tutorials on youtube and they have a tutorial page where they talk about their features
This is amazing!! I love the colors :)) <33 Thank you so much!!
#erinwantstowrite#ao3#ao3 fanfic#leap of faith ao3#peter parker#thank you for the ask!#krita#krita art
92 notes
·
View notes
Note
Do you have any tips/useful information for people who want to start making audio rps?
(Also love ur content sm!!! Mitch is the most lovable little guy)
Aw thank you so much! Love him too!
This is a great question, had to think about it for a bit;
If you want to dabble with making audios, feel free to start off with public scripts! I think there's subreddits like ASMR script haven (IIRC?) that has public scripts that can be filled by anyone. Just be sure to read the author's conditions carefully i.e. credit, terms of use, what can be changed etc. Right at the start I recorded a public script to try and get started, it's a great way to just jump right into making something to learn the ropes of it without also first having to write an entire script for it too. Filling public scripts is a fantastic way to start off, however I reckon writing your own stories is a major part of the fun!
You don't need an expensive mic, but audio quality is a very important factor. Do some test recordings and listen back to them (with headphones!) and see how it sounds. This is especially important for whispered scenes (DO NOT get too close to the mic or breathe on it!) or loud scenes (DO NOT peak the mic!). If your mic has a gain / input dial, play with that before recording! Just start with mono to begin with, play with stereo if your mic supports it after you become familiar with it. Aim for your recording to be no louder than -6db at the highest, if you can keep your voice roughly between like -20 and -6 that tends to sound reasonably natural.
Do your best to eliminate external sounds! If you have AC or anything like that on, turn it off. I have to shut down my main PC and record with only my editing Mac on because the PC fans are much louder and my mic is very sensitive! There'll pretty much always be background fuzz, some mics will just have some, but try to make your room as quiet as you can. Your software may have some background noise removal tools, I use filters for that (expensive so I can't recommend them), but DO NOT use the noise removal tool in Audacity! It's terrible!
Speaking of, Audacity is decent to get started with. It's good basic recording software, plus multiplatform. For a while I preferred recording on Windows with Audiodope, also very simple, plus I liked that it asks me whether I wanted to record in mono or stereo first in case I forget to switch, I currently record on Mac with ocenaudio which does the same, while Audacity won't ask, you have to go into settings. Anyway Audacity is okay to start with for editing, it's free, but from what I understand it's a "destructive" editing software in that after you make a change like adding a filter, you can't then go back in and change it other than just undoing, which I really don't like, plus changing the timing of things looks fiddly. I don't know what to recommend to move up from, I've heard good stuff about Reaper but it looks very complicated. Avoid Adobe unless you have a free subscription from somewhere else. I edit entirely in Final Cut Pro so I can't recommend that unless you're on Mac, plus it's my old work software and expensive! If you need sound effects, I use freesound.org, there are other great free resources as well, but make sure you check each individual sound effect's license before use.
Once you've edited the audio and want to turn it into a video, I've heard good stuff about Da Vinci Resolve and Kden Live, both are free! Make a video canvas of 1920 x 1080, FPS doesn't especially matter if you only have a still thumbnail, 25 or 30 is fine, and render it out as a h264 mp4 if you're not sure what to select! Good compression for internet video, good for streaming. Try to record and export your audio as wav if you have enough space, wav is uncompressed audio so it maintains full quality but they can get large.
I also make my thumbnails in-edit but you may want to use external software like Gimp to make them. Avoid getting random stuff of google especially anime boys / girls, and definitely don't ever use an artist's stuff without asking for permission + giving proper credit. Using pre-built generators like Picrew is totally fine, just be sure to credit where you got it from, but 100% avoid AI generators, obviously. Be careful with Adobe stock images, apparently there's AI slop in there too. You don't need art for audios though, they're a nice to have bonus, but many of my most viewed videos have no art at all. If you need background images, I like unsplash.com because it has a free license! Read over it yourself but basically you're able to use pretty much any image they have in your videos!
Just jump in and try making something small, never start with your magnum opus! I started with the introverted incubus character because I'm a very shy person myself, it was an easier role to get started with! If you want to start writing your own scripts too there's a lot we could talk about there as well, just try to picture the scene from the perspective of the listener, what they may be thinking or feeling at any given moment, not just the perspective of the character you're going to be playing!
This was a lot and I don't think I covered much, I hope some of it helps though!!
49 notes
·
View notes
Text
#free animation software for mac#free animation software for windows#best video editing software#free animation software for android#animation software free#animation software
0 notes
Text
#whiteboard animation software free#free whiteboard animation software#whiteboard animation software for beginners 2023#whiteboard animation software#free whiteboard animation#whiteboard animation software for mac#whiteboard animation free#whiteboard animation software for kids#Whiteboard animation software for beginners#free animation software for kids#free animation software#Animation Software for Mac#Animation Software for Kids#Animation Software for windows#Animation Software for pc#Animation Software online
0 notes
Text
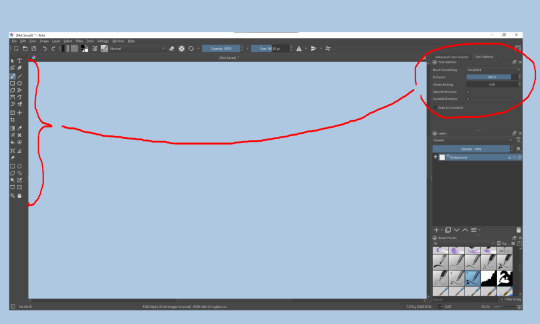
Krita tutorial the way I know it.
Basics: What is where.
Gimmicks.
Specific advice on specific tools.
Basics: What is where.

Upon opening the program this is what you're met with. First of all, must comment: The layout is HEAVILY editable so you can just drag menus anywhere you want, even leave them floating amidst the sheet you're drawing on.
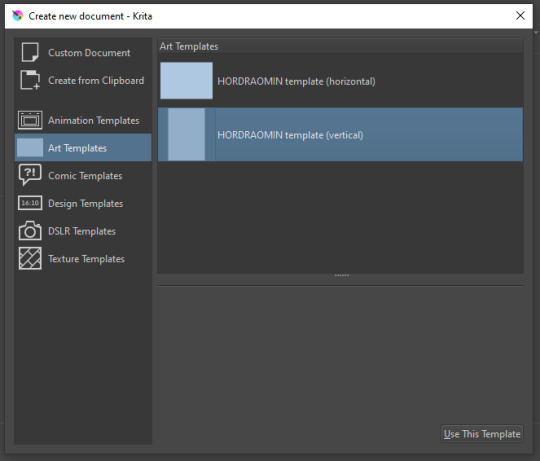
You can create custom art templates, I have two o'mine here as both have my signature background color.
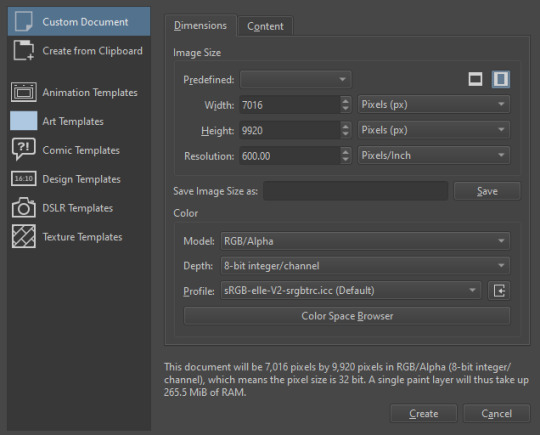
As well, you can edit the custom document settings, as in what size you want it, what resolution, even the initial content of the image. As well you can create from clipboard: Just copy some image from your browser and Krita will recognize it (useful for making meme edits lol).

Now, once you have your file, I will show you what is where.
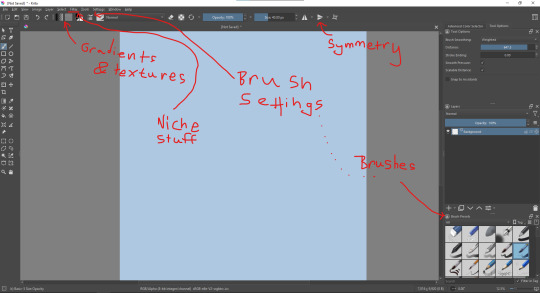
Brushes:
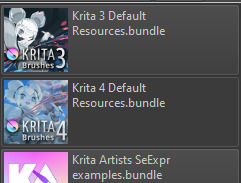
Brushes are easy to edit and there are tons of free bundles to download online. I myself only got one bundle, Jackpack (bit hard to find now due to original source being lost, it is still available but bit tricky to come by).
There. Are. Tons.

Some of these are my custom brushes for calligraphy in neography, you might even guess which ones. You can edit existing brushes, make new ones from the ones you've edited without changing the original, and all sorts of stuff (more below in the third chapter).
There are numerous packages of brushes once you enter Krita, but only one/two are available when you first open it. To unlock them all, click here:

And make sure all bundles are dark gray in color (example of both dark and light below).
Now Tools Options: those will pop up depending on what tool you're using.
Symmetry: Fun stuff. You can drag the lines depending on how you need them and then center them back to the center of the screen if needed.
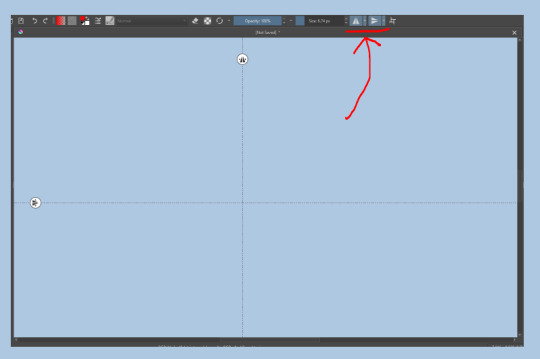
Gradients and Textures also have their tools options, you can play with those to get the feeling what they can do (more in third chapter).

The Filters tab is useful too. Blurring, motion blurring, color mapping, artistic filters and all that: Quite fun.
Gimmicks.
Krita allows you to customize your workspace freely. Floating menus, tabs, anything you want. It has quite many drivers at that-
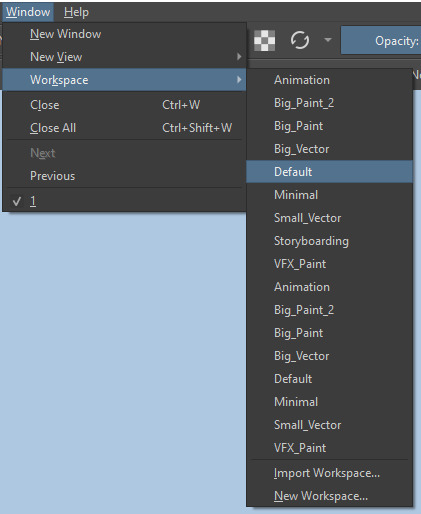
To access the workspace templates, go to Window and choose Workspace.
Krita allows for copy-pasting any image onto the sheet. Though, for me it sometimes crashes if I accidentally copy-paste text into it without choosing the Text tool first.
The software allows for both raster and vector work. It is basically Photoshop sharpened to be used by artists primarily.
There are some interesting mechanics regarding the Eraser (default bind E).

You can use it with any brush, allowing for textured erasure/quick work. Good for sketching.
You can use it on gradients (given there's a transparent point on the gradient preset).
There's a Multibrush tool:

People say Krita is good for animation but my brain can't wrap around it yet honestly @~@.
The keybinds:
B - Brush tool.
E - Erase tool option.
M - Mirror (useful for checking accuracy from a new angle).
Ctrl - Color pick (when used with brush or other color-using tools).
Shift+L.Mouse+drag - Changes the size of the brush by dragging left and right.
Ctrl+E - Merge layer with the one below.
Ctrl+G - Group selected layers.
Ctrl+A - Select whole sheet.
Ctrl+Shift+A - Deselect everything.
F - Bucket tool.
G - Gradient tool.
Ctrl+S - Save document.
Ctrl+Shift+S - Save As document.
Ctrl+N - New document.
Ctrl+O - Open document (will be seen in a new tab on top of the sheet).
Ctrl+C - Copy selected layer or selection.
Ctrl+X - Cut selected layer or selection.
Ctrl+V - Paste copied/cut layer or selection.
Q - Multibrush tool.
R.Mouse - Interesting thing: Opens up a quick selector for brushes and colors you've already used in the piece.
1 - Zoom 100%.
2 - Zoom to fit the piece vertically.
3 - Zoom to fit the piece horizontally.
4, 5, 6 - Turn 15 degrees (4 and 6) or undo the turning whatsoever (5).
Ctrl+I - Negative filter applied to layer.
Ctrl+U - Color editing on the layer.
Ctrl+Y - Soft proofing mode (for color mistakes and stuff like that, mostly annoying for me tbh).
Ctrl+T - Transform selection/layer.
Ctrl+R - Square select tool.
Ctrl+J - Lasso select tool.
Honestly you can just hover your mouse over tools and see their shortcut binds, as well. Or edit them in Settings.
Specific advice on specific tools.
Brush:
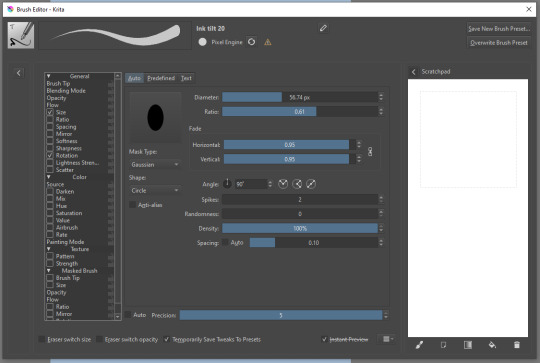
Brush editor is a great tool for making custom brushes, and it even has a sratchpad to test them out. Lots of settings, but no need to be afraid; Most of them you might never use on purpose.
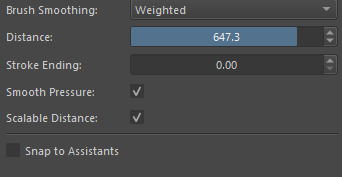
Use Brush Smoothing for great and pretty lines in lining pieces or making calligraphy.
Gradient:
The four icons to the right top are:
Mirror gradient.
Arrange by lightness value.
Arrange by color value.
Space the stops evenly.
Click the gradient to add a new stop. The three things to the left are:
Make the stop use Primary Color.
Make the stop use Secondary Color.
Make the stop use a fixed color.
317 notes
·
View notes
Text

i made some cute food themed mouse cursors! read more if you want them for yourself
you guys can use these for anything btww idgaf also feel free to request more and i may get around 2 them eventually
[*NOTE: the pixel art above has been resized and is NOT the same as the .cur files, you have to download and use those. Link below.]
cursor file download (WeTransfer) (dm me if link expires)
Cursor replacement tutorial for a Windows PC (sorry mac users):
Open the Start Menu or press the Windows button
Type "Mouse" and hit enter
Click "Additional Mouse Options"
In the pop-up, go to the tab labeled "Pointers"
Download the .cur files (Cursor files) from the link above ^
Select which pointer you want to replace, and click "Browse..."
Find where you downloaded the .cur files
Select them, and hit "Apply"
and boom, you're done! If you don't like them you can re-select the ones you want to change, and hit "Use Default" To revert back to your computer's original settings.
How to make your own:
If you would like to make your own cursors, you can download any small .png image (has to be .png because .jpg doesn't support transparency). You can also use any image editing websites or software to shrink/tweak larger images - I use Aseprite for my pixel art, and I highly recommend it for no compression or pixel loss when resizing images, but I'm sure there are free alternatives out there.
After you somehow acquire a small transparent image you can convert them using this handy online tool. Convert it to .CUR for image cursors, or .ANI for animated/gif cursors.
Have fun! Thanks for reading <3
27 notes
·
View notes
Text
Pencil/2D Animation Resources Masterpost
5/10/24:
Hello, I broke into my old account so I could make a little masterpost of resources I come across for learning pencil/2D animation. (Free or affordable classes, places to get tools, videos to give insider insight, etc.) I may not be able to get everything included, so if you think of something, you can reach out and suggest things to add! I will be updating this over time, with notes on when it was last recently updated. And maybe I'll end up giving the old blog a refresh too. I likely won't be making new masterposts outside of this one any time soon, nor updating any old ones. It's been SEVERAL years, and the internet is a different place. I would assume most of the old links are out of date by now, unfortunately. I hope that this list is helpful to you as well, and if I'm incorrect in anything I list, I'm learning too! So please be patient with me and feel free to reach out with a correction. It's not finished yet, but Tumblr deletes my posts before I finish them, so I'm starting with posting the skeleton and slowly updating this)
Find a Community to Learn From!
(recommended groups to lurk/join/make connections and ask questions)
What Tools Do I Need?
PDF Guide to Animation Desks, as written by David Nethry
(next line)
Where Do I Get Tools?
(Places where you can buy art supplies, software, etc)
Cartoon Supplies
(Online seller who carries Ingram Bond paper, lightboxes, storyboard pads, blank cels, etc. See also: Lightfoot LTD, which is identical in every way to Cartoon Supplies and for the life of me I'm not sure the difference, though both are equally recommended along side each other.)
Jet Pens
(Ah... I love window-shopping this site. If you love stationary like I do, you'll be on this site for hours adding things to your cart... and inevitably removing them because it's not feasible to spend hundreds on pens and sticky-note pads.)
Dickblick
(I've found they have good prices on name brands, but I haven't purchased from them yet. Often, I'm too overwhelmed by all the choices.)
Improve Your Art/Learn the Basics!
(anatomy classes, starter tools, etc)
Aaron Blaise (Co-Director of Brother Bear)'s Online Classes
He runs very good deals on the classes occasional, but you can also do a year's access to all classes and keep what you download, which is very useful! They're short, quick lessons, and tend to veer into more "helpful tips" than teaching, from what I've personally noticed, but it's well worth the price if you get them at a good deal!
Inside Look at the Industry -- aka: the Special Features:
(behind the scenes stuff, etc)
Books are more useful than you might think!
(Richard Williams Animator's Survival Toolkit, etc) (check out gently used copies of these books on Thriftbooks for a good deal!)
Nifty Free Resources
(Things like height charts, references, color wheels, blog posts, videos, etc)
What Artists Can Learn From Aladdin's Incredible Color by J. Holt [VIDEO]
(spacing for formatting)
The Art of Color Theory: Guide for Animators, Designers, and Artists (Animator Artist Life)
(space for formatting)
Free software!
GIMP
(A classic, GIMP is an old friend of mine. The first software I downloaded for art, I used to use it almost entirely to create animated GIFs for the Warrior Cat forums. Ah, how time has passed. Nowadays I can't even remember how to animate a GIF on there, but such is life. I still use it to this day for digital art, even having Corel Painter. Before GIMP, I animated the old fashioned way -- MS paint and Windows Movie Maker. With determination, I scripted and animated a handful of Warrior Cat characters frame by frame. Each frame of Hollyleaf or whoever it was blinking was the likely source of death for our old computer, may she rest in peace.)
Storyboarder
(Storyboarder is a free software with which you can use to create professional and clean storyboards. It also provides printable storyboard templates so you can do you work traditionally and re-upload it easily into the software! It also works with Wacom tablets. Check it out! It's actually super cool.)
Pencil 2D
(A free, open source software. Simplistic design, switch between raster and vector, and best of all, again, it's free. I haven't used this one much yet, but I've seen it positively talked about by many! I'll update with more research when I have the chance.)
Krita
(I haven't used this one yet, so I can't speak on it either! But it's going on the list so I can come back and research it later. My poor laptop is not going to handle this many downloads lol.)
OpenToonz
(I also haven't tried this, but see above, haha.)
Blender - Grease Pencil
(Blender is well known for 3D animation, but they added a 2D feature called Grease Pencil as well.)
WriterDuet
(Free for up to 3 projects, very simple, but upgrades to a $10 a month plan, which is... eh, I'll keep my Scrivener for now. I used to write scripts in Microsoft Word or the Notepad on PC back in the day, I don't think I personally need the fancy features.)
Trelby
(A free screenwriting software, very basic and simple, good for beginners.)
Keep an eye out for
(Humblebundle occasionally does software deals -- a good art bundle at a discount can give you an easy start!)
#animation#wip#animation resources#art resources#free software#software resources#art tools#animation tools#how to#how to art#how to animate#animators on tumblr#2d animator#animation masterpost#masterpost#masterposts
28 notes
·
View notes
Text
TFTBL Text Files Tutorial
Was asked by @gay-ratcore on how to get into the tales text files so I decided to make a more "thorough" tutorial for anyone else curious.
I say thorough cause tbh this pretty much just scratches the surface of file extraction, there's so much more to it, but extracting text files /is the easiest thing out of the entire thing.
FULL TUTORIAL UNDER CUT
First things first, you need to have the game installed for this to work. Or at least have it somewhere on your computer/hard drive for the software to view the files inside.
Secondly, download the necessary software for exploring said files, it's called "Telltale Explorer" made by the awesome bgbennyboy - download here. It's a helpful tool that will allow you to view not only the text files of the game but some other neat things as well. As soon as you download the software from the website, extract it, then double click on TelltaleExplorer.exe to run it.
You might get a pop-up from your antivirus saying this software might be malicious or something like that. Pretty sure it does that for all files with the .exe format, this one's ok, so you can ignore said warning.
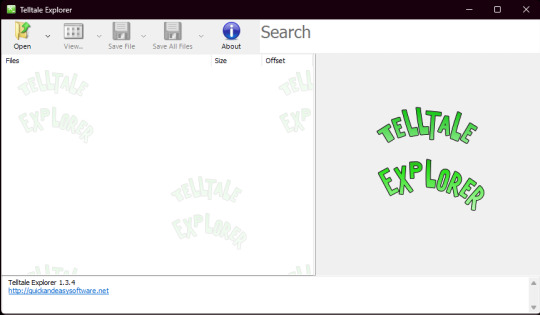
This is what you'll see when you successfully open the explorer. Click on the "Open" tab in the upper left corner and pick the game and episode you want to look through (I've found that most of the time it doesn't matter what you pick, this just a matter simplicity).
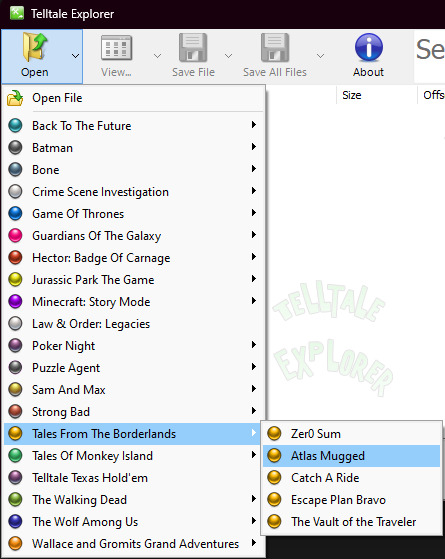
Next, a new browser window will open. You'll need to look for the installed game on your PC. For me, the location was in "C:\Program Files (x86)\Steam\steamapps\common\Tales from the Borderlands" and you need to specifically look into the "Archives" folder, where you'll find all of the necessary game files.

As seen in the picture above, each episode is numbered (e.g. episode 1 is 101, episode 2 is 102, etc.) and divided into 5 categories:
ANICHORE - "animations" and "chores" - not viewable in the explorer
DATA - quite literally what it says, it's a mixture of files, here's where you'll find the text files of the unused content
MS - sound effects, mostly environmental, footsteps, gunshots, etc. - playable in the explorer
TXMESH - models and textures - models not viewable, textures only viewable if you have the original version of the game (the one released by Telltale prior to 2019, not the current one published by 2K)
VOICE - audio voicelines - playable in the explorer, however they are not in order
To view the text files, as mentioned before, you need to choose the appropriate episode and the file ending with _data.ttarch2. Unfortunately, at least for me, opening the data file for the first episode causes the explorer to crash (if you are using the current version of the game, if you have the original one, it works perfectly fine). So for the sake of this tutorial, we will open the data file for episode 2.

Next, you'll want to click on the "View" Tab in the upper left corner and choose the ".landb" option. This will show you only text files. And that's pretty much it, you can look at all the text files and read them on the right side of the screen, you can even copy them into your own text block if you want.
If you have any questions regarding other things I've mentioned here or something else regarding the extraction of files or even viewing the textures, feel free to let me know :)
13 notes
·
View notes