#Free HTML Tutorial
Explore tagged Tumblr posts
Visit Tumblr Blog
Explore Tumblr blogs with no restrictions, modern design and the best experience.
Last Seen Tumblr Blogs


Fun Fact
Average visit duration of Tumblr.com is 10 mins and 25 secs.
Text

So you have a Tumblr account for a long time (or not), but probably you may have a theme that is not supported anymore by its developer, or they just vanished from the face of this earth.
That means that you might be having problems with the new Neue Post Format (NPF) and how is handling new post types.
For more on what went into creating the Neue Post Format, check out Tumblr's Engineering blog post.
I know some-what about coding and even made some themes for Tumblr, though those were for a client so I can share them here.
The goal of this blog is to help:
Fix an old theme that's not behaving well with the new format.
Update some JavaScript knowledge that's breaking your theme.
Update outdated code to better display your theme.
And whatever, if I can help, I will.
AND if you'd like to give me a tip for helping out, that'd be awesome but not require for me to help you. [Ko-Fi not ready yet!]
Please check the READ.ME
⬇️ Versão Português 🇧🇷🇵🇹

Então você tem uma conta no Tumblr há muito tempo (ou não), mas provavelmente você tem um tema que não é mais suportado pelo seu desenvolvedor, ou o dito cujo simplesmente desapareceu da face da Terra.
Isso significa que você pode estar tendo problemas com o novo Neue Post Format (NPF) e como ele lida com novos tipos de postagem.
Para saber mais sobre o que foi necessário para criar o Neue Post Format, confira a postagem do blog de engenharia do Tumblr (em inglês).
O objetivo deste blog é ajudar:
Corrigir um tema antigo que não está se comportando bem com o novo formato.
Atualizar algum conhecimento de JavaScript que esteja quebrando seu tema.
Atualizar o código desatualizado para exibir melhor seu tema.
E tanto faz, se eu puder ajudar, é nóis.
E se você quiser me dar uma gorjeta para ajudar, isso seria ótimo, mas não é necessário para que eu o ajude. [Ko-Fi ainda não tá pronto!]
Por favor, verifique o READ.MEediting
#tumblr theme#tumblr themes#blog theme#blog themes#tumblr glitch#tumblr layouts#theme resources#theme makeover#theme makeovers#tumblr codes#editor#theme#themes#help#pls help#free content#theme change#brblr#html css#theme commissions#tutorial#tumblr issues#editing#layout
7 notes
·
View notes
Text
i need to learn 3d modelling so that more than anything my power to mod persona 4 golden can grow
#rambles#modding#the thing is i'm SO BAD at following tutorials#i've always learned better by doing my own thing. messing around with whatever tool it is until it works#but that isn't really something i can do with 3d modelling.#or at least it's not something i can do at a total beginner level. i imagine it'll be kinda like how i learned coding#(did a couple free online classes and once i learned the very basics/got bored i just did my own thing)#but i started THAT when i was like 14. i wanna be as good at blender as i am with html/css NOW!!!!!!#<- is not even that good w html#<- because of the aforementioned ''hates taking classes on this kind of thing'' thing
3 notes
·
View notes
Text
i dont wanna decide on a career unfortunately everyone wants me to soso bad
#i have to have it in. checks watch. 6 months maximum :)#just because i want biomedical something its what im good at and i cant not help people#like thats not some hero complex thing if o dont get motivated by helping people i will be a danger to myself within a couple months#but guys i am fucking ASS at coding. im goated at block coding i always make it past that#but my neocities wont work even tho im basically copy and pasting from html tutorials#i walk into the room and the machine makes it clear that it does NOT fuck with me#maybe i want biomedical research or something thats a little less hands on#or maybe an occupational therapy direction because i learn a lot about disabilities in my free time#or one of the cna or ekg practicum classes i can take through the local college#OR i can pay minimum a couple thousand for coding classes and brute force it#or stay biomedical engineering and focus on improving the mechanical aspects of existing biomed devices without personally coding as much#or veer way off course for something in sustainability#im literally just gonna end up teaching ap bio somewhere lmfao. why are we stressing#< NO hate to ap bio teachers i fuck with you#but i see that shit in my future Vividly#(or i could plan curriculums for teaching biology and standardize methods for courses such as pltw in the real setting ETC ETC ETC)
7 notes
·
View notes
Text
#Technology Magazine#Free Online Tool#Interactive Tools and Collection#Internet Tools#SEO Tools#Learn Search Engine Optimization#Computer Tips#Freelancer#Android#Android Studio#BlogSpot and Blogging#Learn WordPress#Learn Joomla#Learn Drupal#Learn HTML#CSS Code#Free JavaScript Code#Photo and Image Editing Training#Make Money Online#Online Learning#Product Review#Web Development Tutorial#Windows OS Tips#Digital Marketing#Online Converter#Encoder and Decoder#Code Beautifier#Code Generator#Code Library#Software
0 notes
Text
In the wake of the TikTok ban and revival as a mouthpiece for fascist propaganda, as well as the downfall of Twitter and Facebook/Facebook-owned platforms to the same evils, I think now is a better time than ever to say LEARN HTML!!! FREE YOURSELVES FROM THE SHACKLES OF MAJOR SOCIAL MEDIA PLATFORMS AND EMBRACE THE INDIE WEB!!!
You can host a website on Neocities for free as long as it's under 1GB (which is a LOT more than it sounds like let me tell you) but if that's not enough you can get 50GB of space (and a variety of other perks) for only $5 a month.
And if you can't/don't want to pay for the extra space, sites like File Garden and Catbox let you host files for free that you can easily link into NeoCities pages (I do this to host videos on mine!) (It also lets you share files NeoCities wouldn't let you upload for free anyways, this is how I upload the .zip files for my 3DS themes on my site.)
Don't know how to write HTML/CSS? No problem. W3schools is an invaluable resource with free lessons on HTML, CSS, JavaScript, PHP, and a whole slew of other programming languages, both for web development and otherwise.
Want a more traditional social media experience? SpaceHey is a platform that mimics the experience of 2000s MySpace
Struggling to find independent web pages that cater to your interests via major search engines? I've got you covered. Marginalia and Wiby are search engines that specifically prioritize non-commercial content. Marginalia also has filters that let you search for more specific categories of website, like wikis, blogs, academia, forums, and vintage sites.
Maybe you wanna log off the modern internet landscape altogether and step back into the pre-social media web altogether, well, Protoweb lets you do just that. It's a proxy service for older browsers (or really just any browser that supports HTTP, but that's mostly old browsers now anyways) that lets you visit restored snapshots of vintage websites.
Protoweb has a lot of Geocities content archived, but if you're interested in that you can find even more old Geocities sites over on the Geocities Gallery
And really this is just general tip-of-the-iceberg stuff. If you dig a little deeper you can find loads more interesting stuff out there. The internet doesn't have to be a miserable place full of nothing but doomposting and targeted ads. The first step to making it less miserable is for YOU, yes YOU, to quit spending all your time on it looking at the handful of miserable websites big tech wants you to spend all your time on.
#this is a side point so it's going here but I really think tech literacy should be a requirement in schools like math grammar history etc.#we live in a world so dominated by the stuff and yet a majority of the population does not understand it at even the most fundamental level#tiktok#tiktok ban#indie web#neocities#web development#current events#twitter#facebook#meta#amazon
11K notes
·
View notes
Text
youtube
Build Figma Layouts FAST | Build a Design System
#figma#youtube#web design#free education#educate yourself#ux wireframe#figmadesign#education#figma tutorials#figmatutorial#figma design#figma tips#figma to html#graphic design#figma tutorial#ux and ui design#ui ux design#uidesign#ux#ui#Youtube
1 note
·
View note
Text
========================================================
[tutorial: build your own neocities/nekoweb page]
========================================================
a beginner's guide for making your very own home on the indie web—retro, personal, weird, and 100% yours.
this ain’t an average wix, squarespace, or tiktok aesthetic.
we’re talking full html/css with soul and attitude.
[ prerequisites ]
------------------
> an idea
> basic text editor (vscode, notepad++, or even notepad)
> account on https://neocities.org or https://nekoweb.org
> some gifs or tiles you love (dig deep or make your own)
> optional: image host or gif repo (or self-host everything)
[ feeling overwhelmed? read this. ]
-----------------------------------
you do *not* need to know everything.
html is not a mountain. it's a garden.
you plant one tag. then another. then a style. then a button.
you can build your site piece by piece.
and every piece is a portal to somewhere personal.
you are allowed to make broken pages.
you are allowed to use templates.
you are allowed to start over as many times as you want.
this is *your* world. you control the weird.
[ step 1: create an account ]
-----------------------------
> neocities: https://neocities.org
> nekoweb: https://nekoweb.org
register a name, log in, and enter your file manager.
this is where you upload your files and see your site live.
[ step 2: your first file - index.html ]
----------------------------------------
make a new file: `index.html`
basic starter:
<html>
<head>
<title>my weird little corner</title>
<link rel="stylesheet" href="style.css">
</head>
<body>
<h1>welcome to the void</h1>
<p>this is my page. it’s strange. like me.</p>
<img src="mygif.gif">
</body>
</html>
> upload to the dashboard
> boom. you’re live at
https://yoursite.neocities.org
or https://nekoweb.org/u/yoursite
[ step 3: add a style sheet - style.css ]
-----------------------------------------
create a file called `style.css` and upload it.
here’s some nostalgic magic:
body {
background: url('tile.gif');
color: lime;
font-family: "Courier New", monospace;
text-shadow: 1px 1px 0 black;
}
img {
image-rendering: pixelated;
}
marquee {
font-size: 20px;
color: magenta;
}
link it in your html and the vibes activate.
[ step 4: decorate it like a haunted usb ]
------------------------------------------
> use <marquee> for chaos scrolls
> embed gifs from https://gifcities.org/
> steal buttons from https://cyber.dabamos.de/88x31/
> set up a guestbook at https://www.smartgb.com/
> loop audio with <audio autoplay loop>
> add fake errors, 90s web lore, random link lists
[ step 5: resources, themes, and comfort ]
------------------------------------------
> templates & layouts: https://numbpilled-themes.tumblr.com
> glitchy gifs & buttons: https://glitchcat.neocities.org/resources
> layout builder: https://sadgrl.online/projects/layout-builder/
> free tiled backgrounds: https://backgrounds.neocities.org/
> beginner html intro: https://www.w3schools.com/html/
> pixel fonts & cyber assets: https://fontstruct.com/
remember:
you don't need to know js. you don't need to be a coder.
you just need a mood, a direction, a dream.
the html will follow.
[ bonus concept: shrine pages ]
-------------------------------
> a page just for one character you love
> a room to house digital fragments of your identity
> embed quotes, music, images like altars
> call it shrine.html and link it from your homepage
[ closing mantra ]
------------------
you are not here to be optimized.
you are not a brand.
you are a ghost inside the machine,
carving your initials into the silicon void.
welcome to Your website.
========================================================
#webcore#old web graphics#neocities#web graphics#carrd graphics#carrd resources#rentry decor#rentry graphics#carrd moodboard#carrd inspo#neopets#indie#indie web#early web#webdevelopment#web development#web resources#web design#old internet#old web#oldweb#nekoweb#transparent gif#tiny pixels#pixel gif#moodboard#tutorial#html page#html theme#htmlcoding
471 notes
·
View notes
Text


Shop Sign Wall Lights - UPDATED 15 May 2025
I put together a few sets of shop sign wall lights. But there are instructions. I kept some swatches as a default white color so that you could pick which color you want the light to be while in live mode. This saved on the file size of the package file because the more textures a file has, the more bloated the file size is.
I had some fun with some shop names although I mainly included generic titles in both English and Simlish.
DOWNLOAD for FREE: SFS
OR at Patreon*
*You must be over 18 to access my Patreon page.
INSTRUCTIONS ON CHANGING LIGHT COLORS
Once you place the light in build mode, then go to live mode. Click on the light and you will get the following pie menu.

Select SET COLOR AND INTENSITY and then choose THIS LIGHT. The color options will then appear so you can select which color you want.

If you use the name signs along with the Awning Lights, make sure to place the name on top of the awning so when you select the color picker, the correct sign changes colors. The other option is to place the name separate from the awning, go to live mode and change the color, then go back to build mode and add the awning light you want.
Enable the bb.moveobjects on cheat and then you can make adjustments to location and size of objects. You can adjust the position of the light on the wall by depressing the Alt key while placing the sign (on PC). You can adjust the size of the item by depressing the Shift key and either [ (for smaller) or ] (for bigger) (on PC).
CREDITS
Awning Shop Lights - 19 swatches of various awning wall lights. 18 are pre-colored and one is white so you can change the color yourself in game.
Candy Shop Lights - 20 swatches
Pottery Shop Lights - 25 swatches
Tattoo Shop Lights - 21 swatches
Enjoy!
Creations by SexyIrish7
These cc objects are new 3d meshes created using Blender and Sims 4 Studio.
Polygon Count: 6
All CC have:
*Ability to search catalog using search terms: sexyirish7 and si7
*Customized thumbnail
*******
CREDITS:
Software credits:
Sims 4 Studio v. 3.2.4.1 (Star): https://sims4studio.com
Blender 4.0: https://www.blender.org/download/
GIMP v. 2.10.34: https://www.gimp.org/
Inkscape v. 1.2: https://inkscape.org/
Thank you to the creators and moderators producing tutorials and answering questions!
*******
Model and Image credits:
Mesh created by me.
Simlish font credit to Franzilla: https://modthesims.info/
Image credits:
Awning Lights Image credits: Modified image from Adobe Stock
Candy Shop Image credits:
Swatches 1-3: Image by pch.vector on Freepik https://www.freepik.com/free-vector/christmas-candies-symbols-set-neon-style_11241813.htm#fromView=search&page=1&position=26&uuid=8b541325-0e62-4e37-9468-6bacd30f8963&query=neon+lollipop+candy
Swatches 4-8: Image by gstudioimagen on Freepik https://www.freepik.com/free-vector/sweet-candy-neon-seamless-pattern_5595774.htm#fromView=search&page=2&position=30&uuid=e2259de5-014d-4d04-af87-1198ee0f35e2&query=%40gstudioimagen+neon
https://www.freepik.com/free-vector/sweet-candy-neon-seamless-pattern_5595775.htm#fromView=search&page=1&position=27&uuid=e2259de5-014d-4d04-af87-1198ee0f35e2&query=%40gstudioimagen+neon
Swatches 9-10: Image by openclipart.org https://all-free-download.com/free-vector/download/peppermint_candy_clip_art_13182.html
https://all-free-download.com/free-vector/download/round_candy_with_stick_card_on_pink_background_6823183.html
Swatch 11: Image by All-free-download.com https://all-free-download.com/free-vector/download/round_candy_with_stick_card_on_pink_background_6823183.html
Swatches 12: Image by katemangostar on Freepik https://www.freepik.com/free-vector/ice-cream-cart-neon-sign_3238564.htm#fromView=search&page=8&position=42&uuid=2f82b4d1-5ca8-449c-ae22-4573861ebcb0&query=neon+sign+retail
Pottery Shop Image credits:
Swatch 1: Crafting icons created by andinur - Flaticon https://www.flaticon.com/free-icon/pottery_17392031
Swatch 2: Image by katemangostar via Freepik https://www.freepik.com/free-vector/aquarius-neon-sign_5561944.htm#fromView=search&page=2&position=5&uuid=c55e5e21-0550-46f0-b9be-cfa85ff38796&query=Ceramic+Neon
Swatch 3-4: Pottery icons created by Smashicons - Flaticon https://www.flaticon.com/free-icon/vase_3760867
https://www.flaticon.com/free-icon/vase_3760970
Swatch 5: Icon by istar_design_bureau via Freepik https://www.freepik.com/icon/pottery_1958438#fromView=search&page=2&position=20&uuid=096084ae-13fe-429c-a419-e6e13ccd37b9
Swatch 6:Icons by Eucalyp - Flaticon https://www.flaticon.com/free-icon/pottery_6552610
Swatch 7: Icon by berkahicon via Freepik https://www.freepik.com/icon/spin_13785816#fromView=search&page=2&position=0&uuid=096084ae-13fe-429c-a419-e6e13ccd37b9
Swatches 8-11: Icons by Freepik https://www.freepik.com/icon/pottery_8540816#fromView=search&page=3&position=43&uuid=096084ae-13fe-429c-a419-e6e13ccd37b9
https://www.flaticon.com/free-icon/machine_9200546
https://www.flaticon.com/free-icon/vase_8838322
https://www.flaticon.com/free-icon/pottery_3305262
Tattoo Shop Image credits:
Swatch 1: Modified Image by katemangostar on Freepik https://www.freepik.com/free-vector/tattoo-salon-neon-text-with-tattoo-machine-neon-sign-night-bright-advertisement_2438198.htm?log-in=email
Swatch 2: Image by Nippy Custom https://www.nippycustom.com/products/tattoo-neon-sign
Swatches 3-5: Image by bohlam via Vecteezy https://www.vecteezy.com/vector-art/2185717-tattoo-studio-neon-signs-style-text-vector
https://www.vecteezy.com/vector-art/34210463-neon-sign-tattoo-studio-with-brick-wall-background-vector
*******
TOU:
Do not re-upload and claim as your own
Do not re-upload and hide behind a paywall
*******
Changelog:
15.05.2025
*Updated swatches for compatibility with slotted signs.
*Added wall deco slot so that signs can be stacked on slotted signs for Awning Signs
*Added swatches with inverted images for Candy, Pottery, and Tattoo Shop Signs.
#the sims 4 cc#ts4cc#sims 4 cc#the sims 4#wall decor#sims 4#ts4#lights#wall lights#signs#shop signs#retail#pottery#ceramics#tattoo#ink#candy#lollipop#sweets#sugar#light tutorial#sexyirish7#updated cc#featured
315 notes
·
View notes
Text
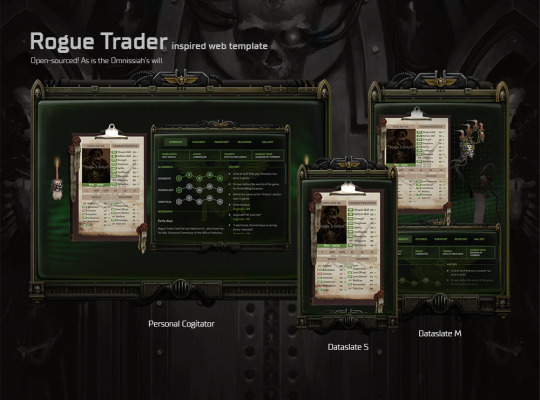
I finished coding my Rogue Trader character sheet template! It's now open sourced on GitHub 🤖
☆ Features
Display your character's stats in (almost) the same way as you've seen in Warhammer 40,000: Rogue Trader CRPG
Multiple sections for character building:
Summary: Character origin info, alignment level, history, and biography.
Features: Show off your build by listing abilities & talents that your character has gained throughout the course of the game.
Inventory: Your Rogue Trader's equipment, armour, etc. goes here.
Relations: Detail the relationship of your Rogue Trader and their retinue members.
Gallery: Place to show off your fanart, commissioned art, fanfics, playlist. Anything goes!
Cool floating servo skulls (only visible in certain screen sizes).
Responsive. Not horrible to look at even in small screens.
☆ Requirements
You would need a static site hosting service for this to work. I recommend Neocities or GitHub pages. Both are free.
Some experience with using npm.
Some experience with basic HTML and JS object/JSON is recommended.
I really wish that it's easier to use and set up, but it's just not possible due to the tech stack I chose initially... I did write a beginner's tutorial on the repository's wiki, but I don't know if it makes sense to normal people who do not code... If you have any questions, let me know and I'll see what I can do.
Tech stack: SvelteKit, SCSS, TypeScript
Bonus:

Name too long? No problem :)
#link to the github repo is in the source!#I made a draft of this post then posted this on Reddit then forgor about it again rip.#rogue trader#warhammer 40k rogue trader#warhammer 40k#warhammer 40000 rogue trader
287 notes
·
View notes
Text
!!! my tag system is below all of this,,, I moved it under a cut because people reblog this post for the links :P
edit: thx for the love on this post. im going to try and continually update this!

⇩ ⠀sites FULL of web graphics ⇩
blinkie maker : make your own blinkies!
DOLLZ REVIVAL : a revival of pixel dolls where you can create and share your own. very cute!
GlowTxt : create glowing transparent text gifs that say whatever u want
HOARDER'S PILE : contains blinkies, buttons, stamps, and teddies
plasticdino.neocities.org : blinkies
Glitter Graphics : contains gifs, blinkies, dividers, and just sooo many web graphics
Cute Kawaii Resources : contains gifs, blinkies, stamps, favicons, dividers, buttons, fonts, literally everything you need. its an insane resource
Adrian's blinkie collection : collection of blinkies, stamps, and buttons
☆ (supplies.ju.mp) : blinkies, stamps, buttons, & favicons
twigbranch.carrd.co : blinkies
lallys.carrd.co : blinkies, stamps, dividers, and other resources
Bugleeblinkie.carrd.co : blinkies, and 3 very special gifs at the end ;)
unshinesblinkies.carrd.co : blinkies
The 88x31 GIF Collection : buttons. there are 5 parts! huge collection!
Bonnibel's Graphic Collection : blinkies
WELCOME TO GIFCITY : blinkies, dividers, favicons, stamps
cass-tastrophe.carrd.co : blinkies, stamps
kotatsuOS : blinkies
Cute web graphics : blinkies, stamps, dividers, and a LOT of other graphics, all very cute
⇩ some html tools! + tags below cut ⇩
MDN (mozilla.org) : if you're just starting out like me this is super helpful HTML Tutorial (w3schools.com): same here! (offers other programming languages as well!) Accessibility Checker(Free Scan) : a site you can use to check accessibility/ADA compliance when making your website! it will point out what needs to be changed. it is free, but they also offer paid services if you need more help imagecolorpicker.com : hex code picker. i use this one because you can upload an image, paste clipboard, OR type in the website and it'll grab a screenshot for you! something simple that was made really well. cssgradient.io : helps you make css gradients for backgrounds or whatever else you need them for smartgb.com : a free guestbook service FC2 Counter! : free "site visits" and "online now" counters. fully customizable Unclosed Tag Checker by Alicia Ramirez : does as it says, checks for unclosed tags (although I recommend using a program that does this as you write anyways. I use Visual Studio Code. Status Cafe : an updateable and embeddable status that you can stick anywhere on your site! it is mostly customizable with CSS but I have noticed a few small quirks with it
my tagging system :))
#graphics
#blinkies
#stamps
#buttons
#dividers
#html/css
#resources
#code
e10's web (neocities.org) <- shameless site plug. show it some love :P
#blinkies#stamps#favicons#gifs#old web graphics#old web aesthetic#old web stamps#old internet#old web#old webcore#2000s web#90s web#html#html css#html5#css#htmlcoding#web design#web resources#early web#early internet#neocities graphics#neocities#geocities#gifcities#web graphics#webcore
602 notes
·
View notes
Text

Tutorials for Aesthetics
Hi! Reign here :) this guide is dedicated to teaching you how to make:
a) colour gradient text b) dividers c) pictures with gradients
Now, as a disclaimer, I'm not saying you should have all these things on your posts. Having pretty things won't guarantee a boatload of interactions and aesthetics shouldn't take away from the actual substance of your writing. Many fics do very well without all the glitz and glamour, and indeed simplicity goes a long way.
You should always prioritise clarity, improvement, and conviction in your writings. Don't get caught up in trying to look pretty and definitely don't be copying other creators' aesthetics unless they've given consent for you to do so.
This serves only as a starting off point for exploring styles that suit you.
Another disclaimer is that Canva, since I wrote and posted this, has and might make more changes which will render parts of this guide inapplicable, but the main parts should remain the same. Canva is best used with premium but I understand that not everyone can and is willing to spend money on this. So my advice is to find a different platform and search up tutorials online.
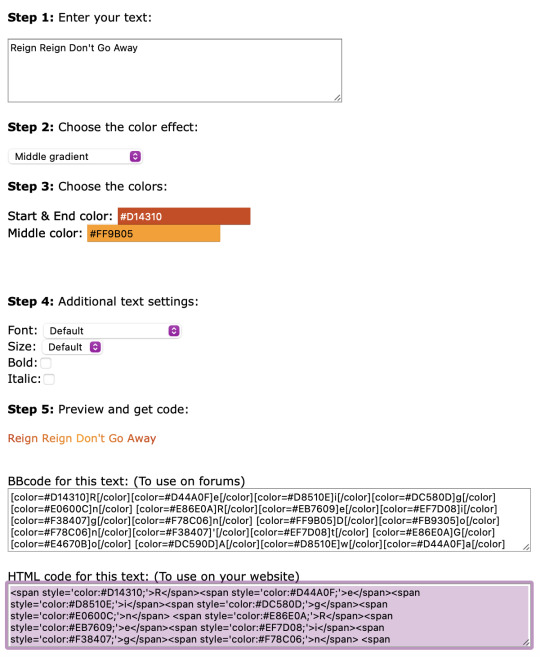
How to get the colour gradient text!
༯ I use stuffbydavid.com
༯ Decide if you want a horizontal gradient/middle gradient/three coloured gradient
༯ Pick your colours + write out the text you'd like to be coloured in the text box
༯ You can see the preview and when you're happy copy all the text in the HTML code box
༯ Go on Tumblr, create a post, click the settings icon of the post, then in the Text Editor function change it from Rich Text to HTML
༯ All your coding will be pasted in the HTML side and they'll appear formatted in the Preview on your Tumblr post


How to make dividers!


༯ I use Canva
༯ Click Create a design
༯ Click Custom size -> for my colour gradient dividers, I use the 3000 x 40 px but you can use whatever sizing you'd like of course -> experiment to your liking
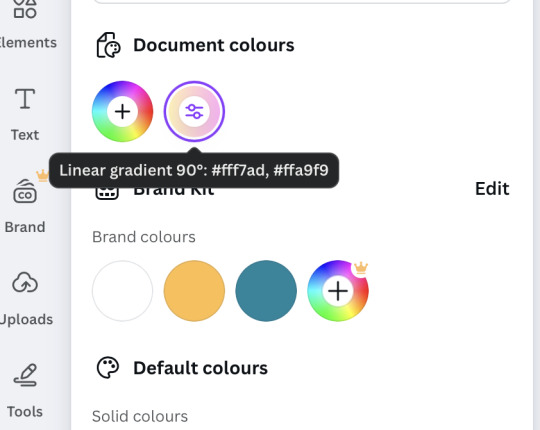
༯ Click the colour wheel to change your background colour
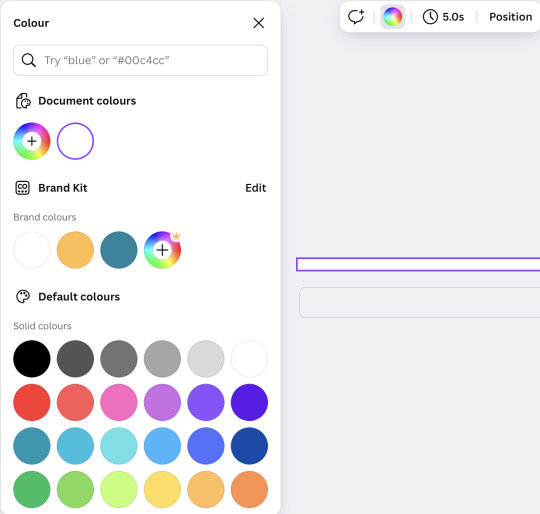
༯ You can do solid colours and use whatever hex code you'd like but to make gradients, scroll through the colour palettes to get to the different kinds of gradient options
༯ From there, you can change the colours of the gradient and adjust to your liking
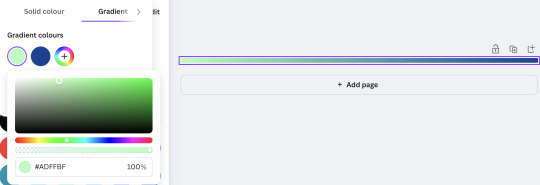
༯ To download it, click Share, Download, keep it PNG, size varies (sometimes Canva updates and it all gets messed up but just experiment) and Download for real

༯ On Tumblr, you're going to just drag and drop that downloaded image on the website or if you're on the app, just add it as a picture and adjust it where you'd like it to go on the post
༯ If you were to have drawings like the hearts or croissants for the divider, you'll want to adjust the Custom size, arrange the pictures or elements on the page, and download with a transparent background (it requires a premium subscription unfortunately but if you do the free trial and just make a bunch of banners and dividers before it runs out, you should be good)
༯ Alternatively, to the premium transparency option on Canva, you can use Adobe background remover, but you just have to make an account first. It works well generally!

༯ A lot of this will involve experimenting for what works for you. There's no cheat code to that, unfortunately. But have fun with it. Don't be afraid to trial and fail -- everyone did at some point
How to add gradient colour to pictures!
༯ Use Canva again
༯ Click Custom size -> 3000 x 800 px (or, again, whatever size you like)
༯ Pick a picture you like -> for manga panels, I like to use Pinterest
༯ Drag that picture onto the blank page and adjust to fit
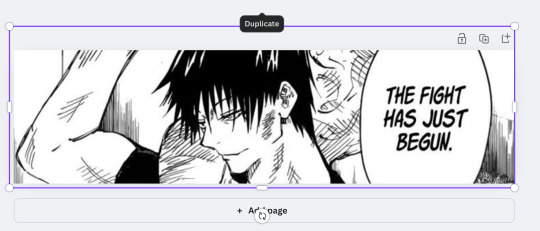
༯ Click Add Page -> on that page, change the background colour. You can use solid colours or gradient colours, it's the same process as for making gradient dividers. You can also choose what kind of gradient you’d like -> horizontal/vertical/centre etc

༯ Click the colour page, copy and paste it on your picture
༯ Adjust the transparency of your picture depending on how opaque you'd like the colour to be


༯ Delete the colour page and keep the picture
༯ Then, again, click Share, change size to 2, and Download
༯ This is the final product -> you can obviously find better pictures and do whatever colours you'd like, this was just an example
༯ I'm not very tech savvy so if my explaining is terrible, I am so sorry 😭 but hopefully this makes senses and encourages you to experiment and be bolder with your layout!
158 notes
·
View notes
Text
For everyone who asked: a dialogue parser for BG3 alongside with the parsed dialogue for the newest patch. The parser is not mine, but its creator a) is amazing, b) wished to stay anonymous, and c) uploaded the parser to github - any future versions will be uploaded there first!
UPD: The parser was updated!! Now all the lines are parsed, AND there are new features like audio and dialogue tree visualisation. See below!
Patch 7 dialogue is uploaded!
If you don't want to touch the parser and just want the dialogues, make sure to download the whole "BG3 ... (1.6)" folder and keep the "styles" folder within: it is needed for the html files functionality (hide/show certain types of information as per the menu at the top, jumps when you click on [jump], color for better readability, etc). See the image below for what it should look like. The formatting was borrowed from TORcommunity with their blessing.

If you want to run the parser yourself instead of downloading my parsed files, it's easy:
run bg3dialogreader.exe, OPEN any .pak file inside of your game's '\steamapps\common\Baldurs Gate 3\Data' folder,
select your language
press ‘LOAD’, it'll create a database file with all the tags, flags, etc.
Once that is done, press ‘EXPORT all dialogs to html’, and give it a minute or two to finish.
Find the parser dialogue in ‘Dialogs’ folder. If you move the folder elsewhere, move the ‘styles’ folder as well! It contains the styles you need for the color coding and functionality to keep working!
New features:
Once you've created the database (after step three above), you can also preview the dialogue trees inside of the parser and extract only what you need:

You can also listen to the correspinding audio files by clicking the line in the right window. But to do that, as the parser tells you, you need to download and put the filed from vgmstream-win64.zip inside of the parser's main folder (restart the parser after).
You can CONVERT the bg3 dialogue to the format that the Divinity Original Sin 2's Editor understands. That way, you can view the dialogues as trees! Unlike the html files, the trees don't show ALL the relevant information, but it's much easier to orient yourself in.


To get that, you DO need to have bought and installed Larian's previous game, Divinity Original Sin 2. It comes with a tool called 'The Divinity Engine 2'. Here you can read about how to unstall and lauch it. Once you have it, you need to load/create a project. We're trying to get to the point where the tool allows you to open the Dialog Editor. Then you can Open any bg3 dialogue file you want. And in case you want it, here's an in-depth Dialog Editor tutorial. But if you simply want to know how to open the Editor, here's the gist:
Update: In order to see the names of the speakers (up to ten), you can put the _merged.lsf file inside of the "\Divinity Original Sin 2\DefEd\Data\Public\[your project's name here]\RootTemplates\_merged.lsf" file path.
Feel free to ask if you have any questions! Please let me know if you modify the parser, I'd be curious to know what you added, and will possibly add it to the google drive.
2K notes
·
View notes
Text
Disco Elysium: The Final Cut Work Skin
I put together a work skin for Disco Elysium AO3 fics or any other HTML/CSS styling! It's compatible with and without dark mode or a dark site skin like Reversi, though I think it looks best with a dark site skin like Reversi, since it's made to look like the game (Final Cut version, anyway, which is what I started with).
Works that use this skin: KK57-1903-1145 THE SHINING MACHINE
Default Site Skin (without work skin | with work skin)
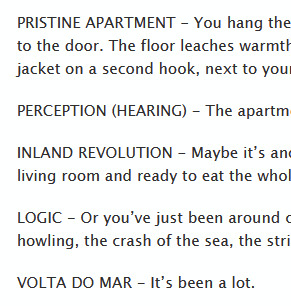
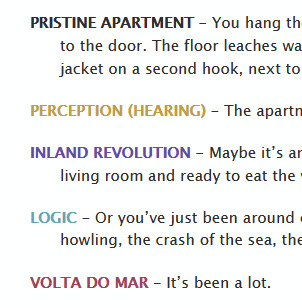
Reversi Site Skin (without work skin | with work skin)

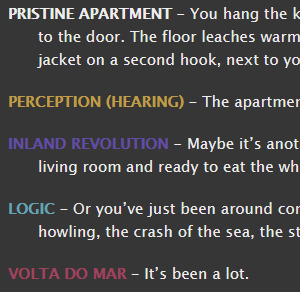
Not pictured but included in the full CSS: choices, active skill checks and skill check results. Full CSS under the cut!
.skill { text-transform: uppercase; font-weight: bold;} .psyche { color: #634CA8;} .intellect { color: #5BA6B7;} .physique { color: #A73F5C;} .motorics { color: #C39E3C;} .check-result { color: #808080;} p { text-indent: -2em; margin-left: 2em;} .white-check { background-color: white; border: 2px solid black; color: black !important; } .white-check-locked { background-color: RGBA(1,1,1,0.8); border: 2px solid black; color: RGBA(0,0,0,0.8) !important;} .red-check { background-color: red; color: white !important;} .choice { text-indent: 0; padding: 0; margin: 0;} .new { color: RGBA(168,60,41,1);} .hovering { background-color: RGBA(0,0,0,0.7); color: white; font-weight: bold;} .used { color: RGBA(168,60,41,0.8);}
Tutorial: Creating a Work Skin
How to use this work skin in particular:
Wrap your labels with tags and use class "skill" for all of them. Add the stat class if appropriate. For example: LOGIC for a LOGIC label (based in the INTELLECT stat, but KIM KITSURAGI for a person.
In the tags for your choice items, add "choice" and any other appropriate classes. You will need to add "new" if you want them to be colored red as they are in the game. This is to prevent incorrect cascading when used with other classes.
Be sure to preview your work skin before you post!
If there are issues or questions please feel free to @ me or drop me an ask 🩵💜🩷💛
#disco elysium#ao3#ao3 work skin#formatting#fanfiction#for as polished as the game is this was surprisingly quick to put together
110 notes
·
View notes
Text
YOU MUST MAKE A WEBSITE
Oh wow, look at that! YET ANOTHER post urging you to make a webbed site! What a completely new thing that people haven't made a thousand masterposts for already!!
• Making a website might look scary. It is Not.
At first, I too thought making a website was too much work. It really isn't! It turns out that all you need is
an HTML file,
a web hosting service and
w3schools tutorials,
and that's about it!
This post will point you towards these resources, and others I found useful while figuring out how to make a website.
• VERY QUICK EXPLANATIONS:
What's HTML and CSS?
HTML is the content of your webpage, the skeleton of it. What shows up in a webpage is what's written in the HTML file!
CSS is the way the HTML is styled; the colour of the background and the letters, the size of elements, the font, all that!
Do I absolutely NEED JavaScript for a website?
Not at all! You don't need to worry about learning it before getting started.
• What do I make a website for? What do I put in there?
ANYTHING AND ALMOST EVERYTHING. Here's some ideas for pages from a post of mine were I was very normal about websites:
You can make a page that's only pictures of your pets.
You can make an interactive adventure.
You can make your own academic blog full of your own essays or articles.
You can just post a ton of art or make a full music page.
You can make a blog and infodump eternally, give book reccs and reviews. You can host a thousand virtual pets and nothing else.
Upload entire books in a single html file. Make a wikipedia for your ocs. Make a fake site for a random fictional place (restaurant, hotel, whatever). You can make a thousand fanpages/shrines about your favorite media. You can upload your own webcomic and make it all like a fancy website and shit.
I could keep going but, for the sake of "brevity", I won't.
• WEBSITE EXAMPLES!
If I started listing the websites I know, this post would be bottomless. Here's only seven:
https://publictransit.neocities.org/ - A webbed site, for sure
https://ribo.zone/ - A personal site
https://leusyth.neocities.org/ - An art archive
https://solaria.neocities.org/ - Personal website with A Lot of stuff (it'll come up in a bit, because it offers web making resources)
https://hog.neocities.org/ - The Hogsite
https://thegardenofmadeline.neocities.org/ - Another personal site! It also has a web resources page and has made another masterpost like this one (but better)
https://spiders.neocities.org/ - My own website, which must be weird to see in mobile . sorry
• You've convinced me. I want a webbed site. Where do I start?
https://neocities.org/
FIRST OF ALL: Neocities. It is a free web hosting service, and it's the one I and the sites I linked use!
When I first started, my website was a black page with red letters and a drawing, and nothing else! It was like that for a month, till i started picking up on how to do things.
Here's what helped me get an idea of how to make things work:
https://sadgrl.online/learn/articles/beginners-guide-neocities
An absolute beginners guide to neocities -- while when you make an account there you get a tutorial page from the site, this one's extra support for that.
https://www.w3schools.com/
Learn HTML, CSS, JavaScript and MANY other coding things for free. All the tutorial/reference pages have live testing windows for you to mess with!! helped me a LOT while figuring this stuff out!
https://htmlcheatsheet.com/
https://htmlcheatsheet.com/css/
Cheatsheets for HTML and CSS, respectively. It includes a JavaScript one too!
https://sadgrl.online/webmastery/
Sadgrl's webmastery resources! Also includes the next resource listed here:
https://sadgrl.online/projects/layout-builder/
Sadgrl's layout builder; not a lot of customization at a first glance, but I've seen wildly different websites all using it as a base, plus it works using CSS Flexbox, so it generates a responsive layout!
(basically, a responsive layout is one that translates well in different sized screens)
https://www.tumblr.com/fysa/728086939730919424/wikitable-code?source=share
Tumblr user fysa made this layout imitating a wiki page!
https://brackets.io/
At some point, you might want to do things outside the Neocities code editor and get one outside the site. I recommend Brackets, because my old as fuck computer can run that and absolutely nothing else apparently, and it works wonderfully! Though I recommend either turning off the code autocomplete or using it after a good while of already using the Neocities code editor, so you get used to coding on your own.
http://www.unit-conversion.info/texttools/text-to-html/
Turn your text into HTML code! i use this kind of pages for my lengthy blog entries that I don't feel like formatting myself.
https://imagecompressor.com/
COMPRESS YOUR IMAGES.
The heavier an image is, the more your site weighs and the more time your page will spend loading. You don't want that, specially if your site is heavy on graphics. This might help!
https://solaria.neocities.org/guides
Some CSS, JavaScript and Accessibility guides! Worth checking out!
https://eloquentjavascript.net/
This is a free, interactive book for learning JavaScript! NOTE: It is very intuitive, but JavaScript is HARD!! I still haven't learned much of it, and my website does fine without so don't worry if you end up not doing much with it. It's still useful + the exercises are fun.
And now, accessories!
• Silly stuff for your page :]
https://gifypet.neocities.org/
Make a virtual pet, copy the code and paste it in your HTML file! You'll get a little guy in your webbed site :]
https://www.wikplayer.com/
Music player for your website!
http://www.mf2fm.com/rv/
JavaScript silly effects for your site :]
https://blinkies.neocities.org/geoblinkies
Blinkie search engine!
https://www.cbox.ws/
Add a chatbox to your site!!
https://momg.neocities.org/
Infinite gallery of gifs. i've spent hours in there looking at moving pictures and out of them all, the ONLY gif i actually ended up using on my site was a rotating tomato slice. it is still there. trapped.
https://wrender.neocities.org/tarotinstructions
A widget that gives you a random tarot card!
https://www.websudoku.com/widget.php
Sudoku widget!
That's about it for now! I don't know how to end this!!! Remember to have fun and google everything you don't know :]
657 notes
·
View notes
Text
Twine/SugarCube ressources
Some/most of you must know that Arcadie: Second-Born was coded in ChoiceScript before I converted it to Twine for self-publishing (for various reasons).
I have switched to Ren'Py for Cold Lands, but I thought I would share the resources that helped me when I was working with Twine. This is basically an organized dump of nearly all the bookmarks I collected. Hope this is helpful!
Guides
Creating Interactive Fiction: A Guide to Using Twine by Aidan Doyle
A Total Beginner’s Guide to Twine
Introduction to Twine By Conor Walsh (covers Harlowe and not SugarCube)
Twine Grimoire I
Twine Grimoire II
Twine and CSS
Documentation
SugarCube v2 Documentation
Custom Macros
Chapel's Custom Macro Collection, particularly Fairmath function to emulate CS operations if converting your CS game to Twine
Cycy's custom macros
Clickable Images with HTML Maps
Character pages
Character Profile Card Tutorial
Twine 2 / SugarCube 2 Sample Code by HiEv
Templates
Some may be outdated following Twine/SugarCube updates
Twine/Sugarcube 2 Template
Twine SugarCube template
Twine Template II
Twine Template by Vahnya
Sample Code and more resources
A post from 2 years ago where I share sample code
TwineLab
nyehilism Twine masterpost
How to have greyed out choices
idrellegames's tutorials
Interactive Fiction Design, Coding in Twine & Other IF Resources by idrellegames (idrellegames has shared many tutorials and tips for Twine, browse their #twine tag)
How to print variables inside links
How do I create a passage link via clicking on a picture
App Builder
Convert your Twine game into a Windows and macOS executable (free)
Convert your Twine game into a mobile app for Android and iPhone (90$ one-time fee if memory serves me right) // Warning: the Android app it creates is outdated for Google Play, you'll need to update the source code yourself
269 notes
·
View notes