#HTML tags for buttons
Text
Learn HTML Tags with WebTutor.dev: Your Ultimate Resource for Web Development Tutorials
HTML (Hypertext Markup Language) is the backbone of the web. It is the standard markup language used to create web pages. HTML consists of a series of tags that define the structure and content of a web page. In this blog post, we will dive deeper into HTML tags, what they are, and how they work.

HTML tags are the building blocks of a web page. They are used to define the structure and content of a web page. HTML tags are surrounded by angle brackets (<>) and are written in lowercase. There are two types of HTML tags: opening tags and closing tags. An opening tag is used to start a tag, and a closing tag is used to end it. For example, the opening tag for a paragraph is <p>, and the closing tag is </p>.
HTML tags can also have attributes, which provide additional information about the tag. Attributes are included in the opening tag and are written as name-value pairs. For example, the <img> tag is used to embed an image on a web page. The src attribute is used to specify the URL of the image. The alt attribute is used to provide a description of the image for users who cannot see it.
HTML tags can be used to define headings, paragraphs, links, images, lists, tables, forms, and more. Here are some examples of commonly used HTML tags:
<html>: Defines the document as an HTML document
<head>: Defines the head section of the document, which contains metadata such as the page title and links to external files
<title>: Defines the title of the document, which appears in the browser's title bar
<body>: Defines the body section of the document, which contains the content of the page
<h1> to <h6>: Defines HTML headings of different sizes, with <h1> being the largest and <h6> being the smallest
<p>: Defines a paragraph
<a>: Defines a hyperlink to another web page or a specific location on the same page
<img>: Defines an image to be displayed on the page
<ul> and <ol>: Defines unordered and ordered lists, respectively
<table>: Defines a table
<form>: Defines a form for user input
<br>: Inserts a line break
<hr>: Inserts a horizontal rule
<strong>: Defines text as important or emphasized
<em>: Defines text as emphasized
<blockquote>: Defines a block of quoted text
<cite>: Defines the title of a work, such as a book or movie
<code>: Defines a piece of code
<pre>: Defines preformatted text, which preserves spaces and line breaks
<sup> and <sub>: Defines superscript and subscript text, respectively
<div>: Defines a section of the page for grouping content
<span>: Defines a small section of text within a larger block of text for styling purposes
Learning HTML can seem daunting, but with the right resources, it can be easy and enjoyable. One such resource is WebTutor.dev, an online platform that provides tutorials on web development, including HTML. The tutorials are easy to follow and provide a hands-on learning experience. The platform also offers quizzes to test your knowledge and a community forum to connect with other learners and ask questions.
In conclusion, HTML tags are the building blocks of a web page. They define the structure and content of a web page and can be used to create headings, paragraphs, links, images, lists, tables, forms, and more. If you are interested in learning HTML, check out WebTutor.dev for easy-to-follow tutorials and a supportive community of learners.
#learn code#learn code for free#school of coding#introduction to coding#learn html#learn CSS#learn JavaScript#programming training courses#how to learn coding for free#best way to learn coding#how long does it take to learn coding#HTML tags for headings#HTML tags for paragraphs#HTML tags for images#HTML tags for links#HTML tags for lists#HTML tags for tables#HTML tags for forms#HTML tags for input fields#HTML tags for buttons#HTML tags for divs#HTML tags for spans#HTML tags for anchors#HTML tags for meta data#HTML tags for stylesheets#HTML tags for scripts#HTML tags for iframes#HTML tags for audio#HTML tags for video#HTML tags for semantic markup
2 notes
·
View notes
Text
My Hunter OC: Hoon


He's not dumb he just has a bad case of ''not-thinking-it-through".
He does, however, think that capes aren't a smart choice. (Except this one time but the fur was soft. He had to)
(And it was faux-fur ofc, who do you take him for? Some seal pup killer?)
His Ghost is Gos and Gos has a little bandana.
Gos is also the smarter one.
According to Gos.
#destiny#destiny art#destiny 2#destiny fanart#original character#destiny oc#Hoon [Plif]#I figured adding a tag for him could help me sort this blog out#but I still haven't found how to add buttons sooo#I did do some html and css tho but I can't remember anything ¯\_(ツ)_/¯#anyway I hope you like this dude and shitpost because ho boi#I'm also doing a small comic about him but life is hard and engineering is harder#why are you still reading these seriously go drink water and sleep i beg you#my art
116 notes
·
View notes
Text
.
#mumbling in the tags#the thing about amateur coding is that you gotta have an idea. then think about how to search how ro make it happen#adn fiddle with wording a couple times until you get actual results. and then you gotta apply that functionaly in a way that works with#everything else you've already done or rewire a bunch of things and then#after a lot of time fiddling with the code and also debugging because idk you got one word or digit wrong#you gotta make it Look the way you want it to look - and the process repeats#and this is just. so much work. but so fun too ;-; so you will accidentally pull all nighters and people will ask 'hey is everything#alright? what are you working on?' and you can't really tell them because everyone knows there's a shit ton of stuff you had to be doing#instead of fiddling with html for funsies#anyway. finally managed to make javascript buttons work in my neocities page 🎉🎉🎉🎉
2 notes
·
View notes
Text
How To Make Your Own Fanfiction Archive, In Just Ten Easy Steps
As the go-to "person who knows about AO3" for quite a few people who read fanfic but aren't really linked-in to wider fandom culture, I've fielded a lot of questions about how to do certain things on AO3 to which my best answer is "you should really start your own archive!" I think, in general, more fans starting their own small archives would be a net good for fandom. AO3 was never meant to be the only archive for all fandom, or even the main archive, and the more spread out and backed up we are the more resilient we are.
But of course I have to be reminded that a lot of fans these days don't really have any idea how little "you should start your own archive!" really involves. (Also, that I should practice what I preach.) So I am now making my own fanfiction archive, and writing up this post as I do it to tell people how to make theirs!
Go to https://neocities.org/ and sign up for an account. It only needs a username (which will also be your website address), password, and email. Pick a username that will be related to your archive's title!
Choose the free account option (if you ever need more than what the free account offers for a text-only archive, you should probably look into graduating from neocities.) This should take you to a menu of "how to make a website" tutorials. You should do them! They're useful skills. But let's get your archive running first.
Hit the big red Edit Site button, or open the menu under your username and select "Edit Site".
Select the "Index.html" file to edit. You're now in an HTML Editor. Congrats, you're a web developer c. 1999!
Find where it has text between the < title> tags. Delete the filler text, and put in the title of your new archive. This text will be what shows on the tab when people go to your archive.
Find where it has text between the < h1 > tags. This will be big header text at the top of your page. Put the title of your archive here again. If you have no experience with HTML, you should read over the other sample text. It covers the basic basics very well! Once you've done that, you can delete everything else between the < /h1> tag and the < /body> tag. Save your index.html file.
Get an HTML file for a fanfic you would like to add to your archive. If it's on AO3, you can use the html download option built into AO3. If you have it as a word processor/google docs file, you should have the option to save as an html file. Save that html file to your computer.
Go back to Edit Site on Neocities and go to "upload". Find the html file you saved and upload it. (You can also drag and drop files to upload.)
The file you uploaded should now be showing with your other neocities files. Right-click on the title and select "copy link".
Go in to edit index.html again. Under where you put your header text, type < br> < a href=" . Then paste in the link you copied. Then type "> Then put in the title of the fic. Then type < /a> . Then save the index page again when you're done. You can do this for every fanfic you have.
Congratulations! You now have your very own personal private fanfiction archive that you are 100% in charge of and make all the rules for. It's at least as good as half the ones I was reading on when I started reading fanfiction and will serve its function well as a way to let people read your fic. You can link to it from anywhere you want! (Including your AO3 profile.)
Blogpost version, with FAQs and discussion
Anyway, here's my beautiful new fanfiction archive made using this tutorial:
Melannen's Fanfiction Archive
(I am honestly way more disproportionately proud of finally making that than I expected to be. It's nice to have your own archive.)
If you make one, share it here ! I want to see!
#ao3#archive of our own#fanfiction#fanfic archive#how-to#tumblr what are you doing to my angle brackets#why would you do that what's wrong with you
4K notes
·
View notes
Text
Buck's Guide to Making Fake Dash Posts
The general format of a "post" is
😀 emoji for the profile pic
regular text for url/username with maybe dashes or underscores or a -deactivated[numbers that indicate a date]
optional Follow text with the blue colored text option (if there isnt a follow its implied the reader of the fake dash post is already following them
contents of post
bold text for notes count
post divider image (see below)
example:
😀 fakestoftumblrinas Follow
ummm im new to tumblr this is my first post
3 notes
the ways to make it cooler:
there is an image between this line and the next which is a skinny rectangle thats a fake post divider (works best on people using dark mode but gets the point across regardless)

^^ feel free to save the image ^^ (as you can see adding an image also adds a blank line above it you prob wanna delete)
i've seen some people put a ♻️ before a users emoji if they are a reblog comment on a post
example:

🤡 clowncarboy
knock knock
♻️🎭 myharlequinromance
who's there?
2 notes
tags:
tags on a normal posts have hashtags before each tag and spaces between the tags and are regular sized but grey (or other alt color per color theme) you can make text grey using HTML but that's likely overkill
#example #tags
some people have been using tiny text for tags (on mobile you highlight text then select the button that says <s>)
example tags
you can also use, chat mode, text
or [this type of, thing]
personally i used chat mode as a pretend version of screenshotting tags
go forth! have fun! also tag your posts with at least "fake dash" if not also "unreality" so folks don't get unnecessarily freaked out :)
937 notes
·
View notes
Text
I Helped Launch a PMD Fanfiction Website!
So you might've seen in my recent fic updates but there's a new Website specifically for PMD Fanfiction! And I totally helped make it! It's run and operated by members of the PMD Fic Writing community and they've all been hard at work updating and keeping the place running! We got a few fics on there already, so we'd love it if you gave it a try!

It's got:
Built-in Text to Speech reading!
Color/Saturation/Font adjust sliders!
The ability to tag paragraphs as sensitive so readers can hide them!
Pretty Splash pages!
Image and Music hosting!
An AO3 Chapter HTML Converter tool for quickly porting your own stories! (There's steps for using it with FFN stories, too!)
Robust bookmarks and a 'read later' button that adds a story to your 'bookshelf' for later!
Super fancy commenting / review tools!
441 notes
·
View notes
Text
index (I hope to follow this tag system lol)
#blinkies
#stamps
#gifs
#favicons
edit: thx for the love on this post. im going to try and continually update this! I just added a section for HTML/CSS resources aimed at people making neocities
⇩ ⠀websites that are FULL of other web graphics below ⇩
⇩ (+ some html tools!) ⇩
Graphics:
blinkie maker : make your own blinkies!
DOLLZ REVIVAL : a revival of pixel dolls where you can create and share your own. very cute!
GlowTxt : create glowing transparent text gifs that say whatever u want
HOARDER'S PILE : contains blinkies, buttons, stamps, and teddies
plasticdino.neocities.org : blinkies
Glitter Graphics : contains gifs, blinkies, dividers, and just sooo many web graphics
Cute Kawaii Resources : contains gifs, blinkies, stamps, favicons, dividers, buttons, fonts, literally everything you need. its an insane resource
Adrian's blinkie collection : collection of blinkies, stamps, and buttons
☆ (supplies.ju.mp) : blinkies, stamps, buttons, & favicons
twigbranch.carrd.co : blinkies
lallys.carrd.co : blinkies, stamps, dividers, and other resources
Bugleeblinkie.carrd.co : blinkies, and 3 very special gifs at the end ;)
unshinesblinkies.carrd.co : blinkies
The 88x31 GIF Collection : buttons. there are 5 parts! huge collection!
Bonnibel's Graphic Collection : blinkies
WELCOME TO GIFCITY : blinkies, dividers, favicons, stamps
cass-tastrophe.carrd.co : blinkies, stamps
kotatsuOS : blinkies
Cute web graphics : blinkies, stamps, dividers, and a LOT of other graphics, all very cute
HTMLS/neocities Stuff:
MDN (mozilla.org) : if you're just starting out like me this is super helpful
imagecolorpicker.com : hex code picker. i use this one because you can upload an image, paste clipboard, OR type in the website and it'll grab a screenshot for you! something simple made really well.
cssgradient.io : helps you make css gradients for backgrounds or whatever else you need them for!
smartgb.com) : a free guestbook service
FC2 Counter! : free site visit and online now counters. fully customizable
#blinkies#stamps#favicons#gifs#old web graphics#old web aesthetic#old web stamps#old internet#old web#old webcore#2000s web#90s web#html#html css#html5#css#htmlcoding#web design#web resources#early web#early internet#neocities graphics#neocities#geocities#gifcities#web graphics#webcore
176 notes
·
View notes
Text
how to spot stolen/uncredited gifs + how to work the search function
there's been a lot of talk about not stealing gifs and not supporting people who do, but it might not be easy to spot shady posts for everyone. so i made this little guide with things i personally look out for.
at the end there's also a guide on how to work the search function.
i hope this will help out there on the wild tumblrmachine!
the gif has a watermark that doesn't match the poster and there's no "gif by @[username]" under the gif. please note that a lot of people don't watermark their gifs at all, but this is one of the biggest give aways to a gif being stolen and reuploaded.
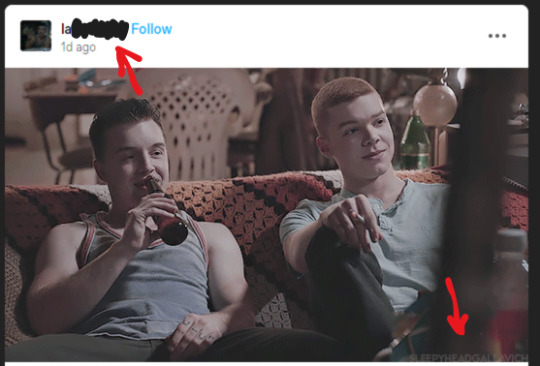
the gif doesn't stretch across the entire post. very seldom does a gif maker go through the entire process of making a gif and not making it cover the entire post space. in the example below, the gif was most likely a part of a set, as a second gif would fit perfectly right next to the one posted.
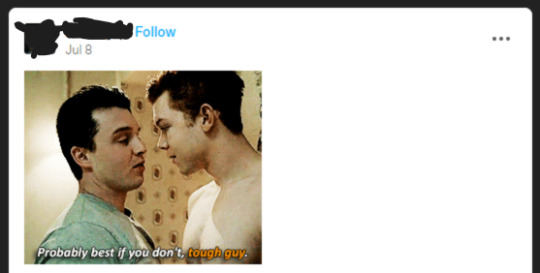
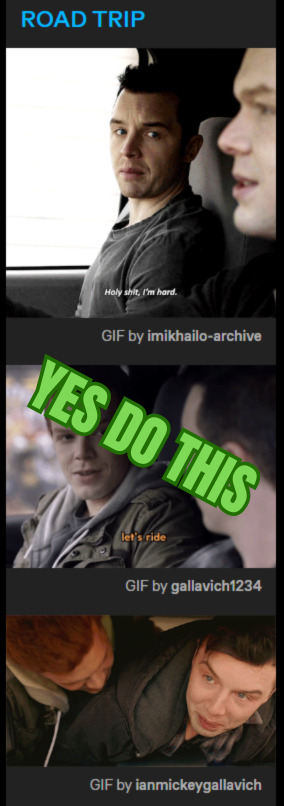
"theme posts" with gifs of different sizes and/or quality. in the examples below, "mickey smiling" has gifs of different sizes and no "gif by" credit under either of them. "theme posts" can still be made with proper credit to the gif maker, like "road trip" to the right.
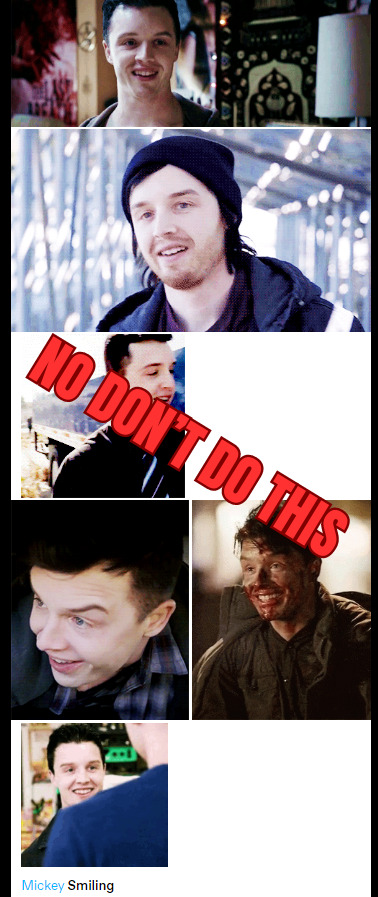
new posters and no "my gifs" tag. if you're unsure if the gif is stolen or not, click the top of the post and go the blog and look at the tags attached to the post. if someone made the gif themselves, there's usually a "my gifs" or a similiar tag under the post. this might be a good thing to do if someone is new to the space has started posting gifs. this is not 100% foolproof method, but it can help you give an idea if the gif is stolen or not.
so how do i work the search function? how do i get the gifs i want?
good question! in the example of "mickey smiling", try searching for just that - "mickey milkovich smile" and you should get some good results.
in the case of grabbing a specific gif from a specific post, i'll try to make a guide down below. if you have any questions, please don't hesitate to ask!
first, find a post you want to use a gif from. we're gonna use this set from @heymacy.
open the post you wanna use and copy the url to it. then make a new post and hit the gif search button. paste the url and it should find you the first gif of the set. click the gif and tumblr brings you back to your post with the gif and the "gif by heymacy" at the bottom.
but say you want the last image in the set. we're gonna use a tiny bit of html but don't fret.
first, do the previous step i just explained above.
click the cog wheel at the top right corner, scroll down and choose "text editor - html". go back to your post and it should be a whole bunch of text instead of an image.
search the text for "img scr" and then delete everything between the two quotation marks following that, it starts with https and ends with gifv.
go back to the post with the gif set and right click the gif you want (in this case the last one of the set), and choose "copy image link" and paste it between the quotation marks where you deleted stuff before. make sure not to delete any quotation marks and that your new link placed between them!
please note: you might get an error message from tumblr that the post contains unsupported html, just ignore that.
then click the cog wheel again, and change the editor back to "rich text". you're new image should be there, with proper credit!
bam, you're done! i'm also including a video below of me doing these steps so you can follow along. sorry my os is in swedish, but the thing i right click on is just "copy image link" as stated above.
here's a more in depth guide to this method, but it can be a little confusing if you're not used to working in html.
as you add more images and text to your post, the amount of text after you change to the html editor will increase. it might be hard to find the exact gif you want to change, but play around with it and try it out. the more you use the method, it'll be easier to work with.
thank you for coming to my ted talk, i hope this helps! 🫂
#dont steal gifs#this took forever and still is a bit meh but you get the point#shameless#mickey milkovich#ian gallagher#im_helping_ralph.gif
147 notes
·
View notes
Note
oh my god I'm so stupid lol
how did I never notice your tags were like that??
oh dont worry, i never like made a guide or anything for it.
i mean, aside from the "my audio posts" and "my video posts" buttons on the html website version of my blog mariogolf.info, which just links to those specific tags.
the website version of my blog is organized similarly! i have a whole FAQ with a bunch of other links to other stuff. and some easter eggs and whatnot. i still sometimes sneak in some new stuff from time to time, though most of it is probably too obtuse to actually find.

88 notes
·
View notes
Text
You can make your Likes and Following private, btw
Your Dashboard is the equivalent of Feed
You can make multiple sideblogs under the same account. People use these to organize their thoughts and interests among other things. It's not a requirement. You can have Everything on your main blog
Always reblog the stuff you like. Especially art and writing. That's the only way that stuff gets circulated
Don't clog tags with irrelevant things (i.e. don't tag #horse, #dog, #cat when the post Only has cats in it)
DO NOT CENSOR TAGS use the full word(i.e. always #spiders not #sp!ders or what have you)
You can filter tags in your settings! So that you will not see whatever you list. (i.e. filter #spiders and all posts tagged with #spiders will be censored(you can click to view, but it won't be immediately visible)
Writers: If you're posting your work, put a summary/intro at the top, then add a Read More button, then the rest of your writing. This prevents a Looooong scrolling post! :]
On desktop you can fully customize your blog page via html coding! There's layouts around that you can use, or you can make your own! They're super cool
Also! You're not required to tag your posts. It's just for the sake of your organization. Most people talk in the tags/add commentary to the post via the tags(it's like whispering your thoughts to your neighbor while passing them a note or book without actually Wrting on it)
You can pin one post to the top of your blog by clicking the meatball menu at the top of the post you wanna pin
#quotev#I feel like I'm forgetting stuff#I made a post specifically for systems transfering from Q too. I'll rb that rq so it's closer to the top of my blog!#Blah blah#Have fun ig
125 notes
·
View notes
Text
Fade to Black Macro

Demo
I have finally turned my fade to black transitions into a somewhat easy to use macro!! :) I am not sure if this has been done before!
Customizable fade times
Built to be compatible with backward and forward buttons (mostly!)
Works across all screen sizes
Note: This is only for SugarCube.
Setup
Copy and paste this Pastebin to your Story JavaScript.
Copy and paste this Pastebin to your Story Stylesheet.
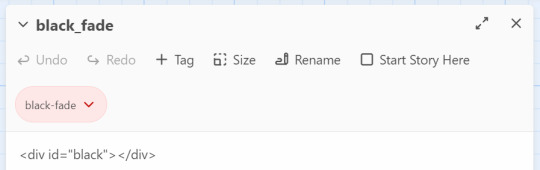
Make a new passage titled exactly as "black_fade". Add the passage tag, "black-fade". Inside, write <div id="black"></div>. Super important! Copy below identically.
After this, your installment of the macro should be complete!
Usage
In the passages where you will be fading from and where you will be fading to, tag it as "passage-fade". For example, I want to transition from "p1" to "p2" with a black fade. Thus, both p1 and p2 should have the tag.
In the passage where you will be fading from, write <<fadestart>>.
Use the <<link>> macro to link to your destination. Inside the link macro, use <<passagefade "[passage name]" [fade time]>> where [passage name] is the passage you want to go to, and fade time is how long the black fade will be in miliseconds. (1000ms = 1s). However, do NOT put the passage you will be going to in the <> macro itself. See below:

Here, I want to go to the passage "p2". Do NOT write <<link "Next passage" "p2">><</link>>. Do not provide the destination passage in the link macro itself. The macro <<passagefade>> will handle it for you if you specify the passage name in the first argument.
Once you do all this, you should be able to sit back and happily use it as you please!
Problems?
Make sure you have the passage "black_fade" titled exactly like that.
Also make sure it has <div id="black"></div> and nothing more!
Make sure "black_fade" is tagged with "black-fade".
Make sure you used <<fadestart>> in the passage you are transitioning from.
Make sure you are correctly using the macro <<passagefade>>. You specify time in miliseconds; it should not have "ms" or "s" included in the argument. It should just be the number (e.g. 4000 for 4 seconds).
Make sure the passages you are fading from and to are tagged with "passage-fade".
There may be CSS/HTML that is interfering with the look of the fade!
There may be other JavaScript code interering with the current code.
If you are having problems, please let me take a look at your Stylesheet or let me know what template you are using! However, I highly recommend looking at the playable and downloadable demo.
(This macro is free to use, free to copy for all commercial and non-commercial projects with no additional fees. Credit is appreciated!)
#interactive fiction#twine#sugarcube#twine coding#sugarcube coding#sugarcube resources#twine coding resources#fade to black macro#ftb macro#coding resources
270 notes
·
View notes
Text
Friday, August 25th, 2023
🌟 New
On /search pages on the web, we moved the search bar from the sidebar to the center/main section of the page.
For folks in the aforementioned reblog header redesign experiment, we added avatars back to posts from group blogs when the option to show author portraits is enabled.
When blocking a blog via a submission in your inbox on the web, you can now block from both your secondary (if it was the recipient) and your primary blog.
On the web, we have made some improvements to localized number formatting across all supported languages.
On the web, logged out users browsing a blog view will sometimes be prompted to log in after scrolling for some time.
We are testing out showing the “You’re all caught up!” carousel to folks with “Best stuff first” enabled.
🛠 Fixed
On the web, we’ve made some improvements to the post header in compact posts (like when they’re displayed in a grid on the Explore page, for example). Long blog names, badges, and the follow button no longer break onto a new line in the middle of a word, and each element remains properly aligned in the header.
We fixed an issue that caused a bullet point to appear next to the Blogs menu item when using Safari.
We’ve made some headway in fixing various issues relating to undo/redo in the post editor on web. You should notice improved stability when using undo and redo in the editor.
On the web, we fixed an issue where avatars from anonymous asks were empty.
On the web, we fixed an issue affecting the HTML and Markdown modes in the post editor where select all would sometimes select text outside of the editor.
We fixed an issue affecting some users where starting a search with a hashtag (#) would return search results instead of results for that tag.
🚧 Ongoing
We are hard at work updating our docs. If you see anything confusing or out-of-date, please send some feedback!
🌱 Upcoming
Nothing to share today.
Experiencing an issue? File a Support Request and we’ll get back to you as soon as we can!
Want to share your feedback about something? Check out our Work in Progress blog and start a discussion with the community.
501 notes
·
View notes
Note
What are some of your favorite skins you've made?
I thought about the answer to this question for a very long time. I want to tell you a story about a skin that broke the site.
(I think this has been fixed now, which is the only reason I'm posting about it.)
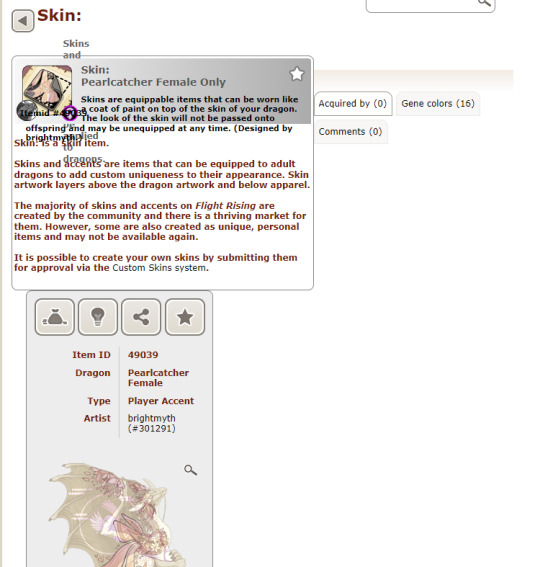
Up until around March of this year, skin names weren't sanitized. I wasn't aware of this and continued to be unaware of this until the day I asked for my Valentine's pearlcatcher skins (named <3 and </3 respectively) to be renamed. Special characters often break when you submit them through the queue, so you have to go and ask the mods in the skroblems thread to fix apostophes for you so they display properly. I went and asked them to fix my pearlcatcher skin's names for me, since they weren't displaying correctly either. This lead, by accident, to the most interesting way I've gotten the site to break in a while.
My friend noticed first when they got a subscribed notification to my skin shop thread. They realized there were two pages that were completely gone.
Then they realized that the front page didn't look right either. My catalogue posts had completely vanished. Only to find... when you hovered over the thumbnail of the </3 skin's icon, my posts had hopped into the item description.
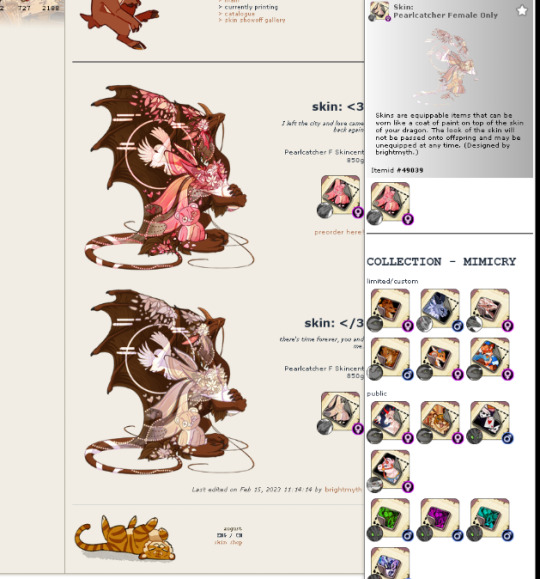
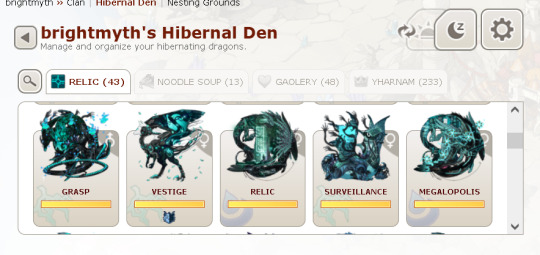
We experimented a little more before realizing this thing was... very, very powerful! You could put the skin into a den tab description, and it would put every single dragon in that tab into the space of the description box. You could break your userpage for ANYBODY on site. Your entire dragon could get swallowed up if you put it into their bio. And because the skin deleted the edit button, you couldn't get it back out.


Little did I know, the </ part of the skin name - when posted using [skin=skinid] or [item=skin: </3] - would act as an HTML tag anywhere it was posted, and completely mess up how the site displayed! I compiled everything I found and sent it into the bug forums and the contact team box for review. The thread got deleted almost immediately, confirming what I suspected: skin names aren't sanitized, and this could very easily be exploited with malicious intentions or SQL injects.
Luckily, they fixed it pretty quickly! I hope the way the site handles skin names has been updated now too. This sort of thing wouldn't have happened even if I had named the skin </3 or, god forbid, dropTable(); in the first place. I do think it was because I had the mods go in and edit the skin name that allowed the unclosed </ to display in the skin's item icon and then break the site.
So that's the story of one of my favorite skins I've made! <3 and </3 are now LOVE and LOVE(LESS) respectively. The designs themselves didn't sell too well, but for a glorious 16 hours, they contained all the power of little nuclear bombs detonating on various HTML-dependent sitepages.
#flight rising#skins and accents#flightrising#my stuff#asks#if any staff see this and need me to take it down because it contains information about a former site exploit... lmk
573 notes
·
View notes
Text
Convert HTML to Image: A Step-by-Step Guide ✨

Do you want to turn some HTML code you've made that's on your website and have a way to convert it into an image for you to save?
Well, look no further! I too wanted to do the same thing but funny enough, there weren't any straightforward tutorials out there that could show you how! After hours of searching, I finally discovered the solution~!
This is an old tutorial I made 🐼

💛 Set your environment
Before we dive into the conversion process, I'll assume you already have your HTML code ready. What you want to learn is how to turn it into an image file. You should have a good grasp of HTML and JavaScript. For this tutorial, we'll use the following HTML code example:

We won't include the CSS code, as it doesn't affect this tutorial. The JavaScript file (script.js) at the bottom of the body element is where we'll add the functionality for the conversion.
Your page should resemble the following:

As you can see, the "Click me" button will handle the conversion. We aim to convert everything within the div.info-div into an image.
💛 Using the html2canvas JavaScript Library
The html2canvas library allows you to take screenshots of webpages and target specific elements on a screen. Here are the steps to include the library in your project:
The steps to put the library in your project:
Visit the html2canvas website for more information.
Copy the CDN link from here

and include it in a script tag in your project's head tag in the HTML file:

That's it for including the library on the HTML side. Now, let's move on to the JavaScript code.
💛 JavaScript Functionality
Here's the JavaScript code to handle the conversion:

In this code, I want to turn the whole div.info-div into an image, I put it into a variable in const div = document.querySelector(".info-div");.
I also put the button into a variable in const button = document.querySelector("button");
I added a click event listener to the button so when the user clicks the button, it will follow the code inside of the event listener!
You can find similar code like this in the documentation of the html2canvas library:

What is happening here is:
We add the div (or what the element we want to take an image of) into the html2canvas([element]).then((canvas)
Added the image file type url to a variable = const imageDataURL = canvas.toDataURL("image/png"); - You can replace the png to other image file types such as jpg, jpeg etc
Created an anchor/link tag, added the href attribute to imageDataURL
The download attribute is where we will give the default name to the image file, I added "dog.png"
Perform the click() function to the anchor tag so it starts to download the image we created
And that's it!
💛 The End
And that's it! You've successfully learned how to turn your HTML into an image. It's a great way to save and share your web content in a unique format.

If you have any questions or need further clarification, please comfortable to ask. Enjoy converting your HTML into images! 💖🐼
#my resources#coding#codeblr#programming#progblr#studying#studyblr#programmer#html#html css#javascript#neocities#coding tips#html5 tutorial#html tutorial
128 notes
·
View notes
Text
why do I keep getting surprised when I learn that people don't know about the "Share" button on the top of AO3 fics that will create a tumblr post (or a tweet) with all of the relevant information about the fic (ship, characters, rating, tags, word count, summary, etc) and add a link all neatly formatted for you?*
*the Share button is at the top of every fic unless the author has selected the "Hide the share buttons on my work." option enabled in their privacy setting, so you can use to promote your own writing, or even recommend a fic to your followers.
I mean, look how easy this is:
step 1: find a story you want to share and click the "Share" button at the top:
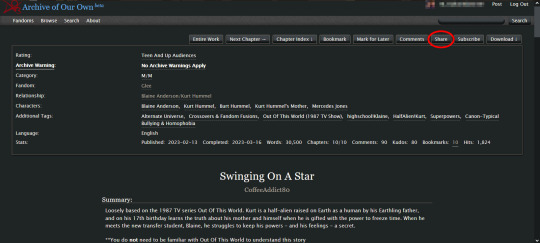
clicking that button will create a pop-up that looks like this:
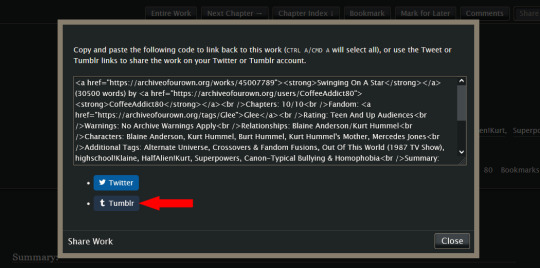
step 2: you can ignore the html in the text box; you don't need it for this. instead, click the "Tumblr" button, and (if you are logged in to your tumblr account) it will create a tumblr post that looks like this: (*this auto-generated post will automatically use tumblr's default color palette for the preview regardless of what you have your preferences set to*)
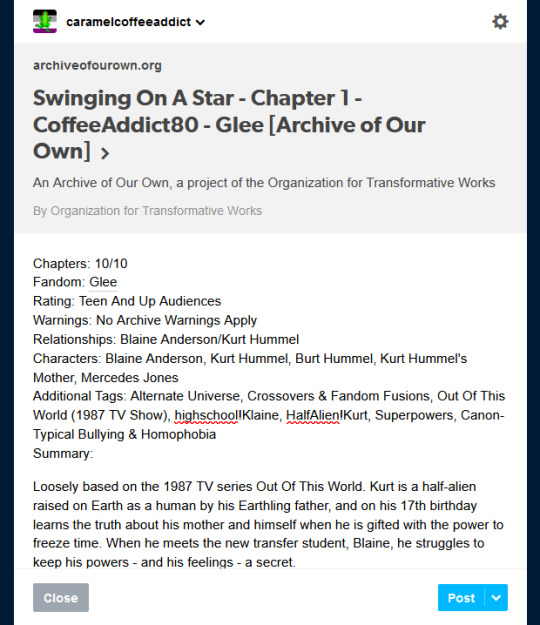
step 3: if you like the way the post looks, just click "Post". (*if you have more than one blog, make sure to double check that you are posting to the correct blog before you post it!*) or if you want, you can add an author's note to the post, maybe add a photo or a teaser of the story, or make other edits to it before clicking the "Post" button. the choice is yours.
it's so simple, and only takes a few seconds to do. it's literally just three button clicks: "Share" -> "Tumblr" -> "Post". you don't have to worry about forgetting to add important info about a story in your tumblr post; or rack your brain trying to figure out which information you should include; or even figure out how to format the post to make it look neat and easy to read.
one thing to note: if you (or the author you are recommending) have your fics locked for AO3 users only, the link at the top of the tumblr post will look like this instead:

other than that, the rest of the post will look the same as above with all of the relevant story information, minus the fic title and author name which are normally displayed in the link preview. you can manually add that missing information to the post yourself before sharing, so your followers will know what story they are clicking on.
124 notes
·
View notes
Text


THEME PACK: THE ARCHIVE
Styled after AO3, this pack includes a theme and matching pages, and was designed for writers and readers alike.
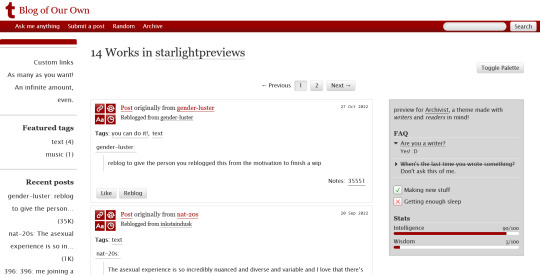
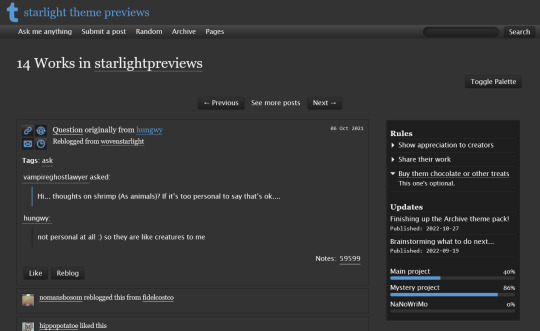
🖋️ Theme 11: Archive Of Your Own
Live preview | Static previews: index page, permalink | Code
Full-width posts in an AO3 work index page format
Sidebars with optional sections such as featured tags, updates, rules, progress bars, and more
Unlimited custom links (display on sidebar or in top navbar), plus several social links in the footer
Add a custom logo beside/replacing your avatar
Inbuilt tag filtering plugin by glenthemes
All fields editable directly in the Customize menu, no HTML required. See below the cut for a full guide
🖋️ Page 3: Archive Records
Preview | Code
A WIP page designed to resemble an AO3 work page
Add tags for ratings, warnings, fandoms, characters, and more, as well as statistics like start dates, word counts etc.
Spaces for summary, start and end notes, and the 'work' itself
🖋️ Page 4: Archivist
Preview | Code
A combined about/navigation page based on the AO3 profile page
Include user statistics or any data you'd like, plus a longer bio
Sidebar navigation with link sections - unlimited links and link groups
The theme and pages all include options for multiple color palettes (initially set to Default and Reversi), text styling (choice of Tumblr/Google fonts and casing options), and more. -
Each page includes instructions on how to edit it, and color/image variables have been gathered together to make customization easier. While not necessary, basic knowledge of HTML is helpful.
For help, check my codes guide, or feel free to send me an ask. Theme 11 customization guide and credits are under the cut.
Theme 11 customization
Regarding the simpler fields:
"Secondary title" refers to the title just above the posts, under the header and navigation. This defaults to "[Total posts] Works in [Username]" when the field is left empty.
"Filtered tags" takes a comma-separated list of tags, entered exactly as they'd be written in the Tumblr post editor but without the hashtag. E.g. the tags #politics, #red and blue, and #green would be entered as "politics, red and blue, green" (make sure there's spaces, and no comma after the last item!). The filtering plugin will then put a warning message over any posts with those tags, along with a button letting you show the post.
"[Section] title" act as the headers for the corresponding section, if provided. "Custom links title" defaults to "Pages" if nothing is entered, and is used when the custom links are displayed on the navbar.
"Featured tags" takes a comma-separated list of tags, in the same format as Filtered tags. This field will display links to those tags, along with the number of posts in that tag on your blog, in the left sidebar.
The Recent posts section displays the 5 most recently posted/reblogged posts on your entire blog, displaying in the left sidebar. If you enter a tag under "Recent posts tag", it'll instead display the 5 most recent posts in that tag on your blog. Only 1 tag is allowed.
Rules and FAQ
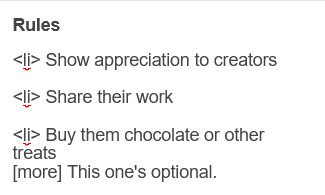
Both these sections work the same way. Each new item, a rule or a question, consists either of one statement, or a statement and some more text, usually as an answer or additional note. E.g. the screenshot below shows three rules, where the last one has more text in the dropdown.
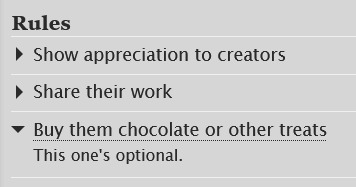
To create an item, prefix it with <li> . To add more text, create a <li> item and add a [more] label underneath, then write your extra text after that. To illustrate, here's the Customize page code for the above:
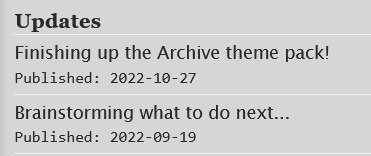
Updates
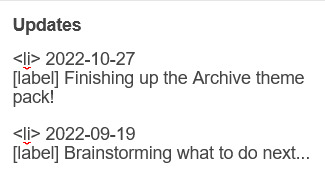
This section is similar to Rules/FAQ, though it flips the order around. After each <li>, first list the date, then add the [label] marker, then add your actual update. Again, here's an example:
And here's the Customize page code that created that:
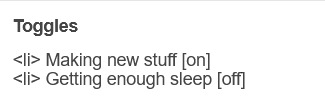
Toggles
This section displays checked/crossed-out items, and uses a simpler version of the formatting for the above sections. Use <li> for each new item, then add [on] or [off] at the end, depending on whether you want it checked or crossed off. Here's an example:
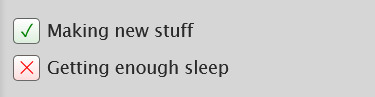
And here's the corresponding Customize code:
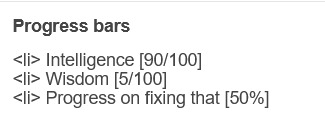
Progress bars
This section also uses <li> items, where each item has two parts: the text label, and the number(s) for the progress percentages, put inside square brackets like with the other sections. Here's an example (note how the top two use fraction values while the bottom one uses a percentage):
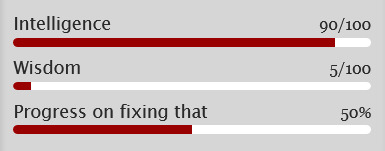
And here's the code that made these. In short, the format is <li> Text here [##/##], or <li> Text here [##%], where ## refers to any number.
Social links in footer
The footer links, aside from the email and personal website fields, take usernames or user IDs for various websites. Be sure to check you're not entering a username in a user ID field!
The Email address field takes a standard email in the format [email protected] and adds a link to let people mail that address.
The Personal website fields will generate a link in the footer's Follow section. Personal website name is the human-readable text label for the generated link, and Personal website URL is the URL that will open when the generated link is clicked. Make sure to add https:// to the start of the personal website URL so the generated link doesn't just redirect you to a different part of your blog.
Credits
Layout and design by Archive of Our Own
Style My Tooltips by malihu
Phosphor Icons
Expanded Tumblr localization and NPF photosets plugin by codematurgy
Custom audio posts by annasthms
Tag filtering by glenthemes
Palette toggle by eggdesign
Scroll to top by Fabian Lins
#code#theme#theme 11#page#page 3#page 4#coding cabin#theme hunter#free#full width#sidebar#topbar#nav text#pagination#unlimited links#header img#custom font size#tfont#gfont#unnested#responsive#npf#color mode#search#rblk buttons#timestamps#tags#group
1K notes
·
View notes
Last Seen Blogs

rhuesdats4mash
Rhue's DA / Sims 4 Obsession

briarcliffmanor
Evan Peters & AHS

truthgroup
Untitled

ofasimfile
Of A Sim File
