#trans tutorial
Explore tagged Tumblr posts
Visit Tumblr Blog
Explore Tumblr blogs with no restrictions, modern design and the best experience.
Last Seen Tumblr Blogs


Fun Fact
Tumblr has a 66 index score for customer satisfaction in the US.
Text
How to Make Your Own Binder that Fits Well and Looks Good
A while back I was in need of some new binders and thought hey, I bet I can make one way cheaper than buying it from somewhere (especially cus some of the ones I’ve bought in the past didn’t really fit right). Except when I started looking for a binder patterns online, I was very surprised that I really… couldn’t find many that looked very nice lol. Most of them had really wrinkled necklines, or didn't bind well, or just overall looked weird. A lot of the patterns also required a serger, which I don't have.
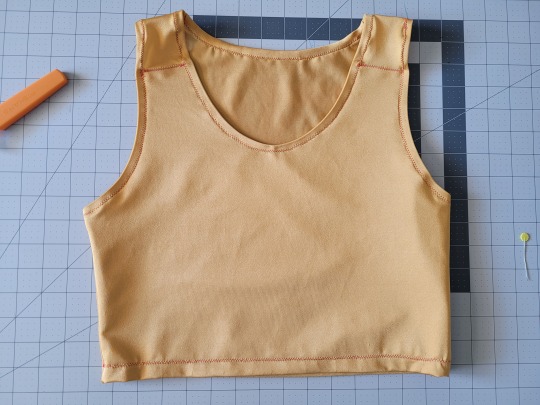
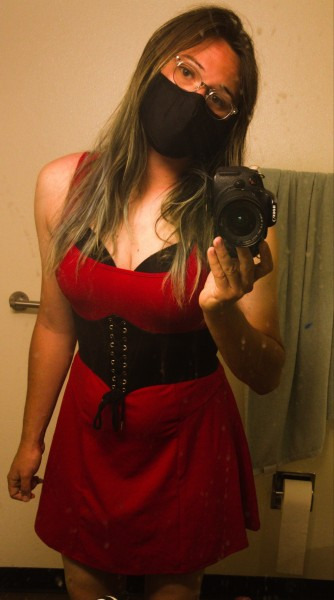
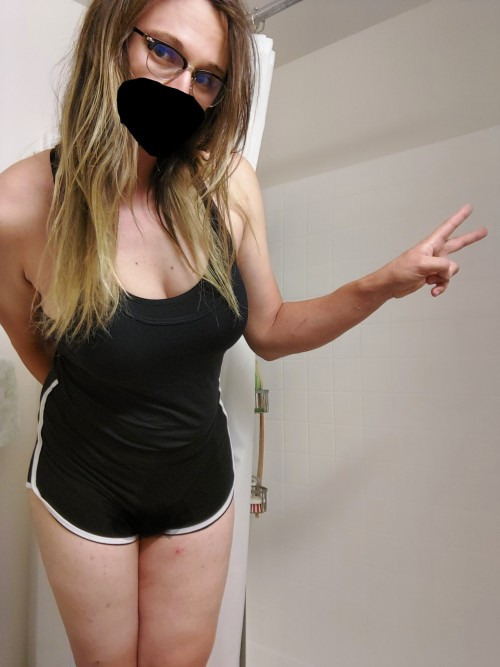
So I just said fuck it and made my own pattern! And it ended up being relatively easy! And the binders fit REALLY WELL and are comfortable to wear, even for long periods. The neckline doesn't show under shirts with loose collars, and the bottom hem doesn't gap or stick out. Here's me wearing one:
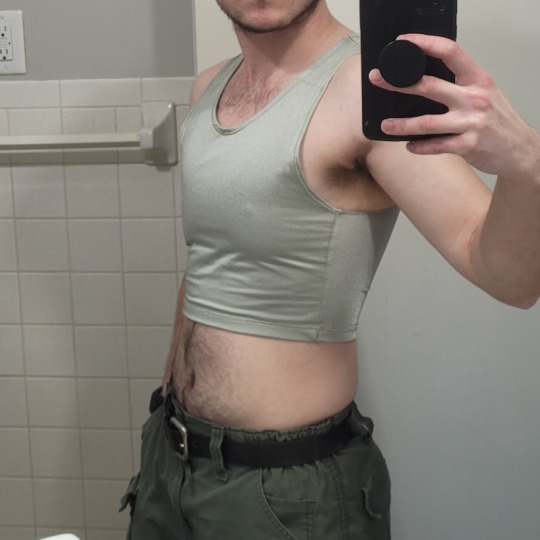
(plus I was able to make myself 5 of them for a total of like ~$50.)
So I figured I could throw together a guide to help out anyone else who wanted to make their own binder but was dissatisfied with the patterns available!
Disclaimer: This tutorial is going to assume a baseline level of sewing experience, and also will require access to a sewing machine. It is not a complicated pattern, but it will most likely require some tweaking and adjustments after you make the first one. Don’t be afraid to make alterations to make it fit better!
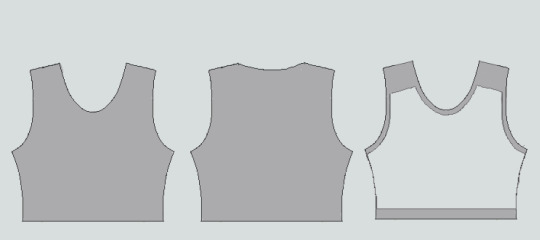
This tutorial is for a gc2b-style half-tank binder. It could be altered to be a full-tank binder, but all instructions will be for the half-tank design.
Materials needed:
Stretchy fabric, probably listed as 'athletic fabric' (I use this kind from Joann’s. Most athletic stretch fabrics should work, look for around 80% nylon/20% spandex blends)
Stiff fabric (I use this shirting cotton because I like how lightweight it is. If you want something a little stiffer with more structure, you can use a cotton or cotton/poly blend twill like this. gc2b binders use twill for theirs.)
Lightweight fusible interfacing (I use this kind) (get FUSIBLE not sew-in)
Fusible webbing like Pellon Wonder-Web (this is technically optional but it WILL make your life easier when you’re sewing - just make sure to get the kind with the paper backing!!!)
“But kiwisoap thats 4 whole kinds of materials, surely I don’t need that many!” Ok sure, you can probably get by without the fusible web and interfacing, but consider: they are both dirt cheap (im talking like $1-2/yard), they will make it much easier to sew the final product, and will give you an overall better-looking result. This tutorial is written with the assumption that you’ll use them.
"How much fabric will I need?" Measure the circumference of your chest below your armpits. Add 6 inches just to be safe. This is the yardage of stretch fabric you’ll need, and should give you enough material to make at least 3 binders without much excess left over. You will need around half as much stiff fabric.
Other supplies:
Big Paper (for drawing the pattern)
Flexible measuring tape
Sewing machine
Iron
Pins
Step 1: Measuring
You will need 4 main measurements for this pattern.

A) Measure the circumference of your chest just below your armpits, then divide the number in half. This will be the widest part of the pattern.
B) Measure from the top of your shoulder down to where you want the binder to end. For most folks, this will usually be around the natural waist (narrowest part of the torso), about 3-6 inches above the belly button. This will be the overall height of the pattern.
C) Measure the distance from below your armpit to where you want the binder to end. This will determine where the arm hole starts.
D) Measure the circumference of your waist where you want the binder to end, then divide the number in half.
So for example, after dividing A and D in half, my measurements are 17", 15", 7", and 14.5".
Next:
Subtract one inch from measurement A - This will help provide some compression. You might need to take it in even further depending on how it fits, but one inch is a safe starting point. I take mine in around 1.5 inches.
Subtract half an inch from measurement D. This will help prevent the bottom edge of the binder from gapping. Again, you may need to take it in more or less, depending on your own body.
Add 1.5 inches to measurement B and one inch to measurement C. This is to account for the hems and armhole placement.
This makes my final measurements
A = 16"
B = 16.5"
C = 8"
D = 13.5"
From here on out, we are only going to be working with the measurements that we have added/subtracted to, NOT the ones we initially took.
Step 2: Drawing the Pattern
You will need a piece of paper large enough to accommodate the entire pattern. This may involve taping multiple pieces together, or using a piece of newsprint, etc.
I recommend folding the paper in half to ensure that you get a symmetrical pattern. However, this means you will need to divide measurements A and D in half again, or else you’ll end up with a pattern that’s twice as wide as it should be!
Also note: the pattern is drawn with the seam allowance built in! You don’t need to add any seam allowance.
To draw the pattern:
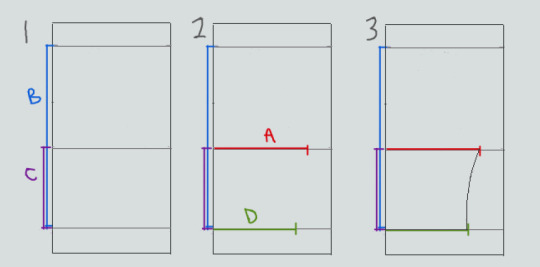

Begin with your folded paper. Measure and mark B and C on the paper, and draw a line extending across the paper. These will be your guidelines.
Measure and mark A and D along the middle and bottom guidelines, respectively. Remember, the paper is folded, so you only use half of the measurement for A and D.
Draw a loose curve connecting the endpoints of A and D. If needed, you can also just draw a straight line between the two.
Mark the opening for the neck hole. Depending on your size, it will measure around 6-8 inches across at the top (remember to divide this in half for the folded paper) and about 5-6.5 inches deep. (mine is 6.5" across and 5.5" deep) Draw a curve to connect the two points. This part will take some tweaking and adjusting to get it to look right lol.
Measure the width of the strap - this should be somewhere between 2.5 - 4 inches wide. They will end up about 1/2” to 3/4” narrower once you sew them. Draw the line at a slight angle, as shown.
Connect the endpoint of the strap to the endpoint of line A with a curve like in the diagram.
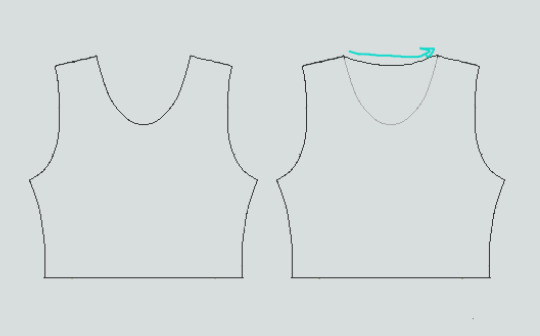
This will be the pattern for the front piece.
To make the back piece, trace the front pattern, but make a very shallow curve for the neckline instead of a steep one, as shown:
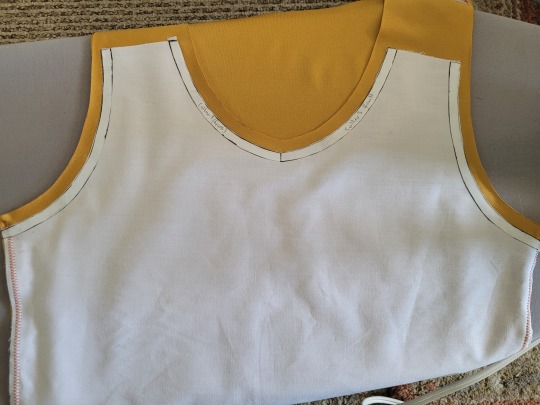
The last piece is the stiff front panel. This is what provides the flattening effect of the binder. To make the pattern, trace the front pattern again. Trim 3/8” in on the sleeves and neckline, and 3/4” to 1” along the bottom. This gives a flatter hem. Then trim the straps shorter by a few inches. This helps the binder lay flatter along the shoulders.
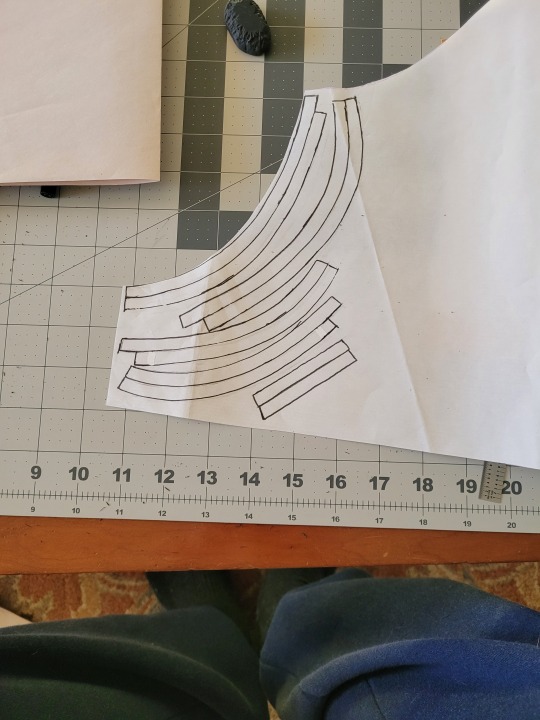
When you're done, you should have 3 pattern pieces that look approximately like this (stiff panel shown overlaid on the stretch fabric to show how it fits together).
NOTE: If you want more compression or just want to make it a bit sturdier, you can add a second panel of stretch fabric to the back piece. Just use the bottom half of the back pattern (from the widest part down to the bottom hem) to cut out another piece of stretch fabric. Attach it to the back piece with a strip of fusible webbing and a zig-zag stitch along the top.
Step 3: Putting It All Together
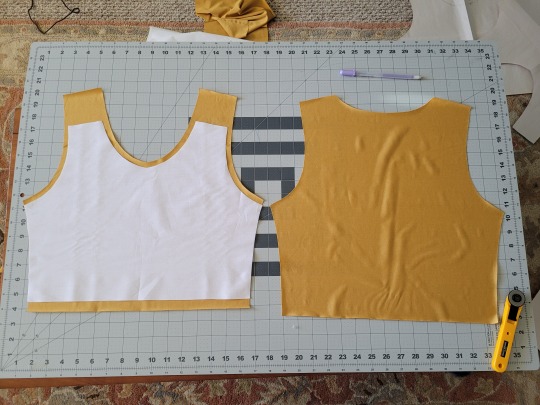
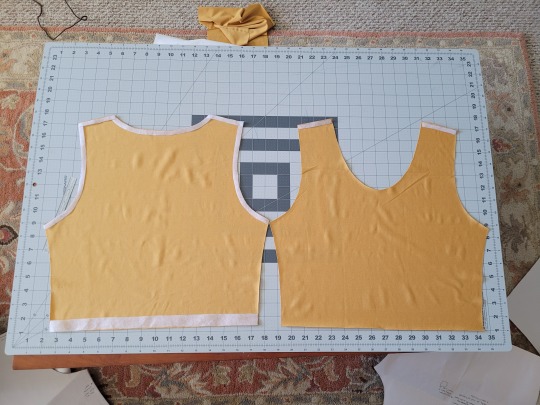
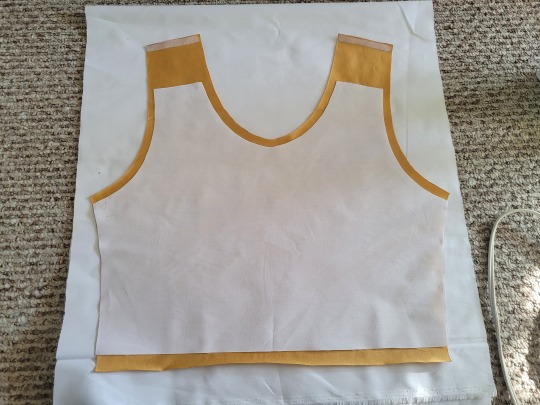
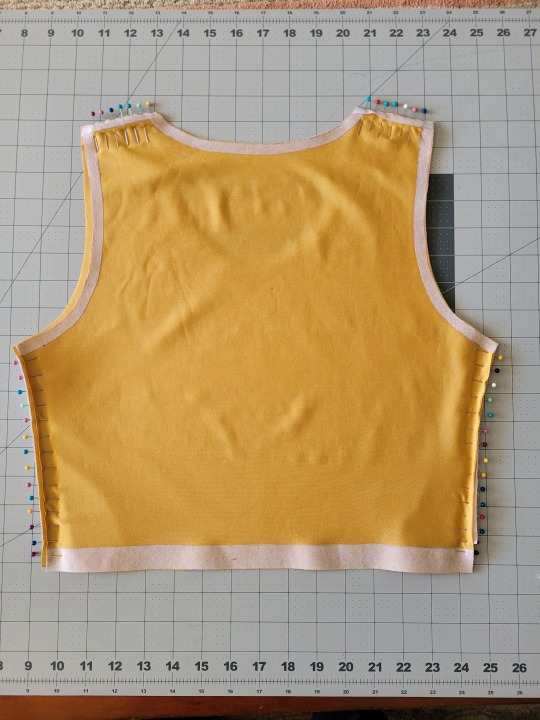
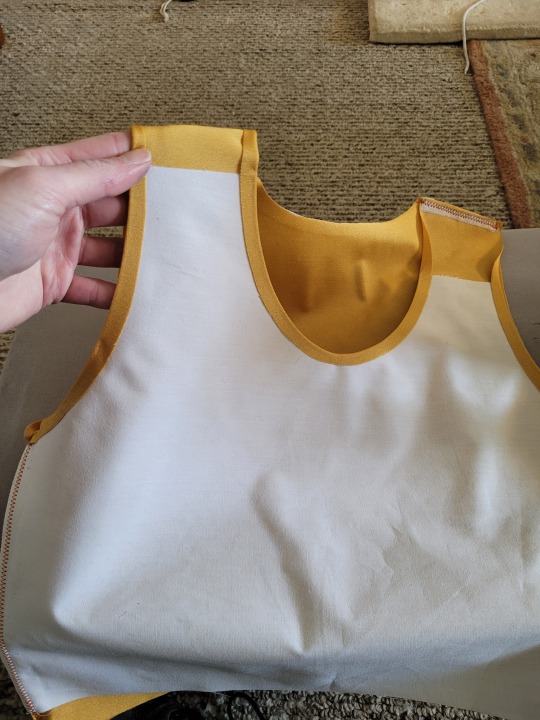
Once you’ve made the patterns and cut out the pieces of fabric, you should have something that looks like this:
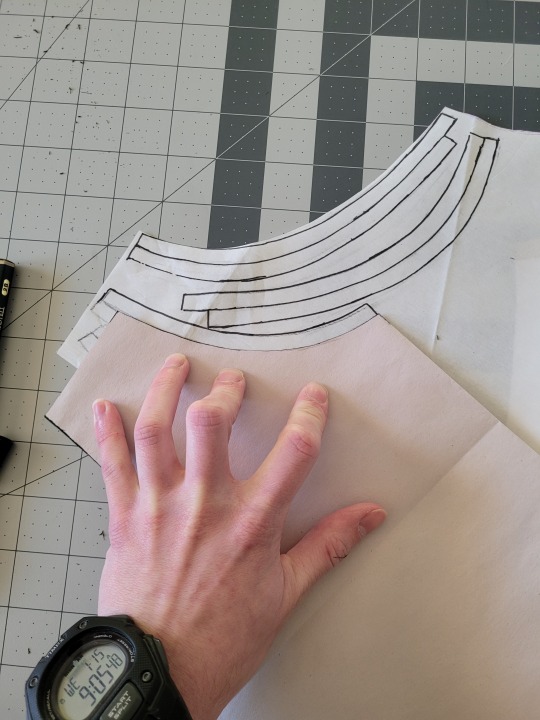
The next step is adding interfacing and fusible webbing. Use your pattern to cut out 3/8" strips to fit on the top of the straps for both pieces, and to the neckline, sleeves, and bottom hem of the back piece, as shown:
If you want to add it to the bottom hem of the front piece, it will help keep that hem flat when sewing it down later, but it's not essential.
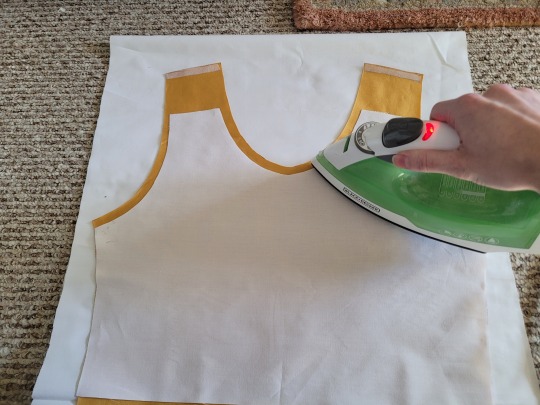
If you choose to also use fusible webbing (WHICH I RECOMMEND), you will apply it to the stiff front panel similarly to how the interfacing was applied, ~3/8” strips along the neckline, sleeves, and top of the straps. Cut out two strips for the neckline and sleeves, because we'll use those later too.
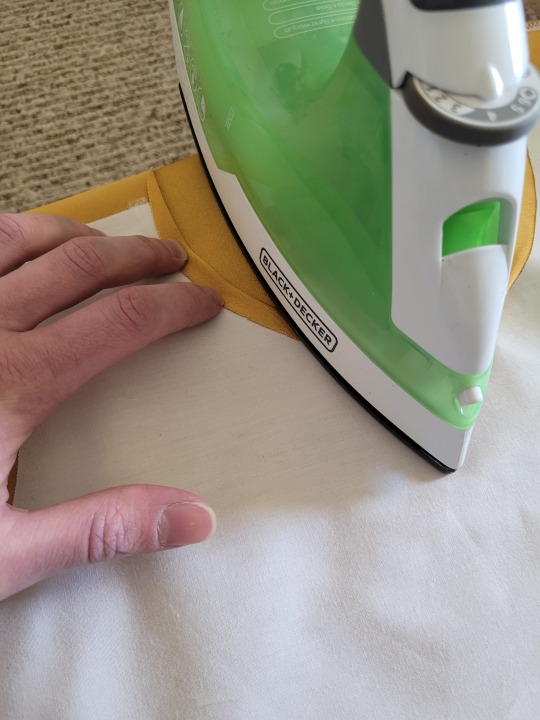
Iron the strips onto the front panel as shown:

Once it's on, just peel off the paper, position it webbing-side down on the stretch fabric, and iron it to fuse the two pieces together so everything stays in place while you sew. THIS MAKES IT WAY EASIER TO SEW.
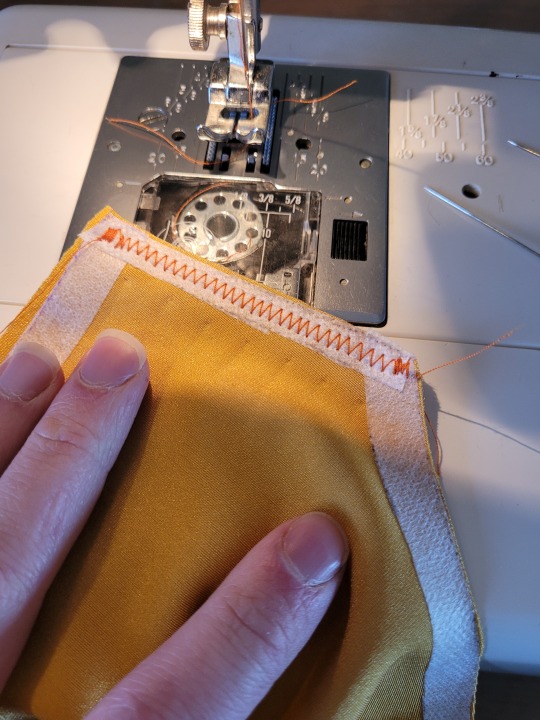
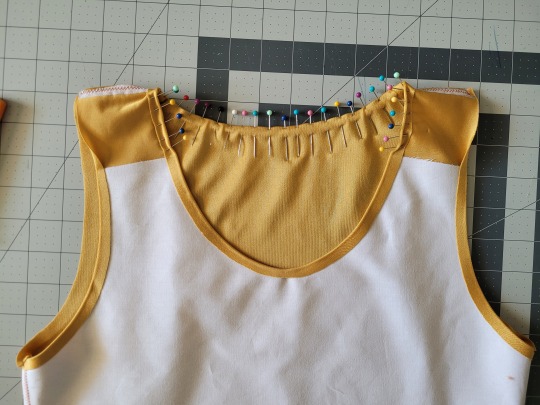
After the stiff front panel is fused to the stretch fabric, you’ll sew the straps of the front and back pieces together, then join the pieces along the sides. Pin the hell out of it to keep everything in place -this type of material is VERY prone to puckering.
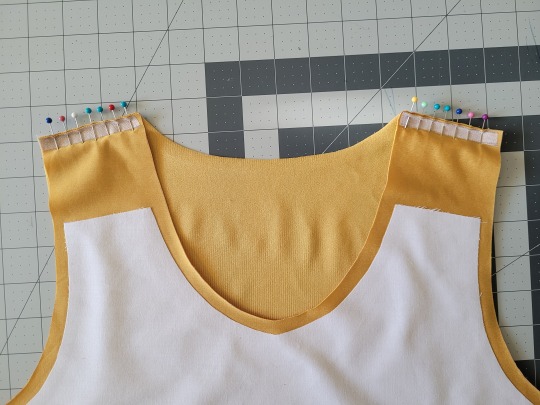
When sewing, USE A ZIGZAG STITCH. A straight stitch will NOT WORK for stretch fabric. I adjust mine to 1.3mm long and 3.5mm wide which has worked well. If your machine doesn’t let you adjust stitch length or width, well. That sucks, I don’t really have any advice.
After you sew the front and back pieces together, you can add more fusible webbing to the front panel to help hold the hem down flat and prevent it from puckering while you sew it. Just add the strip, peel the paper off, then fold the hem over and iron it down. This part isn’t really necessary, but it does make the hems look nicer. If nothing else, I would recommend adding it to the neckline.
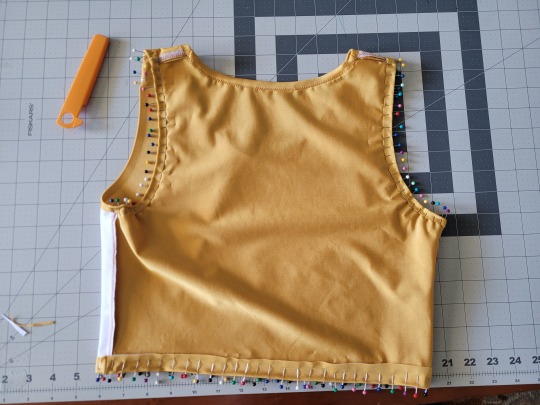
After that, you just fold & pin all the hems and sew them up with a zigzag stitch, then go over the raw edge at the top of the stiff panel (where we cut the straps shorter).
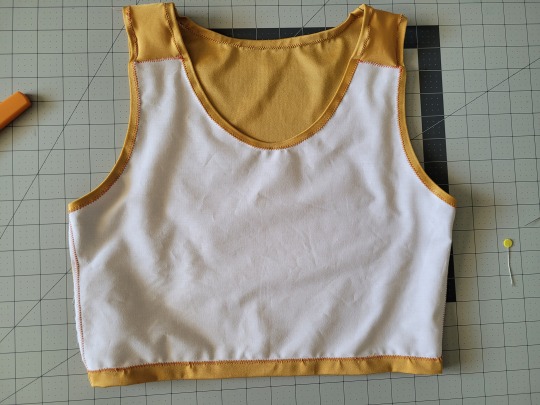
And that’s it! You’re done! And now you can make your own binders whenever you want!
And hey! If you used this tutorial and wanna throw me a dollar or two on ko-fi, I wouldn't complain.
2K notes
·
View notes
Note
the joys of finding another cat(boy?)!!! any tips for drawing furry/feline faces? been trying to draw a sona <:3
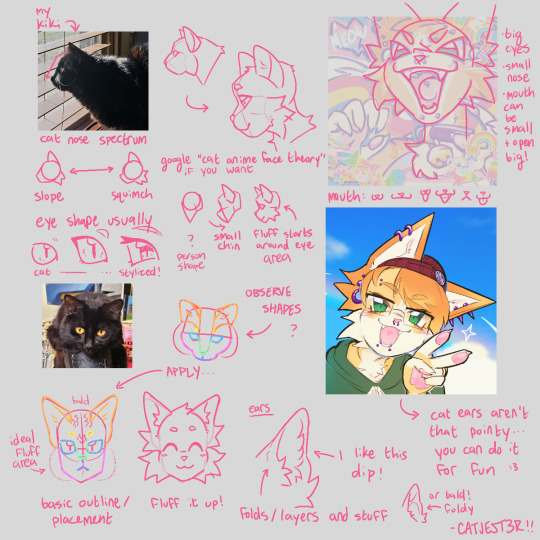
catboy yes!! heres a vague outline of how i draw cat face/heads!
overall i think cats are easiest to draw bc they have simple, short faces, so its a good place to start!! this might be unorganized or unhelpful, ive been around cats and drawing them my whole life, so a lot of stuff is second nature to me ^^' i think when anthropomorphizing(?) it definitely helps to add hair, ive always struggled with drawing bald furries xD
heres my previous tips post which might be good to check out before this one!! thanks for asking btw! 🐱💖
As before I wrote out my notes in alt text in case it's hard to read... :,3 I also recommend zooming in on the sections to view it!!
#art tutorial#furry#furry art#cat furry#digital art#art#my art#artists on tumblr#illustration#fursona#fur#anthro furry#fire alpaca#sfw furry#sfw fursona#sfw furry art#furry commissions#furry artist#furry anthro#anthro art#art commissions#commission#trans artist#transmasc artist#cat fursona#art help#art resources#art advice
184 notes
·
View notes
Text
The magnus archives when everything’s the same but the action happens 10 years into the future (starts 2026) and the institute is under scrutiny because some gossip magazines accused them of having misogynistic management because the Head of the Institute was always a man so Jonah Magnus originally born in the 1700s decides to deal with that by his next body being a woman so now he has to deal with periods and gender dysphoria
#what am I even writing at this point#this is just words#the magnus archives#tma podcast#tma#jonah magnus#elias bouchard#he regrets his choices pretty quickly but can’t#the institute starts paying for their workers gender reassignment surgery#jonah gains a new respect for trans people#tutorial on how to make a Gregorian era man more progressive: make him trans for a decade#my tma aus
468 notes
·
View notes
Text
IDK WHO NEEDS THIS
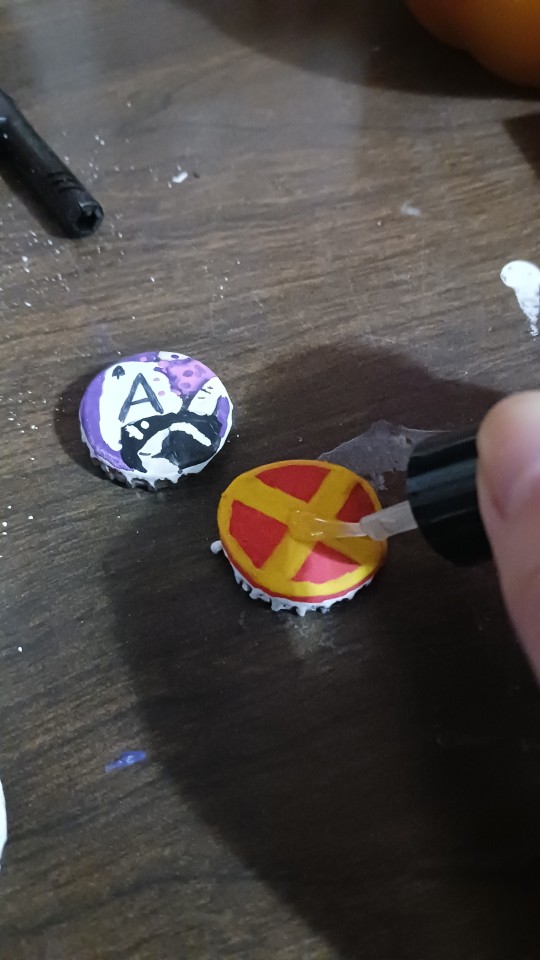
But here's how to make diy pins with a bottle cap!
☆ You will need: A bottle cap, a soda tab, and a safety pin first
☆ Then: Pliers, paint (optional), and clear nail polish later

Put the safety pin through the soda tab like this, make sure the part of the safety pin that opens is facing up


Place the soda tab with safety pin in the bottle cap, double check to make sure the opening part of the safety pin is facing up!
Then use pliers to crunch the sides of the bottle cap down on the soda tab
This will keep the tab and safety pin in place!


Then you can paint whatever you want onto the bottle cap or keep it plain
If you paint it you might want to sand the surface first or cut it up lightly to make the paint stick better
After you're done painting you can use clear nail polish as a top coat!


#diy pins#bottle cap pins#diy pin tutorial#diy tutorial#punk diy#pin diy#pin making#traditional art#art#illustration#artists on tumblr#art tutorial#tutorial#how to make pins#how to make bottle cap pins#recycling pins#ace artist#trans artist#x man pins#recycling#recycling bottle caps#romanisweirdart
176 notes
·
View notes
Text
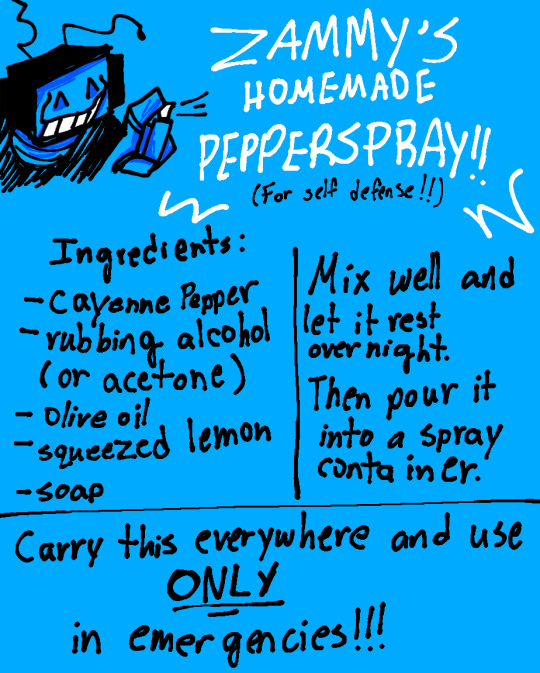
Take care!! Remember that this is only for self defense, DO NOT use it irresponsibly.
Protect yourself and those you love!
#art#digital art#tutorial#recipe#pepper spray#self defense#antifascist#trans#transgender#quotes#lgbtq rights#lgbtq#women's rights#blacklivesmatter#puerto rico#immigrant rights#us politics#2024 us elections#election 2024#LIVE OUT OF SPITE#BITE BACK#FIGHT BACK#MAKE THEM AFRAID#SHOW NO FEAR#eat the rich#rage#anarchism#Zammy'z Life Bookz
223 notes
·
View notes
Text
Here, take my industry secrets.
I don't want people to spend their money on art school when I can make resources for free for them.
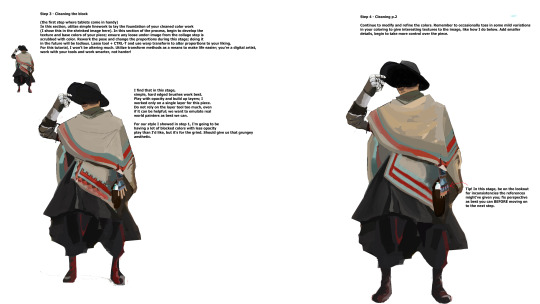
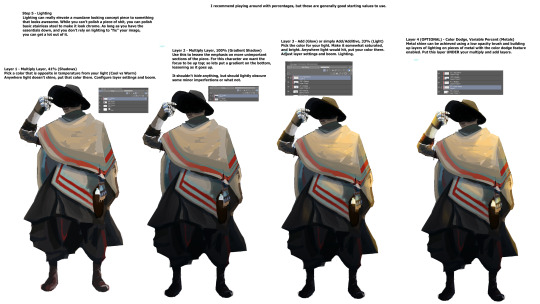
Hey here's a step-by-step guide to making concept art pieces using the industry "Collage > Painting" pipeline. It's how artists pump out a shit ton of concept work for their bosses at record speeds. Intended for newer artists!


For more stuff join my discord! I'm a transfem streamer who makes art stuff!
#art#artist#digital art#illustration#digital painting#digital artist#tutorial#art tutorial#digital art tutorial#digital painting tutorial#painting tutorial#concept art#concept artist#concept art tutorial#transfem#transfem artist#trans artist#transgender artist#transgender
190 notes
·
View notes
Text
Protection spell to Protect a trans person seeking gender-affirming healthcare
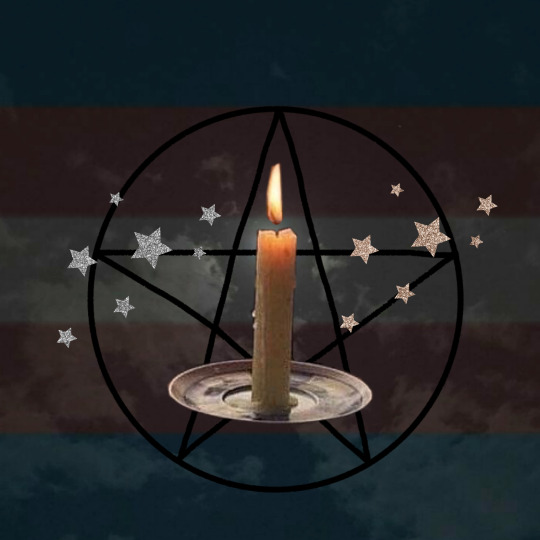
I wrote a guide on my substack for a spell you can use to protect your trans friend (or yourself) while seeking gender-affirming care. I tried to make this spell guide easy to follow. I would really appreciate it if you gave the article a read and saved it for later use.
I would really appreciate it if you could reblog this post so other witches can see it.
#witchblr#witchcraft#witch community#folk witchcraft#substack#trans rights#transwitch#trans pride#spell guide#spell tutorial#witch tips
59 notes
·
View notes
Text
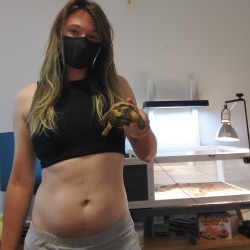
Hi! I’m CatboyBiologist.
Formerly a femboy, now a trans woman just starting HRT, and a PhD student in molecular biology. I started using this online persona as a fun, shitposty way to explore gender a few years ago. I post selfies (generally sfw, but somewhat sexy, so minors and ppl who don’t like that have been warned), rambles about science, tutorials and advice from the stuff I’ve learned by being a femboy in the past, nature pictures, stuff about the ocean, my adorable grumpy little tortoise, and unsolicited opinions on random nerdy topics. Any pronouns are fine. I don’t plan to socially transition for a while, and still present as a man most of the time, so I’m used to whatever you wanna use for me (for now, I’ll update this if that changes). Please send me pictures of your pets or other cute animals in your life!
As a scientist, I’m also documenting my transition! This google sheet will be updated at least monthly. I also have additional metrics I’m keeping to myself, and pictures that go with this, but I’m not sharing them publicly yet. Keep in mind that this is just one person’s experience with HRT, and may not represent universal trends!
Adding a little something here, bc I think it was an interesting bit a writing: if you want to see me respond to a transphobe about what "biologically female" means, here's a thing I wrote about it. CW for transphobia and discussion, obviously.
Also, if any of my measurements look weird, its entirely possible I fucked up. Let me know if anything looks off!
Here’s some of my favorite pre-HRT pictures:
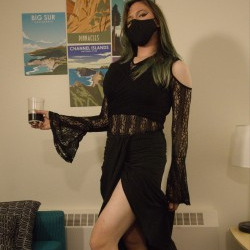
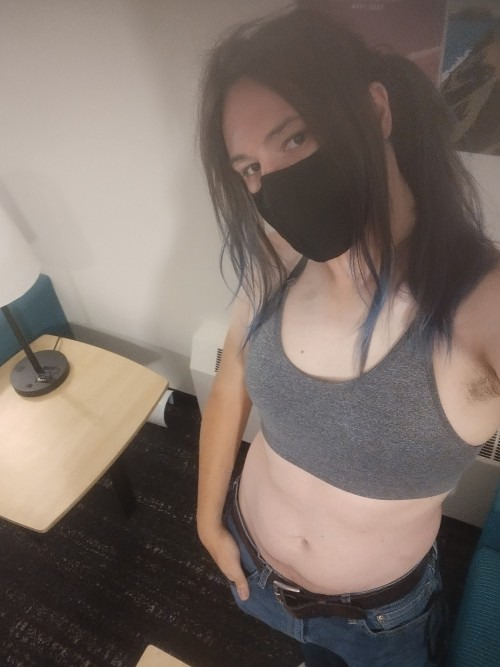
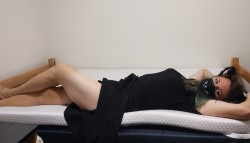
If you want to see more of my pre-HRT selfies, browse the “femboy” tag on my blog!
And as of this writing, I’m only 2 days after the start of HRT, so here’s a picture with my tortoise that’s technically post-HRT (but with 0 time for actual changes):
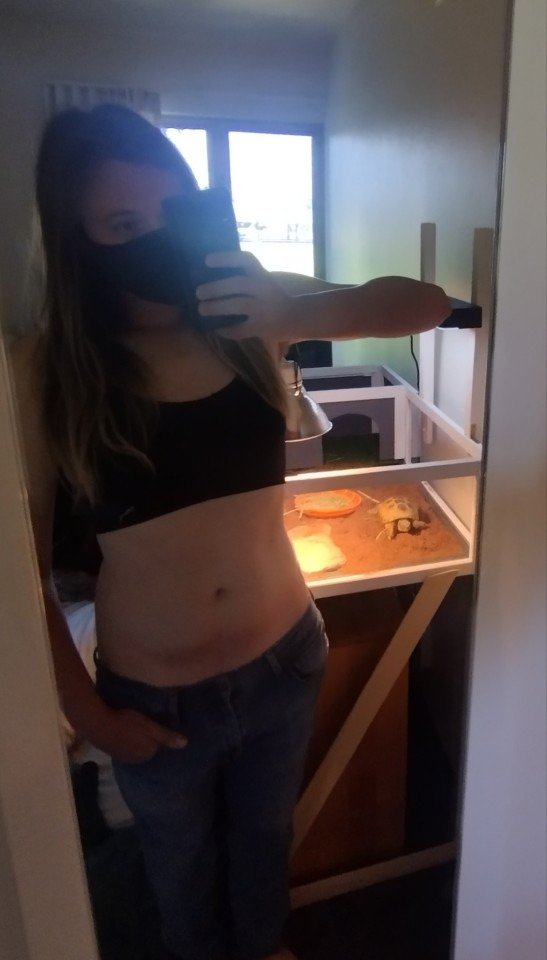
If you want to see my future post-HRT selfies, browse the “trans selfie” tag on my blog!
Also here's another really cute picture and fanart of my tortoise by @whalesharkcat:
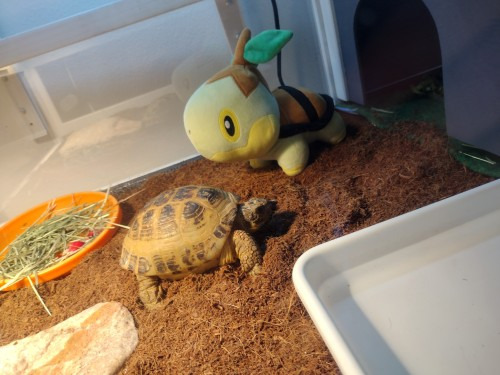
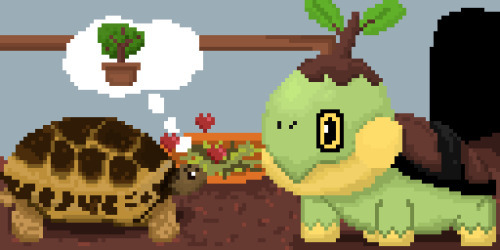
I have affectionately given my tortoise the title of The Grumpus.
I also wrote a couple of tutorials and general vibes about being a femboy before I started HRT:
Sometimes I make shitposts of myself, I don’t take myself too seriously:
This includes the way I came out on tumblr:
And here’s an overly serious, long ramble about trans thoughts and things that I wrote shortly afterwards:
Later addition: Someone asked how I take selfies, so I wrote a quick and dirty guide with some tips on how I do so in response to their ask:
Oh yeah and apparently I was a 196 microcelebrity? I never to thought I was popular enough for that but apparently some people do 🤷♀️. So uh, hi 196 tags, I'm abusing you for my pinned post LOL
As for terminology, I personally do think of myself as a “man who is becoming a woman” as opposed to having always been a woman. If that doesn’t resonate with your experience, I totally get that! But that’s why I freely call pre-HRT me a femboy, while still calling post-HRT me a trans woman. I’m also keeping the blog name as CatboyBiologist for the forseeable future, because at this point, Catboy just seems like a gender neutral term to me.
I’m also trying to put together a script for a podcast regarding how studying biology influenced my perspective on sex and gender- lmk if there’s any interest in that! It’s probably gonna be way too long and indulgent but oh well.
So uh. Yeah. I don’t end these types of things well. Byeeeeee
#196#r196#r/196#rule#/r/196#trans#transitioning#trans woman#trans femme#tortoise#tort#russian tortoise#trans tutorial#trans tummy tuesday#transgender#trans tumblr#trans selfie#trans journal
745 notes
·
View notes
Text

@dudelymantits Fir!
#I love trans replikas#i just know he and devon would be pals i know it#dudely lemme know if i did him justice one word and this post is GONE#even though i threw the doodle at you eh#his hair was very hard i shan't lie#but he was really fun to draw i got to learn how to very badly draw welding streaks#there are NO tutorials for that btw#buuut I think i did okay? i love fir#ara#arar#ara signalis#arar signalis#signalis#signalis fanart#signalis oc#transgender#fir#jay art
25 notes
·
View notes
Text
the transmasc experience of locking yourself in the bathroom to try out your first new binder and getting hit by a wave of happiness and euphoria that is then immediately turning to panic because oh my god I can't get out wait ow my fucking arm oh no oh no what the fuck wait how do I, what, I'm stuck, I'm stuck, I'M STU
#bind safely people theres tutorials online#which i did not follow for 2 and a half whole years.#just somehow wriggling out of there has never not worked but yk#trans#transgender#transmasc
20 notes
·
View notes
Text
color tutorial!


#furry#furry art#furry community#furry fandom#furry oc#furry commissions#furry artist#oc#digital art#digital artist#fursona#sparkledog#sparklefur#art tutorial#tutorial#queer#queer art#queer artist#lesboy#gay#lesbian#fagdyke#gaybian#trans#transgender#ftm#kawaii#feral#feral furry#sfw furry
98 notes
·
View notes
Text


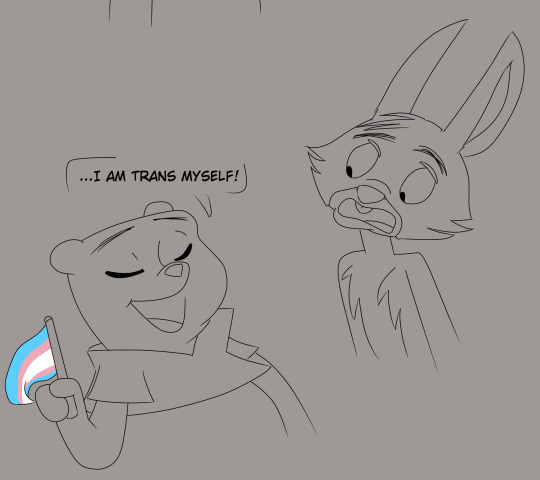
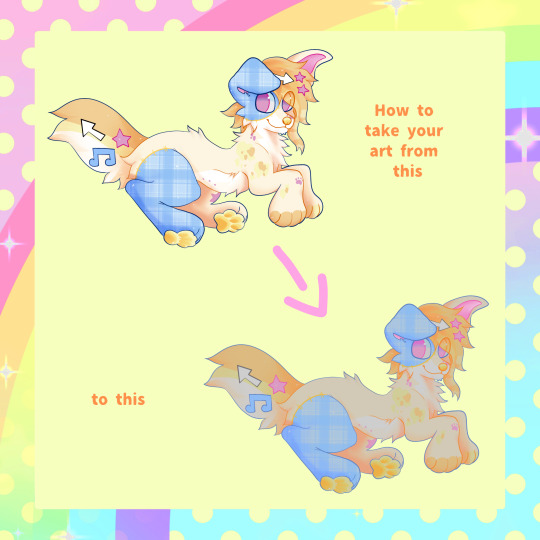
Ever since i heard Rabbit in that 2023 cartoon being a girl i had a headcanon alongside others that he's trans, and since Poohbear is left unconfirmed to be trans himself (since the books did say "Winnie" is a femme name and Pooh doesn't mind it), i decided he's trans as well, leading to this funny scenario! haha!
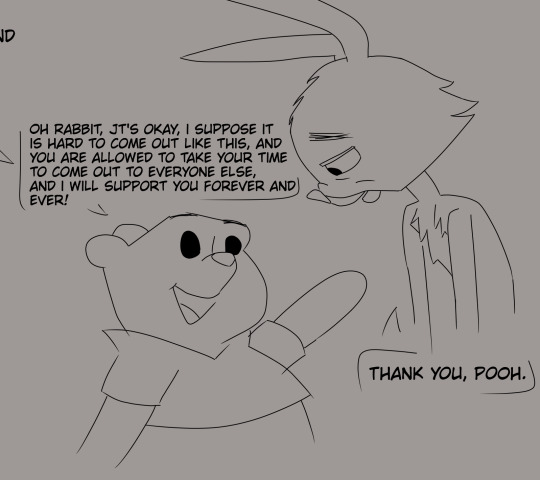
Bonus panel down below:

#my art#fandom related#winnie the pooh#wtp#pooh#pooh bear#rabbit#transgender#transmasc#trans man#trans guy#pride 2025#Can you tell how hard it was to draw pooh?#i struggled even *with* one of the tutorial references#like bro why is your head so fucking square shaped and hard to draw :sob:
17 notes
·
View notes
Text

I mostly referenced jeans from the mens section for this
#what im about to say might be controversial#idk maybe its not#but i see a lot of trans masks draw pants with the V shape when drawing guys#everyone are allowed to draw however they want as long as no one is harmed#its just a common trend i see#also side note if you are a transmask who wanna pass better i recomend staying away from pants who gives that v shape at the crotch#put shit in your pockets too#like have your wallet and phone it helps with giving your front area a more flat shape#art#my art#tutorial#art tutorial#pants
81 notes
·
View notes
Note
do you have any fashion/clothes advice for fat & big titted mascs? I have so much trouble finding more masculine clothes that fit & that I feel like I look good in :(
BABYYYYYYY I GOTCHUUUU wanna look cool like me? follow these three simple steps and youll be looking flyer than a bee in no time

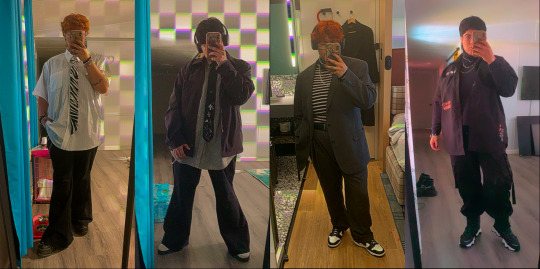
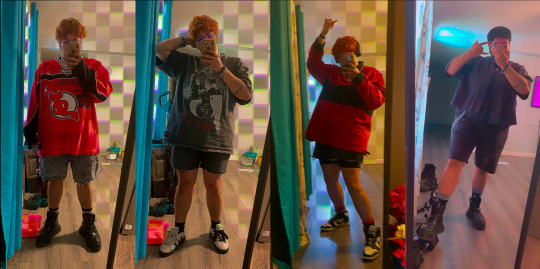
step one *body by megan thee stallion starts playing* love it or hate it your body is yours and its the only one ya got. so you have to understand it. study it. figure out what body type you have {link} {link} {link} and yeah while you might not want to; remember, to find comfort you must first be uncomfortable. now you might be thinking to yourself, king! what the hell does this have to do with dressing more masc? no te preocupes onto……..
step two proportionssss with clothes you can literally change the proportions of your body. do you want to have a longer or shorter torso? are you trying to make your chest look smaller or does that not really matter to you? personally, i bind. while not everyone has a binder, workout and compression tops are pretty easily accessible and comfortable too. now this is advice for us big breasted bitches so bitty titty commitee dont chime in with the sports bra IT DOESNT WORK. we got BIG TITS the extra fabric that tops provide is literally so niceand makes it feel like nothing is gonna spill out. oop got sidetracked a little bit pero back to proportions


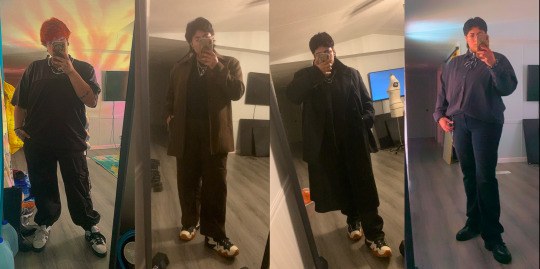
tops if the desired look is a more boxy and less curvy look, dont automatically go for the baggiest shirt in your closet. or do! it all depends on step one. but also dont be afraid of pulling out that crop top that you keep saying youll maybe wear one day and then never do. length is very important for the type of silhouette youre trying to achieve. if you want to minimize your hips, wear a shirt that sits above them not past. if that doesnt really matter, pues lo q sea. some plus sized clothing is naturally designed to minimize hips with a U shaped hem. the problem comes from literally nobody ever thinking about the fact that not every big is big n tall. now u might like that look and i know i certainly do ¡asi q si te gusta sigue!
bottoms tighter is NOT better. skinny jeans accentuates the curvature of your hips. for a more masculine fit go with a straight leg or even just a baggy pant. dont like the looseness at your ankles? try a baggy jogger. if you want to draw less attention to your hips and have a lil fun with your silhouette grab some fucking flared pants or bell bottoms theyre so much fun. grab some shorts. your legs are muscly as fuck from carrying the weight of being a baddie so show those calf muscles off! wearing loose skater shorts with a baggy tee gives the effect of a boxier look
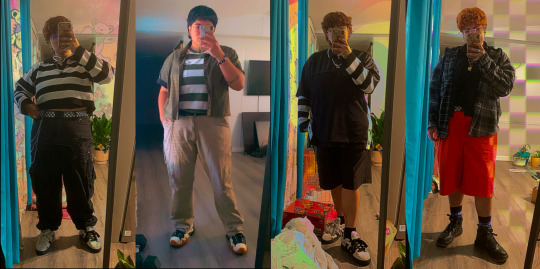

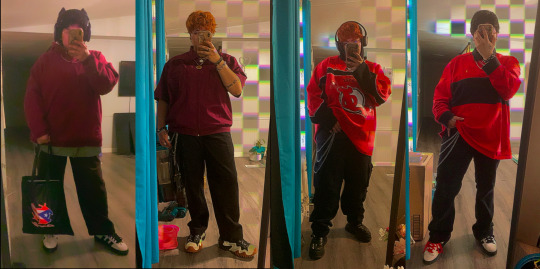
step three putting it all together mix n match that shit! try on one pair of pants and rotate through the tops to see which combinations you like best and then do it in reverse. yeah its a lot of work but do u think i look this good from just tossing shit together? NO i tried every combo i possibly could and figured it out from there and there are still combos that i havent even tried yet. try some layers. go for the classic open button down with a tee. play with the length of the layers. instead of splitting up your silhouette into two try three. get really fun with it and throw yourself a lil fashion show! i love doing a catwalk down my hallway and posing at my mirror in the living room it makes the tediousness of trying on a bunch of different clothes more fun. oh and dont look at the outfit AS youre making it wait to see the results at the end. trust the process
now for the real real advice play with the masculine and the feminine together! youll be surprised at how well the two compliment eachother. go thrifting! youll never find cool shit in retail stores. those mfs think fat people only deserve frumpy shit and never actually carry anything cool in our sizes so dont waste your time and happiness browsing the racks only to find something you wished came three sizes bigger. MODIFY YOUR CLOTHES. you got shit you hate in your closet right? so start there. its not like youre wearing it anyways so change it into something you hate a little less. who knows? you might end up loving it. and once you become more confident with modifying things and finding out what truly works for you you can move on to pieces you like and turn them into pieces you love. OH AND DONT FORGET SHOES AND ACCESSORIESSSS a platform goes a long way to make your legs look longer and again change those proportions. and who doesnt love accessories? get some chunky rings and a chunky necklace or two in your jewelry box. bigger is better 🫶🏽
okay now that everyone is gone
BE NICE TO ME PLS ANT TY ILUUUUUUUU 🫶🏽 I HOPE THIS HELPED
#GAWDDAMN THAT WAS LONG#androgyne aesthetic#androgynous#masc fashion#masc#fashion#fits#mi cara#tutorial#trans tips#clothes#clothing
15 notes
·
View notes
Note
ouuuuu we have a considerable amount of transids and idk if they'd all fit on the pfp XD do u think u could make a tutorial on it? (not forced, obviously)
sory fur late reply ! it's super easy :3 this is wat i do
#rq 🌈🍓#pro rq 🌈🍓#radq please interact#radqueer#flag coining#mogai#transid#pro transid#transid community#trans identity#rq 🍓🌈#rq community#rqc🌈🍓#rq safe#pro radq#radq interact#radqueer 🌈🍓#radq safe#radqueer please interact#tutorial
11 notes
·
View notes
Text
youtube
I found this video and I thought I’d share. I’m not transmasculine nor do I desire a binder but I feel like this was an incredibly easy and helpful tutorial to follow! Especially if you don’t have easy access to a binder or means of buying one but you also happen to know how to sew!
#tarncore#transgender#binder#chest binding#diy tutorial#transmasc#gender nonconforming#tutorial#Youtube#transmasculine#trans masc#ftm
48 notes
·
View notes