#writing for beginners
Explore tagged Tumblr posts
Visit Tumblr Blog
Explore Tumblr blogs with no restrictions, modern design and the best experience.
Last Seen Tumblr Blogs


Fun Fact
The “We are the 99%” Tumblr blog became the slogan for the Occupy Wall Street movement.
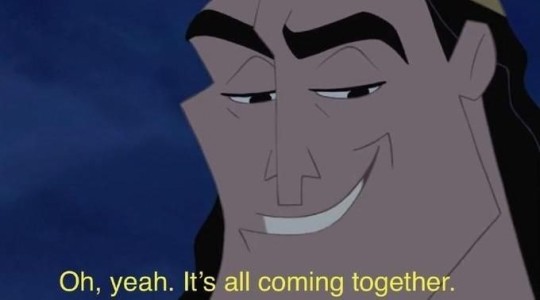
Text
FREE writing taster workshop, Write Your Movie in 30 Days Module 1. Enroll NOW for free here www.buppha.com
#free writing course#free screenwriting class#online writing course#writing workshop#writing for beginners#filmmaking#acting#actor#actress#writer#filmmaker#film#screenplay#writing prompt#writing community#writing inspiration#writing advice#creative writing#writing tips#writers life#write#writers block
2 notes
·
View notes
Text
Appreciation post for all the beginner artists who work hard despite the AI looming over us. You are fabulous. You are precious. Keep up the hard work, you are needed.
#begginerartist#beginner artist#writing#art#anti ai#seeing beginner artists' works fills me with joy#truly you all are precious and full of potential
64K notes
·
View notes
Text
That moment when the unrelated scenes you've been writing for two weeks both somehow connect (i have no idea how this happened)
11K notes
·
View notes
Text
How to make your writing sound less stiff
Just a few suggestions. You shouldn’t have to compromise your writing style and voice with any of these, and some situations and scenes might demand some stiff or jerky writing to better convey emotion and immersion. I am not the first to come up with these, just circulating them again.
1. Vary sentence structure.
This is an example paragraph. You might see this generated from AI. I can’t help but read this in a robotic voice. It’s very flat and undynamic. No matter what the words are, it will be boring. It’s boring because you don’t think in stiff sentences. Comedians don’t tell jokes in stiff sentences. We don’t tell campfire stories in stiff sentences. These often lack flow between points, too.
So funnily enough, I had to sit through 87k words of a “romance” written just like this. It was stiff, janky, and very unpoetic. Which is fine, the author didn’t tell me it was erotica. It just felt like an old lady narrator, like Old Rose from Titanic telling the audience decades after the fact instead of living it right in the moment. It was in first person pov, too, which just made it worse. To be able to write something so explicit and yet so un-titillating was a talent. Like, beginner fanfic smut writers at least do it with enthusiasm.
2. Vary dialogue tag placement
You got three options, pre-, mid-, and post-tags.
Leader said, “this is a pre-dialogue tag.”
“This,” Lancer said, “is a mid-dialogue tag.”
“This is a post-dialogue tag,” Heart said.
Pre and Post have about the same effect but mid-tags do a lot of heavy lifting.
They help break up long paragraphs of dialogue that are jank to look at
They give you pauses for ~dramatic effect~
They prompt you to provide some other action, introspection, or scene descriptor with the tag. *don't forget that if you're continuing the sentence as if the tag wasn't there, not to capitalize the first word after the tag. Capitalize if the tag breaks up two complete sentences, not if it interrupts a single sentence.
It also looks better along the lefthand margin when you don’t start every paragraph with either the same character name, the same pronouns, or the same “ as it reads more natural and organic.
3. When the scene demands, get dynamic
General rule of thumb is that action scenes demand quick exchanges, short paragraphs, and very lean descriptors. Action scenes are where you put your juicy verbs to use and cut as many adverbs as you can. But regardless of if you’re in first person, second person, or third person limited, you can let the mood of the narrator bleed out into their narration.
Like, in horror, you can use a lot of onomatopoeia.
Drip Drip Drip
Or let the narration become jerky and unfocused and less strict in punctuation and maybe even a couple run-on sentences as your character struggles to think or catch their breath and is getting very overwhelmed.
You can toss out some grammar rules, too and get more poetic.
Warm breath tickles the back of her neck. It rattles, a quiet, soggy, rasp. She shivers. If she doesn’t look, it’s not there. If she doesn’t look, it’s not there. Sweat beads at her temple. Her heart thunders in her chest. Ba-bump-ba-bump-ba-bump-ba- It moves on, leaving a void of cold behind. She uncurls her fists, fingers achy and palms stinging from her nails. It’s gone.
4. Remember to balance dialogue, monologue, introspection, action, and descriptors.
The amount of times I have been faced with giant blocks of dialogue with zero tags, zero emotions, just speech on a page like they’re notecards to be read on a stage is higher than I expected. Don’t forget that though you may know exactly how your dialogue sounds in your head, your readers don’t. They need dialogue tags to pick up on things like tone, specifically for sarcasm and sincerity, whether a character is joking or hurt or happy.
If you’ve written a block of text (usually exposition or backstory stuff) that’s longer than 50 words, figure out a way to trim it. No matter what, break it up into multiple sections and fill in those breaks with important narrative that reflects the narrator’s feelings on what they’re saying and whoever they’re speaking to’s reaction to the words being said. Otherwise it’s meaningless.
—
Hope this helps anyone struggling! Now get writing.
#writing#writing advice#writing resources#writing a book#writing tools#writing tips#writeblr#for beginners#refresher#sentence structure#book formatting
7K notes
·
View notes
Text
Cuddling with him: Loki Laufeyson headcanons

Quiet time with the god of mischief ♡
Warnings: fluffy, clingy Loki,
Currently taking headcanon requests :)
▰▱▰▱▰▱▰▱▰▱〥▰▱▰▱▰▱▰▱▰▱▰
It may not seem like it, but Loki is actually a big fan of cuddling. He won't tell you, so you'll just have to figure it out yourself, but when you do, he'll be elated.
He will NEVER admit it, but he secretly enjoys being the little spoon from time to time. He'll put up a big fuss about it, but deep down, he really loves the feeling of just being held and feeling protected for once.
He likes being the big spoon, too, of course. Holding you so close and feeling the gentle warmth of your skin brings him a sense of peace.
His body temperature runs cool so you'll never get overheated when curled up next to him.
Usually holds you from the back so he can bury his face into your hair. He'll wrap both of his arms around your waist, too, to hold you close to his chest like a freaking seat belt.
Tangles his legs with yours so it's harder for you to move away from him.
Oh, you want to get up? Absolutely not. You asked for this, and you're not gonna back out of it now.
Oh yeah, and if you ask him for cuddles, he's gonna groan and complain about it. Explaining to you exactly why he thinks the activity is ridiculous while simultaneously guiding you to the bed and pulling you down next to him.
"You can't be serious. You do understand that I have much more important things to attend to than just laze about with you- come here, you're too far away- than just laze about with you all day-"
Soft kisses to the nape of your neck and into your hair <3
If he's had a rough day, Loki just *might* actually ask you for cuddles. It likely won't be verbal, though. It might be in a simple gesture or some not-so subtle hints that he's craving your affection dropped into the middle of whatever conversation you're currently having.
Sometimes, your presence is so comforting to him that he falls asleep right then and there, and next thing you know, you've got a god softly snoring in your ear.
Swears he doesn't snore (he does).
But he is 10 times more likely to sleep better while you're sleeping next to him.
If you fall asleep in his arms, he might be tempted to prank you in some way but never goes through with it. Your peaceful expression and soft breaths strip him of his desire to cause trouble for you, and he often finds himself just laying in silence, admiring you.
If you were ever to bring up that he cuddles you to ANYONE, oh buddy, you're so cooked. You might as well just write out your obituary now cause you don't have much longer.
▰▱▰▱▰▱▰▱▰▱〥▰▱▰▱▰▱▰▱▰▱▰
#fanfiction#fanfiction writing#fanfiction writer#reading#writing#beginner writer#writer#marvel#mcu#marvel mcu#marvel movies#thor movies#loki laufeyson#tva loki#loki odinson#loki friggason#loki x reader#loki laufeyson x reader#loki headcanons#tom hiddleston#marvel headcanons#mcu headcanons#loki fanfic#loki fanfction#marvel fanfic
574 notes
·
View notes
Text
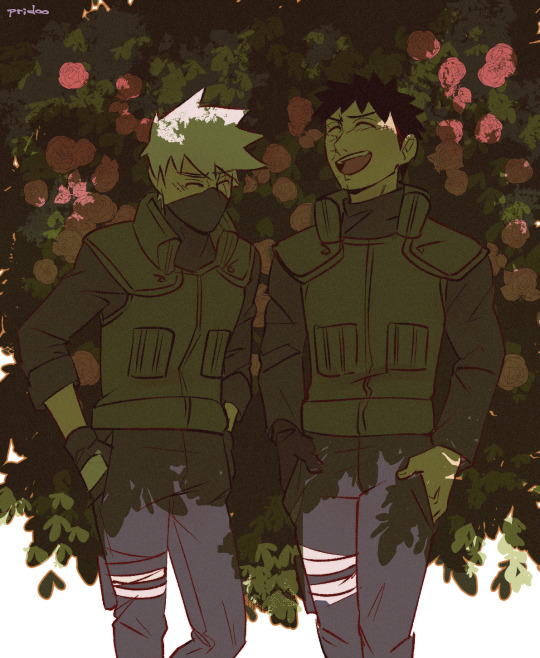
obkk end of may tones 🩷💚🤍
#obikaka#obkk#kakashi x obito#obito kakashi#obito uchiha#kakashi hatake#my art#naruto fanart#I had to draw these colors omg#I also feel like I'm still a beginner at coloring…so it took longer than I expected lol#I'm happy how happy they look tho <3#I've finally overcome some mandatory writing shit and maybe can draw more again?? maybe
397 notes
·
View notes
Text
What it means to write a book
Yes, I’m writing a book.
By which I mean, I made some characters, set them loose in a world and now I have no control over anything.
#kidnappedwriter#writers on tumblr#writing#my writing#writeblr#creative writing#am writing#aspiring writer#beginner writer#fiction writing#indie writer#new writers on tumblr#writer things#writerblr#writers of tumblr#writers on writing#writing a book#writing community#writing blog#writing is hard#writing life#writing problems#writing humor#writerscommunity#writer stuff#writer struggles#writer problems#writer on tumblr#writer community#tumblr writers
661 notes
·
View notes
Text
Relationship headcanons | In-ho Hwang

- Protective and possessive, slight yandere
- Which is to be expected with how his late wife died, he doesn't want you to live up to the same fate
- That's why he'd probably go with a significantly younger woman, he doesn't want her to die before him
- As much as it pains him to know that he'll leave you alone once he dies, he makes sure you gets all of his money and assets
- all that doesnt mean he'd go with someone immature though, he wants someone mature enough to be on par with him, someone witty, someone who makes him feel younger
- let's be honest, he probably met you during the squid game
- he doesn't see many women, curating the games and taking care of all of the work around them and making the VIPs happy is a lot of work, and when he's not working he's drowning himself in sorrow or engaging in other activities
- but he's not the type of man who'd pay someone to be with him
- he's had his eyes on you since the first moment he saw you
- he was trying to not fall for you though, it was highly unprofessional and he had to be neutral towards all players
- that didn't last very long though
- Young il, that's what he introduced himself as
- He saw you. Slowly you went from a normal player to... Something more to In-ho.
- Unknowingly you had made his work so much harder. His resolve breaking down with every interaction you two had
- Usually, he's unwilling meddle with the games too much, but he made an exception for you.
- Your death was planned. It wasn't that hard to come up with the plan.
- The hard part was coming out with the truth to you. That he's not the Young il you've come to love over the few days you've known each other.
- His hands struggled to not tremble as he took off his mask in front of you. You who were still woozy from the drugs they gave you to fake your death.
- But he had to show himself to you. He needed you to know and he hoped you will love him even after knowing the truth.
- To be honest, he was kind of stupid, he thought. All of this risk for a woman he met few days ago. He was willing to risk everything for her.
- That made him feel even more young... and stupid. However... he craved this spontaneity.
- Your reaction didn't surprise him. He knew you'd be heartbroken. He was everything you were against after all.
- But he was sure that this little... Tantrum of crying and screaming of yours won't last long. He won't let you go. He can't let you go. Don't you realize this? You're dead. If any of the VIPs realized you're alive the whole integrity of the squid games would be jeopardized.
- And he was right. It took time but you did come around.
- In-ho's favorite past time was watching the games, a glass whiskey in hand and you cuddling up to his side
- He'd buy anything you could even think of wanting
- Don't forget though. You're his. Until the day he dies. And probably even after.

#squid games x reader#squid game x reader#hwang inho#in ho#in ho x reader#hwang in ho#hwang in ho x reader#in ho hwang x reader#squid game headcanons#squid games headcanons#headcanons#in ho headcanons#in ho hwang#in ho hwang headcanons#writing#beginner writer#x reader#x you
620 notes
·
View notes
Text
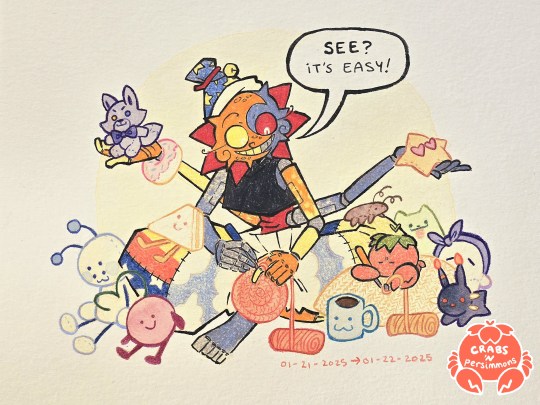
Clip: well maybe it would be easier if you didn't have big meaty claws! crabs: well these claws are only good for attracting mates* *cute robots
so while i was struggling with my creative block, i was trying out new hobbies to fill the void and i decided to try out crochet
i
have not yet learned to enjoy crochet
but hey, Clip's here to be a... support? (show off?) at least he's surrounded me with amigurumi plushies of dear friends. see if you can recognize them all!
i'll put the tags under the cut
from the left to right, top to bottom:
@linafoxoficial - purple fox sona plushie
@inkydoughnut - crochet donut
@itsmuffiiee - sona plushie
@cacaocheri - cherry sona plushie
@eggcromancer - egg sandwich sona plushie
@normal-about-the-dca - beetle sona plushie
@scarredlove - blue mug plushie
@starriegalaxy - star sona plushie
@divinit3a - Pomeranian plushie
@enduu115 - sona plushie
@random-tail - kie kie plushie
#fnaf eclipse#fnaf dca#dca fandom#Clip New Do Same You AU#crab art#traditional art#bright colours#i am#so thankful i have drawing as a hobby#even writing#i just have not reached the stage where crocheting is fun or rewarding yet#i bought a beginner set that walks you through crocheting a little pouch#and i am still at the stage of learning all the basic knots#thankfully my creative block is easing off#i'm able to draw and write again#so maybe i will return to crochet some other time
424 notes
·
View notes
Text
˚₊‧꒰ა Male wife reader x Husband ໒꒱ ‧₊˚
★ This is going to be short, I'm lazy lolzz ★ There may be several grammatical errors or things like that, I wrote this shit at 4 in the morning during a moment of epiphany, Anywayzzzz, I hope you like it
Tw: none.


Your husband had been away all day, working hard to provide for you. As the evening drew near, you stood in the kitchen, preparing a homemade meal for him, knowing how much he appreciated your cooking. Just as you were about to finish, you heard the front door open and the sound of your husband walking inside.
You continued to put the finishing touches on the dish, your heart fluttering at the thought of seeing your husband's face light up when he tastes your cooking. As he entered the kitchen, you heard him let out a weary exhale, hinting at the long, exhausting day he'd had.
You heard your husband approach behind you, and soon felt his strong, comforting arms wrap around your waist as he rested his chin on your shoulder. His body pressed against your back, as if seeking solace in your warmth and presence.
He closed his eyes and took a deep breath, inhaling the aroma of the food you'd been preparing. A soft smile formed on his lips as he spoke, his voice tinged with exhaustion.
"Mmm... that smells amazing." he murmured, his grip on you tightening slightly.
You turned your head to glance at him, smiling at the sight of his weary expression.
"Long day, love?" you asked gently, reaching up to run your fingers through his hair.
He nodded, mumbling a quiet "yeah" before burying his face in the crook of your neck.
The feeling of his breath so close to your skin sent a shiver down your spine, and you couldn't help but let out a soft chuckle.
"I made your favorite. It should be ready in a few minutes." you said, continuing to play with his hair.
He hummed in contentment, nuzzling into your neck even further.
"Thank you... you know I look forward to your cooking all day." he murmured, his hands beginning to wander over your body, as if seeking physical reassurance that you were real and right there in his arms.
You blushed at his words and the way his hands were now caressing your body, his touches conveying a mix of possessiveness and need.
"You don't have to thank me, I enjoy doing this for you." you replied, your cheeks growing warmer as he traced the outline of your curves with his fingertips.
He pressed a soft kiss to your shoulder, his lips lingering against your skin for a few moments before he spoke again.
"You're too good to me. I really don't know what I did to deserve you..." he whispered, his voice filled with a mixture of gratitude and something deeper, something almost possessive.
You could hear the hint of possessiveness in his voice, and it sent a thrill through your veins. You turned in his arms, facing him fully as you reached up to cup his face in your hands.
"I could say the same, love." you said, your eyes meeting his in a tender gaze.
"Now go rest a little before the food is ready." You say.
Your husband hesitated for a moment, his grip on you tightening just slightly.
"But... I don't want to let go of you..." he protested, his voice soft but tinged with a hint of stubbornness.
You chuckled softly, gently caressing his cheek with your thumb.
"It'll only be a few minutes, love. Go sit down and relax, okay? You look exhausted..." you urged, your voice gentle but firm.
Your husband let out a sigh, his resistance crumbling as he relented to your request. He released his hold on you, reluctantly stepping back.
"Fine... I'll be in the living room," he mumbled, his eyes still fixed on you, as if afraid to look away.
You smiled at his hesitation, knowing that he would begrudgingly listen to you.
"I'll let you know when dinner is ready," you reassured him, knowing that as much as he wanted to stay glued to your side, he did need some time to unwind.
He nodded, his expression a mix of reluctance and resignation.
"Alright... I'll be waiting..." he replied, his gaze lingering on you for a few more seconds before he finally turned and headed for the living room.
With your husband temporarily taken care of, you finished up the last touches on the dish, feeling a pleasant sensation in your chest knowing that he would enjoy the meal. Once everything was ready, you carefully carried the food to the dining table and called out to your husband.
"Love, dinner's ready!" you called out, your voice ringing through the house. Moments later, you heard the sound of approaching footsteps and your husband emerged from the living room, his face still showing traces of weariness but his eyes lighting up at the sight of the food laid out on the table.
He took a seat at the table, his gaze fixed on the meal in front of him.
"Looks delicious, as always," he complimented, a small smile appearing on his lips. You took a seat opposite him, feeling a sense of satisfaction seeing the look in his eyes, knowing that you had managed to bring a little bit of joy to his weary soul.
He wasted no time in serving himself a portion, his stomach growling loudly, a reminder of how hungry he was. He took a bite and let out a satisfied sigh, his eyes closing as he savored the taste.
"Mmm... it's so good. You always know what I need, don't you?" he murmured, his eyes meeting yours once more.
Butterflies fluttered in your stomach at his words, and you blushed a little under his gaze.
"It's just some simple cooking," you replied, downplaying your skills. "But I'm glad you enjoy it." you added, a smile tugging at the corners of your lips.
He shook his head slightly, swallowing his mouthful before speaking.
"It's not just the food, though. It's the fact that it's made by you. That makes it special. Everything you do seems perfect to me." he said, his voice laced with adoration. You felt a warmth spread through your chest at his words, his praise causing your heart to flutter.
You found yourself at a loss for words for a moment, not having expected such a sweet compliment. You could see the sincerity in his eyes, the genuine affection he held for you.
"You're... too much, you know that?" you managed to say, your voice a little shaky from the rush of emotions coursing through you.
He chuckled softly, a mischievous glint in his eyes.
"What, for appreciating my wonderful Husband ? I think it's pretty justified." he replied, his tone cheeky yet affectionate. He reached across the table and took your hand in his, his thumb gently caressing your knuckles.
Your heart skipped a beat at his touch, his warm fingers sending tingles up your arm. You looked at him, feeling a mixture of shyness and affection.
"I can never get used to you showering me with such compliments..." you murmured, your voice barely above a whisper.
He chuckled softly again, his grip on your hand firm but gentle.
"I know, but I mean every word." he said, his eyes never leaving yours. He moved his free hand to cradle your face, his touch almost reverent as he stroked your cheek with his thumb.
You couldn't help but lean into his touch, your eyes fluttering closed momentarily. A soft smile played on your lips, the feelings of love and adoration he stirred within you almost overwhelming.
"You're such a sap," you said, teasing him gently as your eyes opened to meet his gaze again.
He smirked at your comment, unbothered by the light jab.
"Guilty as charged." he replied, his expression playful. He continued to hold your hand in his grasp, his thumb still tracing lazy circles on your knuckles. "But can you blame me when I have the most perfect Husband in the world ?" he said, his voice filled with affection.
Your cheeks heated up at his words, your heart racing in your chest. "You're unbelievable," you mumbled, a mix of amusement and flusteredness in your voice.
"I'm far from perfect, you know that." you added, your eyes lowering as you tried to brush off his compliments.
He shook his head firmly, his gaze unwavering.
"Don't even start with that. To me, you are perfect. And nothing you say will change my mind." he stated, his voice leaving no room for argument. He reached over and lifted your chin with his fingers, making you meet his intense gaze once more.
You found yourself lost in his eyes, his intense stare making your heart skip a beat. The sincerity and determination in his voice left no doubt in your mind that he truly believed what he said.
"You... you're impossible," you whispered, your voice almost trembling. Despite your words, you couldn't deny the way your heart fluttered at his unwavering devotion.
He smiled softly, his touch still gentle but possessively holding your chin in place.
"Maybe, but I wouldn't have it any other way." he replied, his eyes flickering with something deeper, something almost primal. He sat back in his chair, but his grip on your hand didn't loosen, his fingers intertwined with yours.
You swallowed, feeling a mix of anticipation and nervousness under his intense gaze. You knew that look in his eyes, that hint of possessiveness that came out when he was particularly worked up.
"Are you finished eating?" you asked quietly, your voice slightly hoarse from the emotions swirling within you.
He nodded, his eyes not leaving yours.
"Yeah, I am." he replied, his voice low and slightly raspy. He didn't loosen his grip on your hand, his fingers now lightly tracing patterns on your skin. "I'm not done with you just yet, though." he added, a hint of darkened hunger in his tone.
A shiver ran down your spine at his words, your heart rate quickening. You knew that look, that tone of voice. It meant he had something else in mind, something that didn't involve food or rest. You tried to keep your composure, even though your body was already reacting to his touch and the implication behind his words.
"What do you have in mind, then?" you asked, attempting to keep your voice steady.
His gaze darkened, his eyes never leaving yours as he spoke.
"Oh, I have a few ideas in mind..." he murmured, his voice dropping an octave. He stood up from his chair without warning, making his way around the table towards you. He pulled you up from your chair as well, his hands on your hips as he pulled you flush against him, his body pressing against yours tightly.
You let out a small gasp as he pulled you close, your body molding perfectly against his. The heat emanating from him was almost scorching, and you could feel the hardness in his trousers pressing against you, a reminder of his desire. Your heart raced in your chest, your breath coming in short gasps as you looked up into his eyes, seeing the mixture of need and possessiveness burning within them. His hands on your hips gripped you firmly, as if he was trying to anchor you in place, as if he could never get enough of you.
He pressed you against him even tighter, his hands moving from your hips to your face, holding you in place. His eyes roamed over your features, as if committing every detail to memory. "I've waited all day for this, you know." he said, his voice low and rough. "For having you all to myself." His lips moved closer to yours, his breath ghosting over your skin as he spoke. His body was tense, coiled with need and desire.
"You drive me crazy, you know that?" he added, his voice filled with both adoration and a hint of desperation.
───────────── ⊹ ⊱ ☆ ⊰ ⊹ ────────────
Creativity is gone so that's it lol
───────────── ⊹ ⊱ ☆ ⊰ ⊹ ────────────

Bye~
#yandere male#ao3 writer#yandere x male reader#yandere x you#fanfic#writers on tumblr#writing#writerscommunity#writers and poets#male yandere#dead dove do not eat#yandere boyfriend#yandere x darling#yandere#writer stuff#beginner writer#writeblr#boys like boys#yaoi#yaoi bl#bottom male reader#male reader#male reader imagine#sub male reader#male x reader#gay fanfiction
699 notes
·
View notes
Text
Avoiding therapy speak in writing
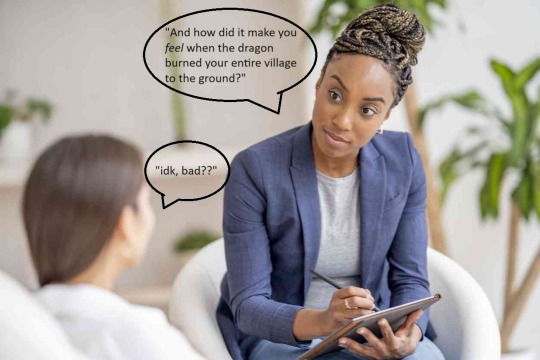
I think we all know by now that therapy speak is irritating and unrealistic, especially if you are writing in a fantasy world that doesn't even have modern psychology.
Part of the reason that it is so annoying is that it is the definition of telling instead of showing: characters are just plainly informing us of their feelings rather than making us work for a better understanding. It's cheap and boring. Instead of making your characters seem like complex individuals with their own hangups and difficulties, they seem like plot points programmed to tell us things.
But obviously, you want to put these people in situations and have them talk about it! How do you do that without sounding maudlin? Here are some options.
Listen to real arguments/conversations
I cannot stress enough how important it is to listen to how actual real human beings talk to each other during heightened emotional states. They don't have to be nasty abusers, and they don't have to be perfect angels, just everyday people doing their normal thing.
Of course, I'd hope you're not seeing people argue all the time, but if you do happen to see it, listen carefully and notice how people actually address their problems. Think back to tough conversations that you have had, even if you wouldn't classify them as arguments. Consider how people acted and reacted to one another. Notice how normal humans talk about issues outside of therapy, even intelligent and emotionally evolved people.
I've had years of therapy, and even I do not talk in therapy ways about my issues when I'm talking to my family or friends. It just feels cheesy and fake outside of that particular setting - plus, it freaks other people out and can seem kind of manipulative. Try talking like that in a real conversation and see how uncomfortable it is. You'll understand why avoiding therapy speak is important.
Consider the character's own hangups
Just as everyone has their own unique speaking style and mindset, so do we all have our own argument styles. These are often informed by our pasts and upbringing; they are as varied as our own histories. However, there are a few different options.
Someone with a happy upbringing may be more assertive and willing to address their problems because they had that demonstrated to them as children.
A spoiled child will grow up to be a demanding adult who refuses to give any quarter.
Those who got yelled at a lot as children may shut down and fawn to avoid getting hurt.
Someone who grew up in a violent household may mimic that behavior and get incredibly aggressive when upset.
Individuals whose parents didn't teach them emotional regulation will lash out and get loud.
Manipulative people may stay very calm and gaslight the other person, or they may get hysterical to garner sympathy and make people focus on comforting them.
Someone who has gone to therapy may revert to their original argument style, or they may imperfectly apply what they have learned in a way that feels a bit unnatural. They may start out with rage, then force themselves to calm down through grounding techniques.
People who have been coached through previous emotional outbursts could demand a time out, then fail to actually calm themselves down.
Some may refuse to acknowledge they are upset and insist, in increasingly forceful terms, that they are fine.
Others may get quiet or crack a joke to ease the tension, but it doesn't really help.
Keep each confrontation short
IRL, emotional confrontations are generally not that long. They don't go on for hours and hours, though it can feel that way. No one is going on and on about their feelings and sharing every little detail of how they feel (at least not that I know of personally, maybe other people are different).
Even the worst arguments I have had, the real nexus of the argument was maybe an hour or two, though the fallout lasted much longer. I'd say there was an hour maximum of real, active confrontation, preceded or followed by hours/days/weeks of simmering frustration.
Why? Because arguments are exhausting. You don't have the energy for that in the heat of the moment. Yes, feuds and fights can last years, but each actual confrontation is short.
For longer, more serious issues, hash it out over a few sessions rather than all at once. It's rare to get everything out of the way immediately unless the characters already have a strong, loving relationship.
Show incongruencies
Especially for more reserved people, they will likely have their emotions leaking all over the place but won't actually say anything. As such, focus on body language while keeping the conversation more focused on the plot. For example, Character A might be crying but still trying to argue their point about whatever is going on.
Address physical complaints instead of emotional ones
In many cases, people will use "I'm tired" or "I didn't sleep well" or "I'm not feeling great" as shorthand for whatever is actually bothering them. It relieves pressure by not making them talk about upsetting matters while still addressing their discomfort in some form.
You should also consider the fact that some people can't connect physical sensations to feelings, so they may genuinely feel ill and not really understand why. This is especially common in people who can't emotionally regulate or have been through trauma.
For myself, I tend to somatize my feelings, so I might not feel upset, but I will feel physically sick. My stomach will hurt, my chest will get tight, or I'll get a headache, but my emotional state will seem calm. This isn't all that unusual, and many people experience this to different degrees.
As such, you can have your character say that their stomach hurts, or that they have a headache and can't discuss this anymore, or that they need to go lie down because they're dizzy. If we know they're relatively healthy, this can be a clue that they're getting overwhelmed but either cannot pinpoint their emotions or don't want to discuss them.
Let characters advance and retreat
A lot of the time, someone will address a scary emotion and then retreat again, sometimes over a period of hours, days, or even weeks. This is normal: most of us don't have the emotional fortitude to forge ahead through something difficult all in one go. Character A may say something vulnerable, then change the topic, laugh it off, say they're done discussing it, or even leave the situation.
Leave emotions partially unaddressed
Again, it's rare for someone to spill out everything they're feeling all in one go. As such, have Character A address the most important thing - or the least important, depending on their level of emotional maturity - and let it be done for then.
They might say their small piece, but when someone tries to probe deeper, they don't have an answer, or they get "stuck" on that one emotional level and cannot go further.
If Character B keeps pushing, then they may get incredibly upset and push back, or retreat.
Have Character B point out the feelings
Works especially well if the other character is a close companion or a parental figure. Often, people who know us really well will have better insight into our emotions than we do. Or, we might have good insight into our emotions but are still too afraid to open up. Having Character B point out the issue gives Character A grace to be more honest.
I can't tell you how many times I've been really upset, so I've distracted from the issue by getting angry about something completely different. Then, my mom will gently point out that I'm not actually crying about my new plastic cup being broken or whatever; I'm actually upset about XYZ. In that moment, I realize I've been caught out and admit that yes, that's what I'm really upset about.
Have Character A address it with a third character
Who among us hasn't gone to someone else to talk about our feelings? Having a third party serve as a sounding board is normal. Sometimes, Character A will feel such catharsis from this conversation that they don't address it as thoroughly with Character B.
Of course, you can use this to your advantage and create more tension if the third character gives bad advice or is biased.
Remember that just because the third party responded well does not mean that Character B does. You also have to avoid omniscience and remember that Character B wasn't privy to that conversation.
Have one confrontation be a stand-in for a larger one
I always think about the "The Iranian Yogurt Is Not the Issue" post when I think about this. Often times, things like not doing the dishes or whatever aren't actually the big deal: it's lack of boundaries, communication, or respect. A minor argument can be shorthand for a larger one that is too challenging for the characters to tackle.
This isn't just creating drama for the hell of it, though; it's about exploring the larger issues without making the characters lay it out on the table. A good reader will be able to see it's not about the Iranian Yogurt as long as you set up the relationship well.
Currently, I am writing a story where Uileac and his sister Cerie go to rescue Uileac's husband, Orrinir. On the way there, Uileac idly comments on how he wonders where a waterfall comes from because he's trying to distract himself from thinking about the fact that his husband is kidnapped and possibly dead.
Cerie, being pretty wound up too, starts arguing with him about it because she's like "why is this relevant? We're kind of too busy to think about geology right now!" Uileac gets annoyed at her for being so aggro, and she gets annoyed at him for being so irreverent. Both of them are upset about something completely different, but they're too scared and panicked to actually address that, so they release their frustrations by complaining about waterfalls.
Those bad vibes have to go somewhere, but neither of them are very good at talking about their feelings (though very good at stuffing them down). As such, they take the pressure off by sniping at one another. You've probably done this too, when you get into a dumb argument about something absolutely pointless because there's something you don't feel strong enough to discuss.
There's also the fact that if you're mad at someone about something but feel it's too stupid or petty to discuss, that frustration will leak out and everything else they do will annoy you, leading to a bunch of irrelevant arguments.
Use "reaffirmation" gestures
I talked about this in a different post, but after an argument, the "make up" stage doesn't always involve going "ohhh I forgive you" and big hugs and kisses, especially when the two characters aren't emotionally mature.
Instead, Character A makes gestures that reaffirm the relationship. This could be offering to do something Character B needs, making plans for later, or changing the topic to discuss something the other character cares about ("how are your cats doing?") etc.
Note that these "reaffirmation" gestures aren't the same as the cycle of abuse. This is more when two characters have had a difficult emotional conversation but aren't really sure how to continue being emotionally open, so they revert to something safer that still shows they care. They're not over-the-top gestures either, but more a special attention to something the other person loves. Knowing what the other person loves also demonstrates the depth of their relationship.
As always, I can't tell you what to do with your writing.
You are the crafter of your own story, and if you want people to talk like therapists for whatever reason, that's your choice. However, we want characters to feel like real people, and most real people don't lay it all out on the table every single time they're upset. If they do, they might be trauma vomiting, which is icky in and of itself.
Healthy communication isn't always perfect communication. People can have strong, loving relationships and still get things wrong - we're human. Having people calmly and rationally and easily talk about their feelings every single time is not only kind of boring, but it also feels weird, because unless we're primed to discuss those difficult topics and know we're perfectly safe, we're not going to do that.
People don't even do that in therapy, where they are paying for the service of talking about their feelings! Therapists also don't always do that IRL!
We're humans, and your characters need to feel like humans as well. That means letting them be imperfect communicators and using context clues rather than making them do all the work for the reader.
If you liked my advice, consider purchasing my book, 9 Years Yearning, for $3!
#beginner writer#young writer#tumblr writers#writing advice#writing tips#on writing#writing resources#writers on writing#writing reference#writing stuff#writing things#about writing#character creation#original characters#ocs#original writing#writers on tumblr#creative writing#writerscommunity#writeblr#writing community#writers of tumblr#writer stuff#writer#writers life#writer things
621 notes
·
View notes
Text
#short film writing#screenwriting for beginners#writing for beginners#writing tips#screenwriting advice#screenplay format#author#fiction#readers#audience#script#writing movies#indie filmmakers#filmmaking advice#playwriting#scriptwriter#poet
1 note
·
View note
Text
writing directly into AO3 so I can have a sense of thrill and excitement again
#ghost phost#ao3 writer#ao3 author#ao3 fanfic#ao3 comments#ao3#archive of our own#fanfic things#fanfic#fanfiction#writing#writers on tumblr#writer#writeblr#writers#fanfic writing#novice writer#beginner writer#amatuer writer
234 notes
·
View notes
Text
A Quick(ish) Comprehensive Guide to Writing in Third Person Limited
When we write, one of the very first aspects we consider is the perspective of the story. Is it in first person? Second person? Third person? Third person point-of-view is arguably the most flexible perspective, but that also makes it difficult to fully grasp and harness.
~~~
INTRODUCTION
Let's begin with the fundamental questions: what is third person and why do people use it?
> What is Third Person POV?
Third person POV is simply a narrative style in which the narrator has a broader view of all the characters and their thoughts. Unlike first person, which is seen through the eyes of one person, calling for the use of pronouns such as I, me, or my, third person uses pronouns such as he, she, or they to refer to everyone, including themselves. As the reader, we aren't meshed into the main character and viewing the story that way. Instead, we're moreso hovering from above and observing collective events, actions, and even thoughts.
There are three MAIN types of this perspective: third person omniscient, third person objective and third person limited.
Omniscient is where the narrator knows everything about the characters, events, and emotions, revealing many, if not all, of these aspects of the readers.
Objective is when the narrator focuses solely on the actions and behaviors of the characters, without providing insight to thoughts or emotions. It's an objective narration style.
Limited is where the narrator focuses on one character (which would likely be the protagonist) and centers the story around that character.
> Why Use Third Person?
To put it simply, third person can allow you to write more. You have access to multiple POVs and there is often less bias. In first person, the narrator is the character, which can cause warped views influenced by their bias.
However, for third person, the narrator is an external voice (oftentimes you), so while there can be some bias depending on the character you're hovering, there is significantly less.
***
THE BASICS
In this post, I won't be talking too much about third person omniscient because it's more uncommon in writing. Instead, I will be talking about a popular variant of third person limited in which we use the POVs of multiple characters one at a time.
> Using the Correct Pronouns
In first person, we use the pronouns "I, me, my, we, etc." to describe the narrator. In second person, we use the pronouns "you, your, etc." to describe the protagonist. In third person, we use the pronouns "she, he, they, etc." to describe the protagonist.
Avoid using first or second person pronouns unless you're writing thoughts or dialogue.
> Making the POV Clear
Since we're using the perspectives of different characters (at different times), it's imperative to clarify who the perspective belongs to. You can do this simply by listing the POV before writing the part or by starting a new paragraph, which begins with a sentence starting in active voice by the focused character.
EXAMPLES
Lexi's POV: She was astounded when she realized that... V.S. Lexi was astounded when she realized that...
Both examples are in third person and evidently centered around Lexi.
> Be Consistent
Be consistent with pronouns; unless you're writing thoughts and/or dialogue, make sure you're always using third person pronouns to address everything. It's easy to let it slip, but it's important not to.
Ex:
WRONG: She stares at the mirror. My hair is kind of messy, so I grab the brush. CORRECT: She stares at the mirror. Her hair is kind of messy, so she grabs the brush.
Another thing to consider is keeping the type of third person POV consistent. If you're writing in third person limited, don't suddenly switch to omniscient. Granted, many readers may not be able to identify this kind of mistake, but it's good to practice consistency!
***
GENERAL TIPS
Now, let's discuss some general ideas to keep in mind when writing in third person limited.
> Use Names
You might be thinking what? No duh I have to use names, but I'm being dead serious. In third person, you might find yourself writing out names of characters more often than when you might be using first person. This is because pronouns get confusing. If there are two girls talking, then which one is 'she'? Remember that your protagonist is also an outside character.
Use names, use different ways to identify people (the taller student, the younger employee, etc.), because even if you know who is who, the readers might not.
> Objectiveness
One of the pros of using third person to storytell is the objectiveness that it grants. First person comes with many biases, which can warp how the reader views the characters, actions, and events of the story.
However, in third person, you want your narrator to be as unbiased as possible. Be objective. Describe things as they are. Sure, sometimes a character's opinion might influence the story, but it shouldn't be too excessive.
> Be Descriptive
I'm sure I've said this only about one million times now, but third person POV is broad. You can talk about anyone, anything, and you can even explain events unrelated and outside of your protagonist's bubble, which you normally can't do in first person.
So be descriptive. You don't have to worry about how a specific may view something because we're in third person. There's so much more for you to describe, you just have to take advantage of it.
You can describe your protagonist's enemy with both distaste and detached neutrality; you can describe minute details of a tree without making your main character seem overdramatic--you just have to do it.
***
ADDITIONAL TIPS
> When to Change Perspectives
In third person limited POV, it's common and often necessary to change the character the narrator hovers around. This is because only following the protagonist is, well, quite limited. So, when do we change which character we follow?
Show Events Outside of the Protagonist: If you have part of the cast (such as the antagonist) that's taking action outside of what the MC is aware of, and you want to show what's happening, this is a good time to switch perspectives! ----
Show Different Reactions to the Same Event: Let's say an intense incident just occurred that affected multiple people. Switching perspectives here can be quite useful because it allows you to show how different characters handle and view the same situation. This also helpful because it gives the reader deeper insight to the characters!
> Incorporating Character
I talked about this alone in a separate post, but I'll reiterate it again. Many people believe that third person POV is less interesting because there's "less personality" in its writing compared to first person.
This is mainly due to the standard objectivity that comes with third person, but it doesn't mean you can't include hints of character within your writing outside of dialogue and thoughts.
At the end of the day, it all comes down to word choice and a bit of sentence structure. Different words and phrases have different connotations, and though it seems like a very subtle detail to focus on, it does impact your writing.
Try to use vocabulary that fits the character you're hovering. Vocabulary that they might use.
If you're writing from the perspective of an angrier character, maybe you'll use cruder language during their section. If it's a more dramatic character, perhaps you'll use more theatrical language and flowy sentence structures mixed with choppy ones.
EX:
1. He felt stupidly annoyed at the man's assumptions. 2. He felt irritated at the man's assumptions. 3. He felt fed up with the man's assumptions.
Those three examples all have similar meanings and identical sentence structures. However, you'll notice that there are slightly different connotations per each sentence.
For number one, it sounds like the character is upset that he's so annoyed. This offers the idea that the character feels he shouldn't be as annoyed as he is, quietly hinting that he isn't the type to get ruffled easily or at least, not towards such assumptions.
For number two, the statement is very direct. The character is irritated. He might not be as displeased as number one or three, but he is still annoyed. However, the forwardness of the statement might suggest that he's a pretty straightforward guy who's expresses his emotions frankly.
Lastly, for number three, the character sounds more tired and possibly angry. He's done with the assumptions. It can be assumed that he's the type who's more likely to take action than the other two.
Now, these are really simple examples, but you can see that the word changes do slightly alter the meaning of the sentence and evoke separate emotions based on the character of the perspective's owner.
If the character uses the word "excessively" instead of "very," we might think that the character is more eloquent.
Yes, all of these descriptions technically belong to the narrator, but there's no linear way to write the narrator. In this case, they act like a mirror, reflecting the voice of the character.
CONCLUSION
We're at the end! This was a MUCH larger post than I expected to write, so kudos to anyone who's read more than 50% of this LOL.
All in all, third person POV isn't actually terribly difficult to get the hang of. You'll need some practice, as with anything, but you'll understand it better the more you work on it--with or without my help!
The biggest point is to make sure your pronouns are in check. Don't use "I, me, my or you, yours, you're" unless you're writing dialogue or thoughts!
Hope this has been helpful! Reach out to me for any questions; I'd love to answer them!
Happy writing~
3hks <3
#writeblr#writing#writerscommunity#creative writing#writing inspo#writing tips#writing advice#writers on tumblr#writing in third person#writing in third person pov#writing in third pov#how to write in third pov#how to write in third person#how to write in third person pov#third person for beginners#third person limited#third person limited pov#how to write in third person limited pov#writing in third person limited pov
159 notes
·
View notes
Text
How to Make Your Writing Less Stiff Part 3
Crazy how one impulsive post has quickly outshined every other post I have made on this blog. Anyway here’s more to consider. Once again, I am recirculating tried-and-true writing advice that shouldn’t have to compromise your author voice and isn’t always applicable when the narrative demands otherwise.
Part 1
Part 2
1. Eliminating to-be verbs (passive voice)
Am/is/are/was/were are another type of filler that doesn’t add anything to your sentences.
There were fireworks in the sky tonight. /// Fireworks glittered in the sky tonight.
My cat was chirping at the lights on the ceiling. /// My cat chirped at the lights on the ceiling.
She was standing /// She stood
He was running /// He ran
Also applicable in present tense, of which I’ve been stuck writing lately.
There are two fish-net goals on either end of the improvised field. /// Two fish-net goals mark either end of the improvised field.
For once, it’s a cloudless night. /// For once, the stars shine clear.
Sometimes the sentence needs a little finagling to remove the bad verb and sometimes you can let a couple remain if it sounds better with the cadence or syntax. Generally, they’re not necessary and you won’t realize how strange it looks until you go back and delete them (it also helps shave off your word count).
Sometimes the to-be verb is necessary. You're writing in past-tense and must convey that.
He was running out of time does not have the same meaning as He ran out of time, and are not interchangeable. You'd have to change the entire sentence to something probably a lot wordier to escape the 'was'. To-be verbs are not the end of the world.
2. Putting character descriptors in the wrong place
I made a post already about motivated exposition, specifically about character descriptions and the mirror trope, saying character details in the wrong place can look odd and screw with the flow of the paragraph, especially if you throw in too many.
She ties her long, curly, brown tresses up in a messy bun. /// She ties her curls up in a messy brown bun. (bonus alliteration too)
Generally, I see this most often with hair, a terrible rule of threes. Eyes less so, but eyes have their own issue. Eye color gets repeated at an exhausting frequency. Whatever you have in your manuscript, you could probably delete 30-40% of the reminders that the love interest has baby blues and readers would be happy, especially if you use the same metaphor over and over again, like gemstones.
He rolled his bright, emerald eyes. /// He rolled his eyes, a vibrant green in the lamplight.
To me, one reads like you want to get the character description out as fast as possible, so the hand of the author comes in to wave and stop the story to give you the details. Fixing it, my way or another way, stands out less as exposition, which is what character descriptions boil down to—something the audience needs to know to appreciate and/or understand the story.
3. Lacking flow between sentences
Much like sentences that are all about the same length with little variety in syntax, sentences that follow each other like a grocery list or instruction manual instead of a proper narrative are difficult to find gripping.
Jack gets out a stock pot from the cupboard. He fills it with the tap and sets it on the stove. Then, he grabs russet potatoes and butter from the fridge. He leaves the butter out to soften, and sets the pot to boil. He then adds salt to the water.
From the cupboard, Jack drags a hefty stockpot. He fills it with the tap, adds salt to taste, and sets it on the stove.
Russet potatoes or yukon gold? Jack drums his fingers on the fridge door in thought. Russet—that’s what the recipe calls for. He tosses the bag on the counter and the butter beside it to soften.
This is just one version of a possible edit to the first paragraph, not the end-all, be-all perfect reconstruction. It’s not just about having transitions, like ‘then’, it’s about how one sentence flows into the next, and you can accomplish better flow in many different ways.
4. Getting too specific with movement.
I don’t see this super often, but when it happens, it tends to be pretty bad. I think it happens because writers feel the need to overcompensate and over-clarify on what’s happening. Remember: The more specific you get, the more your readers are going to wonder what’s so important about these details. This is fiction, so every detail matters.
A ridiculous example:
Jack walks over to his closet. He kneels down at the shoe rack and tugs his running shoes free. He walks back to his desk chair, sits down, and ties the laces.
Unless tying his shoes is a monumental achievement for this character, all readers would need is:
Jack shoves on his running shoes.
*quick note: Do not add "down" after the following: Kneels, stoops, crouches, squats. The "down" is already implied in the verb.
This also happens with multiple movements in succession.
Beth enters the room and steps on her shoelace, nearly causing her to trip. She kneels and ties her shoes. She stands upright and keeps moving.
Or
Beth walks in and nearly trips over her shoelace. She sighs, reties it, and keeps moving.
Even then, unless Beth is a chronically clumsy character or this near-trip is a side effect of her being late or tired (i.e. meaningful), tripping over a shoelace is kind of boring if it does nothing for her character. Miles Morales’ untied shoelaces are thematically part of his story.
Sometimes, over-describing a character’s movement is meant to show how nervous they are—overthinking everything they’re doing, second-guessing themselves ad nauseam. Or they’re autistic coded and this is how this character normally thinks as deeply methodical. Or, you’re trying to emphasize some mundanity about their life and doing it on purpose.
If you’re not writing something where the extra details service the character or the story at large, consider trimming it.
—
These are *suggestions* and writing is highly subjective. Hope this helps!
#writing#writing resources#writing advice#writing tips#writing a book#writing tools#writeblr#for beginners#story structure#book formatting
4K notes
·
View notes