#learn website development
Explore tagged Tumblr posts
Visit Tumblr Blog
Explore Tumblr blogs with no restrictions, modern design and the best experience.
Last Seen Tumblr Blogs


Fun Fact
Tumblr posted its first advertisements in May 2012 and subsequently earned $13M in revenue.
Text
Master Full Stack Web Development by 2024
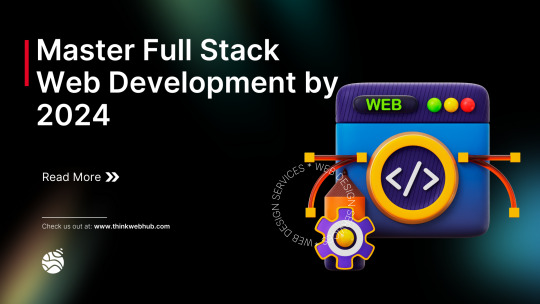
Your definitive guide to being a master in full-stack web development. Click here and find your potential now!
Introduction to Full Stack Web Development
Full Stack Web Development refers to full stack web development—the term that unites Front End and Back End technologies. It is the origination of web applications from ground zero, starting from design to development. Learning Full Stack in 2024 can open the doors to numerous opportunities in the industry.
Full Stack Web Development
Full Stack Developers: On the back and front end of software development lies the core demand. The dual value makes them a valuable asset to any development team. This also makes it easier to troubleshoot and ideate with a developer since the developer can plan according to both ends.
Essential Skills for Full Stack Developers
A full-stack developer should have a view of the frontend and backend technologies with industry knowledge.
Some of the Front-end Technologies include:
HTML/CSS: Building blocks of web development that structure and style a document.
JavaScript: Makes the web page dynamic and interactive.
Frameworks: Use React, Angular, or Vue.js to massively build your UI.
Some of the back-end technologies include:
Server-Side Languages: Python, Node.js, Ruby, and PHP.
Databases: SQL and NoSQL databases to manage data.
APIs: Capable of using RESTful and GraphQL APIs to communicate with many parts of the web application.
How you can become a full-stack developer in 2024
Start with the basics The basics of web development are HTML, CSS, and JavaScript. Make sure you have a grip on them first.
Learn front-end frameworks After understanding the basics, move on to front-end frameworks like React, Angular, or Vue.js. These tools help speed up the development process and enhance your capability to create complex user interfaces.
Learn a Back-End Language Choose any server-side language, such as Python, Node.js, or Ruby. Learn how to setup servers, manage databases, and create APIs. Building small projects can solidify your understanding.
Know About Databases Learn SQL and NoSQL databases with examples of actual databases, like MySQL, PostgreSQL, and MongoDB, respectively. Understanding how to store, retrieve, and manage data is very important when talking about full stack development.
Get Hands-On with Full Stack Projects Put your heads into full-fledged projects by building real small web applications. Hands-on learning from these projects will be very valuable. Start with straightforward projects and then gradually move into much more challenging projects.
Keep Updated with the Trends Web development is dynamic and observably so. To do this, read industry blogs, contribute to forums, and be part of online communities. Keeping abreast of changes to these trends will help you stay ahead of the game.
Tools and Resources to Learn
Online Courses There are online-based platforms like Coursera, Udemy, and freeCodeCamp that provide excellent courses on full stack web development.
Documentation and Tutorials Find the official documentation of any framework or language; it's the perfect one. Websites like MDN Web Docs and W3Schools also provide great tutorials.
Community Support Join online communities on Reddit, Stack Overflow, and GitHub. Engaging with other developers can provide support and inspiration.
Conclusion
It is an achievable goal to master full stack web development in 2024 by taking your time and using the proper resources. With knowledge of both front-end and back-end technologies, you will equip yourself well to build strong, efficient web applications. Begin today so as to unlock your potential in the tech world.
1 note
·
View note
Text
Essentials You Need to Become a Web Developer
HTML, CSS, and JavaScript Mastery
Text Editor/Integrated Development Environment (IDE): Popular choices include Visual Studio Code, Sublime Text.
Version Control/Git: Platforms like GitHub, GitLab, and Bitbucket allow you to track changes, collaborate with others, and contribute to open-source projects.
Responsive Web Design Skills: Learn CSS frameworks like Bootstrap or Flexbox and master media queries
Understanding of Web Browsers: Familiarize yourself with browser developer tools for debugging and testing your code.
Front-End Frameworks: for example : React, Angular, or Vue.js are powerful tools for building dynamic and interactive web applications.
Back-End Development Skills: Understanding server-side programming languages (e.g., Node.js, Python, Ruby , php) and databases (e.g., MySQL, MongoDB)
Web Hosting and Deployment Knowledge: Platforms like Heroku, Vercel , Netlify, or AWS can help simplify this process.
Basic DevOps and CI/CD Understanding
Soft Skills and Problem-Solving: Effective communication, teamwork, and problem-solving skills
Confidence in Yourself: Confidence is a powerful asset. Believe in your abilities, and don't be afraid to take on challenging projects. The more you trust yourself, the more you'll be able to tackle complex coding tasks and overcome obstacles with determination.
#code#codeblr#css#html#javascript#java development company#python#studyblr#progblr#programming#comp sci#web design#web developers#web development#website design#webdev#website#tech#html css#learn to code
2K notes
·
View notes
Text
Introduction To HTML
[Note: You need a text editor to do this. You can use Notepad or Text Edit. But it's so much better to download VS Code / Visual Studio Code. Save it with an extension of .html]
HTML stands for Hyper Text Markup Language
It is used to create webpages/websites.
It has a bunch of tags within angular brackets <....>
There are opening and closing tags for every element.
Opening tags look like this <......>
Closing tags look like this
The HTML code is within HTML tags. ( // code)
Here's the basic HTML code:
<!DOCTYPE html> <html> <head> <title> My First Webpage </title> </head> <body> <h1> Hello World </h1> <p> Sometimes even I have no idea <br> what in the world I am doing </p> </body> </html>
Line By Line Explanation :
<!DOCTYPE html> : Tells the browser it's an HTML document.
<html> </html> : All code resides inside these brackets.
<head> </head> : The tags within these don't appear on the webpage. It provides the information about the webpage.
<title> </title> : The title of webpage (It's not seen on the webpage. It will be seen on the address bar)
<body> </body> : Everything that appears on the webpage lies within these tags.
<h1> </h1> : It's basically a heading tag. It's the biggest heading.
Heading Tags are from <h1> to <h6>. H1 are the biggest. H6 are the smallest.
<p> </p> : This is the paragraph tag and everything that you want to write goes between this.
<br> : This is used for line breaks. There is no closing tag for this.
-------
Now, we'll cover some <Meta> tags.
Meta tags = Notes to the browser and search engines.
They don’t appear on the page.
They reside within the head tag
<head> <meta charset="UTF-8"> <meta name="viewport" content="width=device-width, initial-scale=1.0"> <meta name="description" content="Website Description"> <meta name="Author" content="Your Name"> <meta name="keywords" content="Websites Keywords"> </head>
Line By Line Explanation:
<meta charset="UTF-8"> : Makes sure all letters, symbols, and emojis show correctly.
<meta name="viewport" content="width=device-width, initial-scale=1.0"> : Makes your site look good on phones and tablets.
<meta name="description" content="Website Description"> : Describes your page to Google and helps people find it.
<meta name="author" content="Your Name"> : Says who created the page.
<meta name="keywords" content="Website's Keywords"> : Adds a few words to help search engines understand your topic.
_____
This is my first post in this topic. I'll be focusing on the practical side more than the actual theory, really. You will just have some short bullet points for most of these posts. The first 10 posts would be fully HTML. I'll continue with CSS later. And by 20th post, we'll build the first website. So, I hope it will be helpful :)
If I keep a coding post spree for like 2 weeks, would anyone be interested? o-o
#code#codeblr#css#html#javascript#python#studyblr#progblr#programming#comp sci#web design#web developers#web development#website design#webdev#website#tech#html css#learn to code#school#study motivation#study aesthetic#study blog#student#high school#studying#study tips#studyspo#website development#coding
98 notes
·
View notes
Text
learning to code so i can take over the world
#how i feel after making one singular neocities page#but in all seriousness i am v pleased i am learning coding and making progress on my hobbies and projects im pursuing#achieving my goals feels so good! ♡#girlblogging#it girl#girlhood#pink pilates princess#girly tumblr#this is what makes us girls#girly stuff#programming#coding#web development#website#web design#neocities#girl code#girl thoughts#girl things#girl genius#that girl#dolly girl#becoming her#it girl energy#becoming that girl#notes ❤︎
78 notes
·
View notes
Text
First Steps:
So I want to learn how to get access to the spotify api and my data first in my terminal. So I want to:
Get my top albums in terminal
Get my top artists in terminal
Get my top songs in terminal
If I figure it out really quick:
Add that json data into an xbar project on my Macbook
If that is easy then I'll add more stuff for when you click on xbar
#programmer#software engineering#software#code#coding#codeblr#website development#web developers#web design#baby coder#I know how to do nothing I just learned how to access APIs and make crude Ruby on Rails apps#ruby on rails#ruby
8 notes
·
View notes
Text
Final Thoughts: A Glimpse into the Future of Web Design
The key takeaways: Summarizing the major trends shaping the future of web design. Inspiring designers to embrace innovation: Encouraging creativity and pushing boundaries. A call to action: Encouraging viewers to explore these trends and implement them in their own projects.

Get Free website designing course 2025 👈
Clear Purpose and Goals: Define the primary objective of the website. Ensure that every element on the site supports this goal.
User-Friendly Design: Prioritize intuitive navigation and clean layout. Make sure the design is accessible and easy to use for all users.
Responsive and Mobile-First Design: Ensure the website works well on all screen sizes. Start with mobile design as more users access websites on mobile devices.
5 Important ways to develop responsive website
Fast Load Time and Performance
Optimize images and code for faster loading.
Use caching, a good hosting provider, and efficient coding practices.
Strong SEO and Content Strategy
Use relevant keywords, proper headings, and metadata.
Create valuable, high-quality content that helps your audience and ranks well on search engines.
#us school system#education system#high school education#free science education#3d image design#learn website design#3d banner design#3d vector design#3d model#3d website#well designed website#website optimization#website development#website#web developers#responsive web design#learn web design#web graphics#web development
5 notes
·
View notes
Text
Technical writing part 2
My plan to devote April to writing a tutorial (for my Jolt-JNI open-source software library) went about as I expected. 7 days into May, the tutorial still isn't in a presentable state. Hard to predict when it will be ready, but I'm glad to report I've launched the website and established some forward momentum. I've also built some confidence, both in the library and myself. So progress.
A week spent visiting family in another state didn't help. I made almost no progress on software during that time. Not because I was busy or jet-lagged. More like the environment wasn't comfortable for long stretches of keyboard work.
I've heard you don't really understand something until you can explain it to others. Even as I write tutorial pages for Jolt JNI, I'm learning how to use to library. I typically start writing about a feature with only a vague notion of how it should work, based on similar projects I've used in the past. Then I write a short sample app to demonstrate the feature. Often the sample app doesn't work as expected. I find myself troubleshooting the library, the app, and my own expectations, all at the same!
It feels risky to be teaching things I don't fully understand myself. If I'm mistaken about how/whether something works, I might badly mislead people. Such thoughts trigger (irrational) fears of being exposed as an imposter.
But I'm not an imposter. In fact, I might even be the ideal person for this task. Not only did I write the damned library, but I have a plethora of experience with similar libraries. I'm skilled at troubleshooting unexpected behavior. I've written similar tutorials before. And of course I'm fluent in English. It's still difficult.
In a way, my ignorance is a good thing, because I'm still at or near the level of experience of my target audience.
Expertise is valuable, but it gets in the way of writing for beginners. Beginners require explanations of things that seem obvious to experts. Once one becomes an expert, it gets hard to remember how beginners think.
#imposter syndrome#software development#current wip#documentation#tutorial#library#writing#making progress#troubleshooting#open source software#expertise#jvm#april 2025#target audience#risky#technical writing#website development#features#learning#confidence#beginners
2 notes
·
View notes
Text
ok tangentially related: everyone saying "i never look up the authors of the books i read" is wilddddd to me. seriously? you just randomly pick up books and absorb whatever is between the pages with 0 context and do no further investigation? you don't care what nationality or gender or age an author is????? do you also not care when or where a book was published like how far does this go
it's not even hard to find, like flip to the back for an author bio and the copyright page for a whole bunch of other useful info..... do people not even look at the copyright page???!?
#im being slightly facetious but not entirely#even w fiction i really have a hard time reading anything if i don't know when it was published & who the author is#it doesn't have to be a ton of info but like a cursory “black american woman in her 30s published in 2024” or w/e adds SO much context#knowing the publisher adds info too (at least if you know anything about the company)#and like for me a lot of that info was just learned by reading a lot#as a kid i developed the habit of paying attention to which publishing house or imprint published books i liked#and to this day that's a big way i find new stuff to read is just going directly to publishers' websites#i don't expect everyone to do all that but it is WILD to me that anyone could just. not know anything about an author#and still feel like they're able to understand the book fully#well. i guess they probably don't lmao#bri babbles
4 notes
·
View notes
Text

Tinkering with my personal website again

Above screenie is zoomed out to capture everything. Anyone wanna guess which blinkies I made? Also, the Twitter blinkie just takes you to my BSky lol (on purpose).


Several of the images were put together by me! I can teach pretty much anything in tech, this is just the stuff that I thought of.


I made the floppy-disk icons myself, with some help from wifey on getting the text to render as part of the SVGs!
#personal website#web development#vaporwave#love2d#pico8#personal finance#tutoring#math tutoring#math teacher#computer science#computer science tutoring#game development#electronics design#pcb design#learntocode#machine learning#artificial intelligence#ai#ai development#data science#unity engine#godot engine
2 notes
·
View notes
Text
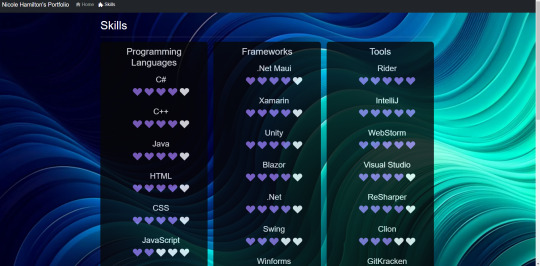
Days 119 to 127 of coding everyday for a year now using Blazor
I have been working on small things here and there as well as doing things at my job but I finally decided to spend my time sharpening my claws with Blazor. I also decided to make a portfolio site like my husband has, but better 🤣. It doesn't show it but I have tool tips on each of these skills. I'll be adding a contact page soon and a few things that will show off my skills with code on the site!
#self improvement#cosmickittytalk#codeblr#csharp programming#csharp#csharp is superior#girls who code#programming#coding challenge#web development#website#my portfolio#blazor#work in progress#programmer#learning programming#learning to code#html#html/css#html css#css#html5#javascript#code#my projects
7 notes
·
View notes
Text

Welcome back, coding enthusiasts! Today we'll talk about Git & Github , the must-know duo for any modern developer. Whether you're just starting out or need a refresher, this guide will walk you through everything from setup to intermediate-level use. Let’s jump in!
What is Git?
Git is a version control system. It helps you as a developer:
Track changes in your codebase, so if anything breaks, you can go back to a previous version. (Trust me, this happens more often than you’d think!)
Collaborate with others : whether you're working on a team project or contributing to an open-source repo, Git helps manage multiple versions of a project.
In short, Git allows you to work smarter, not harder. Developers who aren't familiar with the basics of Git? Let’s just say they’re missing a key tool in their toolkit.
What is Github ?
GitHub is a web-based platform that uses Git for version control and collaboration. It provides an interface to manage your repositories, track bugs, request new features, and much more. Think of it as a place where your Git repositories live, and where real teamwork happens. You can collaborate, share your code, and contribute to other projects, all while keeping everything well-organized.
Git & Github : not the same thing !
Git is the tool you use to create repositories and manage code on your local machine while GitHub is the platform where you host those repositories and collaborate with others. You can also host Git repositories on other platforms like GitLab and BitBucket, but GitHub is the most popular.
Installing Git (Windows, Linux, and macOS Users)
You can go ahead and download Git for your platform from (git-scm.com)
Using Git
You can use Git either through the command line (Terminal) or through a GUI. However, as a developer, it’s highly recommended to learn the terminal approach. Why? Because it’s more efficient, and understanding the commands will give you a better grasp of how Git works under the hood.
GitWorkflow
Git operates in several key areas:
Working directory (on your local machine)
Staging area (where changes are prepared to be committed)
Local repository (stored in the hidden .git directory in your project)
Remote repository (the version of the project stored on GitHub or other hosting platforms)
Let’s look at the basic commands that move code between these areas:
git init: Initializes a Git repository in your project directory, creating the .git folder.
git add: Adds your files to the staging area, where they’re prepared for committing.
git commit: Commits your staged files to your local repository.
git log: Shows the history of commits.
git push: Pushes your changes to the remote repository (like GitHub).
git pull: Pulls changes from the remote repository into your working directory.
git clone: Clones a remote repository to your local machine, maintaining the connection to the remote repo.
Branching and merging
When working in a team, it’s important to never mess up the main branch (often called master or main). This is the core of your project, and it's essential to keep it stable.
To do this, we branch out for new features or bug fixes. This way, you can make changes without affecting the main project until you’re ready to merge. Only merge your work back into the main branch once you're confident that it’s ready to go.
Getting Started: From Installation to Intermediate
Now, let’s go step-by-step through the process of using Git and GitHub from installation to pushing your first project.
Configuring Git
After installing Git, you’ll need to tell Git your name and email. This helps Git keep track of who made each change. To do this, run:

Master vs. Main Branch
By default, Git used to name the default branch master, but GitHub switched it to main for inclusivity reasons. To avoid confusion, check your default branch:

Pushing Changes to GitHub
Let’s go through an example of pushing your changes to GitHub.
First, initialize Git in your project directory:

Then to get the ‘untracked files’ , the files that we haven’t added yet to our staging area , we run the command

Now that you’ve guessed it we’re gonna run the git add command , you can add your files individually by running git add name or all at once like I did here

And finally it's time to commit our file to the local repository

Now, create a new repository on GitHub (it’s easy , just follow these instructions along with me)
Assuming you already created your github account you’ll go to this link and change username by your actual username : https://github.com/username?tab=repositories , then follow these instructions :


You can add a name and choose wether you repo can be public or private for now and forget about everything else for now.

Once your repository created on github , you’ll get this :

As you might’ve noticed, we’ve already run all these commands , all what’s left for us to do is to push our files from our local repository to our remote repository , so let’s go ahead and do that

And just like this we have successfully pushed our files to the remote repository
Here, you can see the default branch main, the total number of branches, your latest commit message along with how long ago it was made, and the number of commits you've made on that branch.

Now what is a Readme file ?
A README file is a markdown file where you can add any relevant information about your code or the specific functionality in a particular branch—since each branch can have its own README.
It also serves as a guide for anyone who clones your repository, showing them exactly how to use it.
You can add a README from this button:

Or, you can create it using a command and push it manually:

But for the sake of demonstrating how to pull content from a remote repository, we’re going with the first option:

Once that’s done, it gets added to the repository just like any other file—with a commit message and timestamp.
However, the README file isn’t on my local machine yet, so I’ll run the git pull command:

Now everything is up to date. And this is just the tiniest example of how you can pull content from your remote repository.
What is .gitignore file ?
Sometimes, you don’t want to push everything to GitHub—especially sensitive files like environment variables or API keys. These shouldn’t be shared publicly. In fact, GitHub might even send you a warning email if you do:

To avoid this, you should create a .gitignore file, like this:

Any file listed in .gitignore will not be pushed to GitHub. So you’re all set!
Cloning
When you want to copy a GitHub repository to your local machine (aka "clone" it), you have two main options:
Clone using HTTPS: This is the most straightforward method. You just copy the HTTPS link from GitHub and run:

It's simple, doesn’t require extra setup, and works well for most users. But each time you push or pull, GitHub may ask for your username and password (or personal access token if you've enabled 2FA).
But if you wanna clone using ssh , you’ll need to know a bit more about ssh keys , so let’s talk about that.
Clone using SSH (Secure Shell): This method uses SSH keys for authentication. Once set up, it’s more secure and doesn't prompt you for credentials every time. Here's how it works:
So what is an SSH key, actually?
Think of SSH keys as a digital handshake between your computer and GitHub.
Your computer generates a key pair:
A private key (stored safely on your machine)
A public key (shared with GitHub)
When you try to access GitHub via SSH, GitHub checks if the public key you've registered matches the private key on your machine.
If they match, you're in — no password prompts needed.
Steps to set up SSH with GitHub:
Generate your SSH key:

2. Start the SSH agent and add your key:

3. Copy your public key:

Then copy the output to your clipboard.
Add it to your GitHub account:
Go to GitHub → Settings → SSH and GPG keys
Click New SSH key
Paste your public key and save.
5. Now you'll be able to clone using SSH like this:

From now on, any interaction with GitHub over SSH will just work — no password typing, just smooth encrypted magic.
And there you have it ! Until next time — happy coding, and may your merges always be conflict-free! ✨👩💻👨💻
#code#codeblr#css#html#javascript#java development company#python#studyblr#progblr#programming#comp sci#web design#web developers#web development#website design#webdev#website#tech#html css#learn to code#github
93 notes
·
View notes
Text
Day 6 [Forms In HTML]
Introduction To HTML
Day 2 [Multimedia Elements In HTML]
Day 3 [Table in HTML]
Day 4 [Link Tag In HTML]
Day 5 [Lists In HTML]
Forms are basically used for collecting user information. And they are really important to learn. Here's a simple form in HTML:
Code:


Line By Line Explanation:
<form>: Used for creating forms. All the form elements go in this tag. Action: When submitted, data is sent to this file or URL [index.html] Method="post": Sends data
<label> : This describes the input tag for="___": Connects the label to the input with id="name" id : gives a unique identification to the tag <input>: It's used to make the form elements
<input> Type Elements :
type="text" : A simple text box is created.
type="email" : A box to input email.
type="checkbox" : A small square that users can tick. Can select multiple options using this.
type="radio" : A small circle, you can only select one option.
type="submit" : A button that submits the data to the server.
<textarea>: Accepts multiple lines of text. rows="4": It creates 4 lines cols="30": It creates 30 characters
<select> : Creates a drop-down list <option>: Creates an item in the dropdown. value="colorname": This is the data sent to the server if chosen.
Output For The Code:

_______________________
Hope This Helps !!
#code#codeblr#css#html#javascript#python#studyblr#progblr#programming#comp sci#web design#web developers#web development#website design#webdev#website#tech#html css#learn to code#school#study motivation#study aesthetic#study blog#student#high school#studying#study tips#studyspo#website development#coding
34 notes
·
View notes
Text

[ID: A collection of black and white sketches showing everyday objects that are haunted by little creatures. These creatures fill in gaps with black space and white dots for eyes /End ID]
As some of you might’ve seen: I’m no longer posting art on Twitter, so Tumblr is now the only social media I’ll be consistently posting art to. However: I’ll also be posting it to my website and possibly other social media platforms in the future.
I also post monthly sketch pages to my Patreon (April’s is on this post) with early access for Patrons, and I’m hoping to add more things to it soon!
Thanks everyone for your support (your tags mean a lot to me!) and I’ve put more of my thoughts in the tags.
#monsters#sketch#Patreon#Putting my thoughts here rather than in a read more so people don’t have to see it a lot:#Went on a vacation at the start of July and realised I’ve been ridiculously burnt out and didn’t realise#The stress of *trying* to have something ready for social media every other day was exhausting#I’m not the fastest artist out there so it takes time! I was really pushing out quick things#not progressing as an artist since I wasn’t practicing besides trying to be faster#So I’m shifting gears more now and doing things that aren’t art as hobbies#Learnt to make my website! Want to keep developing it too and making layouts for other people#Learning auslan (Aussie sign language) and having an amazing time!#mostly getting back into education since I really love learning things#haven’t been in a class for years and it’s been a big boost to my mental health#still have financial worries but not as badly now thankfully#Anyway I’ll probably be posting less art until I figure out what works for me#though less art is better than the NONE that happens when I’m exhausted and having a bad time#Hopefully I’ll start to really enjoy the process again and start getting more ideas#(ideas are so hard to come up with!)
44 notes
·
View notes
Text
Svelte Basics: First Component
I'm going through the Svelte tutorial since it's very comprehensive and up-to-date.
I'm going on a bit of a tangent before I start this post, but I'm straying away from YouTube videos and Udemy courses when learning new programming languages and frameworks. YouTube videos are too fragmented to get good information from. Courses (and YouTube videos) are usually not up-to-date, rendering parts of them useless. Not to mention that you have to pay for free information that's packaged in a course, which is kind of scummy.
Anyway, I've gotten quite a bit further than just the introduction section of Svelte basics, but I don't want to overload myself (or readers) with information.
My First Svelte Component:
This section was relatively straightforward. There wasn't much new information, but I was hooked because of its simplicity. I personally love the idea of having the script tags be a place to define variables and attributes:
<script> let var = "a variable!" </script>
<p>I'm {var}</p>
The example above shows how dynamic attributes are used. I can basically define any variable (and states, but that'll be for the next post) between the script tags that can be used in HTML.
This may seem mundane to programmers experienced in Svelte, but I think it gives really good insight into the philosophy behind Svelte. It's clear that they wanted to keep the language simple and easy to use, and I appreciate that.
As I mentioned in my introductory post, I have a background in React, which has a reputation for being convoluted. Well, maybe that's just my perception, but how Svelte is written is a breath of fresh air!
I look forward to making more posts about what I learn and my attempts at understanding it.
Until next time!
#svelte#web development#website development#developer#software engineering#software development#programming#code#coding#framework#tech#learning#programming languages#growth#codeblr#web devlopment#devlog#techblr#tech blog#dev blog#reactjs#nextjs
2 notes
·
View notes
Text
The Future of Visuals: From Flat to Immersive
From flat design to depth and dimension: Exploring the impact of 3D graphics and animation. The evolution of holographic elements: Bringing virtual objects to life on websites. Creating a truly immersive experience: How to integrate these elements for maximum impact.

Get Free website designing course 2025 👈
Clear Purpose and Goals: Define the primary objective of the website. Ensure that every element on the site supports this goal.
User-Friendly Design: Prioritize intuitive navigation and clean layout. Make sure the design is accessible and easy to use for all users.
Responsive and Mobile-First Design: Ensure the website works well on all screen sizes. Start with mobile design as more users access websites on mobile devices.
5 Important ways to develop responsive website
Fast Load Time and Performance
Optimize images and code for faster loading.
Use caching, a good hosting provider, and efficient coding practices.
Strong SEO and Content Strategy
Use relevant keywords, proper headings, and metadata.
Create valuable, high-quality content that helps your audience and ranks well on search engines.
#us school system#education system#high school education#free science education#learn web development#learn design#learn about physics#learn graphic design#learn animation#learn web design#learn website design#responsive web design#responsive website#responsive wordpress template#website optimization#website developer near me#3d banner design#3d image design#3d vector design#3d website#well designed website#website development
5 notes
·
View notes
Note
WAIT YOURE A PINTEREST GUY I KNOW YOU FROM PINTEREST
Yes hi hello I am from the pintrest!!!! I lived on that app for a few years lol. But yeah I saw you on Tumblr shortly after I left pintrest and was really surprised!!!
#Pintrest#Asks#This is like. The 3rd ask I've gotten where its just people saying#“YOU. I KNOW YOU. YOUR FROM PINTREST. HOW ARE YOU HERE”#and the answer to that question is that I am secretly a mold slowing growing developing and learning from website to website#Except for there was a curse and now im stuck on Tumblr#Isn't to bad#There's boops#ask
2 notes
·
View notes