#self sustainable food
Text
If you’re new in planting a garden, and you want to grow as big volume of food as possible, in as little space as possible, the plants that will give you the biggest harvests are: Tomatoes, Summer squash, Peppers, Green beans. Potatoes, onions and garlic are also good because they can be planted around tomatoes and other stuff too, but the biggest producers are tomatoes, squash, peppers and green beans! These plants, after they’re established, can go on to give out almost unlimited amount of food, for as long as the weather allows them to continue producing.
I believe I managed to store enough food for the winter solely thanks to tomatoes, peppers, and squash. Not only zuchinni can also make a winter squash in an emergency, but it can be dried and added to preserves, and frozen and made into zuchinni bread! Tomatoes are the easiest food to preserve because they’re so acidic, they can even help you preserve other food, by having it submerged in tomato sauce and closed into jars!
Green beans, other than being a great and plentiful summer crop, can be dried and canned and frozen, they also keep producing for as long as the plants are alive.
Other crops like, cabbage, broccoli, cauliflower, onion greens, potatoes, lettuce, dry beans, peas, carrots, leeks, celery, they’re awesome to have, but when they give you produce, they’re likely to do it once, or twice, and that is the maximum you can get out of that space where you plant them. They’re a life saver during the time summer crops wont grow! But the big producers will continue giving you harvests over and over again, as long as they stay healthy and undamaged by weather.
Greens like kale, swiss chard, chives, spinach, can also give you multiple harvests, and they’re great to grow in the colder months, but you still get nowhere near the volume of food that you can get from the summer crops. And there’s also big summer producers like cucumbers, watermelons, cantaloupes, eggplants, that can give you loads of produce, but these also take a LOT of space.
Tomatoes, squash, peppers and green beans are, I think, the absolute essential garden crops to grow. Also potatoes if you have the extra space to plant them.
798 notes
·
View notes
Text
📸 The Seasonal Homestead
#homestead#garden#gardening#homesteading#self sufficient#self sustainable#urban farm#self sustainability#fruit#fruit trees#grow your own food
535 notes
·
View notes
Text
Good afternoon everyone~
It's cold, windy and it's been raining on and off all day but I finally got out to harvesting the sweet potatoes.
I started with the 'L' bed.

This is the bowl I'll be using to collect the spuds for this deep raised bed.
Those are full size scissors btw. This is the absolute biggest strainer I own and when I do harvesting I'm always glad to have it! Helps with carrying and washing off dirt outside so much easier!

It was pretty fun digging round for the spuds and to be honest the size and shape of some of them really suprised me!
For some size comparison, my hand is right on top of them.
All cleaned out!
Next was the little round bed in the corner. I wasn't really expecting much, but it filled the bin pretty good.

I've washed the spuds off and am letting them dry off but I'll be finding a spot inside soemwhere to let them sit and cure for a bit of time. (I probably will let them cure until end of febuary.)
Curing your sweet potatoes is what makes them sweet, you can eat them right away but their said to be bitter. (I will be trying 1 potato to see if this is true!) Curing them should be done for at least 2 week in a cool dry space (around 80*f). If you under 80*f space add 7 more days.
I thought this was neat and wanted to share it. since I've not seen a sweet potato grown or dug up before

I wasn't expecting so much differance in spud size from one single root.
And one last pic,
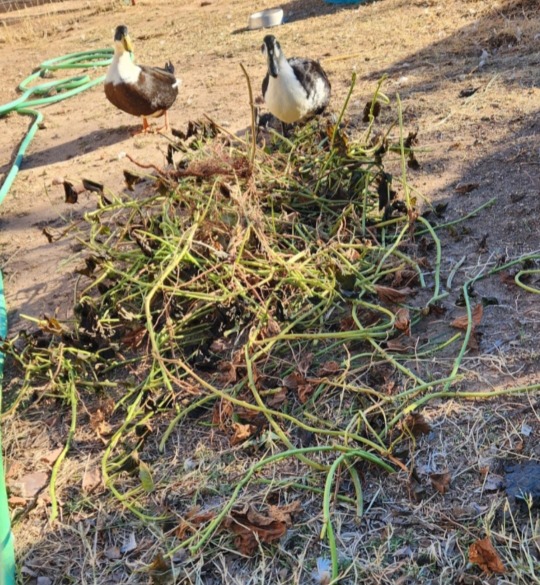
The ducks quite like the greens, while there's not much left of it I'm going to leave the vines a couple days so they can use it as enrichment/snack opportunity.
Weigh in on the spuds later!
🍠🌱Happy Homesteading and Harvesting!!
🌱🍠
1.11.2024
#self sufficient living#homesteading#thestudentfarmer#studentfarmer#self sufficiency#food#garden#gardening#low waste#duck#sustainability#smalls scale differences#urban animal keeping#urban biodiversity#urban homesteading#urban gardening#urban farming#grow what you can#simple plants to grow#multipurpose crops#right to grow#human right to clean food#right to grow food#raised garden beds#start to finish#will it grow?#food sovereignty#whole foods#first time growing#going green as can be
59 notes
·
View notes
Text


June garden update
Omg, so many things have changed since May, but I try to do my best to summarize:
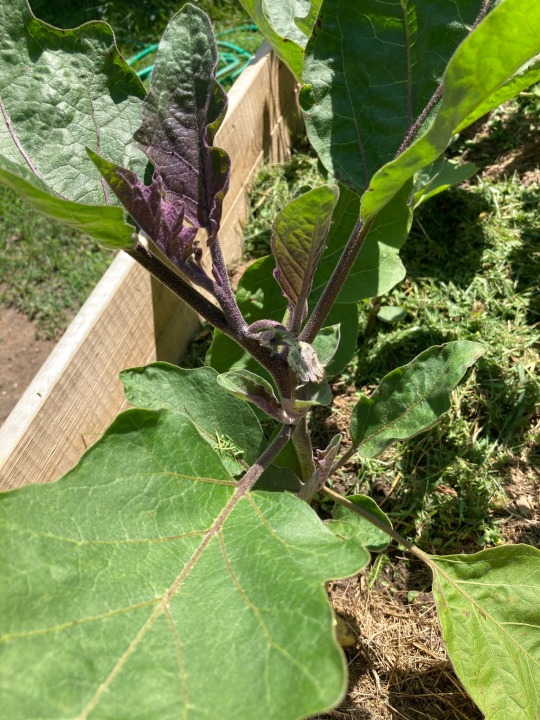
- Planted tomatoes, paprikas, eggplants and cucubers. They are looking pretty good now!
- Created a raised bed, I used the hugelkultur method
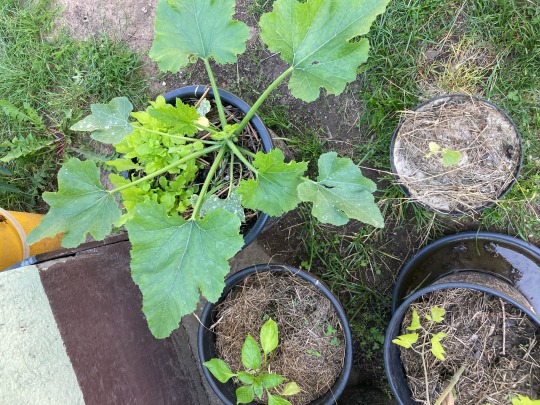
- Lettuce, tomatoes, zucchinis, and sunflowers are getting HUGE
- Ruccola is not growing very well, I might have to find a less sunny spot for them
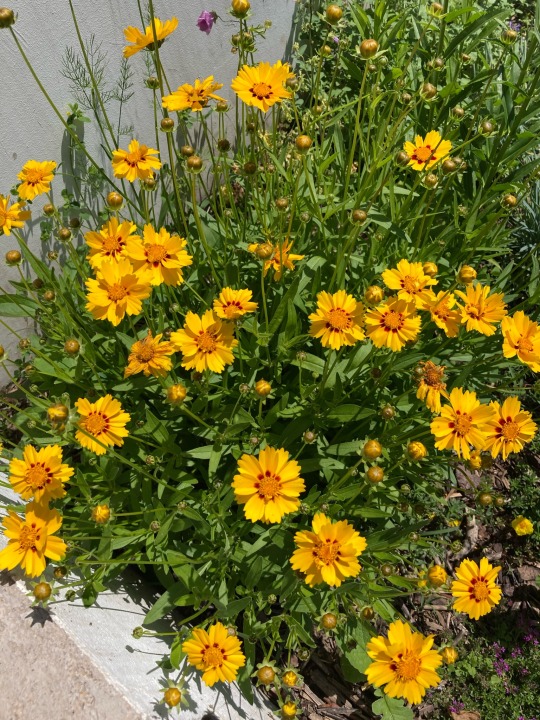
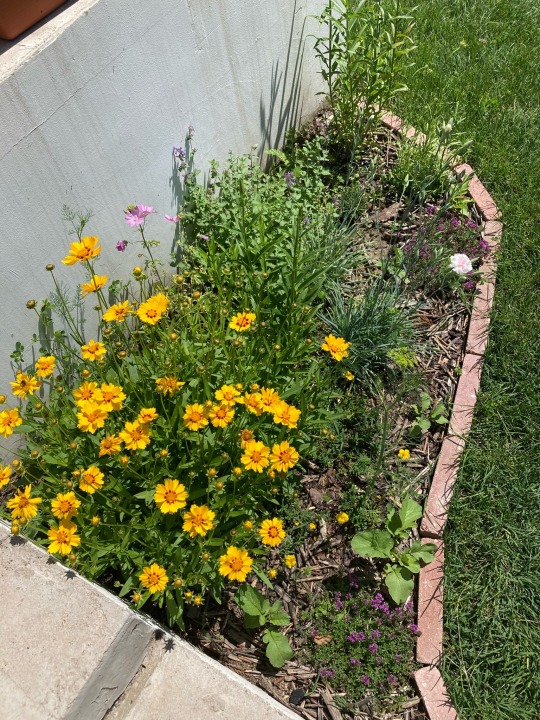
- Coreopsis just started blooming
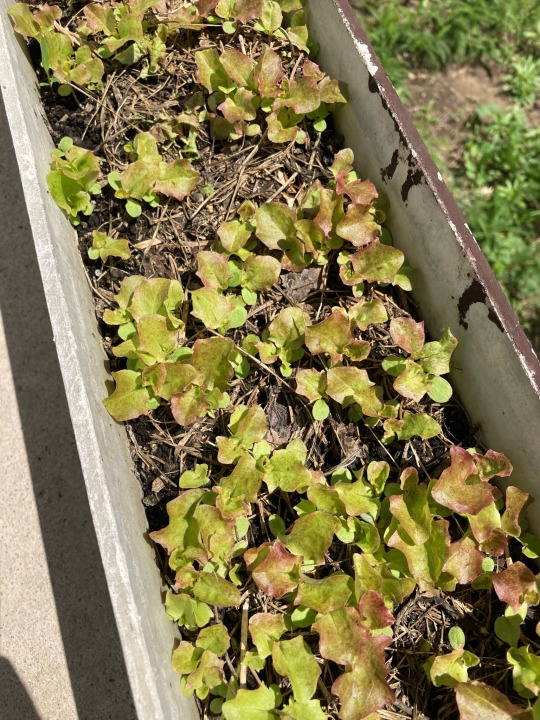
- I got hooked on growing microgreens, I will post a separate little article about it later

#solarpunk#gardening#garden#sustainability#permaculture#garden update#vegetables#container gardening#growing food#balconygarden#raised beds#self sufficiency
72 notes
·
View notes
Text
Hunger
Ghosts need to eat.
And you’re brain’s probably went to a dark place immediately, but no. There’s nothing cannibalistic or depraved about it.
There are plants based on ectoplasm, animals that reform. The Ghost zone simply has food. And ghosts eat it to survive, just as humans do.
In addition, ghosts do not tend to eat in meals.
In the Terminal, that lawless place in the shadow of Pariah’s Keep, they scavenge. They eat frequently, and whatever they can get their hands on.
Whereas in Elysium, the major Greek kingdom, they host meals. Roughly every earth fortnight, they will hold a massive banquet and eat until every one of them is satiated.
In such a place as a kingdom of the ghost zone, none go hungry. It is a value most everybody shares.
Then there is Danny.
Danny who does not know any better, the Phantom who has been starving for so long he is used to it, the boy that eats nothing but the excess ectoplasm his parents make him clean out of the ecto-filtrator.
He knows nothing of food. Has never known anything expect his volatile core and finicky abilities.
oOo
And now that she took a step back and actually looked, Pandora could see. This child’s core was something erratic, as though he’d been consuming raw ectoplasm. And his aura was faint enough that he must have been eating little of that, still.
That- that couldn’t be healthy. Pandora was no expert on the limits of those so liminal as to be halflings, but he was still a child. Even in the Wastes ghosts did not come so unhealthy as this.
But then, if he was liminal, and of the human realm, it was no surprise he didn’t know any better. Had he even ever eaten real food.
She wondered how he had functioned this long, wondered if he even understood there was anything wrong. He was young enough that he could likely digest food most ghosts could not handle, but Pandora did not know how well that would let the child sustain himself, considering she didn’t make a habit of testing the limits of child-stomachs.
So she easily grabbed Daniel in one hand, ignoring his alarmed yelp.
“We need to take you to a doctor at once, little one!” She said, rushing him from the outskirts to the depths of Elysium, paying no mind to his protest.
And if the child became an honored guest at her feasts after that, no one was complaining.
#okay I’m caught up#ghosts kinda just have food idk what to tell you#child ghosts are pretty resilient#Danny’s just been sustaining his half-starved self on toxic portal fluid stuff#not healthy at all#Pandora Frostbite and Clockwork continue to be the only responsible adults in Danny’s life#danny phantom#dp#danny fenton#danny phantom pandora#fanfiction#phicc#dp headcanons#fanfic#dpau#dp au#danny phantom au#ectoberhaunt22#eh chaos#day 10#hunger
396 notes
·
View notes
Text
I find it funny how the Hollow aliens use their abilities to hypnotize other creatures to get food. Like, they have telekinesis, could they not just levitate the berries into their mouths?
So extra ngl
#scavengers reign#scavengers reign spoilers#love them for that#not a criticism in the least in fact I bet there’s a good in universe explanation that just isnt relevent#but also I love the drama. no get food myself only manipulate#maybe the telekinesis isn’t sustainable but the Hollow we see just got too powerful from all that feeding + Kamen interference#it didn’t rlly look like it was self-serving by the time episode five rolls around#for real tho everything about Vesta and this world is so well thought out I’m in awe
32 notes
·
View notes
Text
https://www.tiktok.com/t/ZT8drrR65/
#this is a moot of mine on Tiktok and she has so much good content pls go show some love!!#diy#self sustainability#sustainability#food#canning#gardening#zero waste#save money#tiktok#archive
66 notes
·
View notes
Text
The Atlantis Expedition should have requisitioned at least 120 fertilized chicken eggs and some incubators once the Daedalus could make trips out there. They take 30 days to hatch, so they’d have about 9 days to finish up the henhouse for them before hatch time!
First Pro: You get eggs after 3 months.
Second Pro: If you have at least 1 rooster, your chicken population is self sustaining in population.
Third Pro: You can feed chickens almost anything! They’re omnivores! Just make sure they get enough calcium for their shells! Yes you can feed them eggshells for this, why not? They get binned otherwise.
Fourth Pro: Anything you don’t use you can store by Waterglassing (you just can’t use those eggs for whipping the whites anymore).
Fifth Pro: Trade eggs for other items!
Sixth Pro: Radek with baby birds!!!!!!!
#look I’m not saying they should have an animal husbandry specialist#but I am saying they need self sustaining food!#the amount of times they have to trade for food? what if they also had food to trade for other food?#also radek can play with the chicks#they aren’t pigeons but they’re still birds#stargate atlantis#stargate#radek zelenka#my wormhole
168 notes
·
View notes
Photo


iris sparkler!
#shes blue now#iris sparkler#my ocs#oc#original character#spring mint#iris sparkler is a gardener who travels equestria in her little caravan/shop where she sells her flowers#she got kicked out of her home when she was a teenager so now shes very rough and tumble and self sustaining#she definitely appreciates all she has to the fullest. her favorite food is marshmallows#my art
503 notes
·
View notes
Text

#canning jars#canned vegetables#zero waste#sustainability#homemade#canned food#food waste#eco friendly#eco#sustainable#sustainable living#low impact#ecoconscious#green living#slow living#self sufficiency#off grid living#off grid#slow life#cottage core#low waste living#reduce reuse recycle#reuse#life without plastic#plastic free#country side#grandmacore#cottage vibes
82 notes
·
View notes
Text
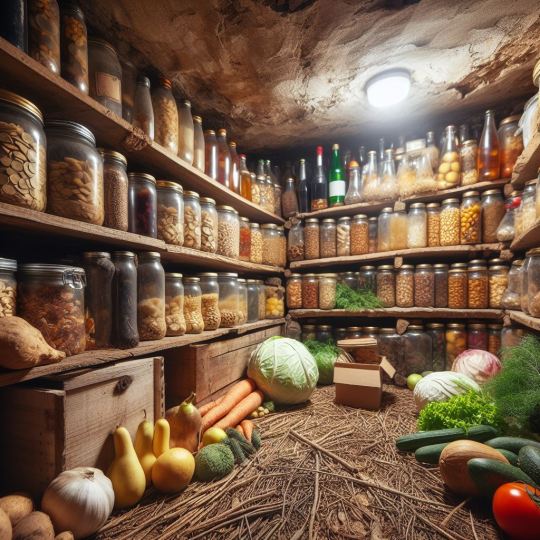
How to Properly Store Your Food Long Term
Storing Oats:
Oats are considered non-perishable, but they can go bad if not stored properly. To store oats for the long term, you must protect them from pantry pests, mold, oxidation, and bad smells. Here are some ways to store oats long-term:
Freezing: Freeze the oats before storage to kill any insect eggs. Store them in an airtight container to protect against moisture and…
View On WordPress
#EmergencyPreparedness#author spiritwalker#collapse#food storage#homesteading#how to#long term food#off grid living#prepare#prepping#self sufficient#sustainable#WW3#WWIII
9 notes
·
View notes
Text
I just wanted to share with you all that there's this bundle sale (until Jan 8th, 2023) for plant-based lifestyle ebooks, guides, courses, and recipes. I'm not associated with it and I tend to find these things a bit gimmicky, but there are a few people who have offered up full-content products (so, it's a good sale to take up, especially if you are one of the following).

I would say it's great if you are:
a vegan athlete,
wanting guidance on eating more whole food plant based or raw vegan,
new to juicing,
needing help with meal planning,
wanting a workout plan to follow,
struggle with plant-based holiday dishes and/or plant-based recipes for your kids,
wanting to learn to grow microgreens/sprouts,
or new to veganism/plant-based living (I definitely think that's THE target audience).
#vegan#raw vegan#whole food plant based#plant based#healthy living#fitblr#lifestyle#recipes#workouts#juicing#fruitarian#vegan athlete#meal planning#microgreens#sustainability#solarpunk#sprouts#holistic health#holistic healing#self healing#vegetarian#high raw#leveling up#self care#veganuary
54 notes
·
View notes
Text
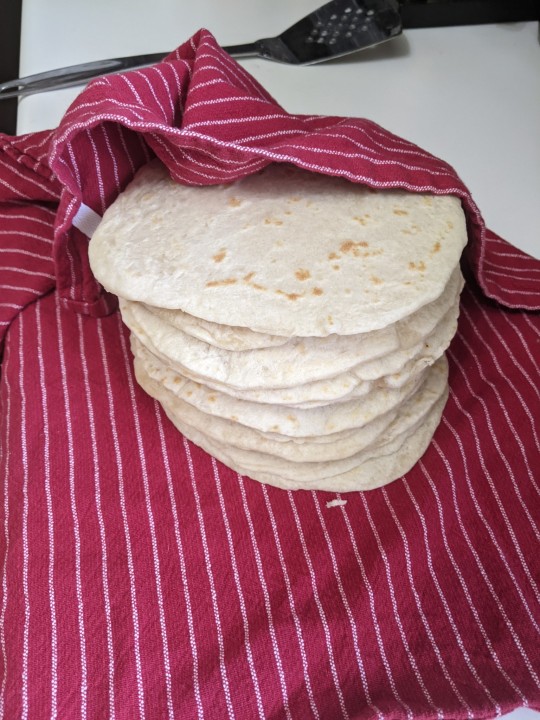
Homemade Flour Tortillas!
2 1/2 cups all purpose flour
1 teaspoon baking powder
2 teaspoons salt
1/2 cup lard, butter, shortening, or oil, room temp
1 cup warm water, approx. 110F
Combine the flour, baking powder, and salt in a bowl.
Using a pastry cutter, fork, or your fingers, break the butter up into the flour mixture until it resembles wet sand, well incorporated.
Add the hot water to the bowl, and gently fold the mixture until a soft dough forms. Do not overmix or overknead, as this will cause the tortillas to be tough.
Once a soft dough ball forms, cover the bowl with plastic wrap, and allow the dough to rest for 20-30 minutes. Do not skip the resting! It is important to let the flour hydrate and gluten relax for a soft tortilla.
Once rested, cut the dough into 8 equally sized pieces. If the dough is too sticky to handle, work on a floured surface. Gently form small dough balls with your hands, and flatten them slightly to make disks. Lightly coat with oil, and cover with a kitchen towel or loose plastic wrap and let rest for another 15 minutes.
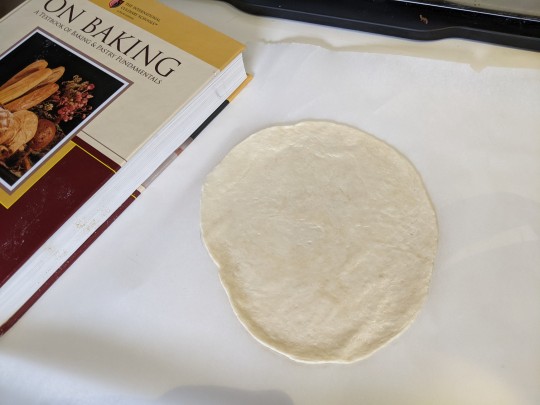
Preheat a skillet or dry pan on medium heat. Working with one dough ball at a time, flatten the dough with your hands, a rolling pin, or a heavy book and parchment paper until the tortilla is as close to 8 inches in diameter as you can get, pretty thin.
Cook the tortilla for about 30-45 seconds on each side, or until yellow gold spots start to form. If you're using the tortillas right away and won't be reheating them on the stove later, cook until golden brown spots form.
Place the tortillas in a folded kitchen towel to cool, allowing them to reach room temperature slowly and retain moisture. Store the tortillas in a sealed container, ziplock, or tightly wrapped plastic wrap for about 5 days, if they even last that long!


#personal fitblr#fitblr#health & fitness#healthblr#fitspo#homemade#made from scratch#tortillas#mexican food#self sustainability#self sufficient living#self sufficiency#cooking#baking#urban homesteading#homesteading#recipes#tortilla recipe
212 notes
·
View notes
Text
Kitchen post today~
With prices being what they are I like a good deal on groceries when I can find it. Sometimes that leads me to buying large quantities of things.
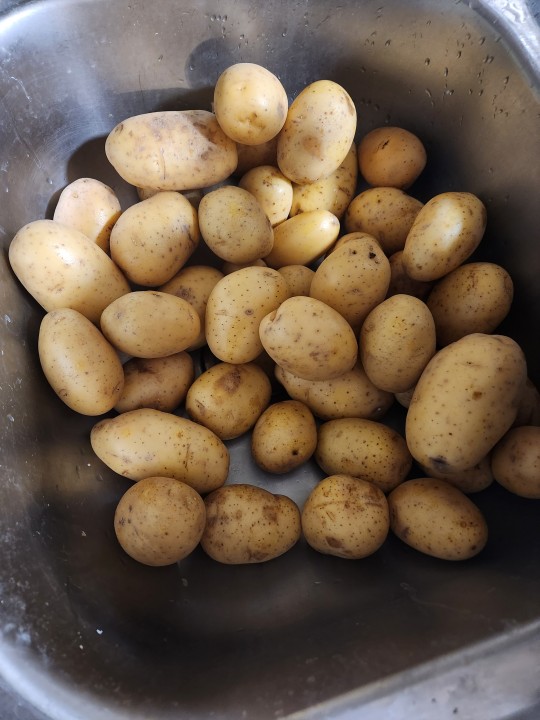
This week the local scratch n dent market had 5 pound bags of golden potatos on sale, 2 for $4. We like potatos so I snagged a few bags. Since i had 2 from last week's groceries I decided to pick through them all.
I tossed a few rotten ones and sorted out the good from the ones getting on the going side. The good ones I put up in a storage tote (a cooking pot for now) for later cooking.
These ones are the contenders for the weekly meal/freezer prep. They had some funny or funky spots, things that can be cut off and thrown away or in the compost. I clean them after washing them well.
As a heads up, it's not suggested to feed chickens raw potatoes. So leave anything with raw potato bits in the trash or the compost bin.
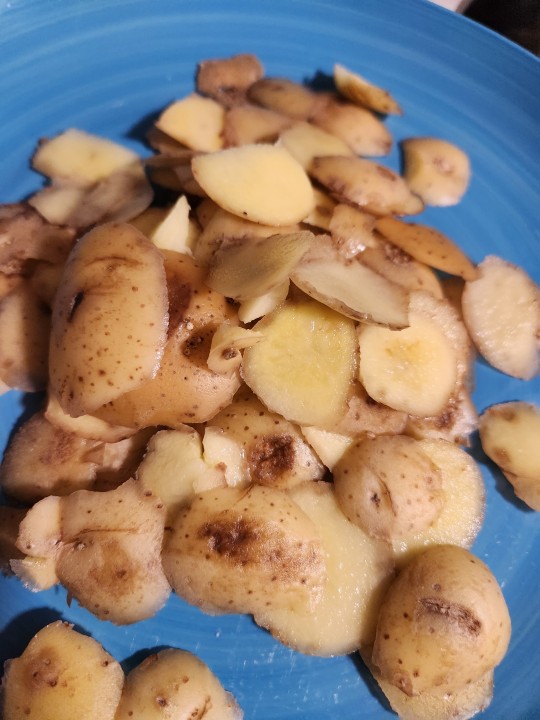
The bad bits.
If you feel need to you can wash them up again. I move to peeling after words.
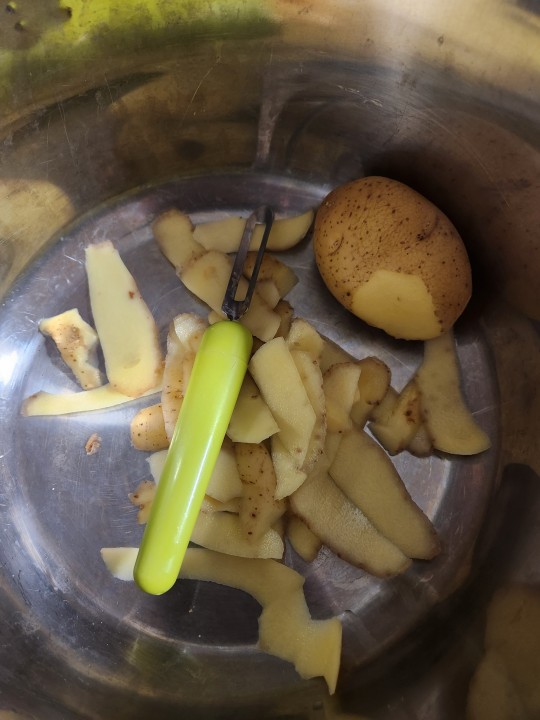
I save the peels for breakfast potatoes, or to make soup.
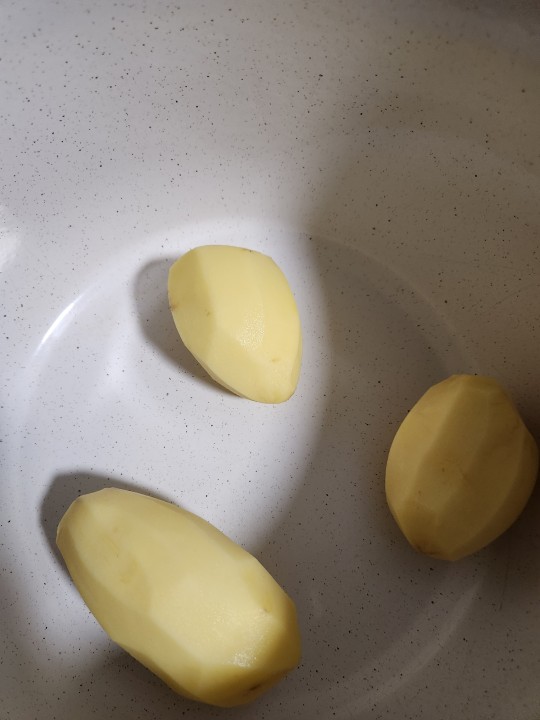
A few peeled spuds.
Afterwords, depending on how many potatoes needed to be processed will decide what im making. This time I had enough potatoes to do cubed potatoes and hashbrown potatoes.
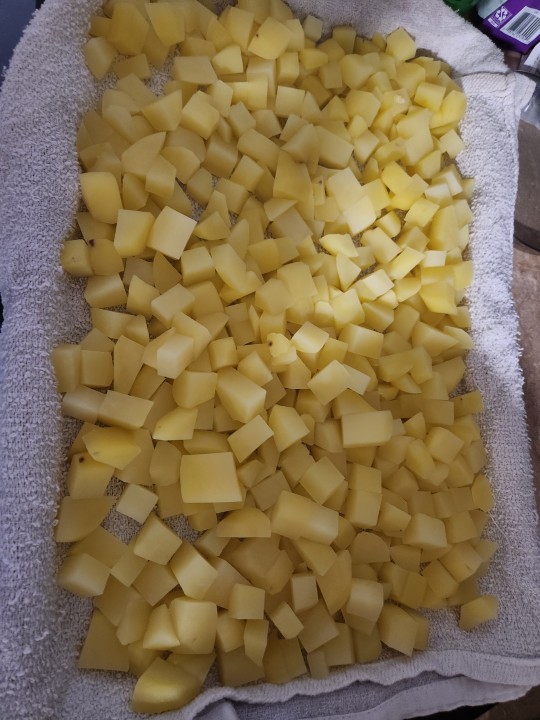
Cube potatoes, then blanch them till all Dante in a pot. (Not quite to mash potatoes softness, but not crunchy.)
Drain, cool quickly. (If your into water conservation, save the water for your plants once cooled) I cool till just under warm and lay them out to drain/dry a bit.
Then take a pan and lay out a clean kitchen towel on it. Pour dry potatoes on and place in freezer till frozen.
Store in container and use like regular frozen potatoes.
Moving to hashed potatoes
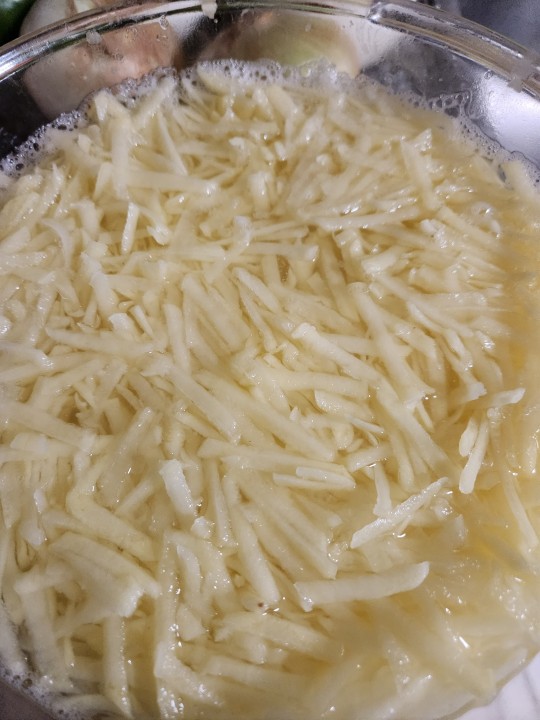
Similar to the cubed potatoes except I grated them.
I like to destarch my potatoes a little so I do a soak for about an hour, drain and then blanch.
I did about 5 minutes to blanch the hash, every couple minutes fish out a peice and test it to see if it's crunchy or just firm. Drain, cool asap.
Lay out to drain and dry a bit.
Lay towel on baking sheet. Place drained hashed potatoes on top. Place in freezer and freeze a few hours.
When frozen package up. Date and use as necessary :)
Other potato freezing/preserving resources
https://www.bbcgoodfood.com/howto/guide/how-to-freeze-potatoes
https://www.motherearthnews.com/real-food/dehydrate-potatoes-for-various-uses-zbcz1507/
🥔🌱Happy Homesteading!🌱🥔
#homesteading#self sufficient living#thestudentfarmer#studentfarmer#self sufficiency#food#garden#gardening#low waste#potato#sustainability#kitchen economics#resources#kitchen#food preservation#preserving freezer#preserving potato#simple eating#urban homesteading#urban farming#rooter to tooter#tip to tail#snout to tail#scrap cooking#budget cooking#small scale solutions
98 notes
·
View notes
Text
So, I’ve brought home more mushrooms than I could possibly eat, and I wanted to preserve some for the winter. My ideal plan was to dry them, but the weather outside is abysmal for drying, all rain, fog, and no sunlight. The heating in the apartment isn’t working yet, or I’d just set them on the radiator in a little newspaper box and they’d dry. But I had to go another route.
I figured I’d freeze a bunch, and I got the instructions that I should blanch them first (meaning, I need to cut them, boil them for 2 minutes, then put them in freezing cold water to stop the cooking, then freeze), and when I finally put them in the freezer, they were not only extremely slimy, but also decided to freeze in one solid rock, which is not very easy to break apart to take little bits out for meals. I decided for the next batch, I’ll try drying instead. Even if it doesn’t work, it’s worth a try.
So I bring out my little homemade drying rack and put the mushrooms to dry, and I couldn’t even set them outside because of how cold and humid it was, so I just set them indoors. I was worried they wouldn’t dry fast enough, and they’d become moldy or start rotting instead of drying, but look at this!

Instead, it worked! I know most of my garden produce would not dry at room temperature, but mushrooms can do it! I let them dry for 4 days, and then finally it was a bit sunny outside, so I set them on the balcony to dry them to that crispy dry level. And now I have a little jar of dried mushrooms!

Extremely easy to use and most importantly they’re NOT SLIMY. I accidentally found out that dried mushrooms are like, ridiculously expensive on the market, I don’t know why, but I feel smug that I could make them on my own.
I also remembered the trick I learned from last year - if something won’t dry completely, you can dry it for a few days on room temperature, and then when you’re using the oven to bake something, you wait until it cools down and it’s just warm in there, and you can set your produce to dry until the end, I dried some apples that way and they were excellent to have as a snack.
#food preservation#diy dried mushrooms#preserving mushrooms#food stash#drying produce#self sustainable#preserving food
80 notes
·
View notes
Text
*picks up Conservative, traditionalist female hobbies but in a feminist, antifascist, anticapitalist kinda way*
#the oracle hath spoken#sucks how for many of them i can't check out online spaces for experiences tips and resources#bc most of them fall under prepper- homesteading-activities so they're RIDDLED with fascists of all flavours#and adjacent weirdos i cannot tolerate ethically and politically#i just wanna become more sustainable and self-sufficient! but in a communal way#i'm way too comfortable and neurotic to like start fires and go foraging#so u know. gotta contribute to the post-revolutionary community somehow. without getting cold and wet#anyway mending clothes is punk and so is knitting and growing food#we only got three strawberries and one chili this year but those were very tasty!#i think the chili was tasty it was way too hot to tell but that means it was grown right right?#improvement!
69 notes
·
View notes
Last Seen Blogs

revitalubrewcoffee-blog
RevitalUbrew Coffee Weightloss

myfeatheredflock
Birbs Of A Feather


qristine-live-blog
Дневник 30.0

patentebcompra
Compra Patente B