#create an html element in javascript
Explore tagged Tumblr posts
Visit Tumblr Blog
Explore Tumblr blogs with no restrictions, modern design and the best experience.
Last Seen Tumblr Blogs


Fun Fact
Tumblr.com rank in the US is 25.
Text
Working on my javascript for my web page. Turns out I have the perfect kind of setup to accomplish some of the project requirements, specifically with even handlers and user interactions
My website, conceptually, will load a different employee details page depending on what employee name is clicked on. But I need to load it dynamically (instead of hard-coding it) so that the user can add or delete employees & it'll be able to still load the relevant shit.
So! Only one employee details page, but depending on how it's loaded, it'll load a different employee's information. Still working on getting down Exactly how to do it (I'm thinking using URL parameters that'll read a different object depending on what ID is used)
It's entirely doable. In fact, it's probably extremely common to do in web pages. No one wants to hard-code information for every new object. Of course not. And thus the usefulness of dynamic javascript stuff.
I can do this. I can very much do this.
#speculation nation#i wasnt very good when i got home and i read fanfic for a while#then took a nap. and now im up again and Getting To Work.#i dont have to have this 100% perfect for final submission just yet. bc final submission isnt today.#but i need to have my final presentation over my thing done by noon (11 hours from now)#and im presenting TODAY. and part of that will be giving a live demo of my project website#so. i need to have all of the core functionality of my website down at the Very Least#might not be perfect yet. but by god if im gonna show up to my presentation with my website not working.#i need to have the employee list lead to employee details with personalized information displayed per employee#i need to create an add employee field that will Actually add an employee. using a form.#and that employee will need to show up on the list and have a new id and everything. the works.#need to set it up so that employees can be deleted. shouldnt be too much extra.#and it would be . interesting. to give an actual 'login' pop-up when someone clicks on the login button#with some kind of basic info as the login parameters. this cant be that hard to code.#the project requirements are: implement 5 distinct user interactions using javascript. at least 3 different eventhandlers#at least 5 different elements with which interaction will trigger an event handler. page modification & addition of new elements to pages#3 different ways of selecting elements. one selection returning collection of html elements with customized operations on each...#hm. customized operations on each... the example given is a todo list with different styles based on if an item is overdue or not#i wonder if my personalized detail page loading would count for this... i also have some extra info displayed for each#but i specifically want the employees to be displayed in the list uniformly. that's kinda like. The Thing.#actually im poking around on my web pages i made previously and i do quite enjoy what i set up before.#need to modify the CSS for the statistics page and employee details to make it in line with what i actually wanted for it#maybe put a background behind the footer text... i tried it before & it was iffy in how it displayed...#but it looks weird when it overlaps with a page's content. idk that's just me being particular again.#theres also data interchange as a requirement. but that should be easy if i set an initial employee list as a json file#good god im going to have to think of so much extra bullshit for these 10 made up employees#wah. this is going to be a lot of work. but. im going to do it. i just wont get very much sleep tonight.#that's ok tho. ive presented under worse conditions (cough my all nighter when i read 3gun vol 10 and cried my eyes out)#and this is going to be the last night like this of my schooling career. the very last one.#just gotta stay strong for one more night 💪💪💪
6 notes
·
View notes
Text
The Secrets of a Skilled WordPress Designer
A WordPress designer is a skilled professional adept at crafting dynamic and visually compelling websites using the WordPress platform. With expertise in both front-end and back-end development, a WordPress design, such as Jane Web Solutions, possesses a deep understanding of the platform's functionalities and customization options. They specialise in creating responsive, user-friendly designs that align with clients' brand identities and objectives. Jane Web Solutions stands out for their proficiency in leveraging WordPress's vast plugin ecosystem, ensuring seamless integration of features for enhanced website functionality. Whether designing corporate websites, blogs, or e-commerce platforms, a WordPress design plays a crucial role in delivering tailored, aesthetically pleasing, and functional websites that cater to the unique needs of clients and provide an engaging online experience for their audiences.
Role and Responsibilities of a WordPress Designer
A WordPress designer is a crucial professional responsible for creating visually appealing and functional websites using the WordPress platform. Their primary role involves translating client requirements into engaging website designs, ensuring a seamless user experience. They collaborate with clients to understand their brand identity and objectives, integrating these elements into the overall design.
Technical Proficiency and Skills
A skilled WordPress possesses a comprehensive understanding of HTML, CSS, and JavaScript, alongside in-depth knowledge of WordPress themes, plugins, and customization options. Proficiency in graphic design tools such as Adobe Photoshop or Illustrator is often essential. This technical expertise enables them to transform creative concepts into fully functional and responsive WordPress websites.
Customization and Theme Development
A designer excels in customization, tailoring websites to meet unique client needs. They adeptly navigate theme development, ensuring that the design aligns with the client's branding while maintaining optimal performance and responsiveness across various devices. The ability to create custom themes or modify existing ones showcases their versatility in adapting to diverse project requirements.
User-Centric Design and Accessibility
An effective WordPress designes prioritises user-centric design, creating interfaces that enhance user experience and accessibility. They consider factors such as intuitive navigation, readability, and mobile responsiveness to ensure that the website engages visitors effectively. Implementing accessibility features is crucial to make the website inclusive and compliant with industry standards.
SEO Integration and Optimization
A proficient designer understands the importance of search engine optimization (SEO) for a website's visibility. They integrate SEO best practices during the design phase, optimising elements like meta tags, headers, and image alt text. This proactive approach contributes to better search engine rankings and increased online visibility for the client's website.
Client Collaboration and Communication
Successful WordPress designer prioritise effective communication and collaboration with clients. They engage in thorough consultations to grasp the client's vision, providing regular updates and seeking feedback throughout the design process. Clear communication ensures that the final product aligns with the client's expectations and goals.
Adaptability and Continuous Learning
The dynamic nature of web design and technology requires designers to stay abreast of the latest trends, updates, and tools. A commitment to continuous learning and adaptability to evolving industry standards sets apart an excellent designer. This ensures that they can leverage new features and technologies to deliver innovative and up-to-date website solutions for their clients.
Conclusion
Engaging a skilled WordPress designer is paramount for a successful online presence. A proficient designer, like XYZ WordPress Designs, brings expertise in leveraging the versatile capabilities of the WordPress platform. With a proven track record of creating visually stunning and functionally robust websites, XYZ WordPress Designs stands out for its commitment to customization, ensuring each website reflects the unique identity and goals of the client. Their proficiency in optimising for responsiveness and user experience underscores their dedication to delivering websites that not only captivate audiences but also function seamlessly across devices. By choosing XYZ WordPress Designs, clients can expect a harmonious blend of aesthetic appeal and technical excellence, resulting in a dynamic and impactful online representation tailored to their specific needs.
#a WordPress design#such as Jane Web Solutions#possesses a deep understanding of the platform's functionalities and customization options. They specialise in creating responsive#user-friendly designs that align with clients' brand identities and objectives. Jane Web Solutions stands out for their proficiency in leve#ensuring seamless integration of features for enhanced website functionality. Whether designing corporate websites#blogs#or e-commerce platforms#a WordPress design plays a crucial role in delivering tailored#aesthetically pleasing#and functional websites that cater to the unique needs of clients and provide an engaging online experience for their audiences.#Role and Responsibilities of a WordPress Designer#A WordPress designer is a crucial professional responsible for creating visually appealing and functional websites using the WordPress plat#ensuring a seamless user experience. They collaborate with clients to understand their brand identity and objectives#integrating these elements into the overall design.#Technical Proficiency and Skills#A skilled WordPress possesses a comprehensive understanding of HTML#and JavaScript#plugins#buy perfume online#A WordPress designer is a skilled professional adept at crafting dynamic and visually compelling websites using the WordPress platform. Wit#CSS#alongside in-depth knowledge of WordPress themes#and customization options. Proficiency in graphic design tools such as Adobe Photoshop or Illustrator is often essential. This technical ex#Customization and Theme Development#A designer excels in customization#tailoring websites to meet unique client needs. They adeptly navigate theme development#ensuring that the design aligns with the client's branding while maintaining optimal performance and responsiveness across various devices.#User-Centric Design and Accessibility#An effective WordPress designes prioritises user-centric design#creating interfaces that enhance user experience and accessibility. They consider factors such as intuitive navigation
0 notes
Text
A structured way to learn JavaScript.
I came across a post on Twitter that I thought would be helpful to share with those who are struggling to find a structured way to learn Javascript on their own. Personally, I wish I had access to this information when I first started learning in January. However, I am grateful for my learning journey so far, as I have covered most topics, albeit in a less structured manner.
N/B: Not everyone learns in the same way; it's important to find what works for you. This is a guide, not a rulebook.
EASY
What is JavaScript and its role in web development?
Brief history and evolution of JavaScript.
Basic syntax and structure of JavaScript code.
Understanding variables, constants, and their declaration.
Data types: numbers, strings, boolean, and null/undefined.
Arithmetic, assignment, comparison, and logical operators.
Combining operators to create expressions.
Conditional statements (if, else if, else) for decision making.
Loops (for, while) for repetitive tasks. - Switch statements for multiple conditional cases.
MEDIUM
Defining functions, including parameters and return values.
Function scope, closures, and their practical applications.
Creating and manipulating arrays.
Working with objects, properties, and methods.
Iterating through arrays and objects.Understanding the Document Object Model (DOM).
Selecting and modifying HTML elements with JavaScript.Handling events (click, submit, etc.) with event listeners.
Using try-catch blocks to handle exceptions.
Common error types and debugging techniques.
HARD
Callback functions and their limitations.
Dealing with asynchronous operations, such as AJAX requests.
Promises for handling asynchronous operations.
Async/await for cleaner asynchronous code.
Arrow functions for concise function syntax.
Template literals for flexible string interpolation.
Destructuring for unpacking values from arrays and objects.
Spread/rest operators.
Design Patterns.
Writing unit tests with testing frameworks.
Code optimization techniques.
That's it I guess!
873 notes
·
View notes
Text
Convert HTML to Image: A Step-by-Step Guide ✨

Do you want to turn some HTML code you've made that's on your website and have a way to convert it into an image for you to save?
Well, look no further! I too wanted to do the same thing but funny enough, there weren't any straightforward tutorials out there that could show you how! After hours of searching, I finally discovered the solution~!
This is an old tutorial I made 🐼

💛 Set your environment
Before we dive into the conversion process, I'll assume you already have your HTML code ready. What you want to learn is how to turn it into an image file. You should have a good grasp of HTML and JavaScript. For this tutorial, we'll use the following HTML code example:

We won't include the CSS code, as it doesn't affect this tutorial. The JavaScript file (script.js) at the bottom of the body element is where we'll add the functionality for the conversion.
Your page should resemble the following:

As you can see, the "Click me" button will handle the conversion. We aim to convert everything within the div.info-div into an image.
💛 Using the html2canvas JavaScript Library
The html2canvas library allows you to take screenshots of webpages and target specific elements on a screen. Here are the steps to include the library in your project:
The steps to put the library in your project:
Visit the html2canvas website for more information.
Copy the CDN link from here

and include it in a script tag in your project's head tag in the HTML file:

That's it for including the library on the HTML side. Now, let's move on to the JavaScript code.
💛 JavaScript Functionality
Here's the JavaScript code to handle the conversion:

In this code, I want to turn the whole div.info-div into an image, I put it into a variable in const div = document.querySelector(".info-div");.
I also put the button into a variable in const button = document.querySelector("button");
I added a click event listener to the button so when the user clicks the button, it will follow the code inside of the event listener!
You can find similar code like this in the documentation of the html2canvas library:

What is happening here is:
We add the div (or what the element we want to take an image of) into the html2canvas([element]).then((canvas)
Added the image file type url to a variable = const imageDataURL = canvas.toDataURL("image/png"); - You can replace the png to other image file types such as jpg, jpeg etc
Created an anchor/link tag, added the href attribute to imageDataURL
The download attribute is where we will give the default name to the image file, I added "dog.png"
Perform the click() function to the anchor tag so it starts to download the image we created
And that's it!
💛 The End
And that's it! You've successfully learned how to turn your HTML into an image. It's a great way to save and share your web content in a unique format.

If you have any questions or need further clarification, please comfortable to ask. Enjoy converting your HTML into images! 💖🐼
#my resources#coding#codeblr#programming#progblr#studying#studyblr#programmer#html#html css#javascript#neocities#coding tips#html5 tutorial#html tutorial
157 notes
·
View notes
Text
Web designer in Jodhpur
Creative Web Design
We are a web designing company that has a team of skilled and experienced web designers and developers who can create stunning and functional websites for any type of business or domain. We offer a variety of web designing services, such as custom web design, web development, web hosting, SEO, and maintenance. We also provide you with a free web design consultation, where we can discuss your goals, needs, and preferences, and provide you with a web design proposal that suits your requirements and expectations.
What we do in Web Design
Our web designing services are the services that provide web designing solutions for clients who want to create or improve their online presence. It involves the use of various elements such as colours, fonts, images, graphics, animations, and interactions to convey the message and purpose of the website to visitors. Web designing services can help clients with various aspects of web designing, such as Consultation: Our web designing services can help clients understand their goals, needs, and preferences, and provide them with expert advice and guidance on how to achieve them . Strategy: Our services can help clients develop a clear and effective web design strategy that aligns with their brand identity, target audience, and business objectives.Design: We help clients create a unique and attractive web design that reflects their vision and personality, and that engages and impresses their visitors.Launch: Our services can help clients launch their website to the public, and provide them with web hosting, domain registration, and security services.
Our Design Technology
At Web Farm House, we understand that web design is not just about making a website look good. It is also about making it work well, communicate effectively, and provide value to the users. That is why we use the latest web design technology to create websites that are:
Visually appealing: We use web graphic design to create stunning and consistent visual elements for your website, such as colours, fonts, images, icons, and animations.
Easy to use: We use user interface design to create intuitive and interactive elements for your website, such as buttons, menus, forms, and navigation.
Functional and reliable: We use web development to code and program your website, using languages such as HTML, CSS, JavaScript, PHP, and others. We follow the principles of web standards, web accessibility, web performance, and web security, to ensure the quality and reliability of your website.
Our Work Process
At Web Farm House, we follow a systematic and collaborative work process to create your website. Our work process consists of four main phases: Discovery, Design, Development, and Delivery:
Discovery: This is the phase where we get to know you and your project. We will ask you some questions about your goals, needs, preferences, budget, and timeline. We will also conduct some research on your industry, competitors, and target audience. Based on the information we gather, we will create a project proposal and a contract for you to review and approve.
Design: This is the phase where we create the visual and interactive elements of your website. We will start by creating a sitemap and a wireframe, which are the blueprints of your website’s structure and layout. We will then create a mockup, which is a prototype of your website’s appearance and functionality. We will present the mockup to you and ask for your feedback and approval. We will make any revisions as needed until you are satisfied with the design.
Development: This is the phase where we code and program your website. We will use the latest web development technology to create a website that is functional, reliable, and compatible with different devices and browsers. We will also test and debug your website to ensure its quality and performance. We will show you the progress of the development and ask for your feedback and approval.
Delivery: This is the final phase where we launch and maintain your website. We will upload your website to your chosen hosting service and domain name. We will also provide you with a user manual and a training session on how to use and update your website. We will also offer you ongoing support and maintenance services to keep your website running smoothly and securely.
We will also listen to your feedback and suggestions and make any changes as needed. We will work with you as a partner and a friend, not just as a client and a vendor. we value your input and satisfaction throughout the work process. We will communicate with you regularly and keep you updated on the status of your project.
Our Web Designing Services
Our is provides web design services for clients who want to create or improve their online presence. We help clients with various aspects of web designing, such as consultation, strategy, design, development, testing, launch, and maintenance:
Static web design
Liquid web design.
Adaptive web design.
Dynamic web design.
Responsive web design.
Single-page web design.
Why Choose Us?
We are a One-Stop Solution for delivering the best web design and development services. We render customized and affordable web design facilities to suit your requirements. Choose the best plans for building a responsive web design according to your needs:
Excellent technical support
Core PHP &Codeigniter + MySQL.
Secure and Reliable coding.
Satisfactory Customer Support.
SEO-friendly web development.
33 notes
·
View notes
Text
JavaScript Fundamentals
I have recently completed a course that extensively covered the foundational principles of JavaScript, and I'm here to provide you with a concise overview. This post will enable you to grasp the fundamental concepts without the need to enroll in the course.
Prerequisites: Fundamental HTML Comprehension
Before delving into JavaScript, it is imperative to possess a basic understanding of HTML. Knowledge of CSS, while beneficial, is not mandatory, as it primarily pertains to the visual aspects of web pages.
Manipulating HTML Text with JavaScript
When it comes to modifying text using JavaScript, the innerHTML function is the go-to tool. Let's break down the process step by step:
Initiate the process by selecting the HTML element whose text you intend to modify. This selection can be accomplished by employing various DOM (Document Object Model) element selection methods offered by JavaScript ( I'll talk about them in a second )
Optionally, you can store the selected element in a variable (we'll get into variables shortly).
Employ the innerHTML function to substitute the existing text with your desired content.
Element Selection: IDs or Classes
You have the opportunity to enhance your element selection by assigning either an ID or a class:
Assigning an ID:
To uniquely identify an element, the .getElementById() function is your go-to choice. Here's an example in HTML and JavaScript:
HTML:
<button id="btnSearch">Search</button>
JavaScript:
document.getElementById("btnSearch").innerHTML = "Not working";
This code snippet will alter the text within the button from "Search" to "Not working."
Assigning a Class:
For broader selections of elements, you can assign a class and use the .querySelector() function. Keep in mind that this method can select multiple elements, in contrast to .getElementById(), which typically focuses on a single element and is more commonly used.
Variables
Let's keep it simple: What's a variable? Well, think of it as a container where you can put different things—these things could be numbers, words, characters, or even true/false values. These various types of stuff that you can store in a variable are called DATA TYPES.
Now, some programming languages are pretty strict about mentioning these data types. Take C and C++, for instance; they're what we call "Typed" languages, and they really care about knowing the data type.
But here's where JavaScript stands out: When you create a variable in JavaScript, you don't have to specify its data type or anything like that. JavaScript is pretty laid-back when it comes to data types.
So, how do you make a variable in JavaScript?
There are three main keywords you need to know: var, let, and const.
But if you're just starting out, here's what you need to know :
const: Use this when you want your variable to stay the same, not change. It's like a constant, as the name suggests.
var and let: These are the ones you use when you're planning to change the value stored in the variable as your program runs.
Note that var is rarely used nowadays
Check this out:
let Variable1 = 3; var Variable2 = "This is a string"; const Variable3 = true;
Notice how we can store all sorts of stuff without worrying about declaring their types in JavaScript. It's one of the reasons JavaScript is a popular choice for beginners.
Arrays
Arrays are a basically just a group of variables stored in one container ( A container is what ? a variable , So an array is also just a variable ) , now again since JavaScript is easy with datatypes it is not considered an error to store variables of different datatypeslet
for example :
myArray = [1 , 2, 4 , "Name"];
Objects in JavaScript
Objects play a significant role, especially in the world of OOP : object-oriented programming (which we'll talk about in another post). For now, let's focus on understanding what objects are and how they mirror real-world objects.
In our everyday world, objects possess characteristics or properties. Take a car, for instance; it boasts attributes like its color, speed rate, and make.
So, how do we represent a car in JavaScript? A regular variable won't quite cut it, and neither will an array. The answer lies in using an object.
const Car = { color: "red", speedRate: "200km", make: "Range Rover" };
In this example, we've encapsulated the car's properties within an object called Car. This structure is not only intuitive but also aligns with how real-world objects are conceptualized and represented in JavaScript.
Variable Scope
There are three variable scopes : global scope, local scope, and function scope. Let's break it down in plain terms.
Global Scope: Think of global scope as the wild west of variables. When you declare a variable here, it's like planting a flag that says, "I'm available everywhere in the code!" No need for any special enclosures or curly braces.
Local Scope: Picture local scope as a cozy room with its own rules. When you create a variable inside a pair of curly braces, like this:
//Not here { const Variable1 = true; //Variable1 can only be used here } //Neither here
Variable1 becomes a room-bound secret. You can't use it anywhere else in the code
Function Scope: When you declare a variable inside a function (don't worry, we'll cover functions soon), it's a member of an exclusive group. This means you can only name-drop it within that function. .
So, variable scope is all about where you place your variables and where they're allowed to be used.
Adding in user input
To capture user input in JavaScript, you can use various methods and techniques depending on the context, such as web forms, text fields, or command-line interfaces.We’ll only talk for now about HTML forms
HTML Forms:
You can create HTML forms using the <;form> element and capture user input using various input elements like text fields, radio buttons, checkboxes, and more.
JavaScript can then be used to access and process the user's input.
Functions in JavaScript
Think of a function as a helpful individual with a specific task. Whenever you need that task performed in your code, you simply call upon this capable "person" to get the job done.
Declaring a Function: Declaring a function is straightforward. You define it like this:
function functionName() { // The code that defines what the function does goes here }
Then, when you need the function to carry out its task, you call it by name:
functionName();
Using Functions in HTML: Functions are often used in HTML to handle events. But what exactly is an event? It's when a user interacts with something on a web page, like clicking a button, following a link, or interacting with an image.
Event Handling: JavaScript helps us determine what should happen when a user interacts with elements on a webpage. Here's how you might use it:
HTML:
<button onclick="FunctionName()" id="btnEvent">Click me</button>
JavaScript:
function FunctionName() { var toHandle = document.getElementById("btnEvent"); // Once I've identified my button, I can specify how to handle the click event here }
In this example, when the user clicks the "Click me" button, the JavaScript function FunctionName() is called, and you can specify how to handle that event within the function.
Arrow functions : is a type of functions that was introduced in ES6, you can read more about it in the link below
If Statements
These simple constructs come into play in your code, no matter how advanced your projects become.
If Statements Demystified: Let's break it down. "If" is precisely what it sounds like: if something holds true, then do something. You define a condition within parentheses, and if that condition evaluates to true, the code enclosed in curly braces executes.
If statements are your go-to tool for handling various scenarios, including error management, addressing specific cases, and more.
Writing an If Statement:
if (Variable === "help") { console.log("Send help"); // The console.log() function outputs information to the console }
In this example, if the condition inside the parentheses (in this case, checking if the Variable is equal to "help") is true, the code within the curly braces gets executed.
Else and Else If Statements
Else: When the "if" condition is not met, the "else" part kicks in. It serves as a safety net, ensuring your program doesn't break and allowing you to specify what should happen in such cases.
Else If: Now, what if you need to check for a particular condition within a series of possibilities? That's where "else if" steps in. It allows you to examine and handle specific cases that require unique treatment.
Styling Elements with JavaScript
This is the beginner-friendly approach to changing the style of elements in JavaScript. It involves selecting an element using its ID or class, then making use of the .style.property method to set the desired styling property.
Example:
Let's say you have an HTML button with the ID "myButton," and you want to change its background color to red using JavaScript. Here's how you can do it:
HTML: <button id="myButton">Click me</button>
JavaScript:
// Select the button element by its ID const buttonElement = document.getElementById("myButton"); // Change the background color property buttonElement.style.backgroundColor = "red";
In this example, we first select the button element by its ID using document.getElementById("myButton"). Then, we use .style.backgroundColor to set the background color property of the button to "red." This straightforward approach allows you to dynamically change the style of HTML elements using JavaScript.
#studyblr#code#codeblr#css#html#javascript#java development company#python#study#progblr#programming#studying#comp sci#web design#web developers#web development#website design#ui ux design#reactjs#webdev#website#tech
400 notes
·
View notes
Text
I currently have my latest blogpost for my website displayed on my front page. If you click on the title, it will take you to the post. I essentially grab the Title, which is a class of h1, and the article, using javascript, and then replace it. However, right now, this is done by manually replacing the href of the javascript. This works; I just create a post, copy the link, and paste it into the script in my home page.
Problem; I am already maintaining my rss feed manually. Why should I do *this* manually? I kind of want to not do either manually.
Solution: Javascript can be used to parse a xml doc. This includes rss feeds. I can simply make a script that, when you load up the webpage, it will request the most recent version of the .xml file associated with my file, then find the one with the most recent pubDate, it will then grab the link from that, and use my existing script to display it on my homepage.
As for updating my rss feed? I may need to create a php script for that. I just need two forms, and a submit button. One will take a link, and the other would be the password. So, I create a new blogpost, upload it, and then copy the link into the form. The password field will be used to create a cryptographic hash, and if it matches the provided one, then it will create a timestamp, and add the item, complete with links, to the html file. I could add in a hidden description to the blogpost, and the script can rip the description from there. Its pretty simple, and I wouldn't trust this authentication process... except that it is extremely limited in scope. All it does is accept a link already part of my blog, and updates an xml document - one I regularly back-up.
I also want to make a script that would get the previous and next posts on the blog, based on the info already in the xml document, rather than manually updating the existing blogposts. It doesn't take long, but it would be one less thing I have to worry about. I just have to match the current link to one in the xml file, get the timestamp, and find the item with the previous and next timestamp, then inject the links into the previous/next buttons. I can use a span element that will be updated to show up once a new document is found by the script.
If I was making one that actually allowed you to write a blogpost - complete with html - then I would want better security - like some form of 2 factor authentication. My authentication script would work. I would also want it limited to posting based on the time (like 1 post per x minutes). I may actually do that later. It would be nice to just go to my site, use my passkey+password authenticator, and then just post to my blog. It would have a form for the title, short description, and the main post. Then, it takes that info, and essentially pastes it into a provided template.
I could also make a similar system for the site-updates and little blurb on the top. Currently, I just edit the html for that. But I could also make an xml document, and just have the posts contained in items like an rss feed, then have the javascript read from there. Use a php script to add new entries to it. They could even be in the same file, just have to use two different elements.
Finally, on the main page, you can click on the title of the blog post to link there. This is done via script, so there is no mouseover indication that you can do this. I want to make the title element change a bit when you mouseover it - perhaps make it a little paler on mouseover?
9 notes
·
View notes
Text
Very easy BBCode spoiler for jcink

The native <details> HTML element is mobile friendly, accessible, keyboard navigable, javascript-free, and very easy to style with a little CSS.
Create a new custom BBCode and choose "2 Param Type". Use this code for the HTML conversion:
<details><summary>(PARAM1)</summary>(PARAM2)</details>
Example styling:
details { padding: 1rem; background: var(--black-dark); } summary { font-size: 1.15rem; font-family: var(--font-accent); text-transform: uppercase; font-weight: 500; cursor: pointer; } details[open] summary { margin-bottom: 1rem; padding-bottom: 1rem; border-bottom: 1px solid var(--accent-1); }
4 notes
·
View notes
Text
Over an hour ago, I opened Ao3 on my phone to relax before sleeping
Found a fic that seemed promising, but it had justify-aligned text that looked atrocious on mobile
But it's no big deal. I'll just scroll up and disable the author's work-skin
There is no disable work-skin button
Went to update my site skin to force left-aligned text. Just one line of CSS. Should be easy
I reload the fic?
Still justified
Spend a few minutes searching Firefox Android's pitifully neutered dropdown and settings menus for its equivalent of the desktop "show page source" option when right-clicking on a website
There is no show page source option
I google how to show a page's html source on Firefox Android and learn that you do it by going to the start of the address bar and typing "view-source:[and then your URL]"
I meticulously type it on my phone's touch keyboard to view the source of the Ao3 fic in question
The text is justify-aligned using HTML, which means no amount of site-skin CSS tinkering will allow me to change it to left-aligned
FUCK
I google how to force-align text on Ao3 to the left
The results?
"Disable author's work skin" "Use a site-skin" "Use this Google Chrome extension" "Use a Firefox addon that only works on desktop" "Change some settings in your about:config, the advanced settings menu that Firefox Android doesn't get access to" "Use this OTHER Google Chrome extention"
After sifting through completely useless advice, I eventually find an actual working solution:
create a bookmarklet that uses javascript that loops through all the text in the page that's justify-aligned and have it instead display left-aligned text
It has been ten years since I last touched javascript, back when I was learning it in high school, but I'm sure some cursory google searches should derust me enough to do some basic code.
I got out of bed and booted my PC.
Reading some basics and primers did not derust me to do some basic code. Not from scratch.
But it did jog my memory enough that I could steal some existing code that did something similar to what I needed and just change the right parts to make it do what I want
Anyway, just tested it and it works! Triumph!
Unfortunately, now I'm wide awake, exhausted, and have no desire to continue reading this fic
BIG, RESIGNED SIGH...
Goodnight, everyone...
btw, here's the code if you need it
javascript:(function(){ const elements = document.querySelectorAll('[align="justify"]'); elements.forEach(el => el.style.textAlign = 'left'); })();
create a new bookmark and put this code in the bookmark's URL. Clicking it will force all text that's justify-aligned using HTML to be left-aligned. Every website nowadays uses CSS to align their text so you're likely only gonna use this for Ao3 fics.
5 notes
·
View notes
Video
youtube
YouTube Intro Splash Screen Animation Using Only HTML & CSS | No JavaScript
🔥 Recreate YouTube's iconic intro animation using only HTML and CSS — no JavaScript required! In this quick and easy tutorial, you'll learn how to build a stunning, smooth animation just like the YouTube app splash screen.
👨💻 Whether you're a beginner or a pro, this CSS animation trick will level up your UI game!
✅ What You’ll Learn: • How to animate elements with keyframes • How to center and style elements with flexbox • How to create a triangle play icon using clip-path • How to mimic professional splash screens
2 notes
·
View notes
Text
Anyone can program (yes, even you)
"Programming is easy"
I saw some variations of this statement shared around the site recently, always in good intentions of course, but it got me thinking.
Is that really true?
Well it certainly isn't hard in the way some developers would want to make you believe. A great skill bestowed only upon the greatest of minds, they're the ones making the world work. You better be thankful.
That is just elitist gibberish. If anyone ever tells you that programmers are "special people" in that way, or tries to sell you on the idea of "real" programmers that are somehow better than the rest, you can safely walk in the other direction. They have nothing of value to tell you.
But I think the answer is more complicated than a simple "Yes, programming is easy" too. In all honesty, I don't think it's an easy thing to "just pick up" at all. It can be very unintuitive at first to wrap your head around just how to tell a computer to solve certain problems.
One person in the codeblr Discord server likened it to cooking. That's a skill that can be very hard, but it's also something that everyone can learn. Anyone can cook. And anyone can program.
I really mean that. No need to be good at maths, to know what a bit is or whatever it is people told you you need. You're not too old to learn it either, or too young for that matter. If you want to start programming (and you can read this post), you already have everything you need. You can write your first little programs today!
One of the cool things about programming is that you can just fuck around and try lots of stuff, and it's fine. Realistically, the worst thing that can happen is that it doesn't work the way you imagined. But you'll never accidentally trigger the fire alarm or burn your house down, so feel free to just try a bunch of stuff.
"Okay I want to learn programming now, what do I do?"
That's awesome, I love the enthusiasm! As much as I'd love to just give you a resource and tell you to build a thing, you still have to make a choice what you want to learn first. The options I'd recommend are:
Scratch: A visual education tool. The main advantage is that you don't have to worry about the exact words you need to write down, you can just think about the structure of your program. The way it works is that you drag and drop program elements to be executed when they should be. You can relatively quickly learn to make cute little games in it. The downside is that this isn't really a "professional" programming language, so, while learning from Scratch will give you the basics that apply to most languages and will make switching to another language easier, you're still gonna have to switch sooner or later. Start here: https://scratch.mit.edu/
Python: The classic choice. Python is a very widely used, flexible programming language that is suited for beginners. It is what I would recommend if you want to skip right to or move on from Scratch to a more flexible language. https://automatetheboringstuff.com/ is your starting point, but there's also a longer list of resources here if you want to check that out at some point.
HTML/CSS/JavaScript: The web path. HTML and CSS are for creating the look of websites, and JavaScript is for the interactive elements. For example, if you ever played a game in your browser, that was probably written in JS. Since HTML and CSS are just for defining how the website should look, they're different from traditional programming languages, and you won't be able to write programs in them, that's what JS is for. You have to know HTML before you learn CSS, but otherwise the order in which you learn these is up to you. Your JavaScript resource is https://javascript.info/, and for HTML and CSS you can check out https://developer.mozilla.org/en-US/docs/Learn/Getting_started_with_the_web.
I put some starting out resources here, but they're really just that - they're for starting out. You don't have to stick to them. If you find another path that suits you better, or if you want to get sidetracked with another resource or project, go for it! Your path doesn't have to be linear at all, and there's no "correct" way to learn things.
One of the most important things you'll want to do is talk to developers when you struggle. The journey is going to be frustrating at times, so search out beginner-friendly coding communities on Discord or wherever you're comfortable. The codeblr community certainly tends to be beginner-friendly and kind. My DMs and asks are also open on here.
#programming#is that a motherhecking RATATOUILLE reference??!?#codeblr#coding#the only reliable predictor of whether someone can be a good programmer is whether they have or can develop a passion for programming#how did me thinking “well is programming actually easy" turn into a resources post uhm#coding resources#shoutouts to the codeblr discord they're coo#long post#Most good programmers do programming not because they expect to get paid or get adulation by the public; but because it is fun to program#- Linus Torvalds
24 notes
·
View notes
Text
So I know how to code websites now, but idk how to upload it to the internet. My plan is to give you all a post that will update with a string of code to sort of visit the website(s?) that I am curating. I will reblog a post that had the original, and include a more patched version as time goes on. I am so sorry in advance.
Because of this.... Lemme show you how html and css works!!
For Project Our Realities, it will all be in html and css since that's what I'm learning so far. JavaScript will be included later.
HTML and CSS basics below!!
HTML, or Hyper-Text Markup Language is the basics of coding a website. It describes how a website will look. It unfortunately doesn't get you too far in terms of digital design, which is why we have languages like Css and javascript.
All HTML files start with <!DOCTYPE html>. This declares to the file that you will be coding in html rather than something like lua.
Each HTML file, after declaring it as an html file, starts with <HTML> and </HTML>. To end a tag, you must close it by adding a forward slash before writing its name (unless it is <br> or <hr>, or similar).
The <head> tag lets you add a title (silly little tab name), a favicon (silly little icon next to the name of the tab) and ways to link your CSS to the HTML.
An HTML file will look like this <!DOCTYPE html>
<html>
<head>
</head>
<body>
</body>
</html>
In the body, you can write the rest of your page, using headers (<h>/<h1-6>), paragraphs (<p>), and even forms (<form>).
--
CSS, also known as Cascading Style Sheets, is a type of coding language that is often used to create websites. No, it is not C++.
Rather than <>, CSS uses brackets {} to code.
CSS is used to style html websites, so it addresses html tags and lets you style their appearance. There is something known as inline CSS, where you can use the <style> tag to style something in your HTML file. HTML was never meant to have colors in its code, but you can change the color of text with inline css. Let's say you would like to style a header.
In your HTML file, it would say:
<!DOCTYPE html>
<html>
<head>
<link rel="stylesheet" href="(name of .css file goes here)">
</head>
<body>
<h1> My first header!!! :> </h1>
</body>
</html>
Now that we have our header, let's turn it red.
In your CSS file, it should say...
h1 {
color: red;
}
The H1 addresses that it will select all h1 elements. The code in the brackets shows that all those addressed will be the color red.
CSS has no starting or finishing lines, all elements will by stylized with {}.
--
To create an HTML file, you must end it with .HTML
To create a CSS file, you must end it with .css
Sometimes, when I create a link for the Css, the required name for the file will be in the HTML code already. Make sure that both files are in the same folder, and not one in a different folder within the same parent folder. This will not work.
--
Wanna test this out? Make a new notepad file on Windows, title it as "firsthtml.html", and create another file called "firstcss.css".
Place this in the .HTML file: <!DOCTYPE html>
<html>
<head>
<title> First HTML </title> <link rel="icon" type="image/x-icon" href="https://i.pinimg.com/736x/1a/8d/9d/1a8d9d26cdca15285d217c817f6953ec.jpg">
<link rel="stylesheet" href="firstcss.css">
</head>
<body> <h1>Welcome, traveler!!</h1>
<h3><I>Thank you for reading the tutorial!! Follow the blog to keep up with our news.</I><h3>
</body>
</html>
Now, for your .css file, write this down:
h1 {
color: dark blue;
}
h3 {
color: orange;
}
--
Thank you so much for following this tutorial. I mainly learned about this from w3schools and in my school course. Happy coding!!! :>
-ava
#.io#ava#ava our realities#io our realities#eps foundation#entertainment productions studio#project our realities#our realities#coding#html#HTML stuff#css#Css stuff#hyper text markup language#cascading style sheets#there will be more coding to come#I hope this helps you guys get into coding
3 notes
·
View notes
Text
Mini React.js Tips #3 | Resources ✨

Continuing the #mini react tips series, its components making time~!
In React, a component is like a Lego brick for building websites or apps. It's a small, independent part of the user interface (UI) that you can reuse whenever you need it. These components can be combined to create bigger and more complex applications. Examples are the header, footer, cards, asides, etc!
What you'll need:
know how to create a React project >> click
know the default React project's file structure >> click
know basic HTML
know basic JavaScript
basic knowledge of using the Terminal

What We Are Creating:
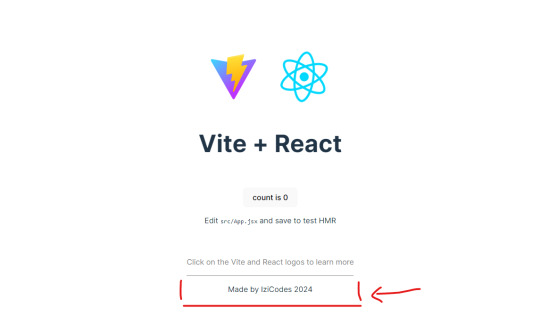
The footer at the bottom!
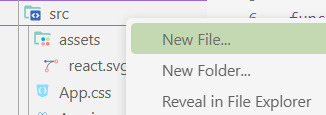
[ 1 ] Navigate to the 'src' Folder: Open your project in Visual Studio Code, locate the 'src' folder, and right-click on it.
[ 2 ] Create a New File: Click 'New File' to create the file within the 'src' folder. This file will house the code for your React component.
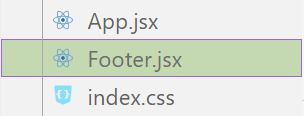
[ 3 ] Naming Conventions: Give your component a name, according to the convention of starting with a capital letter. This naming convention is essential for React to recognize your component~!!
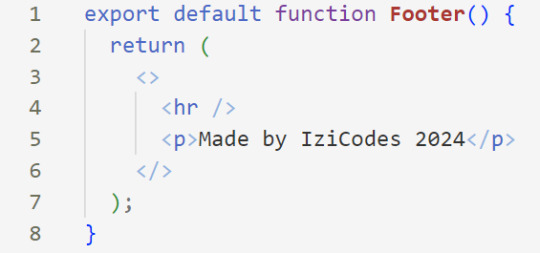
[ 4 ] Create The Initial Function: Open the file and type:
export default function [name of component]() {}

[ 5 ] Insert The return() Statement: The statement is used within a component to specify what content should be rendered when the component is invoked or used. Type:
return()

*the error is there because we haven't added anything inside yet, don't worry!
[ 6 ] Insert The Empty Tags: Inside of the return(), add empty tags (tags that don't have a specified element inside of them).

[ 7 ] Time For Some HTML: Inside the empty tags, enter the normal HTML elements that you want~!
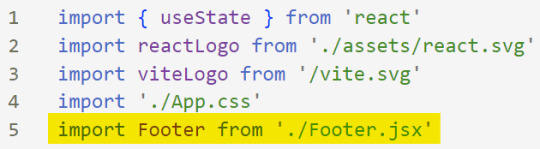
[ 8 ] Integration with App.jsx: Navigate to the 'App.jsx' file in the project, which is typically the entry point of your React application. At the top, import your newly created component. Type:
import [name of component] from './[location of the component]'
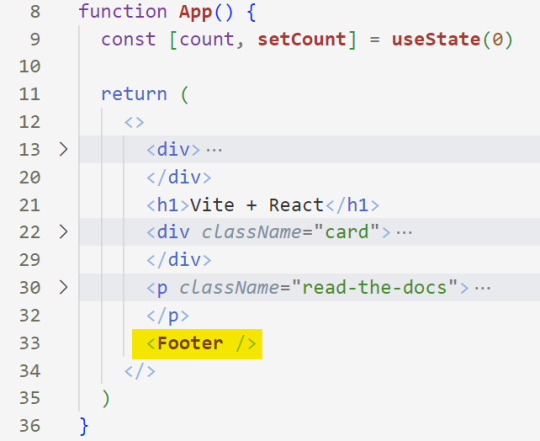
[ 9 ] Use Your Component: Inside the return() statement of the 'App()' function, include your component using the following syntax:
<[name of your component] />
[ 10 ] Run the Development Server: Start your development server with the command (the 'Local' link):
npm run dev
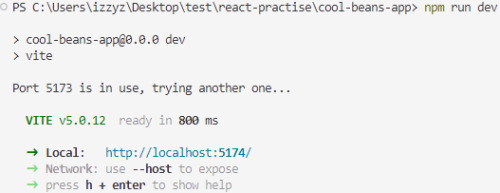
[ 11 ] Preview Your Project: Open the link provided in your terminal in your web browser. Witness your component in action!
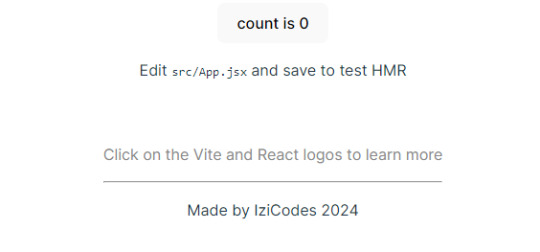
Congratulations! You made your first component! Try and create some new ones and place them around in the App()~!
BroCode’s 'React Full Course for Free’ 2024 >> click
React Official Website >> click
W3School's React Components >> click
Importing and Exporting Components >> click
🐬Previous Tip: Tip #2 The anatomy of the default React project >> click
Stay tuned for the other posts I will make on this series #mini react tips~!
#mini react tips#my resources#resources#codeblr#coding#progblr#programming#studyblr#studying#javascript#react.js#reactjs#coding tips#coding resources
33 notes
·
View notes
Text
JavaScript Tutorial: A Beginner's Guide to the World of Web Development
Welcome to the exciting world of JavaScript! If you're looking to dive into web development, understanding JavaScript is essential. This versatile programming language powers the interactive elements of websites and is a key component of modern web applications. In this tutorial, we'll cover the basics of JavaScript, its syntax, and some practical examples to get you started.
What is JavaScript?
JavaScript is a high-level, dynamic, and interpreted programming language that is primarily used for enhancing the interactivity of web pages. It allows developers to create rich user experiences by manipulating HTML and CSS, responding to user events, and communicating with servers.
Why Learn JavaScript?
Ubiquity: JavaScript is supported by all modern web browsers, making it a universal language for web development.
Versatility: Beyond the browser, JavaScript can be used on the server-side (with Node.js), in mobile app development (with frameworks like React Native), and even in game development.
Community and Resources: With a vast community and numerous resources available, learning JavaScript is more accessible than ever.
Getting Started with JavaScript
Setting Up Your Environment
To start coding in JavaScript, you don't need any special software. All you need is a web browser and a text editor. Here’s how to set it up:
Choose a Text Editor: Popular options include Visual Studio Code, Sublime Text, and Atom.
Open Your Browser: You can use any modern browser like Chrome, Firefox, or Edge.
2 notes
·
View notes
Text
here is a basic code for a #deckEditor in an online game using HTML and JavaScript:
HTML code:
```
<!DOCTYPE html>
<html>
<head>
<title>Deck Editor</title>
</head>
<body>
<h1>Deck Editor</h1>
<div id="card-list">
<h2>Card List:</h2>
<ul id="cards">
<!-- populate with cards from database or API -->
<li>Card 1</li>
<li>Card 2</li>
<li>Card 3</li>
<li>Card 4</li>
<li>Card 5</li>
<li>Card 6</li>
<li>Card 7</li>
<li>Card 8</li>
<li>Card 9</li>
<li>Card 10</li>
</ul>
</div>
<div id="deck-list">
<h2>Deck:</h2>
<ul id="deck">
<!-- display selected cards here -->
</ul>
</div>
<button id="save-btn">Save Deck</button>
<button id="clear-btn">Clear Deck</button>
<script src="deck-editor.js"></script>
</body>
</html>
```
JavaScript code:
```
// get references to all necessary elements
const cardsList = document.getElementById('cards');
const deckList = document.getElementById('deck');
const saveBtn = document.getElementById('save-btn');
const clearBtn = document.getElementById('clear-btn');
// create an array to store selected cards
let deck = [];
// function to add a card to the deck
function addCard(event) {
// get the clicked card
const card = event.target;
// check if card is already in deck
if (deck.includes(card.innerText)) {
alert('Card already in deck!');
} else {
// add card to deck array
deck.push(card.innerText);
// create a new li element for the card
const li = document.createElement('li');
li.innerText = card.innerText;
// append li to deck list
deckList.appendChild(li);
}
}
// function to remove a card from the deck
function removeCard(event) {
// get the clicked card
const card = event.target;
// remove card from deck array
deck.splice(deck.indexOf(card.innerText), 1);
// remove card from deck list
card.parentNode.removeChild(card);
}
// add event listeners to cards in card list
cardsList.addEventListener('click', addCard);
// add event listeners to cards in deck list
deckList.addEventListener('click', removeCard);
// function to save deck
function saveDeck() {
// check if deck is empty
if (deck.length === 0) {
alert('Deck is empty!');
} else {
// send deck array to server or save in database
console.log(deck);
alert('Deck saved!');
}
}
// function to clear deck
function clearDeck() {
// remove all cards from deck array
deck = [];
// remove all cards from deck list
while (deckList.firstChild) {
deckList.removeChild(deckList.firstChild);
}
}
// add event listener to save button
saveBtn.addEventListener('click', saveDeck);
// add event listener to clear button
clearBtn.addEventListener('click', clearDeck);
```
Note: This is a basic code and can be improved and customized according to your specific needs and game requirements.
8 notes
·
View notes
Note
hii i tried following that one forum post for a splash screen that you mentioned before in an ask, i didnt really understand it TT could you make a version for dummies? thank you!
Hi Anon,
Do you mean this ask? about this Forum post? I'll try to make it easier then, cause it mainly is some copy-pasting and some light editing.
The Splash Screen, more explanation
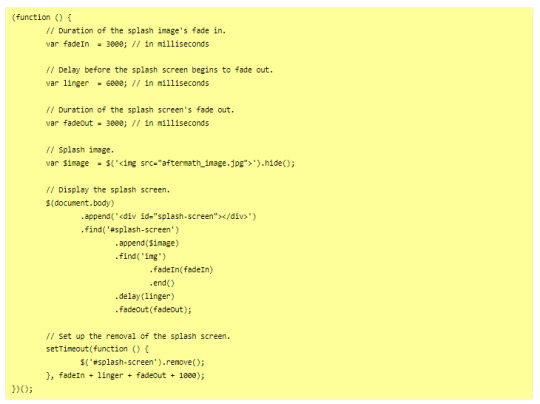
The code from the post will create an element that will cover the whole page, and be triggered every time the game loads (or the tab refreshes).
So first, get on the Forum post, and copy the code in the correct places:
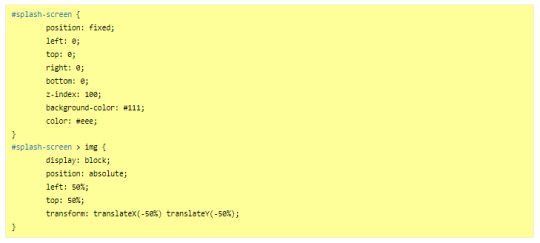
Stylesheet
JavaScript
---
Then you will want to edit it to customise it for your project. There is code to change in both block of code:
In the JavaScript, you will need to indicate the correct image you want to display on the screen, or any other element (like text).
In the Stylesheet, you will want to edit the colour of the background (and potentially the text colour) to match the vibe.
JavaScript
Here, you will want to edit the correct URL of the image you want to have on the screen.

If you want text instead of the image, you can do so by wrapping it with a < p > markup (or other relevant HTML markup):

though, you will need to edit one more thing to make it work, in the .find() line, like below (p for the < p > element, and so on):
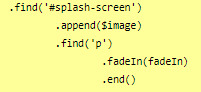
StyleSheet
The biggest change you'd need to make for the code in the style sheet will be with the code below:
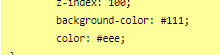
currently, the colours match the basic SugarCube UI colours. So if you've changed the UI palette for your project, you will want to edit those colours (background especially, color is only useful for text)
If you are not using an image, but some text in your splash screen, you will also need to edit this part of the code, to replace the img with the correct HTML markup:
(in the example above, you'd need to change the img with p)
Testing
One important thing afterwards, will be to test the splash screen (for colour, position, or even animation). Note: if you are coding in Twine and used a local image in the splash screen, don't forget to publish to file and open the HTML, rather than test/play through Twine/
If you want to test the Splash Screen, and fiddle with the CSS with the Inspect Tool of your browser, I advise you change the amount of this line in the JavaScript:

Add a bunch of zeros to increase the time (but don’t forget to remove them before uploading your file anywhere).
---
Hope this helps!
27 notes
·
View notes